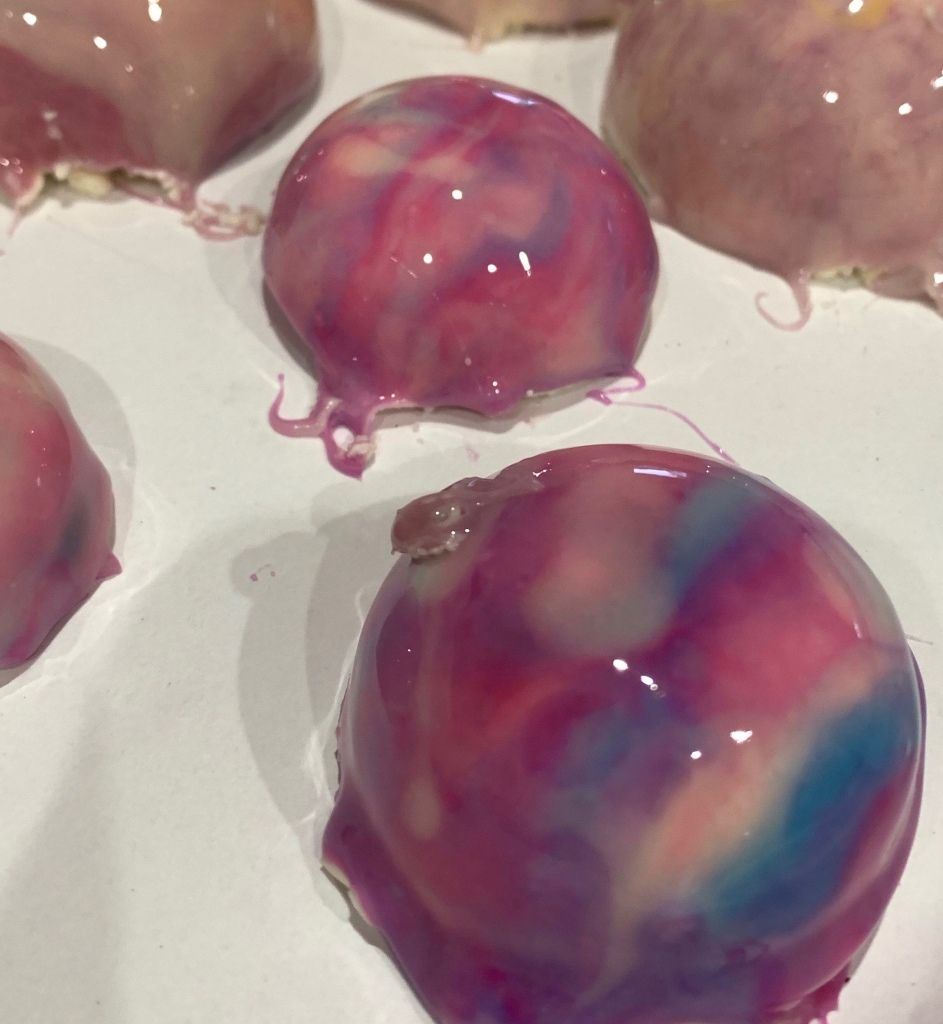
So you may have wondered the purpose of making and posting a simple white chocolate mousse. Well, there was actually a reason for making the mousse, posting? Not so much.
Being bored during the rain storm yesterday I decided to make a half recipe of chocolate-chip/raspberry brownies. I cut a number of them in small rounds to embed in a white chocolate mousse molded into hemispheres then frozen. Today I made a gelatin based mirror glaze intending to coat the frozen mousse with swirling colors to make galactic mousse/brownie desserts. Well, it was practice. You all know I like to practice at home and failures never pass through the front door. I have an order of agar agar arriving soon so will try a vegetable based thickener for the glaze.
While not a failure, they were not a nice as I envisioned. However, practice, practice, practice and learn. The taste was excellent!!


MIRROR GLAZE WITH GELATIN
INGREDIENTS
- 2 packets unflavored powdered gelatin , (1/2 oz)
- 192 g water , divided use
- 215 g sugar , (scant 1 cup)
- 142g or 5 oz (scant 2/3 cup) sweetened condensed milk , (1/3 of a standard 14-oz can)
- 233 g real white chocolate , chopped or white chocolate chips
- Gel food coloring (I used Americolor Royal Blue, Sky Blue, Electric Purple, Electric Pink, Super Black, and Bright White)
METHOD
- Whisk together the gelatin and 3 oz (1/3cup) cold water in a bowl, and set it aside to let the gelatin absorb the water.
- Combine the remaining 3.5 oz water, sugar, and condensed milk in a medium saucepan, and place the pan over medium heat. Stir while the sugar dissolves, and bring the mixture to a simmer.
- Once it is simmering steadily, remove it from the heat and add the gelatin (no need to melt the gelatin first—just scrape the big blob out of the bowl!) Whisk the gelatin as the heat from the pan dissolves it, and whisk until it is almost entirely incorporated. A few small pieces of gelatin are fine.
- Add the white chocolate to the pan, and let it sit for a few minutes to soften the chocolate. If you have an immersion blender, that is best to use—just stick it right in the pan and blend until the chocolate is melted and the mixture is very smooth. If not, you can whisk everything together, just try to avoid vigorous whisking that will create a lot of air bubbles.
- Divide your glaze into as many bowls as you want. I find it’s easiest to have a few “base colors” that are larger portions, and a few “accent colors” that are smaller portions. I made 3 base colors, using Americolor Sky Blue, Royal Blue, and a mix of Royal Blue + a drop of Super Black. I made 3 accent colors using Americolor Electric Purple, Electric Pink, and Super White. All you need to do is whisk a few drops of food coloring into each bowl of glaze.
- Let the bowls set until they cool down to about 95 Fahrenheit (35 C). An instant-read thermometer is the easiest way to check this, but if you don’t have one, it should feel barely warm on your fingertip, and be thick enough to coat it. Stir the bowls occasionally as they cool, so they don’t form a skin on top.
- Take the mousse cakes from the freezer. Cover a baking sheet with parchment or waxed paper for easy clean-up, and set small jars or cups on the sheet for the mousse cakes to balance on—try to use ones that are smaller than the base of the cakes, so the glaze can drip down cleanly.
- In a new bowl, pour about 1/3 cup of one of your base colors of glaze, then drizzle the top of it with a few other colors—there’s no rhyme or reason here, so go crazy! After you’ve added all the colors you want, give it a brief stir to swirl everything together, but do NOT swirl too much and muddy the colors! Take this bowl of glaze and pour it over one of the cakes, swirling it around the top to make sure that all the sides are covered. Let the glaze drip down the cake onto the baking sheet.
- If it is dripping quickly and is a very thin layer, it’s too warm and needs to cool down a few more degrees. If it is gloopy and clinging to the cake and barely dripping, it is too cool. You can warm the bowls of glaze BRIEFLY in the microwave (start with 8-10 seconds each) and stir until they’re fluid again, and keep re-warming as necessary while glazing the cakes.
- Repeat the swirling and glazing process with the rest of the cakes. It’s fun to give them all different color schemes so they each look unique. If desired, finish the cakes with a pinch of edible silver star sprinkles. (Any remaining glaze can be saved and used on a different cake within about a week or so. Make sure it stays covered tightly with plastic wrap so it doesn’t form a skin and dry out.)
- Let the cakes sit for about 15 minutes, until the glaze is semi-set, then transfer them to small plates. Chill for an additional 10-15 minutes until the glaze is full set.
