It’s always fun when Easter and Passover coincide. This doesn’t happen as often as you might imagine, and this non-coincidelitization is not by accident. In 325 CE the Council of Nicaea established that Easter would be held on the first Sunday after the first full moon occurring on or after first day of spring unless the full moon is on Sunday when Easter is delayed by 1 week. Passover commences on the 15th of the Hebrew month of Nisan and lasts for either seven or eight days depending on the Jewish tradition being observed. The Jewish month is lunar based and varies substantially from the Gregorian calendar. I know, TMI. Anyway, this decreases the chances of Easter falling on the same day as Passover, but doesn’t eliminate it, as in this year. Following the Jewish Passover dietary restrictions for the 8 days of Pesach (which I don’t; The first two days are enough for me) while preparing desserts for Easter is… interesting.
Several years ago I purchased a Wilton Egg Mold to make an M&M cake for Robin’s birthday and a football for another party, and now an Easter egg cake. This mold creates perfect egg shaped cakes, but has some challenges. The mold measures 9″x6″x6″ which means you need to time the bake for a 6″ deep cake, but the ends are thinner so don’t over bake and burn the ends. I found doubling the baking time is about right, i.e. 60 minutes for a recipe for a standard 2″ deep pan calling for 30 min.
Another problem is sealing the two halves during the bake. The chocolate cake recipe I prefer adds a cup of boiling water just prior to pouring. This makes a very low viscosity batter which is easy to spill, hence you don’t want to move the mold after it is filled. 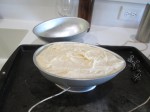 Tying the two mold halves together without sloshing batter is a challenge. I place the string across the oval stand prior to placing the empty mold on it. The mold should be filled to the top rim with batter. Thus far, doing this assured the top half is filled with cake. I
 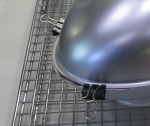 then place the top half on and tie the string around both. This time I also added 5 paper binder clips positioned around the edge of the
 two molds. (I would use 7-10 clips, if I had them.) Do place the mold on a cookie sheet to catch spills and choose one that does not warp in the heat.
If there is little leakage, and the bake is properly timed, and you coated the molds with release spray you should end up with a beautiful Peanut M&M – Football – Easter Egg – shaped cake. A couple of other hints with this mold: remove the top half 5 minutes after removing the cake from the oven,  then remove the cake from the bottom mold 5 minutes later. You may have to shake the pan slightly for the cake to release. Cool on a rack.
For Grace’s 1st birthday I am making a cake for about 100 people. I want this to be a smooth surface (i.e. fondant) but dislike store bought fondant. This weekend I made a 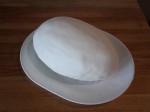 batch of marshmallow frosting to try it on the Easter egg cake. It was easy to make, roll and drape. While intensely sweet (read: marshmallow and confectioners sugar) it tasted much better than store bought, plus it cuts easily to make decorations. This fondant may be flavored, but will be very sweet no matter what flavor. This fondant is smooth and soft,
 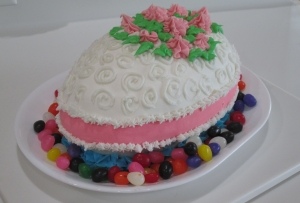 easy to drape and form. The pink band around the cake is a band of colored fondant, wetted and wrapped around the cake.
I wanted the second cake to be a chocolate covered egg with lots of colored royal icing decoration. I envisioned a chocolate egg, like the hollow chocolate eggs you buy in the market for Easter. Alas, my tempered chocolate set to quickly and would not pour over the crumb coated cake. I had to spread it as quickly as possible, but was not quick enough. It was too thick and lumpy. If anyone has suggestions to remedy this I would appreciate your input. The 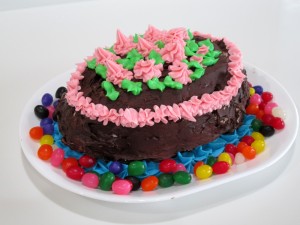 piping is all buttercream, both white and colored. I was going to make buttercream roses for the toppers, but by the time I finished the rest, my hand was cramping and decided simple dropped flowers (Wilton #193 tip) would suffice. I added the jelly beans for some additional color, they probably weren’t needed but we like jelly beans.
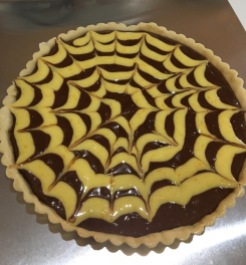
At the end of the meal there was 1/3rd of the white frosted cake left, a 1/4 of the chocolate and almost none of the outstanding carrot cake Fran made. Both 9″ tarts (one creme patisserie/fruit and one chocolate/orange) were left. Not a bad effort for 20 adults.
INGREDIENTS
Chocolate Cake
- 2 cups white sugar
- 1 3/4 cups all-purpose flour
- 3/4 cup unsweetened cocoa powder
- 1 1/2 teaspoons baking soda
- 1 1/2 teaspoons baking powder
- 1 teaspoon salt
- 2 eggs
- 1 cup milk
- 1/2 cup vegetable oil
- 2 teaspoons vanilla extract
- 1 cup boiling water
Yellow Cake
- 4 1/2 cups (570g) all-purpose flour
- 2 teaspoon baking soda
- 1 teaspoon salt
- 2 cup (460g) unsalted butter, softened
- 3 3/4 cups (700g) granulated sugar
- 4 large eggs, at room temperature
- 4 teaspoons pure vanilla extract
- 1 cup (240g) sour cream, at room temperature
- 2 cup (480ml) whole milk, at room temperature
Buttercream
- 4 cups of powdered sugar (or 1 box)
- 1 Cup (2 sticks) of softened butter
- 1/4 cup meringue powder to make a crusting frosting
- 2-3 teaspoons of vanilla
- 1-2 tablespoons of milk
- Violet food coloring (a little of this will make the frosting white, not yellow from the butter coloring. Just a little on the end of a tooth pick is enough)
Marshmallow Fondant
- 500 g marshmallows
- 1000 g confectioners sugar
- 1 tsp white vanilla
- 2-3 Tbl water
Tempered Chocolate
- Scharffen Berger Semi-Sweet Dark Chocolate (I like this brand but any would do)
METHOD
Chocolate Cake
- Preheat oven to 350 degrees F (175 degrees C). Spray both halves of the egg mold.
- Use the first set of ingredients to make the cake. In a medium bowl, stir together the sugar, flour, cocoa, baking soda, baking powder and salt. Add the eggs, milk, oil and vanilla, mix for 3 minutes with an electric mixer. Stir in the boiling water by hand. Pour to fill the bottom mold to the brim.
- Bake for 60 minutes in the preheated oven. (Bake time make take some experimentation) Cool for 5 minutes before removing the top half and another 5 minutes before rolling the cake on a rack to cool completely.
Yellow Cake
- Preheat oven to 350°F (175°C). Spray both halves of the egg mold.
- Whisk the flour, baking soda, and salt together in a large bowl. Set aside. Using a handheld or stand mixer fitted with a paddle attachment, beat the butter on high speed until smooth and creamy – about 1 minute. Add the sugar and beat on high speed for 3 full minutes until creamed together. The mixture should be a light yellow color. Scrape down the sides and up the bottom of the bowl with a rubber spatula as needed. On medium-high speed, add 1 egg at a time, beating well after each addition until both are mixed in. On high speed, beat in the vanilla extract and sour cream. Scrape down the sides and up the bottom of the bowl with a rubber spatula as needed.
- With the mixer running on low speed, add the dry ingredients to the wet ingredients alternating with the milk. Start and end with the dry ingredients. Mix each addition just until incorporated. Do not overmix this batter. The batter will be smooth, velvety, and slightly thick.
- Pour the cake batter into the prepared pan. Smooth it out into an even layer.
- Bake for 60 minutes in the preheated oven. (Bake time make take some experimentation) Cool for 5 minutes before removing the top half and another 5 minutes before rolling the cake on a rack to cool completely.
Buttercream
- Add powdered sugar and meringue powder to mixing bowl.
- Add softened sticks of butter
- Add vanilla. If you want white buttercream use clear imitation vanilla.
- Add 1 tbsp of milk.
- Beat on low until powdered sugar is incorporated. Then move mixer up to medium-high speed. Scrape sides and bottom of bowl often. When completely mixed the frosting may appear dry.
- Add more milk, a little bit at a time until frosting is the proper consistency.
- Again, for white frosting now add a little violet food coloring. I use the end of a toothpick and add just a little at a time. Mix thoroughly.
Marshmallow Fondant
- Grease (well with Crisco or equivalent) a heat proof microwavable bowl
- Place marshmallow in the bowl and sprinkle 2-3 Tbl water over the marshmallows
- Heat in a microwave in 30 second increments until the marshmallow is melted and smooth. Don’t overcook and burn.
- Grease (well) dough hook and stand mixer bowl and add melted marshmallow.
- Add confectioners sugar a cup at a time and stir on medium until incorporated.
- Add the vanilla during one of the sugar additions.
- Reserve about a cup of sugar to use during hand kneading
- Grease (well) your workspace and hands and turn the fondant out.
- Cover with sugar and begin kneading, adding more sugar as necessary until the fondant is smooth and not sticky.
- Use a greased rolling pin and roll the fondant out to required size. For this cake I rolled it out to about 18″ x 14″. It was easy to pick up and drape over the cake.
Tempered Chocolate
- Cut 1 lb of chocolate into small pieces (or pulse in a food processor)
- Place chocolate in a heat proof bowl over simmering water (the bowl should not touch the water.)
- Heat the chocolate while stirring until melted, continue heating to 120 deg
- Remove the bowl from the heat (dry the bottom of the bowl. Any water will cause the chocolate to seize.)
- When the chocolate cools to 82 deg, place back on the heat and heat to 90 deg.
- Pour the liquid chocolate over the cake. This will cool the chocolate and make it set into a thin crust. My problem was I let the chocolate cool too much before trying to pour. Next time I will leave the bowl on the hot water and remove both from the heat. Hopefully this will keep the chocolate thin enough to pour. If anyone has suggestions I would appreciate them.
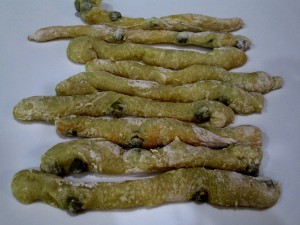 on your work table and generously dust the top of the dough before you gently form it into a rough rectangle about 16″ x 14″. Cut the rectangle in half (two 7″ smaller rectangles) then cut each of those into about 1″ strips, avoiding dissecting any olives. Use your bench knife and separate the first strip by flicking it onto the flour next to the dough rectangle. Pick it up with flour dusted fingers, place on the parchment-lined baking sheet and stretch it to about 10″ and try to straighten. I was not totally successful in straightening the breadsticks, but it doesn’t hurt the flavor.
 Tying the two mold halves together without sloshing batter is a challenge. I place the string across the oval stand prior to placing the empty mold on it. The mold should be filled to the top rim with batter. Thus far, doing this assured the top half is filled with cake. I
  then place the top half on and tie the string around both. This time I also added 5 paper binder clips positioned around the edge of the
 two molds. (I would use 7-10 clips, if I had them.) Do place the mold on a cookie sheet to catch spills and choose one that does not warp in the heat.
 then remove the cake from the bottom mold 5 minutes later. You may have to shake the pan slightly for the cake to release. Cool on a rack.
 batch of marshmallow frosting to try it on the Easter egg cake. It was easy to make, roll and drape. While intensely sweet (read: marshmallow and confectioners sugar) it tasted much better than store bought, plus it cuts easily to make decorations. This fondant may be flavored, but will be very sweet no matter what flavor. This fondant is smooth and soft,
  easy to drape and form. The pink band around the cake is a band of colored fondant, wetted and wrapped around the cake.
 piping is all buttercream, both white and colored. I was going to make buttercream roses for the toppers, but by the time I finished the rest, my hand was cramping and decided simple dropped flowers (Wilton #193 tip) would suffice. I added the jelly beans for some additional color, they probably weren’t needed but we like jelly beans.
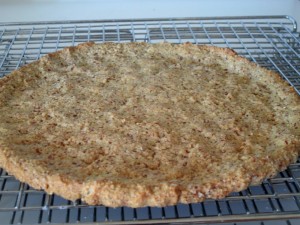
 be a good combination. The slight snap of this buttery cookie and the sweet/tartness of the fig pureé should pair well.