I love John Kanell’s Artisan Bread and make it at least once a week. It has a soft chewy crumb and crunchy/crispy crust. Perfect.
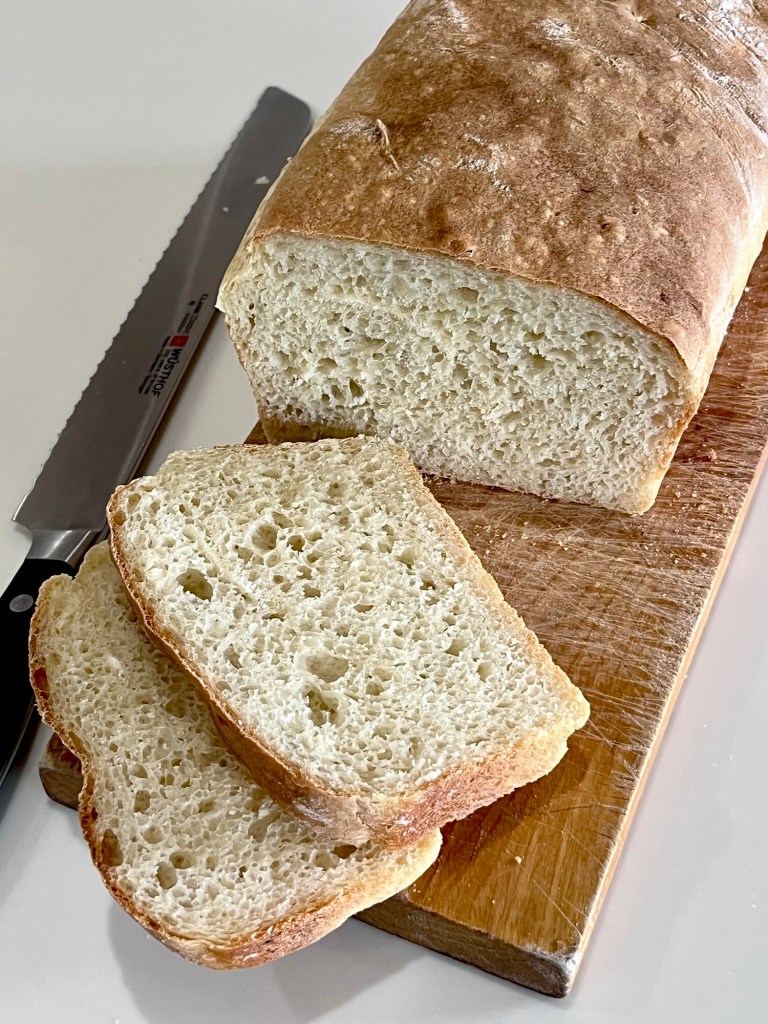
However, I recently discovered Ina Garten’s Sandwich Loaf on FaceBook and although a totally different bread it is now part of my rotation. It’s not a chewy and crispy as the artisan bread but is every bit as easy to make and is a perfect sandwich loaf (not that the artisan bread isn’t .)
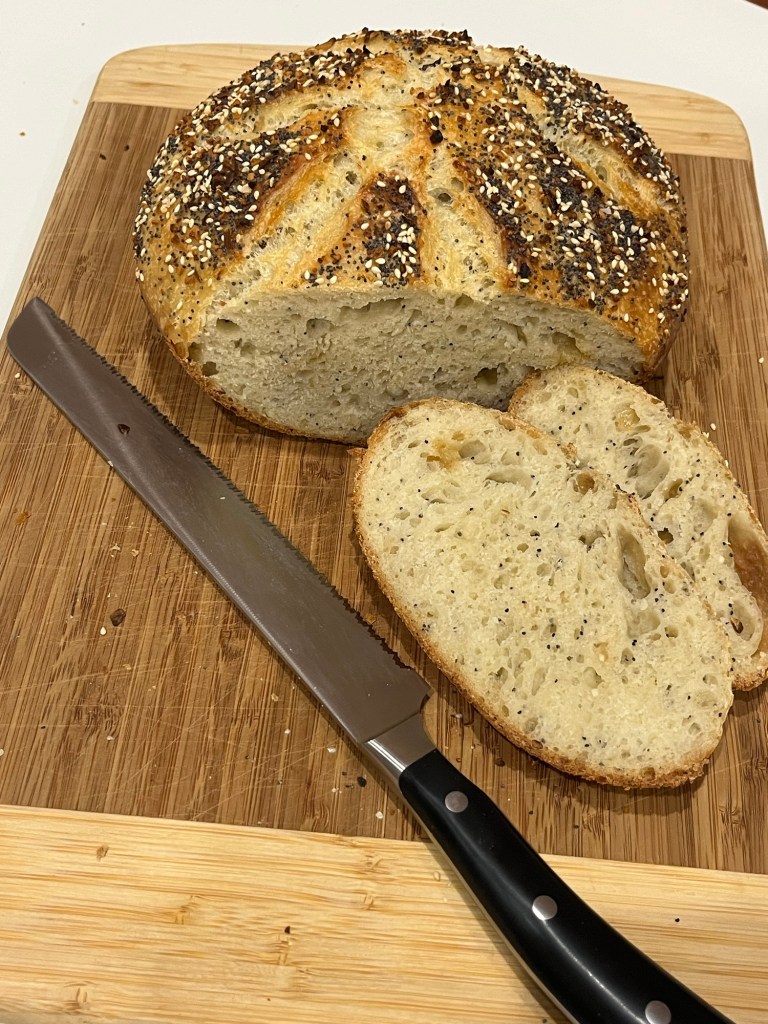
Sandwich Bread – Ina Garten
INGREDIENTS • 440g (3 ½ c) all-purpose flour • 360g (1 ½ c) warm water • 2 tsp sugar • 1 ½ tsp salt • 2 ¼ tsp (1 packet) instant yeast
METHOD
In a bowl, mix warm water, sugar, and yeast. Let it sit for 5-10 minutes until foamy.
Add flour and salt, then stir until combined. The dough will be sticky—that’s okay!
Cover and let it rise, covered for about 1 hour, or until doubled in size.
Transfer to a greased loaf pan, smooth the top, and let it rise for another 30 minutes.
Bake at 375°F (190°C) for 30-35 minutes, until golden brown and internal temperature reaches 190°F.
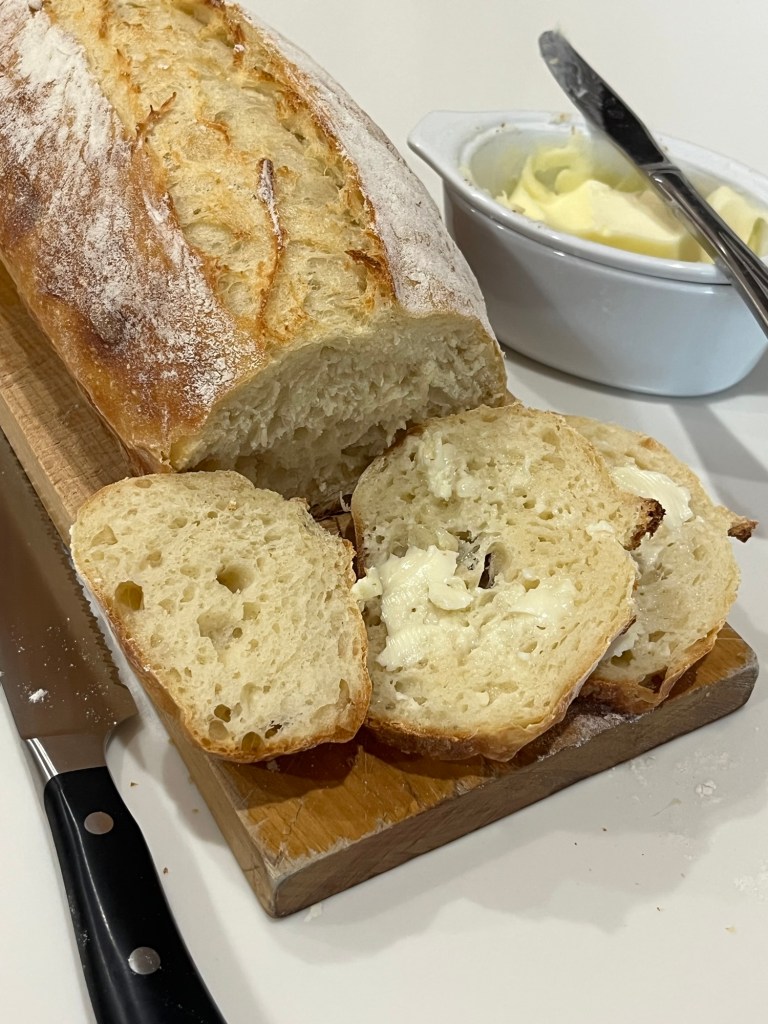
Every time I make this no-knead artisan bread I confirm it is the best loaf I ever made, and this mornings bake is no exception. There are only 4 ingredients and they come together, including weighing, in 10 minutes, then an hour ferment, followed by a stretch and fold and shape for 10 minutes and baked for 20 minutes. (10 minutes with Dutch Oven cover on and ~10 more minutes uncovered to brown and create a great crust) until internal temperature is 190-200F.
If you know, or follow me, you know I am always looking for new recipes, even if I already use a great one. Case in point is the No-Knead Artisan Bread I found a PreppyKitchen.com. It’s wonderful bread with a nice crunchy crust and soft, chewy interior and excellent flavor. Plus it is easy to make, uses few dishes and only takes a couple of hours. However, I do often find alternate recipes and occasionally give one a try. Hence, today’s experiment.
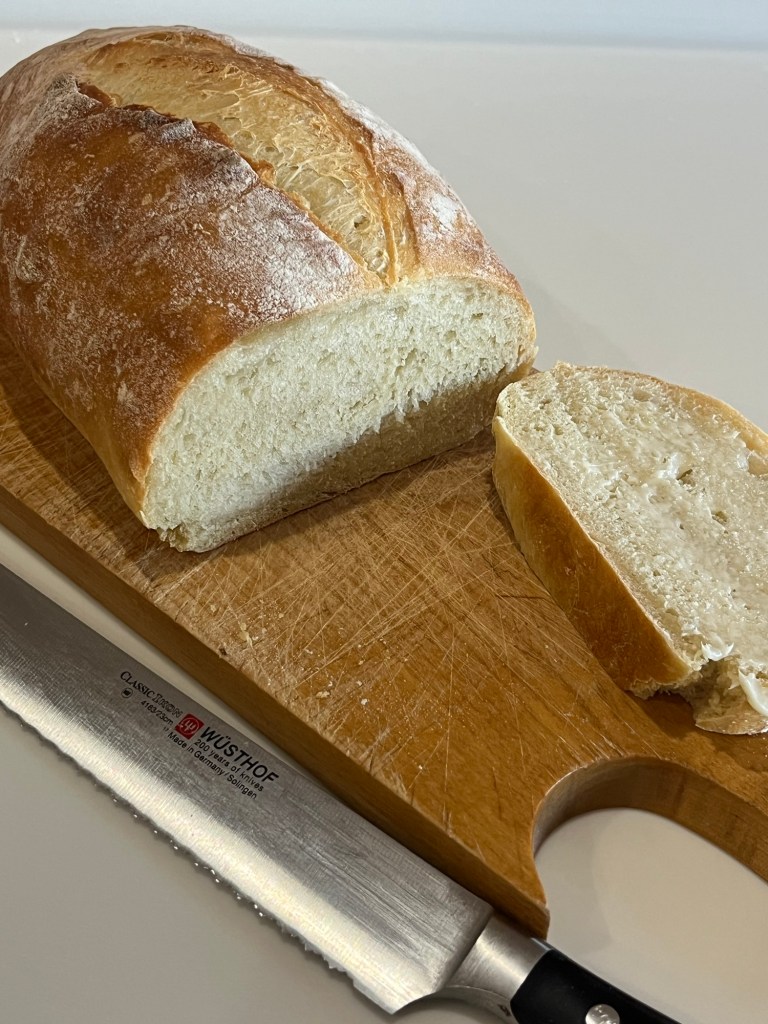
I found a recipe called “Homemade 25 Minute Bread” and made a loaf exactly following the instructions (even though I knew they were wrong.) At this point I am an experienced bread baker and am comfortable with my abilities to distinguish what will work and what will not, but you never know. I bake to learn.
I modified the published recipe, and for expediency used a stand mixer rather than kneading by hand. I enjoy hand kneading, (when I have the time,) but I was making 2 sequential loaves this morning, before I made a batch of rough puff pastry, and watched the RBC Heritage Golf Championship.
The basic difference in the two breads involves handling the dough. The original specified a 5 minute hand knead until the dough was “smooth and elastic.” I increased the kneading time to 8 minutes so it would just about pass the windowpane test. It also only had a 10 minutes “rise” rather than a full “normal” proof, which was 45 minutes at ~90°F. It also did not suggest a lame or sharp knife slash. This gives the dough someplace to expand rather than burst through the sides of the loaf during baking.
The published recipe resulted in a very dense, not very pleasant loaf. ( I see French toast in my future.) The altered recipe was much lighter. While the crumb was very similar it was light and soft with a good crust. The final result is, back to PreppyKitchen!
I renamed the recipe “Homemade 45-Minute Bread – Dede’s Version. It’s slightly more accurate. (The time does not include proofing time.)
Original on the right, “improved” on the leftOriginal with torn sized on the front left, “improved” without tears on the back right.
In a stand mixer bowl, combine the flour (less 4 Tbl) , sugar, salt, and instant yeast. Whisk well.
Add the warm water and olive oil to the dry ingredients. Stir with a dough hook until a dough forms.
Knead the dough for about 10 minutes until smooth and elastic. The dough is very sticky. Add the reserved flour one tablespoon at a time until the sides of he bowl begin to clean.
Shape the dough into a ball and place it in a lightly greased bowl. Cover with a clean towel and let it rise for 45 minutes. The dough weighs ~684g at this point
Preheat your oven to 425°F.
After the dough has rested, punch it down and shape it into a loaf or divide it into smaller rolls.
Place the shaped dough onto a baking sheet lined with parchment paper.
Slash with a lame or knife
Bake for 15-20 minutes or until the internal temperature is ~195⁰F and bread is golden brown and sounds hollow when tapped on the bottom.
Allow to cool slightly before slicing and serving.
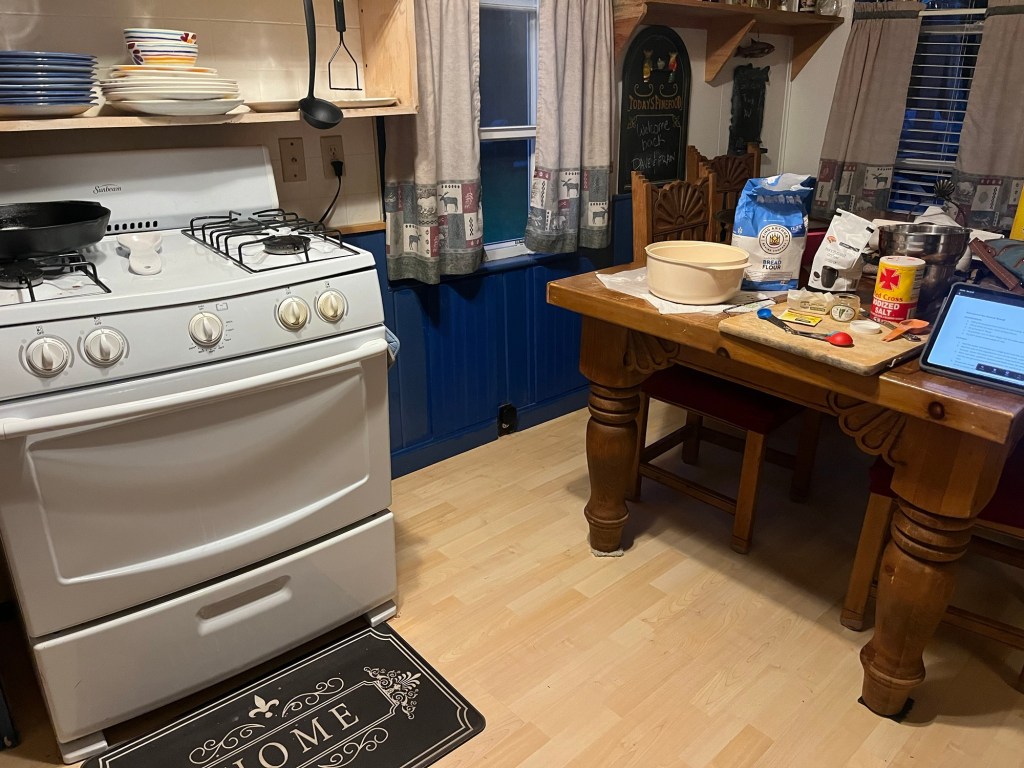
I didn’t realize there would be a test on this vacation. We started our 50th anniversary/baseball stadium tour last week and are now resting in Vermont for a few days before trekking down to Boston for our 3rd stadium then going to New York City for our 4th.
Being away from baking in my kitchen for a whole week I started to get anxious. On our way to Lake Dunmore I stopped and bought some flour and yeast. Our first day here I made two loaves of bread using a cast iron skillet with a second frypan for a lid to substitute for my Dutch Oven. It worked pretty good, except the bottom of the bread burnt slightly due to the dark cast iron. I adjusted temperature and baking time and each one improved, right up to the 4th loaf when I removed the loaf from the pan and placed it on a cookie sheet for the last 30 minutes of baking time. Perfection!! It took 4 tries, but successfully passed the test.
Improve Baking Station“Test” KirchenImprove Dutch OvenShaggy Dough Before Stretch and FoldSmooth Dough after Stretch and FoldFinished Loaf
Dede’s bakery opened early this morning. QC (Fran) loves the smell of fresh bread when she wakes. It had been a while since I made the hi-hydration honey bread, so… I also made some shortbread cookies which will be part of the decorations for a cake this weekend
I need to flood the cookies to finish them, but I have lots of time. I also need to practices some Italian buttercream as I had major issues the last time I made some.
I made two loaves in a steam oven without a Dutch ovenThese are traditional shortbread cookies w/o chocolate.
Both bakes were excellent and a good treat for elevensies.
KAB to the rescue! I made their No Knead Crusty White Bread this morning. Mix ingredients, let sit 2 hours, refrigerate 2 (and more) hours shape, let rise, bake, enjoy.
This is a very easy 75% hydration bread that takes very little hands on time and is exceptional. I made half (630g) on a stone today and will make the other half in a day or two, but use a Dutch Oven.
Combine all of the ingredients in a large mixing bowl, or a large (6-quart), food-safe plastic bucket. “Lukewarm” means about 105°F.
Mix and stir everything together for a minute in a stand mixer with blade to make a very sticky, rough dough. It will weigh roughly 1225g.
Transfer to a greased plastic proofing bucket and let the dough rise for 2 hours at room temperature.
Then refrigerate it for at least 2 hours, or for up to about 7 days. (If you’re pressed for time, skip the room-temperature rise, and stick it right into the fridge). The longer you keep it in the fridge, the tangier it’ll get; if you chill it for 7 days, it will taste like sourdough. Over the course of the first day or so, it’ll rise, then fall. That’s OK; that’s what it’s supposed to do.
When you’re ready to make bread, sprinkle the top of the dough with flour; this will make it easier to grab a hunk. Grease your hands and pull off about 1/4 to 1/3 of the dough — a 400g to 540g piece, if you have a scale. It’ll be about the size of a softball, or a large grapefruit.
Plop the sticky dough onto a floured work surface, and round it into a ball, or a longer log. Roll around the table to tension the surface.
Place the loaf on a piece of parchment (if you’re going to use a baking stone); or onto a lightly greased or parchment-lined baking sheet. Sift a light coating of flour over the top; this will help keep the bread moist as it rests before baking. Drape the bread with greased plastic wrap or cover it with a reusable cover.
Let the loaf warm to room temperature and rise; this should take about 60 minutes (or longer, up to a couple of hours, if your house is cool). It won’t appear to rise upwards that much; rather, it’ll seem to settle and expand. Preheat your oven to 450°F while the loaf rests. If you’re using a baking stone, position it on a middle rack while the oven preheats. Place a shallow metal or cast iron pan (not glass, Pyrex, or ceramic) on the lowest oven rack, and have 1 cup of hot water ready to go.
When you’re ready to bake, take a sharp knife and slash the bread 2 or 3 times, making a cut about 1/2″ deep. The bread may deflate a bit; that’s OK, it’ll pick right up in the hot oven.
Place the bread in the oven — onto the baking stone, if you’re using one, or simply onto a middle rack, if it’s on a pan — and carefully pour the 1 cup hot water into the shallow pan on the rack beneath. It’ll bubble and steam; close the oven door quickly.
Bake the bread for 25 to 35 minutes, until it’s a deep, golden brown.
Remove the bread from the oven and cool it on a rack.
Store leftover bread in a plastic bag at room temperature
Notes: • To freeze the dough, divide into 2 parts, deflate, roll into balls, wrap in plastic wrap and label. Store in freezer for up to 2 weeks
Another winning recipe from King Arthur Baking – Everything No-Knead Bread.
What’s nice about this bread is how easy it is to prepare and bake. It has a fantastic flavor and texture. It took about 30minutes to mix the ingredients (by hand), before it fermented, covered for 8 hours. It’s shaped, popped into a Dutch oven to proof for 1.5 – 2 hours, then baked for about an hour. That it! (Check the proofing by using the poke test. The first loaf was over proofed after 2 hours.)
Weigh your flour; or measure it by gently spooning it into a cup, then sweeping off any excess. Mix the dough ingredients in a large bowl to make a sticky dough. Or beat in a stand mixer for 3 minutes.
Cover with plastic wrap, and let rest at room temperature overnight, or for at least 8 hours; the dough will become bubbly and rise quite a bit, so make sure it’s in a large bowl.
Lightly grease a 14″ to 15″ long lidded stoneware baker, or 9″ to 10″ round lidded baking crock. Our bread baking crock and bread pot are both great choices.
Turn the dough onto a generously floured surface; the dough will be slack. To shape the loaf, fold the dough over onto itself using a bench knife or well-floured hands. Because the dough is slightly sticky, it’s best to work quickly.
Place the dough in the prepared pan, smooth side up.
Cover and let rise at room temperature for about 2 hours, until a slight indentation remains when you poke it with your finger.
Just before baking, spritz or brush the dough with water and sprinkle with about 1 tablespoon Everything topping over the dough. Using kitchen scissors, make several 1/2″ deep cuts in a decorative pattern on the top of the dough to allow the bread to expand.
Replace the lid on the pot and put it in a cold oven; set the temperature to 450°F.
Bake the bread for 50 minutes (start the timer once the bread goes into the oven), then remove the lid and continue to bake for another 5 to 10 minutes, until it’s deep brown in color, and a digital thermometer inserted into the center registers about 205°F.
Remove the bread from the oven, turn it onto a rack, and cool before slicing.
I often make a no knead bread which uses the stretch and fold technique and is delicious, has a good crumb, crust and air holes.
I saw this recipe in my Facebook feed and I was skeptical it could compete with my usual recipe/method.. After a trial bake it was every bit as good as my go-to recipe with NO stretch and fold or kneading. Prep time was about 10 minutes. Total “hands-on” time was about 15 minutes.
I mixed the three ingredients (plus water) with my danish dough whisk assuring all the dry ingredients were well hydrated before covering and placing in the fridge overnight.
In the morning I let the dough warm to room temperature and rise for about 3 hours. I placed it on a well floured parchment paper, folded it into a round boule, flipped it over so the folded side is down. Before placing in the Dutch oven I cut a deep X in the top.
No Knead Bread – 3 Ingredient
INGREDIENTS
3 1/2 cups bread flour
2 teaspoons sea salt
1 teaspoons instant yeast
1 2/3 cups water (100 degrees F
METHOD
Mix dry ingredients in a large bowl. Using a wooden spoon or Dutch dough whisk blend warm water into the dry ingredients. This dough will be wet and shaggy, also very forgiving. Mix until no dry flour is seen. Cover with plastic wrap and put a towel on top to proof for 8-10 hours at room temperature or for several days in the fridge.
If refrigerated, take the dough out and place on parchment before heating the oven so it gets to room temperature, then preheat the oven to 450 F with the covered Dutch oven inside.
Dust a large square of parchment paper with flour and turn out the dough carefully. (It will be sticky but try to preserve the proof.) Dust the top with flour and using a dough scraper gently fold the dough over and create a round boule. Use the sharp edge of the scraper to score lines in the dough. Cover with the plastic wrap and let rest until pot and oven are up to temperature.
Remove the pot from the oven. Place the parchment paper and dough into the Dutch oven and replace lid. Bake, covered, for 35 minutes. Then, anywhere from 5 to 10 minutes uncovered (this is a personal taste issue about the crispness of the crust). Let the bread rest 30 minutes. It will be hard, but you will wreck the loaf by cutting into it immediately.
I ran across a four ingredient, no knead, no stretch and fold, Italian bread. I am on my third bake of this bread, each with minor tweaks.
Version 1 was as presented. Version 2 was as presented but baked in a Dutch oven (my preferred baking method.) Version 3 included Cake and Bread Enhancer (fifth ingredient) and was baked flat on a baking stone.
Version 1 was excellent. Version 2 was excellent. Version 3 was excellent. All three had great, crispy crusts and a soft tender crumb on the inside.
My current favorite is (was) my high hydration honey no-knead bread, but this may be my new go to. It’s even easier than the honey no-knead. Simply mix everything together the let it ferment for 2 hours. Gently pour out, (I do mean pour, it is high hydration, slack and sticky,) minimally shape and bake. All done!
My goal is to create larger holes in the bread. Version 2 (center) and 3 (right) were the best. I overworked the fermented dough a little too much in Version 1. Try, try, and try again!
Rustic Italian Bread
INGREDIENTS • 380 g AP flour + more for dusting • 20 g (3 Tbl) Bread Enhancer • 1 tsp sea salt • 350 g warm water • 2 tsp active dry yeast
METHOD
Add the flour, enhancer, salt and yeast to your stand mixer. Use the paddle attachment to mix and combine so no dry patches remain.
Add the warm water and mix until everything is incorporated and a soft, wet dough forms. It will be a slack, sticky dough.
Loosely cover the bowl with plastic and let the dough rise at room temperature (See tip below) for 2 to 3 hours or until doubled in size.
Dust your kitchen counter with flour and scrape the very sticky dough out with a bowl scraper.
With floured hands shape the dough into a ball (or batard,) deflating it as little as possible.
Line a banneton with parchment paper. (See tip below)
Place the ball of dough in the lined banneton smooth side up and let it rest while your oven heats up.
Use a sharp knife or lame to lightly slash an X in the top of the loaf.
Preheat your oven to 450 F with a dutch oven inside for about 45 minutes before baking the bread. Fill an oven proof bowl with 2 inches of water and place it on the bottom rack.
Once hot, carefully transfer the bread loaf into the dutch oven using the parchment paper.
Cover with the lid and bake for 30 minutes. Remove lid and bake another 5 minutes until golden brown on top. The internal temperature should be 205 F
Remove the bread from the dutch oven and transfer to a cooling rack or it won’t stay crispy.
TIPS
Lining a round banneton: Crumple parchment paper starting from the edges. You should end up with a ball which will smooth out to fill the round banneton
Room temperature proofing: I like to put the bowl in an “off” oven with the light on. In the winter my kitchen tends to be cool (62-65 F) My “off” oven with the light on is 78o F.
From King Arthur Baking’s Cake and Bread Enhancer: A “miracle” ingredient for your cakes!
(From KAB) Our bakers have called this the “miracle” ingredient for many reasons: it makes cakes and other baked goods softer, moister, and helps them stay fresher longer. Our blend contains vegetable fats that act as emulsifiers, allowing the fats and liquids in your favorite recipe to combine more easily. The enhancer also acts as a stabilizer and texture enhancer. Cake enhancers are commonly used in professional bakeries to keep breads fresh and soft, and help cakes stay light and fluffy. It’s especially great for making soft sandwich loaves.
While I was waiting for other items to mix/chill/rise/etc I made a few other items this morning.
We were nearly out of bread (amazing.) I made a loaf of my honey high-hydration no-knead bread. This may be the prettiest loaf I have made. The slashes on top were well defined and kept the bread from blowing out anywhere else.
Oh, by the way, there are three-berry scones in the background. I like to freeze them, then on golf days take them from the freezer and snack on them on the course. They don’t seem to help my game, but do make it more enjoyable.
This time, I made the scones bigger than usual. I used some frozen berries we had (ever frugal) and had trouble incorporating them into the dough. They ended up being delicious!