More Hookers! NYT Fake News! Sad!

A couple of weeks ago, while reading the NYT online I saw this recipe for a Chocolate/Salted Caramel tart. I thought, how could you go wrong with this combination? I mean, salted caramel, chocolate and hookers (tarts), plus wanting to support the poor failing NYT! I planned on making this the first weekend my crack QC/Taster panel was back home. Tada!!

nyt-revenue-report.jpg

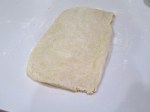
Unsurprisingly, the recipe posted in the successful, reliable and accurate NYT made anBroken Baked Tart Shell excellent tart. I made two error with this pastry. First I removed it from the tart pan too soon. The shell was still very fragile and I put a thumb through the side.

Repaired Filled Tart Close Up


I used a little foil to dam the flow of caramel and chocolate, plus I tipped it away from the breach so there is a thinner layer on that side of the tart. SAD!


I also poured the chocolate ganache when it was a little too thick. That may have helped plug the leak in the damn dam, but did not have the nice smooth, shiny top I was looking for. Finished Tart I also added some white chocolate ganache in a spiral and cut it through with a clean knife to make the star like pattern.


Hover your mouse over these three pictures to see the caption.

Anyway, here is the recipe. I followed it pretty closely and really wouldn’t change anything, except adding the white chocolate starburst. Oh, I did use sour cream instead of creme fraiche. Any notes are in red below.

INGREDIENTS

  • FOR THE CHOCOLATE DOUGH:
    • ½ cup (1 stick) salted butter, at room temperature
    • ½ cup plus 1 tablespoon confectioners’ sugar
    • ¼ cup unsweetened cocoa
    • 1 large egg yolk
    • ¾ teaspoon vanilla extract
    • 1 ¼ cups all-purpose flour
    • Optional: water, a tablespoon at a time until the dough is pliable.
  • FOR THE CARAMEL FILLING:
    • 2 cups sugar
    • ½ cup water
    • ¼ cup corn syrup
    • ½ cup (1 stick) unsalted butter
    • ½ cup heavy cream
    • 2 tablespoons creme fraiche or sour cream
    • Pinch of salt
  • FOR THE CHOCOLATE GLAZE:
    • 3 ½ ounces extra-bittersweet chocolate (70 to 85%), chopped
    • ½ cup heavy cream
    • Sea salt

PREPARATION

  1. Prepare chocolate dough: In bowl of an electric mixer, combine the butter, confectioners’ sugar and cocoa. Beat until smooth. Add egg yolk and vanilla, and beat until blended.
  2. Sift flour into dough mixture. Beat on low speed until combined. (Note: next time I will add a little water here to make the dough a little more pliable. I will also rest in in the fridge for 20-30 minutes.) Press the dough into the bottom and up the sides of a 10-inch tart pan. (You can use a 9-inch pan, but the crust will be thicker and the caramel may take longer to set in step 4.)
  3. Preheat oven to 350 degrees. Line tart with foil, and fill with dried beans, rice or pie weights. Bake for 15 minutes. Remove foil and weights, and bake until pastry is dry and set, another 10 to 15 minutes. Transfer to a wire rack to cool. The shell is fragile. Be sure to wait until it is cool before handling.
  4. Prepare caramel filling: In a large saucepan, bring sugar, water and corn syrup to a boil. Stir or swirl the pan occasionally, until mixture is a medium amber color, about 12 minutes. Remove from the heat. Caramel will continue to cook and darken off of the heat. Carefully but quickly whisk in the butter, cream, creme fraiche and salt until smooth (mixture will bubble up). Pour hot caramel into tart, and allow to cool and set, at least 1 hour.
  5. Prepare chocolate glaze: Place chocolate in a bowl. In a small saucepan, bring cream to a boil. Pour hot cream over chocolate and whisk until chocolate has melted and mixture is smooth. Pour glaze over tart, tilting tart for even coverage. (At this point, I piped a spiral of white chocolate ganache on the tart and used a butter knife to cut through the ganache to make the starburst design.) Refrigerate until tart is set, at least one hour, then sprinkle with a few granules of sea salt. Keep refrigerated until serving.

Clouseau, Clafoutis Hasenfeffer Incorporated

Honey Whole Wheat Clafoutis With Raspberries

One of my favorite bits from the old Peter Sellers Inspector Clouseau Pink Panther movies (imagine Clouseau’s fake French accent)

Clouseau: Does your dog bite?
Hotel Clerk: Non.
Clouseau: [bowing down to pet the dog] Nice doggie.
[Dog barks and bites Clouseau in the hand]
Clouseau: I thought you said your dog did not bite!
Hotel Clerk: That eez not my dog.

I saw this recipe online and followed it back to the source (Ellie Krieger, Special to The Washington Post) and as I had a pint of raspberries left over in the fridge I thought this would make a good, perhaps even, elegant breakfast, rather than a dessert.  Actually, clafoutis [klah-foo-TEE] is a basic pancake which is baked rather than cooked on a griddle, but it sure sounds fancy.

The recipe calls for pastry flour (low gluten) to make a more tender, “pancake” type structure. Not having any whole wheat pastry flour, I substituted regular whole wheat flour and added a little cornstarch. I didn’t have a lemon so substituted ½ teaspoon of key lime juice for a little tartness. I made a half recipe, used a 6” pie plate and topped it with some fresh Vermont maple syrup, cutting the ingredients below in half. Perhaps next time I would add a little baking powder to help the rise some.


Using low-fat milk, whole wheat flour and honey rather than sugar increases the healthfulness of this recipe. I did dust the oiled pie plate with a little caster sugar. In hindsight, I probably wouldn’t do that again. It didn’t add anything to the clafoutis.

INGREDIENTS

  • 2 large eggs, beaten
  • 1/2 cup low-fat (1 percent) milk
  • 1/4 cup honey
  • 2 tablespoons unsalted butter, melted and cooled
  • 1 1/2 teaspoons finely grated lemon zest (from 1 lemon)
  • 1/8 teaspoon salt
  • 1/2 cup whole-wheat pastry flour
  • 9 ounces (2 cups) fresh raspberries
  • 1 tablespoon confectioners’ sugar, for serving

METHOD

  1. Preheat the oven to 325 degrees. Grease a 9-inch pie plate or ceramic dish with cooking oil spray.
  2. Whisk together the eggs, milk, honey, butter, lemon zest and salt in a mixing bowl until well incorporated, then gradually whisk in the flour, to form a smooth batter.
  3. Pour into the pie plate, then add the raspberries; top sides down will help them to stay upright as you work. Bake (middle rack) for 40 to 50 minutes, until the clafoutis is golden brown and center is set.
  4. Dust the top with confectioners’ sugar and serve right away.

San Juan Hill Pastry Hand Pies   

Making puff pastry at home is a tedious process requiring several hours to incorporate the butter into the flour. For years I have relied on the kindness of Trader Joe’s and Pillsbury as my source of puff pastry. Both are delicious and easy to use. TJ’s has less rise and is good for a variety of pastries while Pill’s has skyscraper (get it?, “high rise?”) puff. This spring I found out that TJ’s puff pastry is seasonal. Who knew? Also, trying to insert a very little humor and perhaps some click bait with “San Juan Hill” – Teddy Roosevelt and the “Rough” Riders? Oh well, maybe not.

Anyway, I decided it was time to try, at least rough puff pastry. I tried two different recipes, one from King Arthur Flour and the other from Gordon Ramsey via BBC. The primary difference between the two is KAF adds sour cream while Gordon uses cool water as the liquid and KAF adds some baking powder to assist the rise.

To create the characteristic layers in the puff pastry it needs to be book folded and rolled. Both recipes called for repeating this twice, but many of the comments said to repeat up to four times, which I will do next time. The final pastry was very good, but lacked the layers and puff of either TJ’s or Pill’s.

I have trouble making the pastry and remembering to take photos as the work progresses. What I need is a camera that will take pics every 15 seconds, the just use the appropriate ones. I missed the filling of the pies. I used a heaping teaspoon for the blueberry mix and made a few using 3 fresh raspberries. Another suggestion: cut the tops of the pies about and inch bigger than the bottoms. Once the dough tries to stretch over the filled bottom the edges do not line up. I used about 2.5″ for the bottom and 3:5 inches for the tops. Also, round hand pies are much better looking but wastes a lot of dough. Square pies are rather plain, but more efficient.  What I need are two hexagonal cookie cutters, one 2.5″ and the other 3.5″. Then I could have the “roundish” look but a closest pack design, minimizing waste.

Gordon’s pastry was a bit easier to work with than KAF’s. The original recipe called for too much water which made a very, very wet dough. Luckily, I started with about 50 ml (one third of what the recipe said you may need and half of what it said to add initially.) They both tasted excellent and the texture was good, not great, but that may improve with additional rolling, folding and chilling. Once I made Gordon’s pastry I used the bottom of KAF’s to fill and finish the hand pies.

Rough Puff Pastry – Gordon Ramsey

INGREDIENTS

  • 250g strong plain flour
  • 1 tsp fine sea salt
  • 250g butter, at room temperature, but not soft
  • about 150ml cold water

METHOD

  1. Sift the flour and salt into a large bowl. Roughly break the butter in small chunks, add them to the bowl and rub them in loosely. You need to see bits of butter.
  2. Make a well in the bowl and pour in about one-third of the cold water, mixing until you have a firm rough dough adding extra water if needed. Wrap dough with cling film and leave to rest for 20 mins in the fridge.
  3. Turn out onto a lightly floured board, knead gently and form into a smooth rectangle. Roll the dough in one direction only, until 3 times the width, about 20 x 50cm (~ 8”x20”). Keep edges straight and even. Don’t overwork the butter streaks; you should have a marbled effect.
  4. Fold the top third down to the center, then the bottom third up and over that. Give the dough a quarter turn (to the left or right) and roll out again to three times the length. Fold as before, cover with cling film and chill for at least 20 mins before rolling to use.

Blueberry Hand Pies with Rough Puff Pastry – KAF

INGREDIENTS

Pastry

  • 2 cups King Arthur Unbleached All-Purpose Flour
  • ¾ teaspoon salt
  • ½ teaspoon baking powder
  • 1 cup (16 tablespoons) cold unsalted butter
  • ½ cup cold sour cream

Filling

  • 2 cups blueberries, fresh or frozen
  • 2 tablespoons cornstarch
  • ⅓ cup sugar
  • ⅛ teaspoon salt (a large pinch)
  • 1 tablespoon lemon juice
  • *For frozen berries, use 2½ tablespoons cornstarch.

Topping

  • 1 large egg, beaten
  • 2 tablespoons white sparkling sugar, for garnish

METHOD

  1. To make the pastry: Whisk together the flour, salt, and baking powder. Add the butter, working it in to make a coarse/crumbly mixture. Leave most of the butter in large, pea-sized pieces.
  2. Add the sour cream, and stir until the mixture starts to come together in chunks. Turn it out onto a floured work surface, and bring it together with a few quick kneads.
  3. Pat the dough into a rough log, and roll it into an 8″ x 10″ rectangle. Dust both sides of the dough with flour, and starting with a shorter end, fold it in three like a business letter.
  4. Flip the dough over, give it a 90° turn on your work surface, and roll it again into an 8″ x 10″ rectangle. Fold it in three again.
  5. Wrap the dough, and chill for at least 30 minutes before using.
  6. To make the filling: If you’re using fresh berries, rinse and drain well. Place fresh or frozen berries in a saucepan. Whisk the cornstarch with the sugar, and pour over the berries. Add the salt and lemon juice, stirring to combine.
  7. Place the saucepan on a burner set to medium-high heat and cook, stirring, until the small amount of liquid in the bottom of the pan comes to a simmer. Reduce the heat to medium and continue to cook, stirring frequently, until the mixture starts to thicken, about 5 minutes. Transfer the cooked berries to a bowl and let cool to room temperature. It’s fine to make the filling ahead of time, and refrigerate until you’re ready to use it.
  8. Preheat the oven to 425°F; place a rack on the middle shelf. Line a baking sheet with parchment paper.
  9. To assemble the pies: Roll the dough into a 14″ x 14″ square. With a straight edge and pastry wheel, or a 3½” square cutter, cut out sixteen 3½” squares.
  10. Divide the filling among eight of the squares, using about a heaping tablespoon for each; a slightly heaped tablespoon cookie scoop works well here. Brush some of the beaten egg along the edges of each filled square.
  11. Use a knife to cut a vent into each of the remaining eight squares; or use a decorative cutter of your choice.
  12. Top each filled square with a vented square, and press along the edges with the tines of a fork to seal.
  13. Brush the top of each pie with the remaining beaten egg, and sprinkle with sparkling sugar. Transfer the pies to the prepared baking sheet. Note: If at any time during this process the pies become sticky and hard to work with, simply refrigerate them for about 20 minutes, until firm.
  14. Bake the pies for 18 to 20 minutes, until they’re a light golden brown. Remove them from the oven, and let cool for 20 minutes before serving.
  15. Store pies, lightly wrapped, at room temperature for a couple of days; freeze for longer storage.

Have a Very Independent Day

Happy Independence Day family and friends! Have a wonderful day, full of independence, liberty, personal freedom, free speech and remember our government is OUR government, NOT our elected representative’s government.

For Daniel and Frances’ 4th of July BBQ yesterday I made a U.S. flag tart with crème patisserie filling, raspberry and meringue stripes and blueberry and meringue stars. I also made red, white and blue macarons.  The only new recipe I incorporated into these two desserts (the other recipes can be found elsewhere in this blog) was the Italian meringue used to fill the macarons and make the stars for the flag.  I wish I had kept the 4 star, 3 star, 4 star pattern, but miscounted in the middle of piping. Yeah, I miscounted on the way to 4. Oh well, next time.


As you probably know, there are 3 common methods of making meringue. French meringue is the most common which is made by whisking sugar into beaten egg whites. While the easiest to make, it is the least stable meringue and is perfect for filling or toppings, or folded into batters for sponges, jocondes etc. Italian meringue is made by beating egg whites to stiff peaks then drizzling a simple sugar, heated to 2400 F, into the whipped egg whites. This is the most stable meringue and is great for frosting cakes, top filling pies and mousse. Swiss meringue is made by gently beating egg whites and sugar in a bain marie until the sugar is completely dissolved and the mixture reaches 1300 F. The mixture is then removed from the heat and whisked at high speed to create volume, then lower speed to cool the meringue and is very stiff. Swiss meringue is often used as a base for buttercream frosting.

ITALIAN MERINGUE

Makes about 360 ml (or 1½ cups), Author: The Tough Cookie

INGREDIENTS

  • 150g (or ¾ cup) granulated sugar
  • 60ml (or ¼ cup) water
  • 60g (or ¼ cup) egg whites (about 2 large egg whites)

METHOD

  1. In a medium-sized saucepan, combine the sugar and water. Heat over low heat, stirring until the sugar has dissolved. Once the sugar has dissolved, turn the heat to medium-high and allow the syrup to come to a boil.
  2. In the meantime, add the egg whites to a medium-sized, heatproof bowl and mix (with a mixer fitted with the whisk attachment) until foamy and the whites are almost able to hold soft peaks.
  3. Once the syrup is boiling, clip on a candy (or sugar) thermometer.
  4. Cook until the syrup reaches 240°F, then take the pan off the heat and slowly drizzle the hot syrup into the bowl with the foamy egg whites, mixing continuously to prevent the eggs from scrambling. Don’t pour the syrup onto the whisk, or the syrup may splatter against the sides of the bowl (or into your face!). Instead, aim for a spot close to the whisk.
  5. Once all the syrup has been added, keep mixing until the bottom of the bowl feels cool to the touch and the meringue has cooled down to body temperature.
  6. Use immediately or keep in the fridge (covered) until ready to use. It’s a very stable meringue, so it won’t start weeping, leaking or collapsing.

NOTES

Italian meringue can be made two days in advance and stored in the fridge until needed (covered with plastic wrap).


Challah, Challah Oxen Free!!

Actually challah bread is totally meat free, no oxen, nothing that walks or has a face, real vegetarian. I remember playing hide-and-go-seek with the neighborhood kids when growing up on “the hill.” I also remember its more violent, rambunctious cousin, kick-the-can. Good times.

I decided it was time to try to make (and braid) a challah. I found this recipe and technique at the Kitchn and it worked beautifully. I am annoyed I was so focused on making the braid, I forgot to photograph the process. Maybe next time. You can see their photo instructions at thekitchen.com.

Challah is an enriched dough bread and is the traditional bread used to welcome Shabbat with HaMotzi (blessing for bread) being recited prior to tearing or cutting the bread and distributing to all in attendance. I find it interesting that two loaves are placed on the table on Shabbat to, perhaps, commemorate the two portions of manna given to the Israelites in the desert during their 40-year wander. Also, the challah is covered with a cloth to,perhaps, represent the dew covering the manna keeping it fresh. There are many reasons why challah is braided. Google it to find the reason(s) you like. I like this rational for 6 braids. Each braid represents a “profane” day of the week (all 6 days except Shabbat) and braiding the, combines those days into a unity which is easier to place behind you to allow the peaceful contemplation and celebration of the sacredness of Shabbat. Or perhaps, two loaves, 12 braids represents the 12 tribes, or perhaps the braids are reminiscent of the structure of DNA, or perhaps it is just custom.

From thekitchn.com

INGREDIENTS

  • 2 teaspoons active dry or instant yeast
  • 1 cup (8 ounces) lukewarm water
  • 4 to 4 1/2 cups (20 to 22 ounces) all-purpose flour
  • 1/4 cup (1 3/4 ounces) white granulated sugar
  • 2 teaspoons salt
  • 2 large eggs
  • 1 large egg yolk (reserve the white for the egg wash)
  • 1/4 cup (2 ounces) neutral-flavored vegetable oil, or butter

METHOD

  1. Dissolve the yeast: Sprinkle the yeast over the water in a small bowl, and add a healthy pinch of sugar. Stir to dissolve the yeast and let stand until you see a thin frothy layer across the top.
  2. Mix the dry ingredients: Whisk together 4 cups of the flour, sugar, and salt in the bowl of a standing mixer.
  3. Add the eggs, yolk, and oil: Make a well in the center of the flour and add the eggs, egg yolk, and oil. Whisk these together to form a slurry, pulling in a little flour from the sides of the bowl.
  4. Mix to form a shaggy dough: Pour the yeast mixture over the egg slurry. Mix the yeast, eggs, and flour with the dough hook until you form a shaggy dough that is difficult to mix.
  5. Knead the dough for 6 to 8 minutes: With a dough hook attachment, knead the dough on low speed for 6 to 8 minutes. If the dough seems very sticky, add flour a teaspoon at a time until it feels tacky, but no longer like bubblegum. The dough has finished kneading when it is soft, smooth, and holds a ball-shape.
  6. Let the dough rise until doubled: Place the dough in an oiled bowl, cover with plastic wrap, and place somewhere warm. Let the dough rise until doubled in bulk, 1 1/2 to 2 hours.
  7. Separate the dough and roll into ropes: Separate the dough into three or six equal pieces, depending on the type of braid you’d like to do. Roll each piece of dough into a long rope roughly 1-inch thick and 16 inches long. If the ropes shrink as you try to roll them, let them rest for 5 minutes to relax the gluten and then try again.
  8. Braid the dough: Gather the ropes and squeeze them together at the very top. If making a 3-stranded challah, braid the ropes together like braiding hair or yarn and squeeze the ends together when complete. If making a 6-stranded challah, follow the directions at thekitchn.com.
  9. Let the challah rise: Line a baking sheet with parchment and lift the loaf on top. Sprinkle the loaf with a little flour and drape it with a clean dishcloth. Place the pan somewhere warm and away from drafts and let it rise until puffed and pillowy, about an hour.
  10. Brush the challah with egg white: About 20 minutes before baking, heat the oven to 350°F. When ready to bake, whisk the reserved egg white with a tablespoon of water and brush it all over the challah. Be sure to get in the cracks and down the sides of the loaf.
  11. Bake the challah: Slide the challah on its baking sheet into the oven and bake for 30 to 35 minutes, rotating the pan halfway through cooking. The challah is done when it is deeply browned and registers 190°F in the very middle with an instant-read thermometer.
  12. Cool the challah: Let the challah cool on a cooling rack until just barely warm. Slice and eat.
  13. For those bakers who are not visual: Making a 6-Stranded Challah Braid
    1. The name of the game here is “over two, under one, over two.” Carry the right-most rope over the two ropes beside it, slip it under the middle rope, and then carry it over the last two ropes. Lay the rope down parallel to the other ropes; it is now the furthest-left strand. Repeat this pattern until you reach the end of the loaf. Try to make your braid as tight as possible. Your braid will start listing to the left as you go; it’s ok to lift it up and recenter the loaf if you need to. Once you reach the end, squeeze the ends of the ropes together and tuck them under the loaf.
    2. At this point, your loaf is fairly long and skinny. If you’d like to make a celebration ring, stretch the loaf a little longer and pull the ends toward each other to create a circle. You can either squeeze the ends together, or if you’re feeling adventurous, braid them into a continuous circle.
  14. If you’re making a regular loaf (as pictured), you need to “plump” it a little to tighten the ropes into more of a loaf shape. Place your left palm at the end of the braid and your right palm at the top, and gently push the two ends toward each other, just like plumping a pillow in slow motion. Then slip your fingers under the dough along either side and gently lift the dough while cupping it downwards. (This isn’t a vital step, so don’t worry if you’re not sure you did it correctly.)