Yellow Cake

I’ve been searching for a recipe for an exceptional tasting, moist, tender white cake. I was reminded that I made a cake for my granddaughters baptism and it was described as one of the best “white” cakes they ever tasted. Today, that cake was resurrected as a small, two layer 8’ cake to share with QC and a couple of neighbors as opposed to the two layer 11”x15” cake to serve 60.

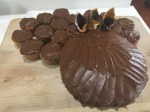
I used a chocolate frosting that complements my Extreme Chocolate Cake. When I say complements I mean it is smooth, shiny and sweet.

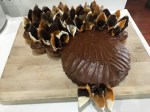
I had a few flower and bird decorations left over from my other granddaughters Princess Aurora birthday cake, and being a frugal ex-pat Vermonter was unable to bin them.

Yellow Sheet Cake

INGREDIENTS : (Double – Half)
• 2 and 1/4 cups (285g) all-purpose flour (570g -142g)
• 1 teaspoon baking soda (2tsp – 1/2tsp)
• 1/2 teaspoon salt (1tsp. 1/4tsp)
• 1 cup (230g) unsalted butter, softened to room temp (460g – 115g)
• 1 and 3/4 cups (350g) granulated sugar (700g – 175g)
• 2 large eggs, at room temperature (4 – 1g)
• 2 teaspoons pure vanilla extract (4tsp – 1tsp)
• 1/2 cup (120g) sour cream, at room temp (240g – 60g)
• 1 cup (240ml) whole milk, at room temp (480g – 120g)

DIRECTIONS:

  1. Preheat oven to 350°F (177°C). Generously grease and lightly flour a 12×17 inch half sheet/jelly roll pan. Set aside.
  2. Whisk the flour, baking soda, and salt together in a large bowl. Set aside. Using a handheld or stand mixer fitted with a paddle attachment, beat the butter on high speed until smooth and creamy – about 1 minute. Add the sugar and beat on high speed for 3 full minutes until creamed together. The mixture should be a light yellow color. Scrape down the sides and up the bottom of the bowl with a rubber spatula as needed. On medium-high speed, add 1 egg at a time, beating well after each addition until both are mixed in. On high speed, beat in the vanilla extract and sour cream. Scrape down the sides and up the bottom of the bowl with a rubber spatula as needed.
  3. With the mixer running on low speed, add the dry ingredients to the wet ingredients alternating with the milk. Start and end with the dry ingredients. Mix each addition just until incorporated. Do not overmix this batter. The batter will be smooth, velvety, and slightly thick.
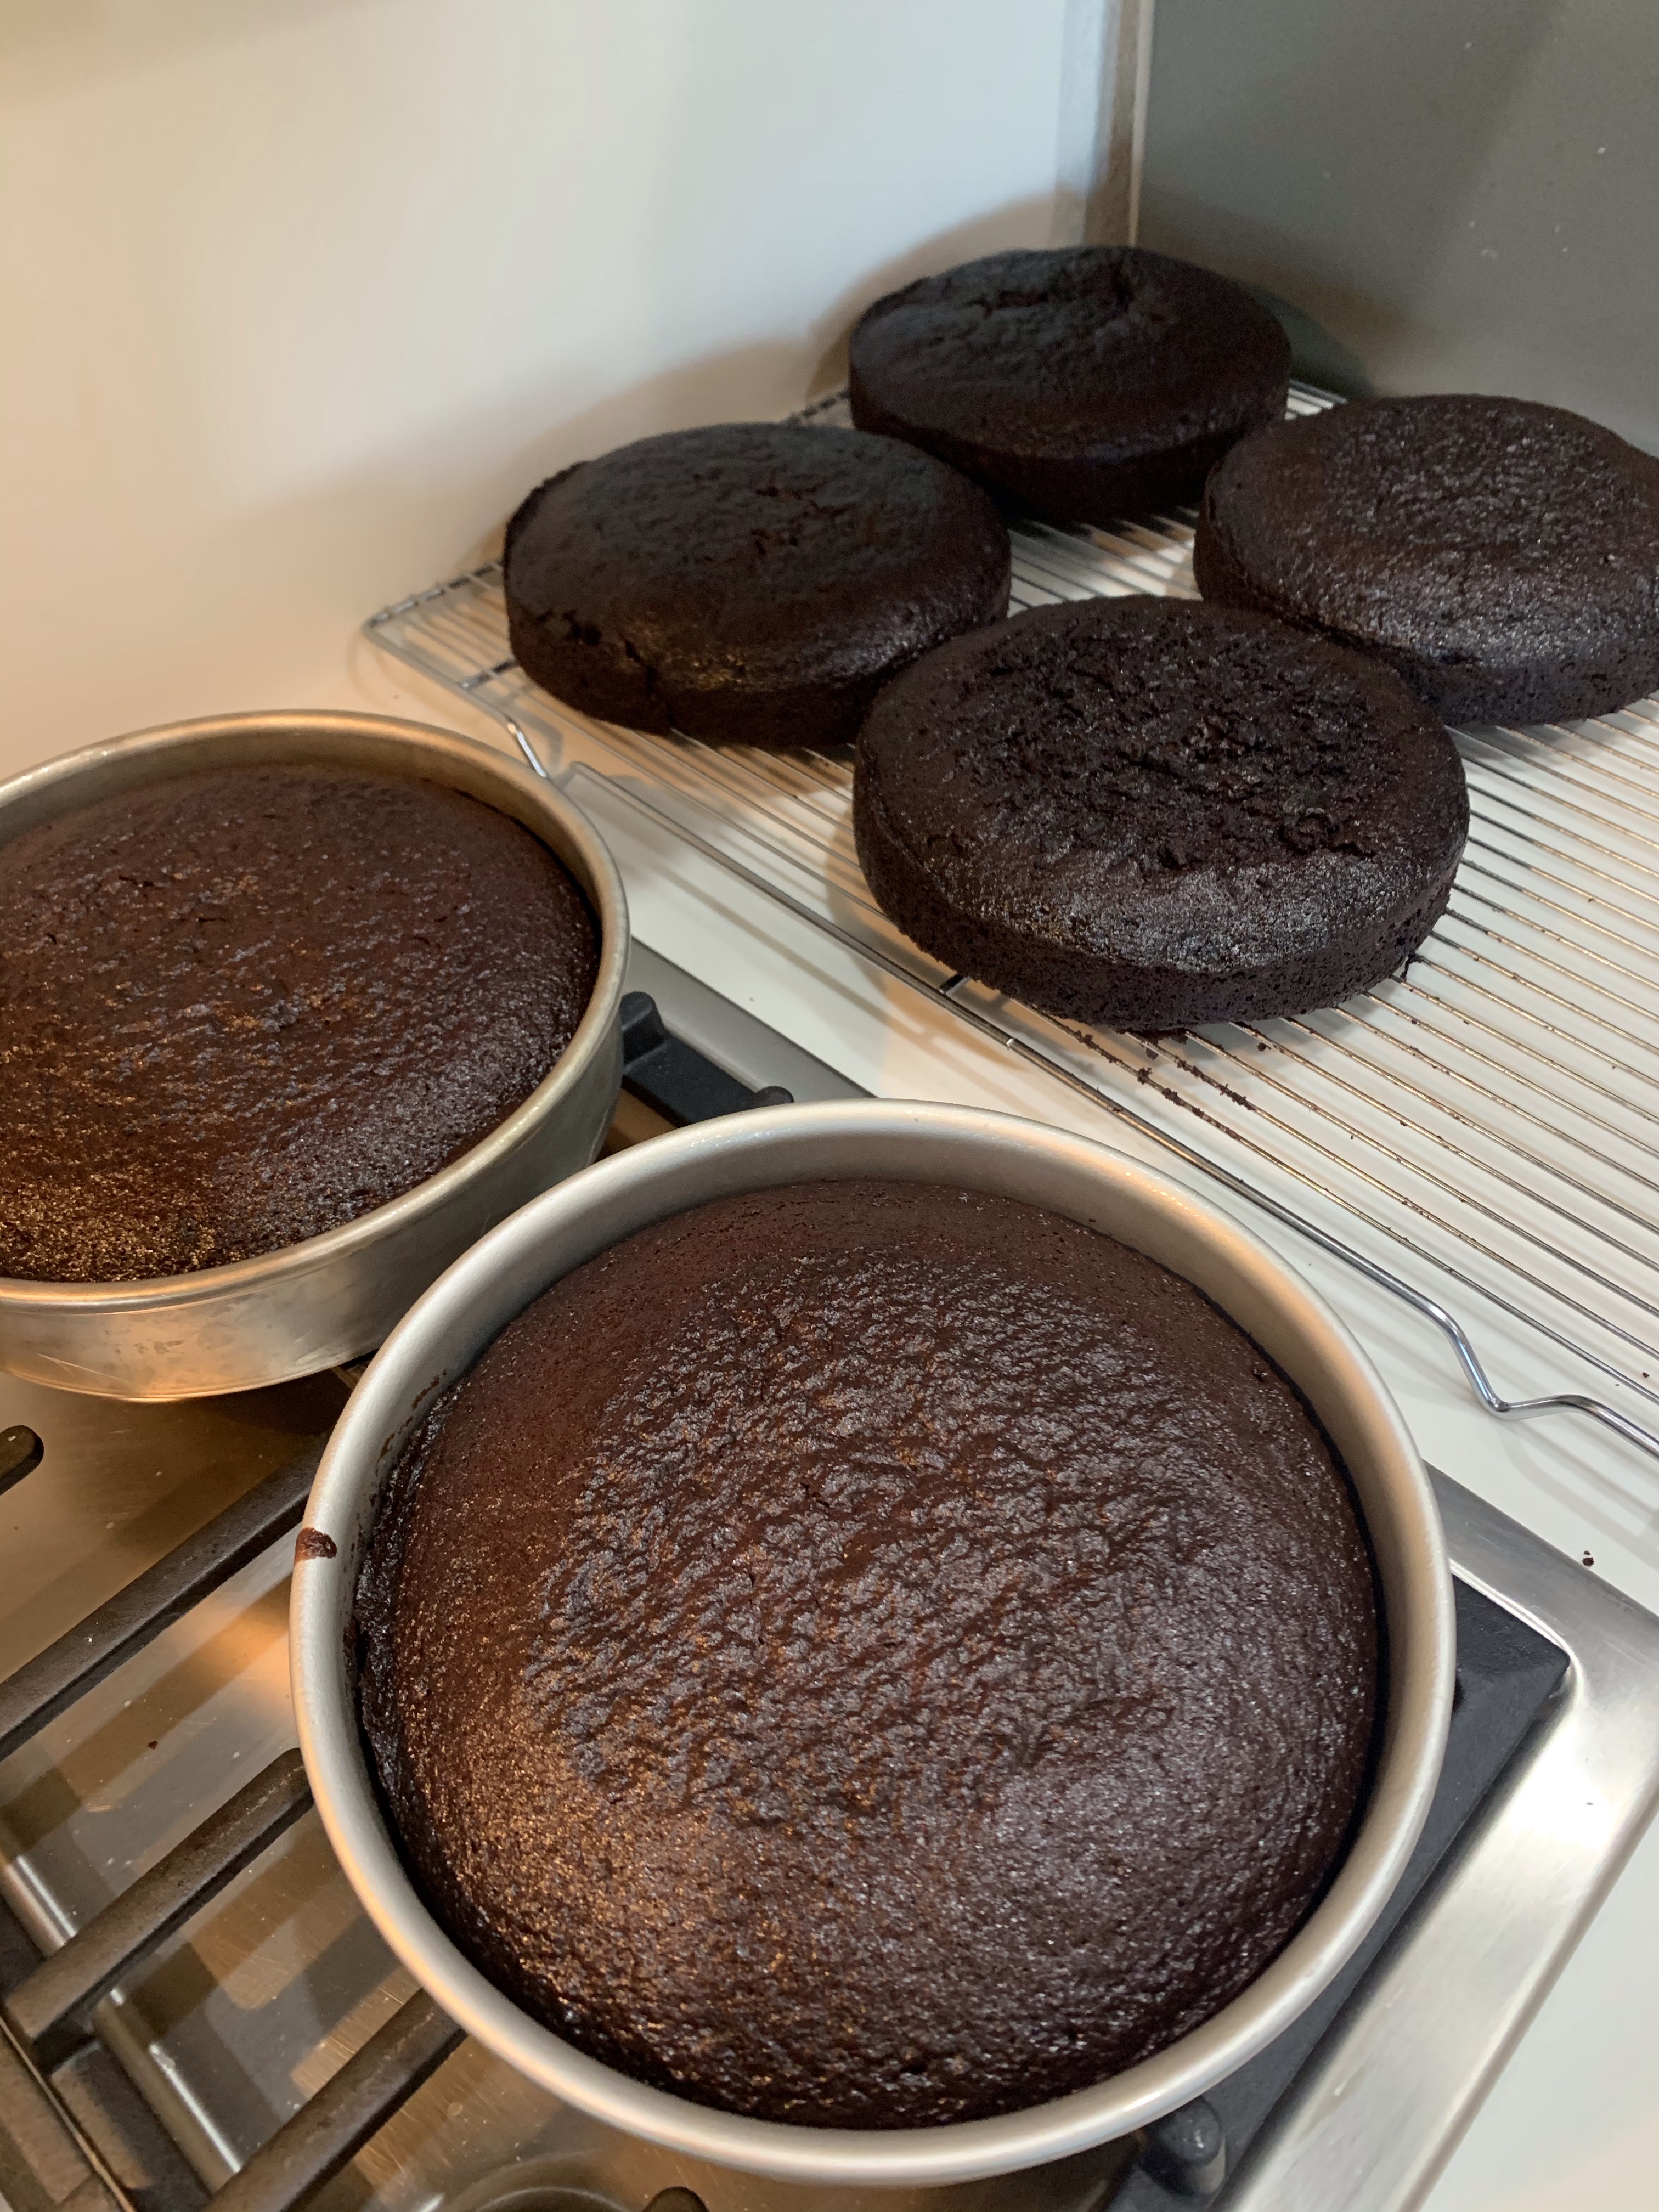
  4. The full recipe yields 2000g of batter. Spread the cake batter into the prepared pan. Smooth it out into a thin, even layer. Bake for 20-22 minutes (for the jelly roll pan, less for a half recipe or 35-40 minutes for a double. Actual times depend on pan used, less time for shallow pan, more for deeper, or until the top is lightly browned and a toothpick inserted in the center comes out clean, or 200F. (Two 8” round pans required 30 minutes to bake in my oven.) Make sure you rotate the cake pan once or twice during bake time if your oven has hot spots. Remove from the oven and allow the cake to cool in the pan placed on a wire rack. As the cake is cooling, make the frosting.
  5. Make ahead tip: Cake can be made 1 -2 days in advance, covered tightly at room temperature.

Extreme Chocolate Frosting

INGREDIENTS (2/3 Recipe)

• 3/4 c butter ½ c (112g)
• 1 1/2 c (125g) unsweetened cocoa powder 1 c (80g)
• 5 1/3 c confectioners’ sugar 624g 3 ½ c (415g)
• 2/3 c milk .45 c (98g)
• 1 tsp vanilla extract

DIRECTIONS

  1. Cream butter until light and fluffy.
  2. Stir in the cocoa and confectioners’ sugar alternately with the milk and vanilla.
  3. Beat to a spreading consistency.

Retirement Cake

I thought a “Book Cake” would be an appropriate choice for a school principal’s retirement party. I was told she likes to read and likes chocolate cake, so….

I didn’t have a rectangular cake board of the appropriate size (13”x17”,) nor did the local stores, so I made one from cardboard and food quality cellophane.

I made two 11×15” Extreme Chocolate Cakes and refrigerated them for a couple of days. When crumb coating, I like to cool (and firm) the cakes. Also, I make my buttercream frosting a little thinner when using it for crumb coating..

One batch of marshmallow fondant was divided 4:1. The large portion formed the edges and were striated to resemble pages of a book. The small portion was colored with the school color “yellow.” The white fondant was wrapped in plastic and left to rest for a couple of hours. The yellow portion was rolled out between parchment paper sheets. I use chopsticks of various sizes to roll the fondant into the desired thickness. The yellow fondant sheet was left to dry slightly, uncovered on a thin bed of powered sugar. After an hour or so, brush some additional sugar on the top of the sheet and flip it over, letting it rest until dry to the touch. I used the yellow to make the letters for the title and spline. (See the top of the pictures below. If they are dry, they are easier to punch out.

When the white fondant is firmer, roll three pieces long and wide enough to cover the edges of the cake. Use a sharp tool to score the fondant lengthwise to represent the pages of the book.

Before covering the cake with fondant smooth the surface of the crumb coat by wetting gloved hands and rubbing them over the surface. This also helps wet the crumb coat so the fondant will stick.

Cut the sheets of white fondant to be an inch longer and wider than the sides of the cake. Press them on, smoothing the joins on the corners and trim the top to be just wider than the book. Cut the bottom off even with the bottom of the book.

Make another batch of fondant. (Note to self: be sure to use fresh, mini-marshmallows. Life will be much easier.) This batch will be the book cover and can be colored “school blue” in the mixer. Once the consistency and color is correct, transfer the fondant to a vegetable-shortening-coated-surface and knead the fondant with gloved and grease covered hands to be sure the fondant is a uniform consistency and color. Let it set for an an hour, wrapped in plastic.

Roll the fondant out on a well sugar dusted table to be two inches wider and longer than the book. In my case it was 16”x16” and I used a 1/4” chopstick to roll it an even thickness. Fold it in half and carefully transfer to the cake. Trim to size and cut thin long pieces to be the bottom cover of the book. Paint water along the bottom edge and apply the thin pieces.

Use the yellow fondant and apply as reinforcements to the corners of the top of the book and thin pieces on the bottom corners. Two more short thin pieces were added to the spline. Wipe the book cover with a damp paper towel. This removes any residual sugar and makes the fondant sticky so the letters will adhere. If the fondant is still too soft, push a toothpick into the top corners to hold it in place. Just remember to remove the toothpick before delivering the cake.

If you have the talent you can brush or pipe the lettering on after the fondant dries. My handwriting is all but illegible so I opt to punch them out and place by hand.

Extreme Chocolate Cake

Makes two 9” round cakes
INGREDIENTS

(Makes one 10’ ROUND CAKE [and two 5”] – quantities are in parenthesis. Or one 11”x15”x2” sheet cake.)
• 2 cups white sugar (3)
• 1 3/4 cups all-purpose flour (2 2/3)
• 3/4 cup unsweetened cocoa powder (1 ¼)
• 1 1/2 teaspoons baking soda (2 ¼)
• 1 1/2 teaspoons baking powder (2 ¼)
• 1 teaspoon salt (1 ½)
• 2 eggs (3)
• 1 cup milk (1 ½)
• 1/2 cup vegetable oil (¾)
• 2 teaspoons vanilla extract (3)
• 1 cup boiling water (1 ½)

METHOD

  1. Preheat oven to 350 degrees F (175 degrees C). Grease and flour two 9 inch cake pans. (SEE QTY FOR 10” CAKES)
  2. Use the first set of ingredients to make the cake. In a medium bowl, stir together the sugar, flour, cocoa,
    baking soda, baking powder and salt. Add the eggs, milk, oil and vanilla, mix for 3 minutes with an
    electric mixer. Stir in the boiling water by hand. Pour evenly into the two prepared pans. (For cupcakes,
    portion ¼ scant cups in each cupcake paper.
  3. Bake for 30 to 35 minutes in the preheated oven, until a toothpick inserted comes out clean or 205F internal temp. Cool for 10 minutes before removing from pans to cool completely.

Marshmallow Fondant


INGREDIENTS
• 1 package (16 ounces) white mini marshmallows
• 2-5 tablespoons water
• 2 pounds (about 8 cups) sifted confectioners’ sugar
• 1/4 cup solid vegetable shortening

METHOD

  1. Grease your mixing bowl and a glass bowl that can be used to melt marshmallows in the microwave.
  2. Place the marshmallows, water and flavoring of your choice in greased glass bowl and microwave on high at 30 second intervals.
  3. Stir every 30 seconds until marshmallows are completely melted, about 2 minutes.
  4. Sift one half of the 2 pound bag of confectioner’s sugar in a greased mixing bowl. Make a well in the center of the confectioner’s sugar and pour in the melted marshmallows.
  5. I use the paddle attachment for my KitchenAid mixer for this first part of the mixture.
  6. Mix until all the melted marshmallows are incorporated in the confectioner’s sugar.
  7. Mixture will be thick but still runny.
  8. Sift the remaining half bag of confectioner’s sugar into the melted marshmallows.
  9. Mix on low until it comes together.
  10. Change to your dough hook attachment as this will get extremely thick.
  11. Fondant will be very thick and have a dough like consistency
  12. Wrap fondant in saran and make sure no air gets to it.
  13. Rest fondant for at least an hour before use.

Chocolate Swiss Roll Yule Log Cake

That title is a mouthful, but not as good a mouthful as the cake!

Roll the cake as soon as it finishes baking. The cake will be HOT. I ended up using the parchment paper and rolling the ends like a small Tootsie Roll. It worked pretty good and saved my fingers.

The cake broke as I unrolled it. Apparently this is not uncommon. I believe I unrolled it too soon after it came out of the refrigerator. It wasn’t much of a problem as the frosting covered the breaks. I was going to make some marshmallow fluff to add to the filling, but forgot to make any this morning. Maybe next time.

I used grapes instead of cranberries for the decorations. (I am not a fan of cranberries.) I wish the long section of log were even longer. The jelly roll pan was a good size, and I think rolling a longer sheet of cake would be much more difficult, but it would have been nice for it to be bigger.

Most of the cake will be given away to family and neighbors, but we will be sure Manufacturing and QC have enough for proper assessment.

I ended up using half the suggested confectioner’s sugar for the frosting (topping.) QC and Manufacturing I checked it often during mixing, until we decided it was sweet enough, but not too sweet.

Chocolate Swiss Roll Cake

INGREDIENTS
Cake
• 4 large eggs, separated
• 1/3 cup (65g) granulated sugar
• 1/3 cup (65g) packed light or dark brown sugar
• 1 Tablespoon (15ml) strong brewed coffee
• 1/4 cup (60g) unsalted butter, melted (see note)
• 1 teaspoon pure vanilla extract
• 1/2 cup (62g) all-purpose flour
• 3 Tbl natural unsweetened cocoa powder, plus 2 Tbl (10g) for rolling*
• 1 teaspoon baking powder
• 1/4 teaspoon salt
Vanilla Whipped Cream
• 1 cup (240ml) cold heavy cream or heavy whipping cream
• 3 Tablespoons (38g) granulated sugar or confectioners’ sugar
• 1 teaspoon pure vanilla extract
• optional: 2 Tablespoons marshmallow creme (“Fluff”)
Chocolate Topping
• 3/4 cup butter
• 1 1/2 cups (125g) unsweetened cocoa powder
• 5 1/3 cups confectioners’ sugar 624g (1c confectioners sugar = 117g)
• 2/3 cup milk
• 1 teaspoon vanilla extract

METHOD

  1. Preheat oven to 350°F (177°C). Spray a 12×17 inch baking pan with nonstick spray or grease with butter, so the parchment paper sticks. Then line it with parchment paper so the cake seamlessly releases. Spray or grease the parchment paper too. We want an extremely nonstick surface for this cake roll.
  2. Make the cake: Using a hand mixer or a stand mixer fitted with whisk attachment, beat the egg whites and granulated sugar together in a medium bowl on high speed for 5 minutes or until stiff peaks form. Set aside. In another bowl, beat the egg yolks, brown sugar, and vanilla extract together until pale and creamy, about 2 minutes.
  3. Sift the flour, 3 Tablespoons cocoa powder, baking powder, and salt together into a large bowl bowl. Pour the melted butter, coffee, and egg yolk mixture over the dry ingredients. Beat everything together on medium speed until completely combined. Using a rubber spatula or wooden spoon, gently fold in the egg whites until completely combined. Avoid over-mixing and deflating those whites. Batter will be very light.
  4. Spread batter evenly into prepared pan. It will be a very thin layer. Shimmy the pan on the counter to smooth out the top. Bake for 10 minutes or until the top of the cake gently springs back when touched with your finger. Do NOT over-bake.
  5. Roll the cake: As the cake bakes, place a piece of parchment paper (larger than the cake) or a thin kitchen towel flat on the counter. Sprinkle with a light coating of cocoa powder. Once the cake comes out of the oven, immediately invert it onto the parchment/towel. Peel off the parchment paper that was on the bottom of the cake as it baked. Starting with the narrow end, slowly and gently roll the cake up with the parchment/towel. The cake will be warm. Allow the cake to cool completely rolled up in the parchment/towel. Place in the refrigerator to speed it up, about 2-3 hours.
  6. Remove the cake roll from the refrigerator and allow to sit on the counter for a few minutes to warm up as you prepare the whipped cream.
  7. Make the whipped cream: Using a hand mixer or a stand mixer fitted with a whisk attachment, whip the heavy cream, sugar, and vanilla extract on medium-high speed until medium to stiff peaks form, about 2-3 minutes. Then beat in the marshmallow creme, if using.
  8. Slowly and gently unroll the cake. Spread whipped cream evenly on top, leaving about a 1/2 inch border around the cake. Gently roll the cake back up, without the parchment/towel this time. Place on a wire rack set on a baking sheet (to catch the extra ganache). Set aside on the counter or in the refrigerator as you prepare the ganache.
  9. Make the topping: Cream butter until light and fluffy. Stir in the cocoa and confectioners’ sugar alternately with the milk and vanilla. Beat to a spreading consistency.
  10. Pipe in horizontal strips to resemble bark. Use an M1 star tip.
  11. Refrigerate for at least 30-60 minutes before slicing and serving.
  12. Cover leftover cake and store in the refrigerator for up to 3 days.
    NOTE:
    To make sugared cranberries and rosemary, add 1/2 cup of sugar and 1/2 cup of water to a boil over medium-high heat. Reduce heat and simmer for 5 minutes, until sugar has melted. Remove from heat and let cool for about 10 minutes. Spread 1/2 cup of sugar evenly on a shallow dish. Dip cranberries and rosemary springs to the sugar water, then roll in the sugar. Let dry before adding to the cake. I also used some of the clumps of sugar left behind to add “snow” to the cake.

I Ain’t Afraid Of No Ghosts

I was shown a picture of a Jack ‘O Lantern cake, found the tutorial and more of less followed it. It is supposed to be one of those plastic buckets used to collect your spoils during Trick or Treat. I am satisfied with my first attempt. The recipe called for chocolate cake, so I used my Extreme Chocolate Cake. I also used my recipe for buttercream frosting and marshmallow fondant.

While a little time consuming, most of the individual elements can be prepared well in advance. I made the cakes almost a week early and frozen them. When thawed they are every bit as good as fresh. Fondant needs to rest overnight and buttercream will stay in the fridge for several days before use.

Mark a 4” circle on the top and the mid-point down the cake. Try your best to carve a half a sphere, evenly around the center of the cake. I put a 4” flat plastic disk to serve as a base. The QC department suggested the top of a round plastic storage container that worked perfectly. Take a deep breath, hold the cake tight and flip it end for end. Repeat the same carving on what will now be the top of the cake, making a perfect sphere, or in my case a slightly distorted, but acceptable, ovoid.

  1. Make the cakes and cool, or if frozen, let warm to room temp.
  2. Mix the buttercream.
  3. Before coloring I set a piping bag full aside to frost some birthday party cupcakes I made.
  4. Frost between the layers, smooth any seepage and refrigerate overnight.
  5. Carve the cool cake and crumb coat, back to the fridge.
  6. Frost the cake and yup, refrigerate again.
  7. Make the marshmallow fondant, break off some of the un-colored fondant and set aside.
  8. Knead in the orange food coloring. Protect your work surface to avoid stains. I like to wear gloves for this.
  9. Knead black food coloring for the face into the white piece set aside.
  10. Find a face you like, or draw your own.
  11. Cut it out, pin it to the cake and cut out holes for the black fondant.
  12. Cut the black fondant to fit the template and fit into the holes on the cake.
  13. Cut a 4” circle on the top about 1/2” deep and line with fondant. (Which ever color you have left over.)
  14. Roll a piece of black fondant out into a long trip. Lay a piece of wire on it and wrap with the fondant, leaving a couple off inches of wire uncoated. Push the clean ends into each side of the top opening.
  15. Place a few pieces of wrapped candy in the shallow hole on the top.
Halloween/Birthday Cupcakes

Chocolat de Couverture Noir

On a visit to a Restaurant Depot my Q.C. Department convinced me to buy 11 lbs of bulk Chocolat de Couverture Noir. (64% is dark chocolate is not very bitter. I use 73% for dark bitter chocolate.) My question is… what should I make with it?

I am thinking Pain au Chocolat, chocolate croissants, chocolate chip cookies and/or brownies. Note the fluidity on the package. This chocolate is suitable for coating caramel, creams, berries and other confections.

Last year I made an over the top chocolate/orange tart. My neighbor’s orange tree has a abundance of oranges too high up for her to harvest. Hmmm……

Maybe something I made before: Eclairs? Chocolate Babka? Soufflés? Chocolate pudding? (Try the easy home made chocolate pudding recipe.) Chocolate chip scones? Lava Cake? Chocolate Fudge? Oh yes, chocolate fudge!!! (Maybe chocolate/peanut butter fudge, the QC department doesn’t like Chocolate/peanut butter fudge.)

Andy other suggestions?????

First Birthday

Well, I was all set for Vivian’s first birthday party on August 10, but due to typical one year old circumstances, it was postponed until today, August 25. This offered no problems, rather a whole new opportunity to perfect (maybe too strong a word) a mermaid themed birthday cake for Vivian.

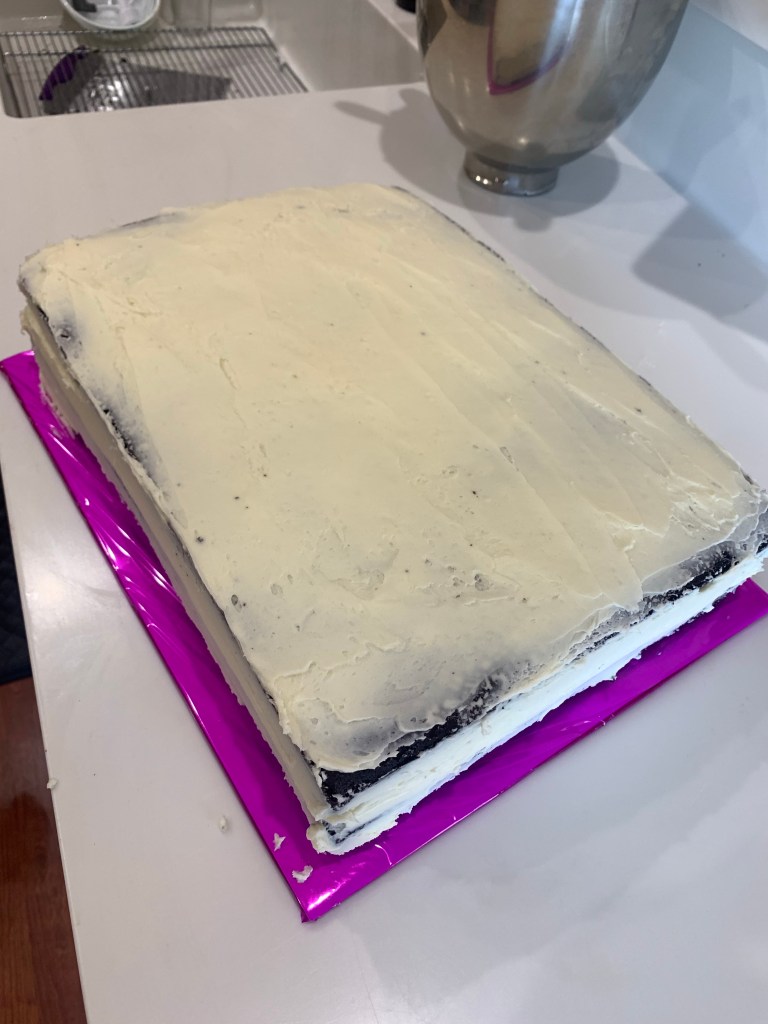
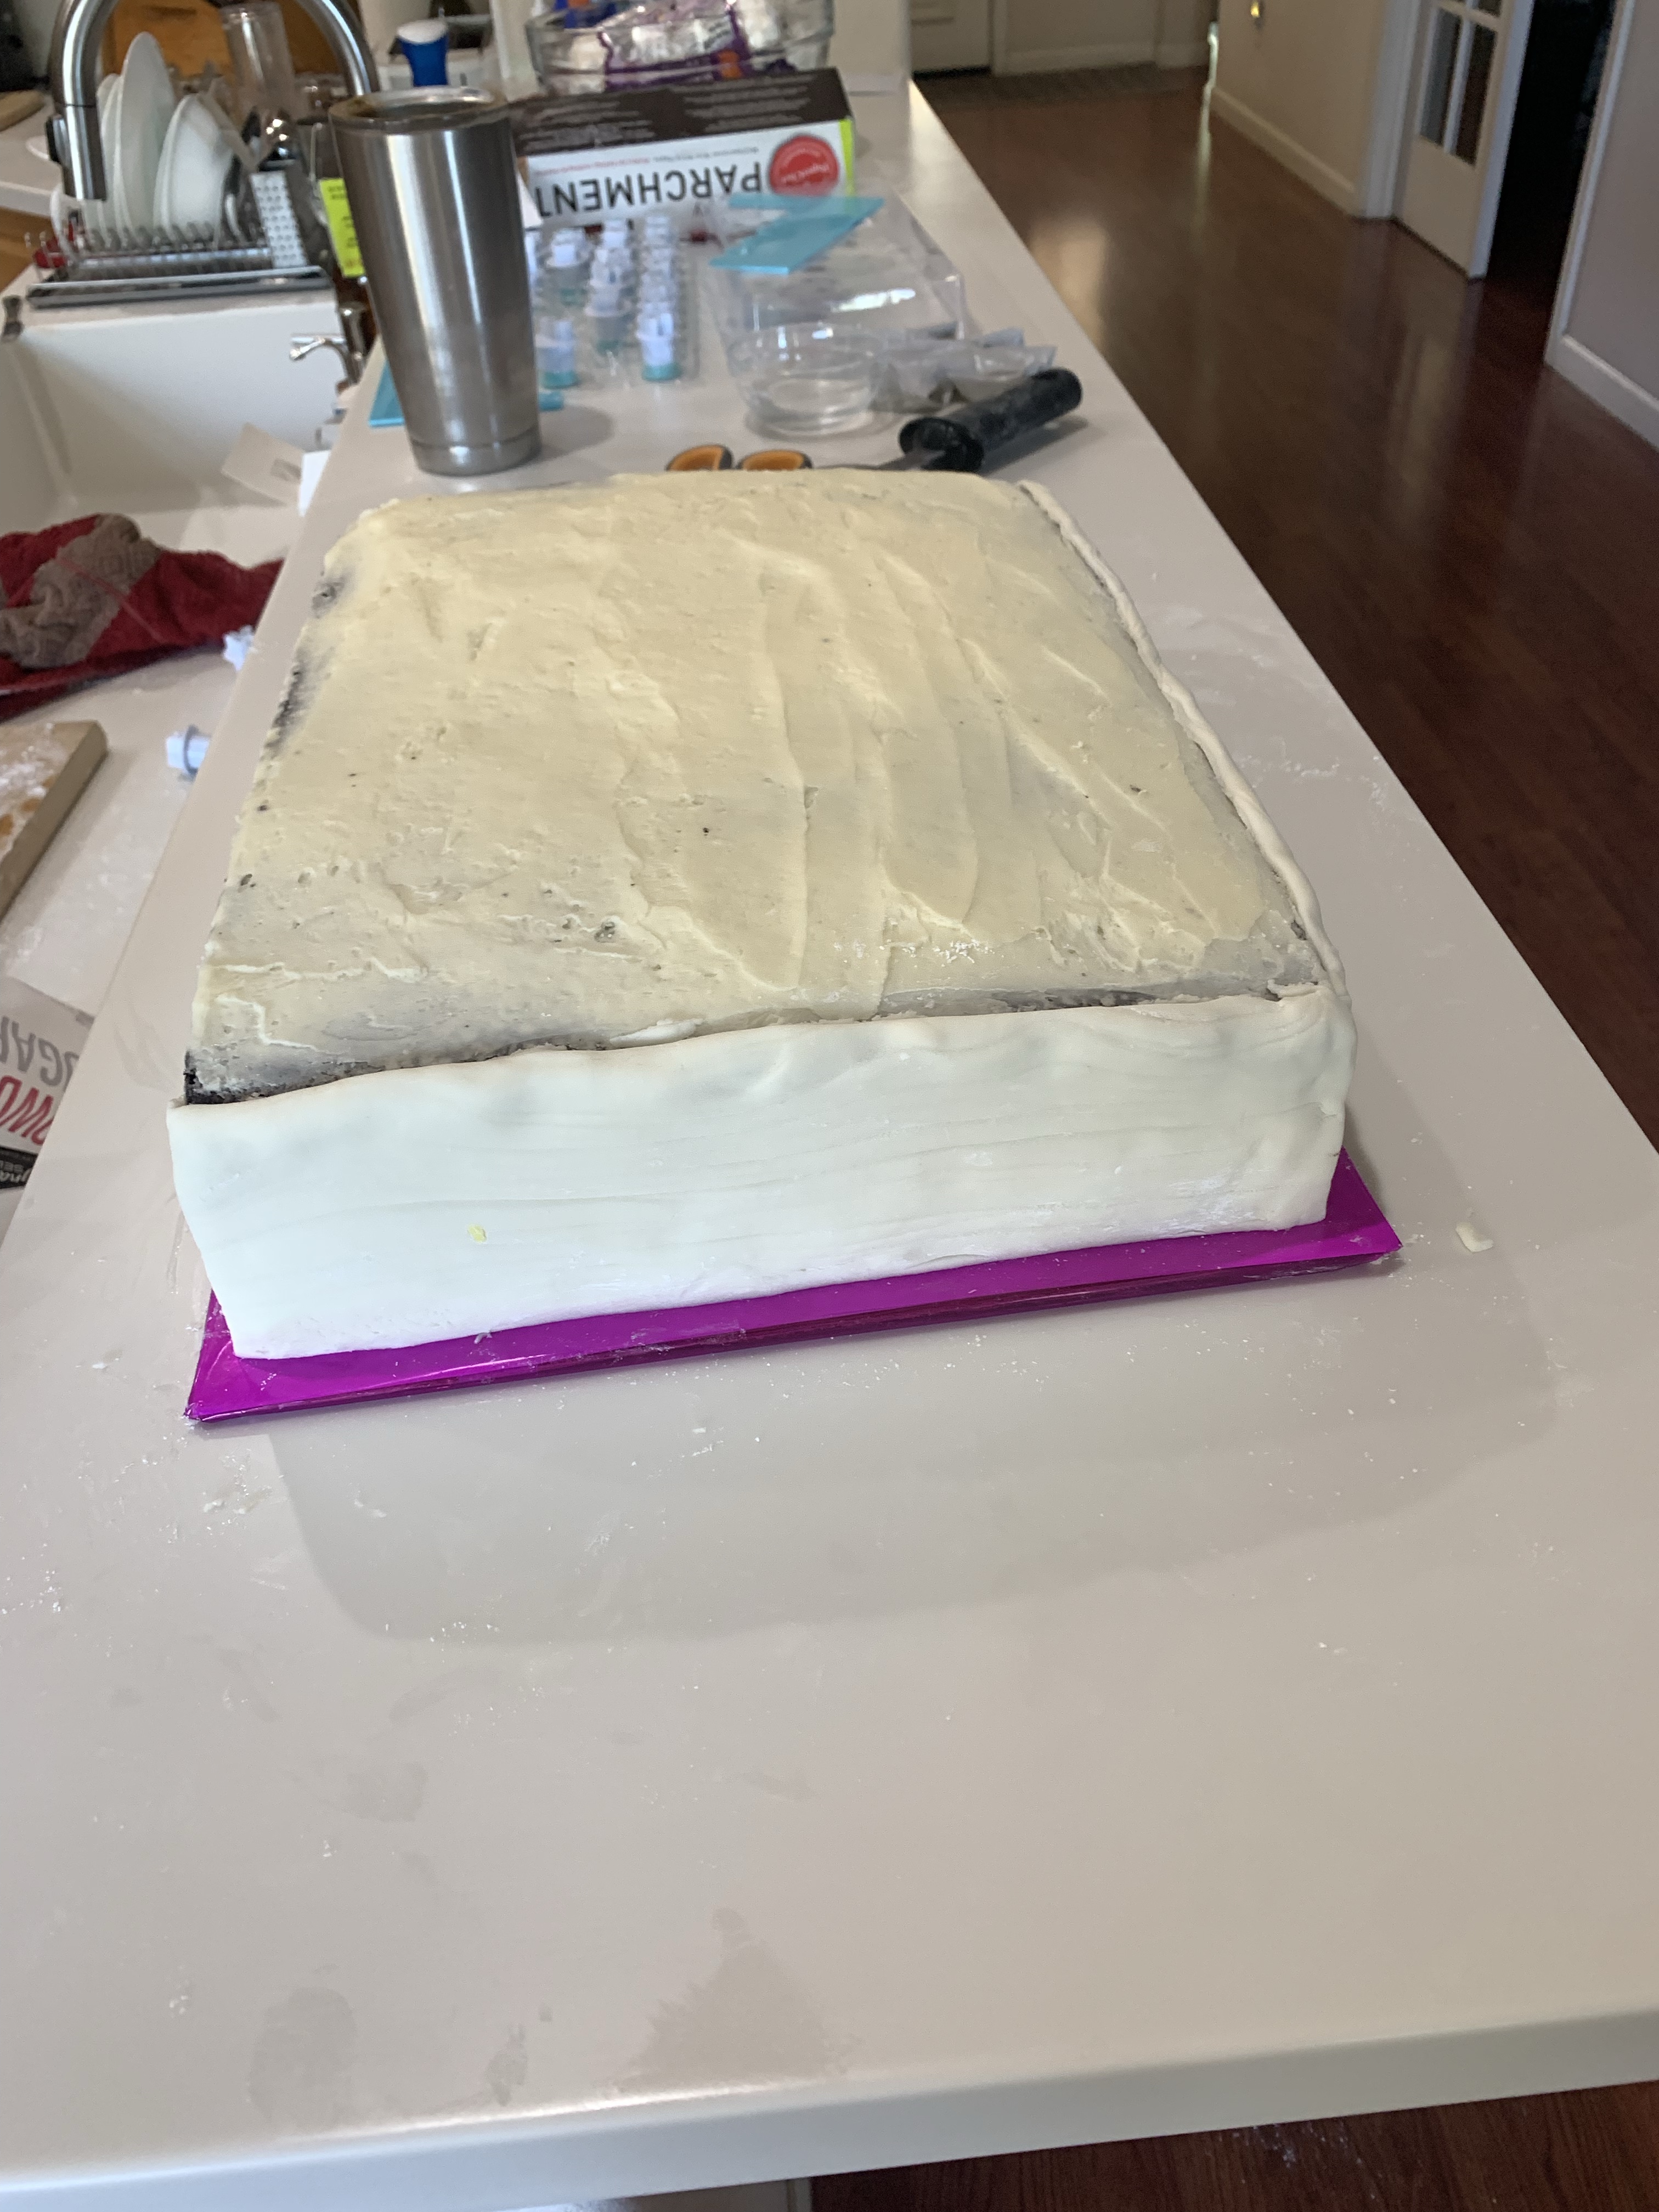
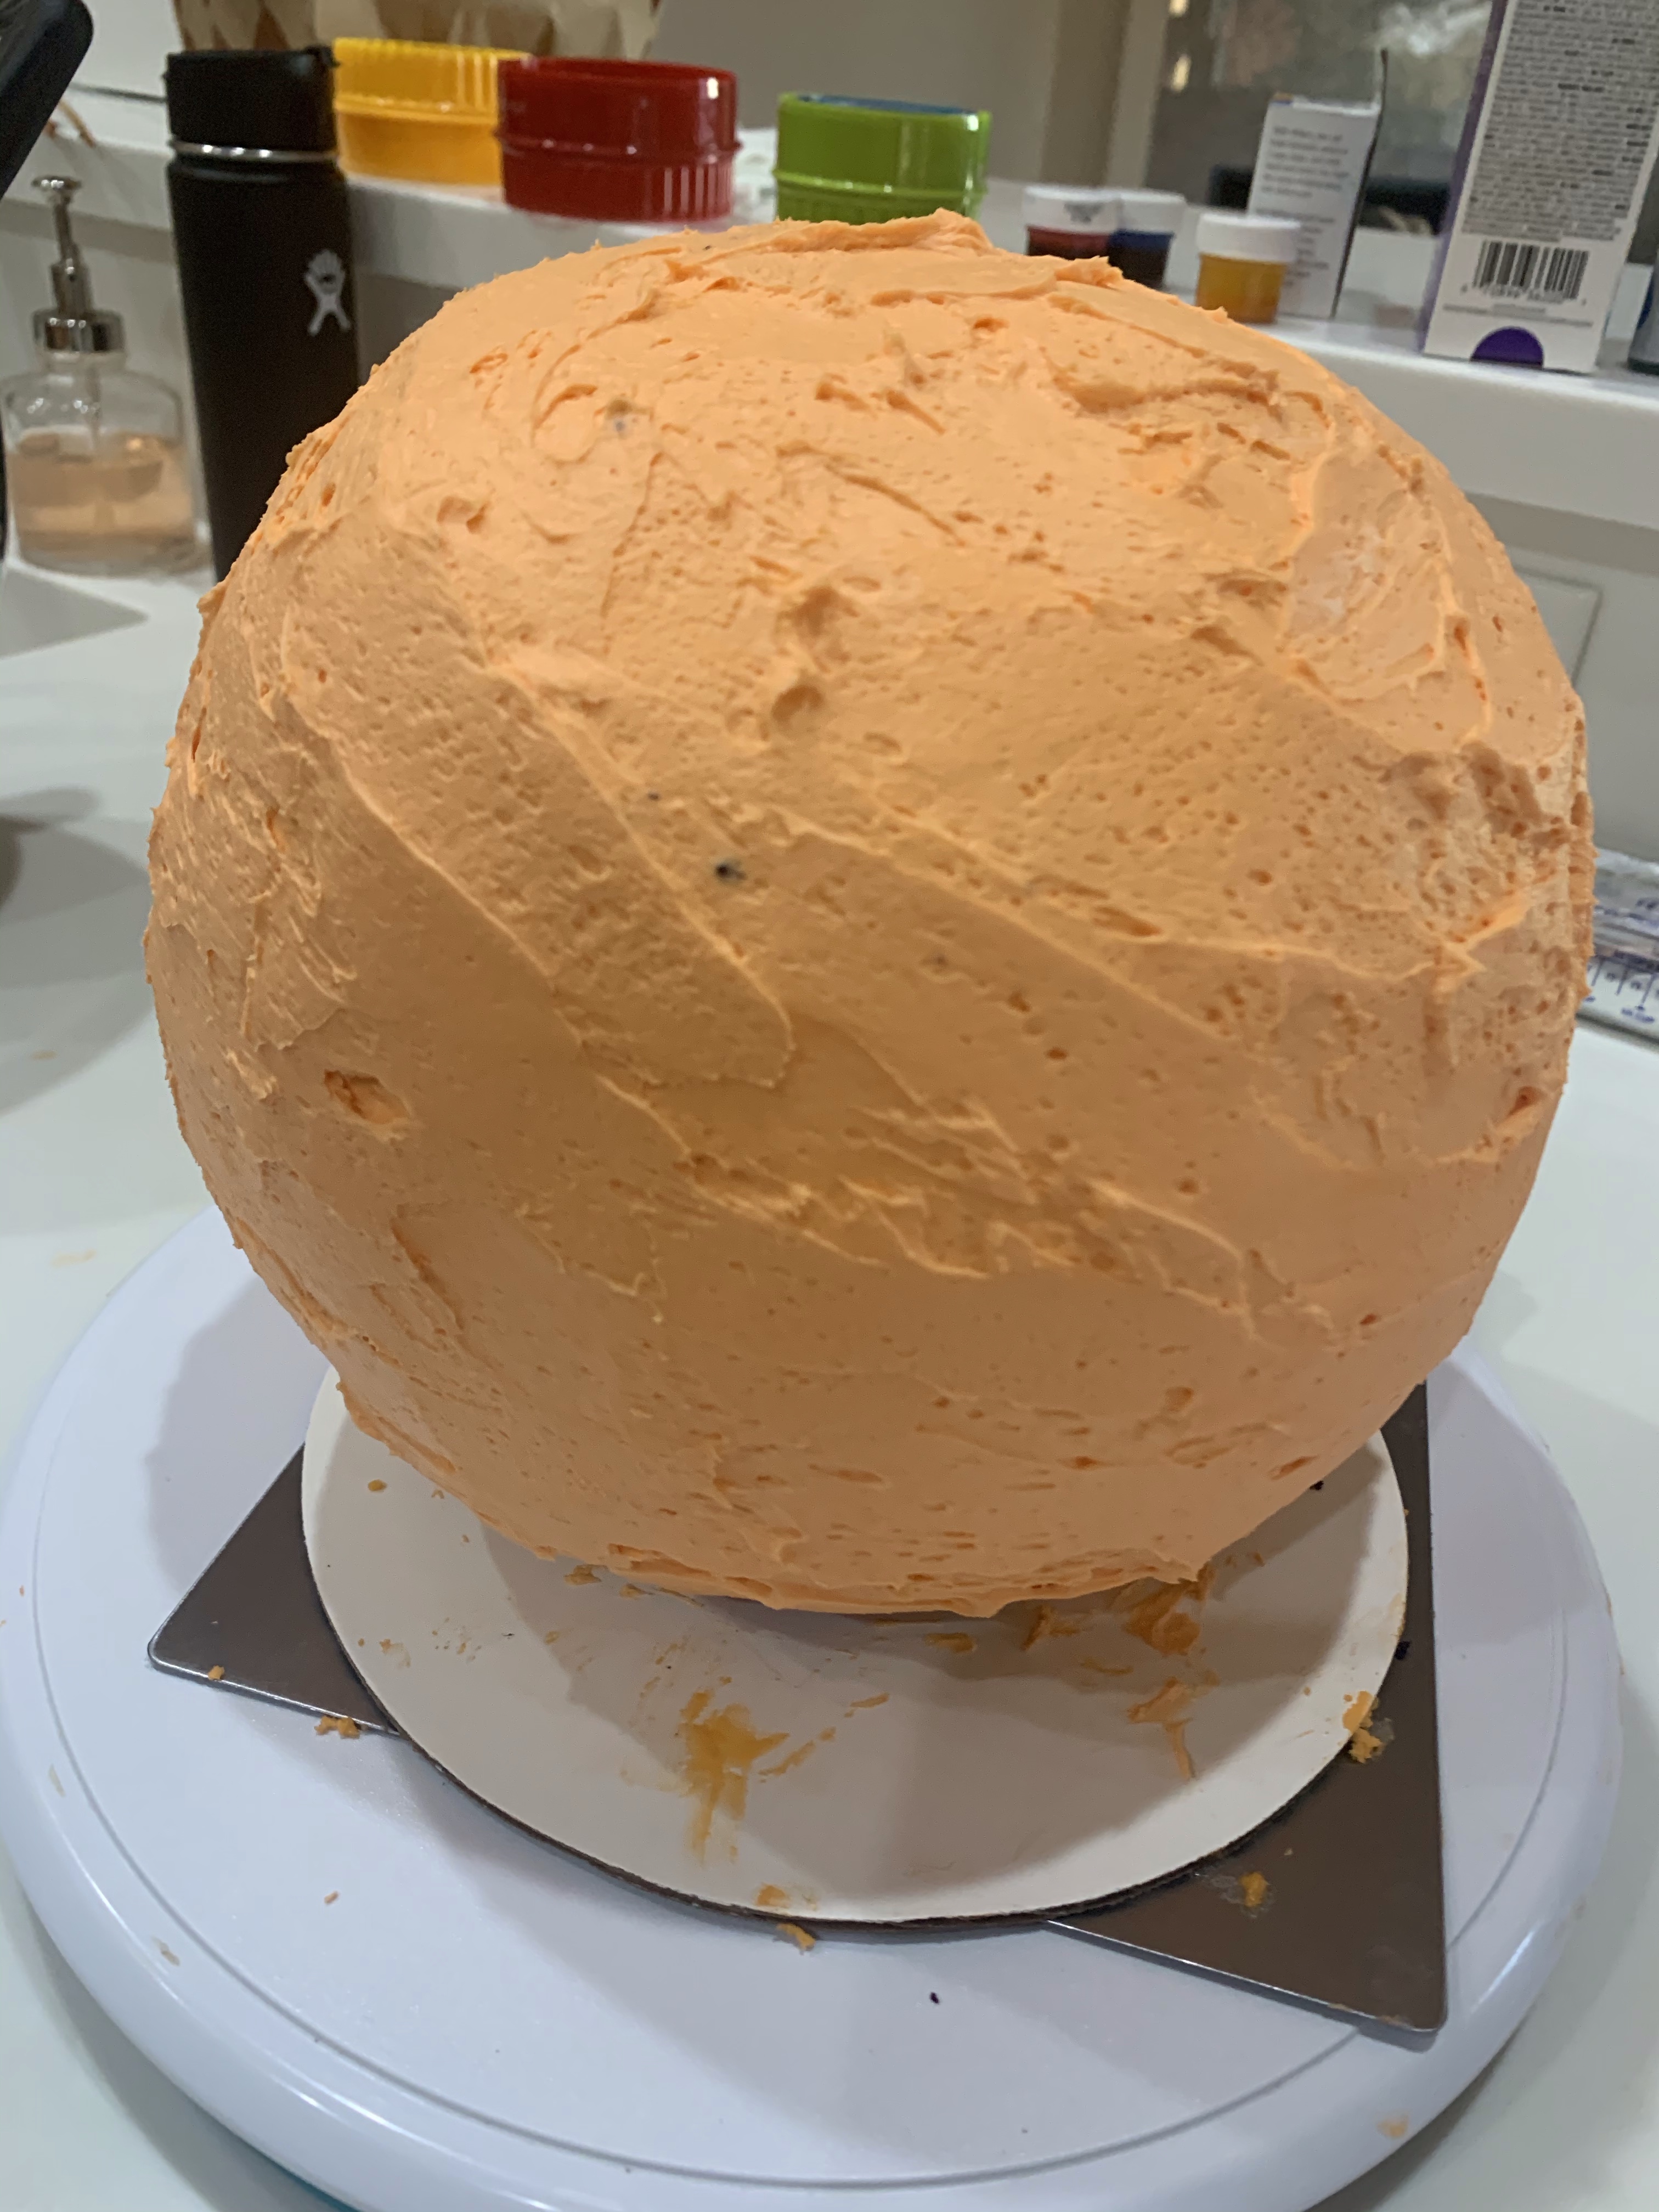
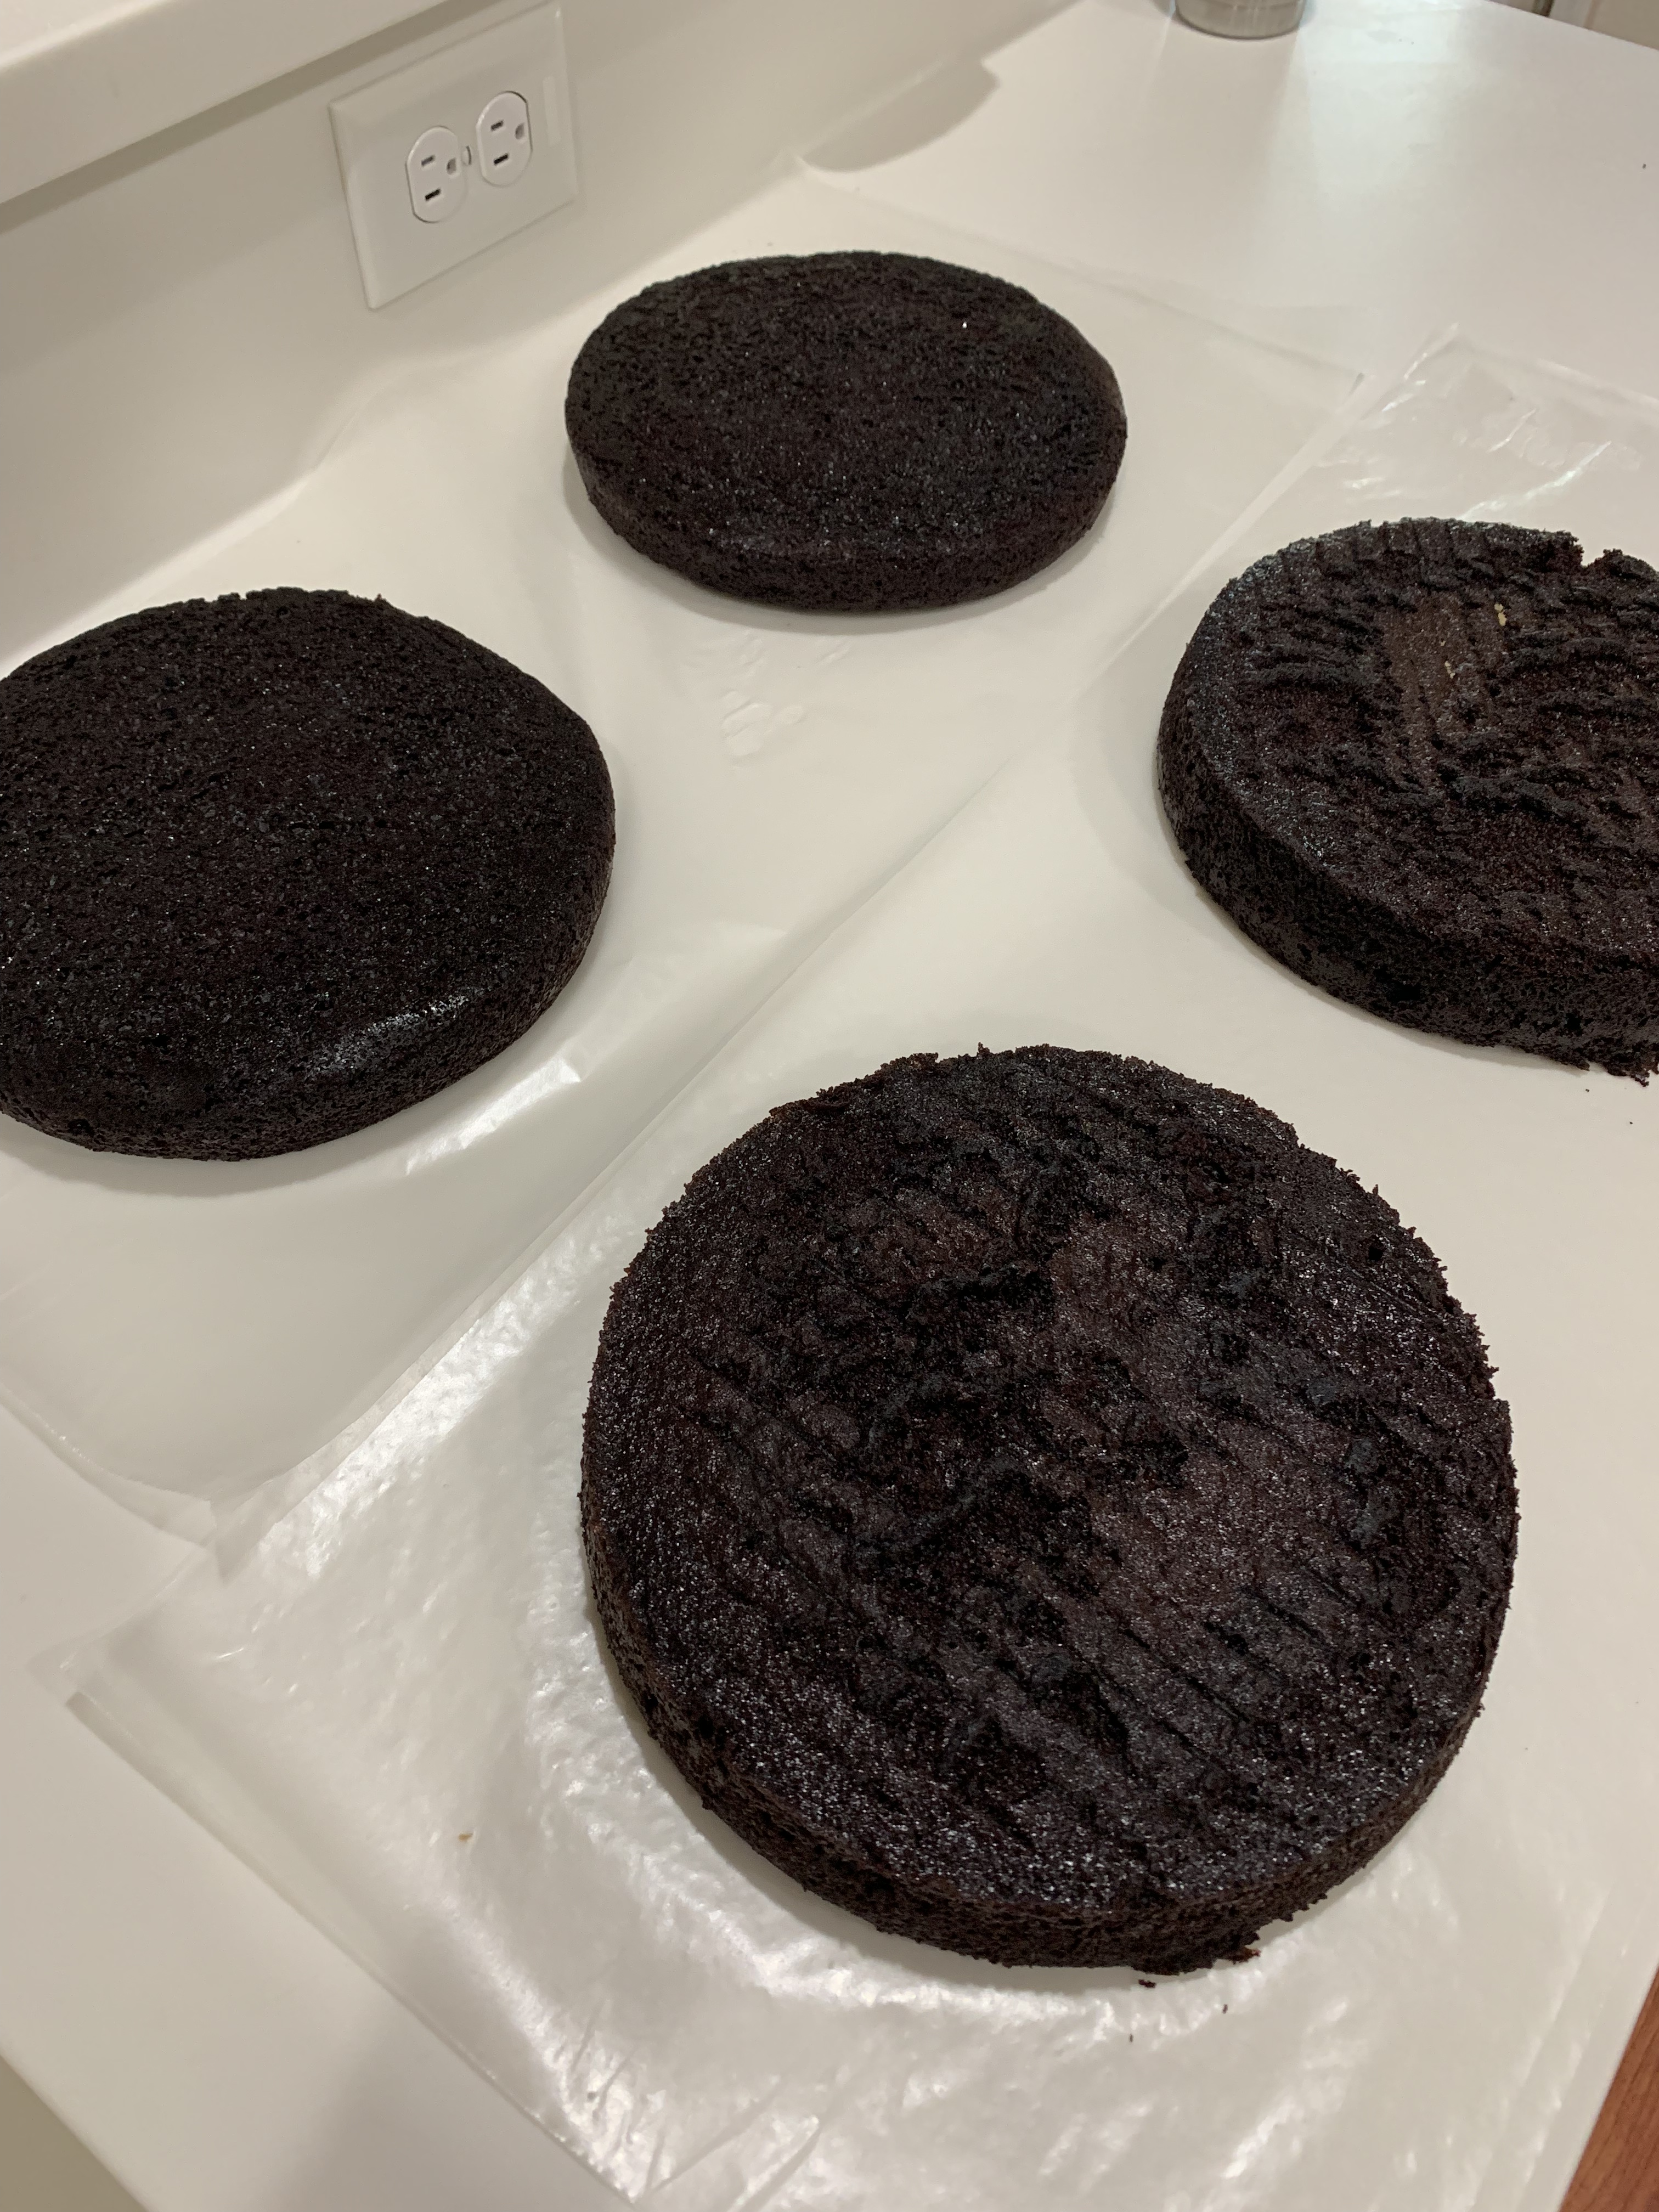
The cake was comprised of two 12″ round merengue white cake layers and three 9″ chocolate layers. Each were crumb coated and refrigerated. 
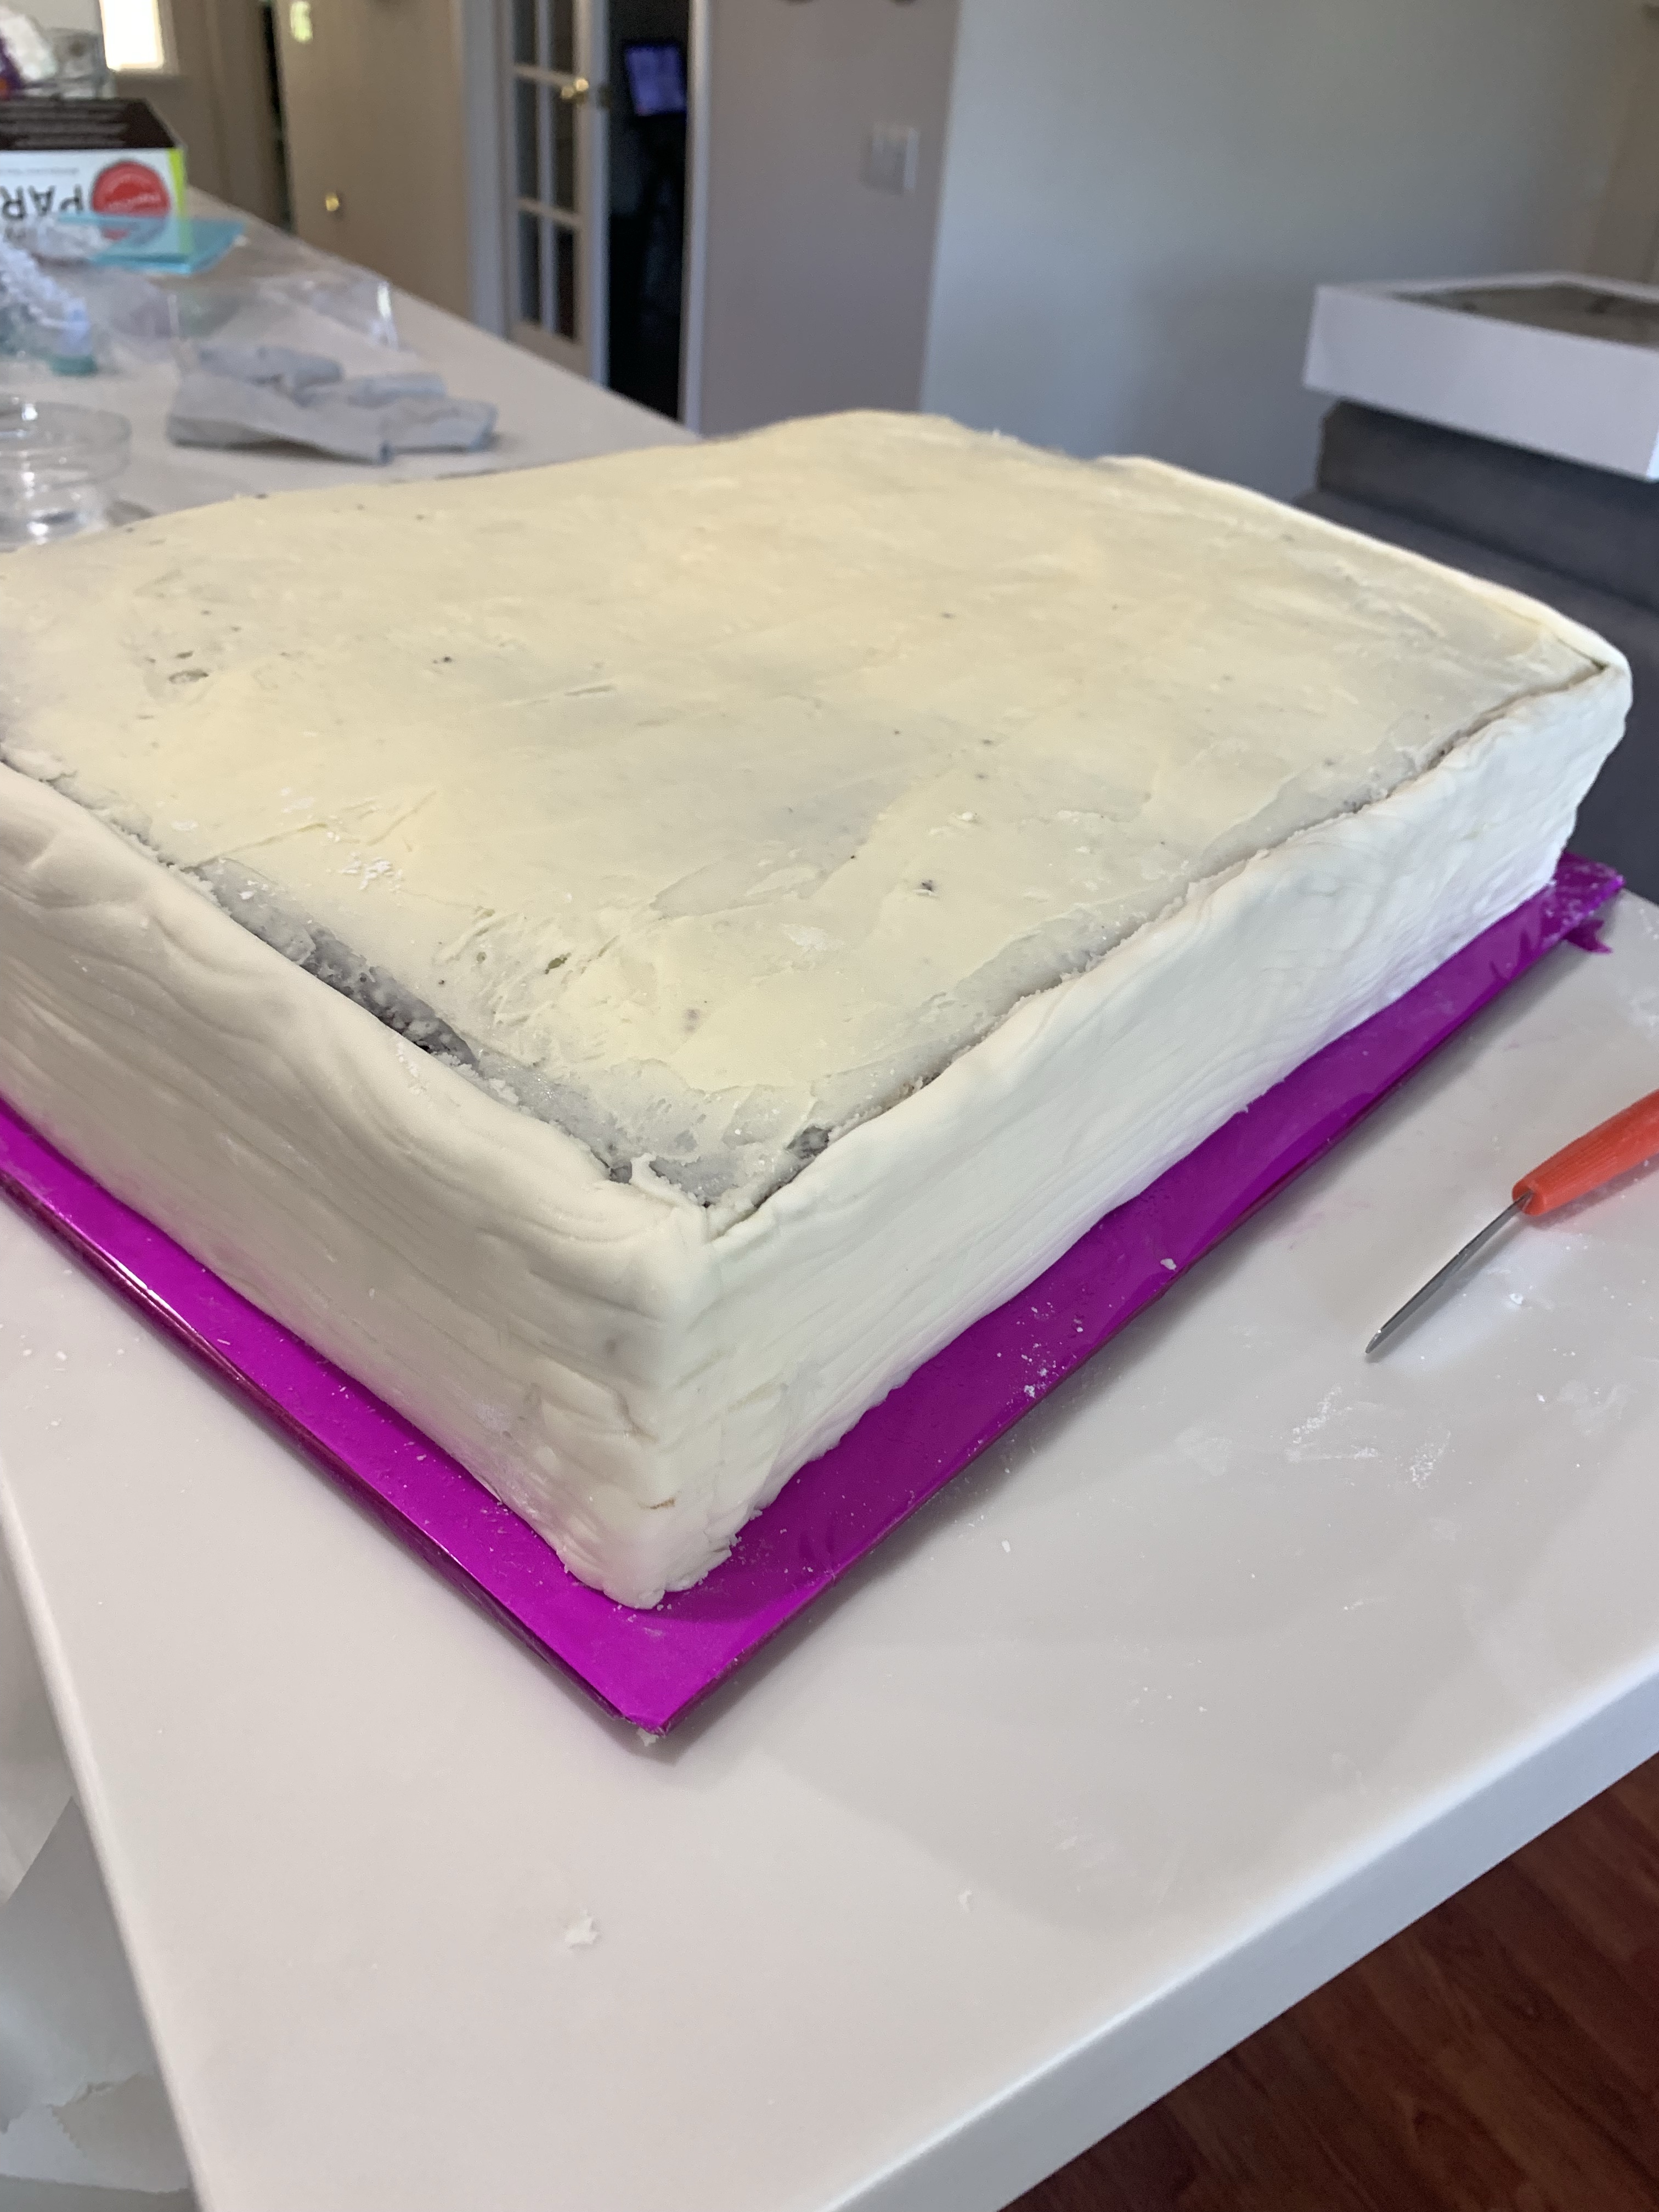
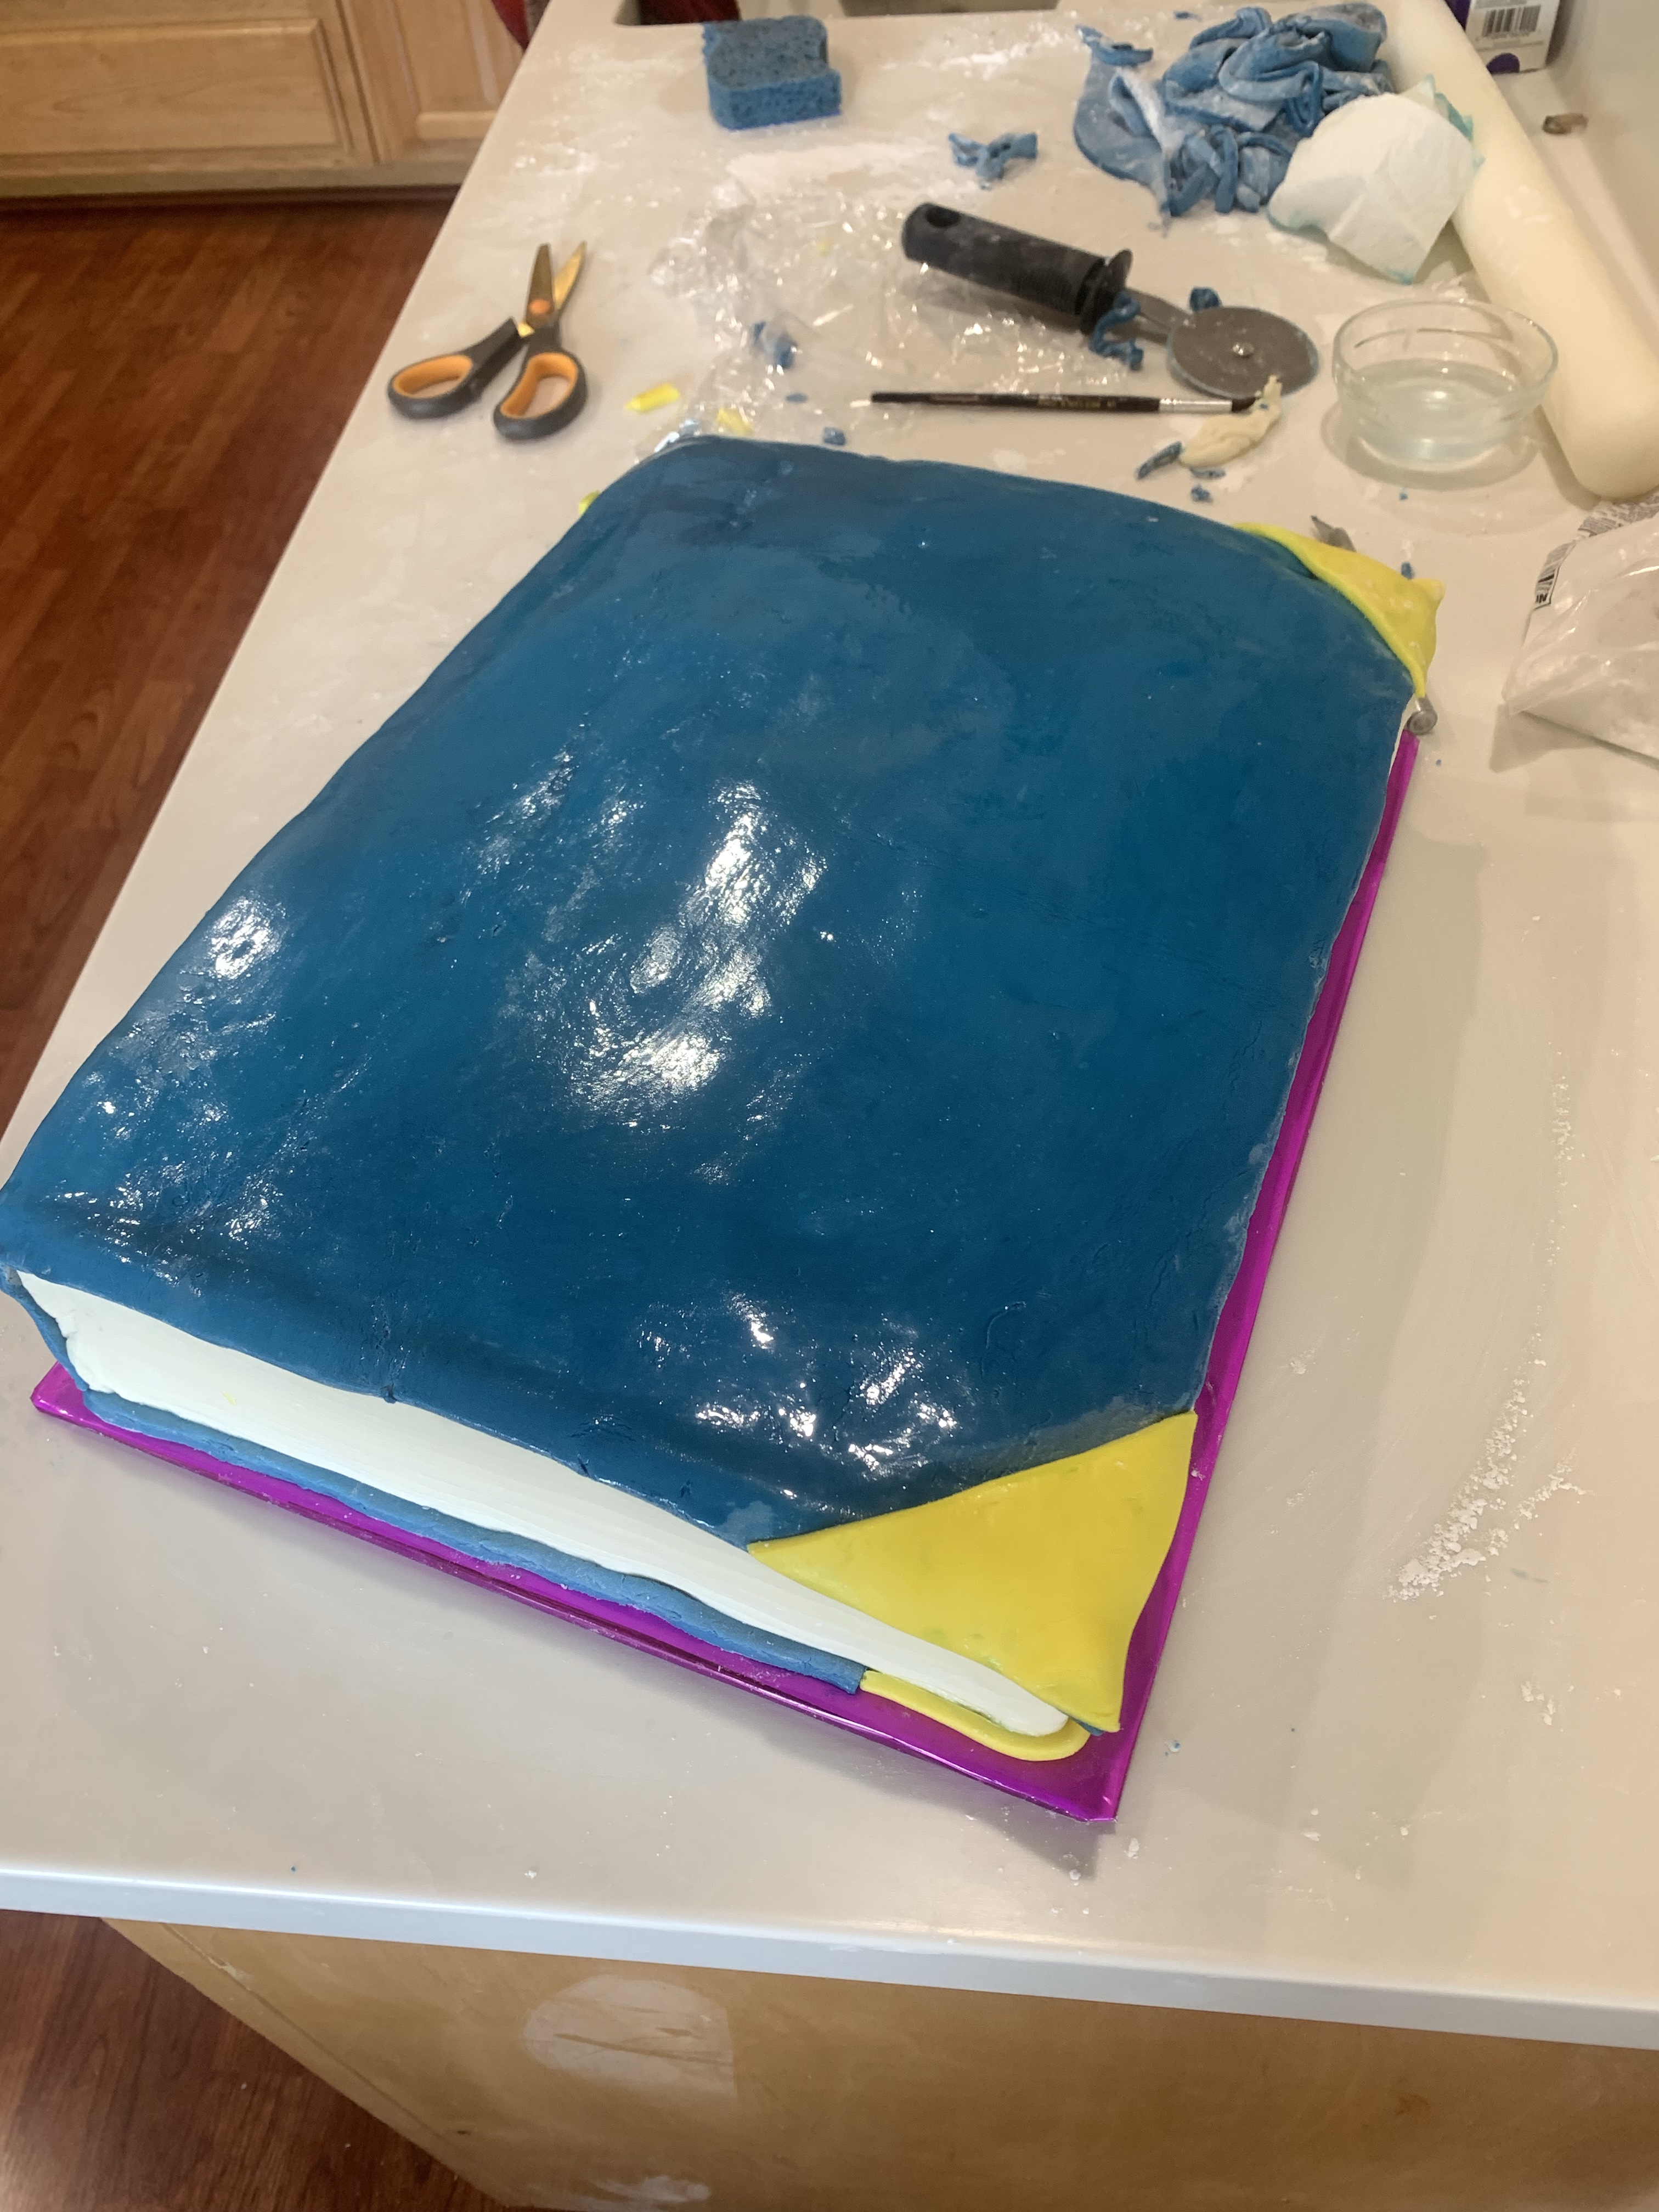
Meanwhile, I made marshmallow fondant and colored portions a shades of “ocean green” colors. The entire 3 layer chocolate and 2 layer vanilla cakes were covered with fondant.Then used some of it to punch out circular “scales.”

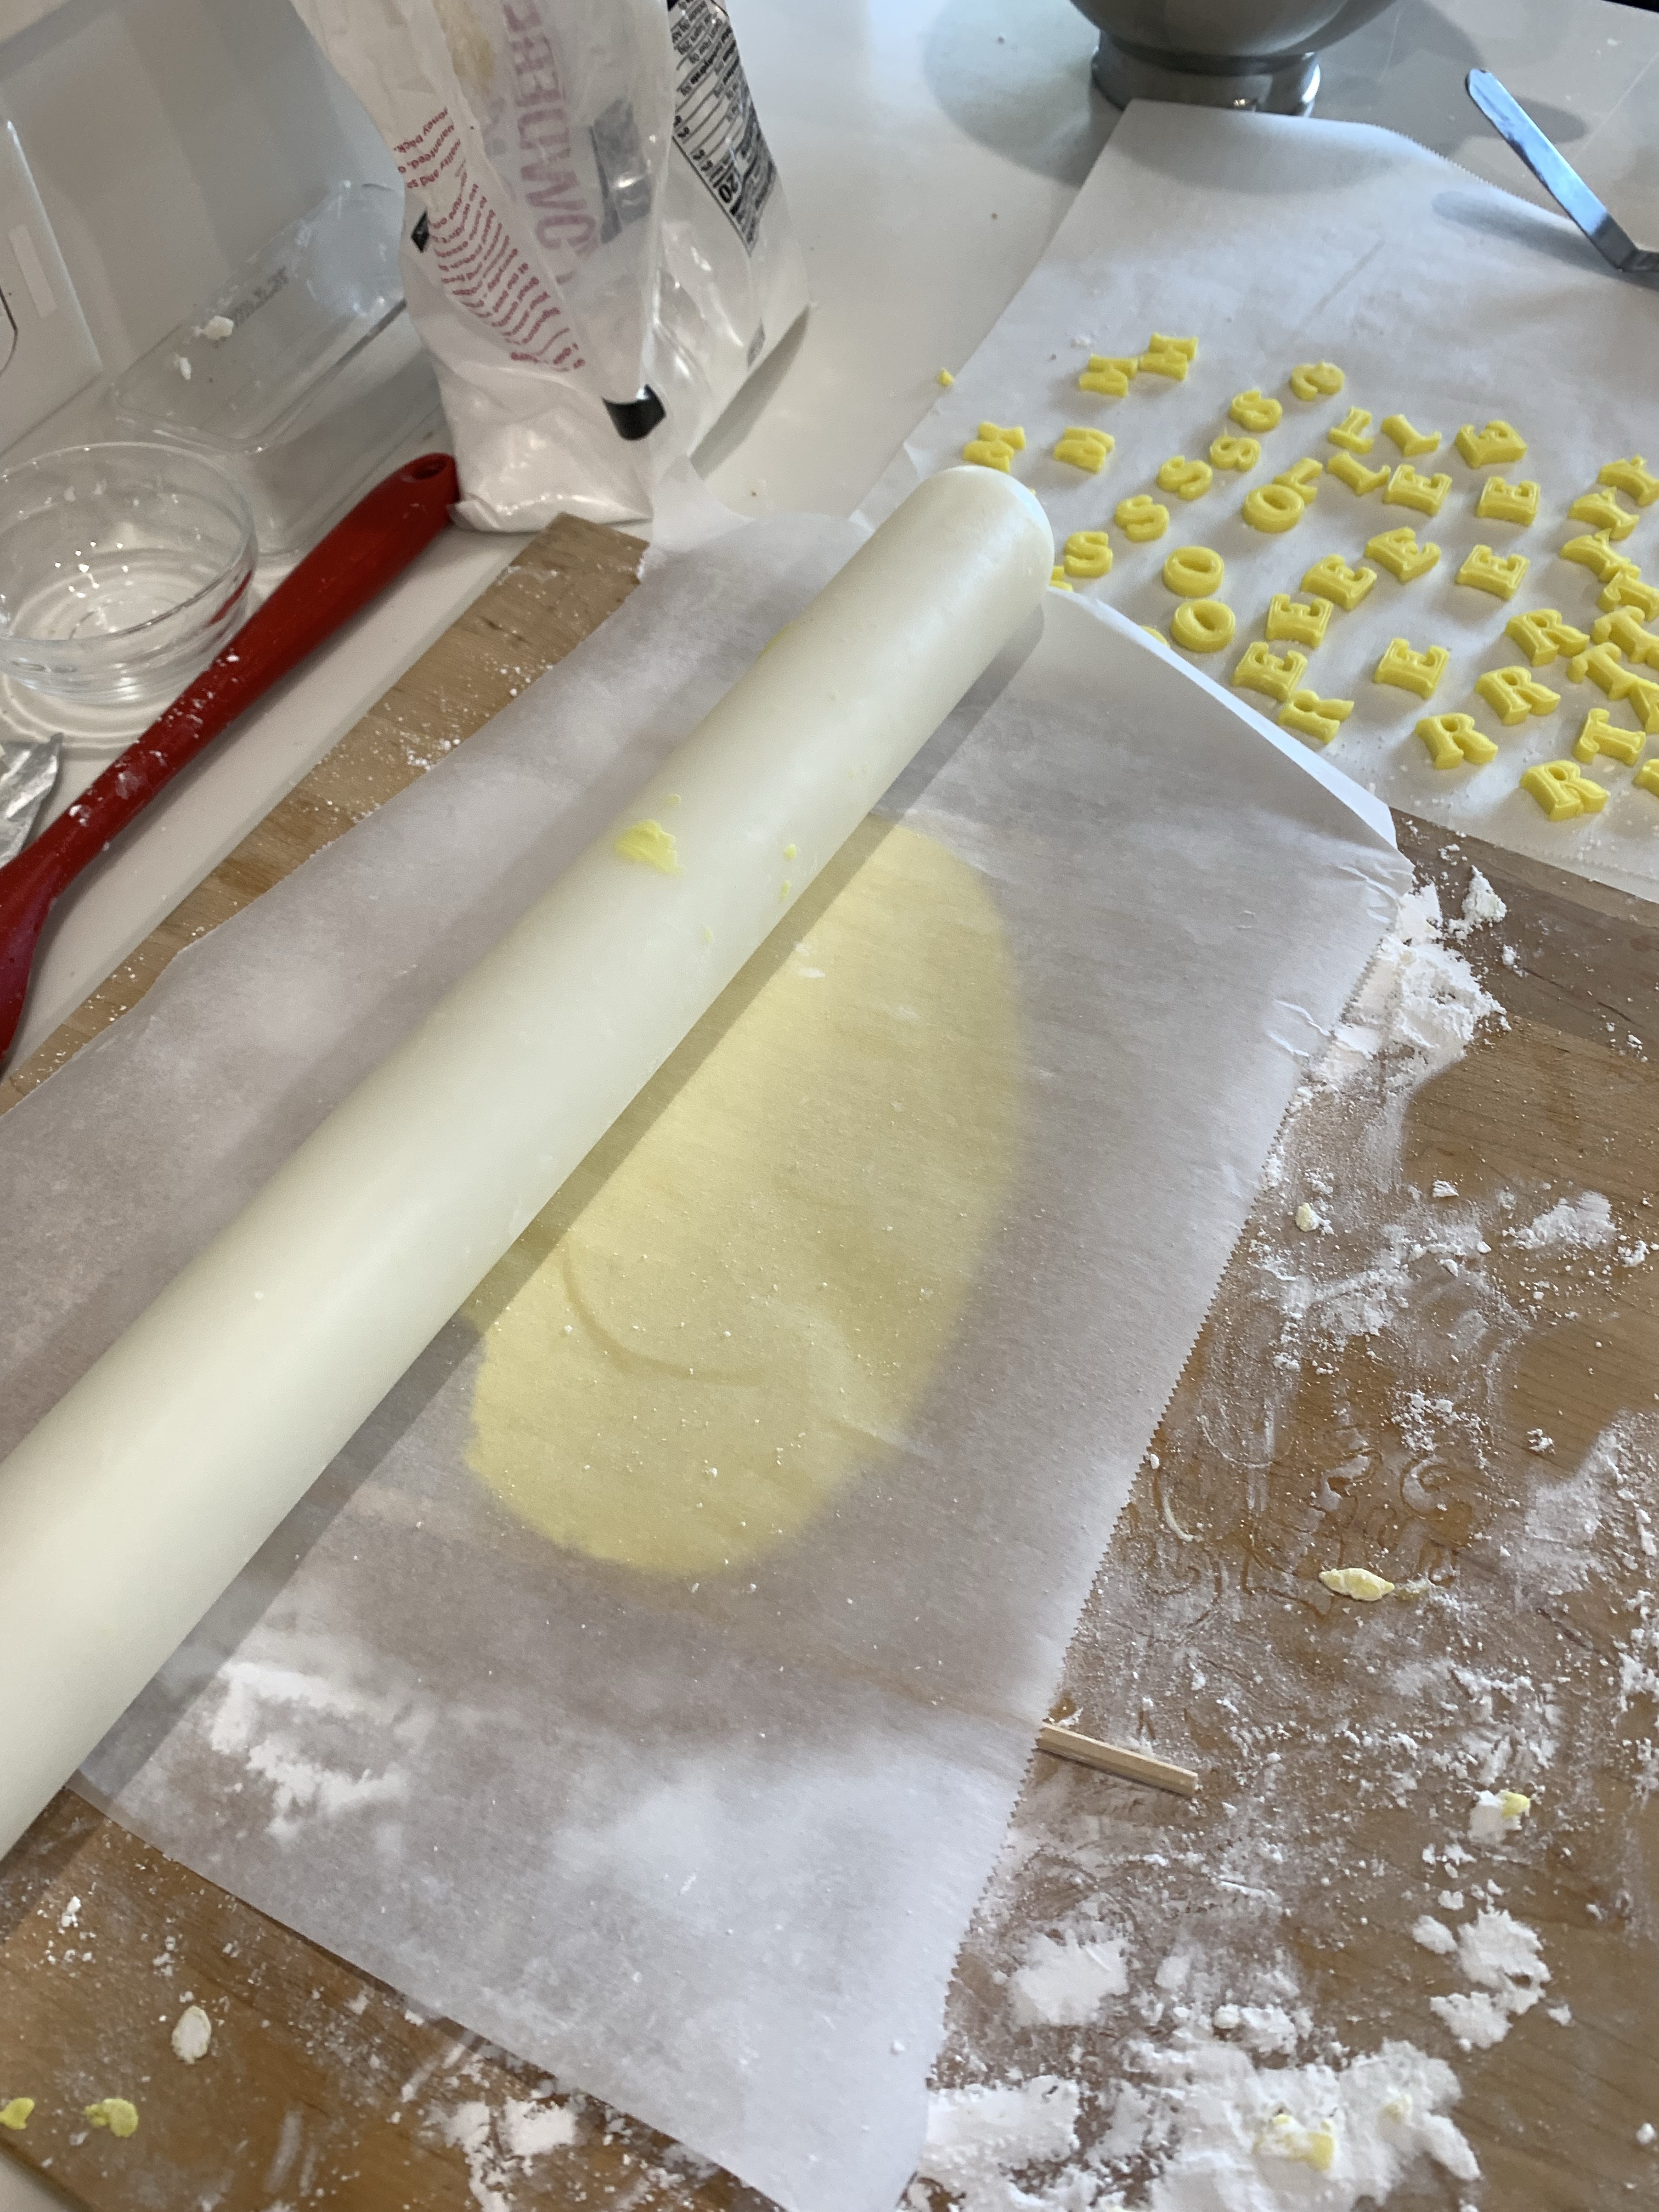
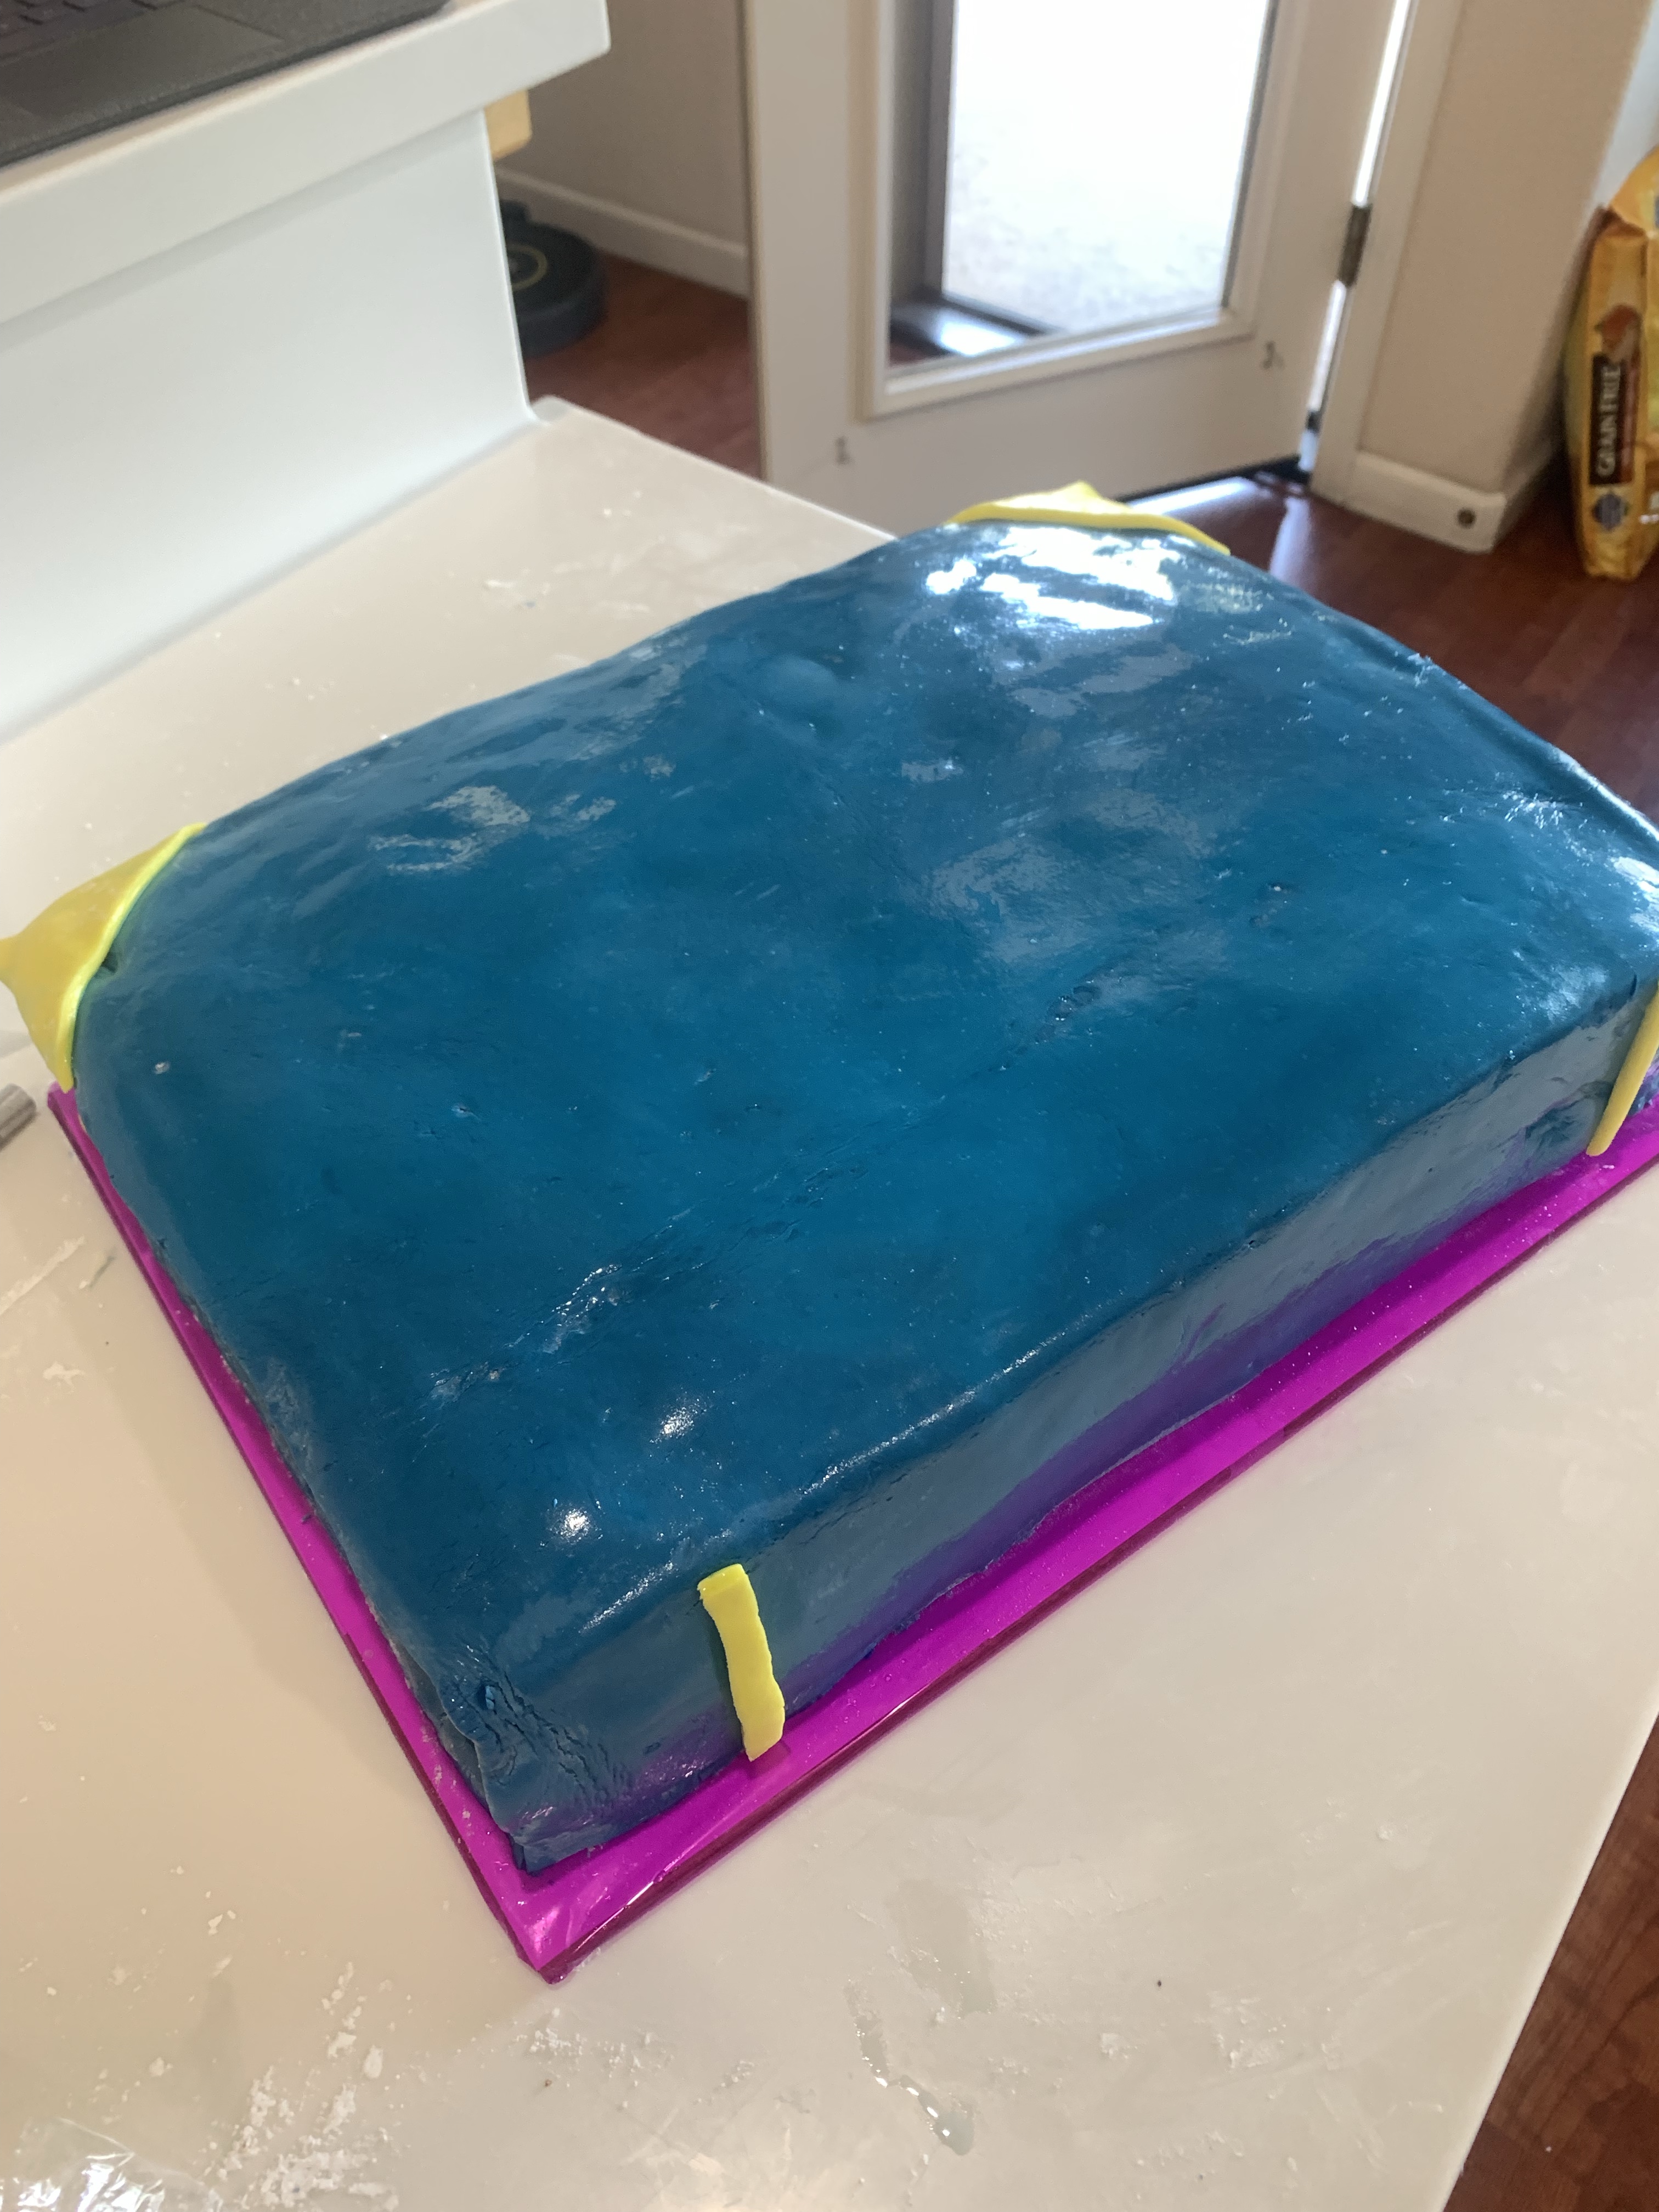
A variety of sea “creatures” were molded from both chocolate, white chocolate (tinted pink) and gum paste. The purple “sea weed” was made from gum paste and stored at room temperature in an airtight container. These were actually made over a month ago and were fine to use today. The chocolate sea creatures were made three weeks ago and stored in the fridge.

The cakes were stacked this morning and the “sea creatures” and mermaid tails were attached using Dab-And-Hold edible adhesive.

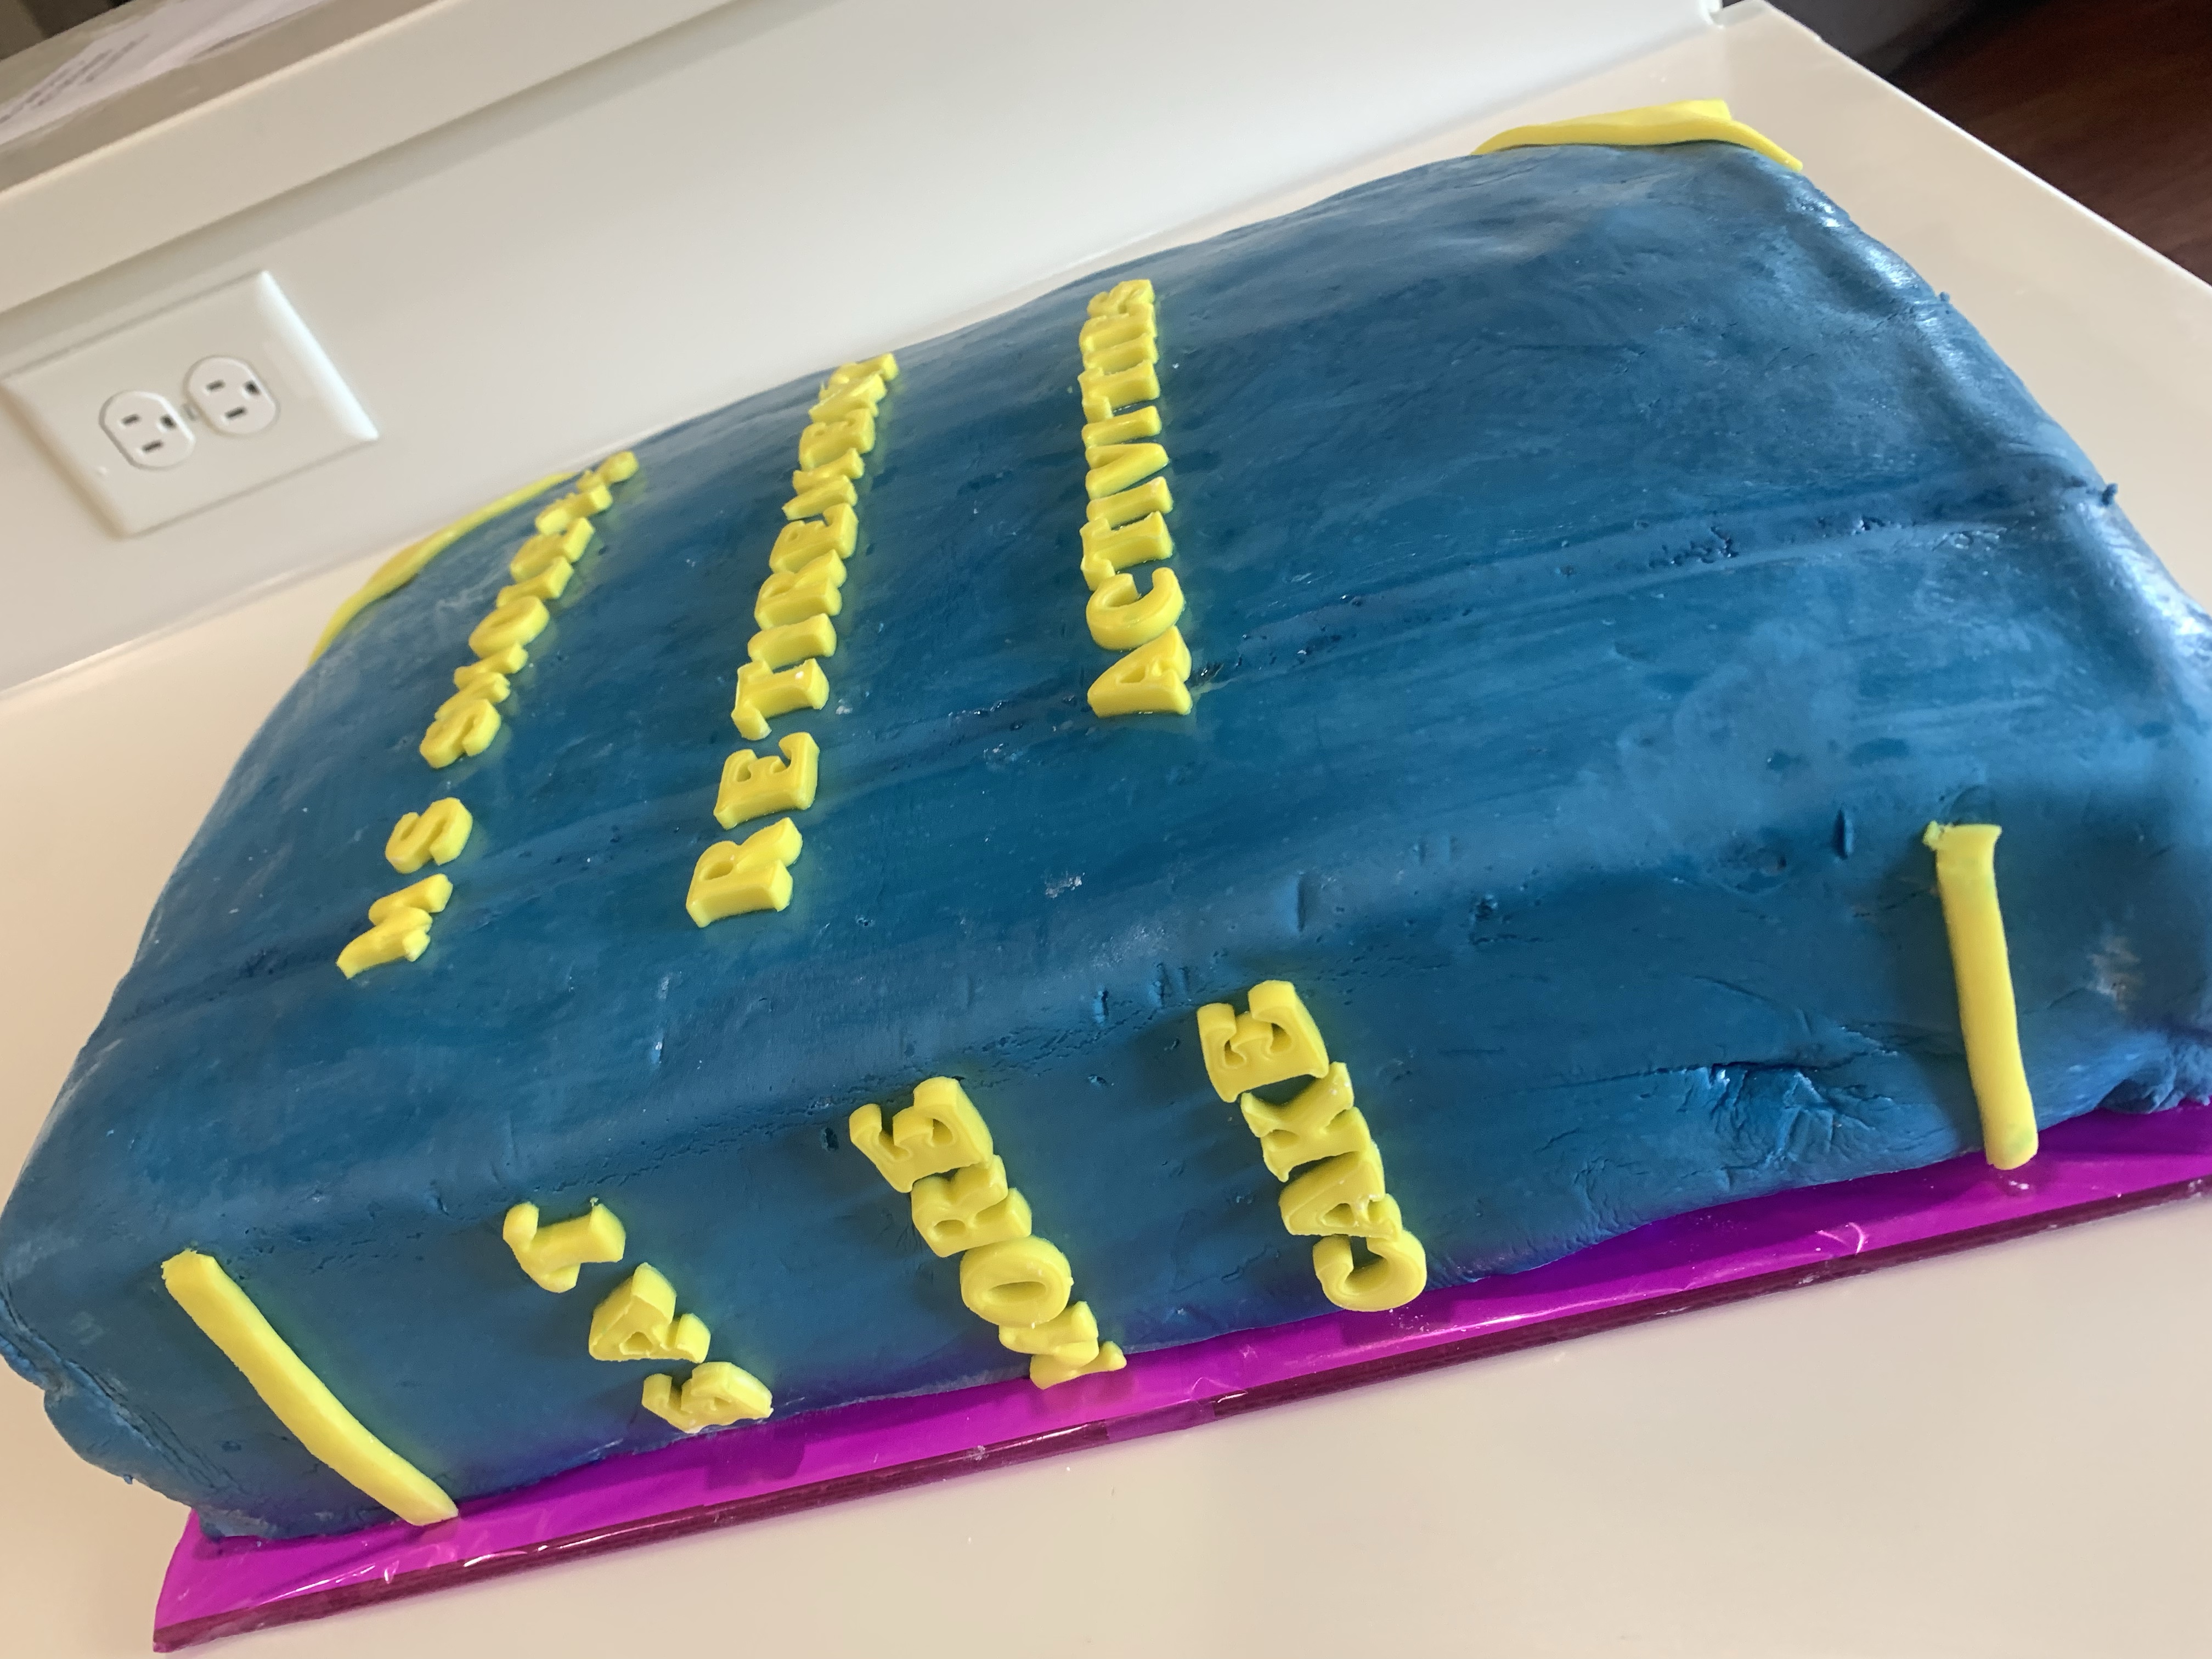
My critique: the design and execution was good. The chocolate cake was outstanding, the meringue white cake tasted good, but was a bit dry. I am still looking for an acceptable recipe. Marshmallow fondant is too sweet, but the little figurines need to be a fixed to a smooth surface. I may give rolled buttercream next. I also found a recipe where I can substitute the cocoa ingredients to create a vanilla cake with similar crumb and moisture to my chocolate cake recipe. More experimentation!!

Extreme Chocolate Cake

INGREDIENTS

  • 2 cups white sugar
  • 1 3/4 cups all-purpose flour
  • 3/4 cup dark unsweetened cocoa powder
  • 1 1/2 teaspoons baking soda
  • 1 1/2 teaspoons baking powder
  • 1 teaspoon salt
  • 2 eggs
  • 1 cup milk
  • 1/2 cup vegetable oil
  • 2 teaspoons vanilla extract
  • 1 cup boiling water

METHOD

  1. Preheat oven to 350 degrees F (175 degrees C).
  2. Grease and flour the two Wilton 3D Egg cake pans. 
  3. Use the first set of ingredients to make the cake.
  4. In a medium bowl, stir together the sugar, flour, cocoa, baking soda, baking powder and salt.
  5. Add the eggs, milk, oil and vanilla, mix for 3 minutes with an electric mixer.
  6. Stir in the boiling water by hand.

Meringue White Cake

INGREDIENTS

• 1 cup butter (softened)
• 1 1/2 cups granulated sugar
• 3 cups cake flour* (345 grams spooned & measured carefully)
• 1/2 teaspoon salt
• 2 teaspoons baking powder
• 1 cup milk (2% milkfat)
• 1 teaspoon vanilla extract
• 3/4 cup egg whites plus 3 tablespoons (160 g)

METHOD

  1. Using a stand mixer, beat the egg whites with the whisk attachment until they are stiff and form peaks. This may take a minute or two. Pour the egg whites into another bowl and place them in the refrigerator until you’re ready to add them to the batter.
  2. Using the same bowl that you used to beat the egg whites, place the softened butter in and cream the butter for about 2 minutes (using the beater blade attachmenuntil it is white in appearance.
  3. Add the sugar to the butter and beat until fluffy (about another 1-2 minutes).
  4. In a small bowl, combine the flour (measured carefully*), salt and baking powder. Set aside.
  5. In another bowl, combine the milk and vanilla extract.
  6. Add the flour mixture to the butter/sugar mixture alternately with the milk.
  7. Add the stiffly beaten eggs to the cake batter. Fold the egg whites in gently. Do not overmix at this point. If you do, your cake will become more dense.
  8. Grease and flour 2 9″ round cake pans. Pour the cake batter equally into the prepared cake pans.
  9. Bake the cakes at 350 degrees for 25-27 minutes or until the top bounces back when you touch it.
  10. Allow the cakes to cool for 10 minutes, then loosen the edges and remove them from the pans to a wire rack, allowing them to cool completely.

Marshmallow Fondant

INGREDIENTS

  • 500 g marshmallows
  • 1000 g confectioners sugar
  • 1 tsp white vanilla
  • 2-3 Tbl water

METHOD

  1. Grease (well with Crisco or equivalent) a heat proof microwavable bowl
  2. Place marshmallow in the bowl and sprinkle 2-3 Tbl water over the marshmallows
  3. Heat in a microwave in 30 second increments until the marshmallow is melted and smooth. Don’t overcook and burn.
  4. Grease (well) dough hook and stand mixer bowl and add melted marshmallow.
  5. Add confectioners sugar a cup at a time and stir on medium until incorporated.
  6. Add the vanilla during one of the sugar additions.
  7. Reserve about a cup of sugar to use during hand kneading
  8. Grease (well) your workspace and hands and turn the fondant out.
  9. Cover with sugar and begin kneading, adding more sugar as necessary until the fondant is smooth and not sticky.
  10. Use a greased rolling pin and roll the fondant out to required size. For this cake I rolled it out to about 24″ x 24″. Once kneaded and no longer sticky I folded it into quarters to make it easy to pick up and drape over the cake. Be careful. If not adequately kneaded, it will tear.


We Only Have One Second Birthday

Granddaughter Grace’s 2nd birthday was Friday, June 1 and her party was Saturday the 2nd. For Mother’s Day, Fran and I met the rest of the family at the San Diego Zoo sending Grace to near Nirvana with all the animals. In the following weeks she visited the Los Angeles Zoo. She fed the giraffe and when she tried to pet it, the zoo keeper said, “No, no, no, don’t pet him,” so now every time she sees a giraffe Grace says “No, no, no.” She calls lions “Roars,” elephants are the trumpeting sound of an elephant that I cannot spell and zebras, oddly, are just “Zebras.”03C2353D-6118-4EC7-B8C0-84C1E604F759

So of course I had to make a zoo themed birthday cake with several fondant animal decorations. I made a “roar”, a “no, no, no” a “bbbrrrrreeeeehhhhaaaaa” (sp?), and a zebra from marshmallow fondant. They sat atop a  a double layer chocolate cake beside a white meringue “2” cake. The chocolate base cake was frosted with pink Italian Meringue Buttercream and the “2” was frosted with traditional white buttercream.

The white meringue “2” cake and the animals were bordered with green buttercream grass and “Happy Birthday Grace” was piped in purple letters. Purple is currently her favorite color. Unfortunately, my handwriting does not enhance the quality of my piping script.  The zebra is eating the grass (because he was falling forward and Fran suggested having him graze to make it look on purpose.)

White Meringue Cake

INGREDIENTS

• 1 cup butter (softened)
• 1 1/2 cups granulated sugar
• 3 cups cake flour* (345 grams spooned & measured carefully)
• 1/2 teaspoon salt
• 2 teaspoons baking powder
• 1 cup milk (2% milkfat)
• 1 teaspoon vanilla extract
• 3/4 cup egg whites plus 3 tablespoons (160 g)

METHOD

1. Using a stand mixer, beat the egg whites with the whisk attachment until they are stiff and form peaks. This may take a minute or two. Pour the egg whites into another bowl and place them in the refrigerator until you’re ready to add them to the batter.
2. Using the same bowl that you used to beat the egg whites, place the softened butter in and cream the butter for about 2 minutes (using the beater blade attachmenuntil it is white in appearance.
3. Add the sugar to the butter and beat until fluffy (about another 1-2 minutes).
4. In a small bowl, combine the flour (measured carefully*), salt and baking powder. Set aside.
5. In another bowl, combine the milk and vanilla extract.
6. Add the flour mixture to the butter/sugar mixture alternately with the milk.
7. Add the stiffly beaten eggs to the cake batter. Fold the egg whites in gently. Do not overmix at this point. If you do, your cake will become more dense.
8. Grease and flour 2 9″ round cake pans. Pour the cake batter equally into the prepared cake pans.
9. Bake the cakes at 350 degrees for 25-27 minutes or until the top bounces back when you touch it.
10. Allow the cakes to cool for 10 minutes, then loosen the edges and remove them from the pans to a wire rack, allowing them to cool completely.

Italian Meringue Buttercream Frosting

https://ofbatteranddough.com/italian-meringue-buttercream-frosting-recipe/ Author: Rebecca Blackwell
Serves: 7 cups

INGREDIENTS

  • ½ cup water
  • 1¼ cup plus ⅓ cup granulated sugar
  • 1 tsp. cream of tartar
  • 9 large egg whites
  • 6 sticks unsalted butter, at room temperature

METHOD

  1. Combine the water and 1¼ cup sugar in a small saucepan and stir once or twice just to moisten the sugar. Do not stir again; stirring encourages the sugar to crystalize. Bring to a boil over medium high heat and continue to cook until it reaches a temperature between 246 and 250 degrees.
  2. As soon as you set the syrup to cook, begin the meringue. Beat the egg whites in a standing mixer fitted with the whisk attachment at medium speed until frothy. While beating, sprinkle in the cream of tartar and then the remaining ⅓ cup sugar. Beat until stiff, but not dry, peaks form. *The goal is to have the syrup at the right temperature and the meringue at the stiff peak stage at the same time. If the syrup is not quite ready, but the meringue is, continue to beat the egg whites with the mixer on the lowest speed until the syrup reaches the desired temperature. If the syrup is done before the meringue is ready, add a very small amount of hot (not cold) water to lower the temperature slightly.
  3. When the syrup is ready, turn off the mixer and quickly pour about ⅓ cup into the meringue. Immediately turn the mixer to medium-high and then continue to pour the hot syrup into the meringue in a thin, steady stream. Try to keep the syrup from getting on the beater, although some will get on there no matter what you do.
  4. Continue to beat the meringue with the whisk attachment at medium speed, until you touch the bottom of the bowl and it is cool to the touch. *It’s important to not add the butter before the meringue is completely cool, so that the butter doesn’t melt.
  5. Turn the mixer to low and add the butter in 2 or 3 tablespoon size chunks. Keep mixing and adding the butter until all 6 sticks are incorporated. If the buttercream doesn’t look completely smooth at this point, just keep beating. It will smooth out. If it looks runny or curdled, the butter has probably melted. Put it in the refrigerator for 20 or 30 minutes and then continue beating until it’s smooth.
  6. After the butter has been fully incorporated, you can add any flavor additions you like. See ideas below.

Which Way to Carnegie Hall?

Everyone knows how to get to Carnegie Hall, right? I am considering making bite size desserts for a gala at our temple with about 200 people expected to attend. Conventional wisdom indicated I will need 4-600 individual desserts. Perhaps you can see why I have not yet committed to this task. Allotting 2-3 desserts per person I should also have 5 or 6 dessert options, too many and it’s overwhelming (for the attendees and the baker!)

blueberry lemon and mango keylime profiteroles

So, back to Carnegie Hall. Practice, practice, practice. For anyone who follows my blog you know mistakes to not leave the house, so I practice everything first. I also experiment with different flavors and combinations. For instance, I made profiteroles last week. One was to be a mango/key lime and the other a lemon/blueberry. They were fine, except the key lime overpowered the mango. I will have to try again. Practice, practice, practice. The lemon was fine, if a bit intense.

vanilla cake and swiss meringue buttercream frosting

A couple of days ago I made some vanilla cake bites with Swiss Meringue Buttercream frosting. It was a new cake recipe, I was looking for something a bit lighter, plus a new buttercream. This one uses a Swiss meringue (egg whites and sugar whisked over simmering water in a bain marie. The frosting was delicious but a bit of a pain in the butt. I would use this if I could have  several desserts that use the same frosting. I may just divide it into aliquots and color them differently to make an easy differentiation.

chouxI make choux fairly often so don’t really need to practice, but the little choux pastries are a good way to try the different filling flavors and icings. I made these choux in an hour or two last week, used a dozen or so for experimenting and froze the other 4 dozen. If I decide to do this project I will take a day and make 200 or so. I just need enough freezer space.

This morning I decided to add two new pastries File Jan 10, 10 17 21 AM
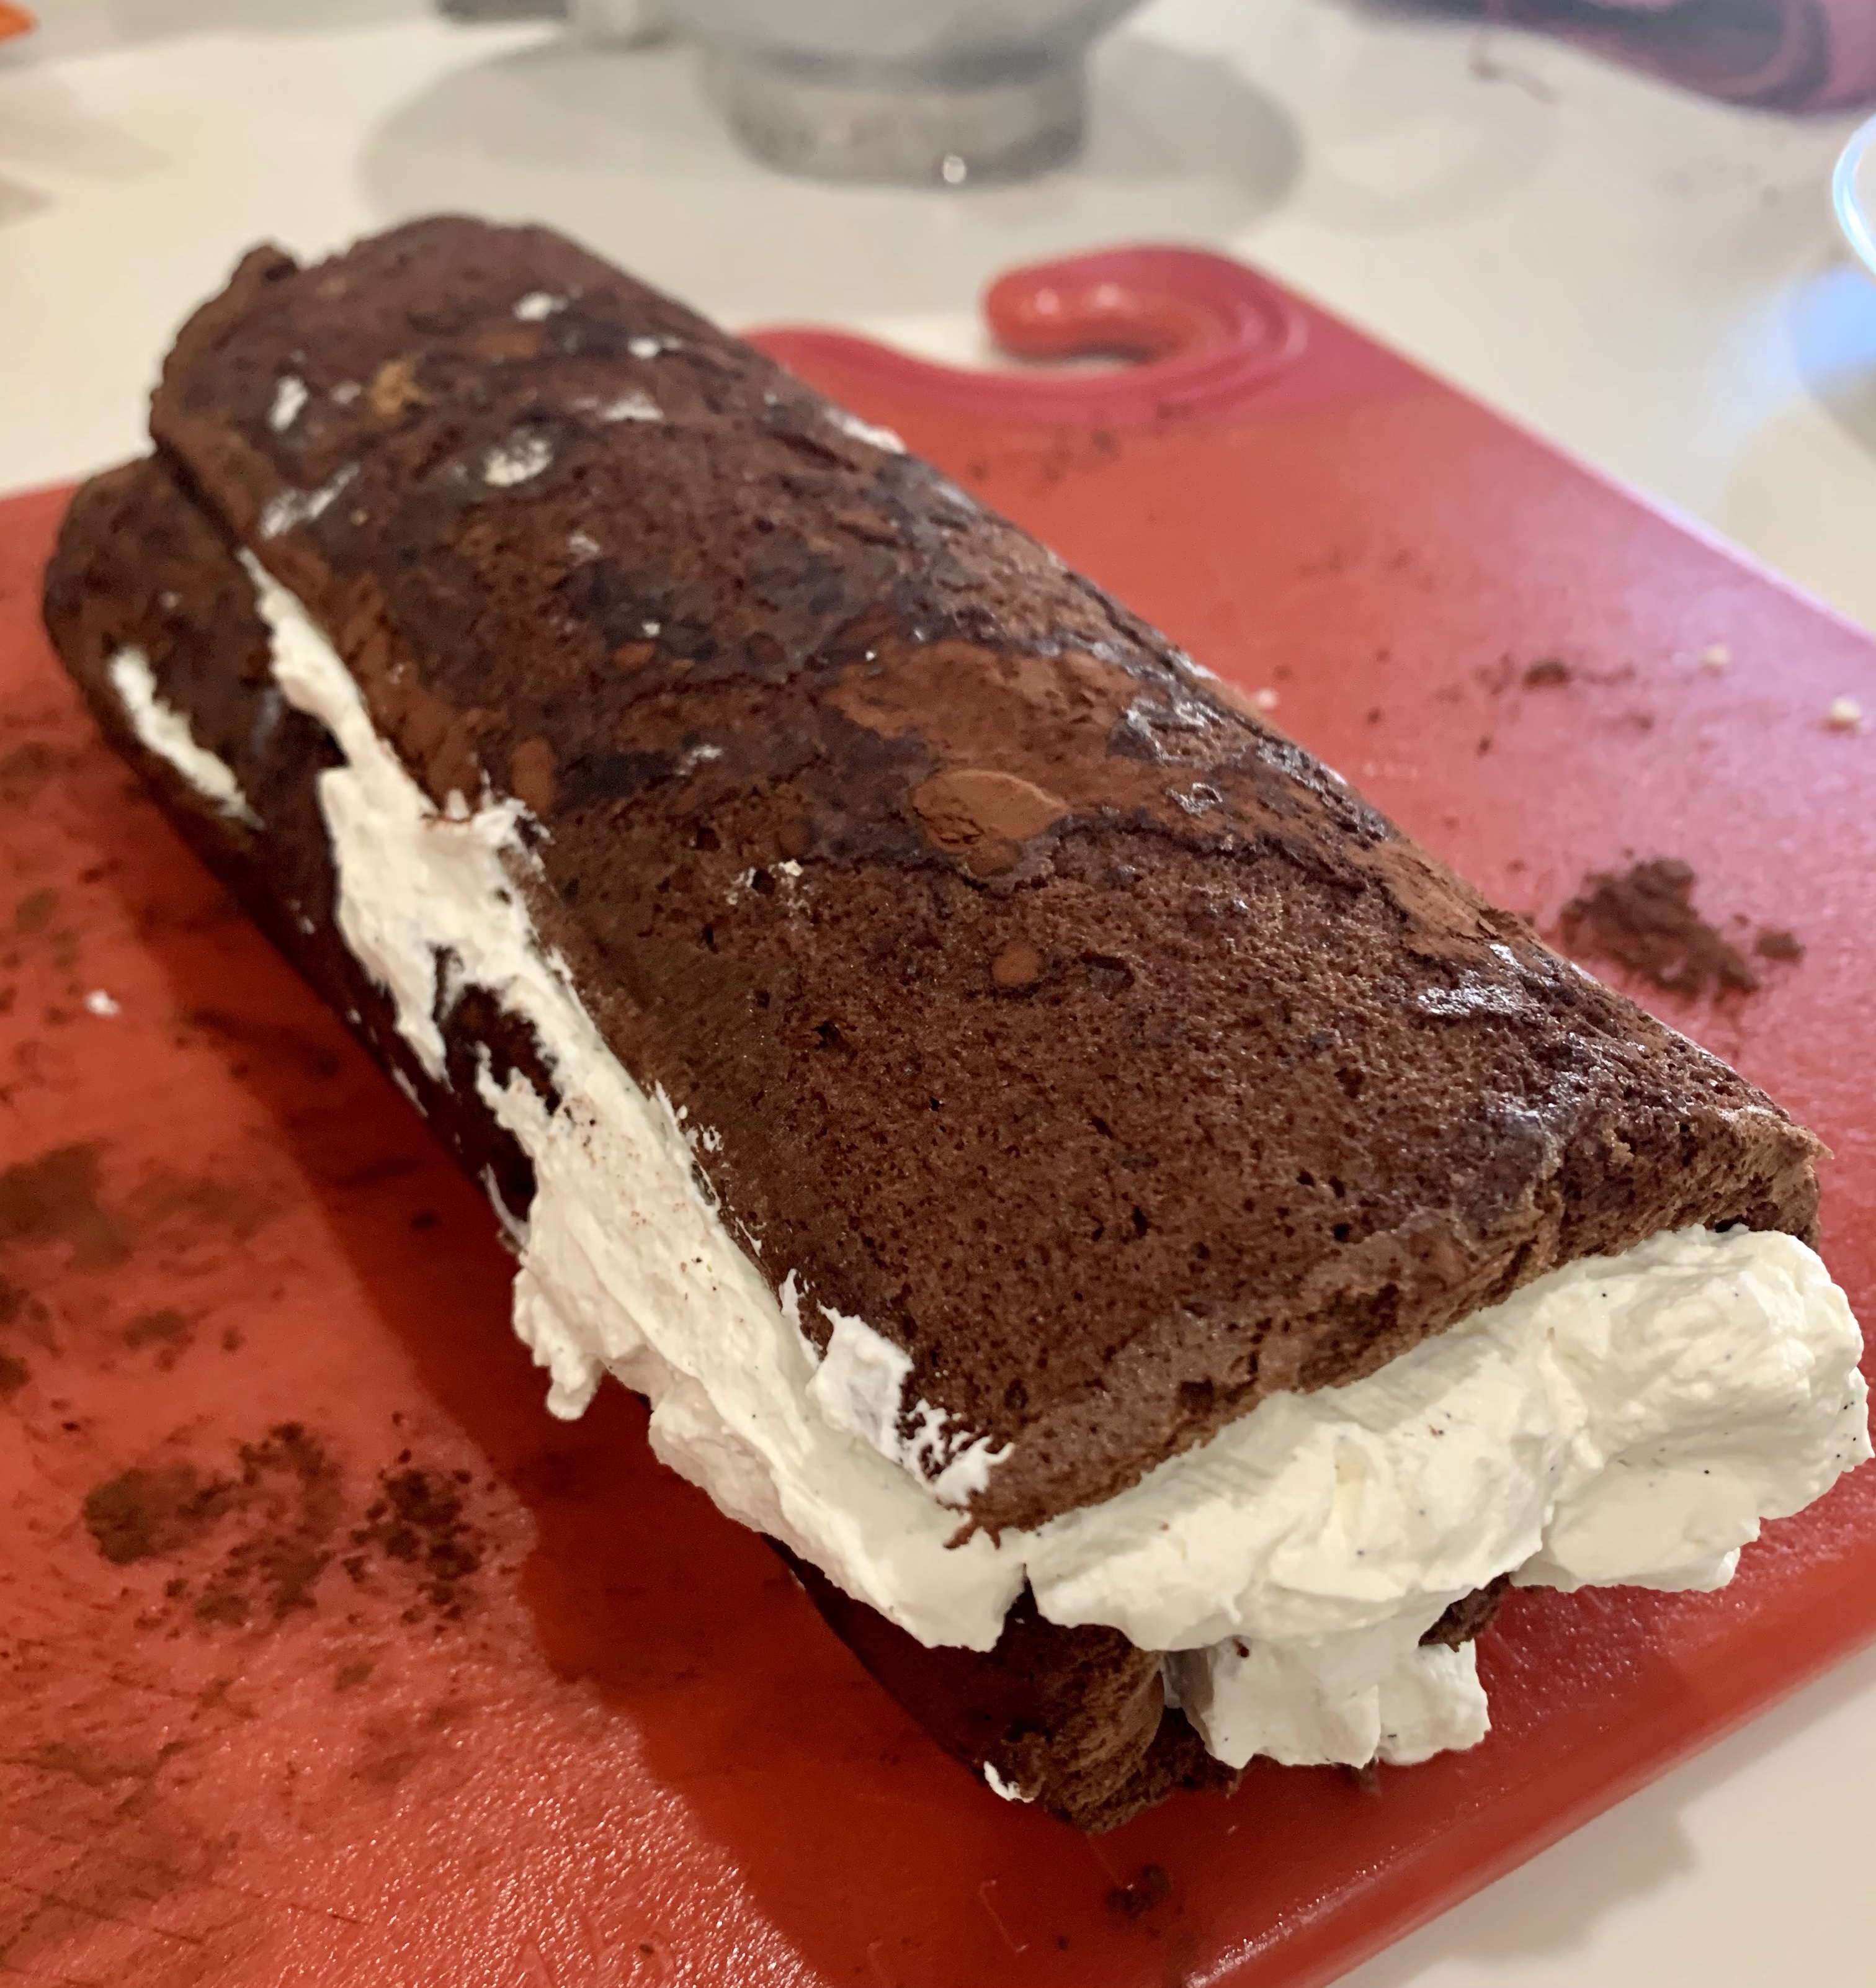
to my portfolio. The first, and easiest was the chocolate cookies with chocolate mousse filling. I decided to add some shaved milk chocolate and white chocolate over some of them and since I had some raspberry coulis in the fridge, I drizzled that over some to add more color.

pineapple upside down bites.jpeg

Once those were complete and I finished cleaning the kitchen, (yes, I clean everything up between each bake) I started the one bite Pineapple Upside Down cakes. I used the same vanilla cake recipe as last week. It was a little tricky miniaturizing everything and keeping them looking good. Next time I will reduce the amount of pineapple and use a quartered cherry so there will be more room for the cake.

Swiss Meringue Buttercream

INGREDIENTS

  • 7 large (210 grams or 7 oz) egg whites
  • 2 cups (400 grams) granulated sugar
  • 1½ cups (3 sticks or 340 grams) unsalted butter, softened*
  • 2 tsp vanilla extract
  • ¼ tsp salt (we use non-iodized fine sea salt)

METHOD

  1. In a medium pot, add at least 1-inch of water and bring to simmer.
  2. Thoroughly wash and dry the stainless-steel mixing bowl from your stand mixer* (you don’t want grease touching meringue). Add 7 egg whites and 2 cups sugar and whisk together.
  3. Place mixing bowl over pot of barely simmering water, creating a seal over the pot (bowl should be over the steam, not touching water). Whisk constantly until mixture reaches 160˚F (takes about 3 min). Sugar should be fully dissolved (you should not feel any sugar granules when rubbing mixture between finger tips). Mixture will feel hot to the touch.
  4. Wipe water from bottom of mixing bowl and transfer bowl to stand mixer fitted with whisk attachment. Beat on medium-high speed until stiff glossy peaks form (about 15-20 min) and bottom of the bowl feels completely at room temp and not warm (important: warm meringue will melt the butter).
  5. Once bowl is at room temp, switch to paddle attachment, reduce to medium speed and add butter 1 Tbsp at a time, adding it just as fast as it is absorbed by meringue. Once all butter is in, scrape down the bowl and continue beating until it reaches a thick whipped consistency (3 min on med-high speed). If it looks lumpy or liquidy at all, keep beating until smooth, thick and whipped.
  6. Add 2 tsp vanilla extract and ¼ tsp salt and mix on med-high until incorporated (about 1 min).

Notes

*Butter should be softened at room temp about 1 hour (more or less depending on your room temperature). It should be slightly cool to the touch and not overly soft or warm. If too soft, refrigerate for 10 minutes at a time.

Vanilla Butter Cake

INGREDIENTS

  • 3/4 cup all-purpose flour, plus more for pan
  • 3/4 cup cake flour (not self-rising)
  • 1 1/2 teaspoons baking powder
  • 1/4 teaspoon salt
  • 4 ounces (1 stick) unsalted butter, room temperature, plus more for pan
  • 3/4 cup plus 2 tablespoons sugar
  • 2 large eggs
  • 1 teaspoon pure vanilla extract
  • 1/2 cup plus 2 tablespoons whole milk Note: I use 1% milk and add the 2 Tbl as whipping cream

METHOD

  1. Preheat oven to 350 degrees. Butter a cast-iron pan, and dust with all-purpose flour, tapping out excess. Sift together flours, baking powder, and salt in a medium bowl.
  2. Beat butter and sugar with a mixer on medium speed, scraping down sides of bowl as needed, until pale and fluffy, 2 to 3 minutes. Add eggs, 1 at a time, beating well after each addition. Beat in vanilla. Reduce speed to low, and add flour mixture in three additions, alternating with milk, beginning and ending with flour mixture, mixing well after each addition.
  3. Fill pan halfway, and bake until golden around edges (time will vary depending on size of pan). Remove from oven, and let cool in pan for 15 minutes. Transfer cakes from pan to a wire rack. Let cool. Coat each with glaze just before serving.

Chocolate Mousse Filled Chocolate Cookies

INGREDIENTS (Half Recipe)

  • 1 cup butter, softened (1/2)
  • 2 cups white sugar (1)
  • 2 eggs (1)
  • 2 teaspoons vanilla extract (1)
  • 2 cups all-purpose flour (1)
  • 3/4 cup unsweetened cocoa powder (6 Tbl)
  • 1 teaspoon baking soda (1/2)
  • 1/2 teaspoon salt (1/4)

METHOD

  1. Preheat oven to 350 degrees F (175 degrees C).
  2. In a large bowl, cream together the butter and sugar until smooth.
  3. Beat in the eggs one at a time, then stir in the vanilla.
  4. Combine the flour, cocoa, baking soda and salt; stir into the creamed mixture.
  5. Spray Baker’s Joy or similar product into mini cupcake pans and fill ½ full (about a level teaspoon).
  6. Bake for 12 to 16 minutes in the preheated oven, until cookies are set.
  7. Allow cookies to cool on baking sheet for 5 minutes before removing to a wire rack to cool completely.

CHOCOLATE MOUSSE

INGREDIENTS

  • 4 egg yolks (2)
  • ¼ cup sugar (2 Tbl)
  • 1 cup whipping (heavy) cream (1/2)
  • 1 package (6 ounces) semisweet chocolate chips (1 cup) (1/2)
  • 1 ½ cups whipping (heavy) cream (3/4)

METHOD

  1. Beat egg yolks in small bowl with electric mixer on high speed about 3 minutes or until thick and lemon colored. Gradually beat in sugar.
  2. Heat 1 cup whipping cream in 2-quart saucepan over medium heat until hot. Gradually stir at least half of the hot whipping cream into egg yolk mixture; stir back into hot cream in saucepan. Cook over low heat about 5 minutes, stirring constantly, until mixture thickens (do not boil). Stir in chocolate chips until melted. Cover and refrigerate about 2 hours, stirring occasionally, just until chilled.
  3. Beat 1 1/2 cups whipping cream in chilled medium bowl with electric mixer on high speed until stiff. Fold chocolate mixture into whipped cream. Pipe or spoon mixture into serving bowls. Immediately refrigerate any remaining dessert after serving.

3 Strikes In A Row!

As you may know, I often make a “practice” cake prior to producing the “public” cake. Thanksgiving Windtorte
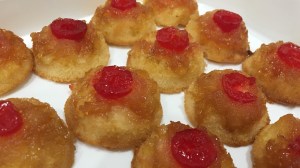
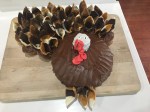
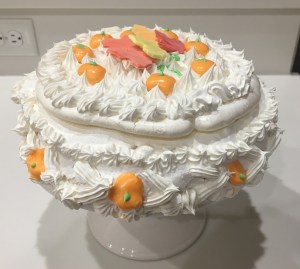
“Practice” cakes do not leave the kitchen, (unless they are good.) I made a practice Thanksgiving cake based on a Spanische Windtorte as seen on GBBO. It looked beautiful and tasted awful. It would have been easier to eat a half cup of sugar with a strawberry chaser.
I fell back to a standard chocolate cake but decorated with a Thanksgiving theme. The feathers are chocolate, white chocolate and butterscotch chips, warmed, mixed with corn syrup, rolled into long thick strings, braided, rolled and cut into equilateral triangles, about 2″ on each side. Fold one side and pinch together forming the feather.


Frost the chocolate cake using a spatula to make feathers across the top. Array 18 chocolate frosted cupcakes (I used white cake for variety for the guests) around the frosted chocolate cake. Place the feathers on the cupcakes and add a few to the front side of the turkey body.

Frost one cupcake with white buttercream, form some red dyed gum paste into the snood and waddle and invert a chocolate chip (pointy side down) into the top as an eye.

Boom!

Chocolate Cake

INGREDIENTS

  • 2 cups white sugar
  • 1 3/4 cups all-purpose flour
  • 3/4 cup unsweetened cocoa powder
  • 1 1/2 teaspoons baking soda
  • 1 1/2 teaspoons baking powder
  • 1 teaspoon salt
  • 2 eggs
  • 1 cup milk
  • 1/2 cup vegetable oil
  • 2 teaspoons vanilla extract
  • 1 cup boiling water
  • 3/4 cup butter
  • 1 1/2 cups unsweetened cocoa powder
  • 5 1/3 cups confectioners’ sugar
  • 2/3 cup milk
  • 1 teaspoon vanilla extract

 METHOD

  1. Preheat oven to 350 degrees F (175 degrees C). Grease and flour two 9 inch cake pans.
  2. Use the first set of ingredients to make the cake. In a medium bowl, stir together the sugar, flour, cocoa, baking soda, baking powder and salt. Add the eggs, milk, oil and vanilla, mix for 3 minutes with an electric mixer. Stir in the boiling water by hand. Pour evenly into the two prepared pans.
  3. Bake for 30 to 35 minutes in the preheated oven, until a toothpick inserted comes out clean. Cool for 10 minutes before removing from pans to cool completely.
  4. To make the frosting, use the second set of ingredients. Cream butter until light and fluffy. Stir in the cocoa and confectioners’ sugar alternately with the milk and vanilla. Beat to a spreading consistency.
  5. Split the layers of cooled cake horizontally, cover the top of each layer with frosting, then stack them onto a serving plate. Frost the outside of the cake.

Chocolate Frosting

INGREDIENTS

  • 1/2 cup butter
  • 3 (1 ounce) squares unsweetened chocolate
  • 1 pound confectioners’ sugar
  • 1/2 teaspoon vanilla extract
  • 3/4 cup milk

METHOD

  1. Melt chocolate and butter in the microwave, or in the top of a double boiler. In a large bowl, combine confectioners’ sugar, vanilla and 1/2 cup of the milk. Blend in the melted chocolate mixture. Add remaining milk, a little at a time, until desired consistency is achieved.
  2. Let stand until spreadable (frosting will thicken as it cools).

Heavenly White Cake (Cupcakes)

INGREDIENTS                                               

  • 2 3/4 cups sifted cake flour
  • 4 teaspoons baking powder
  • 3/4 teaspoon salt
  • 4 egg whites
  • 1 1/2 cups white sugar
  • 3/4 cup butter
  • 1 cup milk
  • 1 teaspoon vanilla extract

METHOD

  1. Measure sifted flour, baking powder, and salt; sift together three times.
  2. In a mixing bowl, beat egg whites until foamy. Add 1/2 cup sugar gradually, and continue beating only until meringue will hold up in soft peaks.
  3. Cream butter or margarine. Gradually add remaining 1 cup sugar, and cream together until light and fluffy. Add sifted ingredients alternately with milk a small amount at a time, beating after each addition until smooth. Mix in flavorings. Add meringue, and beat thoroughly into batter. Spread batter in a 15 x 10 x 1 inch pan which has been lined on the bottom with parchment paper.
  4. Bake at 350 degrees F (175 degrees C) for 30 to 35 minutes. Cool cake in pan 10 minutes, then remove from pan and transfer to a wire rack to finish cooling. This cake may also be baked in two 9 inch round pans for 30 to 35 minutes, or in three 8 inch round pans for 25 to 30 minutes.

Shield of David

Our best friend gave me two gifts for my recent birthday. Now, I am not saying there were ulterior motives here, but she is visiting us this fall. Coincidence? Perhaps not.

The Shield of David (Mogen David, or Jewish Star) is a six pointed star symbolizing the internal and external connections of Torah, God and Israel. A Shield of David bundt pan makes an awesome cake, too.

You may have read elsewhere in this blog, we had a bumper crop of figs in our backyard tree this year. My challenge was how to use all these fresh figs. I froze a few pounds but our freezer is pretty small and already has chocolate chip cookie dough ready for baking, extra tartlet shells for an emergency snack or drop in guests and several quarts of Vermont maple syrup from near my home town in Vermont, so I have frozen enough already.

slice 2

Today I made a fig-spice cake in my new pan. Think apple-spice but with figs instead. The Bundt pan worked really well. Spraying with some Baker’s Joy helped the cake slide out of the pan perfectly. The cake is moist with good texture and is sweet.  (It was even  sweeter after dusting with confectioners sugar.) The figs were well dispersed throughout the cake and the edges had a nice caramelized crunch.


Based on hungryforlouisiana.com/figging-out-fresh-fig-cake/

INGREDIENTS

  • 3 eggs
  • 2 cups sugar
  • 1 cup canola oil
  • 1 cup buttermilk (or 1 Tbl white vinegar mixed into 1 Cup milk)
  • 1 teaspoon baking soda
  • 2 cups all-purpose flour
  • 1 cup chopped fresh figs (between 15-20 small to medium figs)
  • 1 teaspoon cinnamon
  • ¼ teaspoon ginger
  • ½ teaspoon salt
  • 1 pinch nutmeg
  • Confectioner’s sugar and fig leaves for garnish

METHOD

  1. Heat oven to 350 degrees. Using a standing mixer or bowl, whisk eggs briefly. Add sugar and beat until light and fluffy, about one minute. Add oil, and beat until just combined.
  2. In a separate medium bowl, add buttermilk and stir in baking soda.
  3. Beginning with flour, add flour and buttermilk mixture alternately and mix until combined.
  4. Add chopped figs, cinnamon, ginger, salt and nutmeg, and mix until thoroughly incorporated.
  5. Pour batter into a greased and floured Bundt pan, and bake until done (50-60 minutes).
  6. Cool in baking rack for 5-10 minutes, then remove from pan. Allow to cool another 5-10 minutes. Arrange on plate, and garnish with confectioner’s sugar and fresh figs.