I saw a picture of Angel Hair Bread and of course, searched for a recipe. The one I found included a number of flaws, which I fixed, except one. The recipe didn’t call for any salt, and while I thought that was odd, I decided to give the bread a bake anyways. Note to self: If you think it is wrong, fix it.
The author also neglected to add the baking powder although it was listed in the ingredients, (I added it with the first portion of flour.) They also didn’t specify a pan size, but I calculated a 9 x 12” would work, also, I added oiling or spraying the pan, Parchment paper would have helped also, next time.
They also didn’t bother to give approximate times for resting, proving or baking. I watched, timed and noted everything.
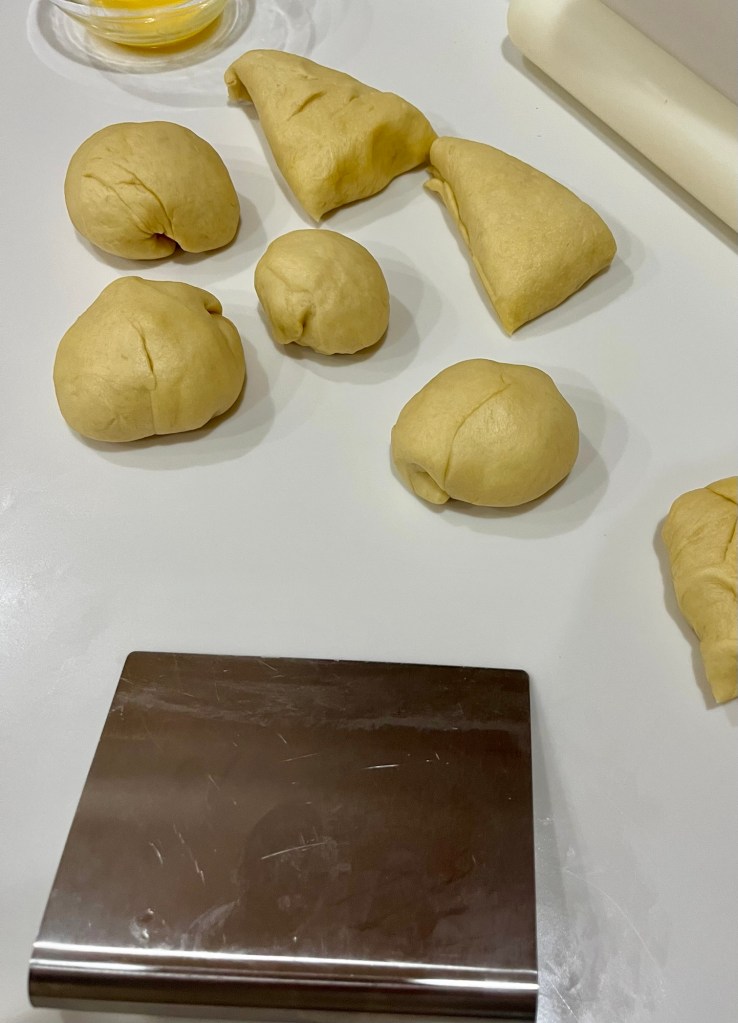
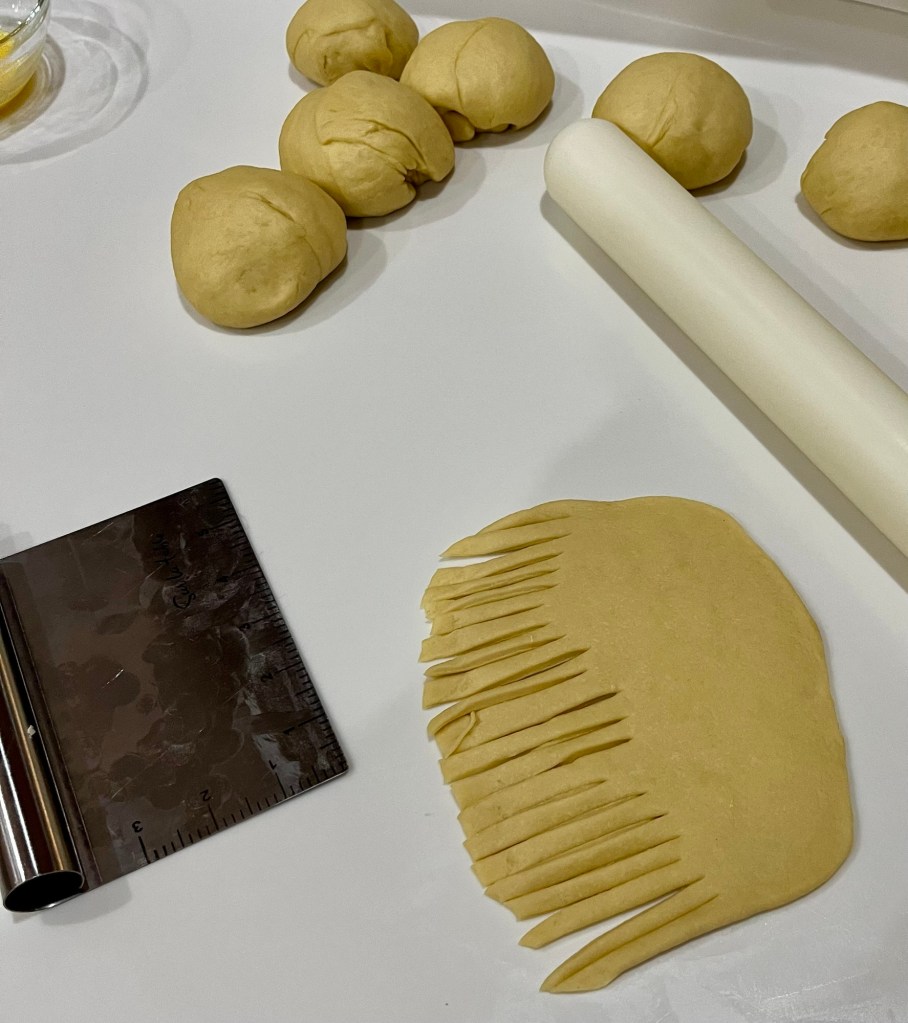
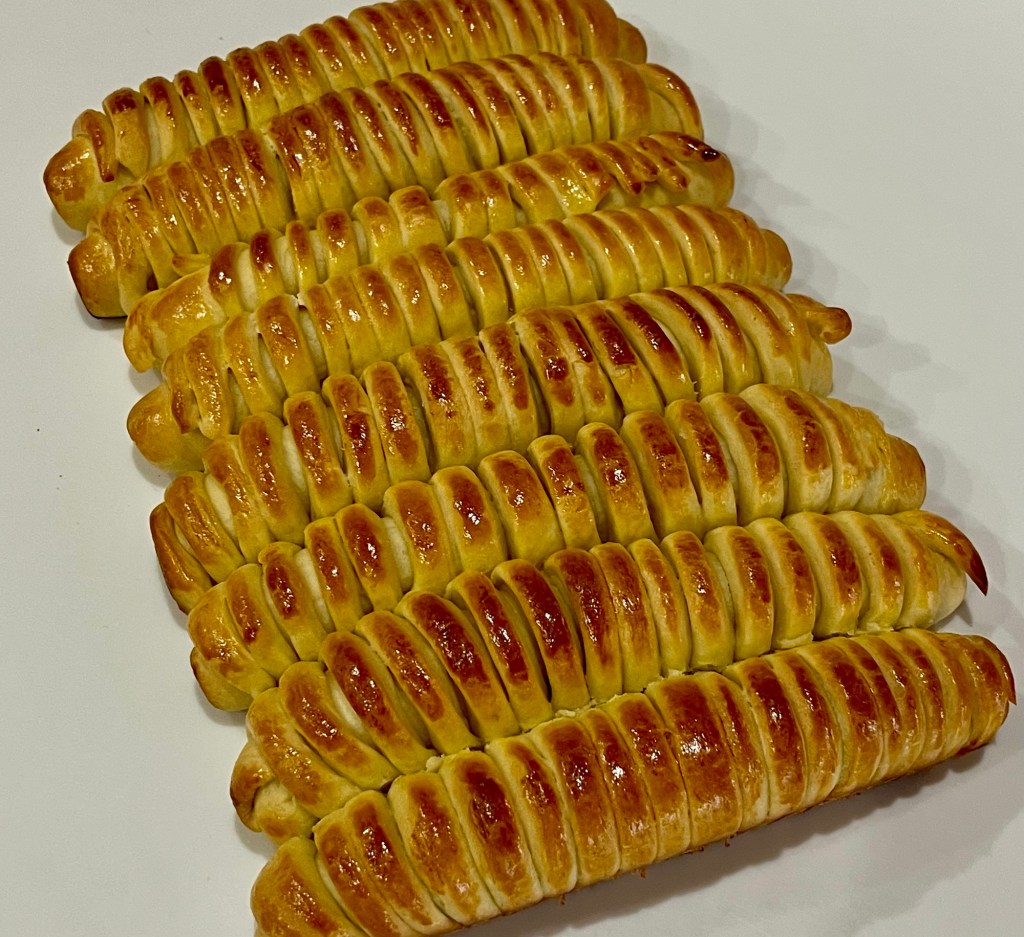
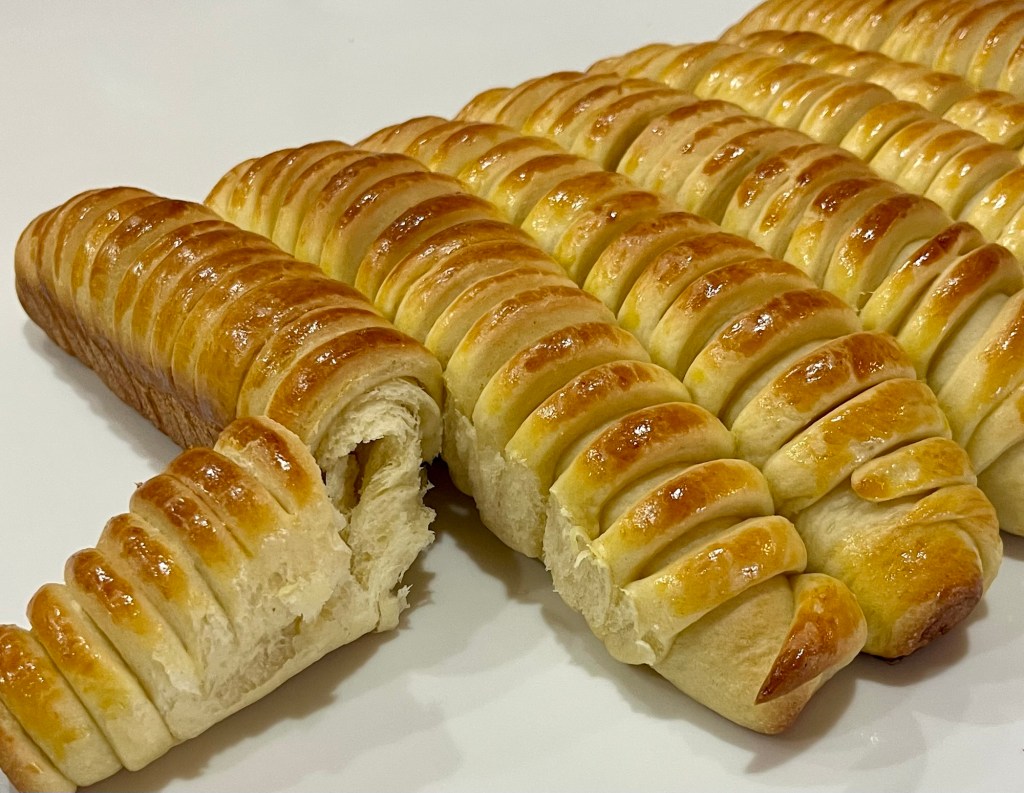
Divided into 8 segmentsRolled to ~6×8” and slicedPlaced in oiled pan and egg yolk washedFinished loafFinished loaf showing crumb
The flavor is good, (although salt would have made it very good), and the crumb is excellent.
Angel Hair Bread
INGREDIENTS • 1 ¼ c warm milk • 2 eggs (1 for egg wash) • 3 Tbl sugar • 1/3 c oil • 10 g yeast • 10 g salt • 10 g baking powder • 700 g AP flour
METHOD
Add warm milk, 1 egg, sugar, oil, salt, and yeast and mix well.
Add 100 g of wheat flour and baking powder in 2-3 portions mixing well after each addition.
Let rest 10 – 30 minutes until mixture is a little firm and full of bubbles
Add the remaining flour and mix well
Dump onto the table and knead it until it becomes smooth, ~8 minutes
Let it rest 45 – 60 minutes (until doubled in size.)
De-gas the dough then knead again
Roll into a circle and divide into 8 pieces.
Form into balls, then roll out to ~6” x 8” ovals
Pinch one long edge of oval to stick to work surface. I stretched the stuck edge to form a rectangle, then cut slits ~ ½” into the thin edge and roll up so that the fingers are exposed.
Lay into an oiled or sprayed 9”x12” baking pan
Leave to rest 10-30 minutes, preheat oven while resting.
Wash with the egg yolk mixed with a Tbl water.
Bake at 350⁰F for 20-30 minutes, until golden brown.
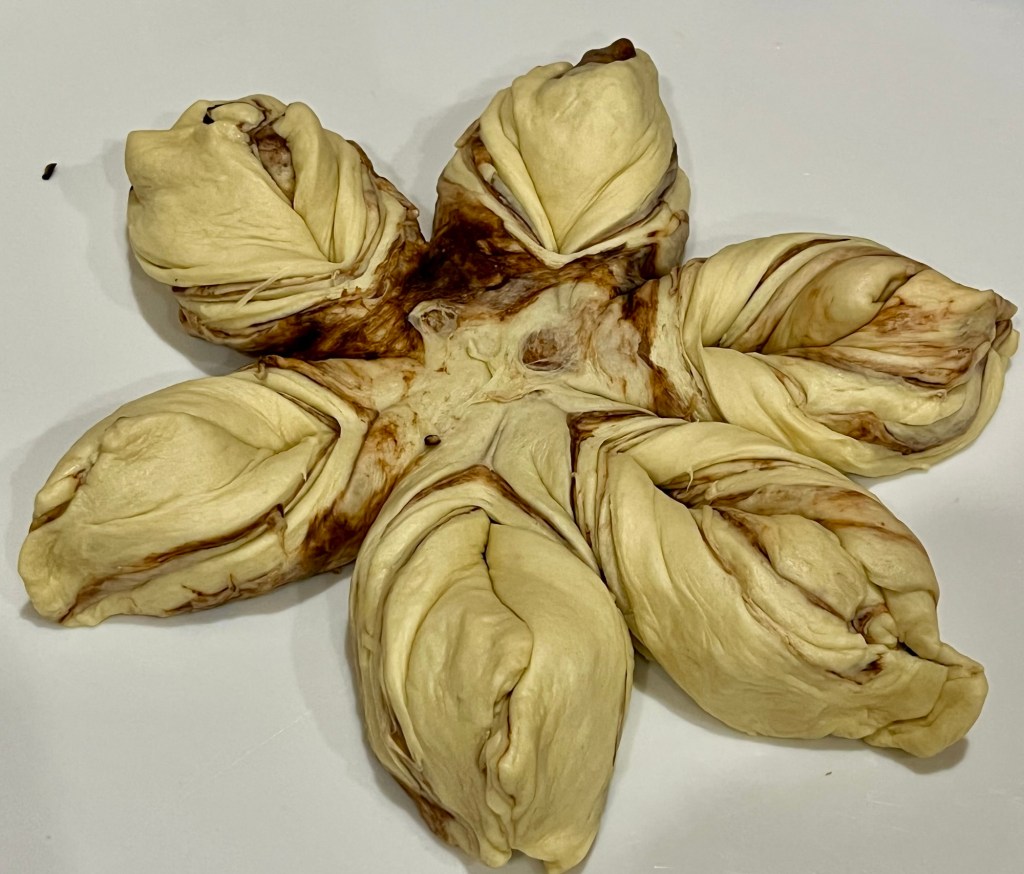
I made this trial loaf for a luncheon I am co-hosting next week. I made this type of bread before but my co-host is making soups and I wanted a bread that wouldn’t fight with the flavors of the soups. Rather than use cinnamon or chocolate to make the color, I used some gel food coloring.
I used my dinner roll recipe as the soft texture would pair well with the various soups. The resultant bread is soft, tender and if you closed your eyes and thought “dinner rolls” that is what you would think you are eating.
Pre-baked star breadScraps as a bouleFinished star breadFinished “Scrap Boule”Inside of “Scrap Boulevard”
Bi-Color Pull Apart Rolls
INGREDIENTS • 488g (2 cups) warm milk • 2 Tbl instant dry yeast • 50g white granulated sugar • 2 tsp salt • 6 Tbl salted butter softened • 2 large eggs • 750-850g all-purpose flour • 1 egg and 1 Tbl water
METHOD
In a stand mixer bowl, combine and mix all ingredients except the flour.
Add in 5 ½ cups of flour. Using a dough hook, turn the mixer on and increase speed slowly to keep the flour from flying all over. Slowly add the remaining flour until the dough pulls away from the sides of the bowl. (I watch the bottom of the bowl and add flour until the dough just comes clean from the bottom.) Once the dough clears, knead for 8 minutes. The dough mixture should be sticky and soft.
Transfer the dough to a lightly greased bowl. Cover and let rise 35-45 minutes (until doubled) in a proofing drawer,
Punch down the dough and form into 2 balls. (I like to weigh the dough and divide the total weight by 2 to make equal sized balls. My dough weighed 1630 g therefore, each ball should be ~815g.)
Add 2-3 drops of brown gel food coloring to one ball and knead until well mixed. (Wear gloves)
Divide each ball into two smaller balls, each ~400g and form each into a rough circle ~6” diameter, then roll out into circles ~10”
Stack the circles interleaving the light and dark colored ones.
Center a 10” cake pan and trim the circles with a pizza cutter to an even circle.
Set a 3” bowl in the center of the stack of circles and press down making an impression
Use a pizza cutter to cut the dough from the perimeter to the outside of the 3” circle into 12 equal portions
Twist adjacent portions away from each other and pinch the ends into a point.
Combine the scraps and roll into an oval, fold and form into a boule.
Cover and let rise 20-30 min. Re-pinch the ends as you stretch them out, then tuck the thin ends under the bread.
Whisk the egg and water and use to egg wash the breads
Preheat oven to 375⁰F. Bake for 20 to 30 minutes, until lightly browned. (Tent the bread with foil after 15 -18 minutes to prevent over browning.) Internal temperature should be ~190⁰ F
Best when served warm. To cool, let rest in the pan for 15 minutes then transfer to a wire rack. Once cooled completely, store in a plastic bag.
I like to keep a dozen or so hamburger rolls in the freezer for ‘impulse’ dinner nights. (You know what I mean: “What do you want for dinner?” “I don’t know, what do you want?” The one constant through all the years, Ray, has been… hamburgers. We always agree on hamburgers. My supply was down to three, meaning there was plenty of room in the freezer for more.
Since I found (and made) a new recipe for dinner rolls with one of my granddaughters yesterday, I decided to make some hamburger rolls today. Also, I wanted some homemade hotdog rolls and this was a perfect opportunity to fulfill that wish. This bread is very briochey. The addition of milk, butter and eggs enriches the normal bread dough resulting in a soft, moist, delicious bread.
A question I am often asked is: “how do I know when I have the right amount of flour in the dough?” I am not sure mine’s the ‘correct’ method, but once the dough starts to clean the sides of the stand mixer bowl, I add flour by the tablespoon until the bottom is clean as well. The two short videos following show the dough cleaning the side of the bowl, and, after adding a few more tablespoons, the bottom.
You probably already know this but the difference between dinner rolls as posted yesterday and the hamburger rolls in todays post is how far apart each ball of dough is positioned when baked. The dinner rolls were allowed to grow together in a baking pan and the hamburger rolls were more widely separated on a baking sheet.
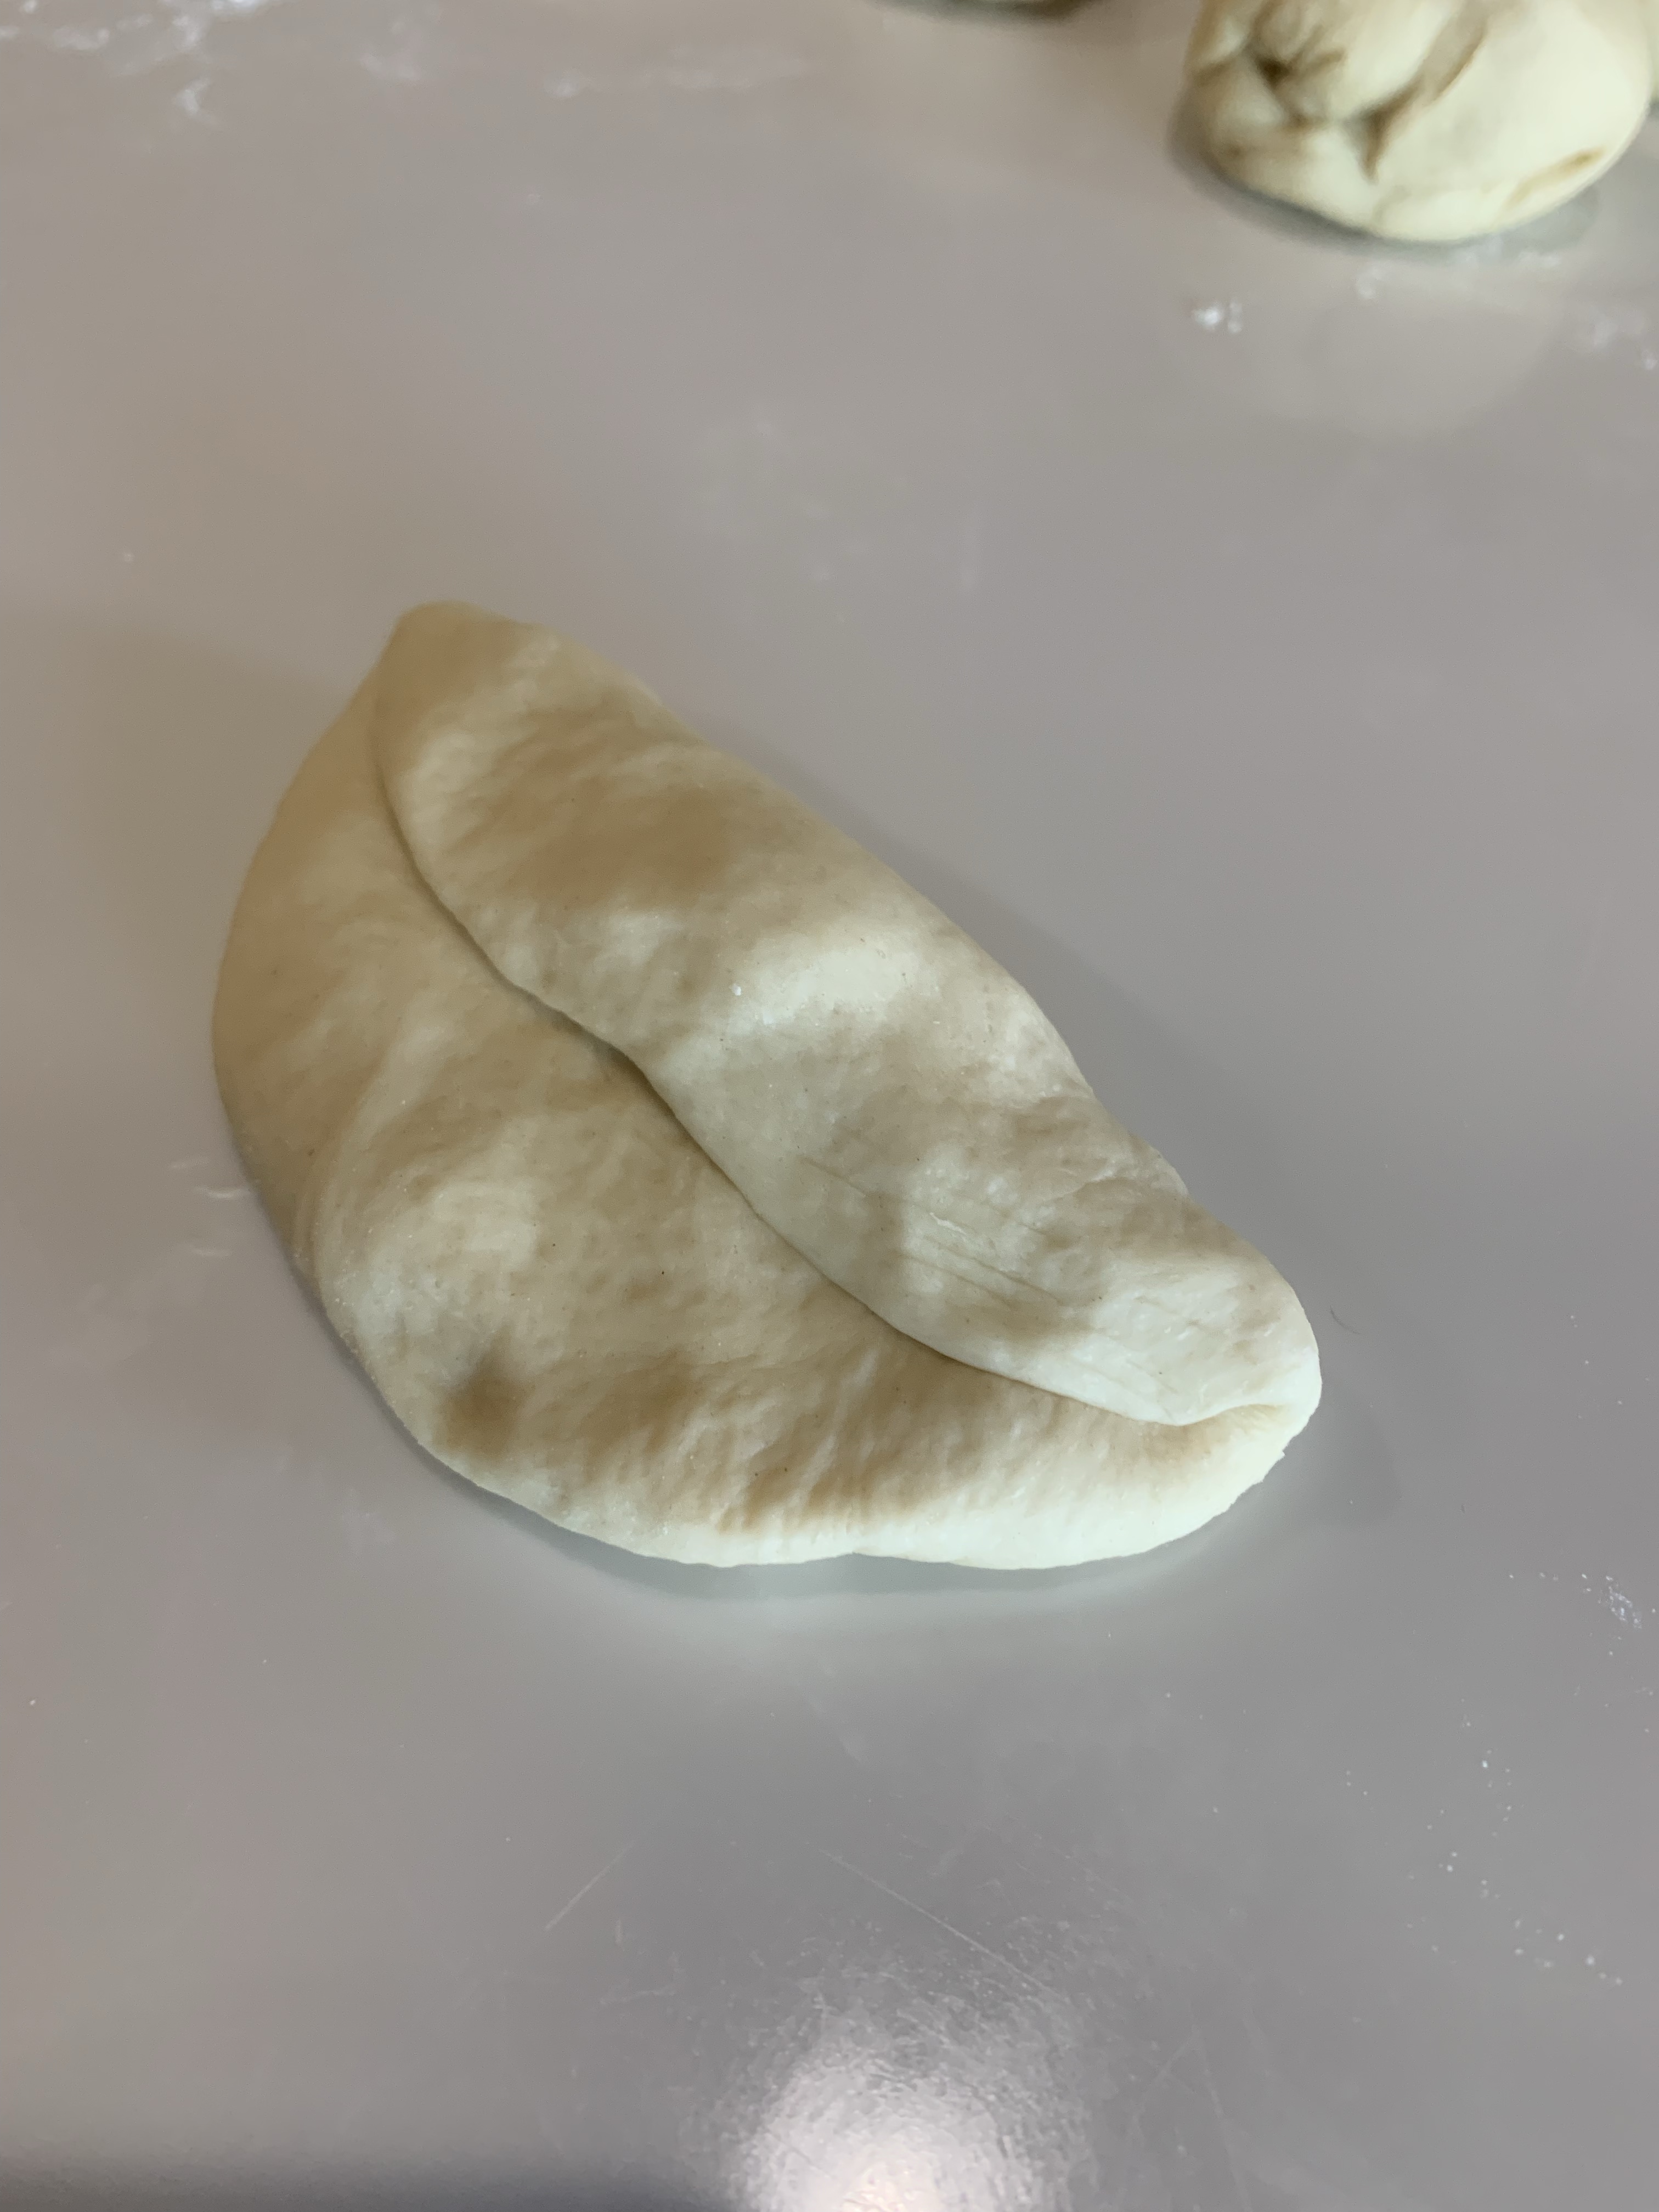
I found a few methods of forming the dough logs to make the hotdog rolls. One is to press or roll a portion of dough into a 3”x3” square, perform an envelope fold, pinch the joins together then roll out into the cylindrical shape, about 6” long and 1” diameter.
L to R: Press into squarish shape, fold, pinch, tada!
The other method (and the one I used for hotdog rolls #2 – 12) is to stretch and tension each portion of dough into a ball then roll out into a log 6” long. It seemed easier and faster than the fold and roll method.
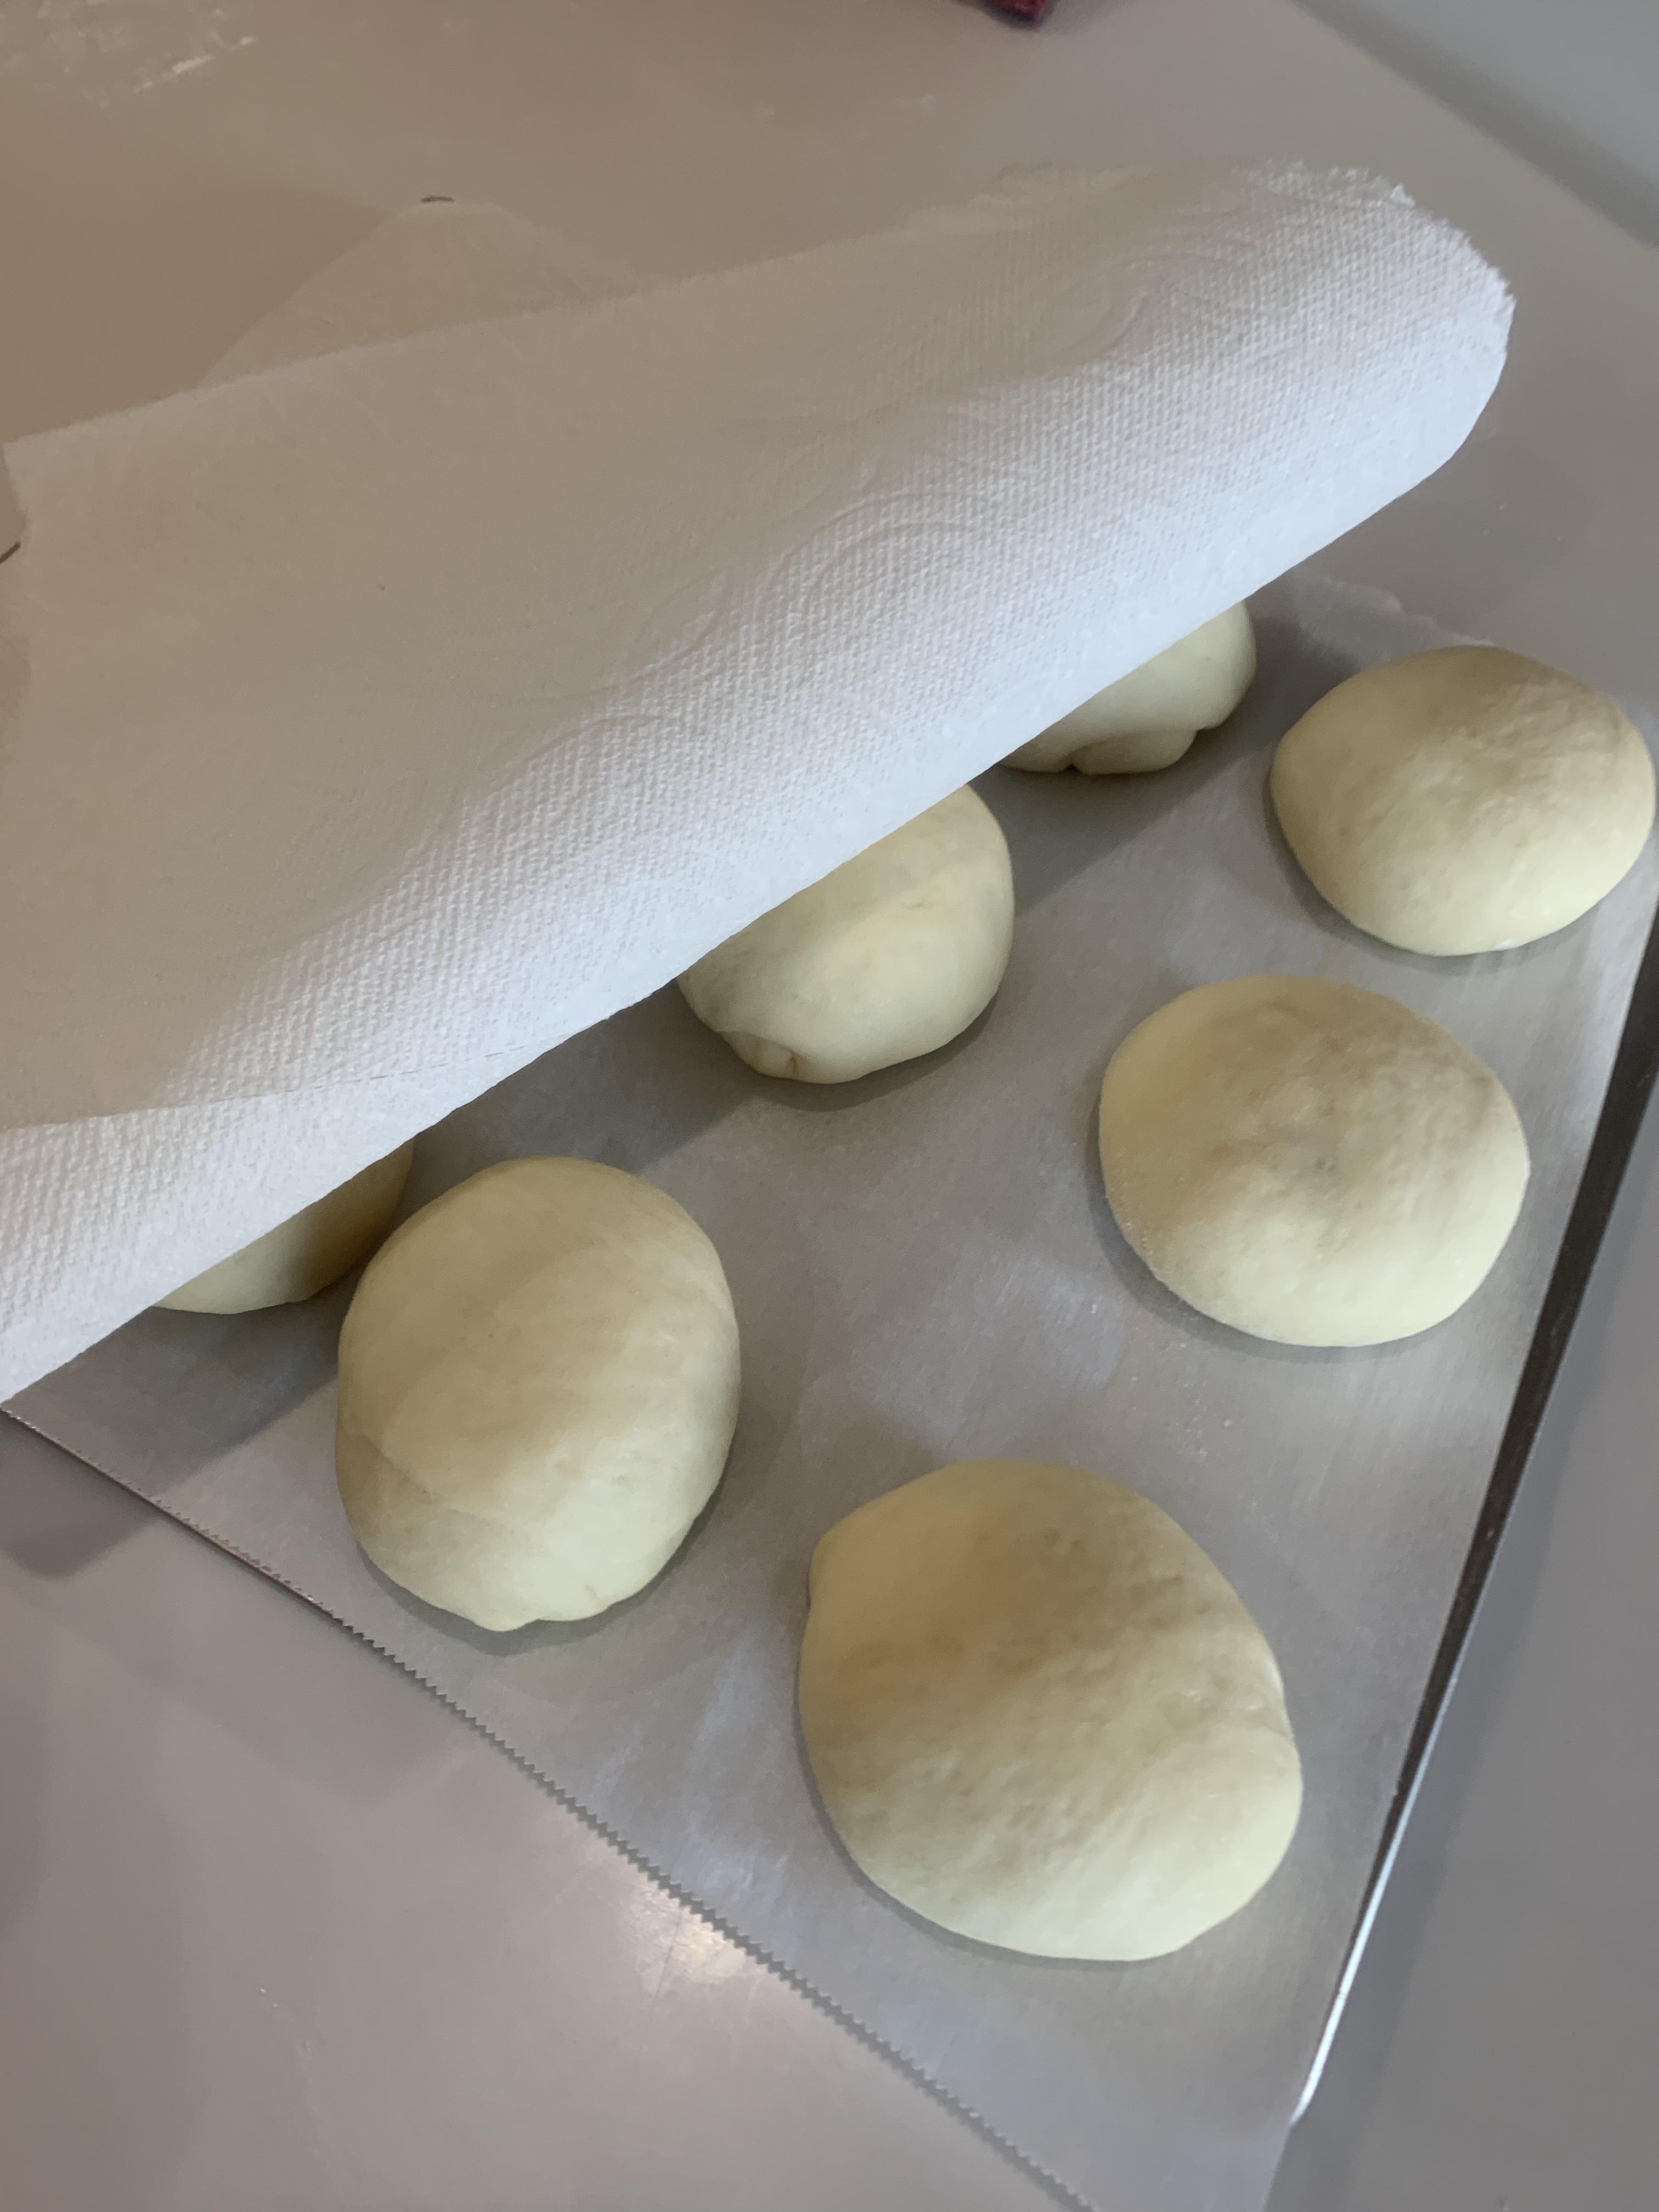
Roll to make the center thinner than the ends. The rise and oven spring tends to enlarged the center more than the ends.L: Hamburger buns – R: Hamburger rolls. – Almost ready to be proved.
I like to cover the dough with a paper towel, then plastic wrap before putting them into the proofing drawer. I read this time somewhere that the paper towel reduces sticking. It works for me.
After proofing, the rolls are egg washed and baked for 12 – 14 minutes or when the tops are a nice brown and the internal temperature is about 180F.
Enriched Dinner, Hamburger and Hotdog Rolls
INGREDIENTS • 488 g (2 cups) warm milk • 2 tablespoons instant dry yeast • 50 g white granulated sugar • 2 teaspoons salt • 6 tablespoons butter softened • 2 large eggs • 750 g all-purpose flour • 1 tablespoon melted butter
METHOD
In a stand mixer bowl, combine and mix all ingredients except the flour.
Add in 5 ½ cups of flour. Using a dough hook, turn the mixer on and increase speed slowly to keep the flour from flying all over. Slowly add the remaining flour until the dough pulls away from the sides of the bowl. (I watch the bottom of the bowl and add flour until the dough just comes clean from the bottom.) The dough mixture should be sticky and soft.
Transfer the dough to a lightly greased bowl. Cover and let rise 60 minutes, (until doubled.)
Punch down the dough and form into 24 rolls. (My dough weighed 1630 g therefore, each roll should be 68g.) Place in an 11×15” greased baking pan. Cover and let rise 45 – 60 min.
Preheat oven to 375 F. Bake the rolls for 12 to 14 minutes, until lightly browned.
Remove rolls from oven and brush with melted butter. Best when served warm. To cool, let rest in the pan for 15 minutes then transfer to a wire rack. Once cooled completely, store in a plastic bag.
To Make Hamburger and Hot Dog Rolls
Use the same recipe as above. There will be enough dough to make twelve 70 g hamburger rolls and 12 hotdog rolls.
Hamburger
Cut 70g portions of dough and stretch into a ball. Pinch the bottom together and tension each ball with the rolling “cupped hand” technique.
Place on a parchment paper lined baking sheet. If you want the rolls to touch, during baking space the rolls about 1” apart. If you want to keep them separate, increase the spacing to 2”.
Cover the rolls with a paper towel to keep them from sticking to the plastic wrap on top.
Let the rolls rise for 45 min, until doubled.
Coat each roll with an egg wash (1 whole egg::1 Tbl water)
Bake at 375F for 12 minutes, until nicely browned and the internal temperature is 180F
Hot Dogs
Cut 68g portions of dough. There are two options (that I tried) to form the hot dog dough into logs. a. Fold and roll method i. Form the portion into a 3”x3” square ii. Envelope fold the dough into an approximately 1”x3” log, then roll as you would a breadstick, or pretzel etc until the log is about 6” long and 1” thick. b. Roll Method i. Stretch the portion into a ball and tension as will the dinner rolls above ii. Roll the ball into a 6” log. (Why take the extra step to fold?)
In either case try to make the center 3-4” of the log a little thinner as when the dough proofs and oven rises the centers tend to rise more than the ends.
Bake the hamburger and hot dog buns as described in the hamburger roll section above.
I have a recipe and method for making dinner rolls that receive great reviews and are in constant demand. With such a success why wouldn’t I try and new recipe, enriched this time?
I forgot to photograph the final rolls, so took this on the way to Grace’s house. Due to time restraints I had to remove the rolls from the pan early which led to their distortion. Believe me, they were perfect coming out of the oven.
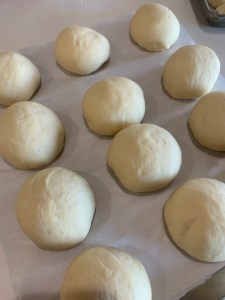
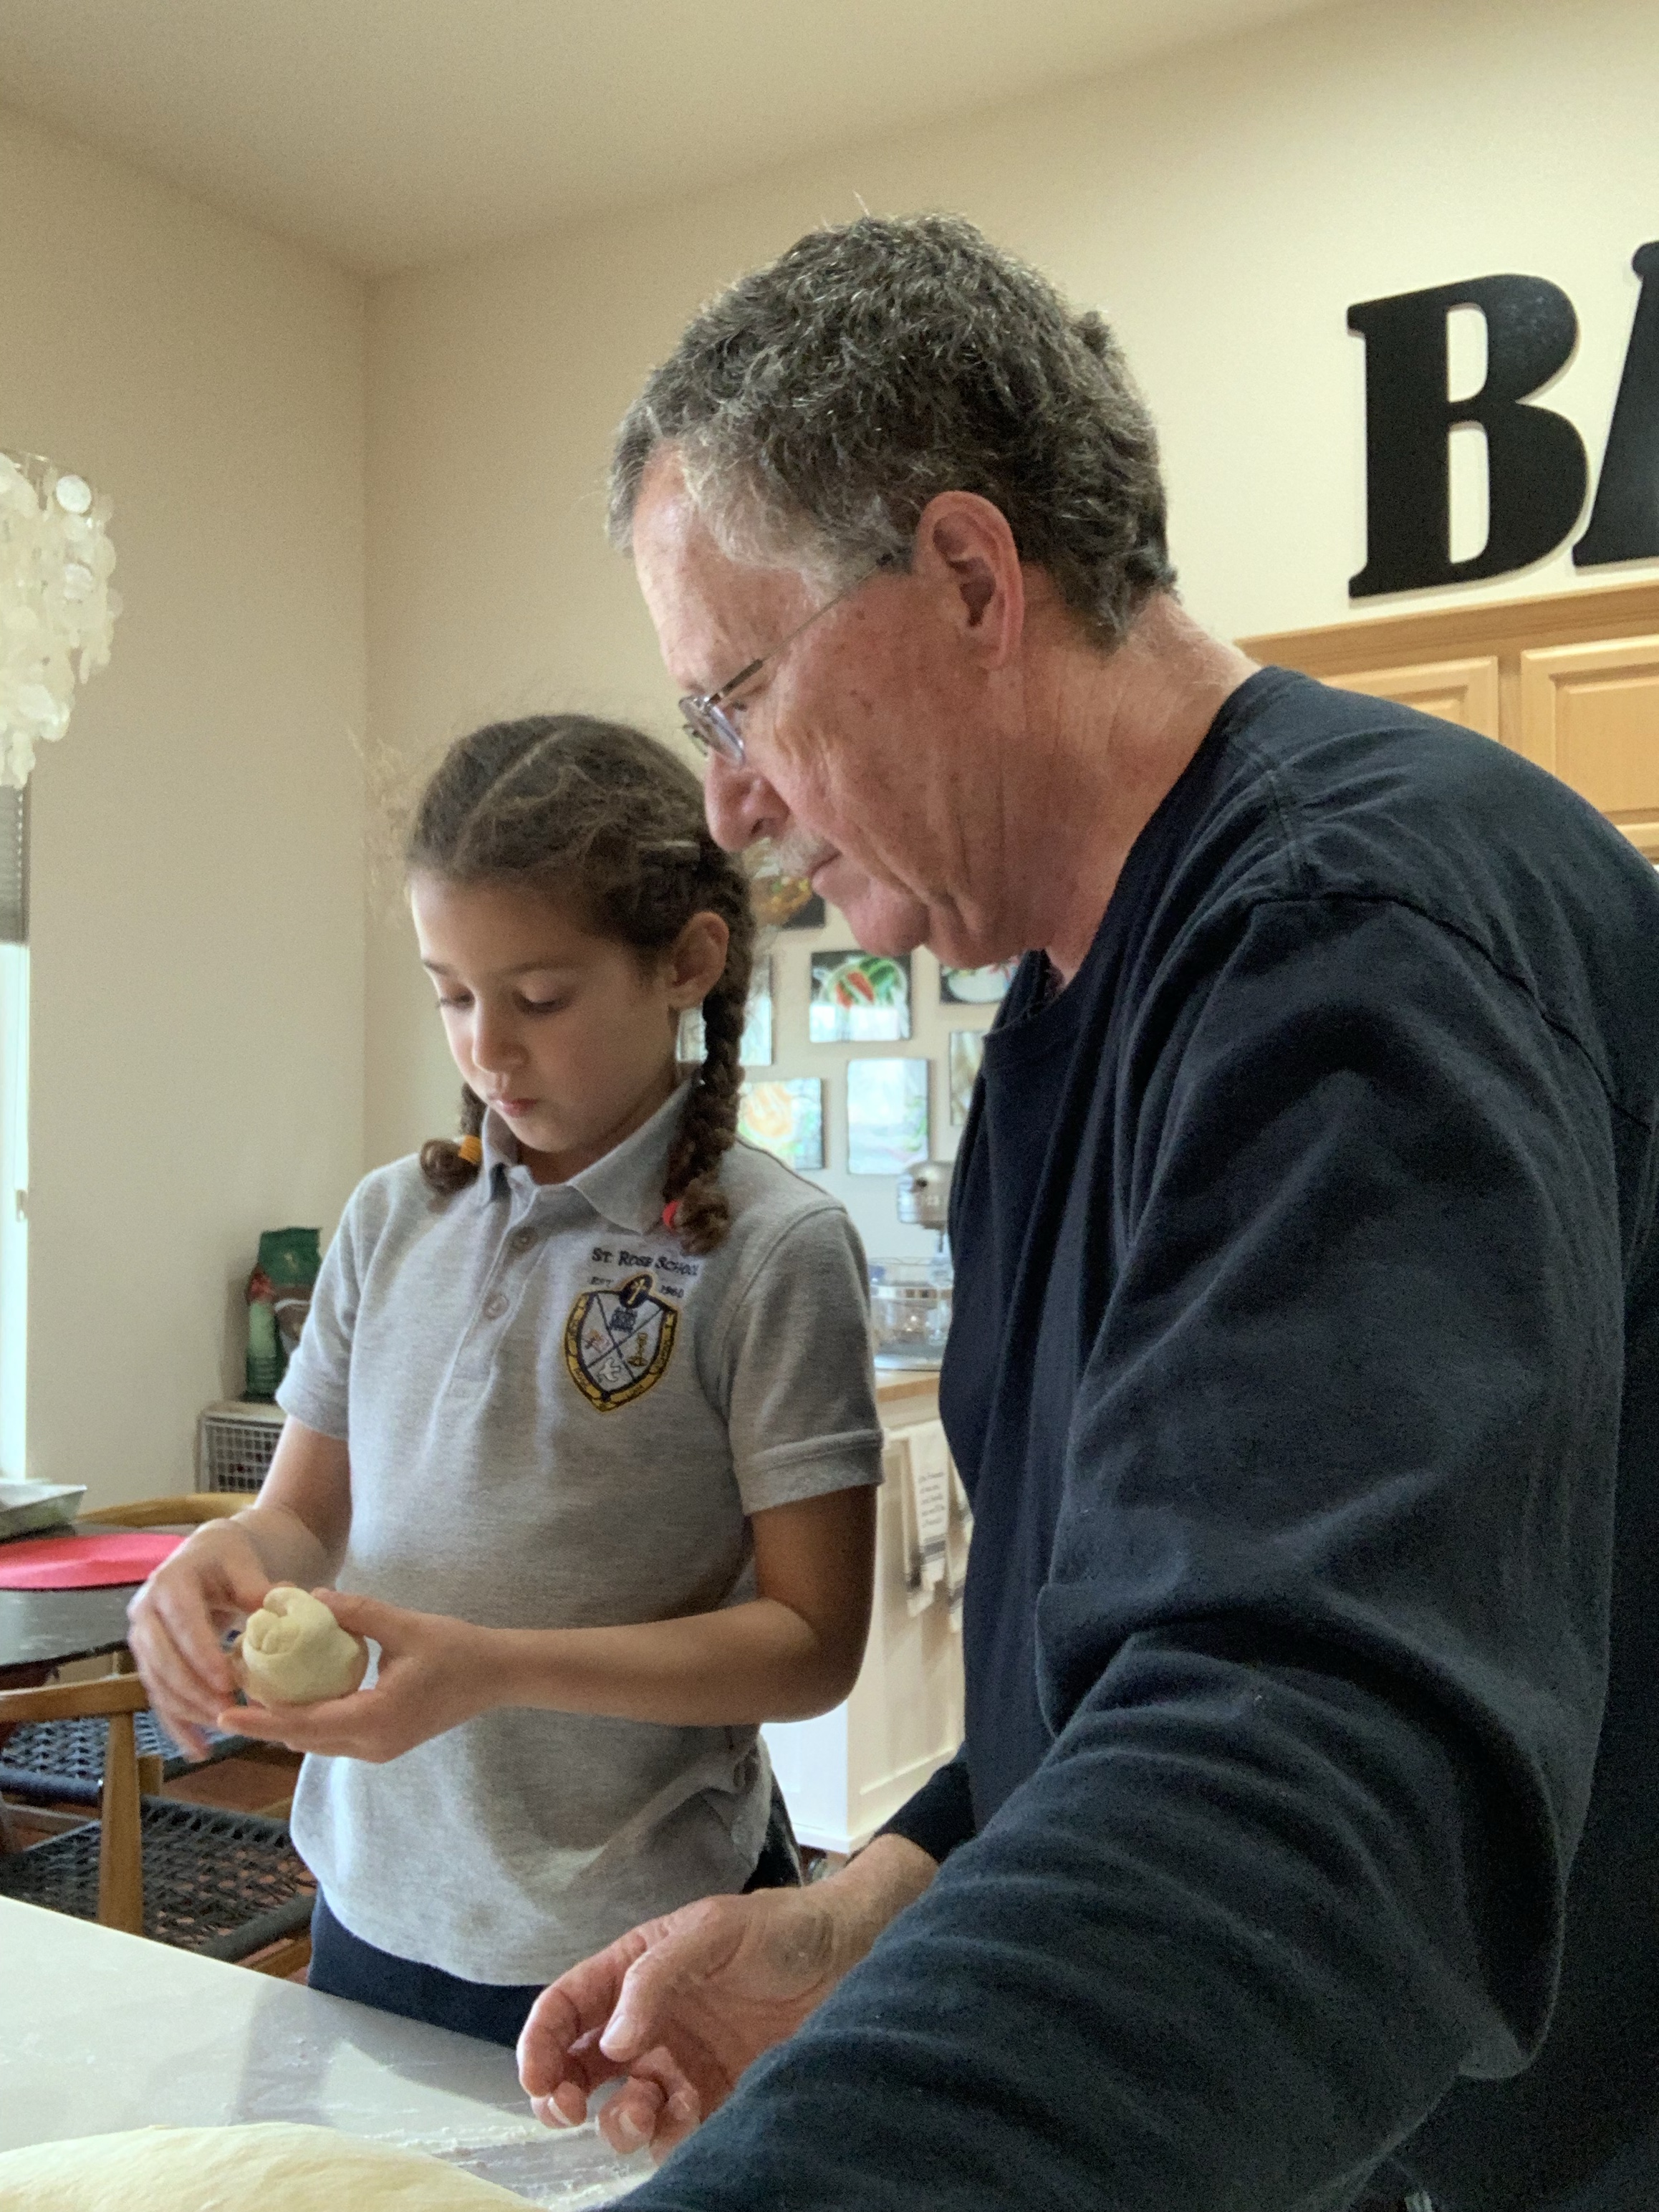
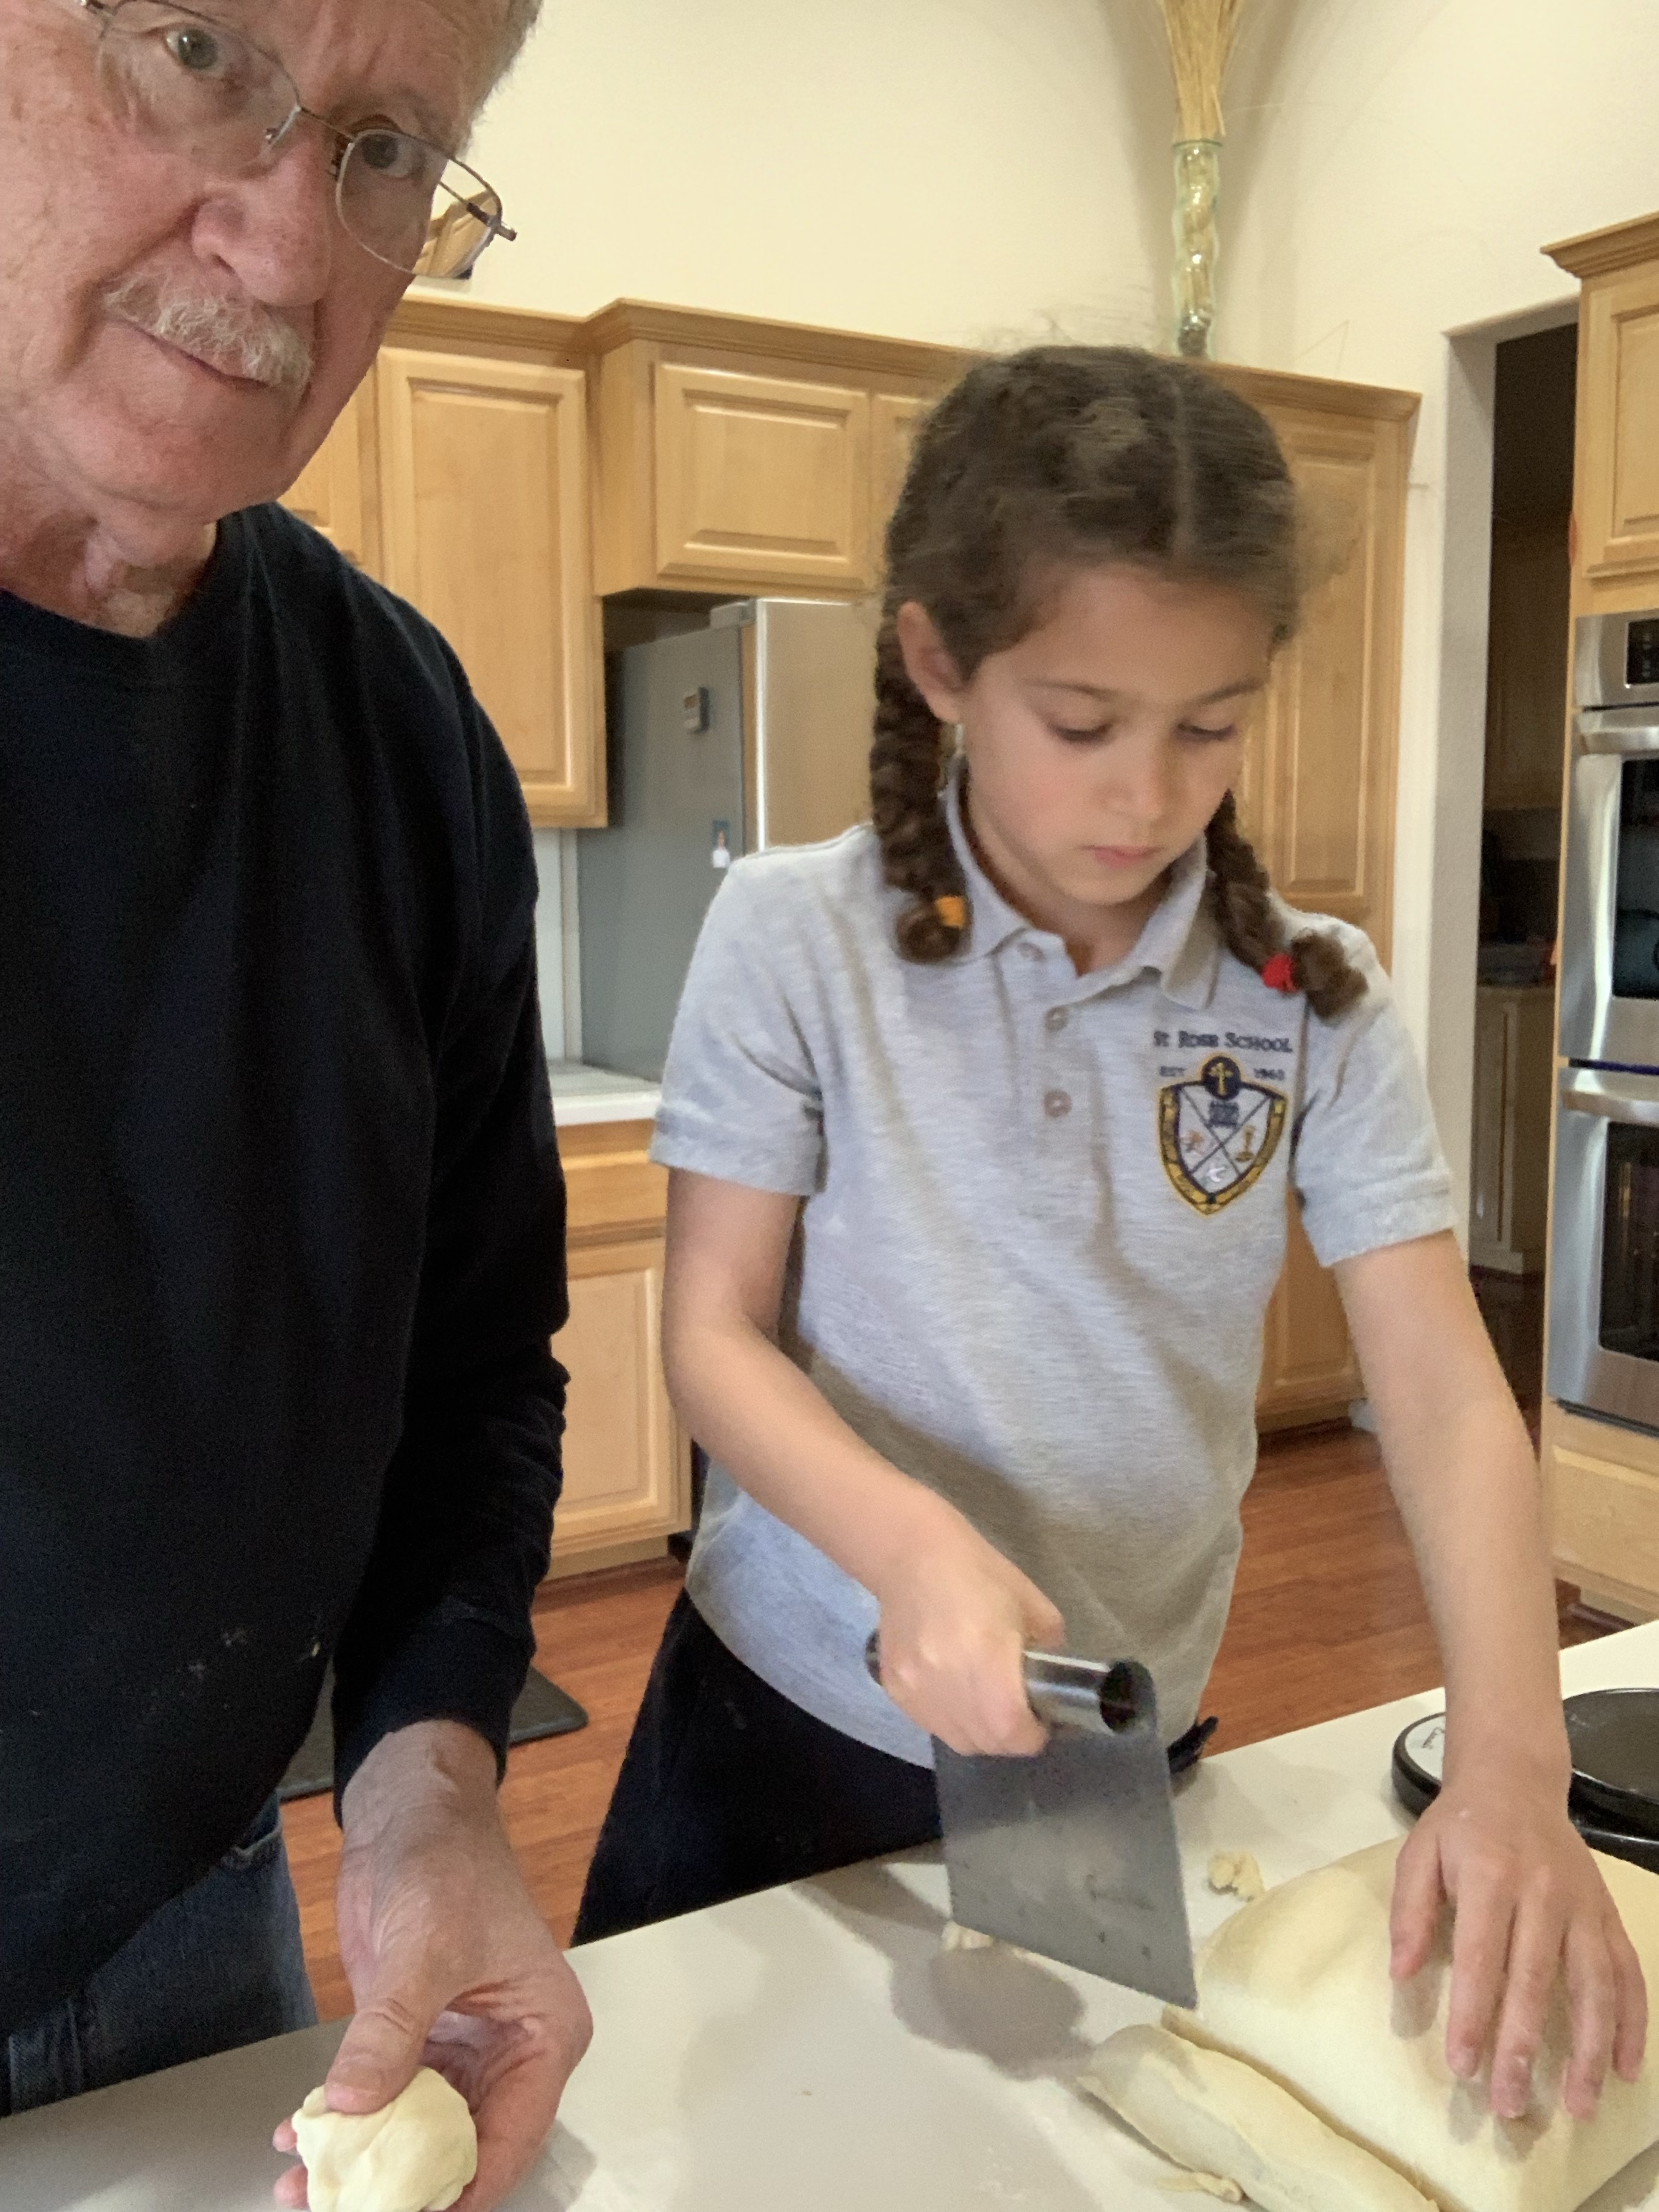
I showed Grace how to cut the dough into small portions (68 g for this recipe) using a bench chopper. It took her a few try’s to figure out when to add or subtract dough from what was on the scale. When I say a few, I mean very few. Three or four tries and she could cut 68 g portions in seconds.
Baking duo! ❤️
She tried to form dough balls with her hands, but alas, at 5 years old this size dough ball was too large for her to handle. We ended up with her cutting and weighing, and me forming the balls. I like to stretch the dough by pulling the it from front to back with my thumbs, rotating and repeating. Pinch the rough backside together, place on a dry counter, cup your fingers over the ball and quickly roll around the counter top. This will smooth and tension the dough providing a great shaped roll.
Enriched Dinner Rolls
INGREDIENTS
• 488 g (2 cups) warm milk • 2 tablespoons instant dry yeast • 50 g white granulated sugar • 2 teaspoons salt • 6 tablespoons salted butter softened • 2 large eggs • 750 g all-purpose flour • 1 tablespoon melted butter
METHOD
In a stand mixer bowl, combine and mix all ingredients except the flour.
Add in 5 ½ cups of flour. Using a dough hook, turn the mixer on and increase speed slowly to keep the flour from flying all over. Slowly add the remaining flour until the dough pulls away from the sides of the bowl. (I watch the bottom of the bowl and add flour until the dough just comes clean from the bottom.) The dough mixture should be sticky and soft.
Transfer the dough to a lightly greased bowl. Cover and let rise 60 minutes, (until doubled.)
Punch down the dough and form into 24 rolls. (My dough weighed 1630 g therefore, each roll should be 68g.) Place in an 11×15” greased baking pan. Cover and let rise 45 – 60 min.
Preheat oven to 375 F. Bake the rolls for 12 to 14 minutes, until lightly browned. (The internal temperature reached 180 F.)
Remove rolls from oven and brush with melted butter. Best when served warm. To cool, let rest in the pan for 15 minutes then transfer to a wire rack. Once cooled completely, store in a plastic bag.
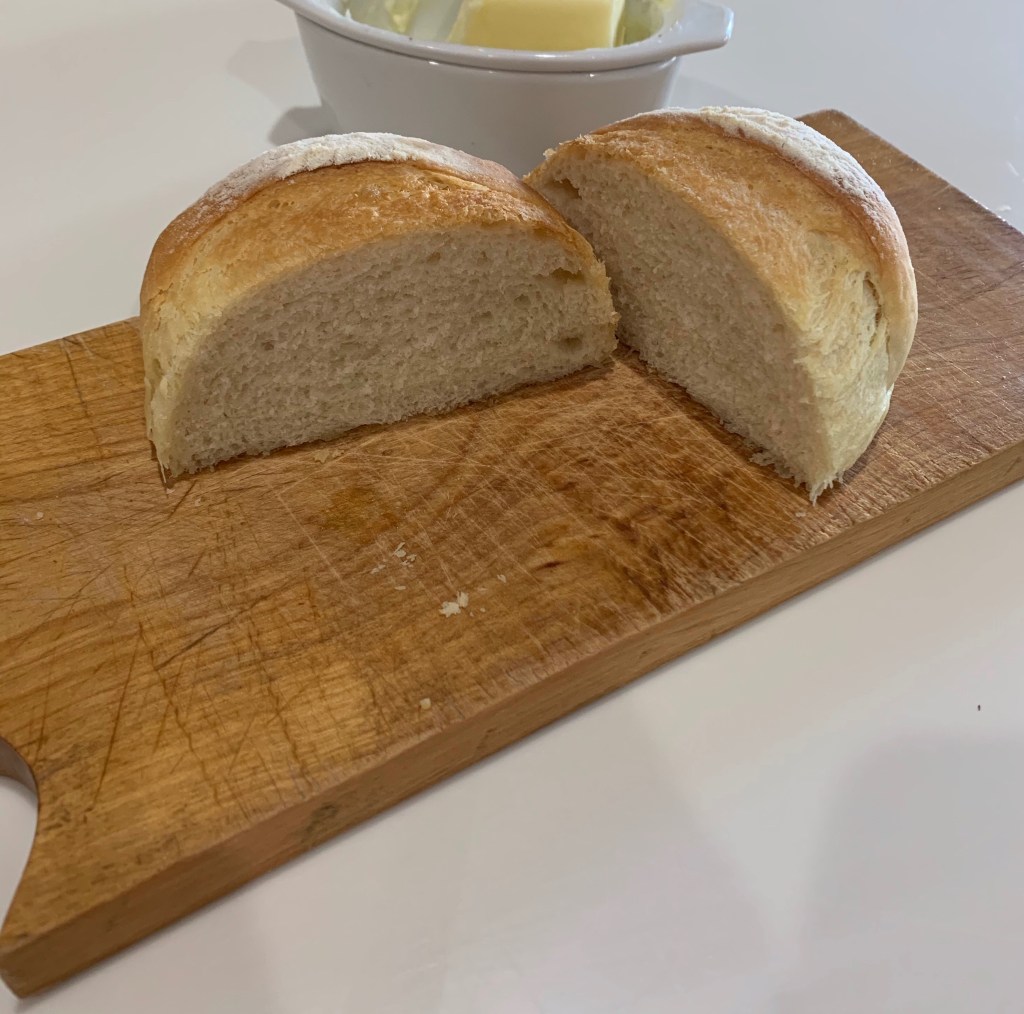
I saw this video on FB last week. A baker from Turkey demonstrated making these small, round, enriched bread loaves. The method was so simple and the final product so beautiful I couldn’t resist trying my hand.
The video was in the baker’s language, but it was captioned either with automatically created captions (I hope) or by someone who was very obviously neither a baker or a native English speaker. In honesty, the computer’s, or human translator’s, mastery of English is far better than my translation to any language other than igpay -atinlay.
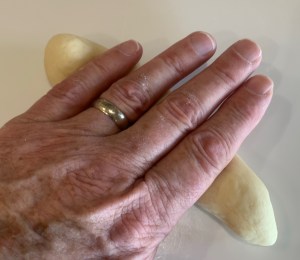
Luckily, and oddly, the recipe ingredients were listed below the video. Oddly in that they were listed in US and Metric units. The method was pretty standard and required little adjustment. I made a few modifications to the original recipe. I mixed and kneaded the down in my stand mixer, rather than my hand. I divided the dough into 7 pieces of 150g each. Next time, I will make each 175g and make 6 loaves as reflected below. This batch of loaves were 5” diameter and 2/5” high. I would like them a little bigger, maybe 6×3”.
The cutting board in this photo was made by my father, or me, I cannot remember, but it is still our day to day cutting board ‘lo these 40+ years.
Enriched Bread – Small Round Loaves
INGREDIENTS • 200 ml warm milk • 200 ml warm water • 10 g (1 Tbl) sugar • 10g (1 Tbl) instant yeast • 30 g (2 Tbl) melted butter • 600g (5 cups) flour • 8 g (1 tsp) salt • 25g butter cut in strips to lay on cut rolls before baking
METHOD
Add milk, water, sugar and yeast to the bowl of a stand mixer and mix until combined
Add 300 g flour,butter, salt and mix
Add remaining 300 g of flour and knead until a smooth dough forms, about 8 minutes.
Form the dough into a ball and place in an oiled bowl. (I spray olive oil into the stand mixer bowl.)
Cover and let rise for 45 min
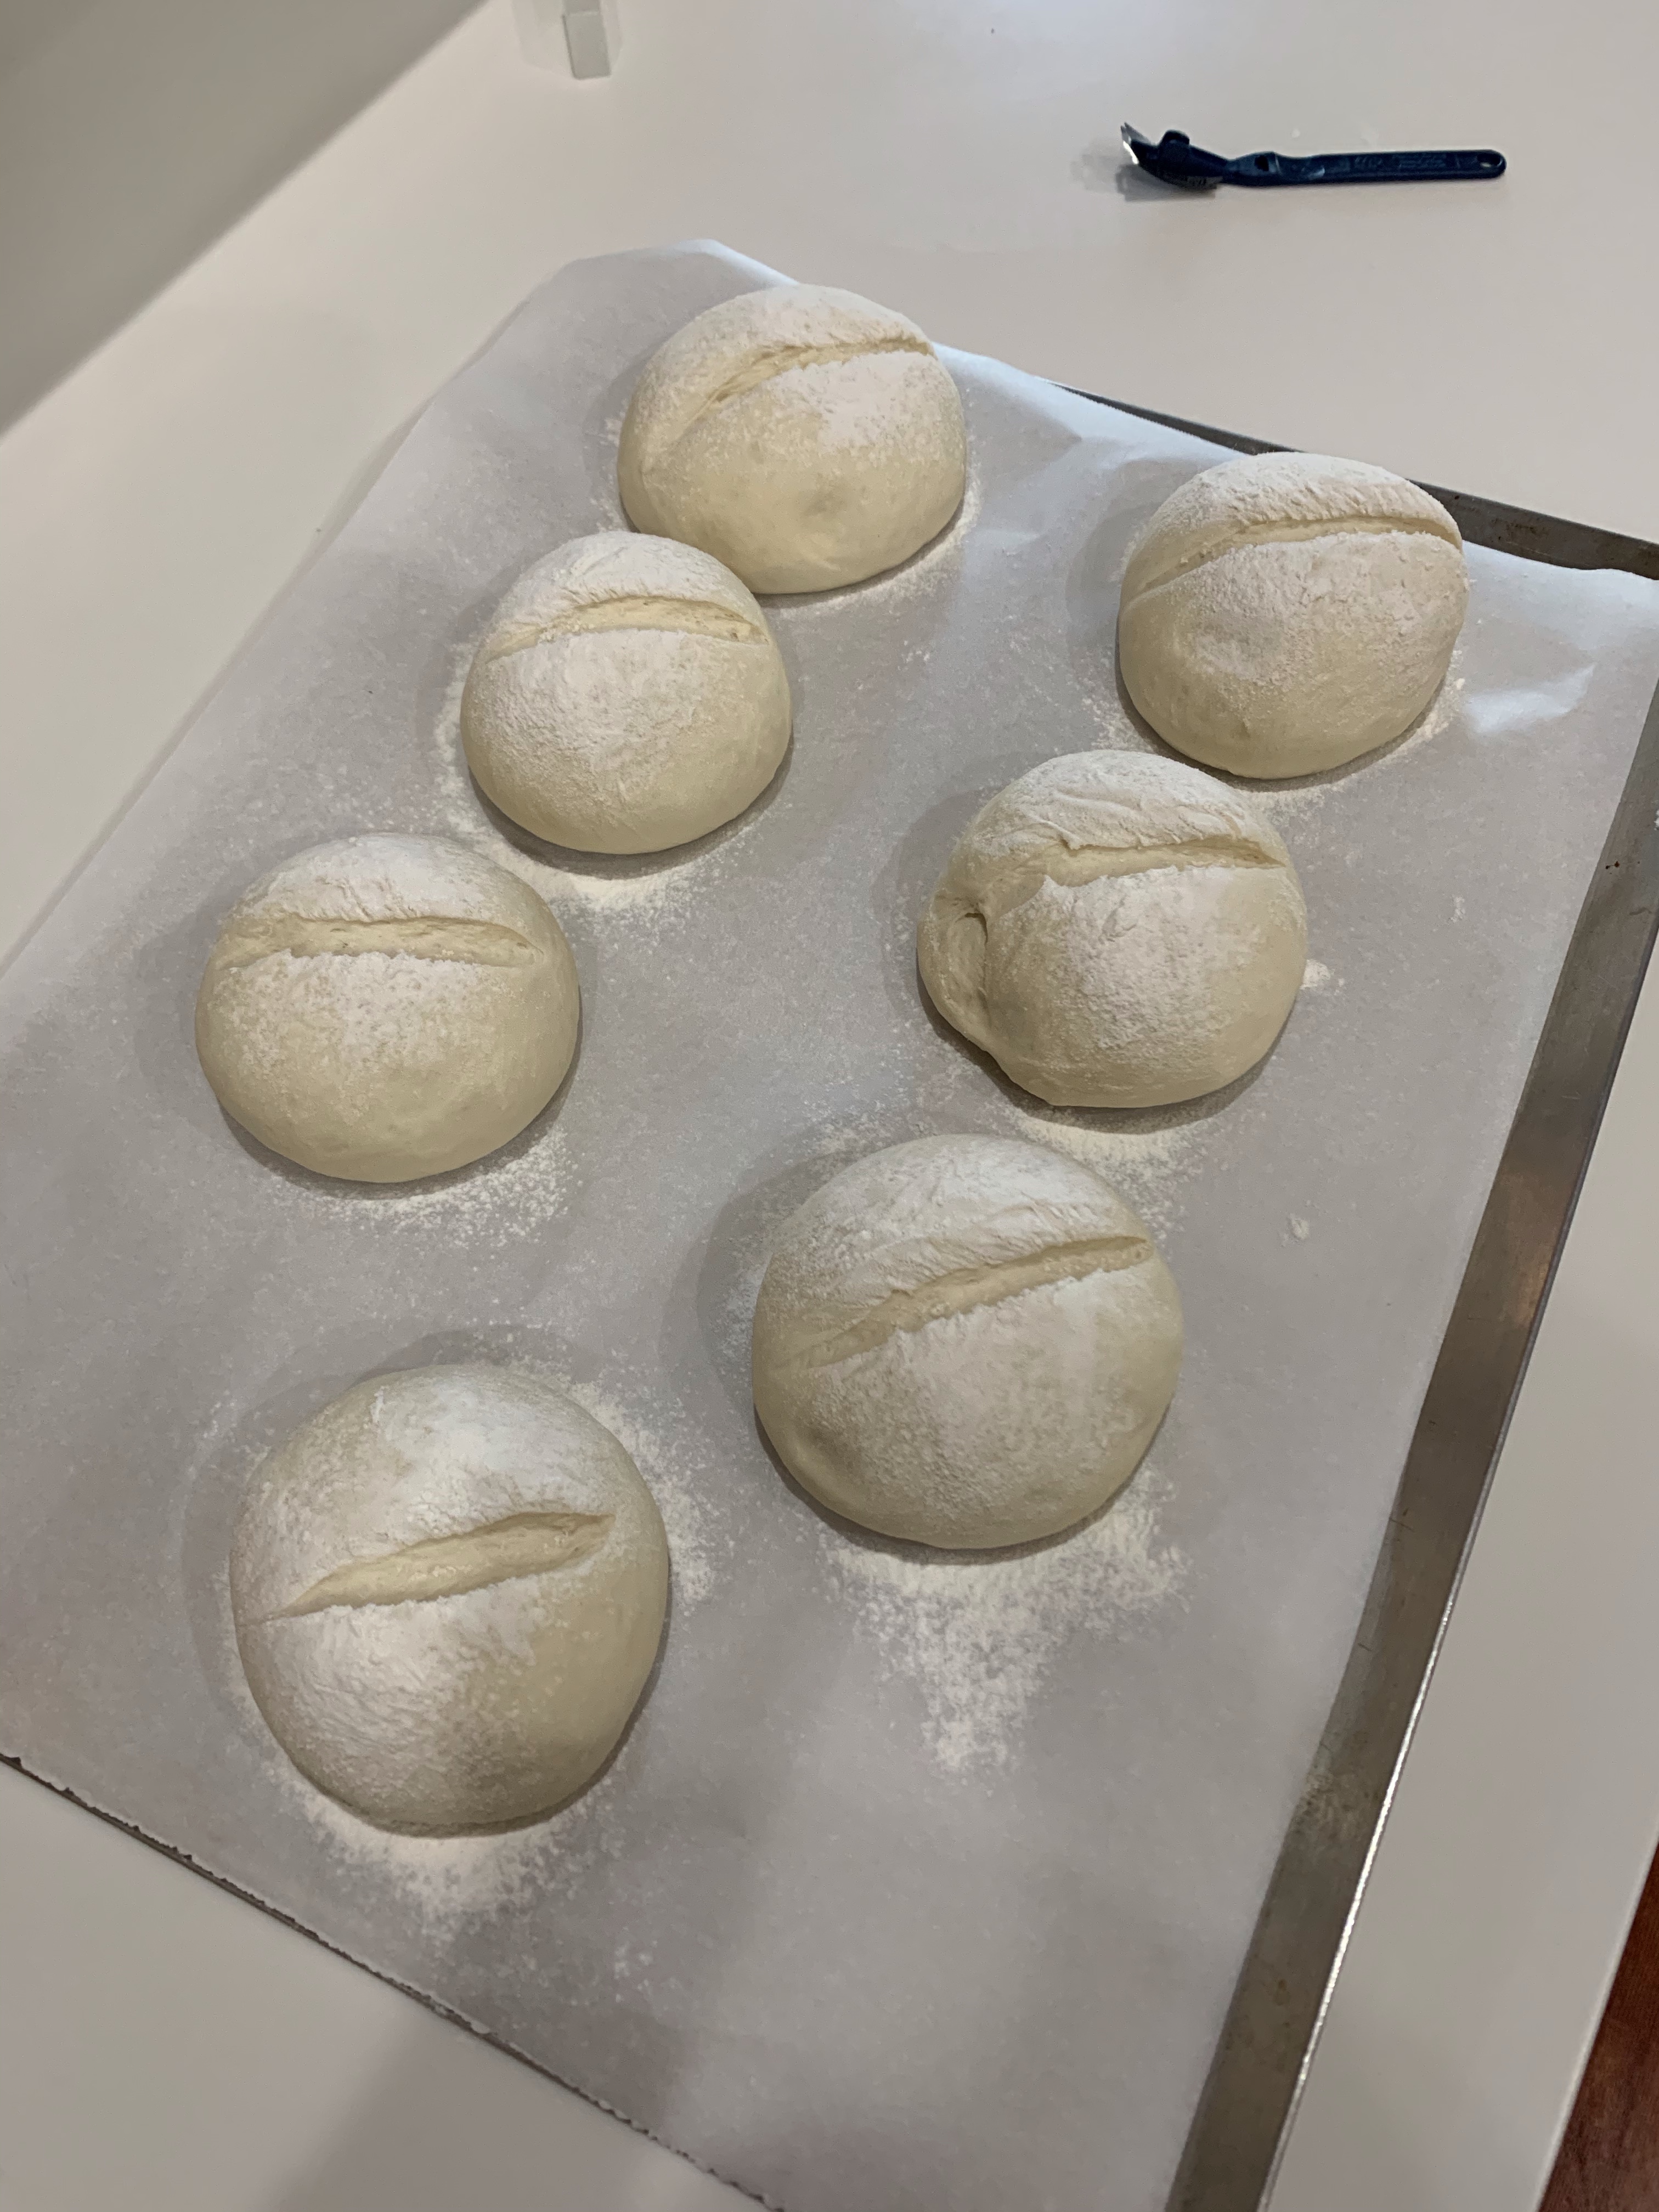
Gently deflate the dough and divide into six 175g pieces
Roll each piece into a ball, tensioning the surface by rolling with a cupped hand on a clean surface. Each ball should be approx 3” diameter
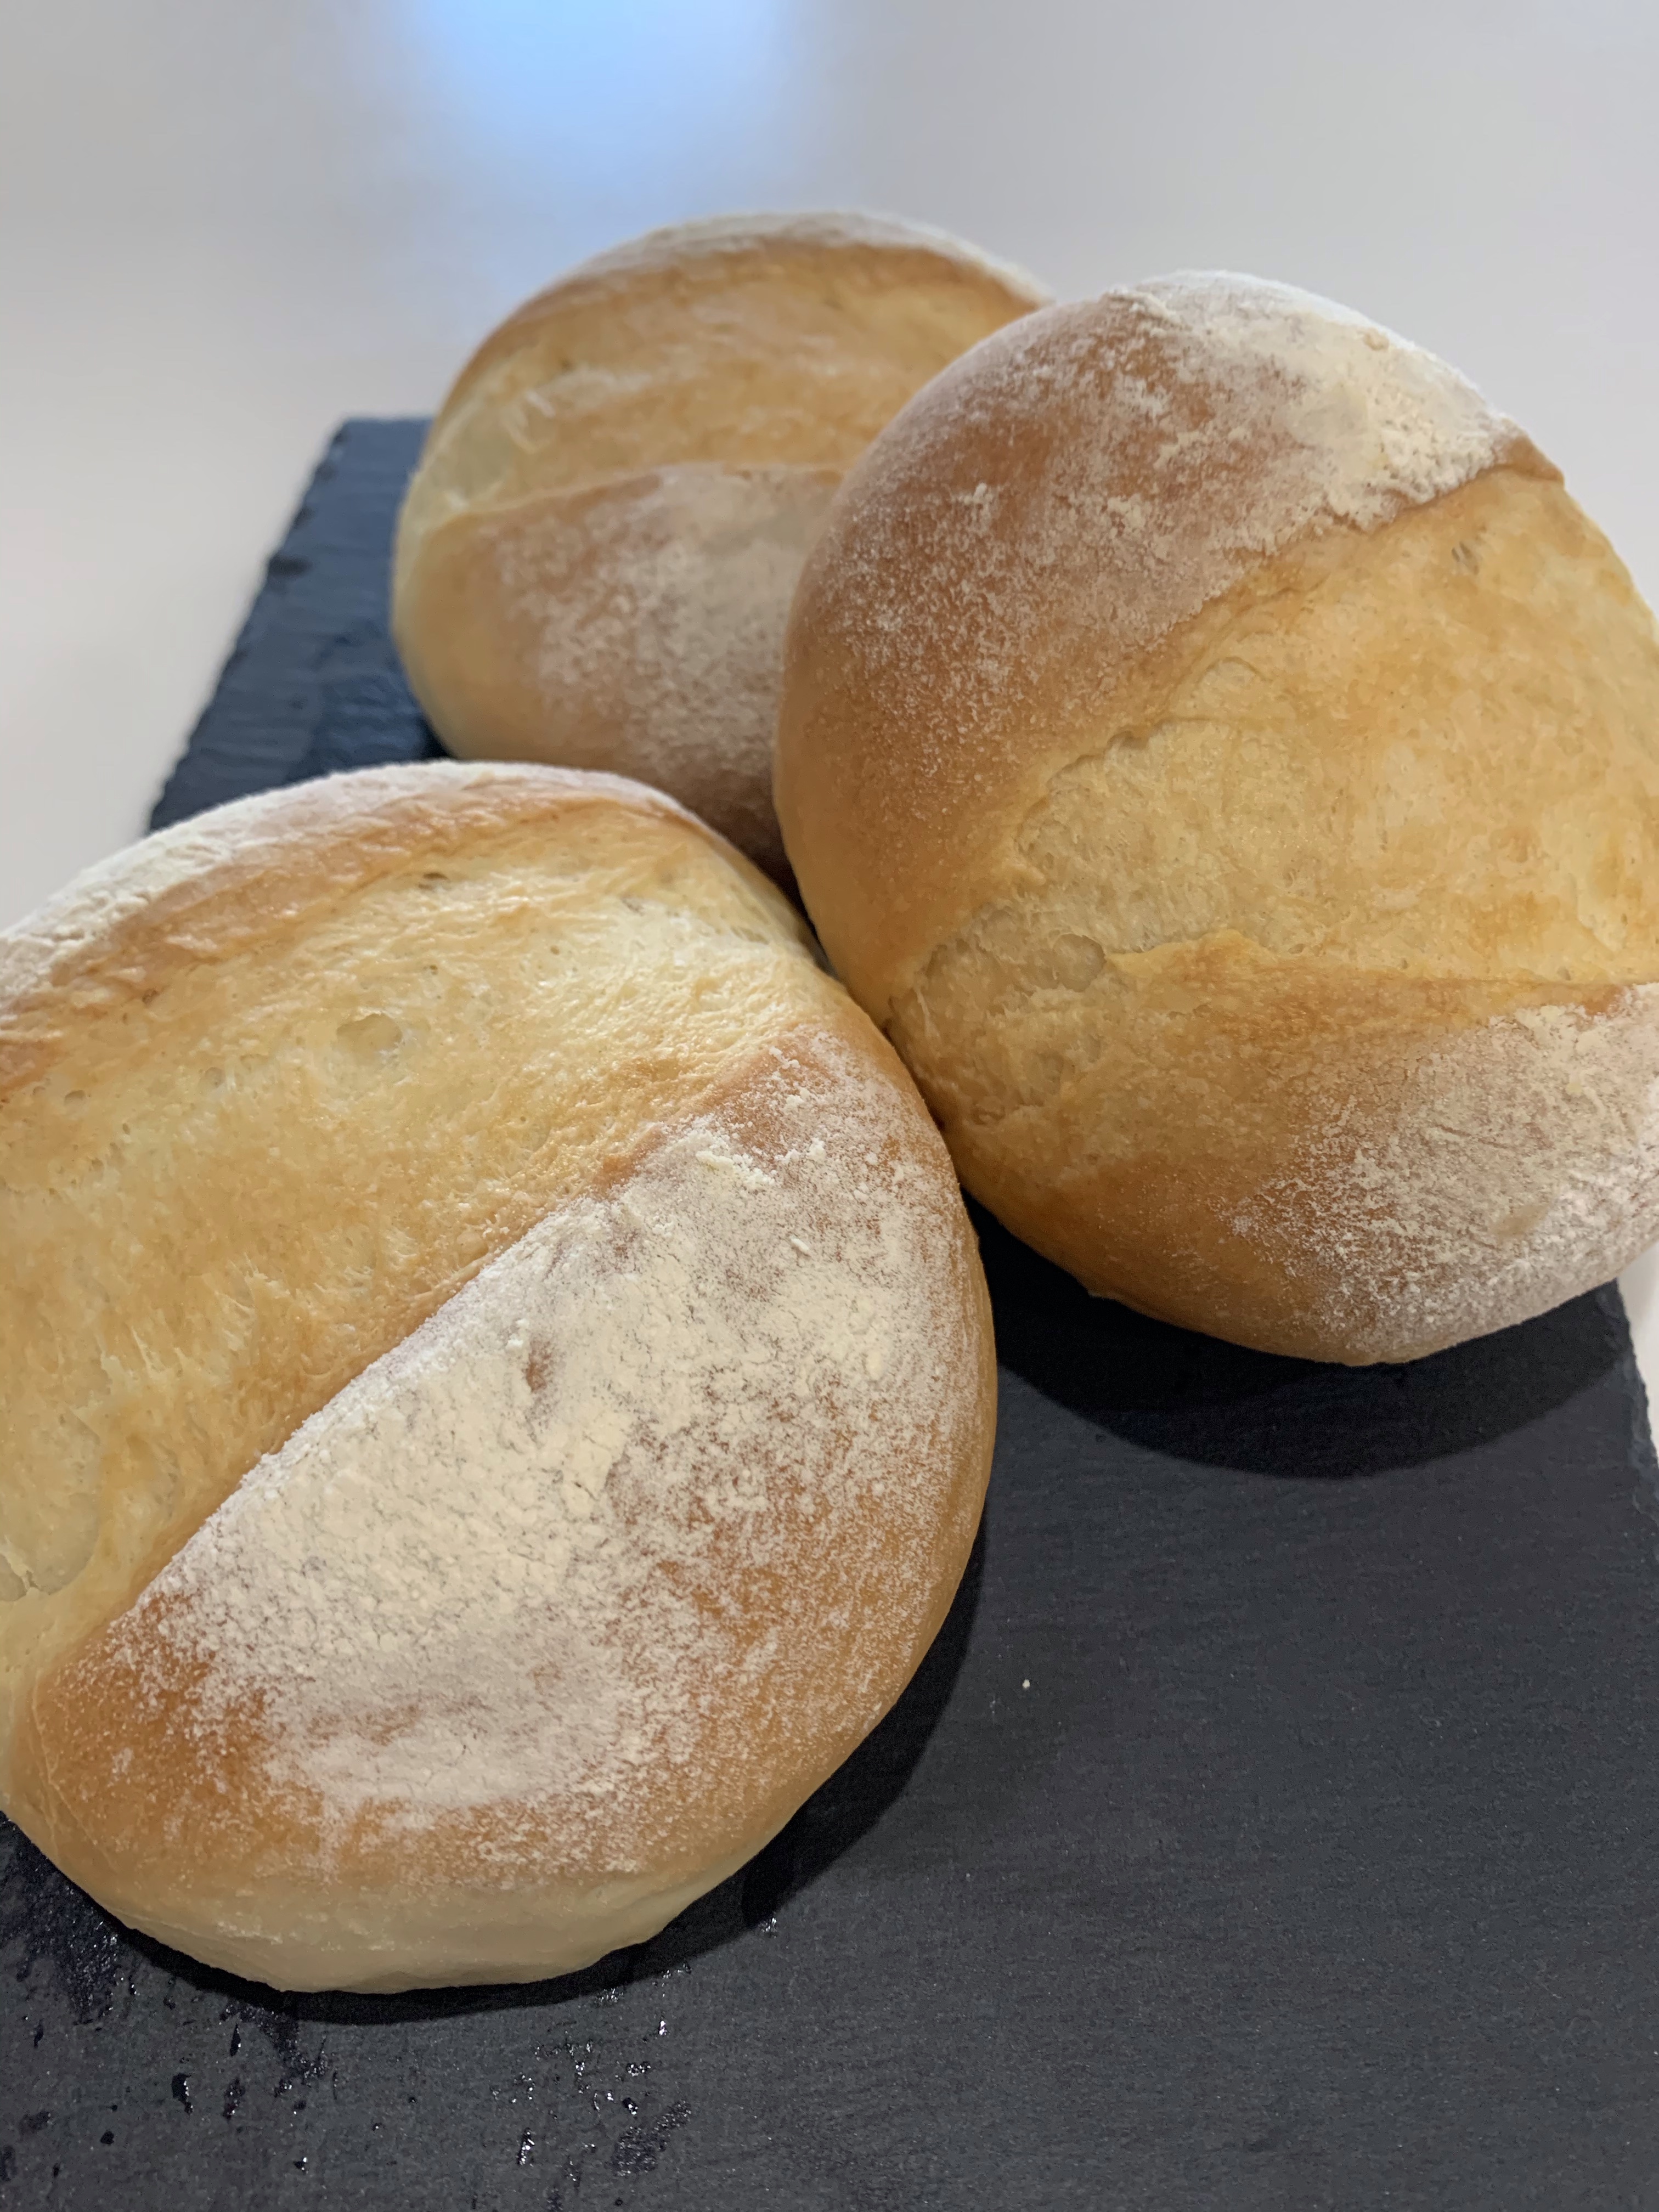
Pat each ball down to flatten and place, well spaced, on a parchment paper lined baking tray. Oven spring will double the size of the loaves
Cover and let rise for 15 – 20 minutes until it passes the poke test
Dust lightly with four, cut a deep slash all the way across the ball with a lame or razor blade or very sharp knife.
Lay a strip of butter, about 0.5”x0.5”x3” long in each slash. (Cut a stick of butter lengthwise into ninths.
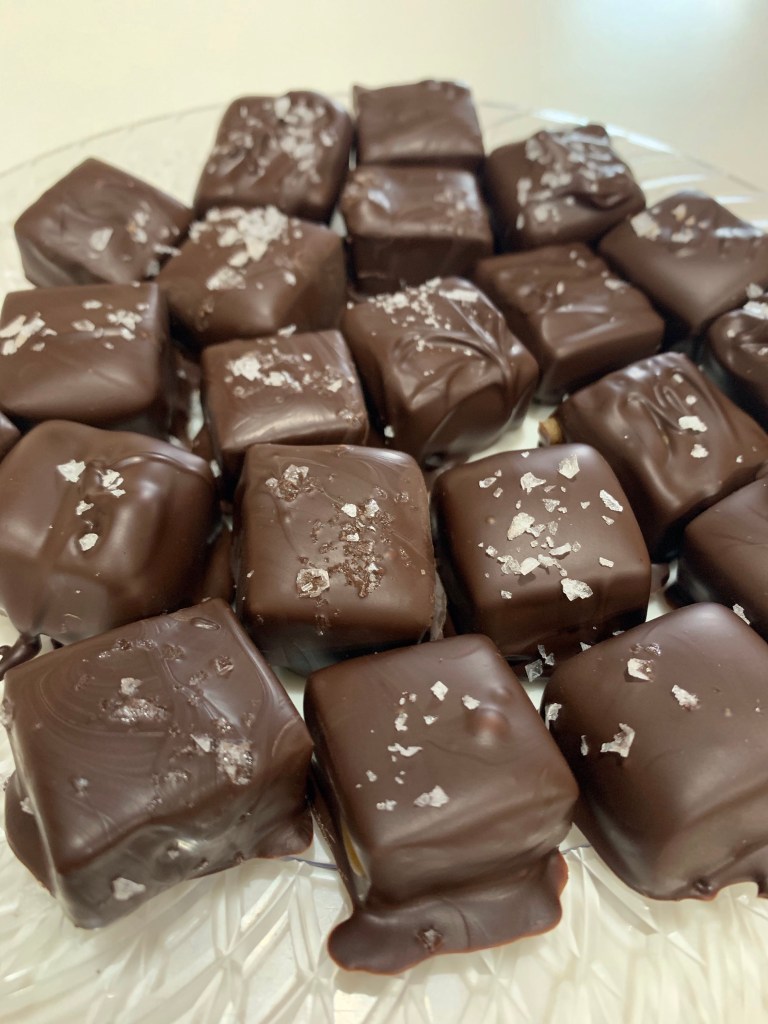
So, what do you do as you are waiting for your dinner rolls to proof? Well, If you have an 11 pound bag of chocolate, 60 pieces of 1”x1” caramel, making salted chocolate covered caramels is a good way to pass the time.
I cut the caramels a day ago, tempered the chocolate, dipped and drained the coated caramel and sprinkled some Maldon flaked sea salt on each.
The chocolates were setting as the first proof of the rolls completed. The proofed dough weighed 1,553 grams, so to make 24 rolls, each had to weigh about 63 g. I weighed each, formed them into a small ball and rolled them on the counter to tension the surface of the roll.
I arranged them 4×6 in a glass baking tray and baked at 375 deg until the internal temperature was 180 deg. (about 20 min.) Once out of the oven, a light brush with melted butter and boom. Excellent dinner rolls! The recipient and methods for both the dinner rolls and chocolates are found elsewhere in this blog.
I am sure most of you are experts at making and baking Parker House Rolls, but I saw a recipe from KAB a week before Thanksgiving and thought I would give them a try.
Making the enriched dough is pretty standard, although this recipe calls for 50g of potato flour. Substituted in any yeast bread potato flour increases the moisture content. Along with the egg and milk this results in a smoother enriched dough than you would expect from 55% hydration bread. (100* weight liquid/weight flour.)
Forming the rolls is what makes the Parker House Rolls distinctive. The dough is rolled out, folded and cut into 3” portions. (See METHOD below for exact steps.) Butter painted onto the inside of the rolled dough, plus the additional butter coating the finished product after baking makes these moist, tender and very buttery. Easy to do and delicious.
Cut lengthwise and folded
Measured and cut
Finished cutting
In the pan, loose edge down
Finished Rolls
Parker House Rolls
INGREDIENTS • 3 cups (361g) King Arthur Unbleached All-Purpose Flour • 2 ½ teaspoons instant yeast • 3 tablespoons (39g) sugar • 1 ¼ teaspoons salt • ¼ cup (50g) potato flour or 3/4 cup (50g) dried potato flakes • 3 tablespoons (43g) butter • 1 cup (227g) milk • 1 large egg • 3 ½ to 4 tablespoons (50g to 57g) butter, melted; for brushing on rolls
METHOD
In a large mixing bowl, or in the bowl of an electric mixer, combine all of the ingredients (except the 3 ½ to 4 tablespoons (50 to 57g) melted butter at the end), mixing to form a shaggy dough. Note: to speed the rising process, whisk together the milk and egg, and heat gently just enough to remove the refrigerator chill; then add to the remaining ingredients.
Knead the dough, by hand (10 minutes) or by machine (7 to 8 minutes) until it’s smooth.
Place the dough in a lightly greased bowl or 8-cup measure (so you can track its rising progress). Allow it to rise for 90 minutes; it’ll become quite puffy, though it probably won’t double in bulk. Note that the dough takes quite awhile to get going; after 1 hour, it may seem like it’s barely expanded at all. But during the last half hour, it rises more quickly.
Transfer the dough to a lightly greased work surface. Divide it in half. Working with one half at a time, roll or pat the dough into an 8″ x 12″ rectangle.
Brush the dough all over with a light coating of the melted butter. You’ll have butter left over; you’ll need it for the other half of the dough, as well as for brushing on top of the baked rolls.
Cut the dough in half lengthwise, to make two 4″ x 12″ rectangles. Working with one rectangle at a time, fold it lengthwise to about ½” of the other edge, so the bottom edge sticks out about ½” beyond the top edge. You’ll now have a rectangle that’s about 2 ¼ ” x 12″. Repeat with the other piece of dough.
Cut each of the rectangles crosswise into four 3″ pieces, making a total of 8 folded rolls, each about 2 ¼” x 3″. Flip the rolls over (so that their smooth non-folded side is facing up), and place them in a lightly greased 9″ x 13″ pan. Repeat with the remaining piece of dough, making 16 rolls in all. You’ll arrange 4 rows of 4 in the pan, with the longer side of the rolls going down the longer side of the pan. Gently flatten the rolls to pretty much cover the bottom of the pan.
Cover the pan, and let the rolls rise for about 45 minutes to 1 hour, until they’re puffy but definitely not doubled. Towards the end of the rising time, preheat the oven to 350°F.
Bake the rolls for 20 to 25 minutes, until they’re golden brown and feel set.
Remove them from the oven, and brush with the remaining melted butter. Pull them apart to serve.
I am not sure there is much better than a fresh, warm, chocolate babka. For anyone who is unfamiliar with this bread/pastry/cake I strongly suggest you don’t wait but either make or buy a loaf. Warning, this recipe could ruin you for store bought.
I was going to take a few pictures to illustrate how to make and shape a babka, but the woman who posted this recipe did a great job of it. https://prettysimplesweet.com/shaping-babka. Copy and paste this link into your browser for details.
INGREDIENTS For the dough: • 3¾ cups (530 g) all-purpose flour , plus extra for dusting • ½ cup (100 g) granulated sugar • 1 tablespoon (10g) instant yeast • 3 large eggs • ½ cup (120 ml) water • ¾ teaspoon fine sea salt • ⅔ cup (150 g) unsalted butter , at room temperature, cut into small cubes • Neutral oil (sunflower, canola) for dressing For the chocolate filling: • ½ cup (50 g) powdered sugar • ⅓ cup (30 g) unsweetened cocoa powder • 130 g dark chocolate , melted* • ½ cup (120 g) unsalted butter , melted • ⅔ cup (120 g) chocolate chips or chunks OR 1 cup (100g/3.5oz) pecans, coarsely chopped (optional) For the sugar syrup: • ½ cup (120ml) water • ½ cup (100g) granulated sugar
METHOD Making the dough:
Place flour, sugar, and yeast in a standing mixer fitted with the dough hook and mix on low speed until combined. Add eggs and water, and mix on medium speed until dough comes together, 2-3 minutes. Add salt, then butter, adding a few cubes at a time, mixing until incorporated. Continue mixing for about 10 minutes on medium speed, until dough is completely smooth, elastic, shiny, and pulls away from the sides of the bowl. During mixing, you will need to scrape down the sides of the bowl.
Place dough in a large bowl brushed with oil, cover with plastic wrap, and leave in the fridge for at least half a day or overnight.
Grease two loaf pans (9×4 inch) with oil and line the bottom of each pan with parchment paper. Divide dough in half and keep one half covered in the fridge. Making the filling:
Whisk together powdered sugar, cocoa powder, chocolate, and butter until you have a spreadable paste.
Roll out dough on a lightly floured surface and shape into a rectangle measuring 15×11 inches. Position dough so that a long side is closest to you. Using an offset spatula, spread half of the chocolate mixture over the rectangle, leaving a ¾ inch border all around. Sprinkle half of the pecans or chocolate chips on top of the chocolate. Shaping the dough:
Use both hands to roll up the rectangle like a roulade, starting from the long side closest to you and ending at the other long end. Press to seal the dampened end onto the roulade, then use both hands to even out the roll into a perfect thick cigar. Rest the cigar on its seam.
Trim about ¾ inch off both ends of the roulade with a serrated knife. Then use the knife to gently cut the roll in half lengthwise, starting at the top and finishing at the seam, essentially dividing the log into two long even halves, with the layers of dough and filling visible along the length of both halves. With the cut sides facing up, gently press together one end of each half, then lift the right half over the left half. Repeat this process, but this time lifting the left half over the right, to create a simple two-pronged plait. Gently squeeze together the other ends so that you are left with the two halves, intertwined, showing the filling on top. Carefully lift the cake into a loaf pan. Don’t worry if there are gaps in the pan since the cake will rise and will eventually look fine, even if you feel like it’s messy at this point. Cover the pan loosely with plastic wrap or a wet tea towel and leave to rise in a warm place for 1 to 1½ hours. Repeat to make the second cake.
Preheat oven to 375°F/190°C, making sure to allow plenty of time for it to heat fully before the cakes have finished rising. Remove plastic wrap or tea towels, place cakes on middle rack of oven, and bake for about 25-30 minutes, until a skewer inserted into the center comes out clean with no dough attached.
While the cakes are in the oven, make the syrup. In a small saucepan over medium heat, bring water and sugar to a boil. As soon as the sugar dissolves, remove from heat and set aside to cool. As soon as the cakes come out of the oven, brush the syrup over them. Use all of the syrup, even if it looks a lot. Let cakes cool until they are warm, then remove from pans and let cool completely before serving. Serve warm or at room temperature.
Babka will stay fresh for 24 hours in an airtight container at room temperature. Don’t place in the fridge.
Babka freezes well for up to 2 months. To thaw, leave on counter or overnight in the fridge.
Recipe Notes
To melt butter and chocolate, place them in a heat-proof bowl, and heat in the microwave in 20 second-intervals, stirring in between each interval, until melted and smooth (or alternatively, set it over a saucepan of simmering water, stirring occasionally).
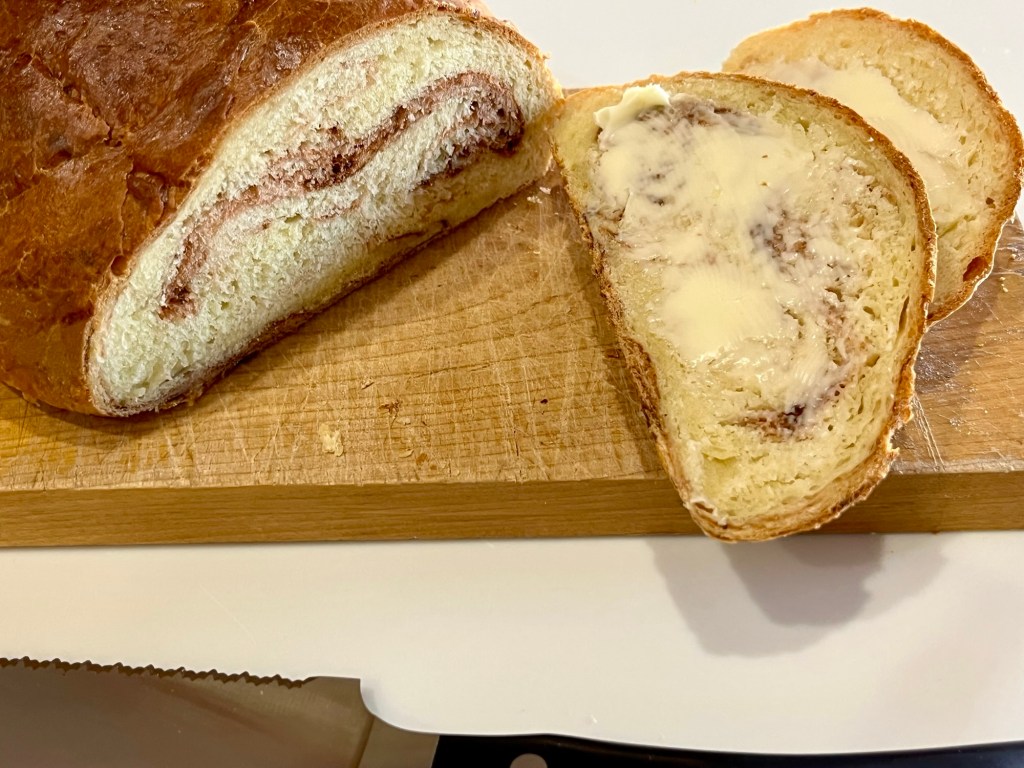
Tangzhong was developed in Asia and used in both China and Japan as a method of keeping bread soft and fresh. Tangzhong is a mixture of flour, water and milk, heated while stirring until the “water roux” thickens. The tangzhong is added to the rest of the ingredients and processed more or less normally. The result is a soft, pillowy white bread (see how I cleverly incorporated the title into the body of this post?)
L: Rolling Log – R: Rolled Logs in Bread Pan
I found the rise and proofing times were much longer that suggested in the recipes. I thought my yeast may have lost potency so I tested it in a water/sugar solution. (1/2 cup water @ 110-115F, 1 tsp sugar, 2 1/4 tsp yeast. Mix and after 10 minutes the mixture should have grown to 1 cup. It was fine. The problem is I now had the beginnings of another bread/pastry or something. QA Department to the rescue—See subsequent post on cinnamon rolls.)
L: Timer set to 10 Min Mixture at 1/2 cup — R: After 10 Min – Mixture at 1 cup — The yeast is good!
The long proof times were likely due to the cooler temperatures in the kitchen today. (It was only 62F when I started.)
L: Finished Loaf – R: Sliced for Sandwiches (and QA)
Combine all of the ingredients in a small saucepan, and whisk until no lumps remain.
Place the saucepan over low heat and cook the mixture, whisking constantly, until thick and the whisk leaves lines on the bottom of the pan, about 3 to 5 minutes.
Transfer the tangzhong to a small mixing bowl or measuring cup and let it cool to lukewarm. Dough
Combine the tangzhong with the remaining dough ingredients, then mix and knead — by mixer or bread machine — until a smooth, elastic dough forms; this could take almost 15 minutes in a stand mixer.
Shape the dough into a ball, and let it rest in a lightly greased bowl, covered, for 60 to 90 minutes, until puffy but not necessarily doubled in bulk. (120 min in cool kitchen)
Gently deflate the dough and divide it into four equal pieces; if you have a scale each piece will weigh between 170g and 175g.
Flatten each piece of dough into a 5″ x 8″ rectangle, then fold the short ends in towards one another like a letter. Flatten the folded pieces into rectangles again (this time about 3″ x 6″) and, starting with a short end, roll them each into a 4″ log.
Place the logs — seam side down and side by side — in a lightly greased 9″ x 5″ loaf pan.
Cover the loaf and allow it to rest/rise for 40 to 60 minutes, until puffy. (I put the dough into a proofing oven for this and let it rise until the tops of the rolls were even with the top of the pan.)
Towards the end of the rising time, preheat the oven to 350°F.
Brush the loaf with milk and bake it for 30 to 35 minutes, until it’s golden brown on top and a digital thermometer inserted into the center reads at least 190°F.
Remove the loaf from the oven and cool it in the pan until you can transfer it safely to a rack to cool completely.
Store leftover bread, well wrapped, at cool room temperature for 5 to 7 days; freeze for longer storage.