Chewy Caramel Center

I love the holiday season! It’s one of the times of the year I can bake and experiment—nearly guilt free. Of course, I will pay for it starting after  the New Year.

2A39C5BC-5D6C-4215-B679-9A18FB58A700Last week I made hard caramels and embedded them them in tempered dark chocolate. They were fine, but what I really wanted were the soft caramel center and chocolate that melts in your mouth. I ticked all the boxes this morning.


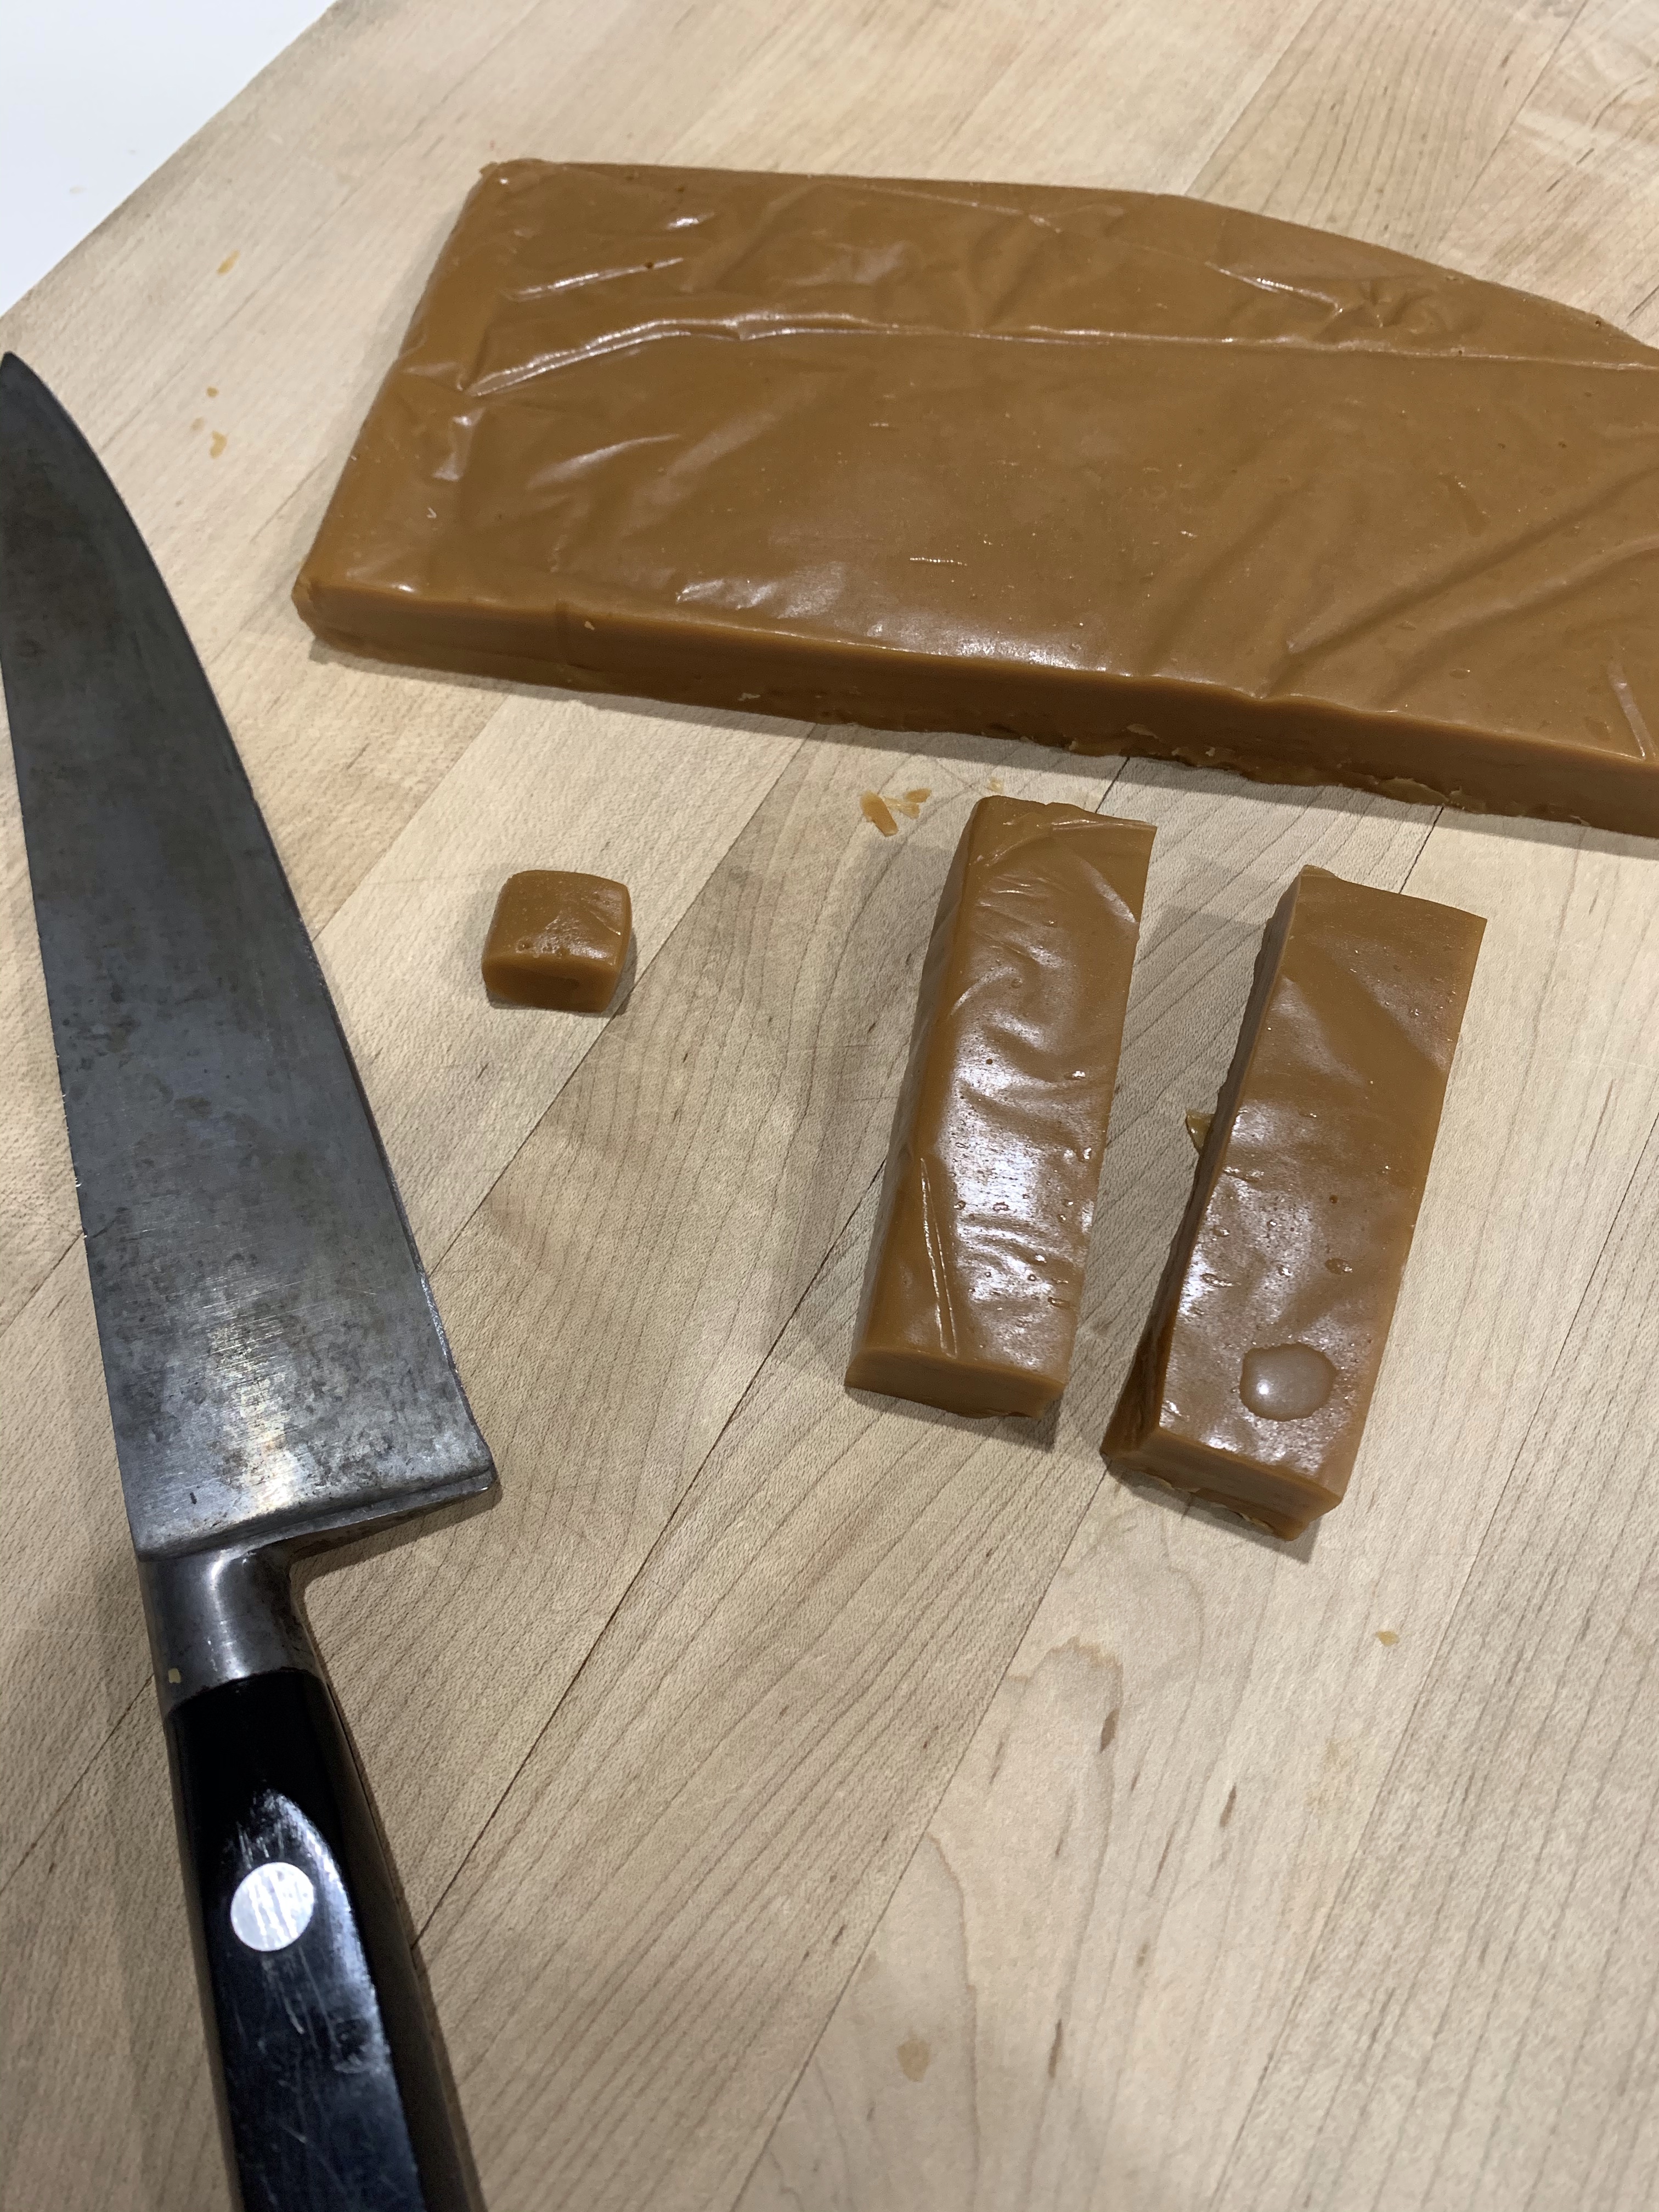
I actually made the caramels last night and left them out to firm up overnight. This morning, they were pliable but firm enough to to hold their shape when cut. I ended up with about 80 one inch square, 1/4” thick squares of caramel.

Be sure to only cook the caramel to 237 degrees F, not 235 or 239, otherwise they will be too soft and not hold their shape, or to hard and chewy.

I used 67% cacao dark chocolate. I am going to try 52% semi sweet next time.

INGREDIENTS

  • 2 Cups Sugar
  • 1 Stick (½ cup) Butter
  • 1 Cup (288g) White Corn Syrup
  • ½ Tsp Kosher Salt
  • 12 oz can Evaporated Milk

METHOD

  1. Put the ingredients into a thick bottomed pot and heat, stirring constantly, until it reaches 237 deg.
  2. Pour the molten caramel into a parchment paper lined 8”x8” pan. (Smaller pan for thicker caramels) DO NOT use waxed paper. Hot caramel sticks to waxed paper.
  3. There is some discussion about adding the evaporated milk. Some people say add slowly (I did) and others say it doesn’t matter. I added about an oz every minute for 12 minutes. It required about 30 min for the caramel to reach the 237 deg.

Santa Bread Baby!

I saw a recipe and tutorial on Food.net last week and thought it would be fun to make and take to a Christmas party we are going to. This bread recipe is a little sweeter than my usual making it taste a little like a Danish pastry. Plus two eggs in 4 cups or 500g AP flour yields a Challah sort of flavor.

The Food.net video tutorial was a great help in cutting and arranging Santas parts. (Search for Food.net Santa Bread.

The instructions they provided were spot on. Follow them and you will have no problems.

INGREDIENTS

  • 3/4 cup whole milk
  • Two packages active dry yeast (4 1/2 tsp)
  • 1/3 cup granulated sugar
  • 4 tablespoons unsalted butter, melted and cooled, plus more for greasing and serving
  • 3 large eggs, at room temperature
  • 4 cups all-purpose flour, plus more for dusting (see Cook’s Note)
  • 1 1/2 teaspoons kosher salt
  • 1 tablespoon heavy cream or whole milk
  • 20 drops red gel food coloring
  • 2 large chocolate chips
  • Confectioners’ sugar, for dusting

METHOD


  1. Heat the milk in a small saucepan until it just begins to simmer, then remove from the heat and let cool to 115 degrees F. Stir in the yeast and let stand until the mixture is foamy, about 10 minutes.
  2. Pour the yeast mixture into the bowl of stand mixer fitted with a dough hook. Add the sugar, butter and 2 of the eggs and stir until smooth. Add the flour and salt and mix on medium-low speed until the dough comes together. Increase the speed to medium high and knead until the dough is smooth and elastic, about 8 minutes. Transfer the dough to a lightly greased large bowl, cover with plastic wrap and let stand until the dough doubles in size, about 1 hour.
  3. Preheat the oven to 350 degrees F and line a rimless baking sheet with parchment.
  4. Turn the dough out onto a lightly floured work surface. Pinch off 1 golf ball-size piece of dough and roll it into a ball for the pompom of Santa’s hat. Pinch off 1 ping pong ball-size piece of dough and roll it into a ball for Santa’s nose. Cut off a 1-inch-wide, 9-inch-long, 1/4-inch-thick strip and roll it into a smooth log for the brim of Santa’s hat. Cut another piece of dough into a roughly 2-inch-wide, 5-inch-long, 1/4-inch-thick strip of dough. Snip evenly from the bottom (but not all the way up) and spread the strips out slightly to form a mustache.
  5. Roll out the remaining dough into an elongated diamond with the top triangle of the diamond double the length of the bottom triangle. Position the diamond on the prepared baking sheet with the top of the longer triangle hanging over the edge. Working on the shorter triangle, use scissors or a knife to cut 1/2-inch-wide strips of dough up toward the middle, stopping at the imaginary line where the top and bottom triangles meet. Pick up each strip of the beard and twist it, if you like, lying the twists down next to each other naturally so they look like a beard.
  6. Fold over the overhanging corner of dough so that it fits back within the edge of the baking sheet and position it slightly to the right to form the tip of Santa’s hat. Position the dough log across the top triangle where the tip of Santa’s hat ends and tuck the ends under the sides of the triangle; this is the brim of Santa’s hat. Position the golf ball-size ball of dough over the tip and against the brim and press lightly to adhere for the pompom of Santa’s hat. Arrange the mustache at the top of the beard, then position the ping pong ball-size ball of dough above the mustache to make Santa’s nose.
  7. Beat the remaining egg with the cream in a bowl to make an egg wash. Using a pastry brush, brush the entire surface of the dough, including the pompom and brim of the hat but not the body of the hat, with the plain egg wash, making sure to get into all the crevices of the shapes. Add the food coloring to the egg wash, stir to combine, then carefully brush the body of the hat with the red egg wash, being careful not to let it stain the pompom or brim.
  8. Bake until the bread is golden brown and cooked through, about 20 minutes. Remove from the oven and immediately set the chocolate chips proportionally on either side and slightly above Santa’s nose to form his eyes. Let the bread cool for 10 minutes on the baking sheet, and then transfer to a wire rack. Using cut pieces of parchment paper or foil to shield Santa’s nose, face and the body of his hat, dust the beard, brim and pompom with confectioners’ sugar. Remove the paper and serve the bread while still warm with butter.

Caramel on the Bay

It’s that time of year again. No, not a trip to Carmel, it’s time for chocolate covered caramel candies. I made a single recipe and formed it into a block 8”x8”x0.75”.

The block was cut into strips, about 1”x4” and those in turn were cut into small pieces for incorporation into the tempered chocolate. I have several silicone molds that require different sized caramels.

Each well of the mold was filled (about 4 at a time) and a piece of caramel was pushed into the well and covered. Once the chocolate hardened the excess was scraped off.

The extra caramel was cut into small pieces, wrapped in wax paper to be eaten, or given away.

CARAMELS

INGREDIENTS

  • 1 cup butter
  • 1 pound brown sugar (2 cups)
  • dash salt
  • 1 cup (288g) light corn syrup
  • 14 oz can sweetened condensed milk
  • 1 tsp vanilla

METHOD

  1. Melt the butter in 3 quart or larger saucepan.
  2. Add the brown sugar and salt and combine. Stir in the corn syrup, mix well.
  3. Gradually add the sweetened condensed milk, stirring constantly.
  4. Cook and stir over medium heat to firm ball stage (245°F) for harder caramels, 240°F for softer.
  5. Remove from heat, stir in vanilla. Pour into 9×9″ parchment-lined pan.
  6. Cool, cut into pieces and wrap in wax paper.

Tempering Chocolate

Stir constantly during the steps and avoid having moisture from coming in direct contact with the chocolate:

  1. Melt chocolate, in a double boiler, to the following temperatures as measured with a chocolate thermometer: Dark 120°F, Milk 115°F, White 110°F.
  2. Cool chocolate to the following temperatures: Dark 82°F, Milk 80°F, White 78°F.
  3. Reheat chocolate to the following temperatures: Dark 90°F, Milk 86°F, White 82°F.

It is now tempered.

KEEP CHOCOLATE IN TEMPER: Ideal temperatures are: Dark 88-90°F, Milk 86-88 degrees F, and white 82-84°F. If the chocolate hardens, you must start the tempering process again.

WHEAT Blew the Referee’s Whistle

So, as I know everyone does, I was browsing YouTube bread baking video tutorials yesterday while watching college football. As often happens as I spun down the YouTube rabbit hole I did a google search for “light, airy, whole wheat bread” and I found MelsKitchenCafe.com.

Having a few hours before the NFL games start today I decided to give it a try. No surprise, I had all the ingredients in my baking supplies, including vital wheat gluten.

Finished loaf – note low rise and tight crumb.
I followed all Mel’s directions and was pleased when my results very closely matched her pictures. I did find that setting 1 or 2 on my KitchenAid mixer was too slow to efficiently mix or knead the dough, so I used 3. (For my white bread I usually knead at 4 or 6. Oddly, there are only even numbers on the speed scale.) Perhaps I knocked some air out of the dough by using a more aggressive knead.
Shaped loaf in bread pan
I left the dough a little slack hoping the extra hydration would increase the size of the holes and crumb would yields the light, airy bread I hoped for. (It didn’t.) The flavor is excellent and this recipe is worth trying again. Now, if you will excuse me I need to check that the cooled bread is every bit as good as the warm.