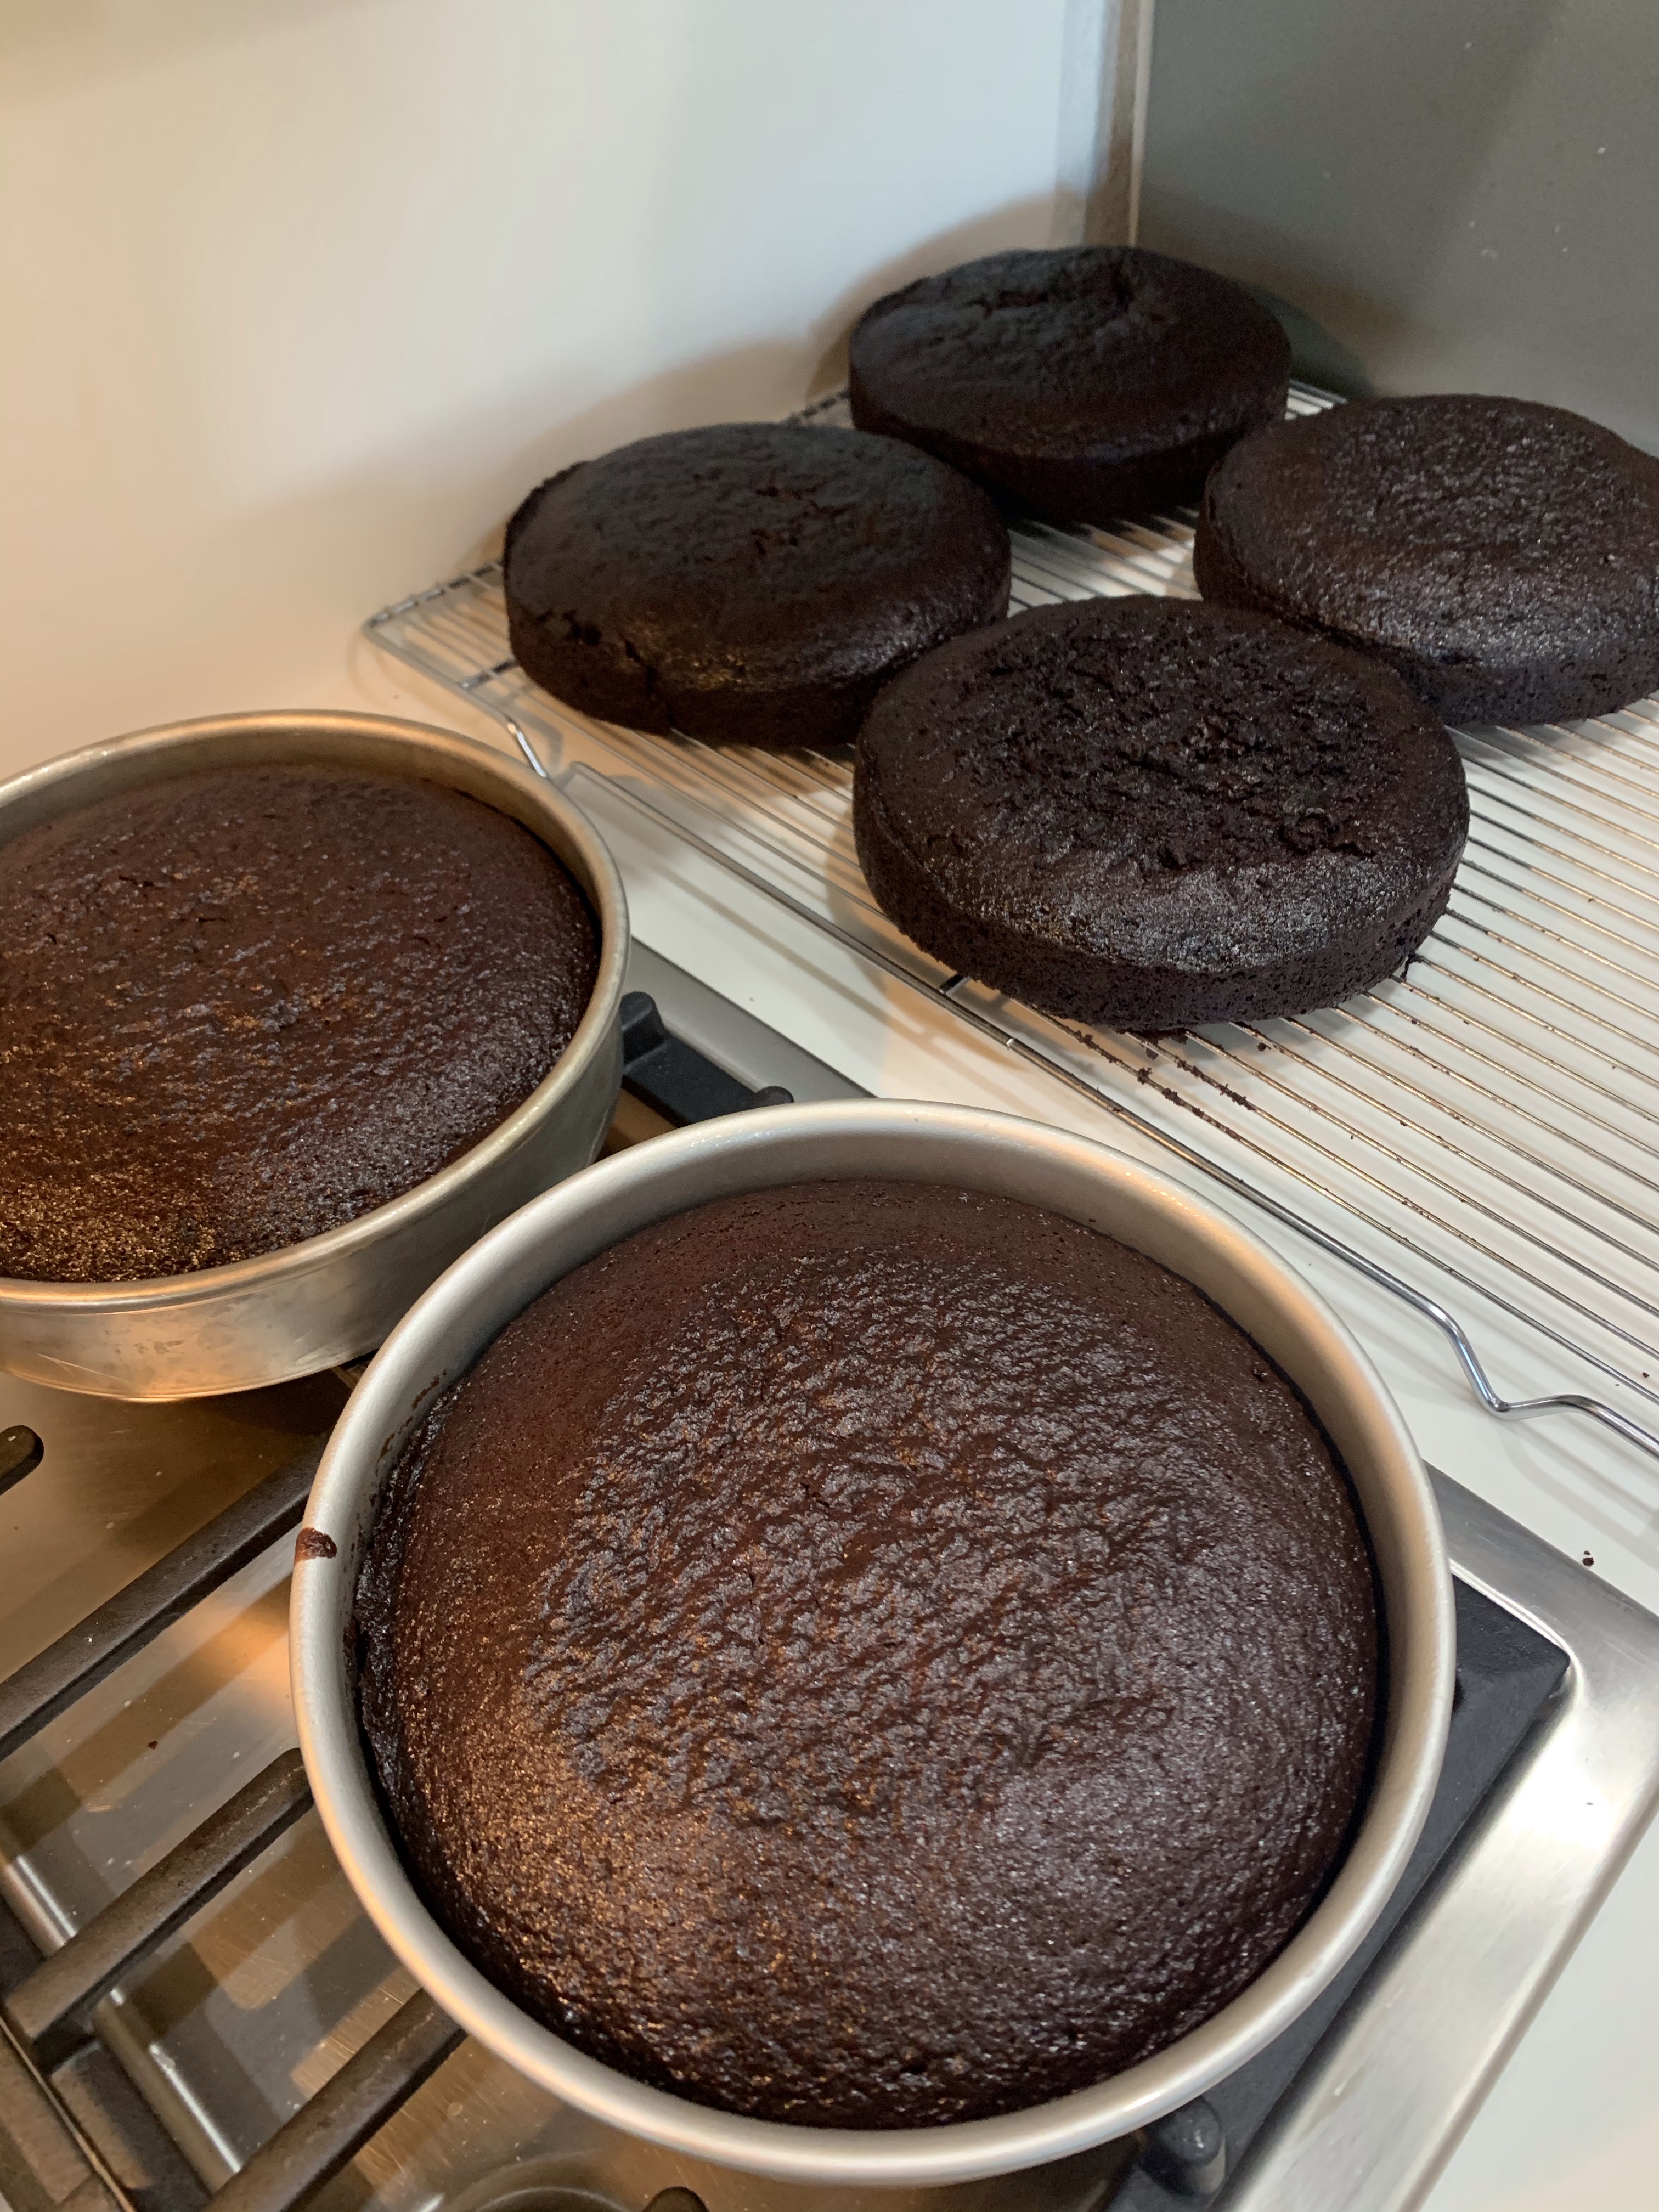
I was shown a picture of a Jack ‘O Lantern cake, found the tutorial and more of less followed it. It is supposed to be one of those plastic buckets used to collect your spoils during Trick or Treat. I am satisfied with my first attempt. The recipe called for chocolate cake, so I used my Extreme Chocolate Cake. I also used my recipe for buttercream frosting and marshmallow fondant.
While a little time consuming, most of the individual elements can be prepared well in advance. I made the cakes almost a week early and frozen them. When thawed they are every bit as good as fresh. Fondant needs to rest overnight and buttercream will stay in the fridge for several days before use.
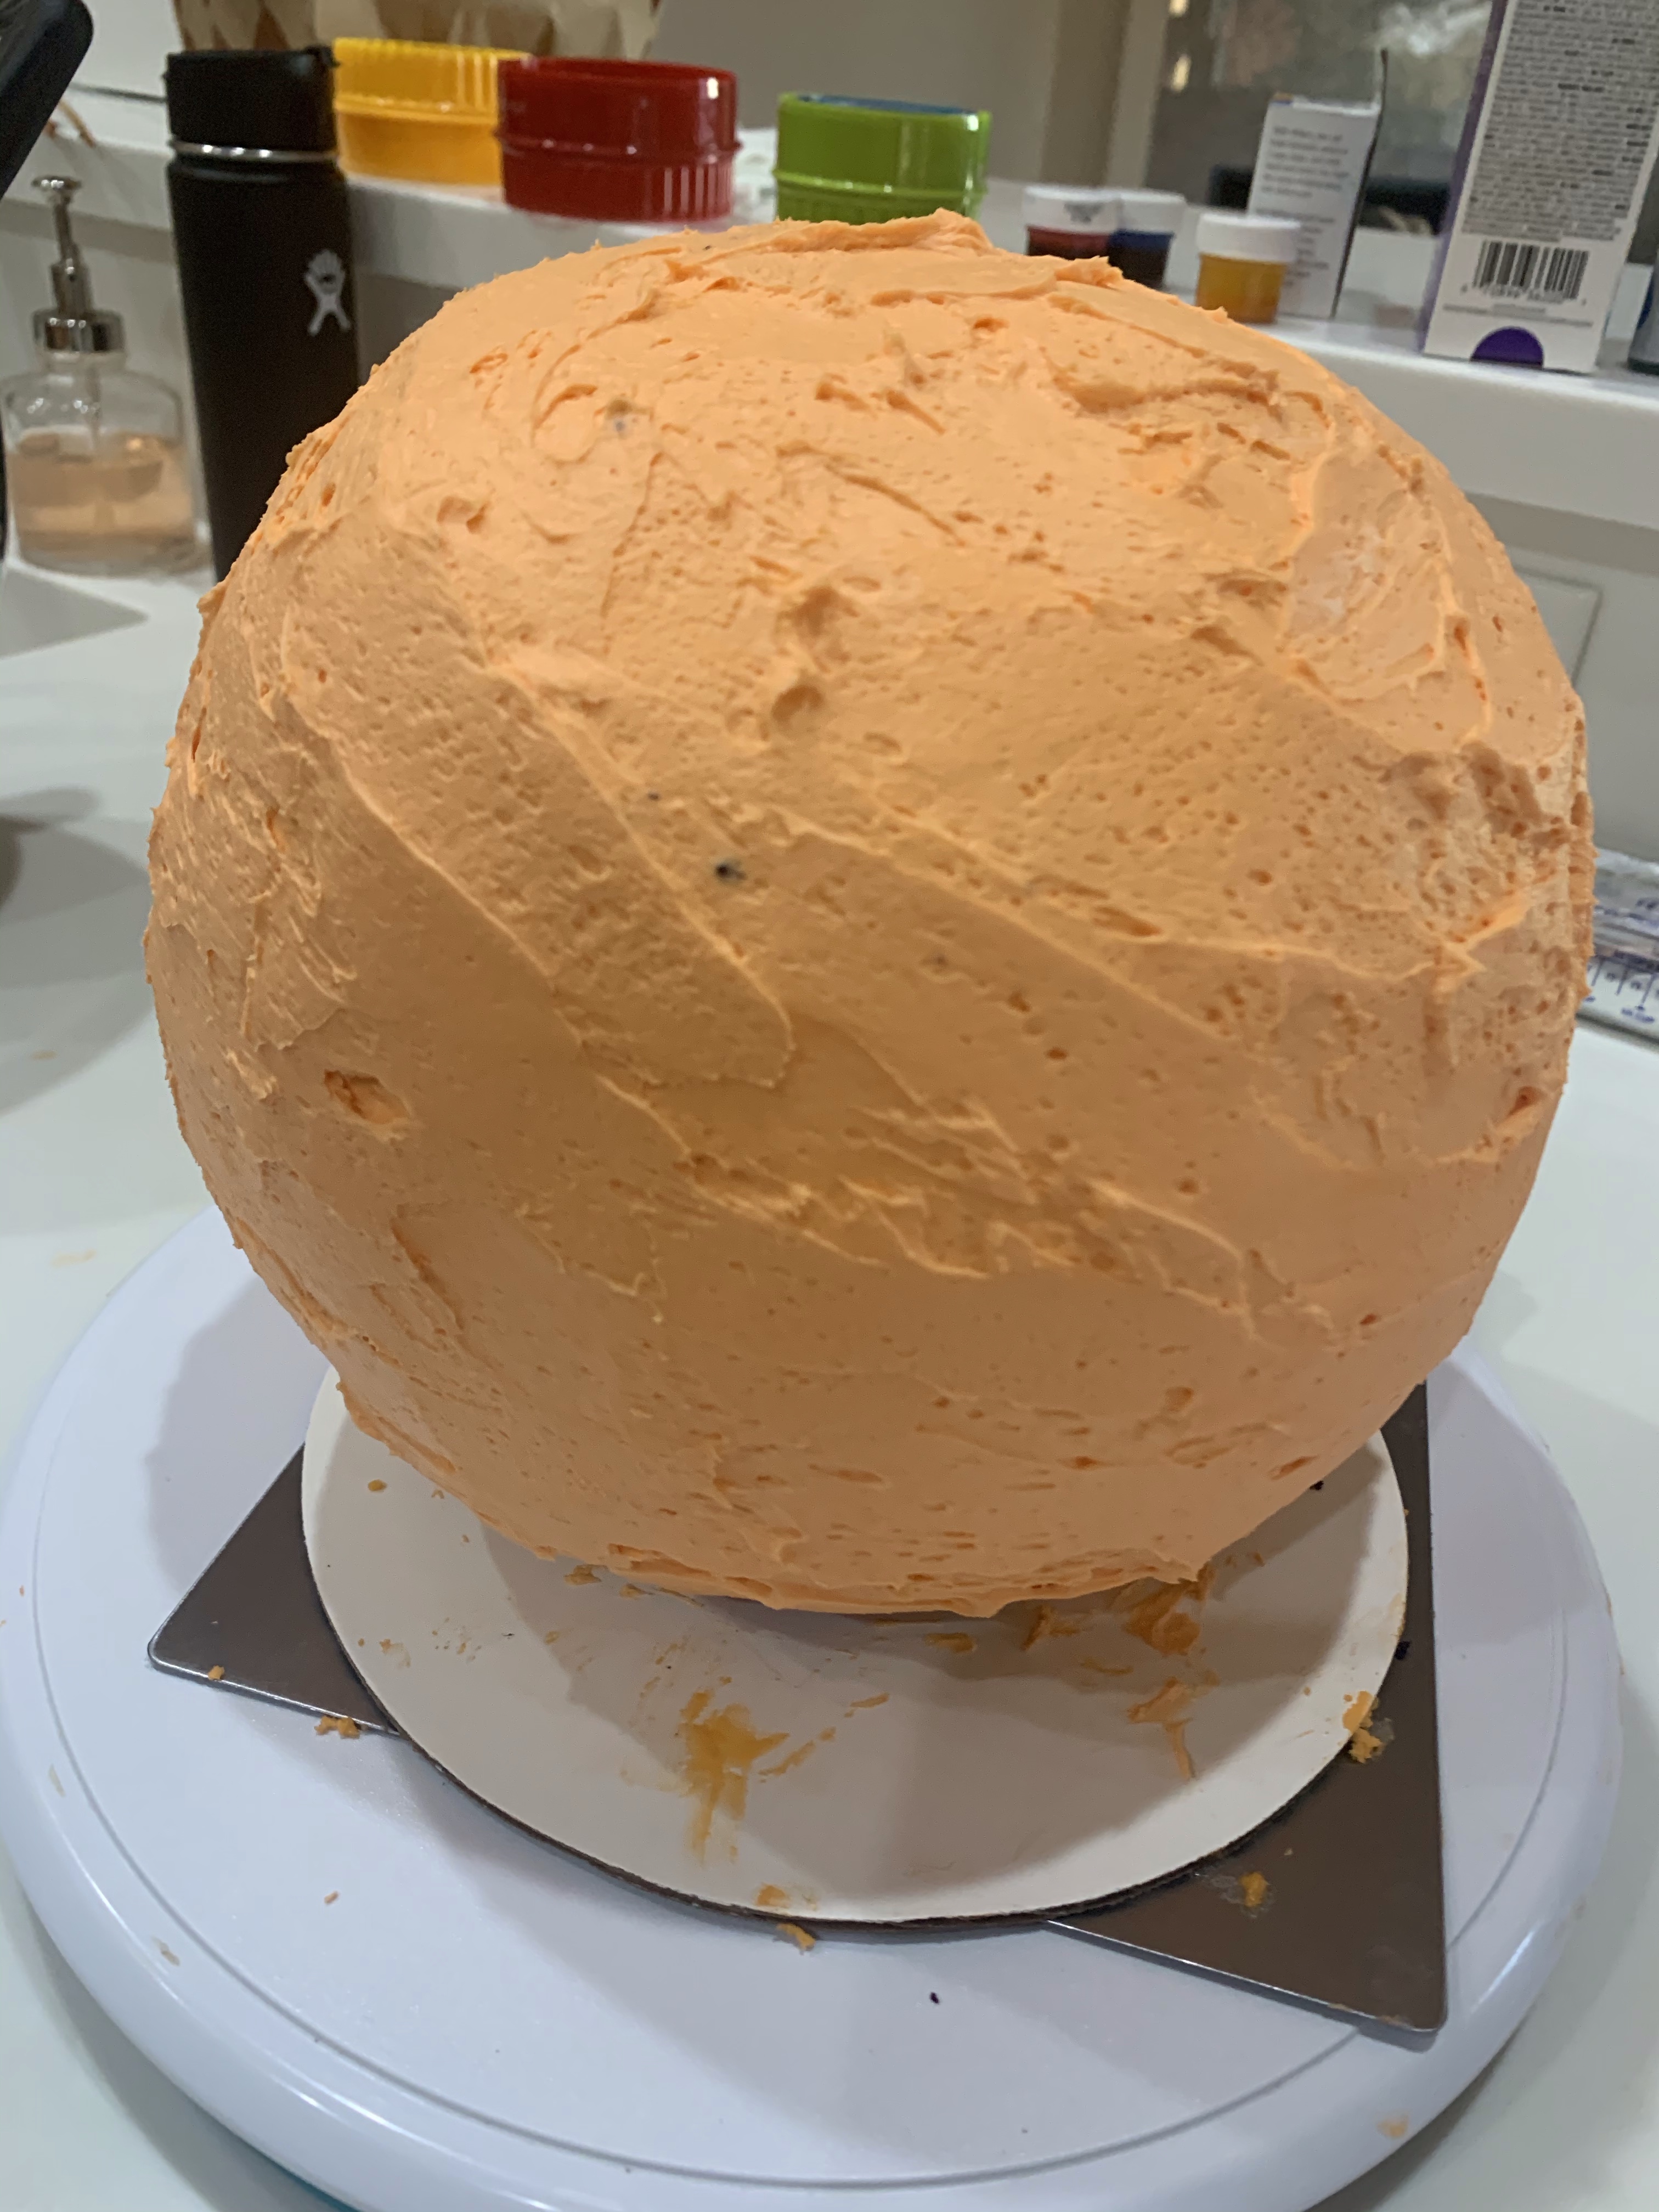
Mark a 4” circle on the top and the mid-point down the cake. Try your best to carve a half a sphere, evenly around the center of the cake. I put a 4” flat plastic disk to serve as a base. The QC department suggested the top of a round plastic storage container that worked perfectly. Take a deep breath, hold the cake tight and flip it end for end. Repeat the same carving on what will now be the top of the cake, making a perfect sphere, or in my case a slightly distorted, but acceptable, ovoid.
Cooling Cakes
Mixing Buttercream
Stacked Cakes
Carved Cake
Frosted
Beginning Fondant
Face Template
Completed Cake
Make the cakes and cool, or if frozen, let warm to room temp.
Mix the buttercream.
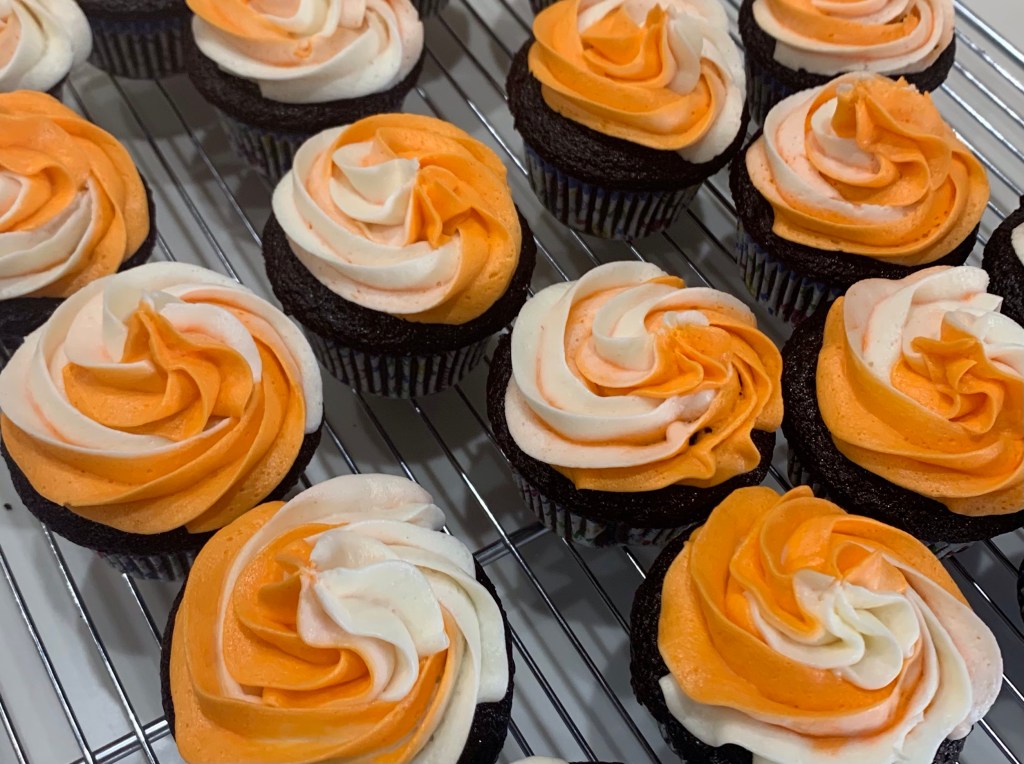
Before coloring I set a piping bag full aside to frost some birthday party cupcakes I made.
Frost between the layers, smooth any seepage and refrigerate overnight.
Carve the cool cake and crumb coat, back to the fridge.
Frost the cake and yup, refrigerate again.
Make the marshmallow fondant, break off some of the un-colored fondant and set aside.
Knead in the orange food coloring. Protect your work surface to avoid stains. I like to wear gloves for this.
Knead black food coloring for the face into the white piece set aside.
Find a face you like, or draw your own.
Cut it out, pin it to the cake and cut out holes for the black fondant.
Cut the black fondant to fit the template and fit into the holes on the cake.
Cut a 4” circle on the top about 1/2” deep and line with fondant. (Which ever color you have left over.)
Roll a piece of black fondant out into a long trip. Lay a piece of wire on it and wrap with the fondant, leaving a couple off inches of wire uncoated. Push the clean ends into each side of the top opening.
Place a few pieces of wrapped candy in the shallow hole on the top.
So, I had some puff pastry left over from the torsades last week, AND I had a half pint of fresh raspberries left over from my breakfast cereal. What am I to do?
I know! I can use some of my 11#s of chocolate for Pan Au Chocolat and puff pastry and raspberries for some hand pies. I posted both recipes and methods elsewhere in this blog so won’t bore you with repetition.
In a continuing search for places to use chocolate I found Chocolate Torsades. The name derives from the French ‘tornado’ for ‘twist.’
There really isn’t a recipe for this. I used my creme patisserie recipe from the eclairs, (I had some left over.) I also had a leftover sheet of puff pastry, and of course lots of existing chocolate. (Still trying to exhaust the old stock.)
Cut, folded, filled pastries
Twisted pieces
Final Product
French Chocolate Torsades (Puff Pastry Twists)
INGREDIENTS • 4 egg yolks • 1/2 cup of sugar • 2 tablespoons of flour • 1 1/2 cups of milk • 1/2 tablespoons of vanilla • 1 tablespoon of butter • 1/4 teaspoon of salt • 1 sheet Puff pastry (270 g) • Chocolate chips dark or milk • 1 egg for egg wash • Sparkling sugar
METHOD For the custard
Whisk eggs and milk together and add to all other ingredients (except vanilla) to a medium saucepan.
Bring to boil whisking constantly
Cook until thickened (it will look lumpy, its ok)
Sieve lumpy mixture into a bowl and add 1 tsp vanilla, mix thoroughly
When incorporated, cover with plastic directly on the cream and cool.
For the Chocolate Torsades
Preheat oven to 410 degrees (215 Celsius)
Roll out puff pastry about 14 inches long or just use the store bought roll
Spread a thin layer of the vanilla custard on top
Sprinkle chocolate chips on top
Fold in half and cut into strips
Twist each strip a few times to create the twist
Whisk one egg in a small bowl and brush the tops of the twists with the egg wash
Place chocolate torsades on baking sheet with parchment paper
Sprinkle with sparkling sugar
Bake at 400 degrees (215 Celsius) for 15 minutes or until golden brown.
I saw a video for this bread on Cookist. I found a recipe and a comment at the bottom said it was not very bananaee (my word) and they were correct. Hence, Hint ‘O Banana. It is a very nice soft loaf and easy to make. I am wondering if I upped the amount of banana in the dough if it would increase the bananaee flavor. It really is a good bread just the way it is, but if you were expecting overwhelming banana flavor, like in a traditional banana bread, you will be disappointed. Definitely NOT your, your Mama’s or your Grammies’ banana bread!
This loaf also provided the opportunity to buy two new baking pans. Great for oblong cakes, cheese cakes, bread etc.
The bread has a very mild banana flavor. I wish I weighed the banana before mashing it into the dough. It was a small one. Next time I will try two small ones or one large one and adjust other liquids. I think I will modify the method to incorporate a tangzhong. Stay tuned.
Banana Bread Loaf
INGREDIENTS • 350 g Bread Flour • 30 g Caster Sugar • 1 tsp salt • 2 Tbl Milk Powder • 1 very ripe banana • 1 egg • 70 ml milk • ½ tsp yeast • 40 g unsalted butter, cubed.
METHOD
Sift flour into mixing bowl of stand mixer and add dry ingredients and mix
Mash banana and add to mixing bowl
Whisk egg and milk together then add to bowl
Add yeast
Mix on medium with dough hook until stiff dough is formed. Add additional milk if necessary
Add cubed butter, a piece at a time, continue on mixing speed 2 for 20 min
Knead by hand, form into a ball, tension surface
Let rise, covered for 60 min
Knock down dough, flatten into an oval and divide in half
Flatten, do envelope fold, turn 90 deg and repeat envelope fold
Form into a ball, tension surface
Cover and let rest 15 minutes
Butter bread trays
Roll each ball out about 6-8” long, roll up into a batard, pinch seams and ends closed
Roll under curved fingers slightly to tension. Don’t apply pressure.
Cut into 1” wide pieces, but not all the way through, keeping loaf together Should be about 10 pieces
Pick up carefully and place into bread pan
Cover and let rise 60 minutes
Bake at 350 for 17-20 minutes until internal temp is 195-200F
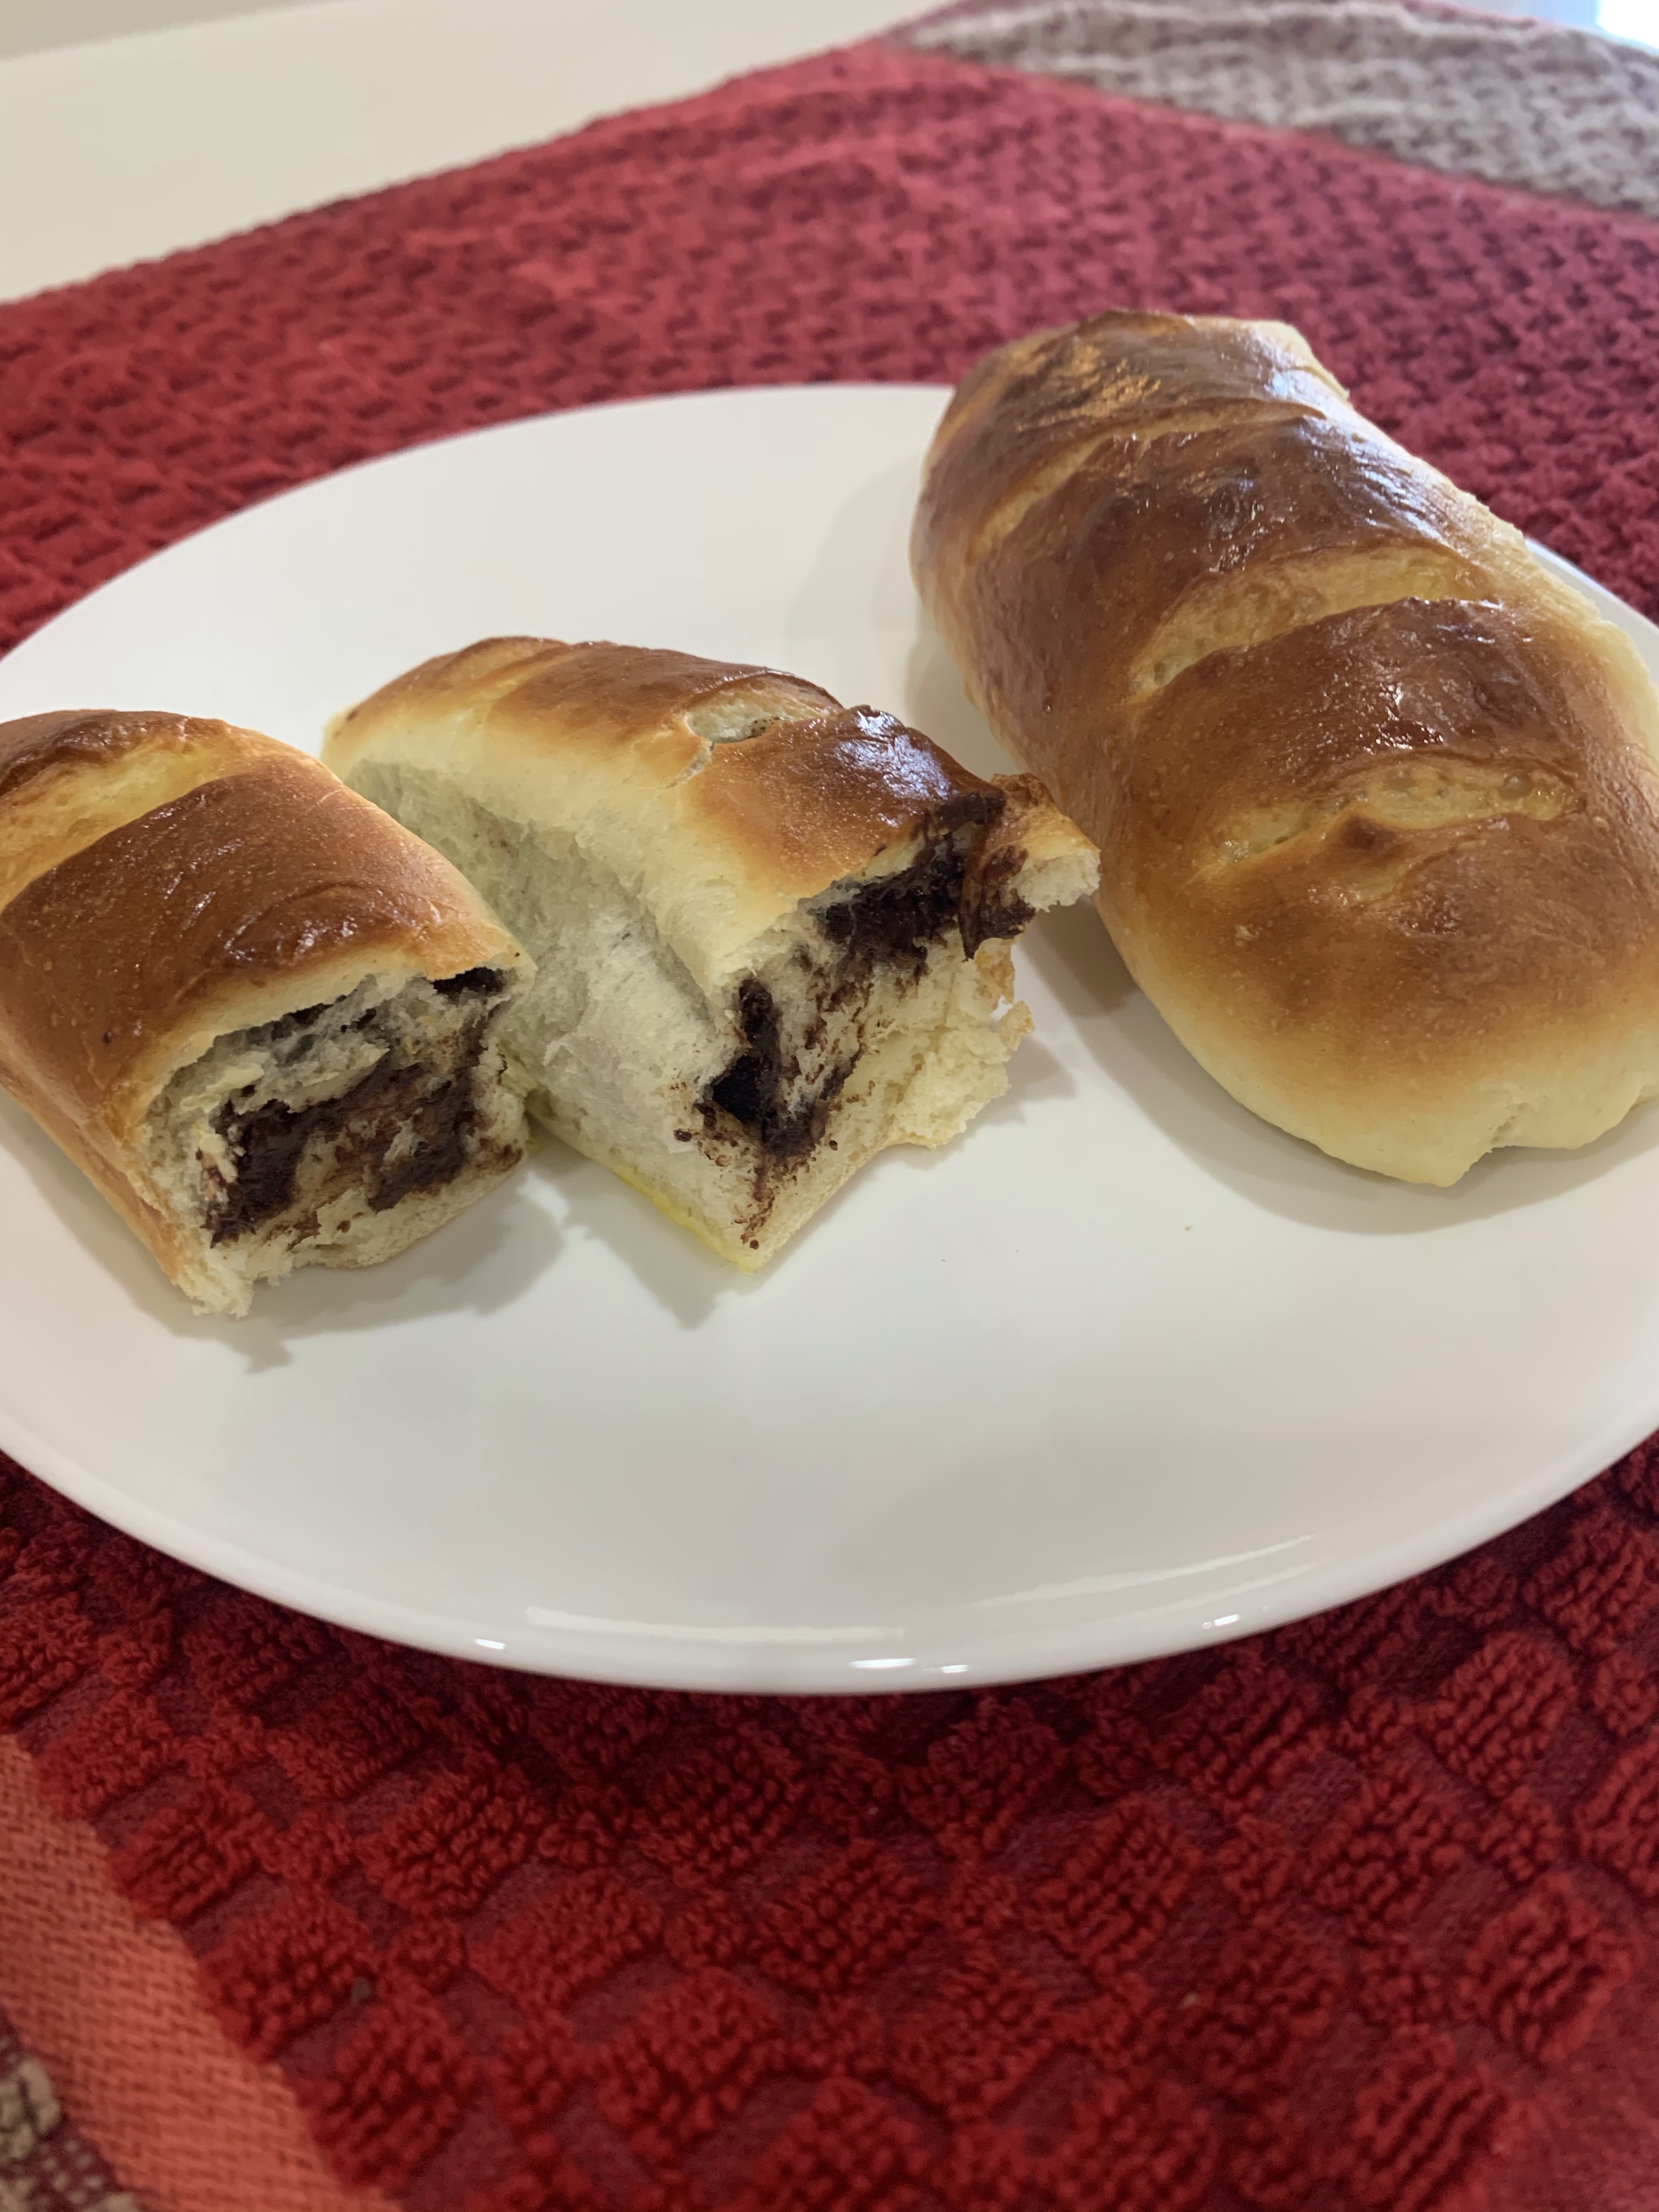
I saw a picture of an elongated bread roll, like a hot dog roll, but slashed with a lame and the slashes were filled with lemon curd before baking. Well, I couldn’t find the recipe so decided to create my own. This is the first time I have stepped out of my chemist-trained-recipe-following comfort zone.
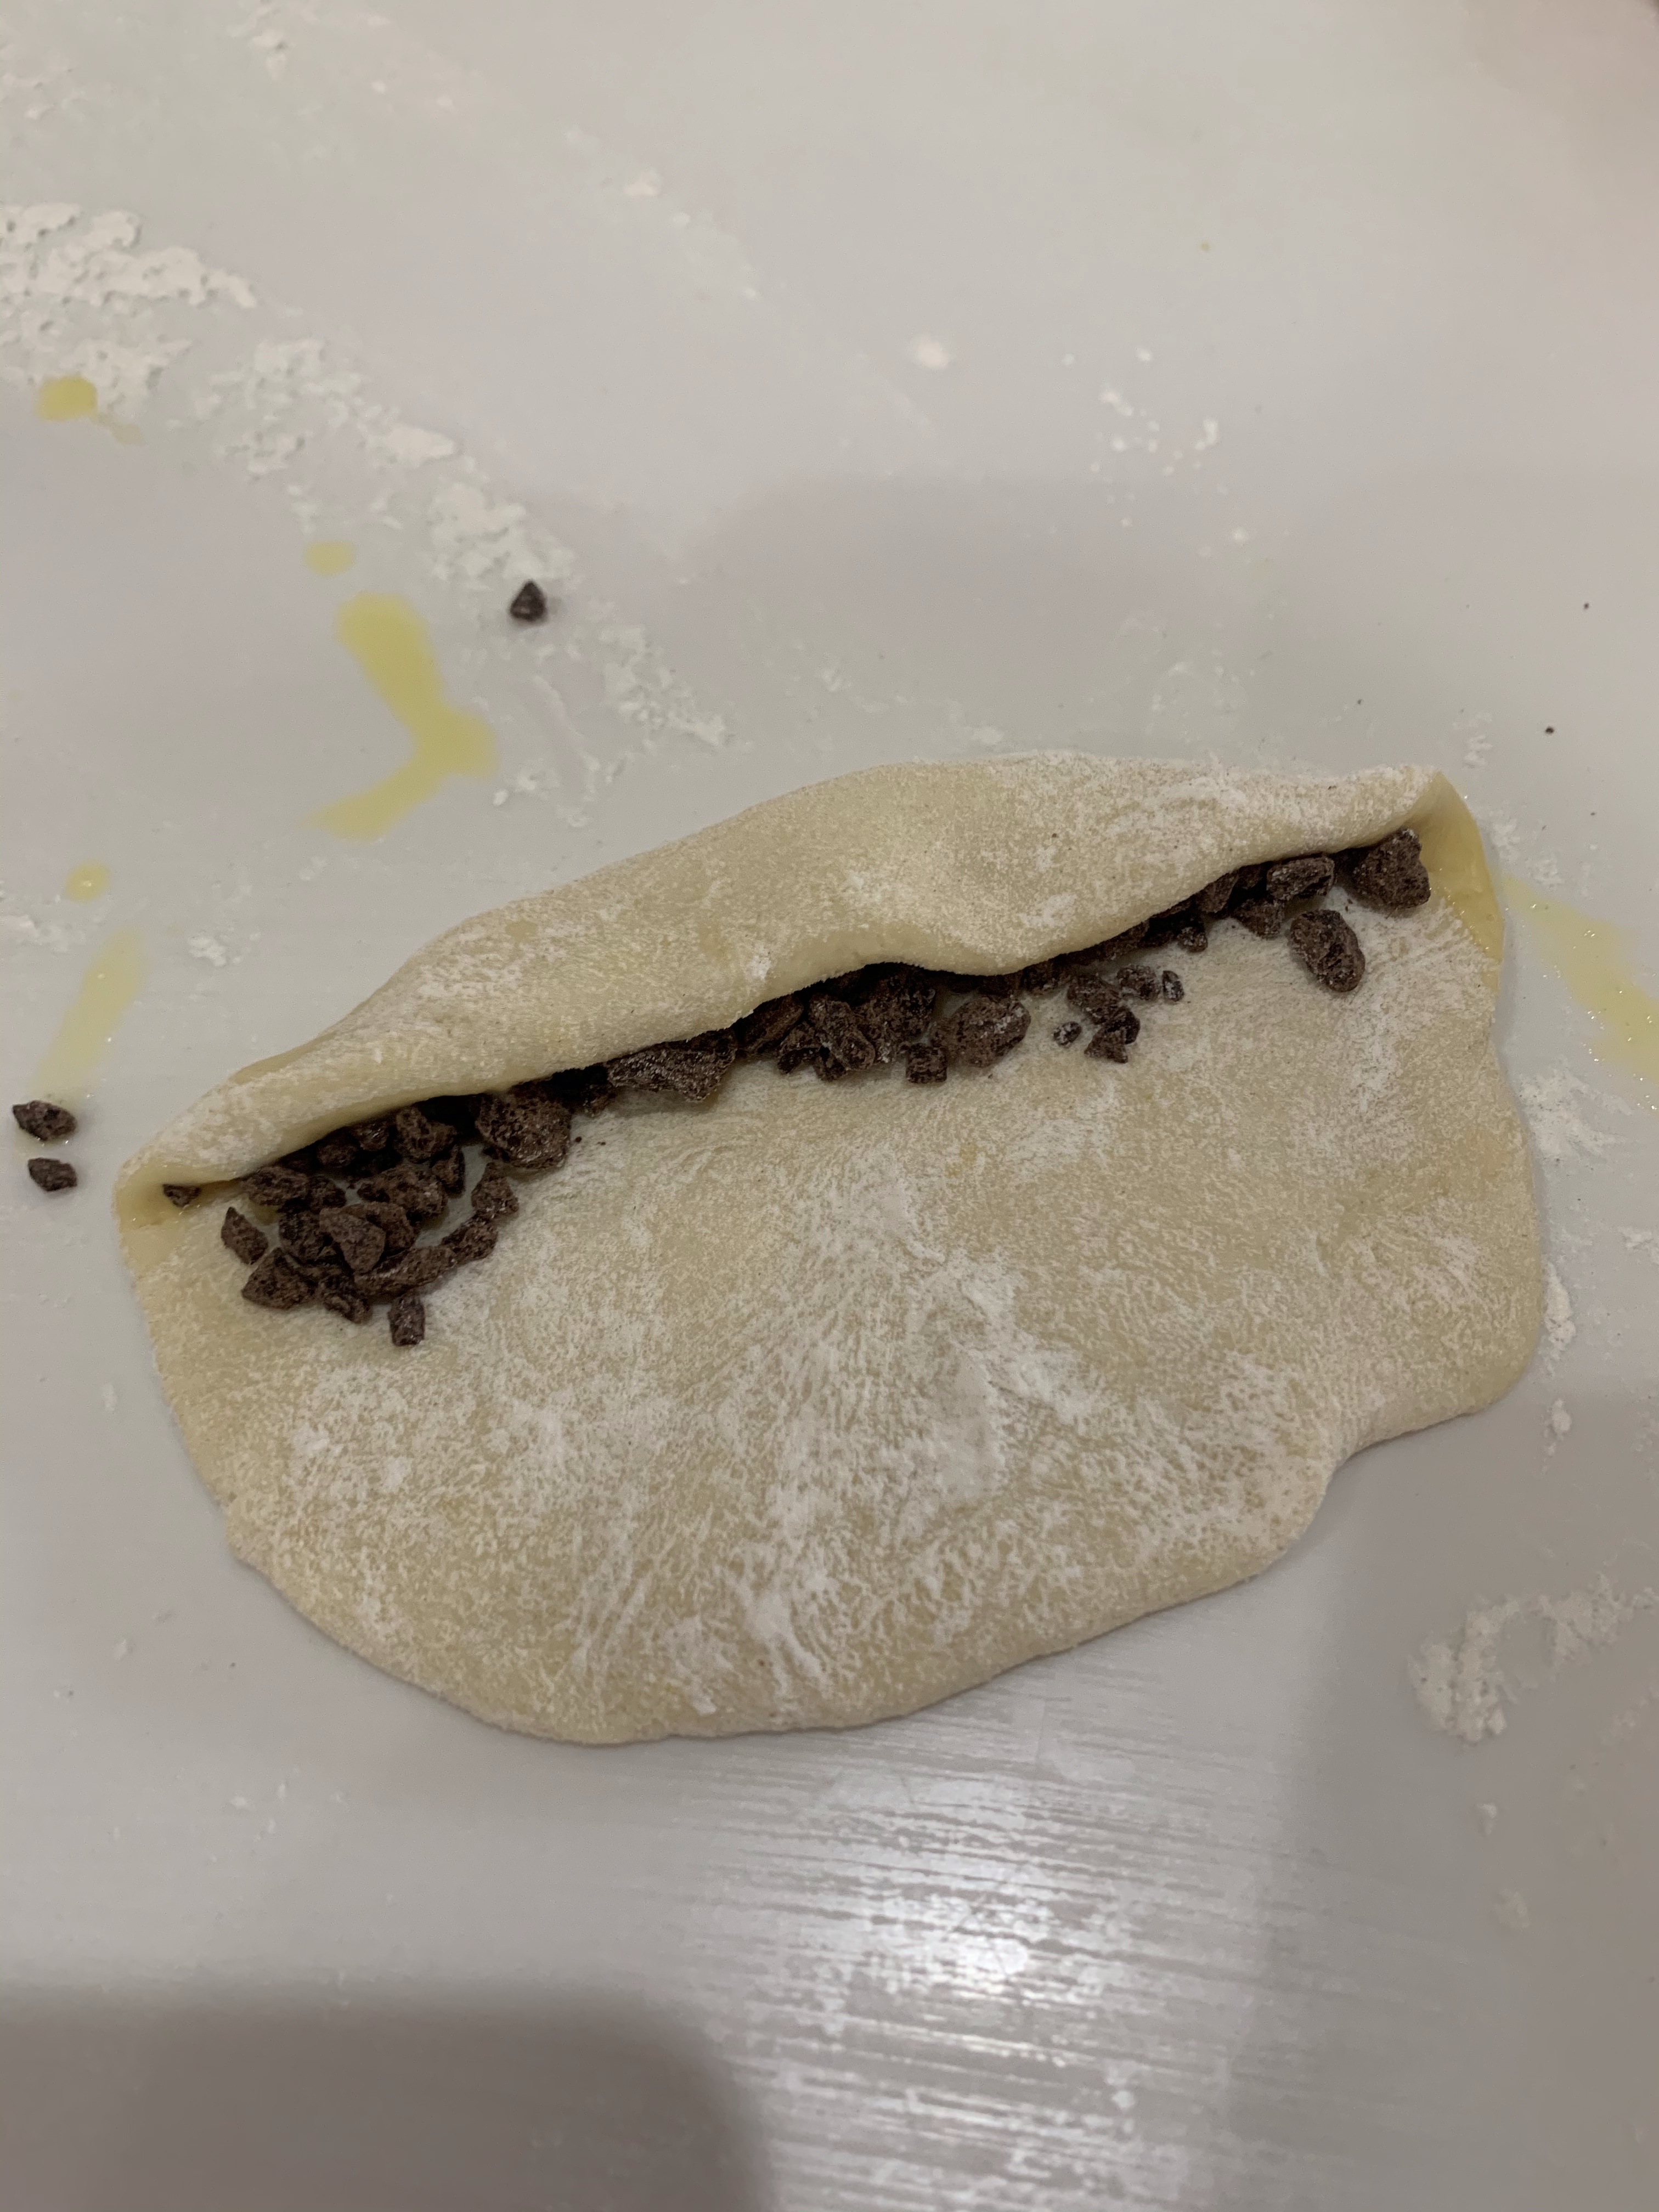
I also decided, since I don’t really care for lemon curd, I would instead roll chocolate ala pain au chocolat but using an enriched bread dough instead of puff pastry. This was also an excuse to use some of the 11# of chocolate I bought a couple of weeks ago.
Finished Roll
Fresh From Oven
Rolled Dough
1st Stripe of Chocolate
Rolled over Chocolate
Ready for Fridge
Ready for Oven
The photos more or less follow the method below.
The QC department suggested a less bitter chocolate (64% cacao) and sparkling sugar topping (good suggestion.) QC will have to live with 64% as I do have 11 pounds. Manufacturing suggested no chop the chocolate so small. Something the size of chocolate chips should melt fine and be easier to handle.
Chocolate Filled Bread Buns
INGREDIENTS • 2 teaspoons active dry yeast • 1 cup barely warm milk • 3 cups all-purpose flour • 2 tablespoons butter, melted • 3 tablespoons sugar • 1 teaspoons salt • 2 eggs, one for dough, one for egg wash • 1 tablespoon orange zest • 165g, about 1 cup (4-6 ounces) bittersweet chocolate chopped fine (pulse in a food processor)
METHOD
In a large mixing bowl, sprinkle the yeast over the warm milk and let sit for 5 minutes.
Add 2 tablespoons melted butter, sugar, salt, egg, and orange zest. Stir until blended and fragrant.
Add 3 cups of flour and mix until the dough comes together. It will be sticky! On a lightly floured surface knead the dough until soft and elastic (about 8 minutes), adding more flour to keep the dough from sticking if necessary. Do not add too much flour! The dough will become more workable the longer you knead. Or, if you have a standing mixer, knead the dough with the dough attachment for 5-7 minutes, or until elastic.
Transfer the kneaded dough to a lightly oiled bowl. Cover with plastic wrap and a clean kitchen towel. Let the dough rise in a warm area until it doubles in size, about 2 hours.
Punch dough down, divide into 12 equal portions, and shape each portion into a round ball. Flatten into an oval then roll to ¼ “ thick rectangle.
Place a stripe of chocolate ½ “ from long end of rectangle. Roll to cover chocolate and place a second stripe of chocolate. Roll up and seal edges and all seams.
Place rolls a on baking sheet coated lightly with cooking spray. Cover with a kitchen towel and let it rise for another 20 minutes.
Preheat oven to 400 degrees F.
Slash diagonally 4x with lame.
Brush 1 egg wash over the rolls. Sprinkle with coarse sparkling sugar.
Bake for 8-12 minutes or until lightly browned. Serve warm or at room temperature.
Well, it ain’t instant pudding, but is sooooo much better!! I made this pudding a couple of times before, each time seemed better than the previous.
If you have read some earlier posts you know I have an 11 lb bag of new chocolate just waiting its turn. I decided to use some of the 70% I had opened (finished it!) to make this home made pudding. It takes a little time and most of it is hands on, but it is so worth it. If you like chocolate and if you don’t mind whisking constantly for a few minutes, try this. It’s delicious. I forgot where I found the recipe and frankly, I don’t care.
A dab of whipped cream would have helped the picture, but we couldn’t wait.
Chocolate Pudding from Scratch
Makes 4 cups; serves 8
INGREDIENTS • 4 ounces bittersweet chocolate • 3 tablespoons unsweetened cocoa powder • 3 tablespoons cornstarch • 1/4 teaspoon salt • 1 cup heavy cream • 3 large egg yolks • 2 1/2 cups whole or 2% milk • 1/2 cup granulated sugar • 1 teaspoon vanilla extract
METHOD
Use a serrated knife to chop the chocolate into fine flakes; set aside.
Whisk the cocoa powder, cornstarch, and salt together in a large, heatproof bowl. Slowly whisk in the cream, a little at a time, until you have a smooth mixture.
Whisk the egg yolks into the cream and cornstarch mixture.
Pour the milk into a 3-quart (or larger) saucepan. Add the sugar and warm over medium heat, stirring frequently, until the sugar is dissolved.
Bring the milk to a gentle simmer over medium heat. Watch for the surface of the milk to vibrate and for bubbles to form around the edges of the pot.
To temper the eggs, slowly pour most of the hot milk into the bowl of cream and egg yolks. Whisk until well-combined, then pour everything back into the pot.
Bring the mixture to a full boil over medium-high heat, stirring frequently. (It should look like lava boiling up!) At this point, the pudding will look much thicker.
Cook for 2 minutes more, whisking constantly and vigorously. Get your whisk into all corners of the pot.
Remove the pot from the heat and whisk in the vanilla. Add the chopped chocolate and let sit for 1 to 2 minutes or until melted. Whisk vigorously until the chocolate is fully incorporated.
Transfer the pudding to a storage container and press plastic wrap or wax paper directly onto the surface of the pudding. Cover with a lid and refrigerate.
Most basic bread is easy to make. There are a few that require extra steps, rises, shaping, etc. but basic bread is… well… basic. Mix, rise, shape, rise, bake.
I made a few changes to the recipe published by Cookist. Some of them were just language or style differences but a couple were more involved. I use instant yeast so I provided the conversion factor from cake to instant. I knead in a stand mixer so referenced it. I added how long to knead and to tension the loaf before the final rise. I added more description on how to shape the loaf.
INGREDIENTS • 2 cups water • 1 tsp sugar • 8g ( 2 ½ tsp) instant yeast • 5 cups AP flour • 1 tsp salt • 2 tbsp oil
METHOD
Pour water into a stand mixer bowl, add sugar and yeast. Mix.
Add flour and salt. Mix. Let rise for 15 minutes.
Add sunflower (or other) oil and knead about 8 minutes.
Let rise covered until doubled.
Divide the dough into two parts.
Form a boule from each part, the press out into an oval, roll into a batard
Tension the battery by rolling on a clean surface, cupping your fingers around the bread and rolling the batard back and forth not allowing it to lengthen.
Place on a baking sheet. Let rise until doubled.
On each bread make an incision, paint with milk. Place a cup of hot water on a baking sheet. Cookist’s video showed slashing the bread by cutting in small short strokes rather than one long cut. It worked really well. I will have to try on other bakes.
Bake for 40 minutes at 180 °C / 350 °F until internal temperature reaches 195-200°F.
You don’t hear it mentioned often, but there is a major problem with the game of golf. Although it is possible the problem is with those who play golf.
I play three times a week, which means there are four mornings a week that I don’t play golf and therein lies the problem. What am I going to do with those four mornings?
Sadly, sort of, I saw a new recipe for cinnamon buns this week, and I am not playing golf this morning…. so.
King Arthur Baking published this recipe for Perfectly Pillowy Cinnamon Buns. Often, once the bun cools, while still flavorful, it becomes more dense. Not these! They remain soft and fresh up to four days after baking. The secret is using a tangzhong in the dough batter. Tangzhong is a mix of milk and flour which is mixed and heated to a thick paste before adding the rest of the dough ingredients. It’s easy, you only need to know to do it.
I made the recipe as listed below, except not having whole milk I mixed 2% milk and whipping cream in a 80:20 ratio. I also only used the cream for the icing. The result is outstanding! We are waiting for the QC report, but manufacturing gives these rolls a big thumbs up!
Tangzhong • 1/2 cup (113g) whole milk • 3 tablespoons (23g) King Arthur Unbleached Bread Flour
Dough • 2/3 cup (151g) whole milk, cold • 2 1/2 cups (300g) King Arthur Unbleached Bread Flour • 1 teaspoon salt • 2 tablespoons (25g) granulated sugar • 2 teaspoons instant yeast • 4 tablespoons (57g) unsalted butter, softened
Filling • 1 tablespoon (14g) butter, melted • 1/2 cup (107g) light brown sugar, packed • 2 tablespoons (15g) King Arthur Unbleached Bread Flour • 4 teaspoons (10g) cinnamon • 1/16 teaspoon (pinch) salt
Icing • 3 tablespoons (42g) butter, melted, divided • 1/2 teaspoon vanilla extract • 1/16 teaspoon (pinch) salt • 1 1/2 cups (170g) confectioners’ sugar, sifted • 1 to 2 tablespoons (14g to 28g) milk, cream, or buttermilk; enough to thin to desired consistency
METHOD
To make the tangzhong: Combine both the ingredients in a small saucepan, and whisk until no lumps remain.
Place the saucepan over medium heat and cook the mixture, stirring regularly, until thickened, paste-like, and the spoon or spatula leaves lines on the bottom of the pan. This should take 1 to 3 minutes, depending on the strength of your burner.
Remove from the heat and transfer to a large mixing bowl, the bowl of a stand mixer, or the bucket of a bread machine (whatever you plan to knead the dough in).
To make the dough: Add the ingredients to the mixing bowl in the order listed; the heat from the tangzhong will help to warm the cold milk.
Mix — by hand, on low speed of a stand mixer with the dough hook attachment, or in a bread machine set to the dough cycle — to bring the dough together. Next, knead the dough until it’s smooth, elastic, and tacky. This will take up to 15 minutes by hand, 10 to 12 minutes on medium-low speed of a mixer, or the length of the dough cycle in a bread machine.
Shape the dough into a ball, place it in a bowl, and cover the bowl with plastic wrap or a reusable cover.
Let the dough rise until puffy but not necessarily doubled in bulk, about 60 to 90 minutes (depending on the warmth of your kitchen).
To make the filling: While the dough is rising, put the melted butter into a medium bowl and add the remaining ingredients, stirring until the mixture is the texture of damp sand. Set aside.
To assemble the rolls: Lightly grease a baking sheet, or line it with parchment paper.
Transfer the dough to a lightly greased work surface and press it into a 10” x 12” rectangle that’s about 1/2” thick. For evenly shaped rolls, try to pat the dough into an actual rectangle (with corners), rather than an oval.
Sprinkle the filling over the dough, covering all but a 1/2” strip along one long side.
Starting with the filling-covered long side, roll the dough into a log.
Score the dough lightly into eight equal 1 1/2” to 2” pieces. Cut the dough at the score marks, using dental floss for the cleanest cut. If you don’t have dental floss, a bench knife or sharp knife will work.
Place the rolls onto the prepared baking sheet, spacing them so there’s at least 2” between each one and they’re 2” away from the edges of the pan; a 3-2-3 arrangement works well. To prevent them from unraveling while they rise and bake, tuck the ends of the spirals underneath the rolls so that they’re held in place.
Cover the rolls with lightly greased plastic wrap or a reusable cover and let them rise for 30 to 60 minutes (depending on the warmth of your kitchen). The rolls should be puffy and the dough shouldn’t bounce back immediately when gently pressed.
About 20 minutes before you’re ready to bake, position a rack in the top third of the oven. Preheat the oven to 375°F.
Bake the rolls for 14 to 18 minutes, until they’re a light golden brown and a digital thermometer inserted into the center of one roll reads 190°F. Bake for the lesser amount of time for extra-soft rolls, and the longer amount of time for rolls with a bit more color and slightly firmer texture.
Remove the rolls from the oven, place the pan on a rack, and brush the hot rolls with 1 1/2 tablespoons (21g) of the melted butter. Let the rolls cool for 10 to 15 minutes before icing.
To make the icing: Combine the remaining 1 1/2 tablespoons (21g) melted butter with the remaining icing ingredients in a medium bowl, mixing with a spatula until smooth.
Ice the rolls and serve immediately. If you’re planning to serve the rolls later, wait to ice them until just before serving. Store icing at room temperature, tightly covered, until you’re ready to use it.
Store completely cooled rolls, un-iced and well wrapped, for a couple of days at room temperature; or freeze for up to 1 month.
To reheat leftover rolls: These rolls stay wonderfully soft for at least 3 days. The best way to enjoy them for breakfast is to bake them the day before, store them tightly sealed (and un-iced) at room temperature overnight, then the next morning lightly cover the rolls with foil and warm them in a 300°F to 350°F oven for 5 to 10 minutes. Spread with icing and enjoy.
Tips from the KAB Bakers
With origins in Japan’s yukone (or yudane), tangzhong is a yeast bread technique popularized across Asia by Chinese cookbook author Yvonne Chen. Tangzhong involves cooking some of a bread recipe’s flour in liquid prior to adding it to the remaining dough ingredients. Bringing the temperature of the flour and liquid to 65°C (149°F) pre-gelatinizes the flour’s starches, which makes them more able to retain liquid — thus enhancing the resulting loaf’s softness and shelf life.
These rolls are bakery-sized, meaning big enough to enjoy as an indulgent breakfast or snack. For smaller-sized rolls perfect for a side dish at brunch, score and divide the dough into ten 1” to 1 1/2” pieces and bake for 13 to 16 minutes.
Do you enjoy your cinnamon rolls with tangy, thick cream cheese frosting instead of vanilla icing? Stir in 4 to 6 tablespoons (57g to 90g) softened cream cheese to the icing along with the other ingredients. The softer the cream cheese is, the easier this will be to do. Resist the urge to add more than 2 teaspoons of milk until the icing is fully mixed. If it’s too thick for your liking, add more milk a teaspoon at a time to get it to the consistency you prefer.
Wondering about all the liquid choices for thinning the frosting? Milk is certainly the most convenient, but if you have cream or buttermilk, the former will add an extra layer of richness, while the latter will add a subtle tang to balance out the sweetness.
I receive King Arthur Baking Company’s magazine and always peruse the products and recipes. This month there was a beautiful picture of their Molasses Multi-Seed Bread and decided to give it a try.
I discovered two things. More seeds are better and try different time/temperature combinations. I made it as directed and the final loaf was overdone, although the internal temp was just 195°F. Next time I will either drop the temp a little, maybe to 350°F or 325°F. I will also tent it with foil earlier. This time, my first attempt, I tented it for the final 10 minutes, but it was too late.
I may also need to buy a tea loaf pan. The standard 4” x 9” was really to small for the bread to be shaped correctly. The 12” x 4” tea loaf, as specified by KAB would be better. Maybe… let it rise (second rise) on a French bread pan. I may try that before investing in a tea loaf pan that I would use infrequently.
Molasses Multi Seed Bread
INGREDIENTS • 3/4 cup (170g) warm milk, 105° to 110°F • 1/2 cup (113g) warm water, 105° to 110°F • 2 tablespoons (28g) butter, melted and slightly cooled • 1 cup (113g) King Arthur White Whole Wheat Flour • 2 1/2 cups (300g) King Arthur Unbleached Bread Flour • 1/8 teaspoon ascorbic acid, optional • 2 teaspoons instant yeast or active dry yeast • 1 1/2 teaspoons salt • 1/4 cup (85g) molasses • 3/4 cup (129g) Artisan Bread Topping, divided METHOD
To make the dough: In the bowl of your stand mixer, combine all the ingredients except the bread topping. Mix and knead with a dough hook for about 8 minutes until a smooth, slightly sticky dough forms, adding a tablespoon of flour if needed. With a minute or so left, knead in 1/4 cup of the topping.
Place the dough in a lightly greased bowl, cover, and let it rise until puffy, 1 to 1 1/2 hours.
To shape the bread: Deflate the dough and divide it in half; roll each half into a 12” rope. Roll one of the ropes in the remaining topping. Be sure the rope is VERY well covered with seeds. When it rises the seeds will separate.
Pinch the ends of the ropes together and twist one over the other, pinching them together at the opposite end.
Transfer the dough to a lightly greased tea loaf pan or similar long loaf pan (12″ x 4″). Cover and let rise until the bread domes 1” above the edge of the pan, about 1 hour. Toward the end of the rising time, preheat your oven to 375°F.
Uncover the loaf and egg wash the un-seeded rope.
Bake for 32 to 36 minutes, or until a digital thermometer inserted into the center registers 190°F. The bread was too dark with this time/temp setting. (Drop temp to 350°F and tent the bread with foil after 20 min or so, before it turns dark.)
Remove the bread from the oven and place the pan on a rack for 5 minutes. Tilt the bread out of the pan and return it to the rack to finish cooling completely.
Store bread, well wrapped, at room temperature for several days; freeze for longer storage.
This morning’s Pain Au Chocolat required a couple of hours in the fridge before baking. We needed another batch of hoagie, or sub or grinder rolls after finishing what we had with steak sandwiches last night, and I had time. I also had time for another loaf of honey white bread. Busy morning!!
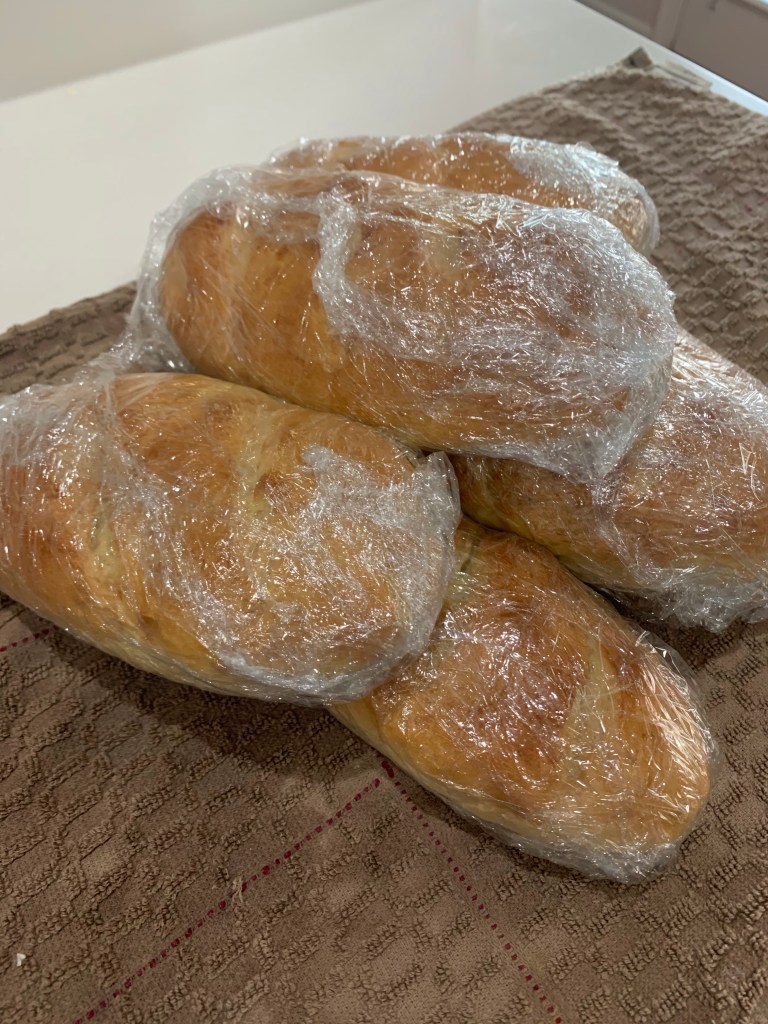
These are outstanding rolls and I am lucky to have stumbled across the recipe a month or so ago. I wrapped them for freezing before taking a picture so decided to photograph them as wrapped for the freezer. I double wrap them, then give them a couple of hours to thaw before using. After a month, or more, in the freezer, after thawing, they are as fresh as just baked.
Hoagie Rolls
INGREDIENTS • 448-512g (3½ – 4) c. bread flour • 308-355 g (1¼ cups plus 2 Tbl – 1½ c.) warm water (110-115F degrees) • 2 Tbl sugar • 2¼ tsp instant yeast • 1 tsp kosher salt • 4 Tbl cold butter, cubed METHOD
Using a stand mixer fitted with the dough hook, mix 2 cups of flour, water, sugar, and instant yeast on low for 4 minutes.
Add the salt and 1 cup at a time of the remaining flour and mix for 5-6 minutes until the dough is slack. (Slack dough is fluid but not liquid. Poured onto a board it could not be shaped. It would flow and not hold a shape.)
At this point, your mixer should be at medium speed. If your dough, after 5-6 minutes is not slack add in a bit more water (2-4 Tbl). The additional water will fully depend on how humidyour room is.
Add the butter 1 Tbl at a time and mix until almost fully blended before adding the next Tbl. In total, mix for 1-3 minutes or until the dough comes back together. Remove from bowl and transfer to a greased, covered bowl until doubled in size. ~1 hour.
Punch the dough down and place on a very lightly floured board. Divide into 4-8 pieces and shape. I would advise using as little flour as possible when shaping these. The more flour you add, the tougher the hoagies will be. (Hoagie rolls: 125 g, Hamburger rolls: 75g)
When you divide the dough, with your fingers, gently pat into a 4:3 rectangle where the dough is about 1/4″ thick.
Envelope fold the short end of the rectangle towards the center and press gently to seal.
Rotate the dough 180 degrees and repeat the above folding using your hand to seal the dough.
The dough should be shaped like a log/snake. Gently cup your hand over the center of the dough and, without applying pressure/pressing down, gently roll the dough back and forth to reinforce the seal and roll it out into a log.
Carefully pull the ends of the log outwards to stretch out dough (just an inch or so – again dependent on how long you want your rolls).
To help round out the ends, cup each hand at the end of the roll and move them in opposite directions with a back and forth motion to roll the ends and then tuck underneath the roll.
Transfer to a parchment lined tray and cover with lightly sprayed plastic wrap. Allow to rise again until almost doubled. ~30-45 minutes. Do NOT overproof them otherwise they will fall flat.
Preheat oven to 375 F. If you want to slash your bread, using a lame, make your slashes. If desired, brush with coating of choice and bake for 16-23 minutes or until golden brown. To ensure doneness, test the internal bread temp. It should be at 200F.