It’s Independence Day This Time

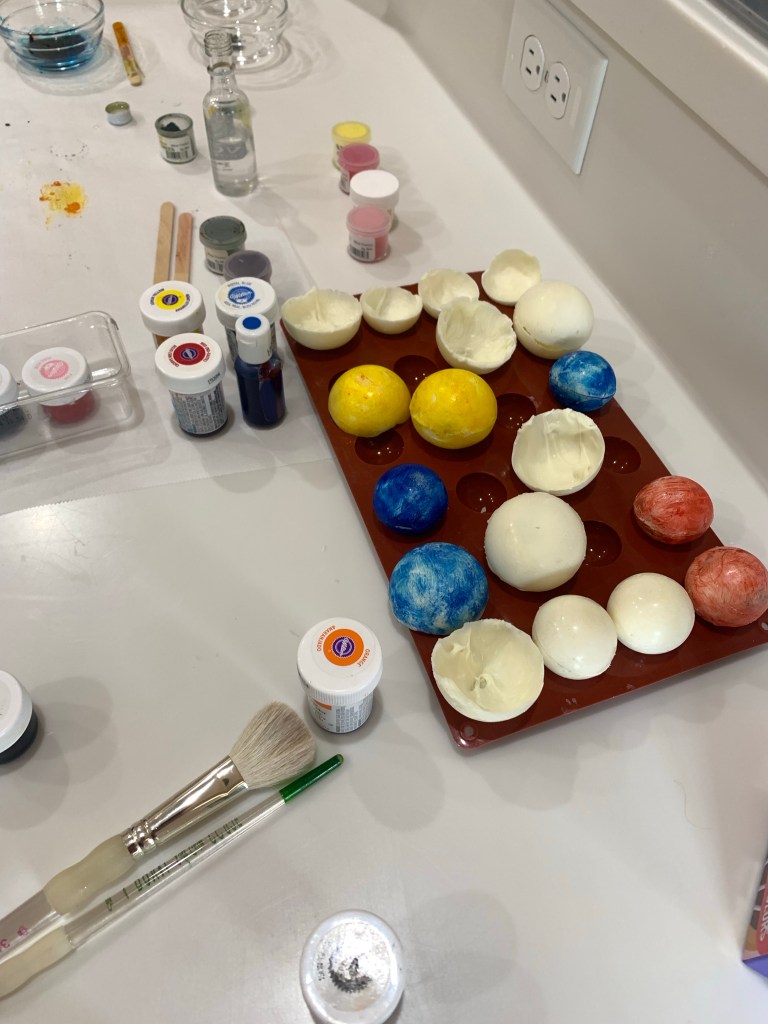
I need an Independence Day themed dessert for a party this weekend. I started out with a red, white and blue mousse cake. The blue was to be blueberry mousse. As you may know, blueberries are not chucked full of flavor, so having made the blueberry mousse, (it tasted mostly like whipped cream) I looked elsewhere for inspiration.

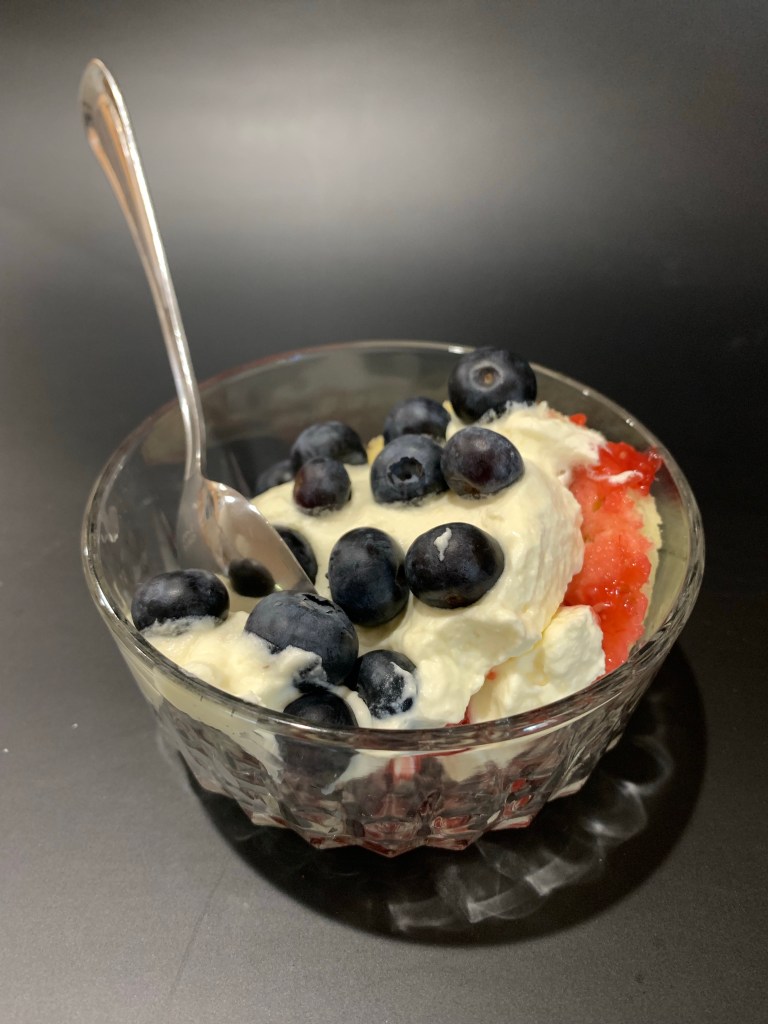
I don’t know how it came to mind, but a berry trifle with red berries, whipped cream and blueberries sounded perfect for a cool, light summer dessert. As one of the kids at the party is allergic to strawberries I used raspberries as the red. (The fact raspberries are my fav, didn’t enter into the decision.) I wanted something more substantial than simple whipped cream so I decided on Creme Diplomat. This creme is basically cream patisserie and whipped cream. I fortified each with cornstarch to help it retain is structure longer.

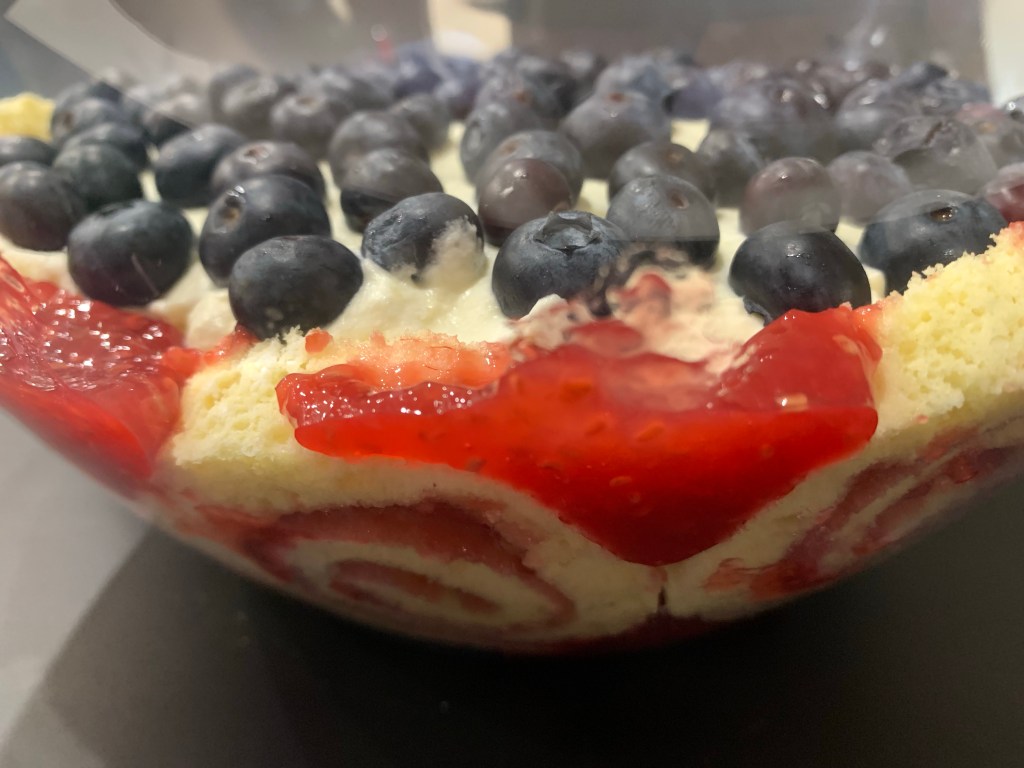
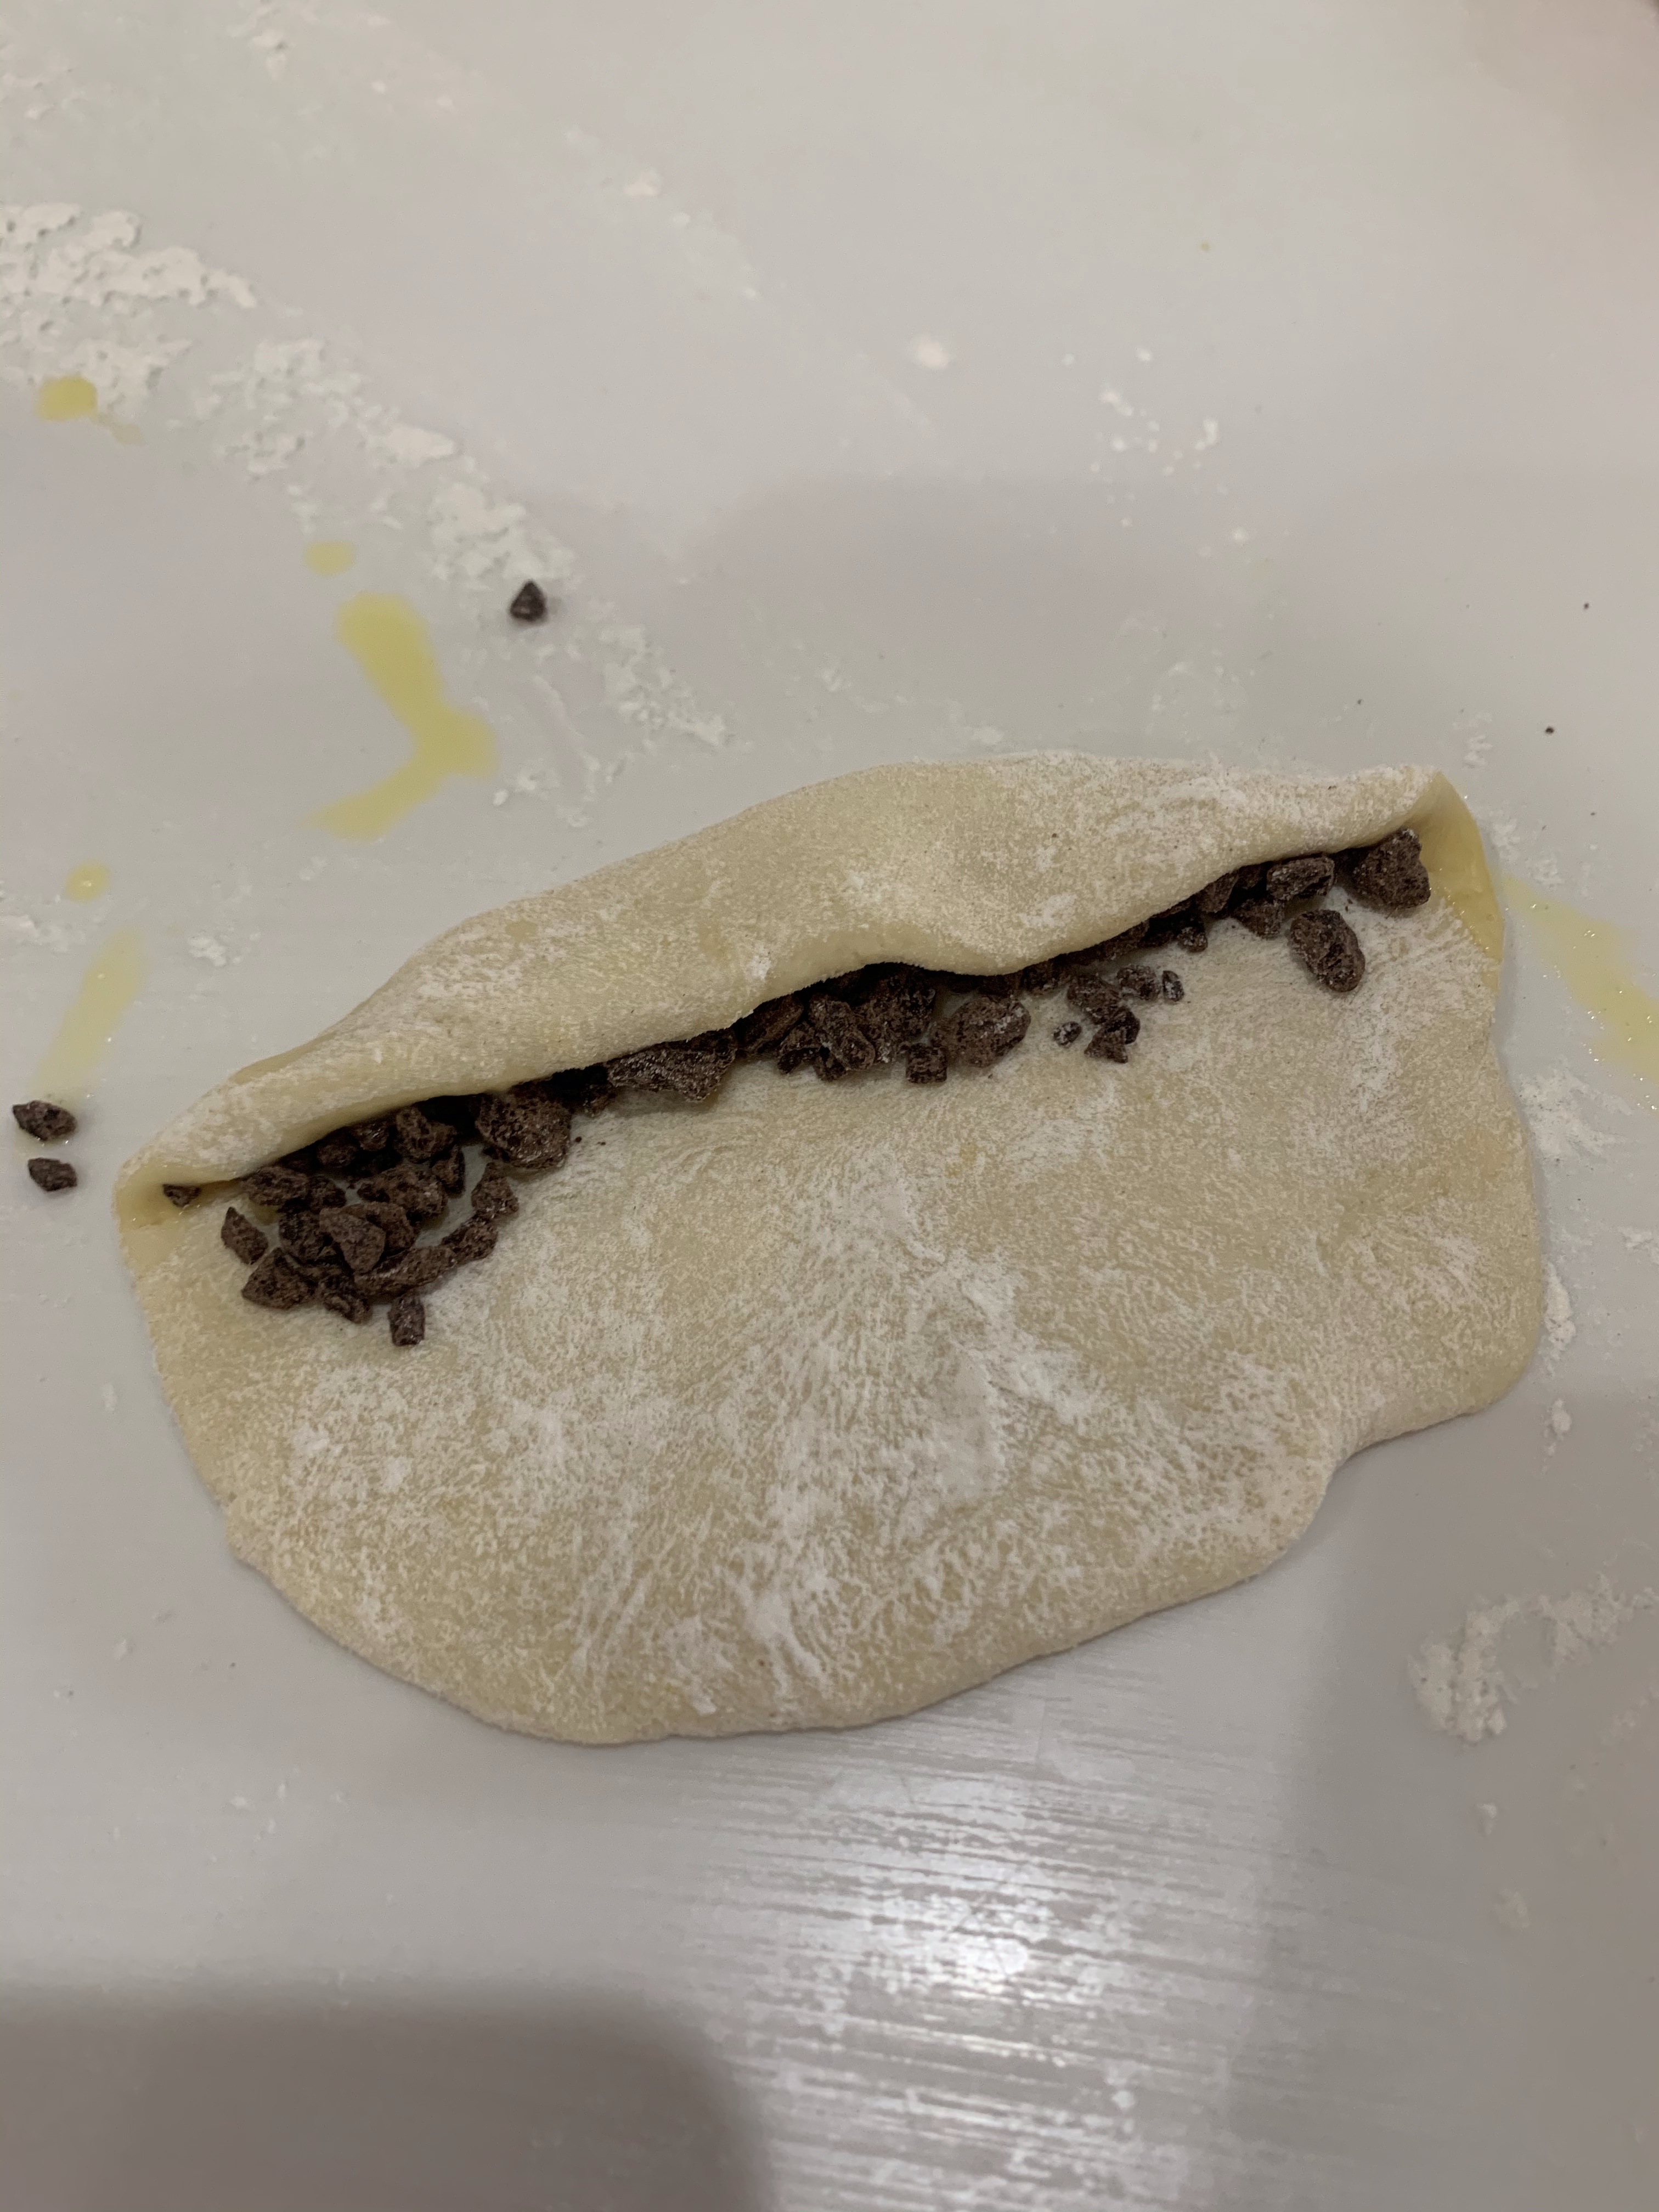
Rather than lady fingers or simple cubes of white or vanilla cake I settled on a sliced Swiss roll with raspberry filling. (Prettier). I never made a Swiss roll before, but had lots of advice and examples from watching years of GBBO.

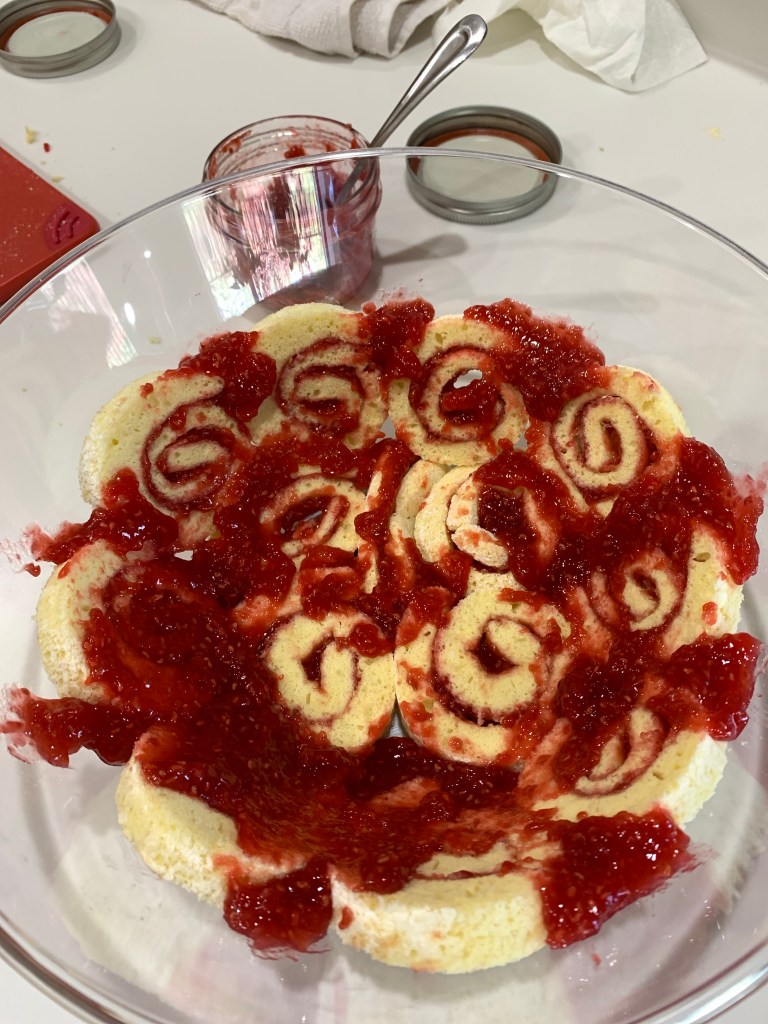
By coincidence, I made raspberry jam last week and had plenty to use for this project. I sliced the cool, filled Swiss roll into 14 pieces. (Note the nice tight swirl pattern. GBBO contestants always struggle with this.) The bottom and sides of the bowl were lined with the slices, then extra jam was forced into any openings between, or on top of the slices.

Creme Diplomat is essentially 1:1 cream patisserie and whipped cream. It resulted in a light, cool and perfect for a summer dessert. QC loved it, said it wasn’t overly sweet but delicious. 😄

I am experimenting with a new backdrop for many of my pictures. I am using the dark background in this post. Let me know what you think.

Crème Diplomat

INGREDIENTS

• ½ c sugar
• ¼ c corn starch
• Pinch salt
• 2 c whole milk
• 4 egg yolks
• 2 Tbl butter
• 2 cups heavy cream, cold
• 2 Tbl granulated sugar

METHOD

  1. Whisk eggs and milk together and add to all other ingredients (except vanilla) to a medium saucepan.
  2. Bring to boil whisking constantly
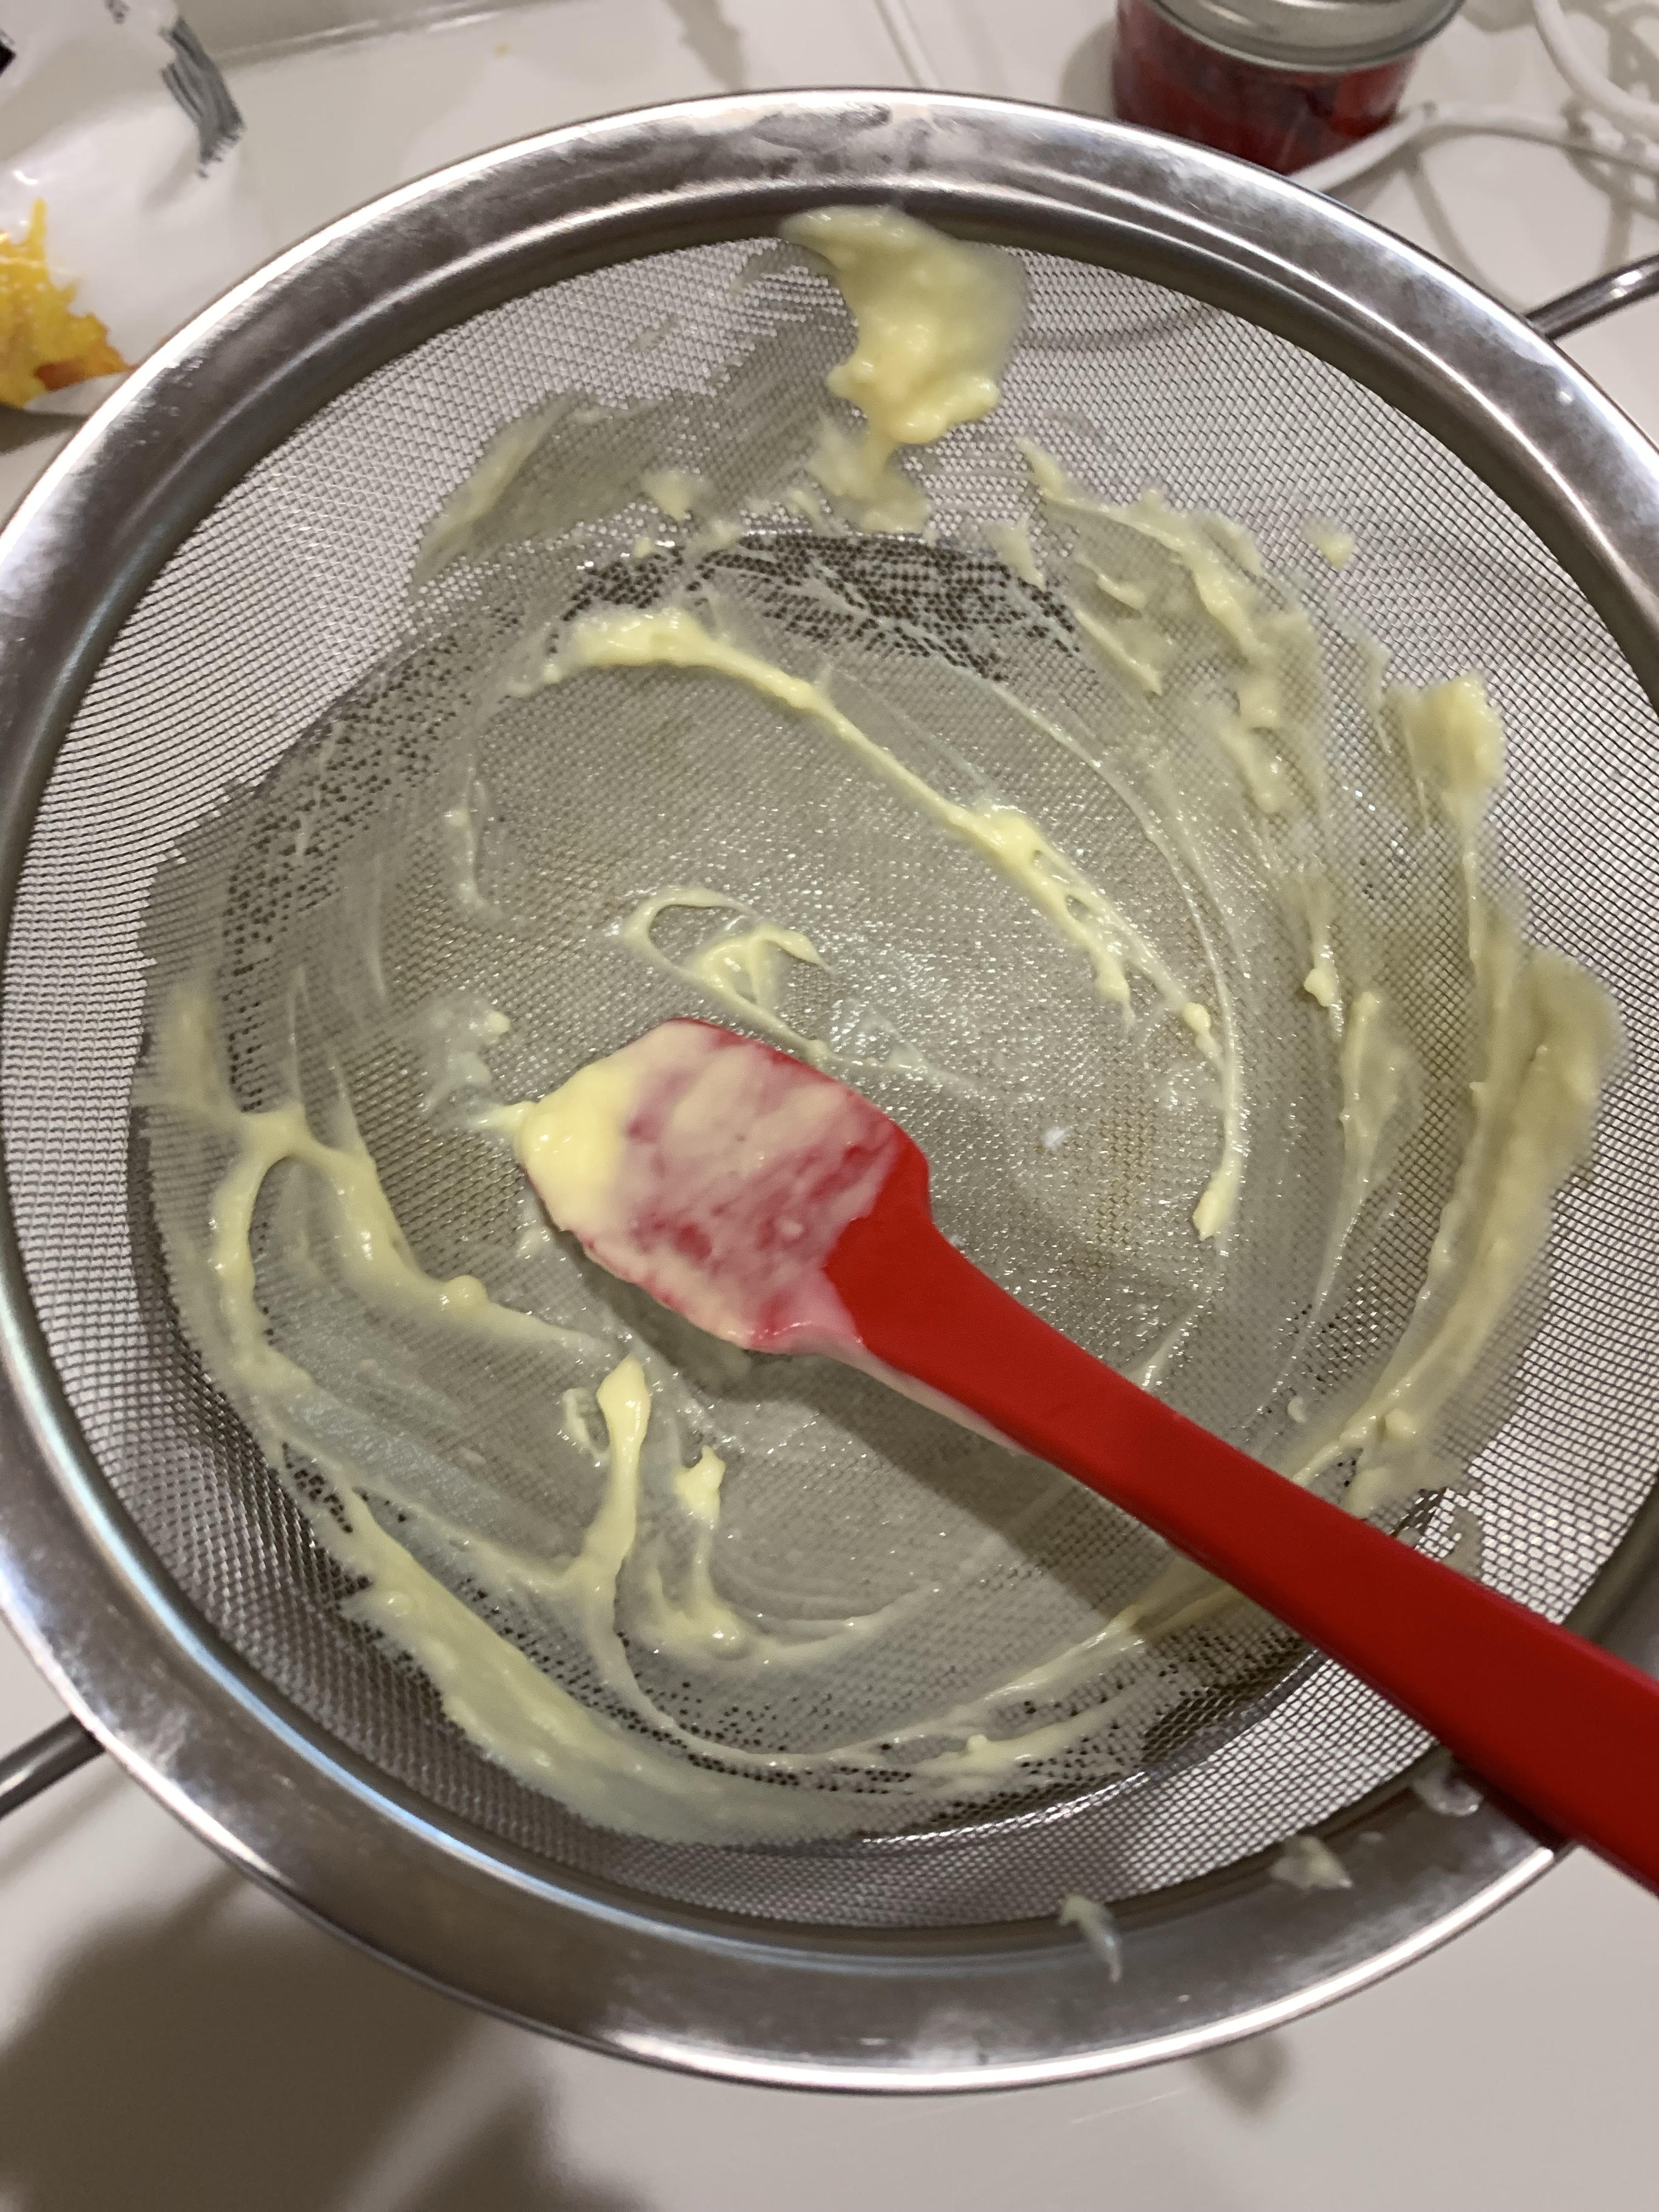
  3. Cook until thickened (it’s ok if it looks lumpy)
  4. Sieve lumpy mixture into a bowl and add 1 tsp vanilla, mix thoroughly
  5. When incorporated, cover with plastic directly on the cream and cool about an hour.
  6. Whip the cold heavy cream and granulated sugar to medium peaks.
  7. Fold a few spoonfuls of the custard into the cream. Gradually fold the rest of the custard in 2 or 3 additions, being careful to not knock the air out.

Mousse, No Squirrel

Don’t ask me why I was obsessed with making a Neapolitan Mousse Cake, but I was, and it’s now complete. Today was the third and fourth (and final) adjustments to the recipe(s).

To make the three layers approximately the same thickness I increased the amount of white and strawberry mousse. I also adjusted the amount of agar agar to create the consistency I wanted.

Neapolitan Mousse

INGREDIENTS

WHIPPED CREAM (for Chocolate Mousse)– YIELDS 1 ½ CUPS OF WHIPPED CREAM
• 1 cup Heavy whipping cream
• 4 tablespoons Powdered Sugar or Confectioners sugar
• 1 ½ teaspoons Cream of tartar
• 1 tsp vanilla bean paste
WHIPPED CREAM (for Vanilla and Strawberry Mousse)– YIELDS 2 CUPS OF WHIPPED CREAM
• 1 ½ cup Heavy whipping cream
• 6 tablespoons Powdered Sugar
• 2 teaspoons Cream of tartar
• 1 ½ tsp vanilla bean paste
WHITE CHOCOLATE
• 2 cup White chocolate chips
• ½ cup heavy whipping cream
DARK CHOCOLATE
• 1 cup dark chocolate chips
• ½ cup Heavy whipping cream
STRAWBERRY PURÉE
• 1 ½ cup fresh strawberries
• 1/3 + 2 Tbl cup granulated sugar
• 1 ½ tsp strawberry extract
• Red food coloring to suit (1-2 drops)
AGAR AGAR
• 2 Tsp Agar Agar
• 2 Tbl warm water
CHOCOLATE GANACHE
• 1 cup chocolate
• ¾ cup heavy cream
GRAHAM CRAKER CRUST
• 2 cups finely crushed regular graham crackers
• 1/3 cup butter, melted
• ½ beaten egg white
• 3 tablespoons sugar

METHOD

GRAHAM CRACKER CRUST

  1. Heat oven to 350°F. In a food processor pulse the crushed graham crackers several times, then add the rest of the ingredients until well mixed. Press remaining mixture firmly and evenly against bottom of an 8” removable bottom cake pan.
  2. Bake at 350 F for 10 min. Set aside to cool.
  3. When cool, line the inside edges of the cake pan with acetate

WHIPPED CREAM – (3 batches required)

  1. Before beginning with the recipe, place the mixing bowl and whisk in the freezer for at least 10 minutes to chill.
  2. Once the bowl has chilled, add heavy cream and vanilla and beat on low speed until the cream starts to thicken slightly. There will be fewer and larger bubbles.
  3. Add the cream of tartar and powdered sugar and beat with increasingly higher speed until stiff peaks form. Once done, set it in the fridge to chill.

PREPARING THE CHOCOLATE MOUSSE

  1. Heat heavy cream to steam, not boil. I use the microwave in 30 second bursts
  2. Place 1 cup chopped chocolate in a heat proof bowl.
  3. Pour heated cream over chocolate, cover and let sit 30 seconds
  4. Beat until the cream is completely incorporated and the chocolate is smooth and creamy
  5. Let come to room temperature
  6. Gently fold the room temperature chocolate into the cold whipped cream
  7. Spread the chocolate mousse evenly on top of the graham cracker crust
  8. Refrigerate

PREPARING THE STRAWBERRY PURÉE

  1. Combine strawberries and sugar in a saucepan and bring to a boil. Lower the heat and simmer for 10 minutes until the syrup thickens.
  2. Keep stirring occasionally. When the strawberries are soft and the syrup has thickened, remove from heat and allow to cool.
  3. When completely cooled, coarsely puree it with an immersion blender. Add strawberry extract and set it aside. Measure the syrup – you will require ½ cup of thick syrup

AGAR AGAR MIX

  1. Mix 3 teaspoons Agar agar powder with 4 Tbl lukewarm water
  2. Whisk to combine
  3. Let rest 4 – 5 minutes for the agar agar to bloom

PREPARING STRAWBERRY AND VANILLA MOUSSE

  1. Heat a pan 1/2 filled with water over low heat and place the white chocolate bowl over the water when it simmers. Keep stirring the chocolate as it softens and melts.
  2. Add agar agar mix and stir constantly for 5 minutes
  3. Add ½ cup warm milk and mix until the chocolate is thick but runny.

FOR VANILLA MOUSSE

  1. If desired add a few drops of white food coloring to lighten the yellowish mixture and mix well
  2. Gently fold the cool to touch white chocolate [and agar] mixture into the cool whipped cream until combined. Do not beat and deflate the mousse.

FOR STRAWBERRY MOUSSE

  1. Add half the cooled whipped cream to the cool white chocolate mixture
  2. Add the strawberry syrup that was prepared earlier to the whipped cream/white chocolate mixture
  3. Mix gently to not deflate.
  4. Add the rest of the whipped cream to the strawberry-white chocolate.
  5. [OPTIONAL – add two drops of red food coloring. Without the coloring the strawberry mousse is not strongly differentiated from the vanilla mousse.]

TO MAKE CHOCOLATE GANACHE

  1. Warm cream in the microwave just until a simmer and not boiling hot.
  2. Pour it over the chocolate and let it rest, undisturbed, for 30 seconds.
  3. Now start stirring gently until it forms a smooth chocolate ganache.
  4. Let the ganache cool slightly, but it should still be pourable.

DECORATING THE MOUSSE CAKE WITH GANACHE

  1. Pour the chocolate around the edge of the mousse cake letting some run down the side, but not so much as to drip all the way to the bottom.
  2. Cover the rest of the cake with chocolate and top with sliced strawberries.

DECORATING THE MOUSSE CAKE WITH A CHOCOLATE COLLAR

  1. Cut a piece of parchment paper the circumference and height (or a little more) of the mousse cake.
  2. Place it on a larger piece of parchment paper to help later clean-up.
  3. Temper a cup of chocolate, fill a piping bag and let cool slightly. This was an experiment for me. It needs to be cool enough to not run when piped, but warm enough to pipe easily
  4. Cut a small hole in the end of the piping bag and with an erratic swirling pattern make a lace pattern over the smaller piece of parchment paper, being sure to cover all the way to the edges.
  5. Let the chocolate collar dry such that it won’t drip when picked up.
  6. Carefully wrap the mousse cake with the still slightly soft collar and press gently.
  7. Let the collar cool for a few minutes then carefully peal the parchment paper base from the collar, leaving the chocolate collar adhered to the mousse cake.

In a Galaxy Far Far Away…

Grace’s sixth birthday is a space themed extravaganza so I made a galaxy cake. It’s more of a solar system cake, but not our solar system.

The cake is a six layer stacked extreme chocolate cake. A cardboard cake board separates each two layers to make cutting and serving easier. Each layer is a 9” round cake, and the “internal” cake board is 8” to allow a smooth buttercream transition between layers. The small white stars are tempered white chocolate made with a silicon mold. The larger stars, around the base, are various colors of white chocolate, again formed using a silicon mold.

The planets are white chocolate made with a variety of hemispherical silicon molds and painted with decorating colors mixed with vodka. Some of them were fused together to make spheres, the ones on the side of the cake were left as hemispheres. Slightly melting the edges of the hemisphere or the bottom of the spheres helped them adhere to the blue buttercream.

Before adding the planets I splattered the cake with white food coloring. The “space woman” was purchased and a printable decal image of Grace was pasted on the silver faceplate of the space suit.

The Long and Shortbread of It

We love shortbread cookies, and we love chocolate. Combining the two is a step from ecstasy. Also, this gave me the excuse… I mean opportunity… to use the hexagonal cookie cutters Fran (aka QC) bought me.

Using hexagonal cutters reduces dough waste as there are no gaps between each cut.

Hexagonal Cookie Cutters with the one used on the lower right.
Shortbread Cookies surrounded by Raspberry Hand Pies.

Shortbread Cookies

INGREDIENTS
• 3/4 pound unsalted butter, at room temperature
• 1 cup sugar, plus extra for sprinkling
• 1 teaspoon pure vanilla extract
• 3 ½ cups all-purpose flour
• ¼ teaspoon salt
• 6 to 7 ounces very good semisweet chocolate, finely chopped

METHOD

  1. Preheat the oven to 350 degrees F.
  2. In the bowl of an electric mixer fitted with a paddle attachment, mix together the butter and 1 cup of sugar until they are just combined. Add the vanilla.
  3. In a medium bowl, sift together the flour and salt, then add them to the butter-and-sugar mixture. Mix on low speed until the dough starts to come together. Dump onto a surface dusted with flour and shape into a flat disk. Wrap in plastic and chill for 30 minutes.
  4. Roll the dough 1/2-inch thick and cut with a 3 by 1-inch finger-shaped cutter. Place the cookies on an ungreased baking sheet and sprinkle with sugar. Bake for 20 to 25 minutes, until the edges begin to brown. Allow to cool to room temperature.
  5. When the cookies are cool, place them on a baking sheet lined with parchment paper. Put 3 ounces of the chocolate in a glass bowl place over a pan of boiling water. Turn the burner down to simmer and heat with stirring until the chocolate is nearly all melted. Stir vigorously until the chocolate is smooth and slightly cooled; stirring makes it glossier.
  6. Drizzle 1/2 of each cookie with just enough chocolate to coat it.

Raspberry Drop Scones and Blackberry Hand Pies

As mentioned elsewhere days without golf can be dangerous. Along with a new Pumpernickel/Rye Bread and High Hydration Honey White Bread I tried a new puff pastry to make blackberry hand pies and raspberry drop scones to freeze and thaw for breakfast.

The more important thing is I was able to try out my new hexagonal cookie cutter. I never liked the square, or triangular (folded squares) hand pies. Circular were good, but the space between the circles wasted a lot of puff pastry. The hexagonal cutter was nearly as efficient as cutting squares, but look more like round pies.

My new hexagonal cookie cutters

I used a larger cutter for the top to assure good coverage of the smaller bottom. I docked the bottom piece with a fork to manage the puff of the pastry.

The edges of the covered pies were pinched with the fork, and egg wash painted on, a steam vent cut on the top and sparkling sugar sprinkled on each pie before baking.

I’d Give $1000 to be One of Them Millionaires

I saw these on GBBO and decided to give them a go. (Kind of English slang for “try to make them”.) Millionaires Bars are layers of shortbread, caramel and chocolate.

I used a jelly roll pan, which is about 25% bigger than the specified pan. This caused each layer to be thinner than I expected. As they were setting I considered increasing the recipe quantities by about 50%. After cutting and eating them I think I am going to leave them the way they are. They ended up being about 1/4” thick and if I cut them into 1” square pieces they will be perfect bite sized pieces.

Self induced problems: 1) Forgot to use the parchment paper making me worry about releasing the bar from the jelly roll pan. No problem. I cut around the outside and across the center. Each large piece came out easily. 2) I should have poured the chocolate on the caramel before it set. Not doing so caused the chocolate to not adhere to the caramel. Cutting the bars into 1” squares, so you can just pop them into your mouth without taking a bite and “breaking” them, converts the problem into an enhancement.

Overall, these are delicious cookies. The caramel was heated to 242 deg which made it a perfect softness and texture. The chocolate wasn’t tempered but resulted in a nice layer with a good snap. The short bread base was difficult to push to the edges of the pan, but perhaps rolling it out before placing in the pan would help. I also skipped the macadamia nuts as my pantry was bare. If you saw my pantry, you wouldn’t believe that possible.

Millionaire Shortbread Bars

Millionaire Shortbread Bars

Paul Hollywood’s Salted Caramel Bars

https://people.com/food/paul-hollywood-salted-caramel-bars-recipe/

INGREDIENTS
• ⅓ cup granulated sugar
• 1⅓ cups unsalted butter, softened and divided, plus more for greasing
• 1¾ cups all-purpose flour
• ½ tsp. table salt
• ¾ cup packed light brown sugar
• ⅓ cup sweetened condensed milk
• 3 tbsp. golden cane syrup (or honey as a substitute)
• 1 tsp. flaky sea salt
• 7 oz. dark chocolate baking bar, chopped
• ½ cup coarsely chopped macadamia nuts

METHOD

  1. Preheat oven to 300°. Grease a shallow 11×7-inch baking dish with butter.
  2. Line baking dish with parchment paper, allowing paper to extend by 2 inches on each side; grease parchment.
  3. Beat granulated sugar and 2/3 cup butter in a large bowl with an electric mixer on medium speed until light and fluffy, 2 to 3 minutes. Add flour and table salt; stir with a spoon, and then combine with your hands to form a smooth dough (try not to overwork it). I ended up adding a couple of Tbl water to the dough so it would come together,
  4. Press dough into pan in an even layer, and prick surface all over with a fork. Bake in preheated oven until pale golden and cooked through, 30 to 35 minutes. Cool completely in pan, about 45 minutes.
  5. Combine brown sugar, condensed milk, golden syrup (or honey) and remaining 2/3 cup butter in a medium-size heavy saucepan over medium heat. Cook, stirring often, until butter melts and mixture is smooth, about 3 minutes. Bring to a boil, and cook, stirring constantly, until the caramel bubbles become larger, mixture thickens and turns a rich, glossy caramel color, about 10 to 12 minutes. Pour caramel evenly over the shortbread, and sprinkle with sea salt. Cool completely until set, about 1 hour.
  6. Melt chocolate, stirring often, in a heatproof bowl suspended over a pan of simmering water, making sure the bottom of the bowl doesn’t touch the water. Pour melted chocolate evenly over caramel layer; spread with an offset spatula until level and smooth. Sprinkle with nuts. Let stand until chocolate is set, about 1 hour. Use a knife to release ends of bars from pan; use the parchment paper as handle to remove from pan. Cut into bars.

(Cream) Puff the Magic…

I saw a recipe and “how to” video on making cream puffs. I usually make my choux into eclairs or profiteroles, but thought some sweet whipped cream filling would be a nice change.

Natasha Kravchuk used 1/2 cup water and 1/2 cup milk instead of just a cup of water. Unlike Natasha, I used an egg wash to darken the tops and give the choux a nice sheen. Other than that, it was the same recipe I normally use. Same with the whipped cream except she used 2x the amount of sugar and vanilla. She also piped the whipped cream leaving the center empty. She (and I ) added a fresh raspberry inside before covering with the cut off top.

Also, I saw a hint to wet the parchment paper before piping the choux. I am not sure if it made a difference but the choux rose nicely and didn’t collapse. A few did have bottoms that bowed in. They were sent to QC for evaluation. We were so concerned we sent a larger number of samples than usual.

Twist and Shout – With Chocolate

In a continuing search for places to use chocolate I found Chocolate Torsades. The name derives from the French ‘tornado’ for ‘twist.’

There really isn’t a recipe for this. I used my creme patisserie recipe from the eclairs, (I had some left over.) I also had a leftover sheet of puff pastry, and of course lots of existing chocolate. (Still trying to exhaust the old stock.)

French Chocolate Torsades (Puff Pastry Twists)

INGREDIENTS
• 4 egg yolks
• 1/2 cup of sugar
• 2 tablespoons of flour
• 1 1/2 cups of milk
• 1/2 tablespoons of vanilla
• 1 tablespoon of butter
• 1/4 teaspoon of salt
• 1 sheet Puff pastry (270 g)
• Chocolate chips dark or milk
• 1 egg for egg wash
• Sparkling sugar

METHOD
For the custard

  1. Whisk eggs and milk together and add to all other ingredients (except vanilla) to a medium saucepan.
  2. Bring to boil whisking constantly
  3. Cook until thickened (it will look lumpy, its ok)
  4. Sieve lumpy mixture into a bowl and add 1 tsp vanilla, mix thoroughly
  5. When incorporated, cover with plastic directly on the cream and cool.

    For the Chocolate Torsades
  6. Preheat oven to 410 degrees (215 Celsius)
  7. Roll out puff pastry about 14 inches long or just use the store bought roll
  8. Spread a thin layer of the vanilla custard on top
  9. Sprinkle chocolate chips on top
  10. Fold in half and cut into strips
  11. Twist each strip a few times to create the twist
  12. Whisk one egg in a small bowl and brush the tops of the twists with the egg wash
  13. Place chocolate torsades on baking sheet with parchment paper
  14. Sprinkle with sparkling sugar
  15. Bake at 400 degrees (215 Celsius) for 15 minutes or until golden brown.

Long Chocolate Buns

I saw a picture of an elongated bread roll, like a hot dog roll, but slashed with a lame and the slashes were filled with lemon curd before baking. Well, I couldn’t find the recipe so decided to create my own. This is the first time I have stepped out of my chemist-trained-recipe-following comfort zone.

I also decided, since I don’t really care for lemon curd, I would instead roll chocolate ala pain au chocolat but using an enriched bread dough instead of puff pastry. This was also an excuse to use some of the 11# of chocolate I bought a couple of weeks ago.

The QC department suggested a less bitter chocolate (64% cacao) and sparkling sugar topping (good suggestion.) QC will have to live with 64% as I do have 11 pounds. Manufacturing suggested no chop the chocolate so small. Something the size of chocolate chips should melt fine and be easier to handle.

Chocolate Filled Bread Buns

INGREDIENTS
• 2 teaspoons active dry yeast
• 1 cup barely warm milk
• 3 cups all-purpose flour
• 2 tablespoons butter, melted
• 3 tablespoons sugar
• 1 teaspoons salt
• 2 eggs, one for dough, one for egg wash
• 1 tablespoon orange zest
• 165g, about 1 cup (4-6 ounces) bittersweet chocolate chopped fine (pulse in a food processor)

METHOD

  1. In a large mixing bowl, sprinkle the yeast over the warm milk and let sit for 5 minutes.
  2. Add 2 tablespoons melted butter, sugar, salt, egg, and orange zest. Stir until blended and fragrant.
  3. Add 3 cups of flour and mix until the dough comes together. It will be sticky! On a lightly floured surface knead the dough until soft and elastic (about 8 minutes), adding more flour to keep the dough from sticking if necessary. Do not add too much flour! The dough will become more workable the longer you knead. Or, if you have a standing mixer, knead the dough with the dough attachment for 5-7 minutes, or until elastic.
  4. Transfer the kneaded dough to a lightly oiled bowl. Cover with plastic wrap and a clean kitchen towel. Let the dough rise in a warm area until it doubles in size, about 2 hours.
  5. Punch dough down, divide into 12 equal portions, and shape each portion into a round ball. Flatten into an oval then roll to ¼ “ thick rectangle.
  6. Place a stripe of chocolate ½ “ from long end of rectangle. Roll to cover chocolate and place a second stripe of chocolate. Roll up and seal edges and all seams.
  7. Place rolls a on baking sheet coated lightly with cooking spray. Cover with a kitchen towel and let it rise for another 20 minutes.
  8. Preheat oven to 400 degrees F.
  9. Slash diagonally 4x with lame.
  10. Brush 1 egg wash over the rolls. Sprinkle with coarse sparkling sugar.
  11. Bake for 8-12 minutes or until lightly browned. Serve warm or at room temperature.

Un-Hasty Pudding

Well, it ain’t instant pudding, but is sooooo much better!! I made this pudding a couple of times before, each time seemed better than the previous.

If you have read some earlier posts you know I have an 11 lb bag of new chocolate just waiting its turn. I decided to use some of the 70% I had opened (finished it!) to make this home made pudding. It takes a little time and most of it is hands on, but it is so worth it. If you like chocolate and if you don’t mind whisking constantly for a few minutes, try this. It’s delicious. I forgot where I found the recipe and frankly, I don’t care.

A dab of whipped cream would have helped the picture, but we couldn’t wait.

Chocolate Pudding from Scratch

Makes 4 cups; serves 8

INGREDIENTS
• 4 ounces bittersweet chocolate
• 3 tablespoons unsweetened cocoa powder
• 3 tablespoons cornstarch
• 1/4 teaspoon salt
• 1 cup heavy cream
• 3 large egg yolks
• 2 1/2 cups whole or 2% milk
• 1/2 cup granulated sugar
• 1 teaspoon vanilla extract

METHOD

  1. Use a serrated knife to chop the chocolate into fine flakes; set aside.
  2. Whisk the cocoa powder, cornstarch, and salt together in a large, heatproof bowl. Slowly whisk in the cream, a little at a time, until you have a smooth mixture.
  3. Whisk the egg yolks into the cream and cornstarch mixture.
  4. Pour the milk into a 3-quart (or larger) saucepan. Add the sugar and warm over medium heat, stirring frequently, until the sugar is dissolved.
  5. Bring the milk to a gentle simmer over medium heat. Watch for the surface of the milk to vibrate and for bubbles to form around the edges of the pot.
  6. To temper the eggs, slowly pour most of the hot milk into the bowl of cream and egg yolks. Whisk until well-combined, then pour everything back into the pot.
  7. Bring the mixture to a full boil over medium-high heat, stirring frequently. (It should look like lava boiling up!) At this point, the pudding will look much thicker.
  8. Cook for 2 minutes more, whisking constantly and vigorously. Get your whisk into all corners of the pot.
  9. Remove the pot from the heat and whisk in the vanilla. Add the chopped chocolate and let sit for 1 to 2 minutes or until melted. Whisk vigorously until the chocolate is fully incorporated.
  10. Transfer the pudding to a storage container and press plastic wrap or wax paper directly onto the surface of the pudding. Cover with a lid and refrigerate.