Spring is thin mint cookie season. At QC’s request. I made Not Very Thin Mint Cookies for her Mah Jongg group. This was not my first thin mint rodeo. The mint flavor was strong the first time, so this time I didn’t add mint extract to the chocolate coating and the hint ‘o mint was perfect.
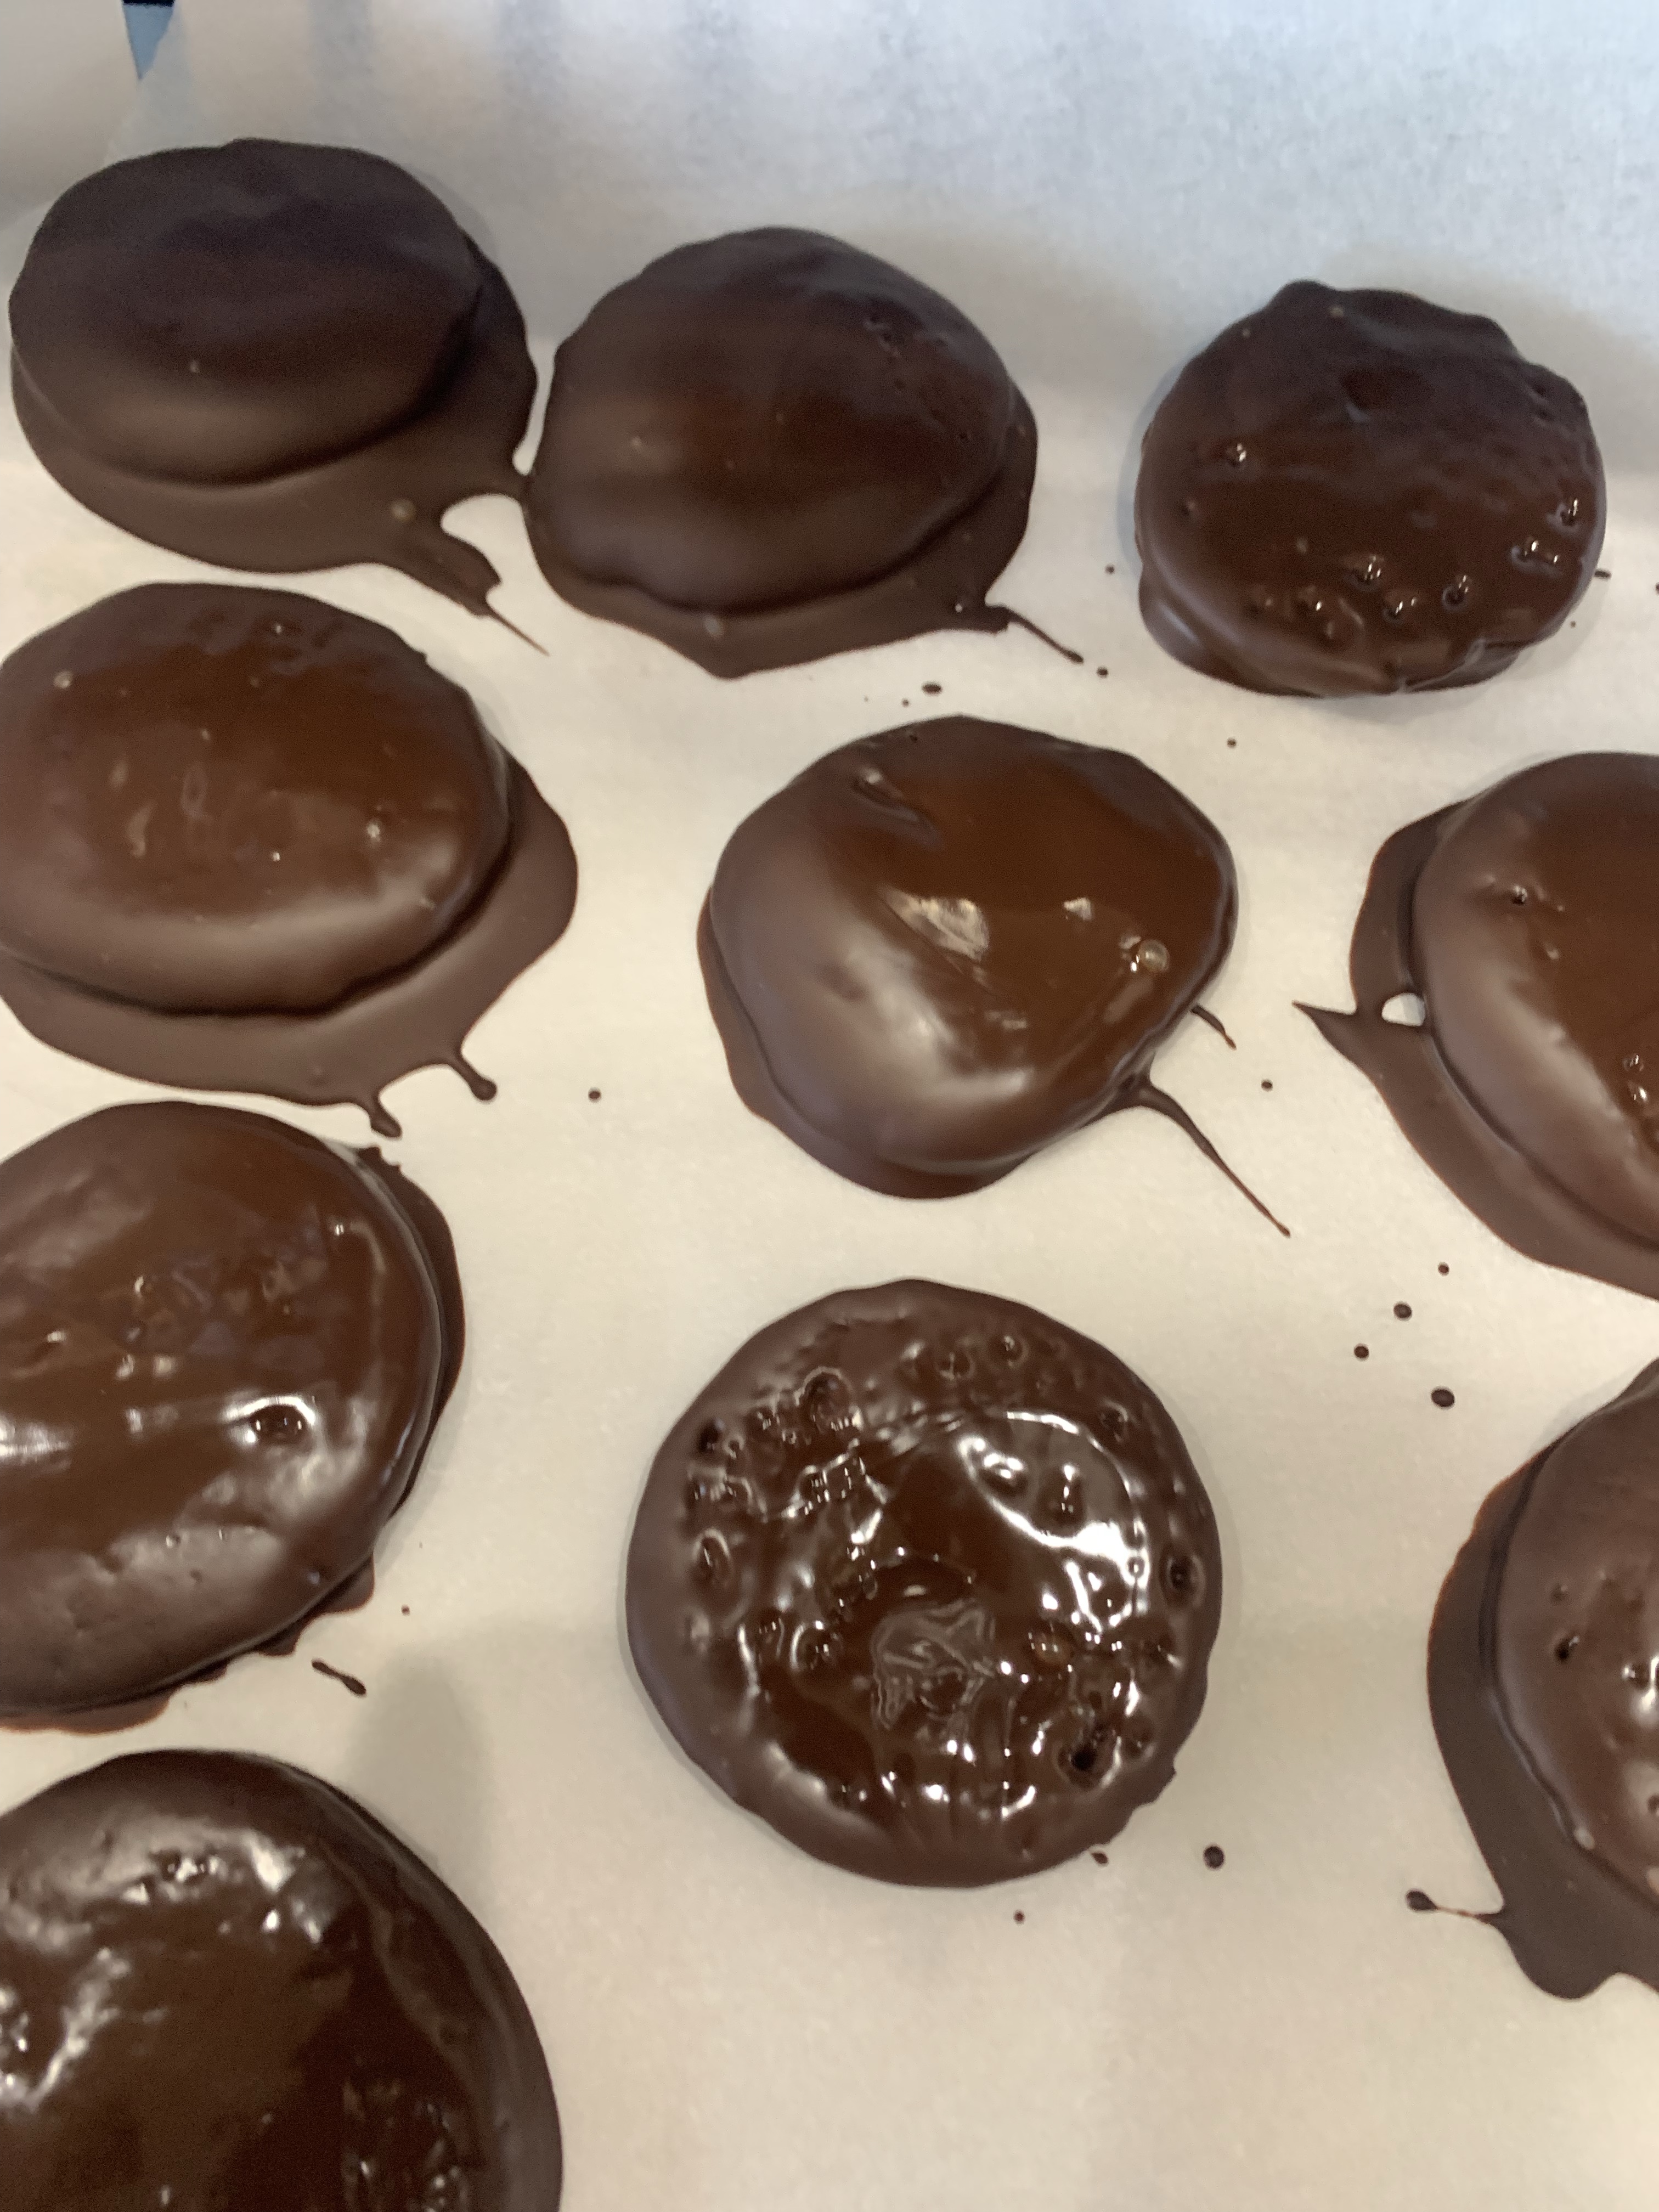
I coated the cookies with milk chocolate (31% cacao) rather than the dark chocolate (first attempt) or the second attempt with semi-sweet chocolate coating. The dark (64%) and semi-sweet (46%.)

The dark chocolate did not add enough sweetness to counter the strong mint flavor. The semi-sweet was a big improvement, so why not go a little sweeter yet? I am not a big fan of milk chocolate and I felt the last attempt was past the mark. I remember back when I was a professional photographer—when printing photos always go past what you think the perfect exposure/contrast is… just to be sure. Semi-sweet is the winner.
The liquidity of the chocolate is inversely proportional to the sweetness. This means the thickness of the chocolate coating increases with sweetness, which if you are not a fan of milk chocolate, is not a plus.
Thin Mint Cookies
INGREDIENTS
• ½ cup butter
• ½ cup granulated sugar
• ½ cup brown sugar
• 1 egg
• 1 cup AP flour
• ½ teaspoon baking powder
• ½ teaspoon salt
• 1/3 cup special dark cocoa powder
• ½ teaspoon pure peppermint extract
Chocolate Coating:
• 8 ounces baking chocolate
• ¼ teaspoon vegetable oil
• ¼ teaspoon pure peppermint extract
METHOD
- Preheat the oven to 350°F.
- In a bowl, combine the flour, baking powder, salt and cocoa powder. Whisk until smooth.
- In a mixing bowl, cream the butter and sugars until light and fluffy. Mix in the egg and peppermint extract. Gradually mix in the dry ingredients until the dough comes together. Use your hands to form the dough into a ball.
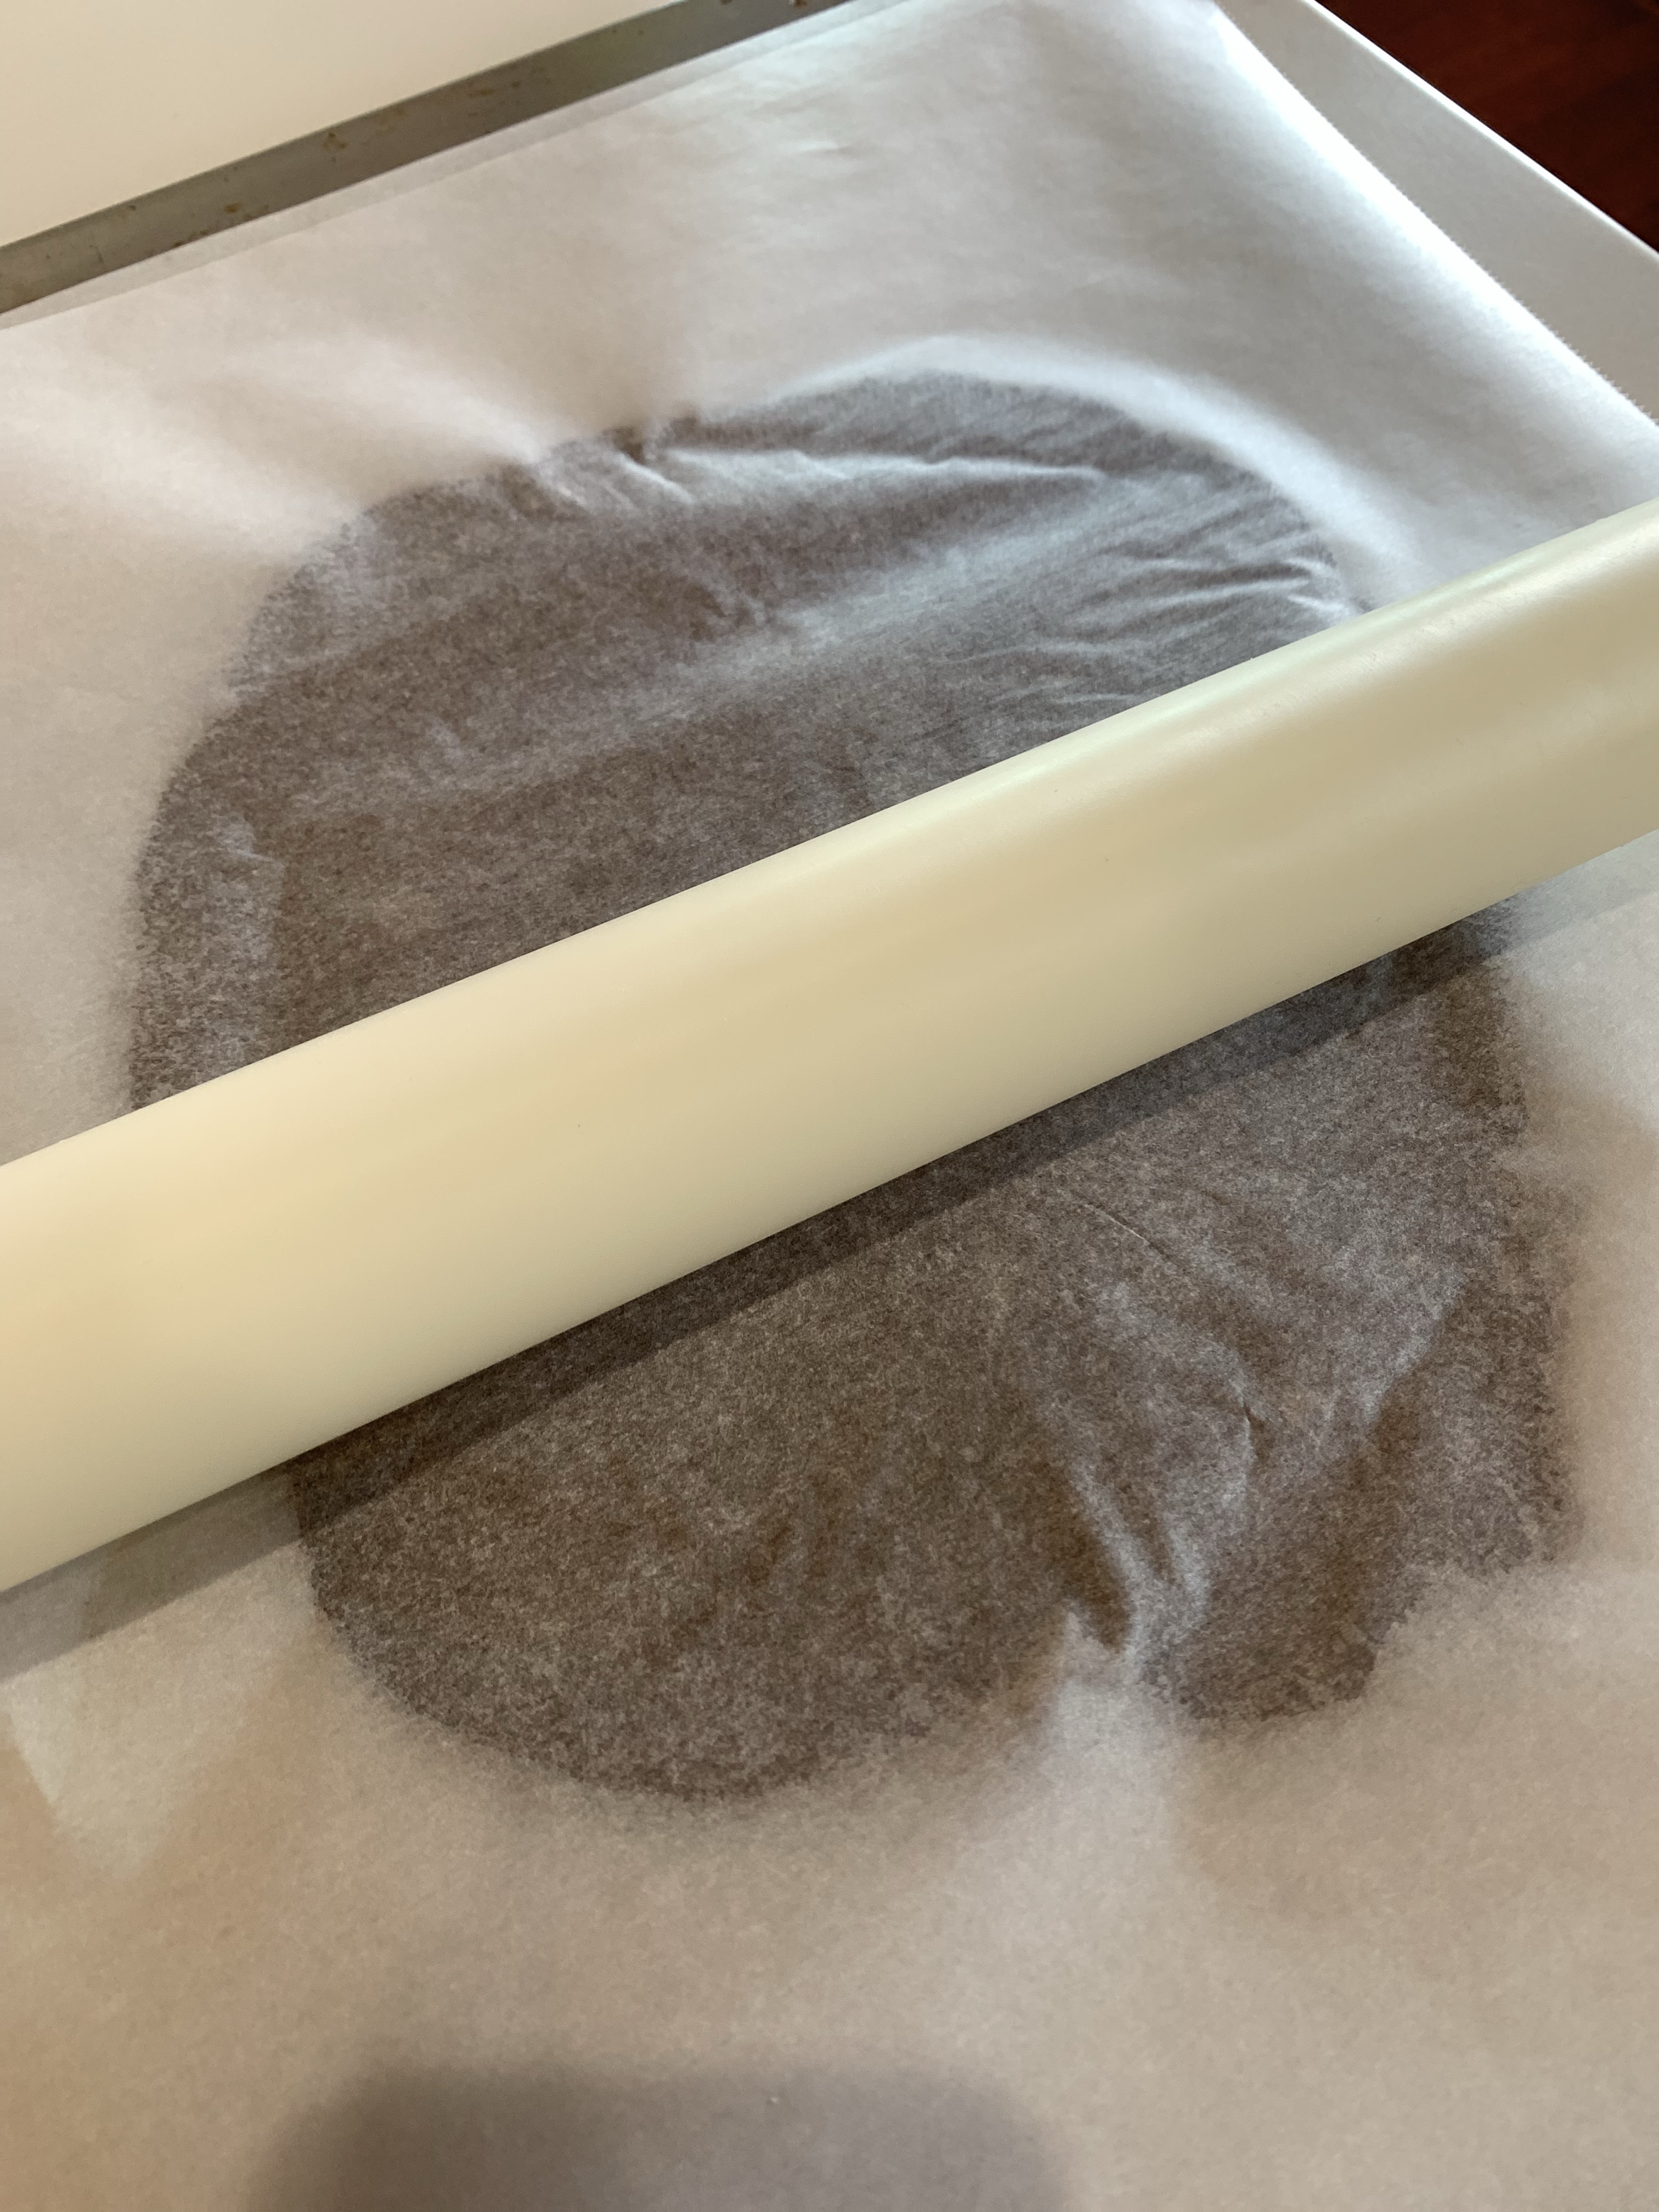
- Place the ball of dough onto a sheet of parchment paper. Flatten it into a disk and put another piece of parchment paper on top.
- Use a rolling pin to roll out the dough to 1/4-inch thick. (I like to use chopsticks on either side of the dough to control the thickness.) Transfer the rolled dough, with the parchment paper, onto a baking sheet.
- Place the baking sheet in the freezer to chill for 10 minutes.
- Transfer the flattened dough to a countertop. Remove the top sheet of parchment paper and use it to line the baking sheet.
- Use a small, circular cookie cutter to cut out disks of dough. Transfer the cut disks onto the prepared baking sheet, leaving space in between. Because the dough is chilled, these cookies won’t spread while baking.
- Place the baking sheet in the oven and bake for 11 minutes. Once baked, remove the cookies from the oven, then transfer the parchment paper and cookies to a cooling rack to fully cool.
- I temper chocolate using a sous vide. I find it is easier to control the temperature to modify the chocolate’s crystal structure. It is also easier to maintain the proper temper temperature while you dip and coat the cookies. Stir the chocolate until fully melted and stir in the peppermint extract.
- Use two forks to tip and flip the cookies. Once covered in chocolate, transfer each cookie back to the baking sheet lined with parchment paper. Place the baking sheet in the fridge for 20 minutes to allow the chocolate to fully set and harden.
• Thin Mints are best enjoyed cold.
• Store in an airtight container in the freezer or fridge.
• Keep in the freezer for one to two months, or in the fridge for two weeks. This will also keep the chocolate coating at its best.
• Store in an airtight container for two days.