Cheese It!!

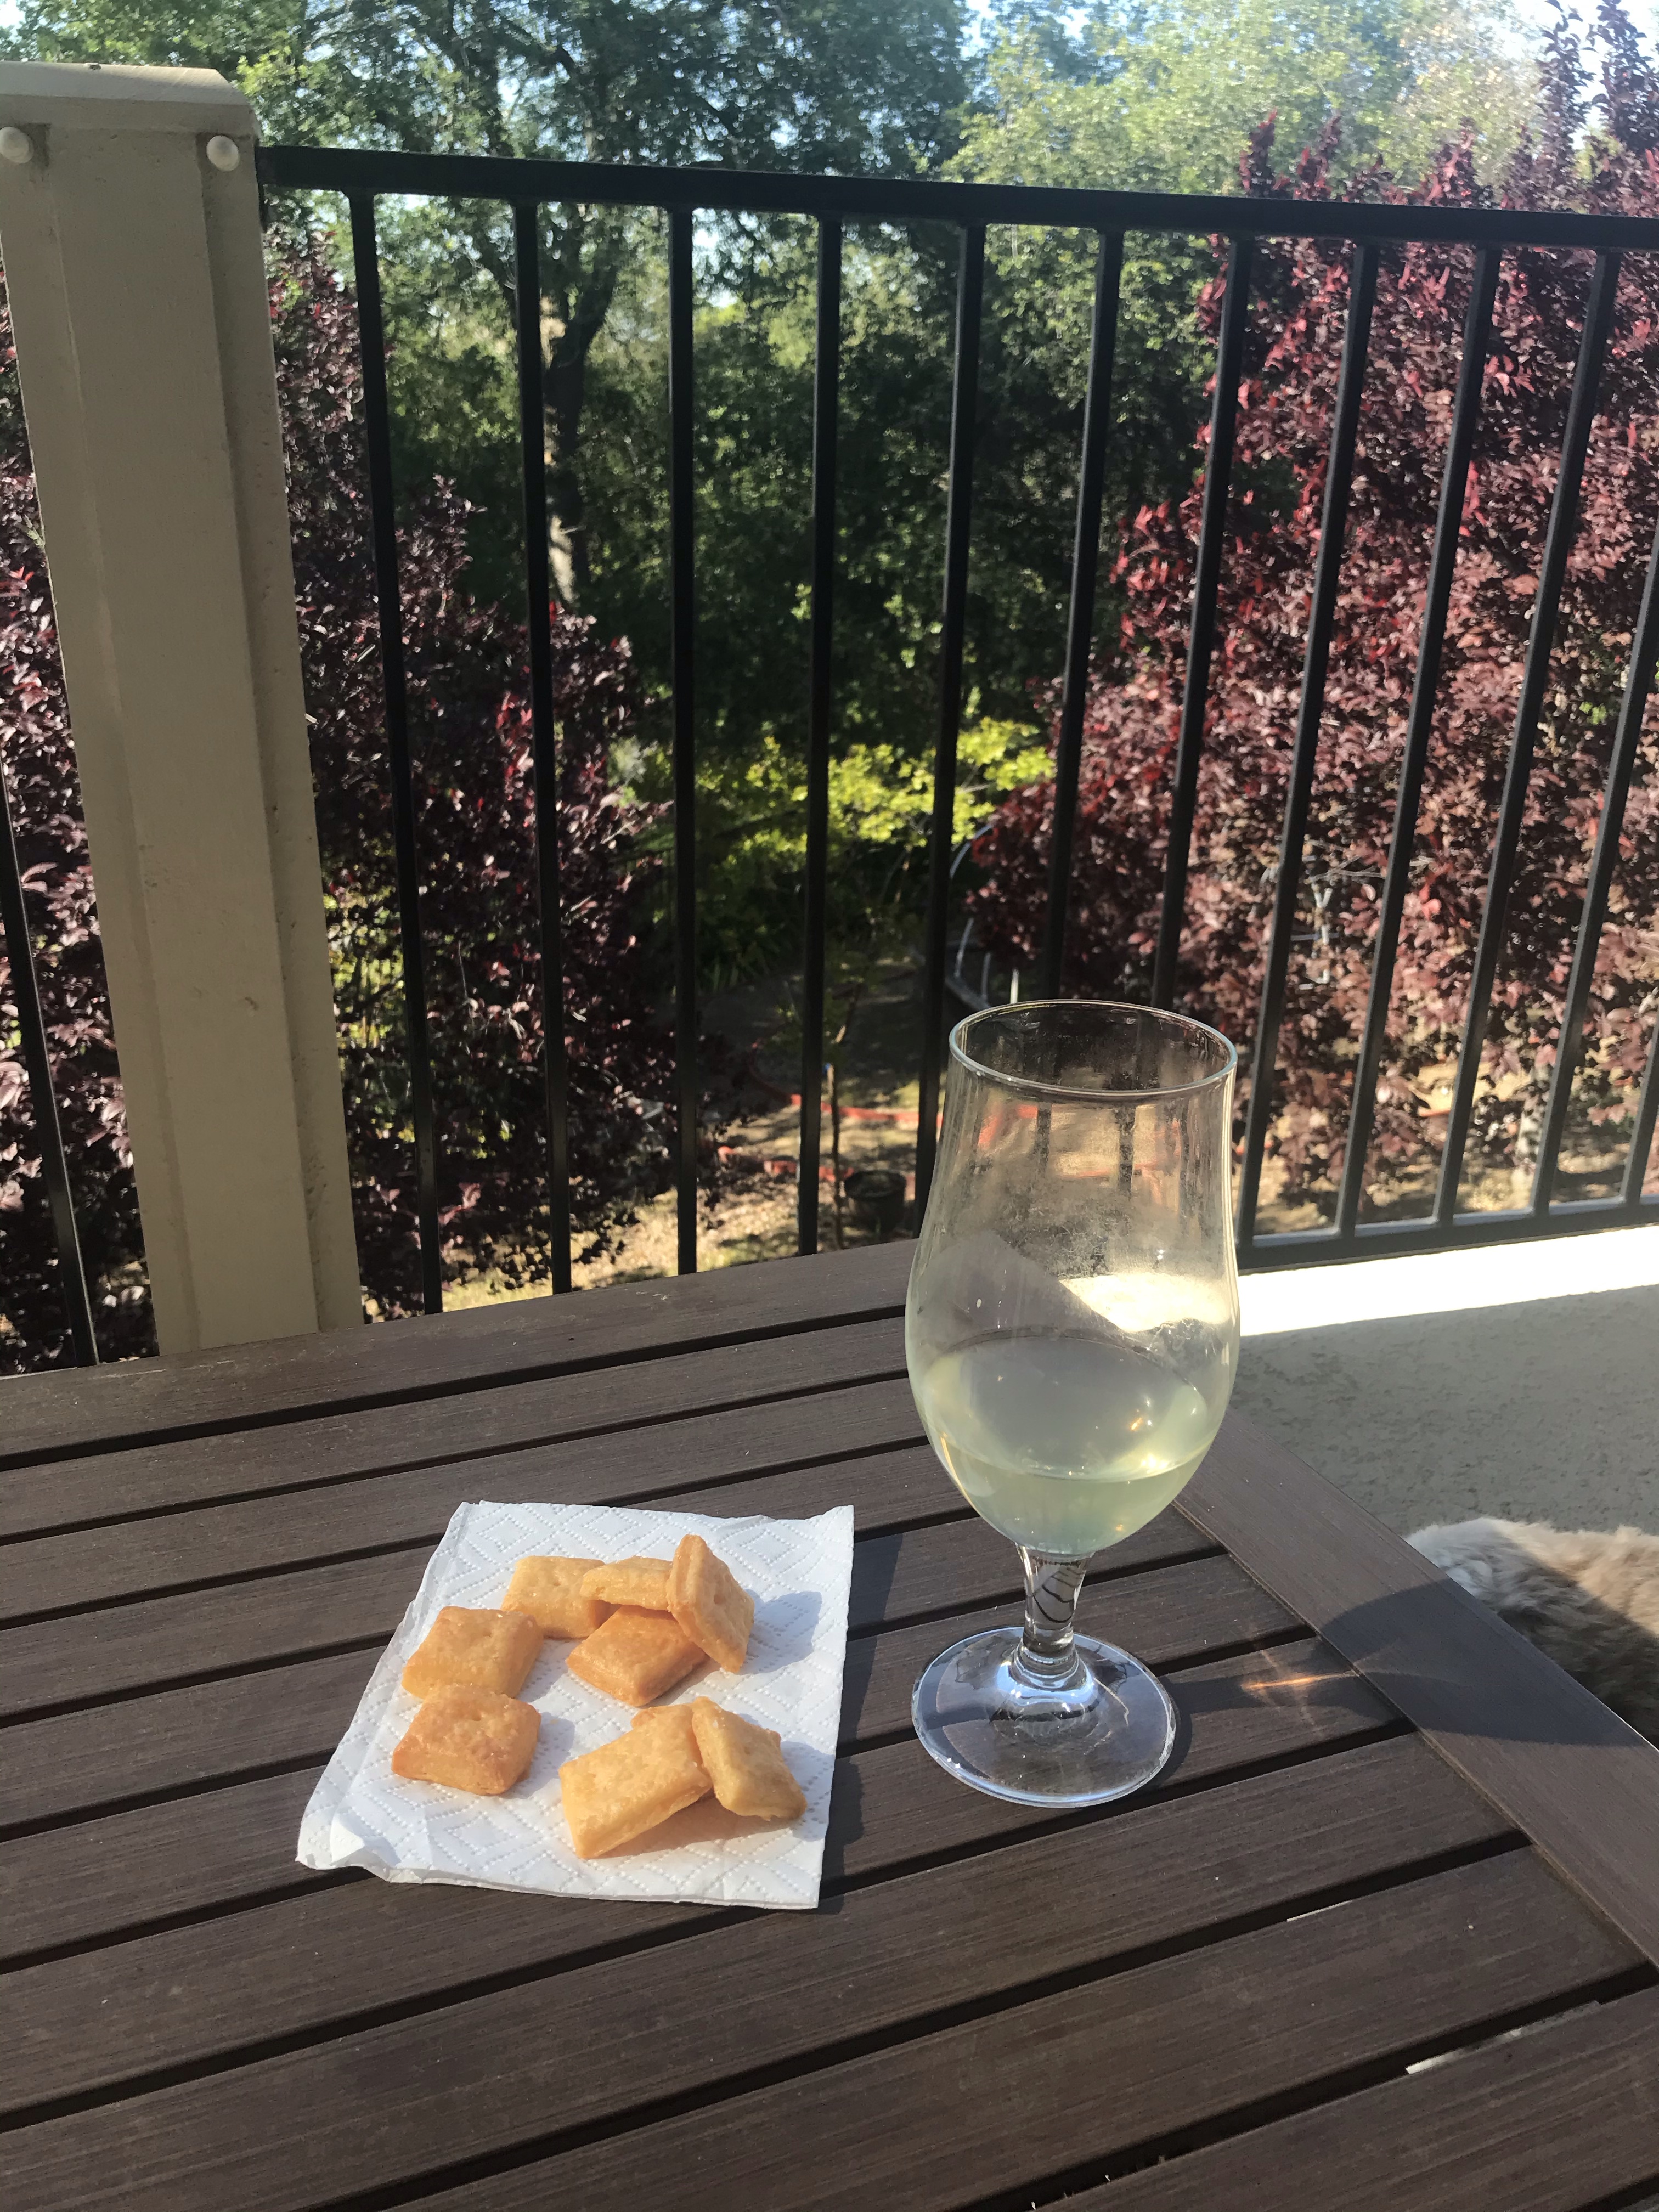
So, I made a margarita this afternoon and was sitting out on the deck enjoying the view. I don’t have salt for the rim of the glass, so decided a nice salty cracker would be a good substitute. I have an untried recipe for “Cheese-Nibs” and decided to make them to accompany my drink.
(The margarita was full when I started baking.)

They take very little time and are easy to make. You can adjust the amount of dusting salt to suit your taste. I rolled the dough out on the same parchment paper I used to bake them—less mess, more efficient. I also left a few of them un-separated on the baking sheet and they seemed to be fine. Next time I will just cut them and leave them all attached. They seem to shrink slightly and pull away from their neighbors. As you are working on one of the chilled disks of dough keep the other in the fridge. After each step return the dough to the fridge to set up a bit. It makes cutting etc much easier.

Cheez-Its Recipe

https://www.inkatrinaskitchen.com/homemade-cheez-its/

YIELD: 7 dozen crackers

INGREDIENTS
• 8 oz sharp cheddar cheese, grated
• 3 Tablespoons of unsalted butter, room temperature
• 1 Tablespoon vegetable shortening*
• ½ teaspoon salt
• 1 cup flour
• 2 Tablespoons ice water
• Coarse salt for sprinkling

METHOD

  1. Combine cheese, butter, shortening, and salt in the bowl of your mixer fitted with the paddle attachment. The mixture will be crumbly.
  2. Slowly add flour and then the ice water. You may add a few more drops of water to help it come together but be careful not to add too much. You don’t want a wet dough.
  3. Pat the dough into 2 discs and wrap in plastic wrap and chill for at least 30 minutes (or longer).
  4. Preheat oven to 375⁰F.
  5. Using parchment paper or a silicone mat roll each disc to 1/8 inch or less and sprinkle with coarse salt
  6. Cut into 1 inch squares (a pastry wheel or pizza wheel is easiest). Use a toothpick to punch a hole into the center of each square.
  7. If you have difficulty separating and transferring the crackers onto the baking sheet return the parchment paper/mat to the refrigerator for 10 minutes (while you roll out the 2nd dough disc).
  8. Bake for 10 – 15 minutes or until puffed and browning around the edges. If you pull them out too soon and the crackers don’t have the desired crispiness you want then simply return them to the oven for 2-3 more minutes.
  9. Move crackers to a cooling rack. Makes about 7 dozen crackers.

A Remiss is as Good as a Re-mile

I was remiss in not documenting the baking I did for our synagogue’s Oneg (celebration of the joy of Shabbat after Friday night services) a couple of weeks ago. All of the recipes are posted elsewhere. Search this blog for the various key words for more detail.

We were one of three families providing pastries etc for the Oneg. I made Gooey Strawberry Brownies. (Previously I made raspberry brownies so tried strawberry this time.)  Due to the size of the strawberry jammy bits the brownies ended up very moist and “gooey,” which is not a bad thing. Somehow, only half of the brownies made it onto the serving tray, so sadly, the other half had to come home with me.

I also made sweet whipped cream filled, chocolate drizzled profiteroles. I find choux pastries easy to make and freeze well for a last minute snack when invited out, or if friends stop by. I actually saw them online a few weeks ago and decided they would be good to add to my Oneg selection.

There is nothing like a couple of dozen tartlets with cream patisserie filling and blueberry topping. Tartlets and cream patisserie are quick and easy to make, and again the tart shells freeze for future use, if necessary.  It wasn’t necessary to freeze any, they were decimated at the oneg. I like to glaze pastries with apple jelly to add that nice shine. Last year I could not find any apply jelly in the stores, or even anyone who had heard of it, so I made a couple of pints and am still using it.

And finally I decided to make some fig newtons with some of the huge store of figs I have in the cupboard prior to this year’s harvest.

Oh! I almost forgot.  I had some sugar cookies in the freezer so added them to the mix on a whim. A few months ago I froze them in cylinders so I could just cut them into disks and bake them. I used them all up so need to make another batch.

NOT Caramel by the Sea

I had some leftover caramel in the fridge. It was (almost) too soft to fill chocolates (see below) but too thick to top ice cream. What a dilemma! Over the weekend I re-heated it, being sure it was 248 degrees then poured it into a hemispherical silicone mold.

I have been practicing chocolate work so I figured this would be a good way to conserve caramel and increase tempering skills, and have some chocolates for quality control consumption.

As I said, I poured the 248F liquid caramel into a mold then tossed the mold into the fridge to set. I weighed and chopped 250 grams of semi-sweet dark chocolate. You want the chocolate to be very fine so it will melt easily during the tempering. Dark chocolate is tempered by melting about 2/3rds of the chopped chocolate in a bain-marie to 120F.
Remove Chocolate covered Caramel 1
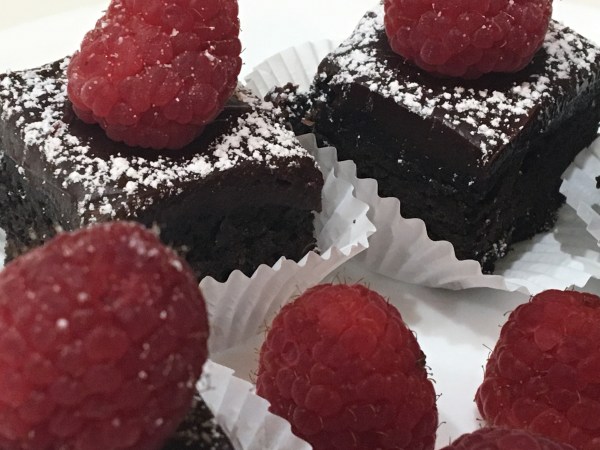
from the heat and add the remaining chocolate a little at a time waiting for each addition to melt. If after all the chocolate is added and melted the temperature is still above 82F stir until it cools to 82F. Then place it back on the barely simmering bain-marie until
it reaches 85-86F. Remove the pot containing the water and the bowl holding the melted chocolate and place it next to the caramel to be dipped. The temperature of the chocolate will continue to rise a few degrees and should hold at 88F to 90F. Dip each piece of caramel, or whatever you are coating, lift it out with a fork, drain and place on waxed paper. Repeat, repeat, repeat…

017e21b931fdb63ab976dd07c2d459f8dd8ed2ecfd

I had some leftover chocolate so put some in a piping bag and set it aside to cool slightly. The rest I poured in the cleaned silicone mold to make some nice hard chocolate candies, or to re-melt sometime in the future. Who knows, I may decide to make more caramel to use up the extra chocolate I have waiting in the fridge.

Chocolate covered Caramel 2

When the chocolate in the piping bag was cooler but not set I snipped the end off and drizzled the lines of chocolate over the dipped chocolate to add some character.

A week ago I tried to make some chocolates for Fran’s Mah Jongg group by using the still soft caramel. They looked pretty, but it was hit or miss if there was much caramel in the chocolate candy. I also used milk chocolate which is much harder to work than the dark semi-sweet. Next I think I should make some more caramel, or maybe nougat and practice with the milk chocolate.

Chocolate covered Caramel 3


Baking in Jammies?

No, not quite. Maybe it should read “Baking With Jammies,” or “Incorporating Fruit Jammies in Your Baking,” or in this case “How I Made Strawberry Jammies to Incorporate in Strawberry Brownies.”

Recently, meaning within the last 4 months, I bought some Raspberry Jammy Bits from KAF to use in making some Raspberry Brownies. They were soooo good and added extra moisture, chewiness and flavor to the brownies, I decided to make them myself. Short story shorter: it didn’t go well. They didn’t gel adequately to form into little sugar-coated bits which would retain some integrity during baking. I ended up storing them in the trash bin.

Even more recently, as in last week, I had some leftover strawberries and decided to give image1it another go. I pureed 2 cups of hulled strawberries and heated it to boiling in a medium saucepan, added 2 Tbl of fruit pectin and mixed until dissolved before adding 2 cups of sugar.  The mixture was cooked over medium-low heat (just boiling) and stirred very frequently. Once it reached 2250 F, I spread it ⅛” to ¼” thick on a caster sugar coated silicone sheet and placed it in the freezer.

After an hour I coated the top of the still tacky spread with more caster sugar. The mixture was still too sticky to cut easily. Using a pizza wheel, I managed, while using some very short words)  to cut half of the spread both lengthwise and crosswise into bits, which I then rolled in more sugar and placed back on the silicone sheet. The strawberry jammy bits were useable but not great.

image2
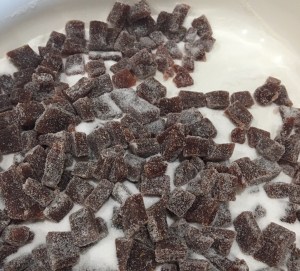
Undeterred, I tossed the second half of the spread back in a small saucepan and cooked for another 10 minutes or so. My candy thermometer died so had to guess the temperature. One trick I remember is to note how long it takes for the stirring marks to disappear. When I first started the second cooking, after the jam started to boil, the marks would disappear in 5 seconds. After 10 min of a quiet boil they remained 7-10 seconds and the jam spun as a wh0le around the spatula. I spread the twice cooked jam back on the silicone and froze again.

An hour later the spread solidified to a crack. I let it warm at room temperature for a few minutes to soften and was able to cut it with the pizza wheel. Actually, this version was just about the correct viscosity (or jamminess) and I could cut it with a long knife, cleaning in hot water and drying between cuts. Roll in more sugar and store in a air tight container in the freezer. Checking a few days later they are still semi-soft and have not fused back into a blob.

image4

Adding the DIY Strawberry Jammy Bits and some chocolate chips to the brownie batter before baking (good alliteration, huh?) resulted in spectacular brownies (NOTE: Do NOT overbake!! The middle of the pan should feel very soft and the edges should look cooked. Don’t let the middle bake to firmness, the brownies will be over baked.)

Fruit Jammy Bit Brownies

INGREDIENTS

  • 2 cups Berries (I have now used Rasp and Straw Berries and will try others)
  • 2 TBL Fruit Pectin
  • 2 cups sugar
  • Caster sugar (Extra Fine) for coating

METHOD

  1. Hull and puree strawberries
  2. Heat puree to barely boiling and add pectin
  3. Once pectin is incorporated add the sugar
  4. Continue boiling until mixing marks stay 7-10 seconds or about 235-2400F
  5. Spread mixture on caster sugar coated silicone mat and freeze
  6. Remove the sheet of fruit from the freezer and coat top with caster sugar
  7. Flip coated over onto a cutting board and coat the now top surface with more sugar
  8. When the fruit sheet is pliable cut into small squares (1/4” across) with a knife
  9. Toss the jammy bits into a bowl of sugar then store in an air-tight container in the freezer

Stairway to Raspberry Heaven

I saw a KAF recipe for Chocolate and Raspberry Brownie Bars. If you are a regular reader, you know I am baking about 800 one and two bite desserts for a fundraiser in March. Since brownies are baked in a sheet pan and cut to bite size, these brownies become a relatively easy way to make 4 dozen desserts (or about 6%) at once.F677178C-384A-4527-AFD1-0640B7565AD4

Basically this is a brownie with both chocolate chips and raspberry jammy bits folded into the batter and coated with a heavy layer of ganache. Once baked, and still warm a thinned coating of seedless raspberry jam is spread over the brownies. (Don’t over bake the brownies!) I cooled the coated brownies in the fridge for a while as I made and cooled to thicken the ganache.

While not essential topping with a raspberry and dusted with confectioners sugar really set this dessert off. (Rats, just ended that sentence with a preposition.)

CHOCOLATE AND RASPBERRY BROWNIE BARS

INGREDIENTS

BROWNIES

  • 4 large eggs
  • 1 1/4 cups dark cocoa
  • 1 teaspoon salt
  • 1 teaspoon baking powder
  • 2 teaspoons vanilla extract
  • 2 1/4 cups sugar
  • 1 cup unsalted butter, melted
  • 1 1/2 cups All-Purpose Flour
  • 1 cup chocolate chips
  • 1 cup Raspberry Jammy Bits
  • 3 tablespoons seedless raspberry jam
  • 1 tablespoon  water

CHOCOLATE GANACHE GLAZE

  • 1 cup heavy cream
  • 1 tablespoons light corn syrup (20g)
  • 2 2/3 cups (400 g)) semisweet or bittersweet chocolate, chopped
  • 1 tablespoon vanilla extract

METHOD

  1. Preheat the oven to 350°F. Lightly grease a 9″ x 13″ pan. To make very even bars, line the pan with aluminum foil before baking, leaving foil sticking up above the edges of the pan.
  2. Crack the 4 eggs into a bowl, and beat them with the cocoa, salt, baking powder, and vanilla until smooth.
  3. Add the sugar and melted butter, stirring until smooth.
  4. Add the flour, chips, and Jammy Bits, again stirring well.
  5. Spoon the batter into the prepared pan.
  6. Bake the brownies for about 30 minutes, until a cake tester inserted into the center comes out clean, or with just a few moist crumbs clinging to it. The brownies should feel set on the edges, and the center should look moist, but not uncooked. Do not overbake! Remove them from the oven.
  7. Heat the seedless raspberry jam with the water, and stir until smooth. Brush over the warm brownies. Set aside to cool for an hour or longer before topping with the ganache.
  8. To make the ganache, heat the cream and corn syrup until they begin to steam. Pour over the chopped chocolate in a bowl. Let sit for 5 minutes, add any flavorings, and whisk until smooth. Let cool for 15 minutes or so.
  9. Pour ganache over the brownies while it’s still warm, but has begun to thicken — reheat if it thickens too much as you work. Allow several hours for the ganache to set up fully. You may refrigerate the brownies to hasten the setting of the ganache.
  10. Remove the brownies from the pan using the aluminum foil sling. Heat a knife in hot water, wipe dry and use to cut the brownies. Repeat with each cut.
  11. Just before serving, garnish brownies with fresh raspberries and confectioners’ sugar, if desired.

…Thrill on Blueberry Hill

Having just washed some rust and dirt from my hands caused by carrying some rebar I bought at Home Depot (for the uninformed, rebar is a steel rod with ridges for use in reinforced concrete, or in my case, stakes for anchoring wooden tripods framing  our frost blanket tripodnew citrus trees to hold frost blankets,) I caught up with Fran who was just leaving the produce section of the supermarket, when she said: “Look, I bought some blueberries.”


Hence:blueberry muffins cropped
Jordan Marsh BLUEBERRY MUFFINS
by KAF
INGREDIENTS

  • ½ cup (8 tablespoons) butter, at room temperature
  • 1 cup sugar
  • 2 large eggs
  • 2 teaspoons baking powder
  • ½ teaspoon salt
  • 1 teaspoon vanilla extract
  • 2 cups King Arthur Unbleached All-Purpose Flour
  • ½ cup milk
  • 2½ cups blueberries, fresh preferred
  • ¼ cup sugar, for topping

METHOD

  1. Preheat the oven to 375°F. Lightly grease a standard 12-cup muffin tin; or line the tin with papers, and grease the papers.
  2. In a medium-sized bowl, beat together the butter and sugar until well combined.
  3. Add the eggs one at a time, scraping the sides and bottom of the bowl and beating well after each addition.
  4. Beat in the baking powder, salt, and vanilla.
  5. Add the flour alternately with the milk, beating gently just to combine. Scrape the bottom and sides of the bowl.
  6. Mash 1/2 cup of the blueberries. Add the mashed and whole berries to the batter, stirring just to combine and distribute.
  7. Scoop the batter by the heaping 1/4-cupful into the prepared muffin pan; a muffin scoop works well here.
  8. Sprinkle about 1 teaspoon granulated sugar atop each muffin, if desired. It’s traditional — go for it!
  9. Bake the muffins for about 30 minutes, until they’re light golden brown on top, and a toothpick inserted into the middle of one of the center muffins comes out clean.
  10. Remove the muffins from the oven, loosen their edges from the pan, and after about 5 minutes transfer them to a rack to cool.

TOPPING

  • ½ cup sugar
  • 1/3 cup flour
  • ¼ cup butter
  • 1½ tsp cinnamon

Mix together sugar, flour, butter, and teaspoons cinnamon. Mix to a coarse granular consistency, and sprinkle over muffins before baking.

Fig and Oatmeal and Chocolate, Oh My!

I am expecting to harvest over 100 pounds of fig from our single tree in the back yard. We are leaving the very high figs for the birds and squirrels. They don’t seem to understand that and keep raiding my allotment on the lower branches. To date I ate figs, froze figs, made fig preserves, fig spread, fig newtons, fig cake and now fig/oatmeal/chocolate chip cookies. Daniel is making some figgy pudding, I am planning some fig hand pies and we gave away 20 lbs to friends, family and neighbors. What’s next, Fig fudge? Fig ice cream? Fig bread? You know, sometimes there may be too much of a delicious thing.

cookie and milk small

I searched a number of recipes to find one I liked for fig cookies. The one I chose also had oatmeal and chocolate. Think oatmeal/chocolate/raisin cookies except the fig imparts a softer and more subtle flavor and texture the raisin would. I upped the fig content being sure to not use any fully or over ripe figs. They would kick up the moisture content making the cookies too soggy. I also omitted the coconut (not a favorite of Fran.) Chilling the batter is essential. I chilled for 2 hours and it may not have been enough. The first batch were a little flat, the second were better.

Fig and Chocolate Oatmeal Cookies

Based on post from fiveandspice at Food52.com

Makes about 2-dozen cookies

INGREDIENTS

  • ½ cup plus 3 tablespoons salted butter, at room temp.
  • 2/3 cup sugar
  • 2/3 cup dark brown sugar
  • 2 large eggs
  • 1 teaspoon vanilla extract
  • 1 ¾ cups all-purpose flour
  • 1 ½ cups rolled oats
  • 1 teaspoon baking soda
  • ½ teaspoon salt
  • 9 ounces chopped dark chocolate (I like 70% cacao)
  • 1½ cup chopped fresh figs (not over ripe)

METHOD

  1. Cream the butter and sugars together until light and fluffy (3-5 minutes) in a standing mixer fitted with the paddle attachment. Add the eggs and vanilla and beat until fully incorporated, scraping down the sides of the mixer as needed.
  2. In a separate bowl, stir together all the remaining ingredients. Stir these into the butter mixture on low speed until fully combined with no dry floury patches left.
  3. Refrigerate the dough 30-60 minutes before proceeding. Heat your oven to 350F. Scoop the dough in 2-3 Tbs. scoops onto baking sheets. Bake each sheet one at a time (keep the full sheets that aren’t being baked in the fridge until it’s their turn) until the cookies are golden around the edges but still look a tad doughy in the middles, about 15-18 minutes, rotating each baking sheet halfway through the bake time.
  4. Let the cookies cool on the sheet for 5 minutes before transferring to a cooling rack to finish cooling.

What The Fig!!

Well, it finally happened. The figs in our backyard tree are ripe and ready for harvest. To date, we have harvested about 55 pounds (about 25 Kilos) of figs. Let me be clear. That is the first harvest. We probably have 2 or 3 more to go.  Prolific tree, I just wish the apricot and plum trees would take a lesson. I made several pints of fig preserve and several fig newton filling (alone with some homemade fig newtons), fig and brie tarts and froze a few pounds for future consideration.

Picking the figs proved somewhat challenging. It turns out many people are allergic to the sap and/or leaves of the fig tree. As luck would have it, all of us were, some more than others. Soap (Dawn dishwashing detergent) and water and time worked well to remove the itch and rash. It was gone the next day. Next time, long sleeves and gloves.

After the figs were washed, dried and sorted the best were sliced (about ½” thick) and frozen. Some were laid out on parchment lined baking sheets and put in the freezer. Others were sliced and put into zip lock bags and a simple syrup with Fruit Fresh added were frozen. We shall see which method we like better.

Picking Figs

Picking 2

Picking

Frances and I picked the first half of the harvest. Daniel, The Young and Tall, joined us after his work the next day to  help with the high fruit. Rosie, the Supervisor as ever vigilant.Supervisor


Washing, Sorting and Processing

The fruit was washed, dried (wet fruit spoils faster) and spread as a single layer on paper towels in the refrigerator for processing the next day (after rash). Note to self: Use gloves on day two also.

The cut figs were boiled to 220oF and either mashed with a potato masher (Frances’ method) or food processed with a couple quick pulses (my method) and canned. I added a couple more pulses for the newton filling, which seemed about right in the final product.

Here are a couple of tips about making the fig newtons. The recipe makes just the right amount of cookie batter vs. filling, try it. After cutting the rolled dough to an 8”x14” sheet, roll it as rectangular and with as straight edges as possible. It will make the cookies look better.  Also, before trying to fold the dough over and pinching shut cut the sheet in half, or ever thirds, crosswise. This makes the soft dough easier to fold smoothly. More also, be bold when folding. Like flipping eggs in a frying pan. Just go for it. If you don’t fold far enough for the un-filled edges to meet, it’s a bear to try to stretch the top layer to meet the bottom to seal.

For the tartlets, be sure to use enough Brie (or other cheese) to fill half the shell. Too little and the cheese does not add enough flavor. You can always add a piece of cheese to the top to compensate. I also sprinkled the tartlets with a little flaked sea salt to offset the fig sweetness.

Homemade Fig Newtons – HGTV

INGREDIENTS

  • 1 pint fresh or preserved figs or 12 ounces dried figs
  • 1 1/2 cups flour
  • 1/4 teaspoon baking powder
  • 1/4 teaspoon salt
  • 1 stick butter
  • 1/3 cup sugar
  • 1 egg
  • 1 teaspoon vanilla extract
  • 2 tablespoons orange juice

If you are using:

  • Fresh figs: Remove stems and boil figs with a cinnamon stick and 2 cups of sugar in 1 cup of water for 45 minutes. Drain and cool.
  • Dried figs: In a bowl, pour boiling water over figs (stems removed) and let rest 10 minutes. Drain all but 2 tablespoons water and stir in 2 tablespoons corn syrup + ¼ teaspoon cinnamon.
  • Preserved figs: Drain syrup.

METHOD

  1. Puree figs in food processor until a thick paste forms (if too thick or thin to spread evenly, add a little water or flour until spreadable consistency is reached).
  2. Combine flour, baking powder and salt together and set aside.
  3. Cream butter and sugar in a mixing bowl.
  4. Add egg and vanilla, mix until smooth
  5. Add orange juice and combined dry ingredients to bowl and mix until dough forms.
  6. Optional: for dough into a flat thick disk and chill to set butter and make it easier to roll and fold.
  7. Roll dough out on a floured surface into a 8”x14” rectangle about ¼” thick.
  8. Cut rectangle in half lengthwise.
  9. Spread fig paste onto half of each rectangle, lengthwise.
  10. Cut the rectangle in half crosswise, or even thirds to facilitate folding.
  11. Fold dough in half lengthwise to cover fig paste and pinch edges to seal.
  12. Slide each newton log onto a parchment lined baking sheet.
  13. Bake 25 minutes at 350 degrees until crust begins to brown.
  14. Slice into cookie-sized segments and cool. Slice while warm to reducing flaking.

WTF! (What The Fig!)

For Purim this year I made and donated 4 dozen hamantaschen to our California temple for their bake sale. I really, Really, REALLY liked the fig variety and knew there must be another place to use that fig purée.  I was considering homemade Fig Newtons®, but those cookies are available in those so-convenient two serving packages I thought, why try to copy perfection? I mean, artists copy Renoirs to hone their artistic skills, but only as an exercise… for practice… right? How could I chance trying to improve my baking skills and thereby perhaps plagiarize perfection?

I thought a fig-filled/short-bread cookie might Fig Shortbread Cookie 3be a good combination. The slight snap of this buttery cookie and the sweet/tartness of the fig pureé should pair well.  

I was right, but the first batch had a minor problem.  I tried to roll the shortbread dough thinner than usual for cookies, but it still ended up too thick. I rolled them directly on the parchment paper covered cookie sheet thinking they would be too fragile to move after cutting. I chickened out and still left them about 2x too thick, much like leaving your birdie putt short. (NEVER leave your birdie putt short!) By making the cookie thick, the buttery flavor of the cookie overpowered the fig flavor, so I added additional fig filling for each cookie. (What a shame.) When biting the cookie, the filling squeezes out the sides of the cookie and has to be licked off. (What a shame.)

Shortbread Cookie

INGREDIENTS

  • 1 cup butter or margarine, softened
  • ¾ cup powdered sugar
  • 1 teaspoon vanilla
  • 2 ½ cups Gold Medal™ all-purpose flour

METHOD

  1. Heat oven to 350°F. In large bowl, beat butter, powdered sugar and vanilla with spoon. Stir in flour. (If dough is crumbly, mix in 1 to 2 tablespoons butter or margarine, softened.)
  2. Roll dough ¼” (or less if you can) thick on a parchment paper lined cookie sheet. Cut into small shapes and remove the excess, combine and roll out again, and again.
  3. Bake 10 to 16 minutes (depending on thickness of the cookie) or until set and bottoms are light golden brown. Immediately remove from cookie sheet to wire rack. Cool completely, about 30 minutes. I like to slide the parchment paper off the cookie sheet with all the cookies still attached, let cool until cookies release from the paper and leave on the wire rack until cool.

Fig Filling

INGREDIENTS

  • 1 ½ scant cups chopped, stemmed, dried black figs (about 9 ounces)
  • 3/4 cup (177 ml) pomegranate juice
  • ⅓ cup (66 grams) sugar
  • Finely grated zest of 1 orange
  • 1 star anise, or ¼ tsp crushed fennel seeds
  • 1 cup water

METHOD

  1. In a saucepan, combine the figs, juice, sugar, zest, star anise (or fennel), and 1 cup of water and bring to a boil.
  2. Simmer over low heat until the figs are softened and the liquid is syrupy and is reduced to about ½ cup.
  3. Let the figs cool in their syrup, then puree in a food processor until smooth. [If you dislike the taste of star anise, you should remove it before pureeing, but if you do, leave it in.

Somewhere, Under the Rainbow

Frances sent me a picture of these cupcakes thinking I might like the design and might make them. She was right, I did and I did. Sadly, she is not eating any added sugar at the moment… sigh. I also had a new white cake recipe I wanted to try and the confluence of these two irresistible forces resulted in an almost perfect cupcake. However, my unpaid, full time, in-house taste tester felt the cupcake was sweet and adding the buttercream frosting just put her over the edge. You know, the typical shakes, cold sweats and hyperactivity of a pure sugar high. The white cake recipe is a keeper though. Maybe a cream cheese frosting…

Land o’Lakes published the rainbow piping concept. I read it but then I did it my way

Yes, there were times, I’m sure you knew
When I bit off more than I could chew (get it?)
But through it all, when there was doubt
I ate it up and spit it out (never!)
I faced it all and I stood tall
And did it my way

Buttercream Frosting

Previously if I wanted multi-colored piping I will fill small piping bags with different colored frosting, snip the ends off and cram them into a large bag. This worked fair at best. This technique is far superior, and maybe even easier. I use Wiltons Icing Colors. They are concentrated and you don’t need much for very vibrant colors.

Once the colored frosting is piped into rows on a piece of food wrap, roll the wrap up and snip off the end. Put the rolled frosting into a large piping bag with a large star end.

Run a little of the frosting out until the mixture comes out evenly distributed, then pipe the rainbows, surrounding the marshmallow clouds.

Thank you Land o’Lakes, this was a great technique.

THE BEST BUTTERCREAM FROSTING

INGREDIENTS

  • 4 cups of powdered sugar (or 1 box)
  • 1 Cup (2 sticks) of softened butter
  • 2-3 teaspoons of vanilla
  • 1-2 tablespoons of milk
  • Violet food coloring

METHOD

  1. Add powdered sugar to mixing bowl.
  2. Add softened sticks of butter
  3. Add vanilla. If you want white buttercream use clear imitation vanilla. Also, adding a little violet food coloring (like the end of a toothpicks worth) will help lighten the yellowish color due to the butter.
  4. Add 1 tbsp of milk.
  5. Beat on low until powdered sugar is incorporated. Then move mixer up to medium-high speed. Scrape sides and bottom of bowl often. When completely mixed the frosting may appear dry.
  6. Add more milk, a little bit at a time until frosting is the proper consistency.

White Cup Cakes –

I don’t remember where I saw this recipe but it is a basic white cake with whipped egg whites (meringue) gently folded into the batter. I made a half recipe just to try it. This made 15 medium sized cupcakes. Either follow the instructions and make cakes, or do what I did, or both, and make a lot of cupcakes!

INGREDIENTS

  • 1 cup milk
  • 1 ½ teaspoons vanilla extract
  • 1 cup butter, softened
  • 2 cups sugar
  • 3 cups cake flour
  • 1 tablespoon baking powder
  • 5 egg whites

METHOD

  1. Preheat oven to 350°. Grease 3 (8-inch) round cake pans; line bottoms with parchment paper, and grease and flour paper.
  2. Stir together milk and vanilla.
  3. Beat butter at medium speed with a heavy-duty electric stand mixer until creamy; gradually add sugar, beating until light and fluffy. Sift together flour and baking powder; add to butter mixture alternately with milk mixture, beginning and ending with flour mixture. Beat at low speed just until blended after each addition.
  4. Beat egg whites at medium speed until stiff peaks form; gently fold into batter. Pour batter into prepared pans.
  5. Bake at 350° for 20 to 23 minutes or until a wooden pick inserted in center comes out clean. Cool in pans on wire racks 10 minutes. Remove from pans to wire racks; discard parchment paper. Cool completely (about 40 minutes).
  6. Spread Vanilla Buttercream Frosting between layers (about 1 cup per layer) and on top and sides of cake.