The primary recipes for this months Sally’s Baking Challenge is Frosted Strawberry Cookies and the alternate is Banana Chocolate Chip Muffins with Cinnamon Streusel. She had me a “chocolate.”
These muffins may be a bit chocolate forward, i.e., the chocolate overpowers the banana, Next time I will cut the amount of chocolate back by a third or so. Nonetheless, these muffins are delicious, moist and definitely a keeper.
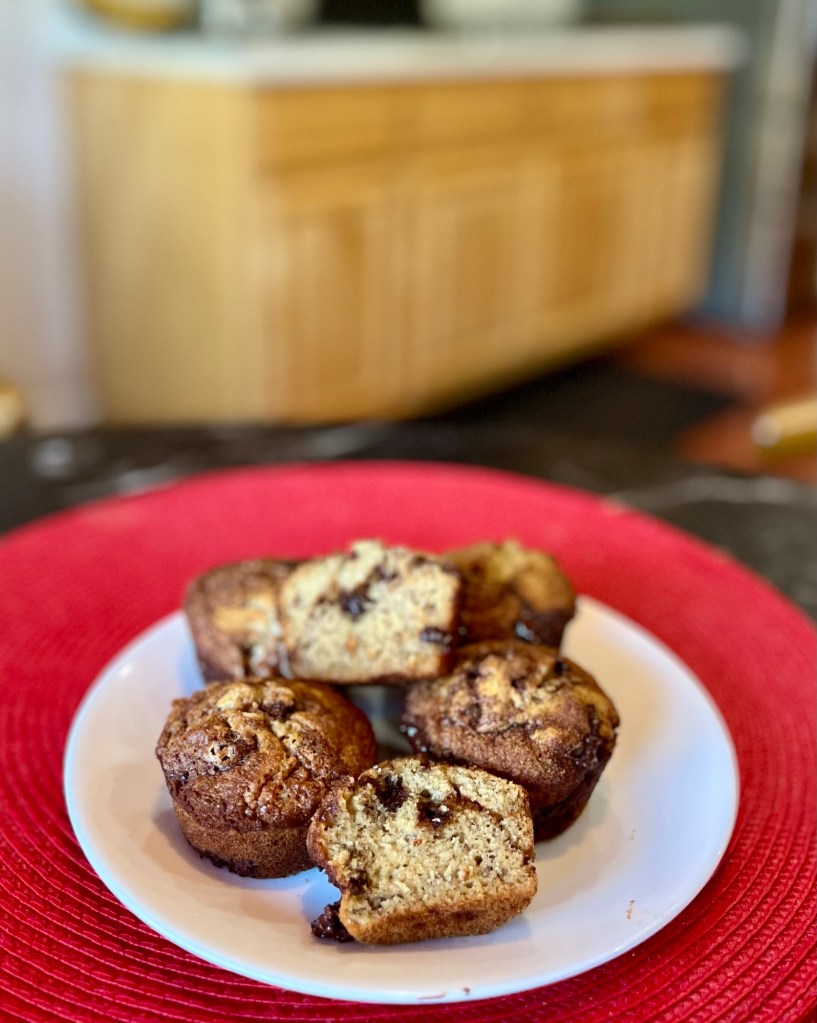
Banana Chocolate Chip Muffins with Cinnamon Streusel
Yield: 12 muffins
INGREDIENTS
Streusel
• 2 ½ tsp ground cinnamon
• 50g ( ¼ c) packed light or dark brown sugar
• 135g ( ¾ c) semi-sweet chocolate chips
Muffins
• 208g (1 and ⅔ c) all-purpose flour
• ½ tsp ground cinnamon
• ¾ tsp baking soda
• ¾ tsp baking powder
• ¼ tsp salt
• 85g (6 Tbl) RT unsalted butter
• 100g ( ½ c) granulated sugar
• 1 large egg, at room temperature
• 345g (1½ c) mashed bananas (about 4 medium or 3 large bananas)
• 60g ( ¼ c) plain yogurt or sour cream
METHOD
- Preheat oven to 425°F. Spray a 12-count muffin pan with nonstick spray or line with cupcake liners. Set aside.
- Mix all the streusel ingredients together in a small bowl. Set aside.
- Whisk the flour, cinnamon, baking soda, baking powder, and salt together in a medium bowl. Set aside.
- Using a handheld or stand mixer fitted with a paddle attachment, beat the butter and sugar together on medium-high speed in a large bowl until creamed, about 3 minutes. Scrape down the sides and bottom of the bowl as needed. Add the egg and beat until combined, about 1 minute. Scrape down the sides and bottom of the bowl as needed. Add the mashed bananas and yogurt, and then beat on high speed until combined; mixture will look curdled and that’s ok.
- Add the dry ingredients and beat on low speed until combined. Batter is thick. Do not overmix.
- Layer a large spoonful (about 1½ Tablespoons, 20ml scoop) of batter into each muffin cup. Sprinkle with 1 scant Tablespoon of streusel. Layer another large spoonful of batter over each, using up the remaining batter, then finish by sprinkling remaining streusel on top of each muffin. The 12 muffin cups should be filled all the way to the very top. With a toothpick or knife, gently swirl the streusel topping with the batter.
- Bake for 5 minutes at 425°F, then, keeping the muffins in the oven, reduce the oven temperature to 350°F. Bake for an additional 15–16 minutes or until a toothpick inserted in the center comes out clean. The total time these muffins take in the oven is about 20–21 minutes. Allow the muffins to cool for 5 minutes in the muffin pan, and then transfer to a wire rack to continue cooling, or enjoy warm.
- Muffins stay fresh covered at room temperature for a few days, then transfer to the refrigerator for up to 1 week.
Notes
- Make Ahead & Freezing Instructions: For longer storage, freeze the muffins for up to 3 months. Thaw overnight in the refrigerator, then warm up in the microwave if desired.
- Frozen Bananas: You can use thawed frozen bananas in this muffin recipe. Thawed bananas are extra wet, so drain off as much of the excess liquid as you can before mashing.
- Yogurt or Sour Cream: You can use either regular or Greek plain yogurt in this recipe (any fat content) or sour cream. In a pinch, 1/4 cup (60ml) buttermilk may be substituted.
- Why the initial high oven temperature? Like I do for most muffin recipes, bake the muffins for 5 minutes at a very hot temperature. Then, keeping the muffins in the oven, switch to a lower temperature for the remaining bake time. This initial high temperature will quickly lift the muffin tops so they’re extra high, then the centers will bake during the lower temperature bake time.