Terza Volta un Incanto

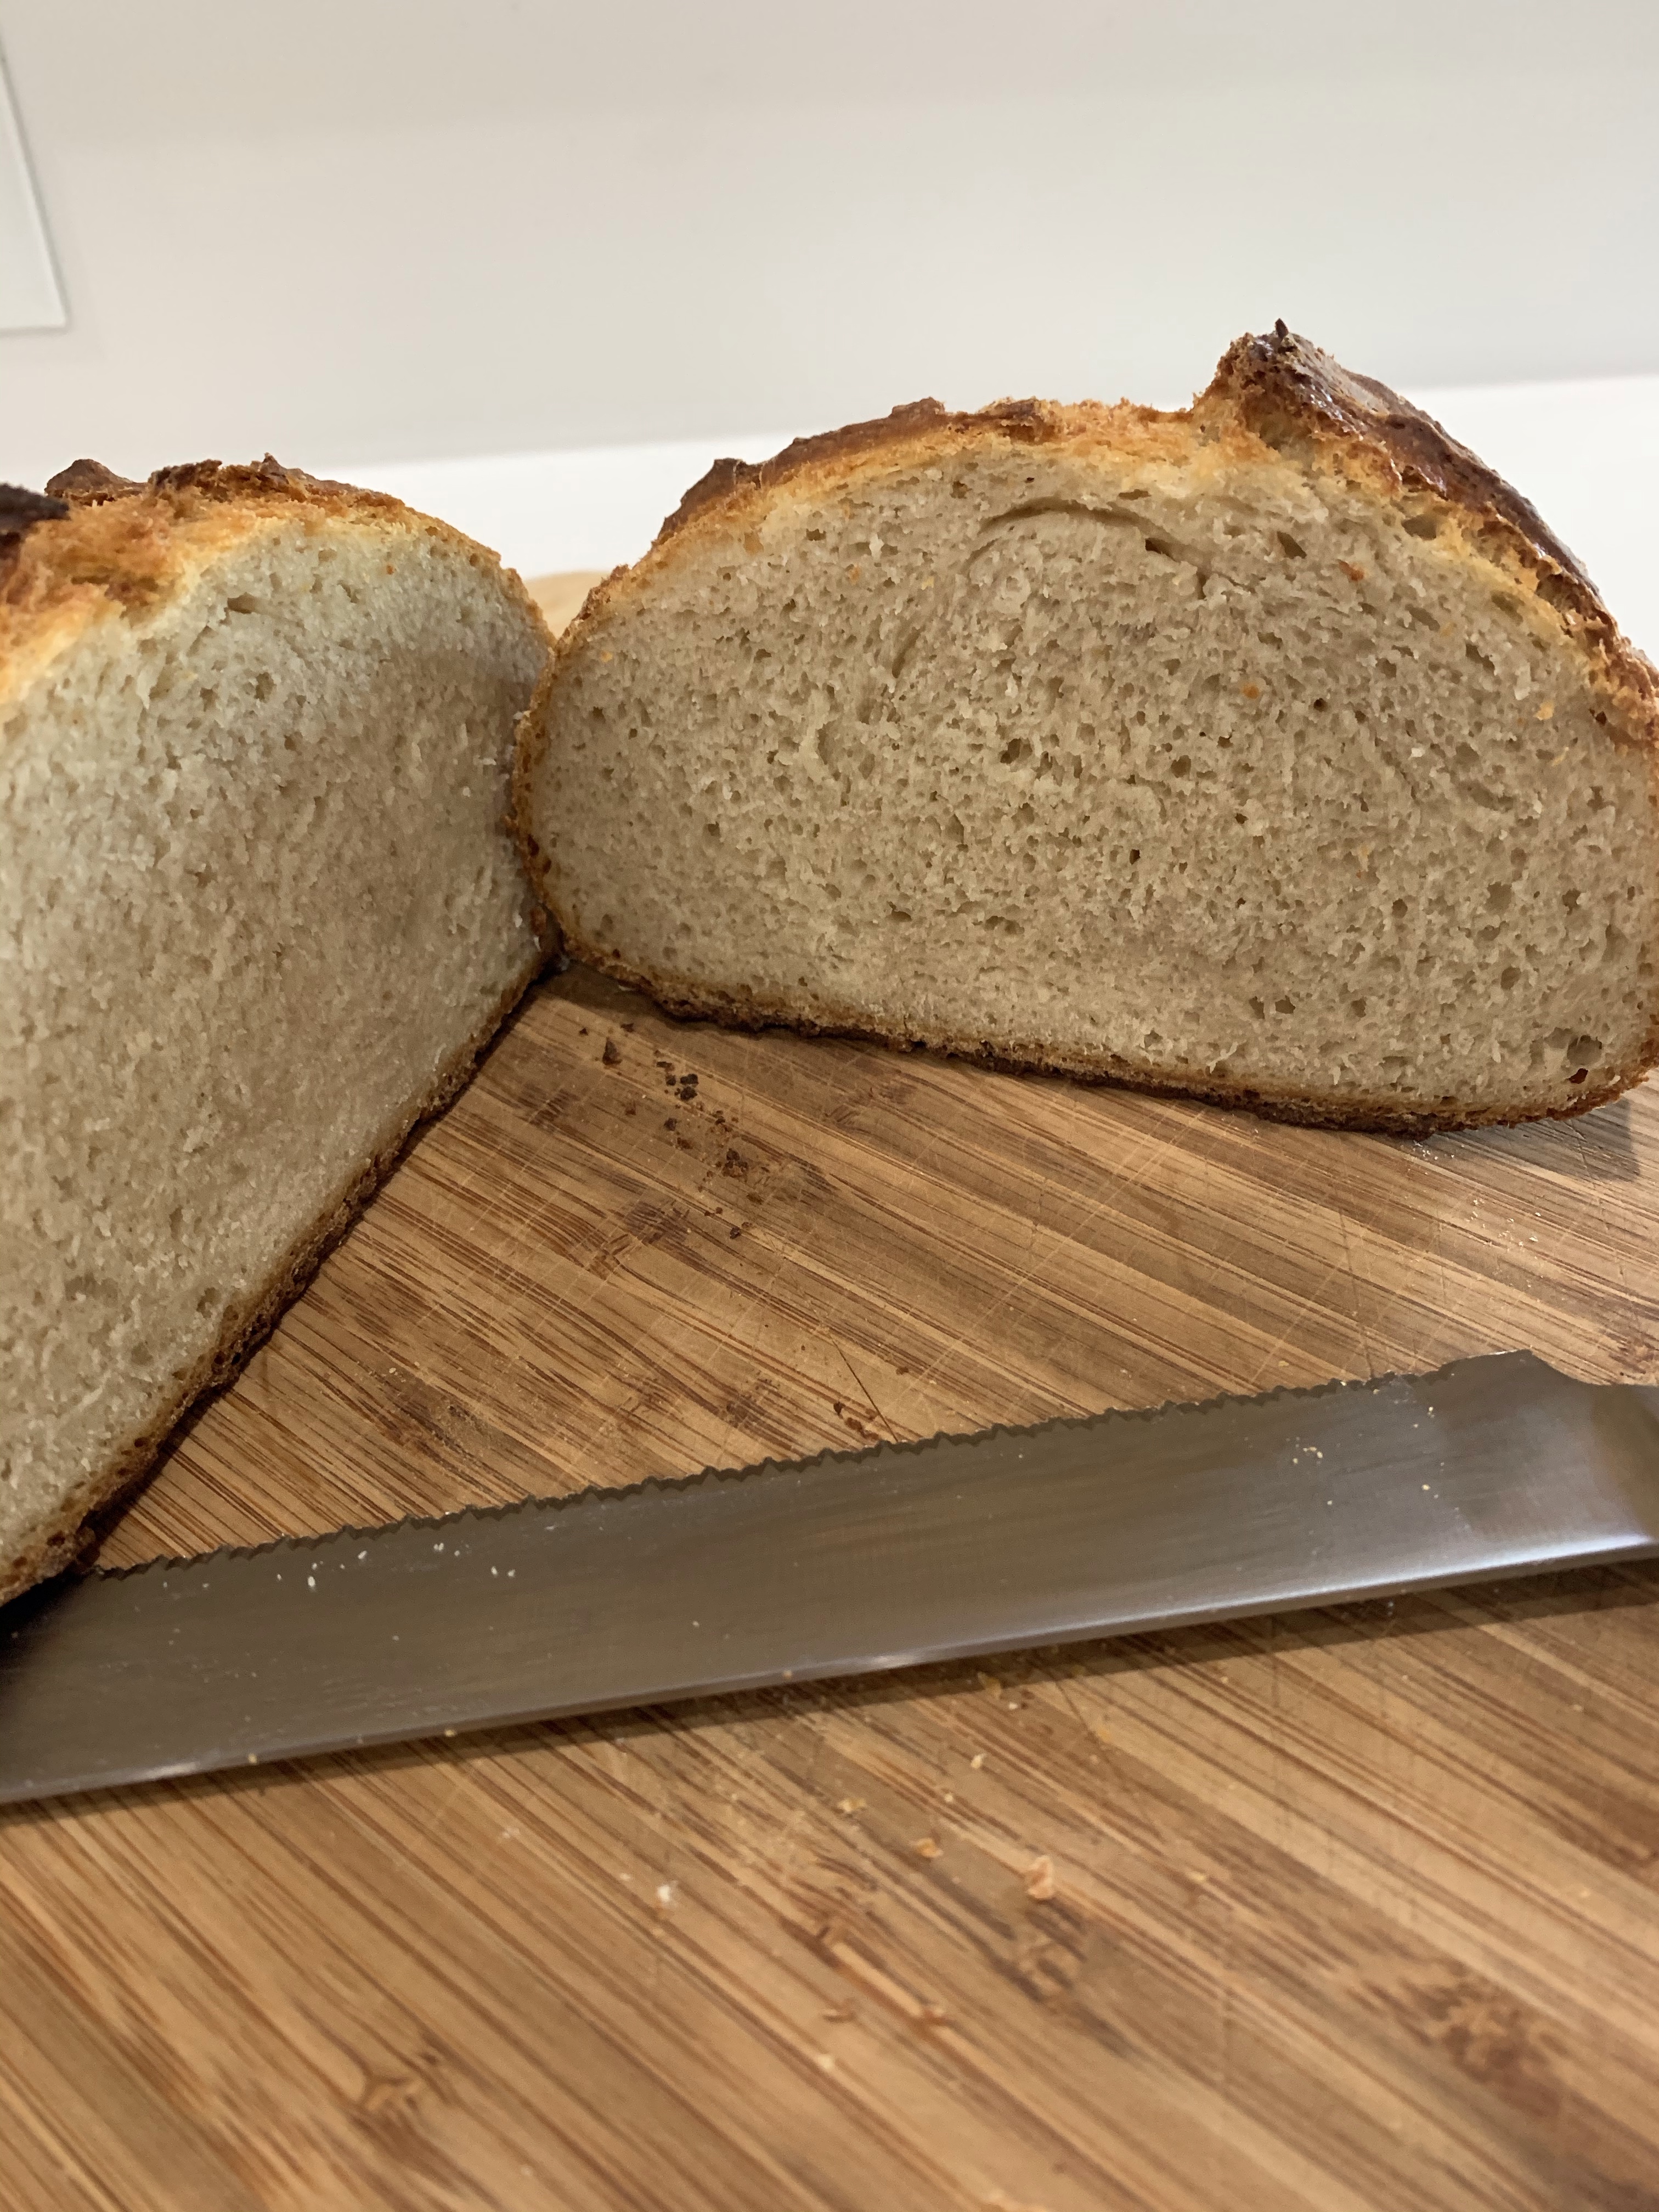
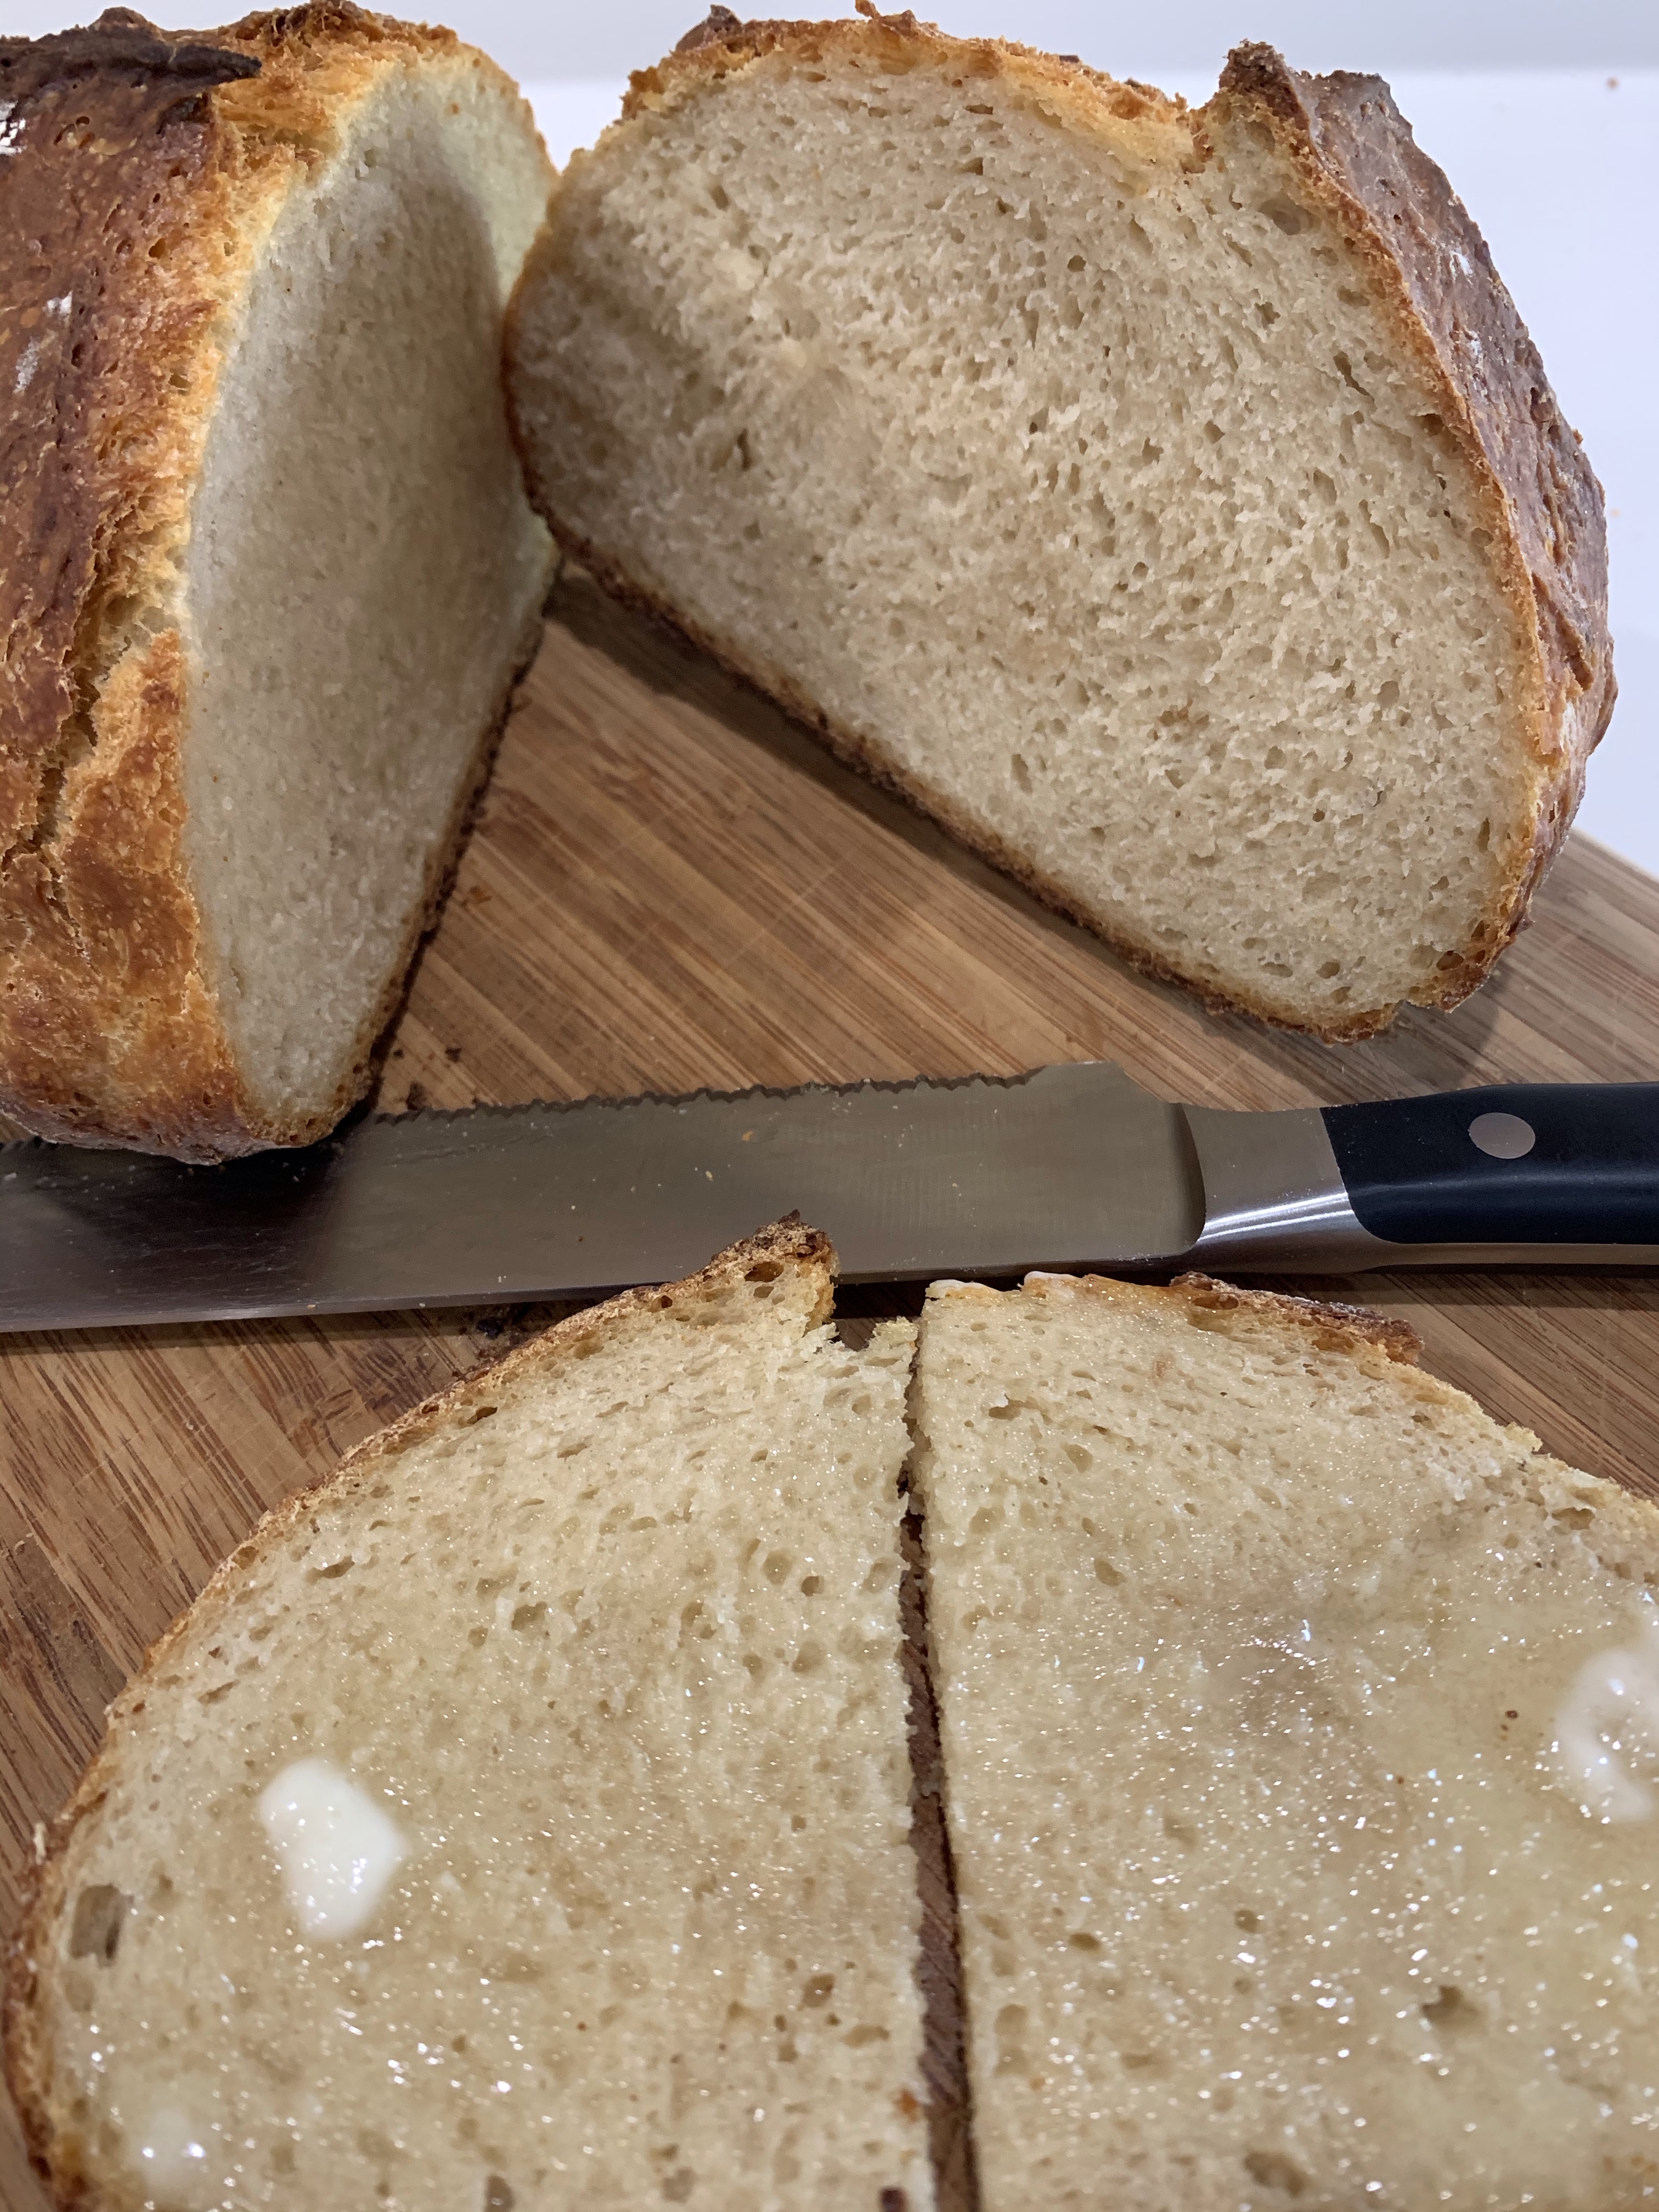
Ever hear the third times a charm? Well, believe it—it’s true. This was my third attempt at this bread. The first two were disasters due to simple, stupid mistakes. In the first one I used 2 Tbl of salt instead of 2 tsp. I proofed the second one too warm. I tossed the first one. Not only did it take forever to rise due to the salt retarding the yeast, the salt taste was overwhelming. Plus I forgot the egg wash so the crust was dull and unappealing. The second was proofed in the proofing oven and rose too fast causing splits along the sides and when scored with the lame it flattened but was still ok to use for garlic bread.

The third and successful bake was proofed at room temperature for 15 minutes shorter than the recipe called for, but still doubling the size of the dough. I also activated the yeast for 10 min prior to adding the rest of the ingredients. (Step 1 below.)

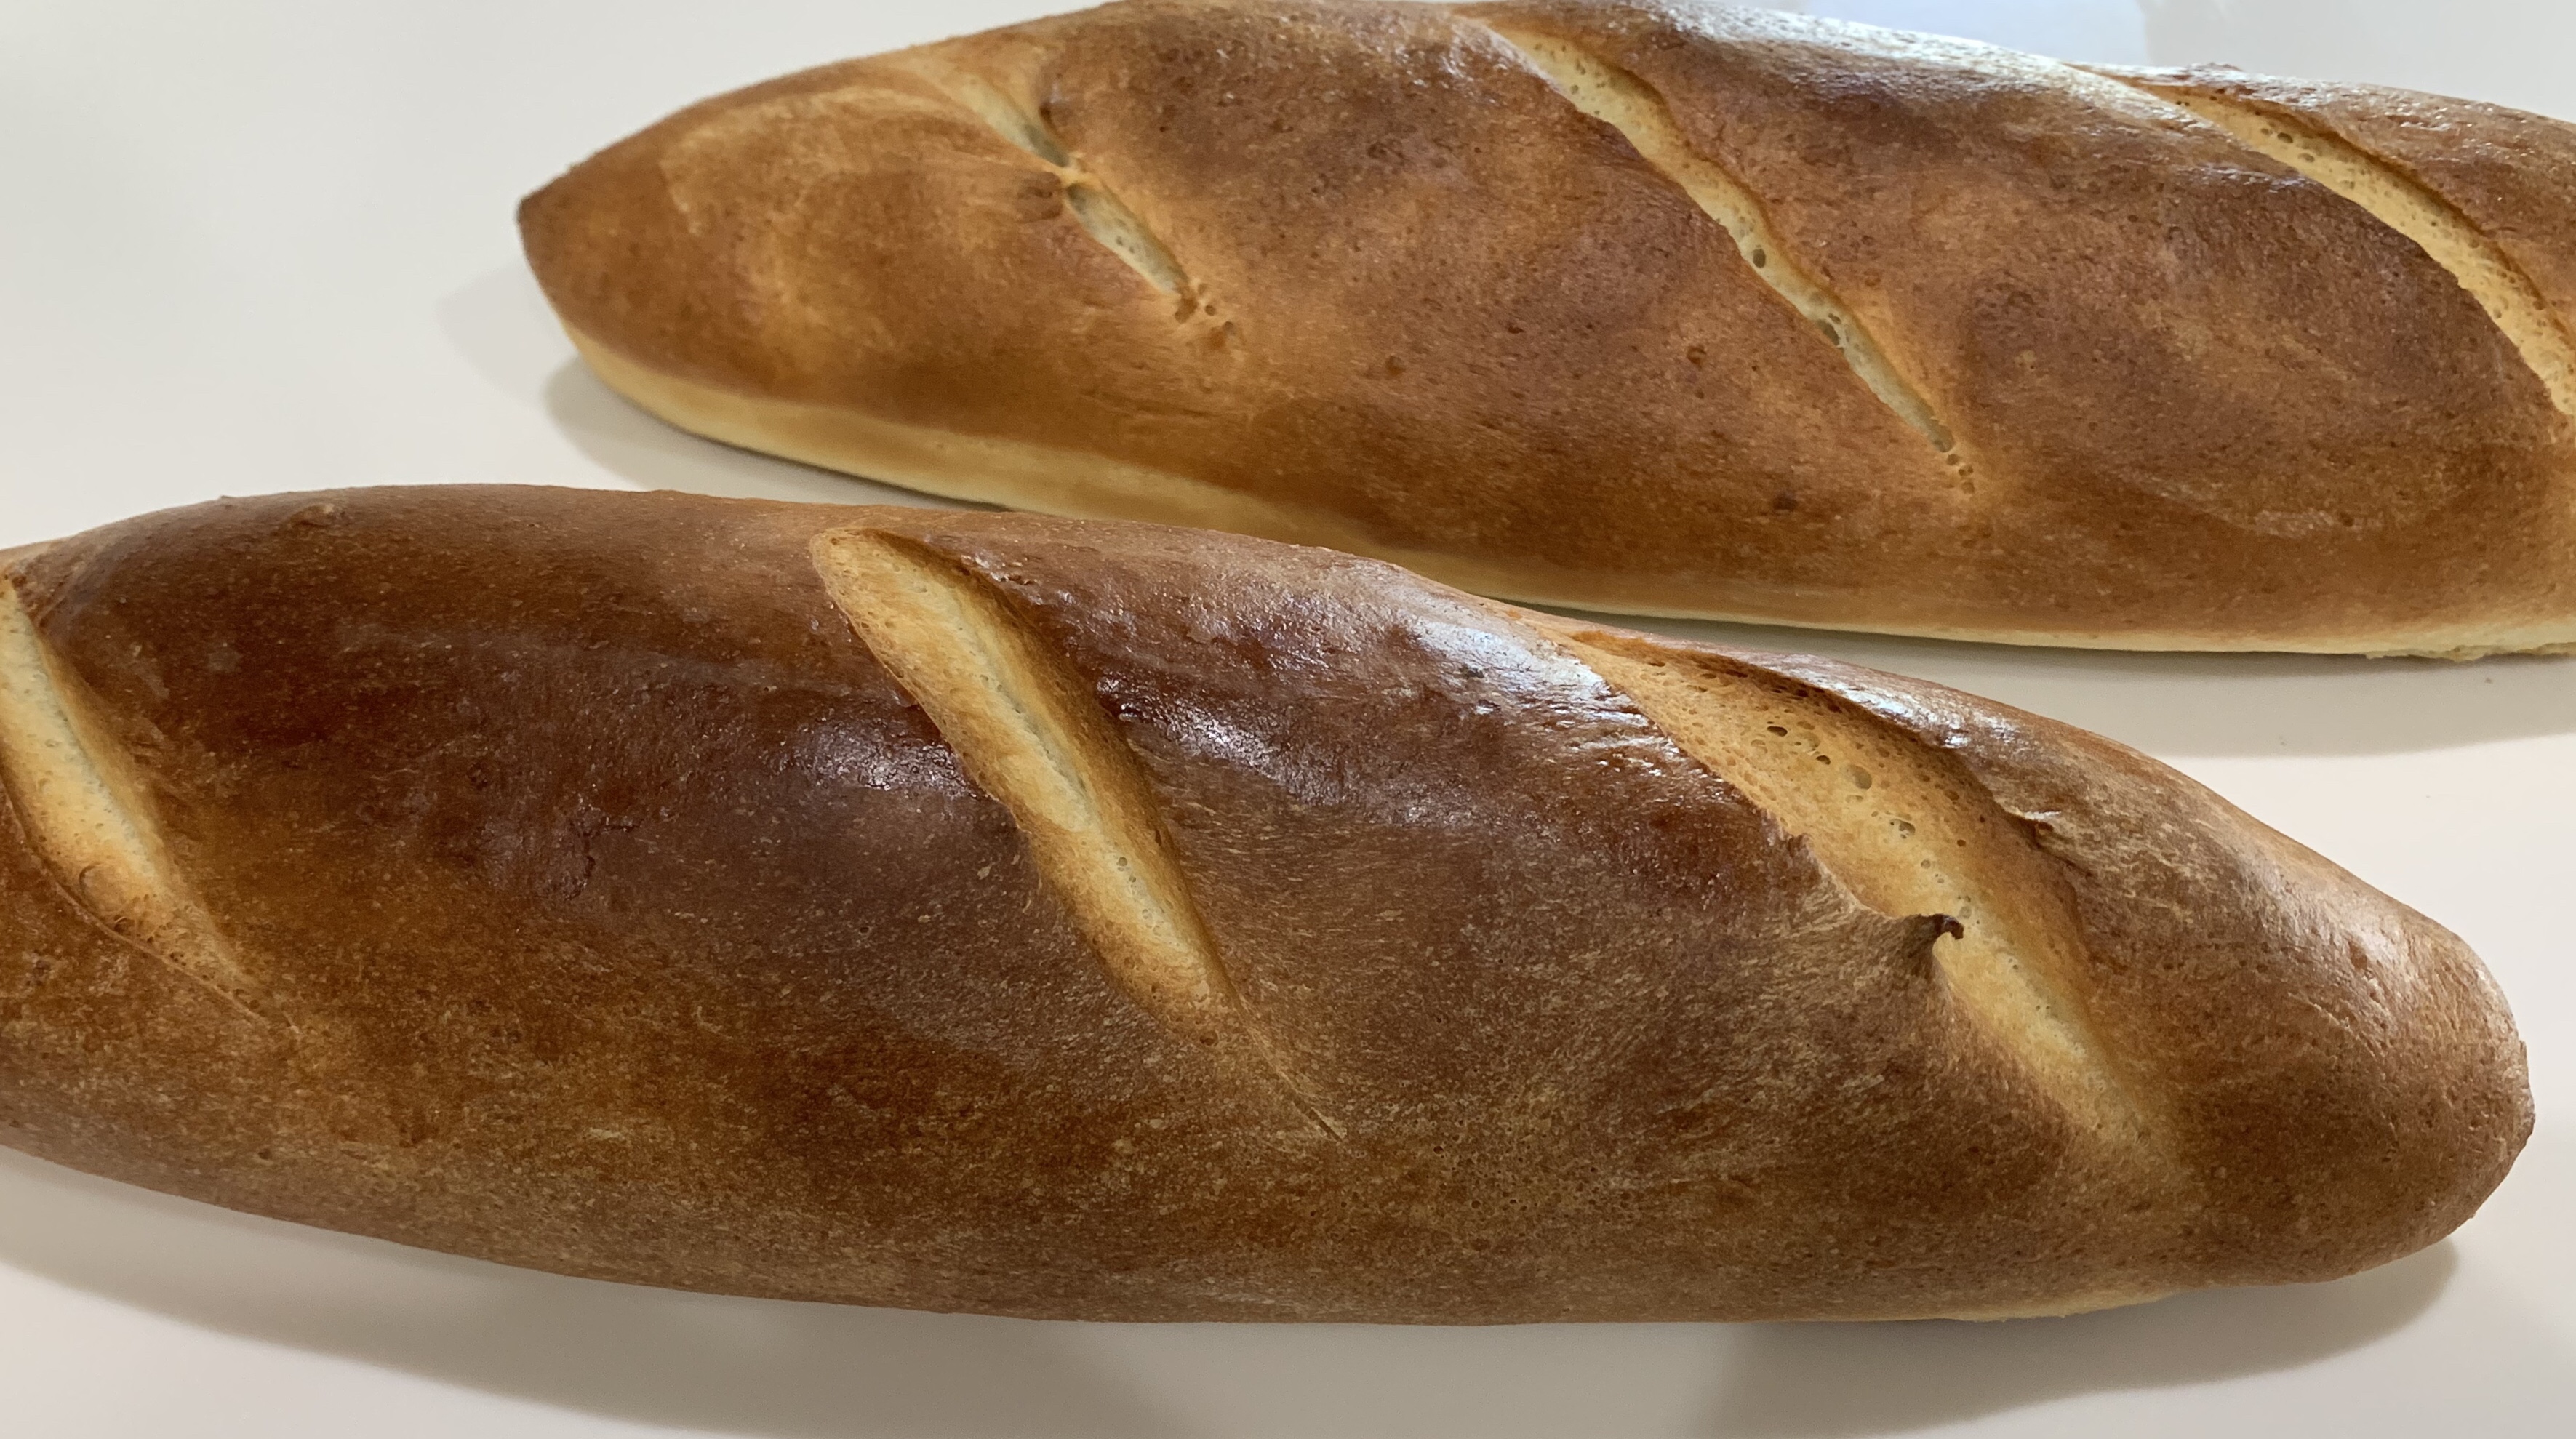
Italian Supermarket Bread KAF

INGREDIENTS
Dough
• 4 cups (482g) AP Flour
• 2 tablespoons (21g) potato flour or 1/4 cup (21g) dried potato flakes
• 1/4 cup (35g) nonfat dry milk
• 2 teaspoons salt
• 2 teaspoons sugar
• 2 teaspoons instant yeast
• 1 1/3 cups (301g) lukewarm water
• 3 tablespoons (35g) olive oil
Topping
• 1 egg white, beaten with 1 tablespoon water, or substitute Quick Shine
• sesame seeds
METHOD

  1. In your stand mixer bowl combine the yeast, sugar and water and allow to rest for 10 minutes
  2. Add half of the flour and all of the rest of the dough ingredients till cohesive. Add the rest of the
    flour mixing between each addition
  3. Knead the dough for 5 to 8 minutes, until it’s smooth and supple, adding more water or flour as
    needed.
  4. Cover the dough and allow it to rise for 1 hour, or until it’s doubled in bulk.
  5. Transfer the dough to a lightly greased work surface and divide it into two pieces. Shape each
    piece into a smooth 16″ log. Place the logs into the two wells of a lightly greased Italian bread
    pan, cover, and let the loaves rise until very puffy, about 1 hour.
  6. Brush the loaves with the egg wash (or spray them with Quick Shine), then sprinkle heavily with
    sesame seeds. Slash the loaves diagonally, making 3 slashes in each, and immediately put them in the oven. Bake in a preheated 400°F oven for about 25 minutes, until the loaves are golden brown. For the crispiest crust, turn off the oven, prop the door open, and allow the bread to cool in the oven

I Ain’t Gonna Work on Maggie’s Farm No More

My friend, Maggie, and I have been trading recipes, tips and techniques for a while now. A couple of weeks ago she sent me this recipe for her biscuits, and it is outstanding. Making the batter takes 10-15 minutes, then 15 minutes in the oven and they are ready.

I followed her method exactly, except I cut the biscuits out with a 2” circular cutter. I then bunched the leftovers into a ball, patted them out and re-cut, twice. This provide a good sample for our Quality Assurance Department, who graded them A+

Maggie’s Six Biscuits

INGREDIENTS
• 1 tsp Baking Soda
• 1 tsp Salt
• 1 tsp Sugar
• 1⁄2 tsp Baking Powder
• 1 1/2 c AP Flour
• 1 stick Cold Butter
• 3/4 Sour Milk or Buttermilk (I soured whole milk with a bit o’lemon juice)

METHOD

  1. Mix the dry ingredients.
  2. Cut in the butter (fingers or pastry thingie, your choice) til it’s a shaggy mess … remembering
    that the less it’s messed with the flakier it’ll be.
  3. Once it’s at the shaggy mess stage begin adding the liquid a bit at a time until it’s a soft dough …
    keeping in mind then”remembering” bit notes above.
  4. Knead it a tiny bit.
  5. Turn it out onto a lightly floured surface, pat it into a rectangle about 1/2” high, spread some
    melted butter on it,
  6. Fold in half, pat it into a rectangle about 1” high, spread some melted butter on it.
  7. Cut into 6 pieces, place on parchment papered baking sheet, bake at 425 for about 15 minutes.

Cheese It!!

So, I made a margarita this afternoon and was sitting out on the deck enjoying the view. I don’t have salt for the rim of the glass, so decided a nice salty cracker would be a good substitute. I have an untried recipe for “Cheese-Nibs” and decided to make them to accompany my drink.
(The margarita was full when I started baking.)

They take very little time and are easy to make. You can adjust the amount of dusting salt to suit your taste. I rolled the dough out on the same parchment paper I used to bake them—less mess, more efficient. I also left a few of them un-separated on the baking sheet and they seemed to be fine. Next time I will just cut them and leave them all attached. They seem to shrink slightly and pull away from their neighbors. As you are working on one of the chilled disks of dough keep the other in the fridge. After each step return the dough to the fridge to set up a bit. It makes cutting etc much easier.

Cheez-Its Recipe

https://www.inkatrinaskitchen.com/homemade-cheez-its/

YIELD: 7 dozen crackers

INGREDIENTS
• 8 oz sharp cheddar cheese, grated
• 3 Tablespoons of unsalted butter, room temperature
• 1 Tablespoon vegetable shortening*
• ½ teaspoon salt
• 1 cup flour
• 2 Tablespoons ice water
• Coarse salt for sprinkling

METHOD

  1. Combine cheese, butter, shortening, and salt in the bowl of your mixer fitted with the paddle attachment. The mixture will be crumbly.
  2. Slowly add flour and then the ice water. You may add a few more drops of water to help it come together but be careful not to add too much. You don’t want a wet dough.
  3. Pat the dough into 2 discs and wrap in plastic wrap and chill for at least 30 minutes (or longer).
  4. Preheat oven to 375⁰F.
  5. Using parchment paper or a silicone mat roll each disc to 1/8 inch or less and sprinkle with coarse salt
  6. Cut into 1 inch squares (a pastry wheel or pizza wheel is easiest). Use a toothpick to punch a hole into the center of each square.
  7. If you have difficulty separating and transferring the crackers onto the baking sheet return the parchment paper/mat to the refrigerator for 10 minutes (while you roll out the 2nd dough disc).
  8. Bake for 10 – 15 minutes or until puffed and browning around the edges. If you pull them out too soon and the crackers don’t have the desired crispiness you want then simply return them to the oven for 2-3 more minutes.
  9. Move crackers to a cooling rack. Makes about 7 dozen crackers.

Sure, I’ll Pop Right Over

We saw a recipe for strawberry popovers from William Sonoma. I decided to try straw, black and rasp berry popovers. While the taste was spot on, the moisture from the berries retarded the bake on the bottom, resulting in the dreaded soggy bottom. I will try again with some freeze dried berries. Luckily, I also made vanilla ice cream to fill the hole where the popover collapsed from the excess moisture. It won’t fix the problem, but who cares?

The flavor and texture of the popover was very good. Can’t wait to try them with the ice cream! Oh, and I didn’t have any mascarpone cheese, hence the vanilla ice cream.

Strawberry Popovers

INGREDIENTS

• 1 ½ cups (12 fl. oz./375 ml) whole milk
• 4 eggs
• 1 ½ cups (7 1/2 oz./235 g) all-purpose flour
• 3 Tbs. granulated sugar
• 3/4 tsp. kosher salt
• 2 tsp. grated lemon zest
• 2 tsp. vanilla bean paste
• 3 Tbs. unsalted butter, melted
• 8 strawberries, hulled and very thinly sliced
• Confectioners’ sugar for dusting
For the mascarpone whipped cream (optional):
• 1 cup (8 fl. oz./250 ml) heavy cream
• ½ cup (4 oz./125 g) mascarpone cheese
• 3 Tbs. granulated sugar
• 1 tsp. vanilla extract

METHOD

  1. Place a standard 12-well muffin pan in an oven and preheat to 425°F (220°C).
  2. In a blender, combine the milk and eggs and blend on high speed until frothy, about 30 seconds. Add the flour, granulated sugar, salt, lemon zest and vanilla bean paste and blend on high speed until combined, about 30 seconds, stopping the blender to scrape down the sides as needed. Add the melted butter and blend on high speed for 30 seconds.
  3. Remove the pan from the oven and spray the wells with nonstick cooking spray. Working quickly, divide the batter evenly among the prepared wells, filling each about three-fourths full. For each popover, place 4 strawberry slices on the surface of the batter.
  4. Bake the popovers for 20 minutes, then reduce the oven temperature to 350°F (180°C). Continue to bake until the popovers are deep golden brown and the strawberries look slightly dehydrated, 10 to 15 minutes more.
  5. While the popovers are baking, make the mascarpone whipped cream, if desired. In the bowl of an electric mixer fitted with the whisk attachment, beat the cream on medium speed until soft peaks form, about 1 minute. Add the mascarpone cheese, granulated sugar and vanilla and beat until medium peaks form, about 10 seconds.
  6. Transfer the pan to a wire rack and let the popovers cool in the pan for 3 minutes, then dust with confectioners’ sugar.
  7. Using an offset spatula, remove the popovers from the muffin pan. Serve warm with the mascarpone whipped cream, if desired. Makes 12 popovers.

Tisket a Tasket I made an Easter (Bread) Basket

You know those little cooking videos that pop up on FB occasionally, or in my case, constantly? Apparently, FB knows what you like and what you want to see. Think Orwell’s “Nineteen Eighty Four.”

Tasty posted a video describing how to make a bread basket for Easter. If you know me, you know I never make anything without making a practice recipe before delivering the final product. This one is heading to Dan, Frances, Kathy, Grace and Vivian for their Easter Dinner on Sunday afternoon. (We would have been there but are still “sheltering at home.”) The final basket will be filled with dinner rolls, and maybe some berry popovers. (I haven’t made a practice recipe of those yet… maybe tomorrow?) I also asked for a few colored eggs to be added and photographed, so look for an update next week.

I made few changes to the method but not the ingredients. Here are some tips to the method:

  • After the strips are cut, you can stretch them to fit around the bowl. The two braided strips can also be stretched to fit.
  • Put a little water on the ends of the dough strips as adhesive to join them together.
  • You will not end up with a perfect rectangle when rolled out. Cut equal width strips. Use the shorter dough strips (from the ends of your “rectangle” to circle the smaller bottom of the basket (which is the top of the upside-down bowl.)
  • Use toothpicks to hold the dough strips in place, especially the latitudinal ones. They fall down the sides of the oiled bowl.
  • The longitudinal strips need to be flattened, or offset to keep them from being too high and not having a flat surface to stabilize the finished basket. I cut the peak off to make a nearly level bottom.
  • After removing the basket from the bowl and removing the aluminum foil I returned the basket to the oven, right side up, for about 10 min to completely cook the inside of the basket where it was in contact with the bowl. I also wrapped the edge of the basket that was fully baked to prevent it from further darkening.

Bread Basket – Tasty.co

INGREDIENTS
• 1 ½ cups (350g) water
• 1 Tbl 1 tsp (12g) brown sugar
• 14 g yeast
• 4 ¼ cups (531g) AP flour
• 2 Tbl Canola oil
• 1 Tbl salt

METHOD

  1. Mix water, yeast and brown sugar. Let it sit five minutes
  2. Add flour, canola oil, salt mix. Knead
  3. Form into a ball then place in a greased bowl
  4. Cover and let rise 30 minutes in a warm place
  5. Roll to a 15 x 18“ rectangle when relaxed
  6. Cut into 15 strips across the 18 inch direction.
  7. Cover outside of the bowl with aluminum foil and spray with oil
  8. Place four strips across the top of the bowl
  9. Lift up every other strip wrap one strip around the circumference
  10. Lift up alternate pieces and place another strip around lift up the first pieces place another strip around – use toothpicks to hold in place
  11. Lay a total of 5 strips (or as many as required to fill the side of the “bowl.” (I used 7.) It depends on the width of the strips and size of the bowl.
  12. Cut ends of the longitudinal strips to fit
  13. Braid 3 pieces, cut the ends off to squared the ends of the braid.
  14. Stretch and fit around the bottom of the bowl
  15. Braid 3 more strips, place over a bowl to form the handle and cut the ends to square them up.
  16. Coat the handle with egg wash and flaky sea salt
  17. Bake 350 for 30 to 35 minutes
  18. Attach the handle to the basket with toothpicks

Little Jack Horner said, “Let Them Eat Cake!”

I have a recipe for fig cake, but currently have an over abundance of sliced plums in the freezer and this year’s crop is on the tree. Substituting the plums for figs was a good choice. The tartness of the plums paired nicely with the sweetness of the cake. Now, what to do with the bags of frozen figs?

Lemony No Snicket

As we hunker down at home I realize I have to stop reading new recipes! Despite exercising nearly as much as pre-Covid19 my baking is up around 400%. While all this baking is increasing my skills, it is also increasing my belt size. Luckily, as we are sheltering-in-place stretch waist warmup pants are all the rage.

I saw this recipe from PopSugar online and as I had lemons and raspberries all I needed was the plain Greek yogurt, which was procured during our sanctioned grocery shopping yesterday. Speaking of grocery shopping, we find it difficult to buy a weeks, much less two weeks worth of groceries in one trip. Any suggestions?

The only change I made to the recipe was to substitute equal quantities of olive for canola oil. The intense flavor of the fresh raspberries complemented, but didn’t overpower the lemon. It may be fun to remake these muffins using AP flour rather than whole wheat. I’m thinking it may make a lighter muffin. We have weeks more hunkering down here. Who knows? Obviously, only the Shadow knows.

I also baked these using Convection, which dropped the temperature from 400 deg to 375. I set the timer for the lower range (18 min) and took the muffins out at 20 min.

The batter is very thick so folding in the berries without mashing them is difficult. Be gentle. Be patient.

Lemon Raspberry Muffins

from PopSugar

INGREDIENTS
• 1 lemon
• ½ cup sugar
• 1 cup plain nonfat Greek yogurt
• 1/3 cup canola oil
• 1 large egg
• 1 teaspoon vanilla extract
• 2 cups white whole-wheat flour
• 1 ½ teaspoons baking powder
• 1 teaspoon baking soda
• ¼ teaspoon salt
• 1 ½ cups fresh raspberries

DIRECTIONS

  1. Preheat oven to 400°F. Coat 12 large (½ -cup) muffin cups with cooking spray, or line with paper liners.
  2. Use a vegetable peeler to remove the zest from the lemon in long strips. Combine the zest and sugar in a food processor; pulse until the zest is very finely chopped into the sugar.
  3. Add yogurt, oil, egg, and vanilla. Pulse until blended.
  4. Combine whole-wheat flour, baking powder, baking soda, and salt in a large bowl. Add the yogurt mixture, and fold until almost blended. Gently fold in raspberries. Divide the batter (it will be thick) among the muffin cups.
  5. Bake the muffins until the edges and tops are golden, 18 to 25 minutes. Let cool in the pan for five minutes before turning out onto a wire rack. Serve warm.

On the Lighter Side

While the dark rye I made last week was excellent, I really wanted a lighter rye. I have never had a lot of success with light rye but found a KAF recipe and gave it a go.

I followed the directions as written with just a couple of minor changes. I like to let the proofed dough rest as the oven preheats. I removed it from the proofing bowl, put on a lightly floured piece of parchment paper, form it into a ball and cover to rest. This lets me pick up the dough from the corners of the parchment paper and place into the Dutch Oven. The method below is as KAF published it.

After the recommended baking time the bread was only 145 deg in the center. It required almost 20 more minutes for the temp to be 195. This caused both the top and bottom to brown too much, and the center was barely cooked. Next time I’ll reduce the temperature to 400 and bake for 45 min, checking the internal temp at 30 minutes. Still, good flavor, even if it was a bit of a close texture.

Light Rye Bread – KAF

INGREDIENTS
• 1 ½ cups (340g) lukewarm water
• 2 1/3 cups (280g) Bread Flour
• 1 ½ cups (163g) light rye flour
• 1/4 cup (28g) nonfat dry milk
• 1 ½ teaspoons table salt
• 1 ½ teaspoons instant yeast
• 1 ½ teaspoons Deli Rye Flavor, optional
• 2 tablespoons (25g) vegetable oil
METHOD

  1. Place the water in a large mixing bowl.
  2. Combine the flours with the remaining ingredients in a large mixing bowl, or the bowl of your stand mixer. Mix until there are no dry spots. Using a stand mixer, mix at low speed until all of the flour is moistened. The texture of the dough will be soft and sticky due to the pumpernickel flour.
  3. Cover the bowl and let the dough rise at room temperature for 2 hours. Then refrigerate overnight, or for up to 48 hours.
  4. To bake bread: Grease your hands, and scoop the dough out onto a lightly greased or floured work surface. Shape it into a ball and place it, smooth side down, in a floured brotform; or in a bowl lined with a floured smooth cotton dish towel. Let the dough rise, covered, for 2 to 3 hours.
  5. About 45 minutes before the end of the rising time, start preheating the oven to 450°F with a 4- to 4 ½ -quart baking pot or casserole with a lid inside.
  6. When the loaf is fully risen, remove the hot casserole from the oven, carefully grease it, and tip the risen ball of dough into it. Make several slashes in the dough. Cover the pot with the lid, and place it on a middle rack in the oven.
  7. Bake the bread for 25 minutes. Remove the lid and bake for an additional 5 to 10 minutes; the loaf should be lightly browned, and the interior should register at least 195°F on a digital thermometer.
  8. Remove the bread from the oven and turn it out of the crock onto a rack. Cool for several hours before slicing.

Rawhide – Give it a Minute

We only had Ritz and Saltines in the cupboard, then I saw these crackers online. I have both Brie and aged cheddar cheeses in the fridge and while the cheddar is fine on Ritz the Brie just doesn’t work for me on either cracker. However, lightly salted soda crackers, topped with a little homemade fig jam and Brie is, as Mary Berry would say, is “scrummy”.

The hardest part of making these crackers is the rollin’, rollin’ rollin’. Luckily, the dough, once rolled out slightly becomes very supple and elastic and didn’t tear. Rolling out to the ultimate 11”x15” sheet seemed to take forever. Luckily, preheating the oven to 425 deg likewise takes a long time. (I used convection which dropped the temp to 400 deg.) Too bad there isn’t a way to photograph the crisp snap. The crackers are great!

Gourmet Soda Crackers

INGREDIENTS

• 1 1/2 cups (163g) Italian-Style Flour (40g cake flour, 123g AP flour)
• 2 teaspoons instant yeast
• 1/4 teaspoon salt
• 1/4 teaspoon baking soda
• 1/4 teaspoon cream of tartar
• 1 tablespoon King Arthur Easy-Roll Dough Improver, optional but helpful
• 1 teaspoon sugar
• 6 tablespoons (85g) water
• 2 tablespoons (28g) butter
• 2 tablespoons (25g) vegetable oil

METHOD

  1. Whisk together the flour, yeast, salt, baking soda, cream of tartar, dough improver, and sugar. Set it aside.
  2. Put the water, butter, and oil in a microwave-safe cup, or in a saucepan. Heat gently just to melt the butter. Remove from the heat, and cool to 120°F-130°F. If you don’t have a thermometer, this will feel hotter than lukewarm, but not at all uncomfortably hot; it’ll be cooler than your hottest tap water.
  3. Add the liquid ingredients to the dry ingredients. Beat at medium, then high speed for a total of about 90 seconds, to make a soft dough.
  4. Place the dough in a lightly greased bowl, cover it, and refrigerate overnight, or for up to 18 hours. It won’t rise much; the bowl can be small.
  5. Remove the dough from the refrigerator, and allow it to rest for about 15 minutes. Preheat the oven to 425°F.
  6. Lightly flour a work surface (a silicone rolling mat works well here), and remove the dough from its rising bowl. It won’t feel like normal yeast dough; it’ll be more clay-like. Shape the dough into a 3″ x 5″ rectangular block; pre-shaping it like this will help you roll it out evenly. Roll it into a rough 13″ x 15″ rectangle; it’ll be quite thin. Be sure to keep the rolling surface well-floured, to avoid sticking.
  7. Starting with a shorter side, fold the dough in three like a business letter.
  8. Roll it out again, this time to an 11″ x 19″ rectangle, or thereabouts. The dough will shrink when you stop rolling it; your goal is to end up with a rectangle that’s about 10″ x 18″.
  9. Sprinkle the dough with your choice of salt — we like an herbed or smoked salt — and gently press it in with the rolling pin.
  10. Using a rolling pizza wheel (easiest) or a baker’s bench knife, cut the dough into 2″ squares. Note: If you’re using a silicone mat, cut very carefully – you don’t want to damage the mat. We like to use an acrylic-blade pizza wheel.
  11. Transfer the crackers to two lightly greased or parchment-lined baking sheets; you can put them fairly close together, as they’ll shrink as they bake, rather than spread. Prick each cracker once or twice with the tines of a fork.
  12. Bake the crackers for about 10 minutes, till they’re a very light golden brown. Watch them carefully towards the end of the baking time; they can darken very quickly.
  13. Turn off the oven, and open the door completely. Leave the crackers on the oven rack; they’re going to cool down right in the cooling oven, in order to preserve their crispness. Keep your eye on them for the first couple of minutes; if for some reason your oven isn’t cooling off quickly, and the crackers are continuing to brown, pull the rack out partway.
  14. When the crackers are completely cool, remove them from the oven, and wrap airtight, to preserve their crispness.