Summery Shortbread Cookies

I need a variety of summery cookies for QC’s Mah Jongg group who will meet at our house. Some people do not like chocolate (philistines), some do not like tart and unbelievably, some do not like sweet. I dredged cookies in tempered 54% chocolate, hard setting key lime and raspberry icing to try to satisfy most of them.
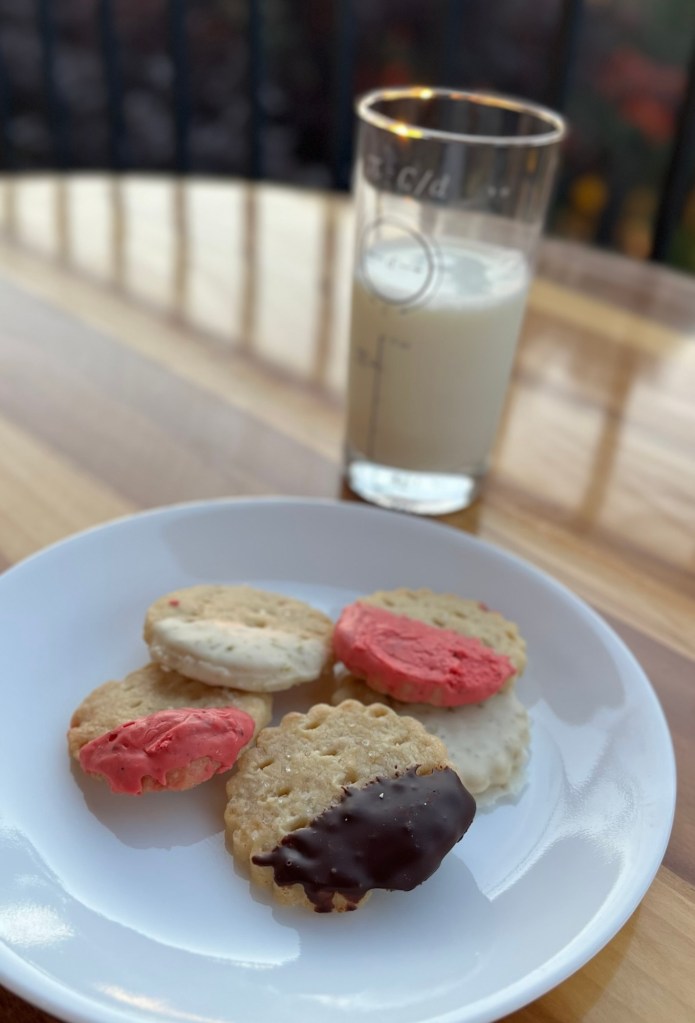
Shortbread Cookies

INGREDIENTS (Half Recipe)
• 336 g = 3 sticks, 36 Tbl (170g = 1½ sticks) unsalted butter, at RT
• 200 g = 1 c (100g = ½ c) sugar, plus extra for sprinkling
• 1 tsp (½ tsp) pure vanilla extract
• 420 g = 3 ½ c (210g = 1¾ c) all-purpose flour
• ¼ tsp (⅛ tsp) salt
• 175-200 g semisweet chocolate, finely chopped
• Optional: 3 Tbl fresh orange zest

METHOD

  1. In the bowl of an electric mixer fitted with a paddle attachment, mix together the butter and sugar until they are just combined. Add the vanilla, (and zest if using.)
  2. In a medium bowl, sift together the flour and salt, then add them to the butter-and-sugar mixture. Mix on low speed until the dough starts to come together. Dump onto a surface dusted with flour and shape into two flat rectangles ~ ¾ inch thick each. Do not overwork it and the flour will hydrate some in the freezer. Wrap in plastic and chill for 30 minutes.
  3. Roll the dough ~1/2-inch thick and cut into desired shapes. Place the cookies on an ungreased baking sheet dock with a fork (and optionally sprinkle with sugar.)
  4. Preheat the oven to 350⁰F. Refrigerate cut cookies while the oven heats. (~ 15 minutes)
  5. Bake for 20 to 25 minutes, until the edges begin to brown. Allow to cool to room temperature.
  6. If chocolate coating, when the cookies are cool, place them on a baking sheet lined with parchment paper.
    a. Temper the chocolate as described below
    b. Drag ½ of each cookie with just enough chocolate to coat it.
    c. Optional: dust still warm chocolate lightly with zest

Tempering Chocolate with Mycryo

INGREDIENTS
Weigh 1% of the mycryo butter so it’s ready to add.
• 100g/3.5oz chocolate + 1/2 tsp (1g) Mycryo cocoa butter
• 200g/7oz chocolate + 1 tsp (2g) Mycryo cocoa butter
• 1kg/35.27oz chocolate + 5 tsp (10g) Mycryo cocoa butter.
METHOD

  1. Melt chocolate to 122-126°F (microwave or bain-marie). Leave the chocolate to cool to 93-95° F (or 91-93° F for milk, white or colored chocolate) at ambient temperature.
  2. When cooled, sprinkle the 1% Mycryo® cocoa butter as per table above and wait a few seconds as it melts then stir in to combine.
  3. Use a rubber spatula to scrape the chocolate off the sides and fold into the middle.
  4. Stir well and continue to stir well frequently
  5. Use immediately. To keep the chocolate in temper, maintain it within working temperatures: 88°F–91°F for dark chocolate, and 82°F–84°F for milk/white/colored chocolate.
  6. If the chocolate starts hardening, then heat it up and stir well until it warms back up to working temperature and the chocolate is smooth again. (Do this carefully, putting it in the microwave in 5 second bursts, stir vigorously and repeat until desired temperature is achieved.)

Key Lime Icing – Hardening
Sets Firm/Shiny
This creates a classic, hardened sugar glaze, which is perfect for bundt cakes and cookies.
INGREDIENTS
• 113 g (1 c) powdered sugar,
• 1 -2 Tbl fresh key lime juice
• ½ – 1 tsp meringue powder (optional, but helps it dry faster and harder).
• Zest from 1 small lime
METHOD

  1. Add ingredients to a small bowl
  2. Beat until completely smooth. The icing should be thick enough to slowly drip in a ribbon.
  3. Let it sit at room temperature for 12 to 24 hours to set completely dry and crisp.

Raspberry Icing – Hardening

INGREDIENTS
• 113 g (1 c) Powdered Sugar
• 40 g (⅛ c) Seedless Raspberry Jam
• 2 – 3 ½ Tbl Milk or Heavy Cream
• ¼ tsp Vanilla Extract
• Pinch of salt
• ½ – 1 tsp freeze dried raspberry powder

METHOD

  1. In a medium bowl, beat the ingredients, and 1 tablespoon of milk.
  2. Beat until completely smooth. If the icing is too thick and difficult to pour or drizzle, add the remaining milk ½ teaspoon at a time until you reach a pourable yet thick consistency.
  3. If you want a perfectly leveled, mirror-like “melted” glaze that hardens quickly, gently warm the mixture in a double boiler or microwave for 10–15 seconds before pouring.
  4. Pour, dip or drizzle over your cookies, cakes, or pastries. Let it sit at room temperature for 1–2 hours to harden into a firm crust
Pugliese Bread, the Easier Way

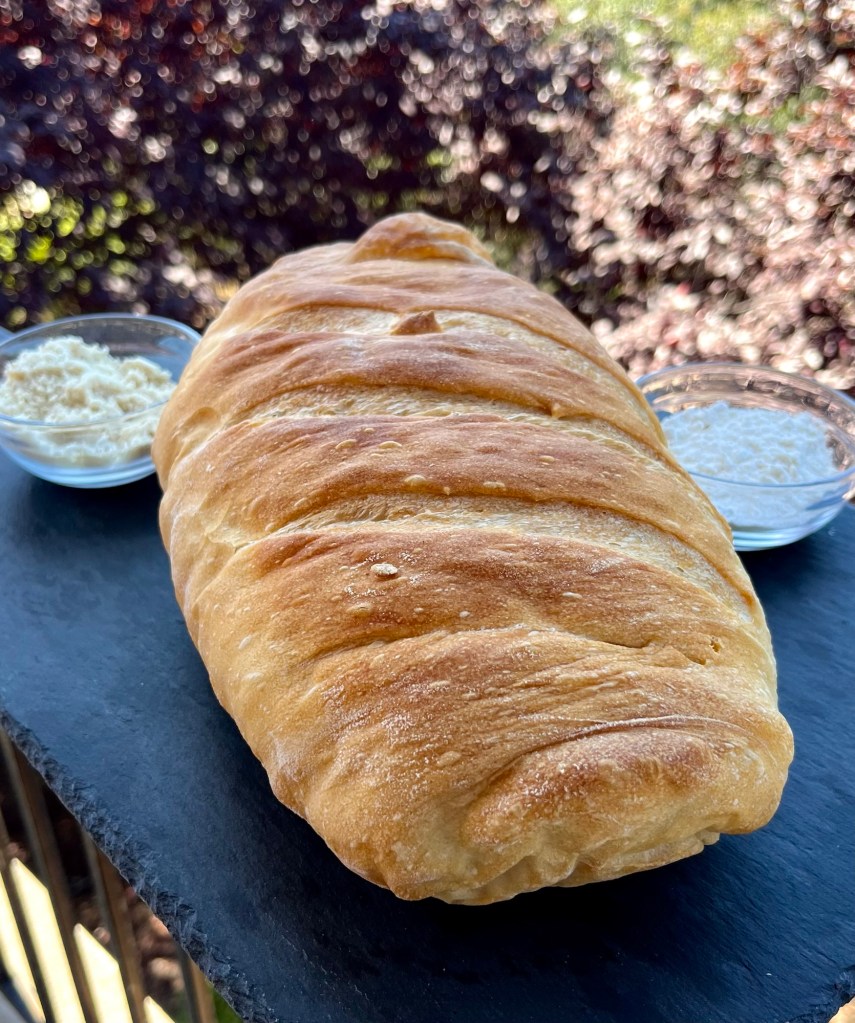
You can do this easy, or hard. It’s your choice. I decided to do it somewhere in the middle, the “Easier Way.”

Making pugliese can be a long, involved process. It can also be as easy as any artisan bread. I chose to use mostly traditional ingredients, but shorten the method. I didn’t have any fine semolina flour on hand so used only bread flour. Some pugliese recipes use mash potatoes, I did not.

I followed the method pretty closely but I used a stand mixer and like to do the second rise in a parchment paper lined banneton. This makes it easier to transfer from the banneton to the dutch oven. Remember to put the dough in the banneton seam side down so you can score the smooth side..

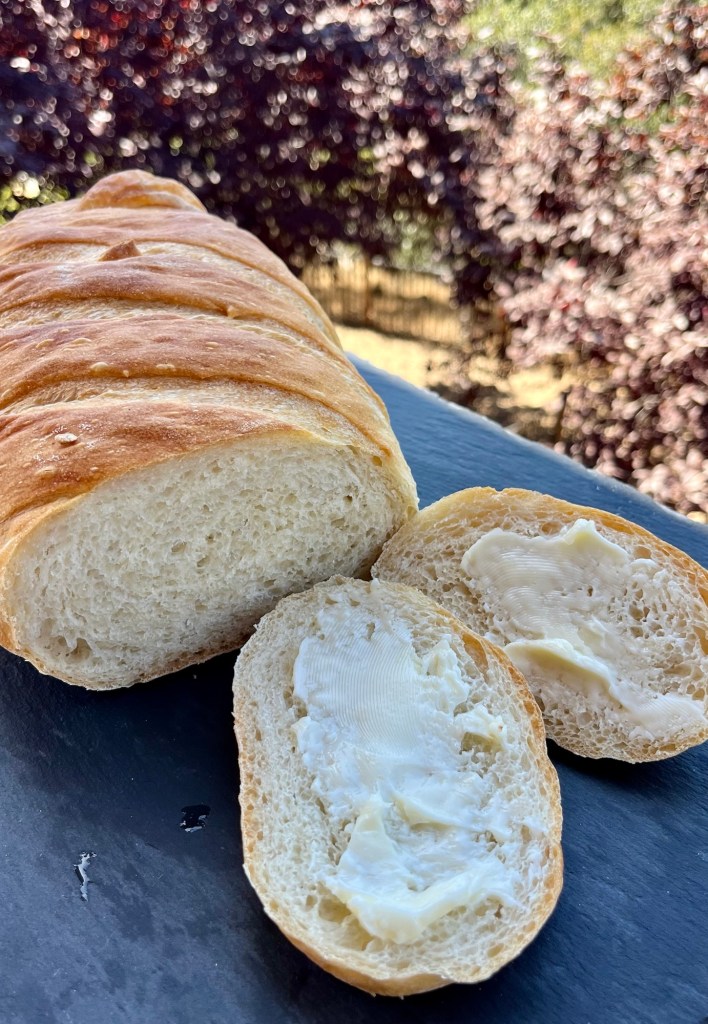
The final result is a tasty loaf with good crumb and very chewy crust, very much like a traditional pugliese.

Pugliese – Easier

INGREDIENTS
For the Biga:
• 260 g (2 cups) Bread flour
• 155 ml (2/3 cup) Water (room temperature)\
• ¼ tsp Instant yeast
For the Final Dough:
• All of the fermented Biga
• 260 g (1 ¾ c) Fine semolina flour (or additional bread flour if semolina isn’t available)
• 235 ml (1 c) Water (lukewarm)
• 15 g (1 Tbl) Fine sea salt
• 1 tsp Instant yeast

METHOD

  1. In a bowl, mix the flour, water, and yeast for the biga until a shaggy dough forms. Cover tightly and let rest at room temperature for 12 to 18 hours (or in the fridge for up to 2 days).
  2. In a stand mixer bowl, dissolve the biga and the yeast in the lukewarm water and beat on low for 5 minutes.. Add the semolina flour and salt. Mix thoroughly until you have a very wet, sticky dough.
  3. Cover the bowl with plastic wrap and let it proof at room temperature for 90 minutes (or until tripled in size).
  4. Generously dust your work surface with semolina flour. Gently turn out the dough and shape it into a loose oval (batard) or round boule. Place it seam-side down into a parchment paper lined banneton.
  5. Cover and let it proof for another 90 minutes until it has grown significantly.
  6. Preheat your oven and a Dutch oven to 450°F for 30 minutes.
  7. Score the top with a sharp blade, and bake covered with the lid on for 25 minutes.
  8. Remove the lid and bake for another 20 minutes until the crust is deep golden brown and sounds hollow when tapped.
  9. Cool: Let it cool on a wire rack for at least 45 minutes before slicing.

Fresh Peach Braided Puff Pastry

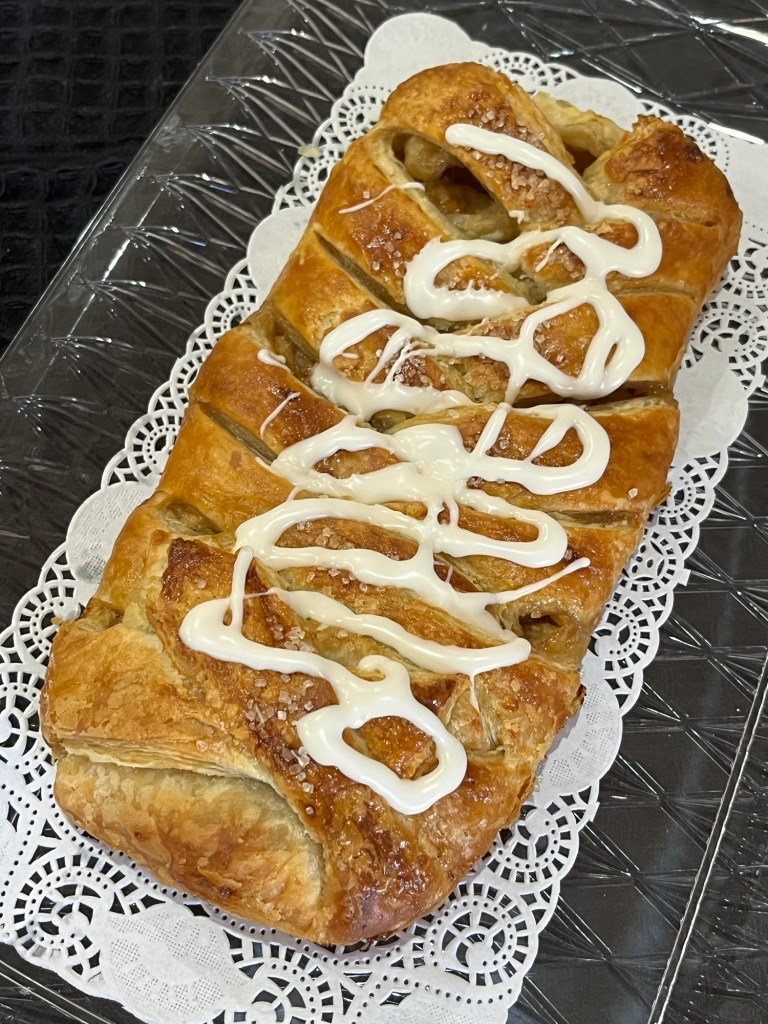
My neighbors went to Hawaii as the peaches on their tree were ripening, so they gave me a dozen peaches. It’s a shame they are missing some of their peach season but they are in Hawaii after all. I can’t feel too bad for them.

I studied several recipes to pick and choose the parts I wanted to create this pastry which would taste of fresh peach but not be soggy from all the peach juice.

I succeeded.

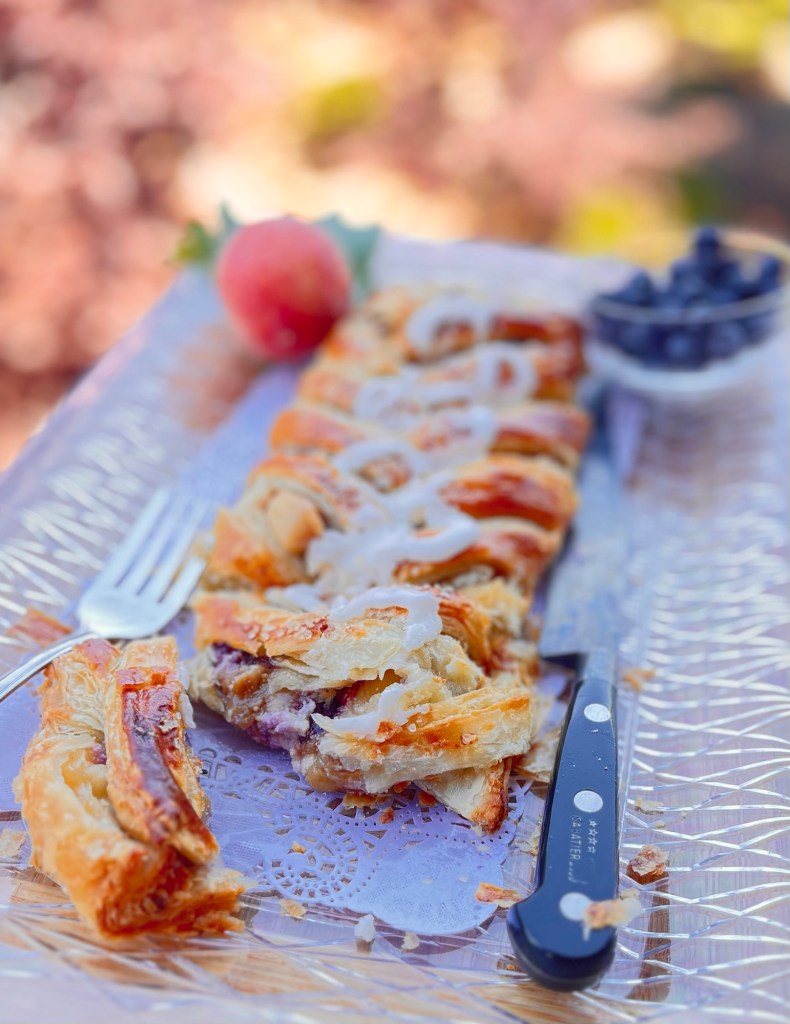
I made one with simple peach filling and a second one with a cream cheese/sugar paste and fresh blueberries along with the peach filling.

They were both delicious, crisp, and not soggy. The lemon/sugar drizzle added a touch of tartness to the sweet peaches.

I created a template to remember how to cut and fold the pastry. After filling the ends fold up and over the filling.

I am sorry I didn’t include weights in the measurements but I didn’t take notes as I was creating/inventing. The weights of everything are well known except the peaches. I also hope I didn’t miss anything. I don’t think so.

Fresh Peach Braided Puff Pastry

INGREDIENTS
Pastry & Filling:
• 1 sheet Sally’s puff pastry, thawed
• 3–4 (1 c) fresh peaches, peeled and sliced
• 1/3 c granulated sugar
• 1/3 c brown sugar
• 1 Tbl cornstarch
• 1/8 tsp nutmeg
• 1/2 tsp cinnamon
Egg Wash & Glaze:
• 1 whole egg + 1 tbsp water (whisked for egg wash)
• 2 tsp coarse sugar (or turbinado/granulated)
• 1/3 c powdered sugar + 3-4 tsp lemon juice (whisked for drizzle)

METHOD

  1. Preheat oven to 400°F (200°C) and line a rimmed baking sheet with parchment paper. (It’s important to use a rimmed baking sheet or you will have to clean the oven as I did.)
  2. In a small bowl mix the granulated sugar and cornstarch
  3. In a medium saucepan , mix the sliced fresh peaches, brown sugar, nutmeg, and cinnamon, heat on low.
  4. Add sugar and cornstarch mixture stirring to thoroughly combine, and continue heating until syrup thickens,
  5. Remove from heat and drain in a fine mesh sieve to remove excess juice.
  6. Unfold the thawed puff pastry sheet onto a lightly floured counter. Roll to 12″ x 14″.
  7. (If including the cream cheese/sugar and blueberries spread the cream cheese mixture down the center of the pastry and place blueberries sparsely on top of it.)
  8. Spoon the peach mixture down the center third of the pastry. Using a pizza cutter, make 1-inch diagonal cuts along both long sides of the dough (up to the edge of the peach filling).
  9. Fold the strips over the filling, alternating left and right to create a crisscross braid effect. Pinch the top and bottom ends tightly to seal.
  10. Transfer to a parchment paper lined, rimmed baking sheet
  11. Brush the entire braid with your egg wash and sprinkle generously with coarse sugar. Bake for 25–30 minutes until golden brown.
  12. Mix 1/3 cup of powdered sugar and 4 teaspoons of lemon juice. Adjust the amount of lemon juice
  13. Let the braid cool for 15 minutes, then drizzle with the powdered sugar and lemon juice glaze.

Fresh Baked Artisan Bread Almost Sandwich

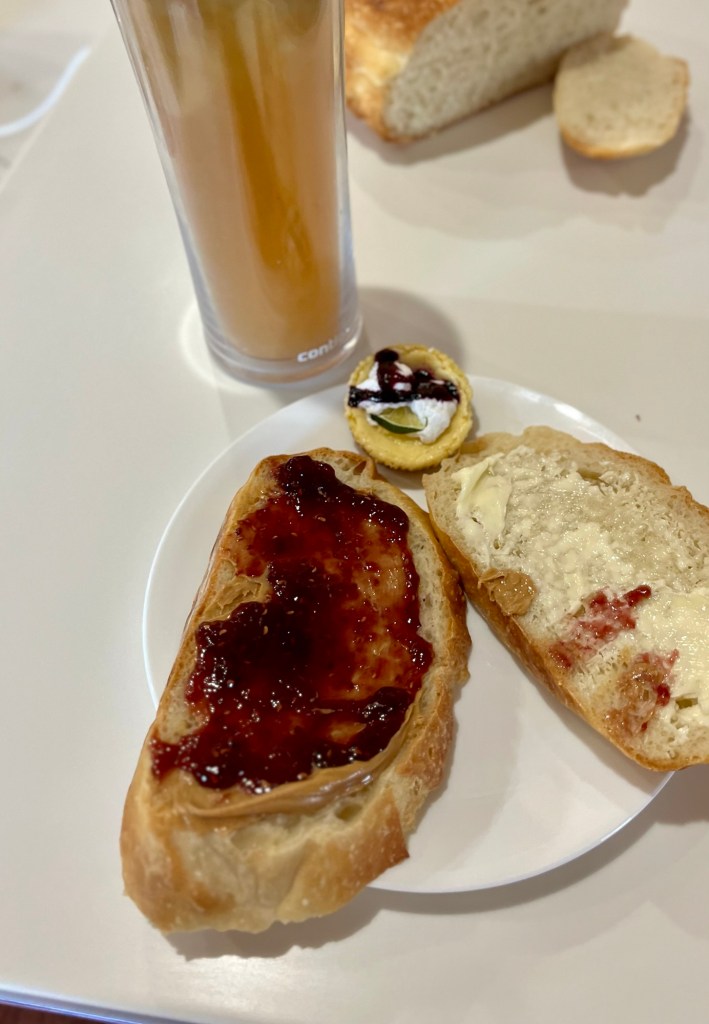
The artisan bread was still a bit warm at lunch time. I decided to make a PB&J sandwich with it. I know artisan bread should sandwich piles of lettuce, tomato, cucumbers and either meat or other veggies of your choice, but c’mon, I am talking FRESH bread with PEANUT BUTTER AND JELLY. It doesn’t get any better for me!

In the background is Mr Arnold Palmer made with freshly squeezed lemons and sun tea and in the middle is one of the few surviving mini key lime pies. A lunch fit for… me!

Crusty Italian Bread

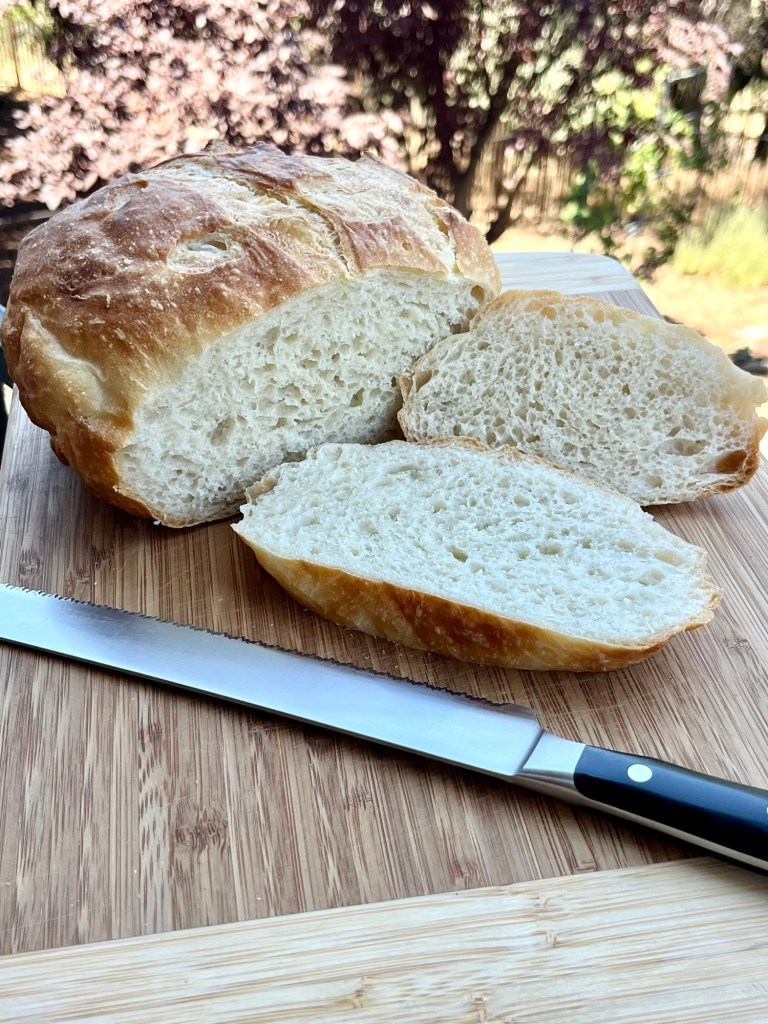
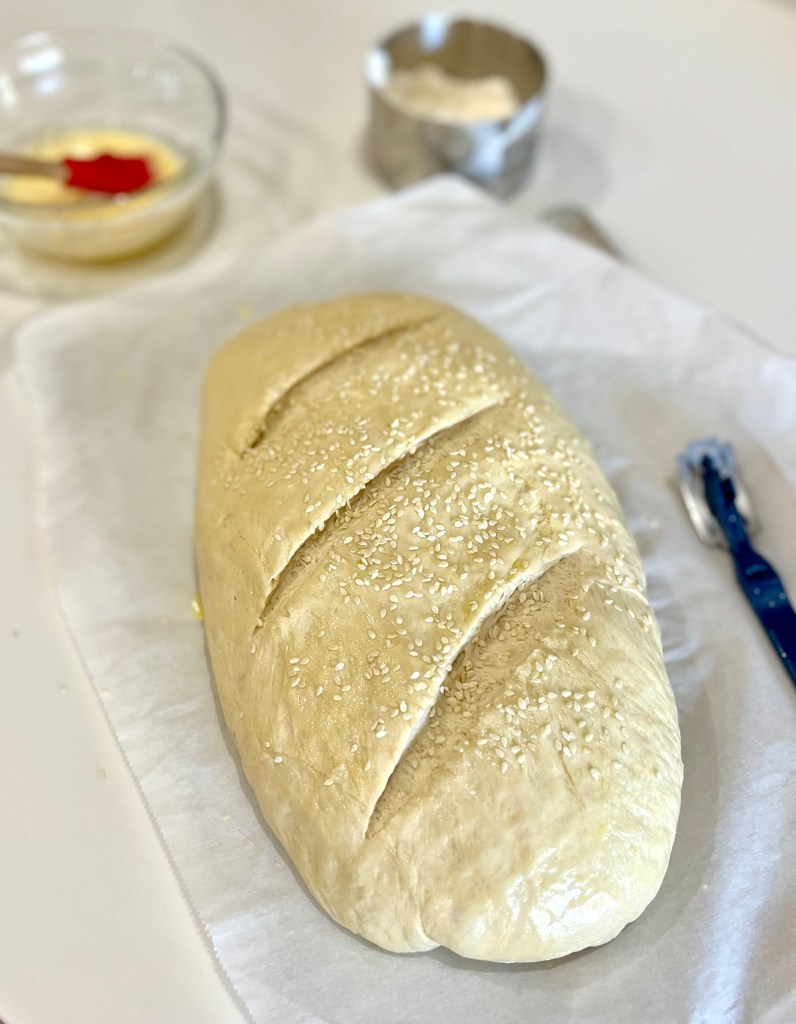
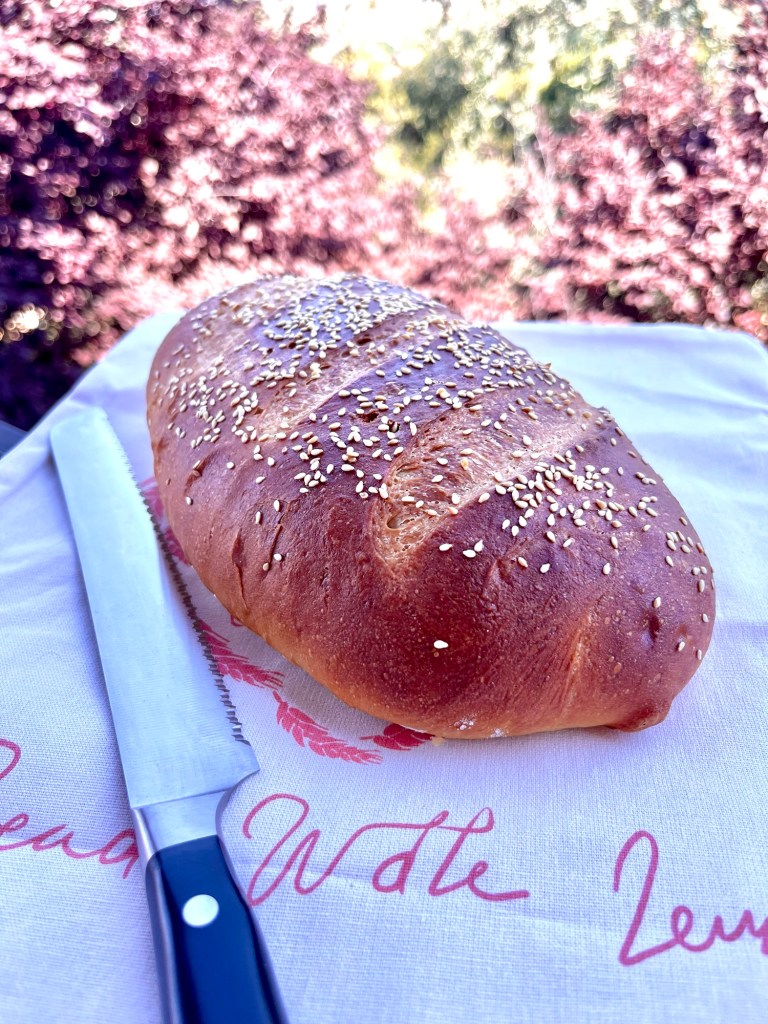
This bread hadn’t made an appearance in a while and to find out why, I made a loaf this morning. Unfortunately (?) it was very good which didn’t help me remember why I hadn’t made it in a year or so.

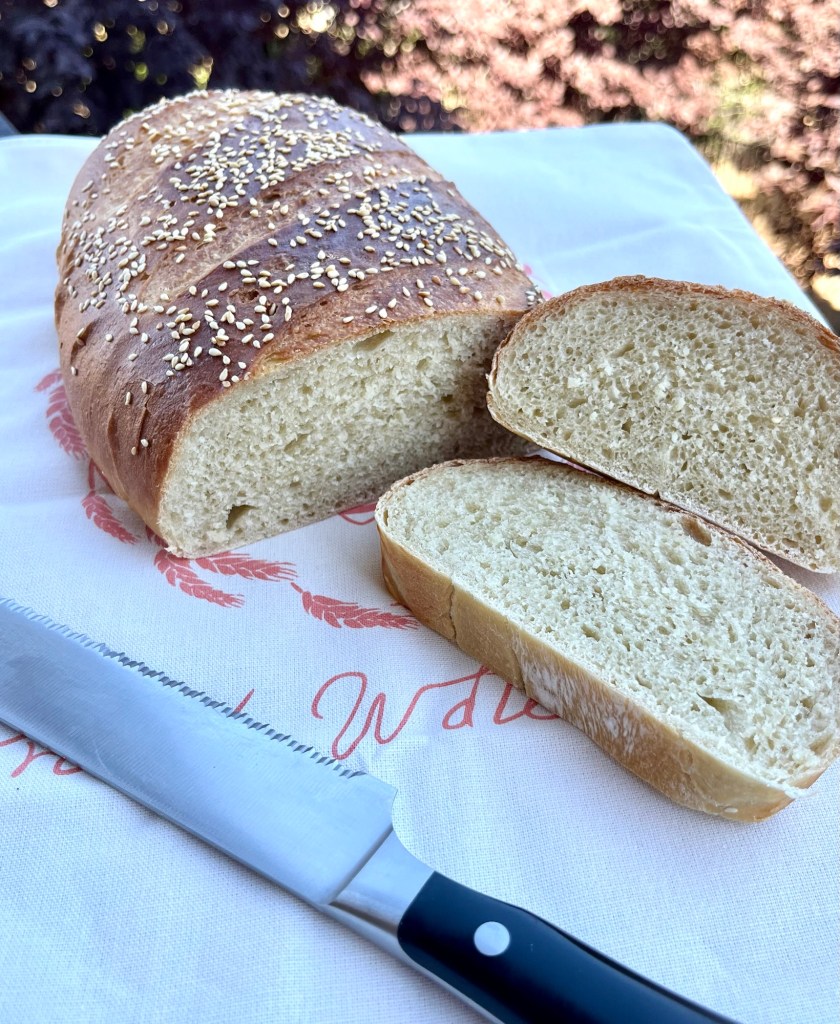
It has a nice crust and tight crumb, perfect for sandwiches. It’s similar to my go-to artisan bread with the exceptions of using AP flour plus a little brown sugar and olive oil. It can be mixed and kneaded in a stand mixer and has minimal fermentation and rise times.

The resulting bread is tasty, firm and worth making more often,

Crusty Italian Bread

INGREDIENTS
• 314 g (1⅓ cups) warm water
• 7 g (2¼ tsp) yeast
• 16 g (1 Tbl) brown sugar
• 18 g (1 Tbl) salt
• 21 g (1½ tsp) olive oil
• 500 g (~4 c) AP flour
• 1 egg yolk for wash
• 1 Tbl sesame seeds

METHOD

  1. Combine warm water, yeast, and brown sugar in a stand mixer bowl, stir and let stand ~8-10 minutes until it begins activate
  2. Add olive oil and salt, mix well. (Mixing and kneading can also be done in a stand mixer.)
  3. Gradually add the flour and mix with a danish dough whisk until the sides and bottom of the bowl come clean.
  4. Knead knead by hand for ~8 minutes until the dough is soft, smooth and not sticky. The dough should weigh ~865g
  5. Cover the dough and let rise until doubled, ~30 minutes.
  6. Punch it down, shape into an oval and book-fold into a boule
  7. Tension by rolling back and forth with a cupped hand. Pinch seams and roll to smooth out.
  8. Cover the loaf with a damp cloth and let it rise until doubled. ~20 min. Over-proofing will cause the loaves to flatten.
  9. Preheat oven to 375ᵒF degrees.
  10. Brush top of loaf with an egg wash (1 egg yolk and 1 Tbl water)
  11. Sprinkle top of loaf with sesame seeds (if desired)
  12. Score with a few, quick, cuts diagonally across the loaf.
  13. Pour 1 cup of hot water in a shallow pan on the rack underneath the bread in the oven.
  14. After 20 minutes put an oven-safe digital thermometer into the loaf.
  15. Continue baking for an additional 5-10 minutes (internal temp reaches 190ᵒF) or until the loaf turn golden brown and produces a hollow sound when tapped.
  16. Remove from the oven and cool on racks.

Mini Key Lime Pies and Graham Cracker Cookie Sandwiches

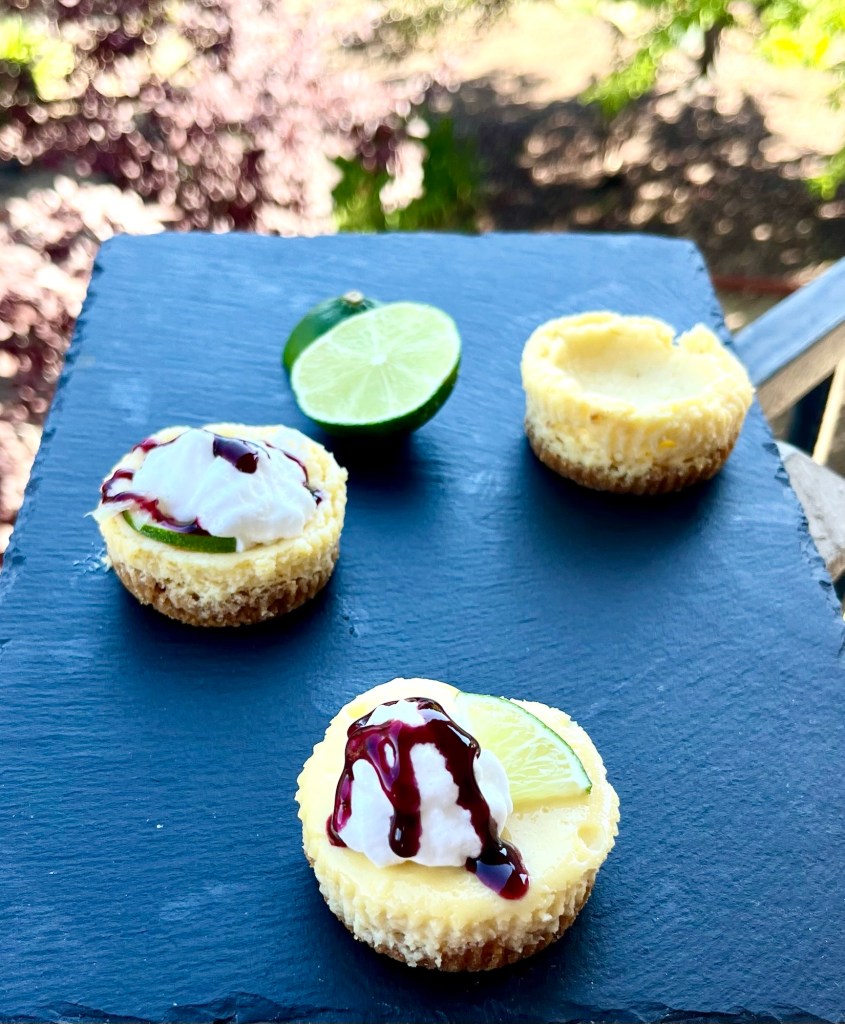
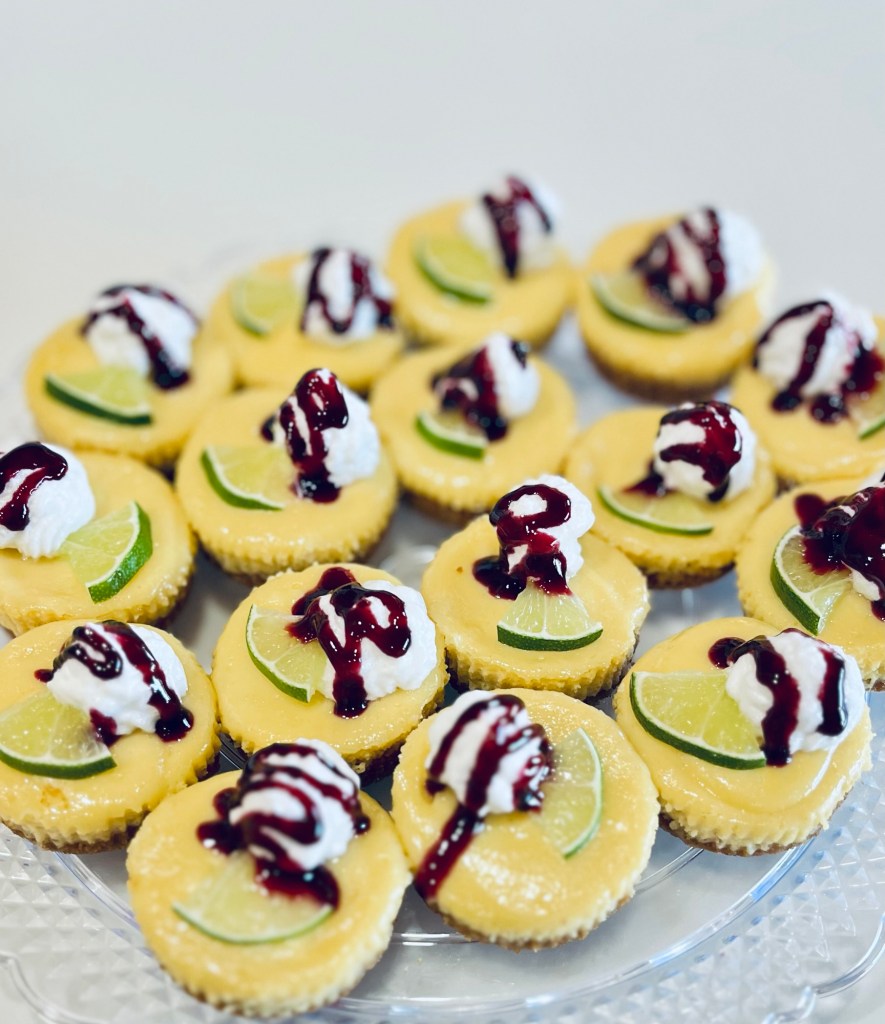
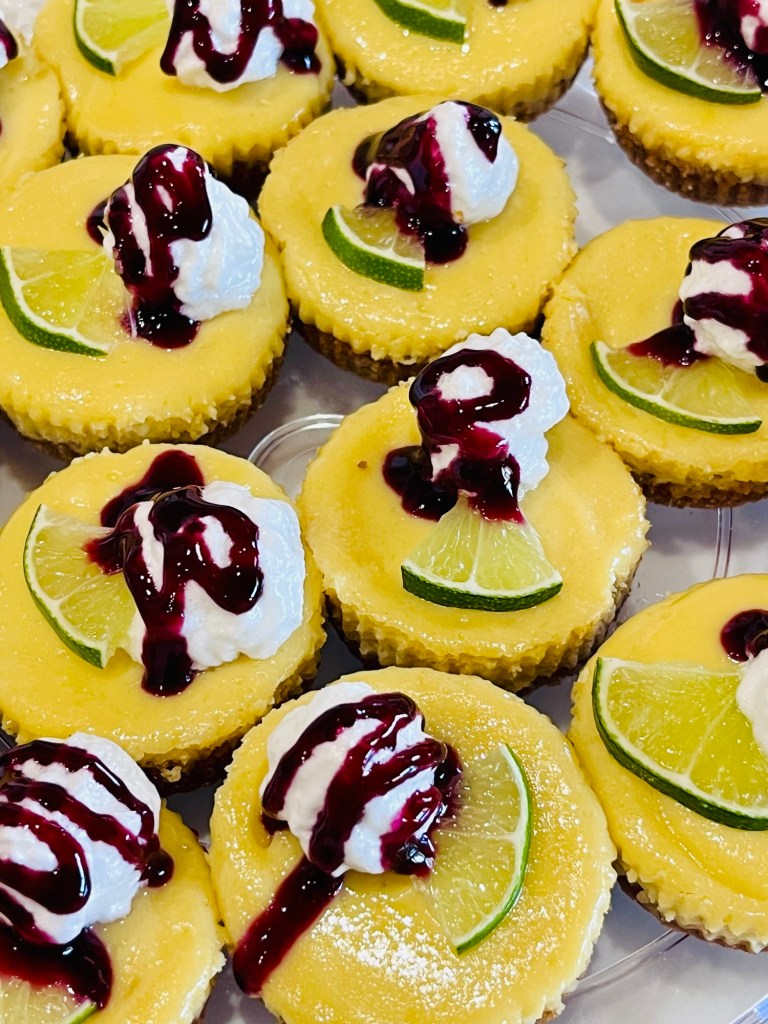
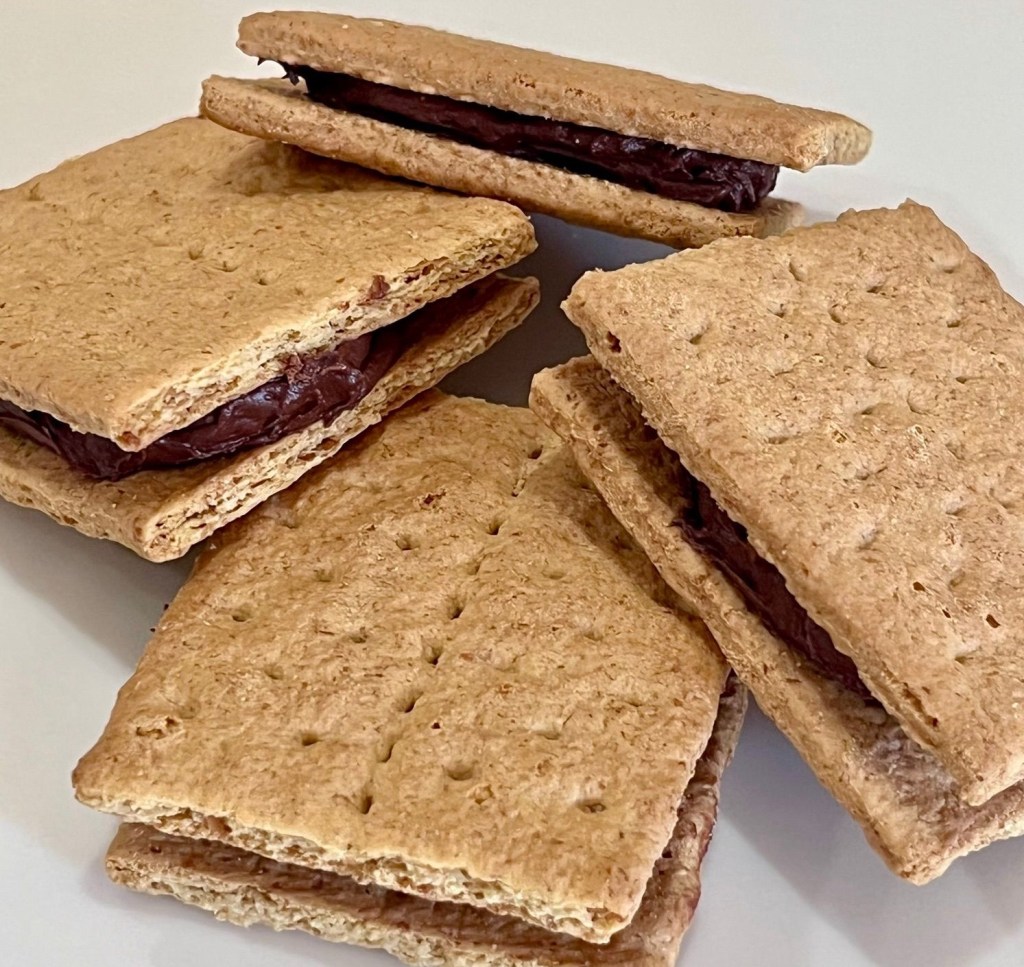
It was a busy weekend. I made Mini Key LIme Pies for a party/luncheon today and with made some Chocolate Frosting filled Graham Cracker Cookies with the leftover graham cracker. Did I mention we also went to a wine tasting south of Sacramento?

The pies took two attempts as the first was a disaster. I over whipped the batter and cooled the pies to quickly causing them to collapse. I made them a second time and swapped the whisk for a paddle attachment after the eggs and cream cheese were well blended. I also left them in the oven when they were at the “jiggle” stage, turned the oven off and opened the door. This allowed them to cool slower. Once I could move the pan with bare hands I let them cool on the counter until they were room temperature, then moved them to the fridge.

The Graham cracker cookies can use and chocolate frosting you like.

Mini Key Lime Pies – Sally

INGREDIENTS
Crust
• 180 g (1 ½ c) graham cracker crumbs (about 12 full sheet graham crackers)
• 85g (6 Tbl) unsalted butter, melted
• 50 g ( ¼ c) granulated sugar
Filling
• 4 ounces (113g) full-fat brick cream cheese, softened to room temperature
• 4 large egg yolks
• 396 g (one 14-ounce can) full-fat sweetened condensed milk
• 120 ml ( ½ c) key lime juice*
optional: lime slices and whipped cream for garnish

METHOD

  1. Preheat the oven to 350°F (177°C). Line a 12-count muffin pan with liners and a second 12-count muffin pan with only 4 (since this recipe makes only around 16). Set pans aside.
  2. Use a food processor or blender to grind graham crackers. Mix the graham cracker crumbs, melted butter, and granulated sugar together with a silicone spatula in a medium bowl until combined. The mixture will be thick, coarse, and sandy. Press a heaping Tablespoon of mixture down into each liner, making sure the crust is tight and compact. You might have a little crust leftover. If so, press a little more into each liner—if desired! Pre-bake the crusts for 5 minutes. Remove from the oven.
  3. In a large bowl using a handheld or stand mixer fitted with a whisk attachment, beat the cream cheese on high speed until smooth, about 1 minute. On medium-high speed, beat in the egg yolks, scraping down the sides as needed. On high speed, beat in the sweetened condensed milk and lime juice until combined. DO NOT OVER MIX.
  4. Pour the filling evenly into each crust. Bake for 15–16 minutes or until the centers of the pies only slightly jiggle. Turn off the oven and open the door. Allow the pies to cool until the pans can be moved with bare hands, then let them cool to room temperature. Once completely cool, place the pan in the refrigerator for at least 2 hours and up to 1 day.
  5. Once chilled, serve the key lime pies cold with whipped cream or Italian meringue and a lime slice if desired. I also drizzled some blueberry sauce over the pie.
  6. Store leftover pies in the refrigerator (covered) for up to 1 week. If they last that long!

Sally’s June 2026 Challenge

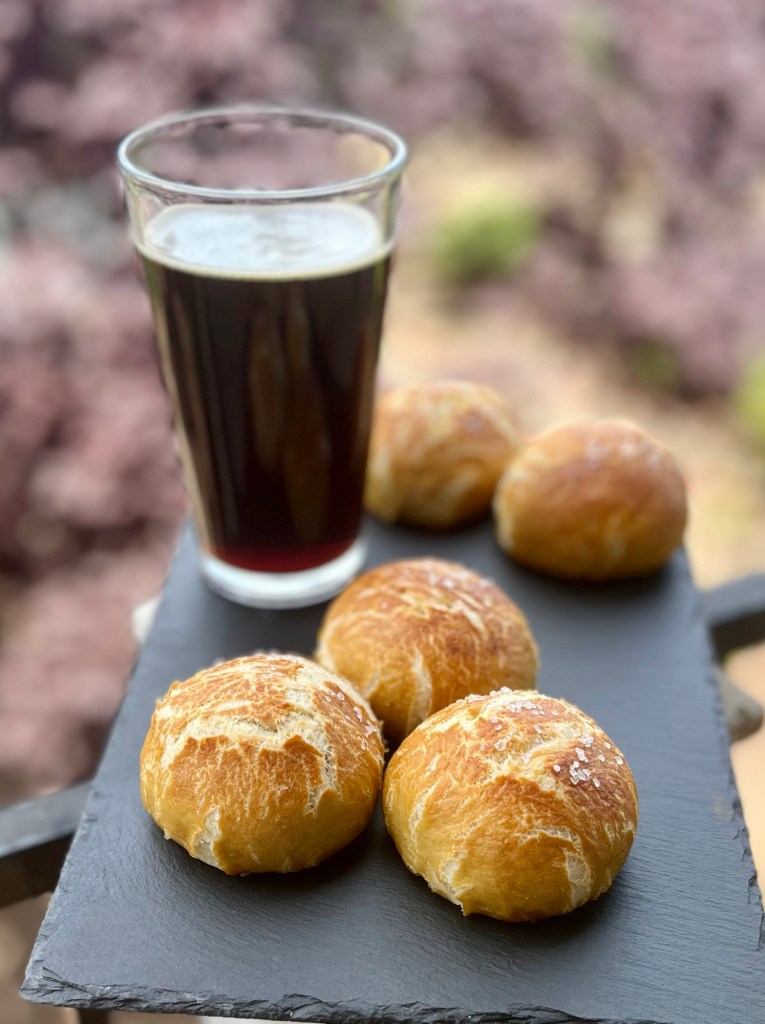
Sally’s June 2026 Baking Challenges was Fluffy Cornbread Biscuits with the alternate being Pretzel Rolls. Sorry, but she had me a “PRETZEL!” I am a sucker for pretzels and these rolls are exceptional. (The biscuits will wait until late this week.)

I made a two changes to the recipe. When making pretzels I use baked baking soda. This converts the sodium bicarbonate into sodium carbonate, a stronger alkaline (higher pH) compound.

I also added malt powder (the same kind I used to use when brewing beer) to increase flavor, color and larger air bubbles in the pretzels.

I made the Pretzel Rolls at 10 AM but felt uneasy opening a beer that early. I waited until after lunch to take the picture. I did not wait to eat my first roll.

Easy Pretzel Rolls – Sally

INGREDIENTS
• 360ml (1 ½ c) lukewarm water
• 7g (2 ¼ tsp) active dry yeast
• 56g ( ¼ c; 4 Tbl) unsalted butter, divided
• 1 teaspoon salt
• 1 Tablespoon brown sugar
• 4690599g (3 ¾ to 4 ) all-purpose flour
• coarse sea salt for sprinkling

Baking Soda Bath
• 4 Tbl baked baking soda
• 1 Tbl light malt powder
• 9 cups water

METHOD

  1. Whisk yeast and warm water together. Allow to sit for 1 minute. Meanwhile, melt 1 Tablespoon of butter (reserve the rest for step 7). Whisk in salt, brown sugar, and melted butter. Slowly add 3 cups of flour, 1 cup at a time. Mix with a wooden spoon or dough hook attached to a stand mixer until dough is thick. Add 3/4 cup more flour until the dough is no longer sticky. If it is still sticky, add 1/4–1/2 cup more, as needed. Poke the dough with your finger—if it bounces back, it is ready to knead.
  2. Knead the dough: Keep the dough in the mixer and beat for an additional 5 full minutes, or knead by hand on a lightly floured surface for 5 full minutes. If the dough becomes too sticky during the kneading process, sprinkle 1 teaspoon of flour at a time on the dough or on the work surface/in the bowl to make a soft, slightly tacky dough. Do not add more flour than you need because you do not want a dry dough. After kneading, the dough should still feel a little soft. Poke it with your finger—if it slowly bounces back, your dough is ready to rise.
  3. Rise: Place in a large greased bowl, cover tightly with plastic wrap, and allow to rise in a proofing oven for 1 hour or until nearly doubled in size.
  4. Once risen, punch down dough to release any air bubbles. Turn out onto a lightly floured surface and, with a sharp knife or pizza cutter, cut dough into (900g ÷12) = 75g sections. You should have about 12 pieces. Shape into balls.
  5. Preheat oven to 400°F (204°C). Line a baking sheet with parchment paper or silicone baking mat OR line a 9×13 baking pan with parchment paper. Set aside.
  6. Bring baking soda and 9 cups of water to a boil in a large pot. Drop 1–2 pretzel rolls into the boiling water for 20–30 seconds. Any longer than that and your pretzels will have a metallic taste. Using a slotted spatula, lift the pretzel roll out of the water and allow excess water to drip off. Place pretzel rolls onto prepared baking sheet or close together in the baking pan.
  7. Melt the remaining butter. Lightly brush each roll with melted butter and sprinkle with coarse sea salt. Using a sharp knife, score a couple slits into the top of each.
  8. Bake for 22–26 minutes or until deep golden brown on all sides.
  9. Remove from the oven and serve warm. Pretzel rolls may be stored in an airtight container or zip-top bag for up to 3 days (they lose a little softness over time).