Sally’s Peanut Butter Cookies

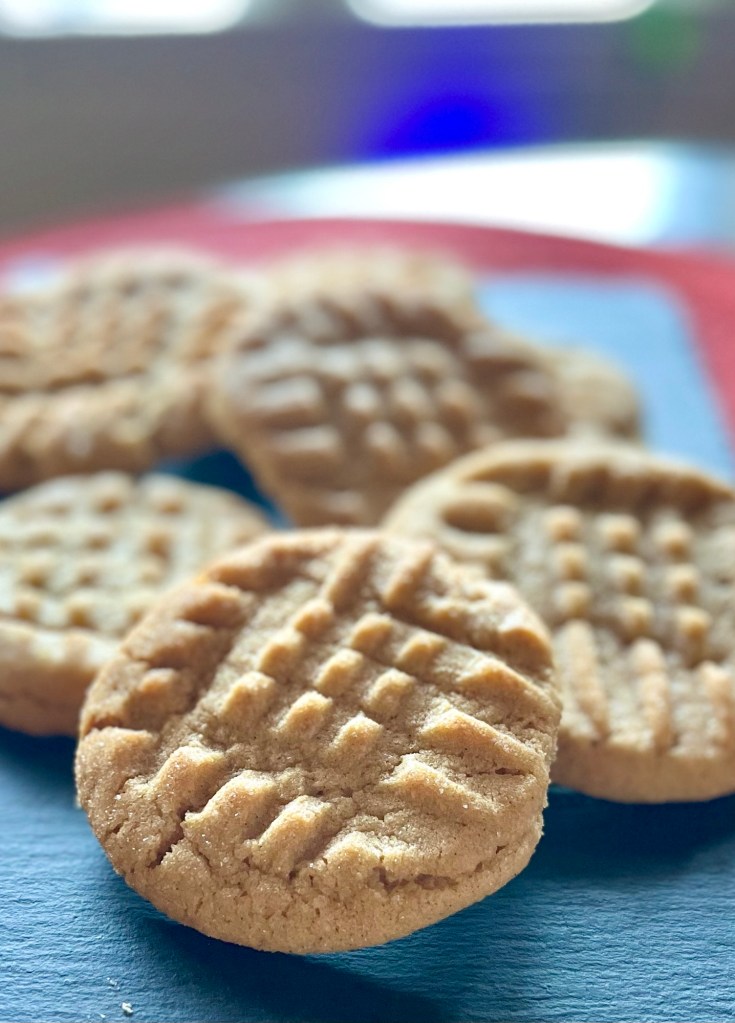
I was about to run out of chocolate calettes so decided to make Sally’s Peanut Butter Cookies. Good choice. In case you were wondering my favorite chocolate calettes are Callebaut Recipe No. 811 Belgian Dark Chocolate Callets 54.5%

Classic Peanut Butter Cookies

INGREDIENTS
• 1 cup (230g) unsalted butter, softened to room temperature*
• 1 cup (200g) granulated sugar
• 3/4 cup (150g) packed light brown sugar
• 2 large eggs, room temperature
• 2 teaspoons pure vanilla extract
• 1 cup (250g) creamy peanut butter*
• 3 cups (375g) all-purpose flour (spoon & leveled)
• 1 teaspoon baking soda
• 1 teaspoon baking powder
• 1/2 teaspoon salt
• optional: 1/3 cup (67g) granulated sugar, for rolling

METHOD

  1. Using a hand mixer or a stand mixer fitted with paddle attachment, cream the softened butter and both sugars together on medium speed until smooth. Add the eggs and mix on high until combined, about 1 minute. Scrape down the sides and bottom of the bowl as needed. Add the vanilla and peanut butter and mix on high until combined. Set aside.
  2. In a separate bowl, toss the flour, baking soda, baking powder, and salt together. Add to the wet ingredients and mix on low until combined. Dough will be thick, yet very sticky. Cover dough tightly and chill for at least 3 hours (and up to 2 days) in the refrigerator.
  3. Preheat oven to 350°F (177°C). Line two large baking sheets with parchment paper or silicone baking mats.
  4. Roll balls of dough (about 1.5 tablespoons of dough per cookie) and roll into granulated sugar. Place 2 inches apart on the baking sheets. Press fork into the tops to create the criss-cross pattern. Bake for 11 minutes or until very lightly browned on the sides. The centers will look very soft and undone. Remove from the oven and let cool on baking sheet for 5 minutes before transferring to a wire rack to cool completely. The cookies will continue to “set” on the baking sheet during this time.

NOTES

  1. Make Ahead & Freezing Instructions: Cookies stay fresh covered at room temperature for up to 1 week. You can make the cookie dough and chill it in the refrigerator for up to 2 days. Allow to come to room temperature and continue with step 3. Baked cookies freeze well – up to three months. Unbaked cookie dough balls freeze well – up to three months. Bake frozen cookie dough balls for an extra minute, no need to thaw.
  2. Room Temperature Ingredients: Make sure your butter is softened, not melted in the slightest. Do not soften in the microwave – that makes it sort of melty and greasy. Place out 1 hour before beginning. Room temperature eggs are preferred. Good rule of thumb: always use room temperature eggs when using room temperature butter.
    Peanut Butter: Chunky peanut butter works as well. I do not suggest using natural style, oily peanut butter. Brands such as Jif or Skippy work best

Efficient Saturday Bake

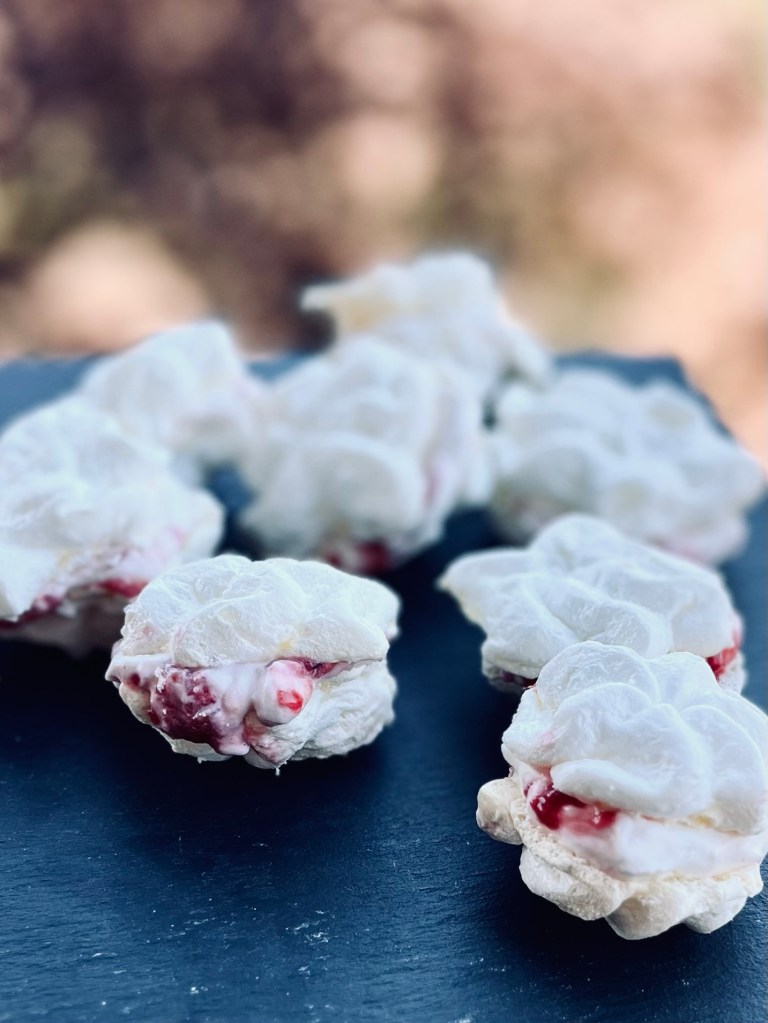
I had an idea for making sandwich meringue cookies filled with raspberry curd folded into cream cheese whipped cream. I did not consider the effect of putting wet filling between to layers of meringue. (Bring a spoon.)

Making meringue cookies requires many egg whites. So what do you to with a bunch of egg yolks? Make creme patisserie, of course. What do you do with a bowl of creme patisserie? Make eclairs of course.

I did all of the above.

Choux Pastry

INGREDIENTS
• 250g Water
• 80g Butter cut into small pieces
• 150g Bread Flour
• 6 or 7 Eggs
• 1/8 tsp Salt

METHOD

  1. In a saucepan that can hold four times the quantity of liquid to be used, add the water, salt and the butter.
  2. Bring the water to a boil over medium heat, stirring from time to time. Be sure the butter is completely melted before the water comes to a boil ; if not, a portion of the water will evaporate, rendering the batter too dry.
  3. Remove the boiling water/butter mixture from the heat and add the flour (this is done off the heat to avoid excessive evaporation of the liquid). Make sure the flour is added all at once to avoid lumps.
  4. Work the mixture with a spatula, moving slowly at first to avoid splashing the water or spilling out any of the flour. Work with the spatula at an angle to the mixture, to avoid splashing and ensure a smoother mixture. Once the mixture begins to stiffen, work it rapidly until a homogeneous mass is obtained.
  5. Put the saucepan back on a high heat while working the batter rapidly with the spatula. Continue stirring until the mixture coats the bottom of the pan with a heavy film.
  6. When working the batter over the heat, it is preferable to stop the process early rather than overworking.
  7. Transfer the batter to a stand mixer bowl and beat at medium speed until it cools to 115 deg
  8. Add one third of the eggs and mix until fully absorbed, then incorporate the remaining eggs carefully, one beaten egg at a time, until the desired consistency is obtained
  9. The batter should form a ‘ribbon’. Take a small quantity of the batter on the end of the spatula and hold it 5 to 10 cm (2 to 4 in) above the surface of the bowl, at a 45 degree angle. The batter should fall off slowly without breaking or running off as a liquid.
  10. Run a finger through the batter at about 1 cm (1/2 in) depth. The indentation left in the batter should slowly close in on itself.
  11. Take a small quantity of the pastry on the tip of the finger and hold the finger upright. The pastry should form a small hook at the end.
  12. For large pastries and for individual-sizes, a #12 pastry tip should be used. For ‘petits fours’ pastries, use a #7 tip.
  13. Be sure to arrange the pastries in staggered rows, to allow the heat of the oven to circulate among the individual pieces. – Brushing these pastries with egg wash improves their appearance. Be sure to use a very little egg wash. If too much is used, it drips down the sides, hardens during the cooking, and prevents the pastries from rising. Once the egg wash has been applied, lightly streak each pastry with the back of a fork that has been deep in cold water (to prevent sticking). That will even out the shapes of the pastries and break up the bubbles that may be trapped in the pastries, Wich would distort their shape during the cooking.
  14. Places the pastries in a very hot oven preheated at 500 F. Turn it off and leave the pastries 15 min. Turn on the oven at 160 C (320 F) and bake the pastries for 15-20 more minutes. The choux must be golden brown and not light
  15. The cooking of the pate å choux is complete when it is firm enough to not fall when taken from the oven. The pastries should have a golden brown color on all their surface and should be slightly paler on the sides. As soon as they come out the oven, it is best to remove them to a cake rack to cool. Otherwise, moisture is likely to accumulate on the bases and cause them to dampen and become soft. If, however, they seem too dry, it is best to cover them with a towel after transferring them onto cooling racks.

Meringue Raspberry and Cream Cheese Filled Cookies

INGREDIENTS

• 4 (120g) large RT egg whites

• ½ teaspoon cream of tartar

• ⅛ teaspoon salt

• 200g (1 c) granulated sugar

• 1 teaspoon vanilla extract

METHOD

  1. Preheat oven to 225F (105C) and line a large cookie sheet with parchment paper.
  2. Combine egg whites, cream of tartar, and salt in a large, completely clean, grease-free bowl.
  3. Using a stand mixer with the whisk, stir on low speed until mixture becomes foamy then Increase speed to high.
  4. With mixer on high, gradually add sugar, about 1 Tablespoon at a time, stirring after each addition until sugar is dissolved (about 15-20 seconds between each addition).
  5. Beat until mixture is thick, shiny, and has increased in volume. Mixture should have stiff peaks and sugar should be completely dissolved (you can test this by rubbing a small bit of the mixture between your fingers, if it feels gritty, the sugar isn’t dissolved).
  6. Stir in vanilla extract and any other extract you may like to use. If using food coloring, add the food coloring at this stage, too.
  7. Fit a large disposable piping bag with a large tip and transfer meringue to prepared piping bag and pipe onto prepared cookie sheet. The meringue cookies can be pretty close to each other as they won’t spread, and you will want to bake all of the cookies at the same time, so make sure you make enough space.
  8. Bake on 225F for 1 hour. Turn off the oven once the baking time has passed, and do not open the oven. Leave the oven door closed and allow cookies to cool completely in the oven (1-2 hours) before removing.
  9. Meringue cookies should be crisp and can be stored in an airtight container. Keep away from heat and moisture as it can soften your meringues.

Cream Cheese Whipped Cream


INGREDIENTS

• 85g (3 oz) full-fat block RT cream cheese
• 240g (1 c ) heavy cream, cold
• 23g (3 Tbl) confectioners’ sugar
• ½ teaspoon vanilla bean paste or pure vanilla extract

METHOD

  1. Using a stand mixer fitted with the whisk attachment, beat the cream cheese on medium speed until smooth and creamy, about 1 minute. Add the confectioners’ sugar and vanilla, and beat until completely smooth (absolutely no lumps!).
  2. Add a few Tablespoons of the cold heavy cream, and beat until the mixture loosens and smooths out.
  3. With the mixer running on low speed, slowly stream in the remaining heavy cream.
  4. Increase to medium high speed and whip until medium peaks form, about 3 minutes. Spread or pipe as desired

Peach/Blueberry Streusel Muffins – Sally

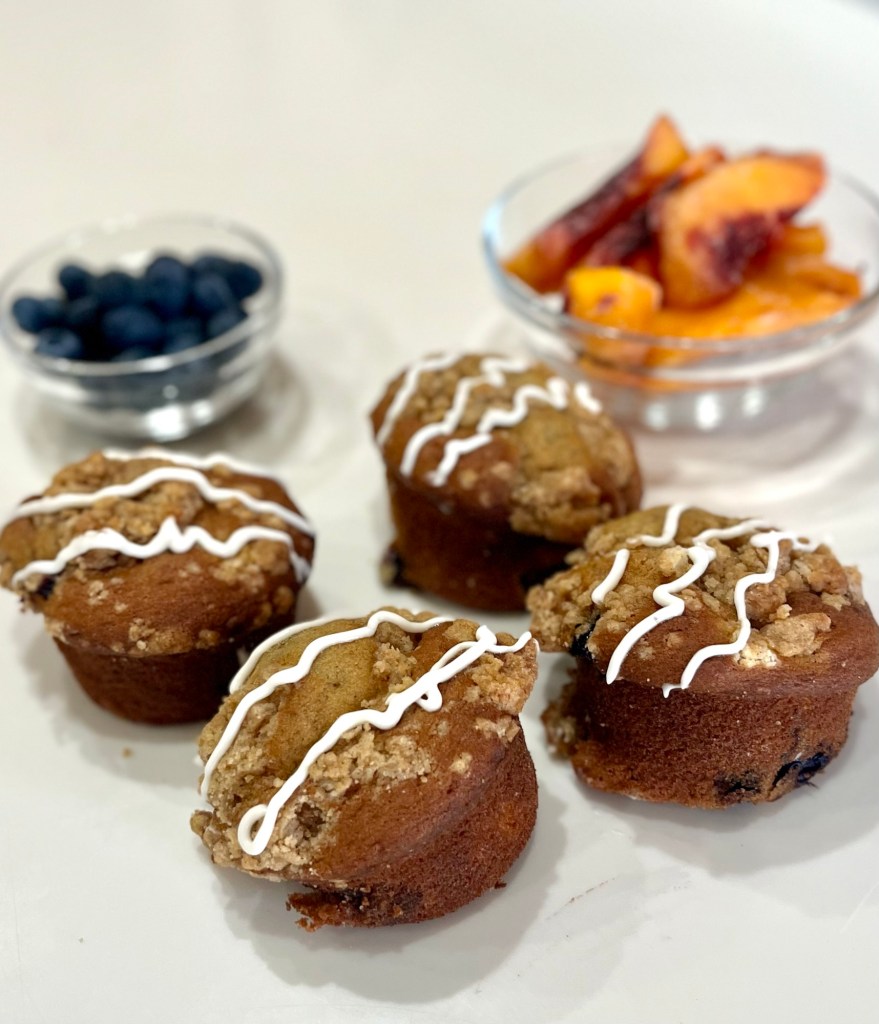
I saved this recipe for a while, but today was the day. Soft, tender muffins enhanced by the flavor of peaches and blueberries. In truth, Sallly’s recipe did not include blueberries, and I had some, so why not?

Peach/Blueberry Streusel Muffins – Sally

INGREDIENTS
Crumb Topping
• 67g ( 1/3 c) light or dark brown sugar
• 15g (1 Tbl) granulated sugar
• 1/2 tsp ground cinnamon
• 56g ( ¼ ) unsalted butter, melted
• 84g ( 2/3 c) all-purpose flour
Muffins
• 219g (1 ¾ c all-purpose flour
• 1 tsp baking soda
• 1 tsp baking powder
• ½ tsp ground cinnamon
• 1/8 tsp ground allspice
• ½ tsp salt
• 113g ( ½ c) RT unsalted butter
• 100g ( ½ c) light or dark brown sugar
• 50g ( ¼ c) granulated sugar
• 2 large eggs, room temperature
• 120g ( ½ c) RT plain yogurt or sour cream
• 2 tsp pure vanilla extract
• 30ml (2 Tbl) RT milk
• ~300g (1 ½ c) peeled chopped peaches
• 100 g Blueberries
Vanilla Icing (Optional)
• 120g (1 c) confectioners’ sugar
• 45g (3 Tbl) heavy cream (or milk for a thinner consistency)
• ½ tsp pure vanilla extract

METHOD

  1. Preheat oven to 425°F (218°C). Spray a 12 count muffin pan with nonstick spray or line with cupcake liners. Set aside.
  2. Mix the brown sugar, granulated sugar, cinnamon, and melted butter together in a small bowl until combined. Add the flour and use a fork to gently mix until crumbs form. Don’t over-mix into a paste. Just mix until it is crumbly. Set aside.
  3. Whisk the flour, baking soda, baking powder, cinnamon, allspice, and salt together in a medium bowl. Set aside.
  4. In a large bowl using a handheld or stand mixer fitted with a paddle attachment, beat the butter and both sugars together on high speed until smooth and creamy, about 3 minutes. Scrape down the sides and bottom of the bowl as needed. (Here’s a helpful tutorial if you need guidance on how to cream butter and sugar.)
  5. Add the eggs, yogurt or sour cream, and vanilla extract. Beat on medium speed for 1 minute, then turn up to high speed until the mixture is combined and mostly creamy. (It’s ok if it appears somewhat curdled.) Scrape down the sides and bottom of the bowl as needed.
  6. With the mixer running on low speed, add the dry ingredients and milk into the wet ingredients and beat until no flour pockets remain. Fold in the chopped peaches.
  7. Spoon the batter evenly into each cup or liner, filling each all the way to the top. Spoon crumb topping on each, gently pressing it down so it sticks.
  8. Bake for 5 minutes at 425°F; then, without opening the oven, reduce the oven temperature to 350°F (177°C). Bake for an additional 16–19 minutes or until a toothpick inserted in the center comes out clean. The total time these muffins take in the oven is about 21–24 minutes.
  9. Allow the muffins to cool for 5 minutes in the muffin pan, then transfer to a wire rack to continue cooling. When warm, the muffins are quite fragile because of the wet peaches. Let them cool for at least 15 minutes before unwrapping and eating.
  10. Whisk all of the icing ingredients together and drizzle over warm or cooled muffins.
  11. Iced or plain muffins stay fresh covered at room temperature for a few days or in the refrigerator for up to 1 week.

Notes

  1. Muffins freeze well for up to 3 months. It’s best to freeze the muffins without the icing and add the icing after thawing and before serving. (Freezing them with the icing on is completely fine, but the muffins taste better with fresh icing.) Thaw muffins in the refrigerator or at room temperature before icing/serving.
  2. You can use either regular or Greek plain yogurt in this recipe (any fat content) or sour cream. The same amount of unsweetened applesauce or mashed banana may also be used if needed.
  3. You can use any milk, dairy or nondairy.
  4. Frozen Peaches: You can use chopped frozen peaches—do not thaw. Extend total bake time by 1–2 minutes.
  5. Jumbo Muffin Pan: 425°F for 5 minutes, then reduce to 350°F for 22–25 minutes for a total of 27–30. Makes about 6.
  6. Mini Muffin Pan: 350°F for 12–14 minutes. Makes about 36–40.

Easy Peach Cobbler

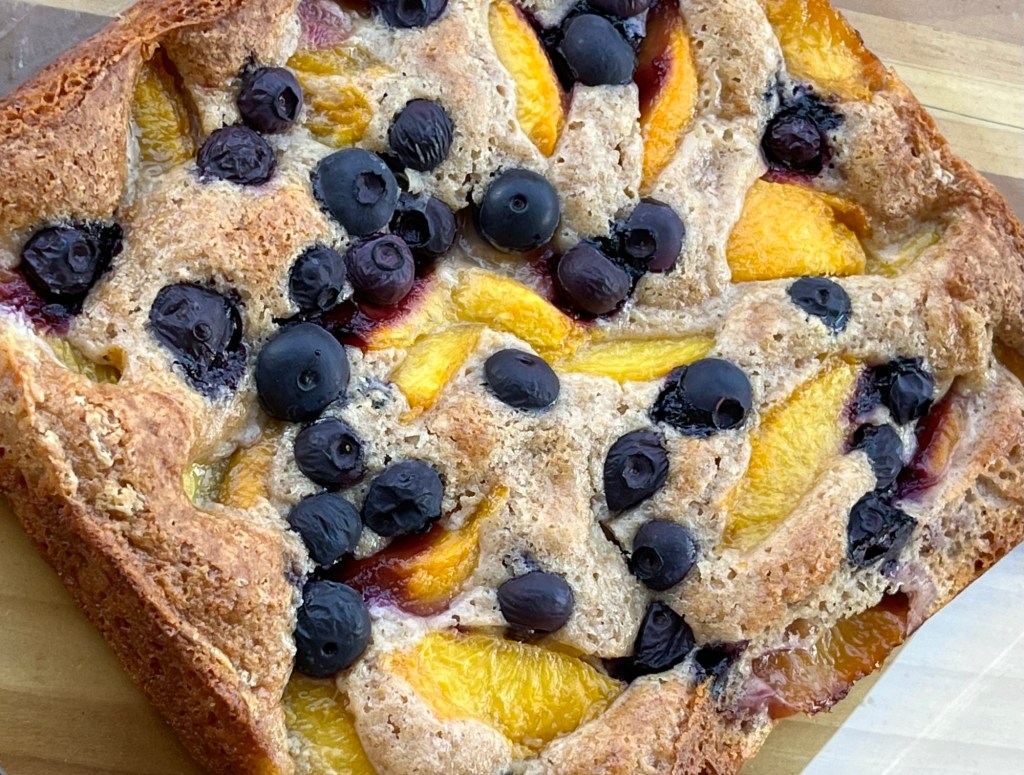
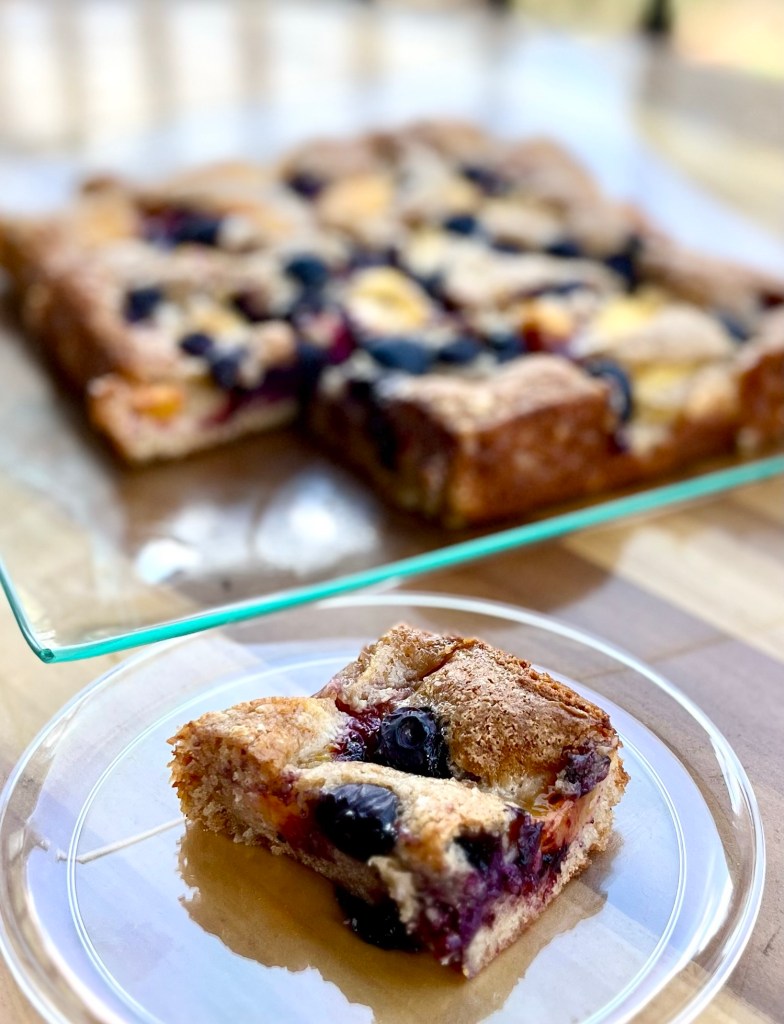
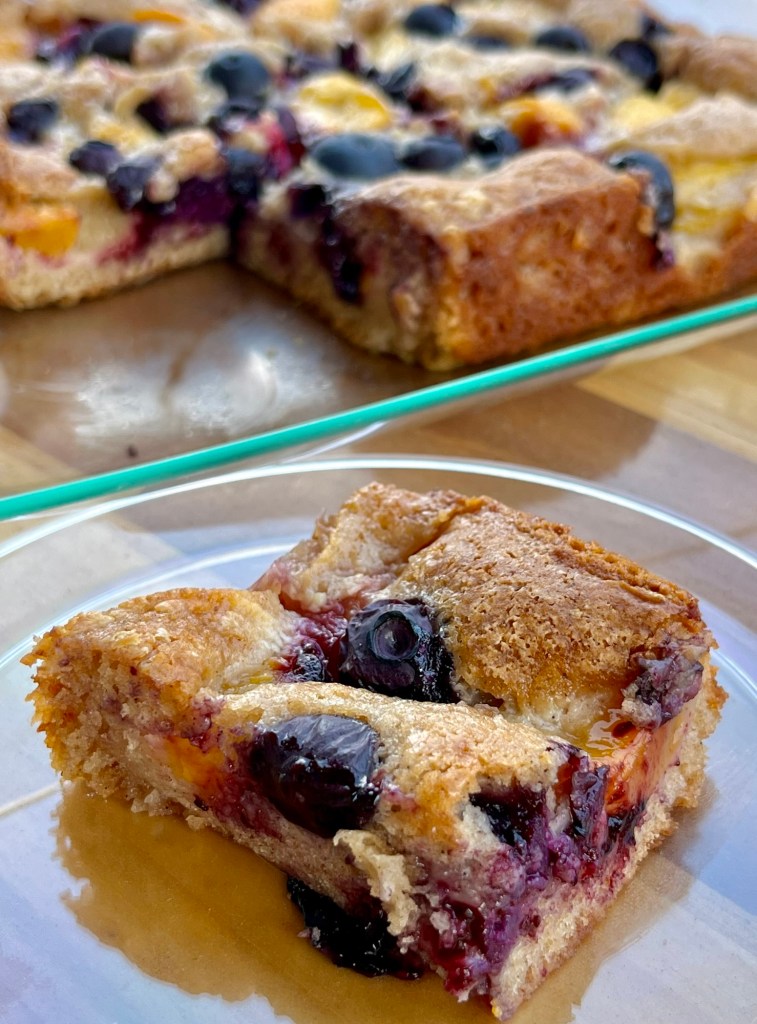
I saw a recipe for an easy peach cobbler and used it as the basis of my version. As claimed, it was easy to make with minimal pans used, hence quick clean up. Not to mention it is delicious, but it’s peaches… so no surprise.

Peach Cobbler


INGREDIENTS
• 4 Tbl unsalted butter
• 400g (3 c) peeled and sliced peaches
• 90g ( ¾ c all-purpose flour
• 100g ( ½ c granulated sugar
• 1 ½ tsp baking powder
• ¾ tsp kosher salt
• ¾ tsp ground cinnamon
• 2/3 cup whole milk (I use a Tbl heavy cream and fill with 2% to 2/3 cup
• 1 tsp vanilla extract
• 100 g blueberries (optional)

METHOD

  1. Line an 8×8” baking pan with parchment paper leaving a couple of inches extending over all four edges of the pan to make lifting the crumble out of the pan easier.
  2. Add the butter on top of the parchment paper and set the baking dish in the oven and preheat the oven to 350°F. Once the butter is melted, remove the baking dish from the oven (4-6 minutes.) Set the baking dish aside while preparing the batter.
  3. In a medium sized bowl whisk the flour, sugar, baking powder, salt, and cinnamon until completely mixed. Add the milk and vanilla extract and whisk until smooth.
  4. Pour the batter into the baking dish with the melted butter. There is no need to stir. Add the sliced peaches (and optional blueberries) directly on top of the batter.
  5. Bake in the preheated oven until the cobbler is golden and set in the middle, 45-55 minutes. The fruit will make the base wet. You may want to tent the pan after 40 minutes and let the crumble bake a few more minutes.
  6. Once baked, remove from the oven and cool 15 minutes before serving.

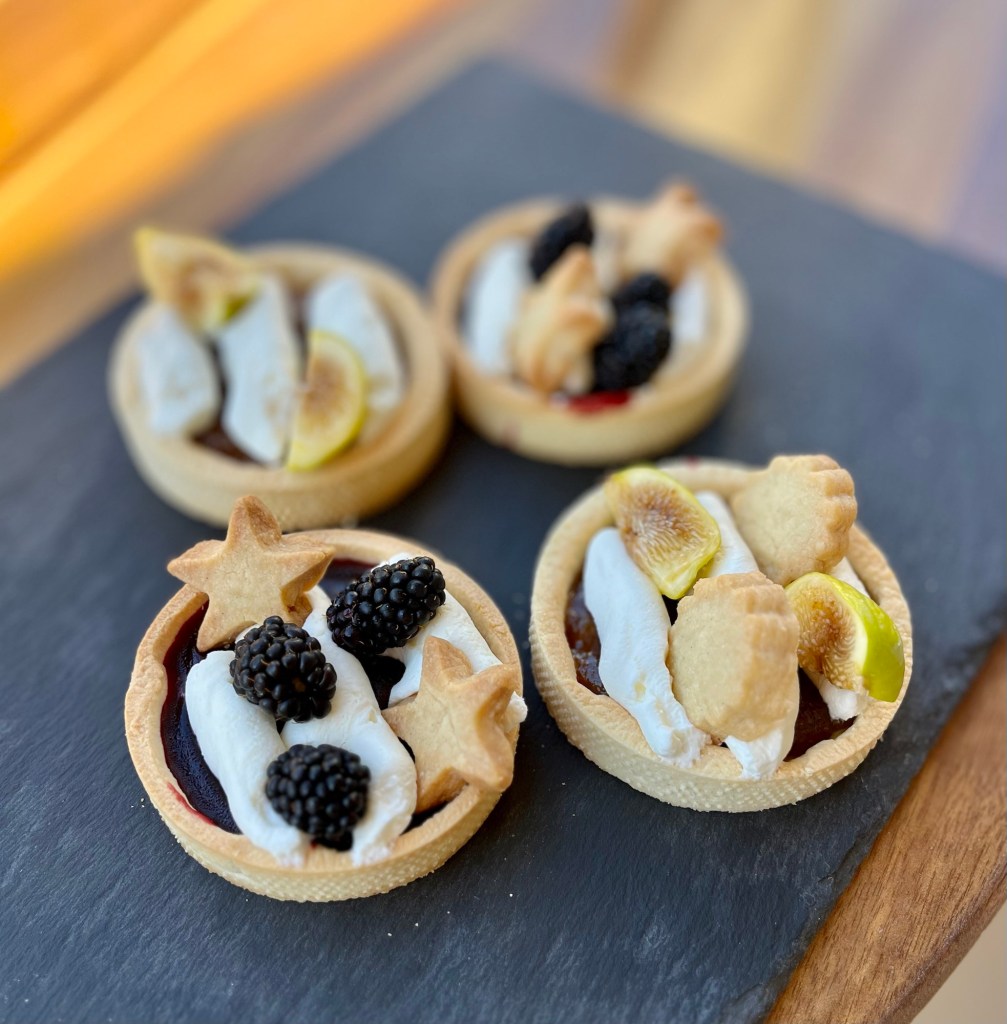
A Birthday Present to Myself

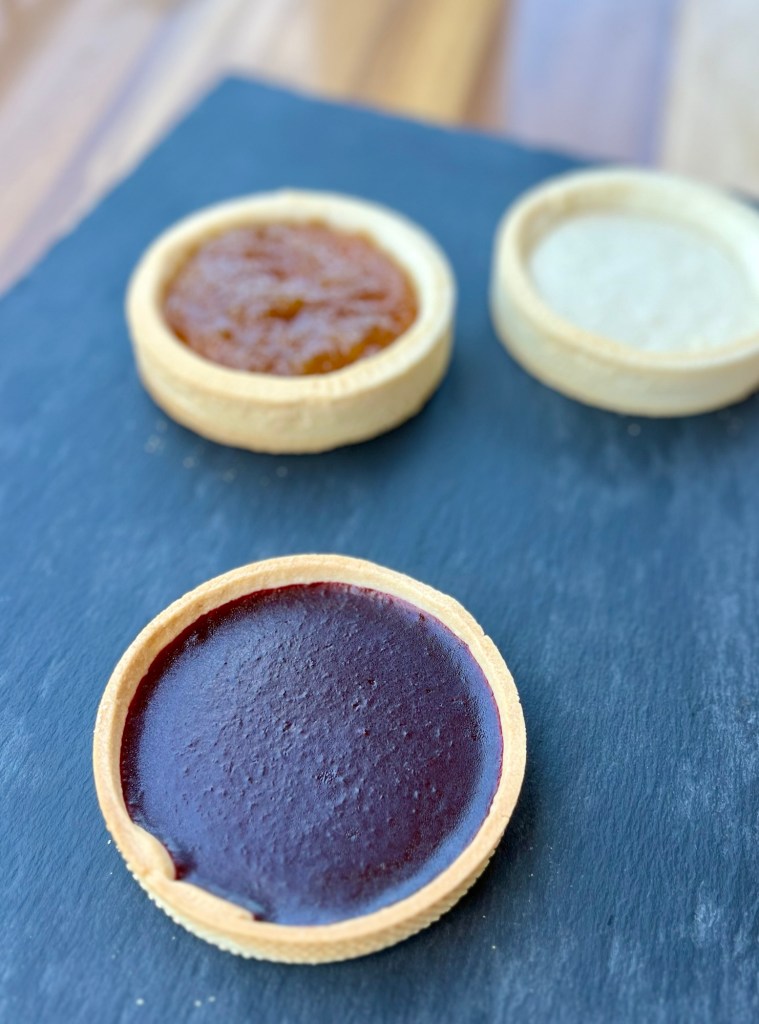
I had a blackberry tart similar to this one at KAB in Vermont and wanted to try my hand, It was a great time making the tart shells (four times) until they were acceptable. (I used the rejects for my QC Cadre as they tasted great although not perfectly formed.

I followed the tart process from Hanbit Cho on YouTube. He explains everything very well (like Sally.) The cream cheese whipped cream is from Sally and the blackberry gel base is my own concoction.

Tart Crust – Hanbit Cho

INGREDIENTS
• 100g RT Unsalted Butter
• Salt a pinch
• 72g Powdered Sugar
• 29g Almond Powder
• 30g Corn Starch
• 1 Egg (36g)
• 170g Cake Flour

METHOD

  1. Beat the room temp. butter lightly (add in salt).
  2. Sift in powdered sugar, almond powder and corn starch. Beat lightly.
  3. Add the RT eggs gradually and mix.
  4. Finally, add in the cake flour and mix well.
  5. Using a bench knife, “Fraiser” the dough by repeated smearing portions of it on the table.
  6. Roll it out to 2mm/3mm thickness between parchment papers. (2mm thickness for 6~8cm diameter, 3mm thickness for 14~18cm thickness. Any other sizes, you decide)
  7. Rest in the fridge for 1~2hrs.
  8. Cut it out into strips/discs. Disks equal to tart ring diameter, strips ~ ¾” wide and 2” longer than tart ring circumference, ~14.5” for a 4” tart ring. (4” x π + 2”)
  9. Coat the inside of the ring with butter
  10. Position tart ring over a disk, press down to cut the dough disk and place on a perforated mat.
  11. If the strips are too stiff to bend, warm slightly with your hands. Line the side of the tart ring with the disk. Glue any seams by warming with your finger.
  12. Trim top of strip with a knife
  13. Refrigerate for 20 minutes.
  14. Bake crust at 350⁰F for 15mins. (320⁰F
  15. If you are to bake the tart crust again after adding any filling, then bake 2-3mins less. (~12-13mins.)
  16. Add ¼ cup of filling to par baked tart and bake for 12 minutes.

Blackberry Jelly Recipe For Baked Tarts

 INGREDIENTS                                                  

• 725g mashed blackberries                 

• 130g granulated sugar                            

• 1 – 1 ½ tsp corn starch                            

• 2 Tbl lemon juice                                          

 METHOD

  1. Place clean blackberries, 2 Tbl water and 30g of sugar in a large, deep pot.
  2. Heat to break down the berries, about 10 minutes
  3. Use an immersion  blender to process the berries until they are completely broken down and juicy. Let sit 10 min.
  4. Pour the pureed mixture through a fine-mesh sieve or a dampened cheesecloth into a large measuring cup. Press gently and scrape the bottom of the sieve with a spatula. Let the puréed berries drain for an hour, stirring occasionally,  to extract as much of dark, clear juice as possible; discard the seeds. (600g whole berries yielded 337g juice.) If necessary, add water to make 1 cup.
  5. Transfer the juice to a clean jar. Set aside to complete later, or return to a clean sauce pan and continue with step 6.
  6. Stir in the lemon juice and butter.
  7. Bring the mixture to a full rolling boil (a boil that doesn’t stop bubbling when stirred) over high heat.
  8. Stir in the rest of the sugar all at once. (Depending on how much juice was collected the amount of sugar may need to be adjusted.) Return the mixture to a full rolling boil.
  9. Thicken with cornstarch (best for baked tarts) If you want to bake the filling directly inside the raw or partially baked tart shell, cornstarch will give you a glossy, stable set that does not break down under high heat.
  10. Use 1 to 1½ tablespoons of cornstarch for every 1 cup of blackberry jelly.
  11. Whisk the cornstarch into 1 tablespoon of cold water or lemon juice until smooth.
  12. Stir the slurry into your jelly in a saucepan over medium heat, bring it to a boil, and cook for 1 to 2 minutes until thick and clear.
  13. Let the mixture cool slightly before pouring it into your tart shell and baking


Cream Cheese Whipped Cream


INGREDIENTS
• 85g (3 oz) full-fat block RT cream cheese
• 240g (1 c ) heavy cream, cold
• 23g (3 Tbl) confectioners’ sugar
• ½ teaspoon vanilla bean paste or pure vanilla extract
METHOD

  1. Using a stand mixer fitted with the whisk attachment, beat the cream cheese on medium speed until smooth and creamy, about 1 minute. Add the confectioners’ sugar and vanilla, and beat until completely smooth (absolutely no lumps!).
  2. Add a few Tablespoons of the cold heavy cream, and beat until the mixture loosens and smooths out.
  3. With the mixer running on low speed, slowly stream in the remaining heavy cream. Increase to mediumhigh speed and whip until medium peaks form, about 3 minutes. Spread or pipe as desired.