I had some over ripe bananas and not being one to thrown them out (or eat them) I looked for a use for over ripe bananas. Sally once again to the rescue!
Everything she said about them is true. Very nice banana flavor and delicious cream cheese frosting. As it contains bananas, which is a traditional breakfast food, and cream cheese, which is a natural on breakfast bagels, I advertised this cake as a breakfast dessert with a clear conscience.
QC Cadre comments were: “Cake is to die for” (hope not!); “Very Delicious”; “The cake is so moist and good and that frosting is fabulous. Very breakfasty.”
Banana Cake – Sally
INGREDIENTS Banana Cake • 345g (1 ½c) mashed bananas (about 4 medium or 3 large bananas) • 375g (3 c) all-purpose flour (spooned & leveled) • 1 tsp baking powder • 1 tsp baking soda • ½ tsp ground cinnamon • ½ tsp salt • 170g (¾ c;12 Tbl) unsalted butter, softened to room temperature • 200g (1 c) granulated sugar • 100g ( ½ c) packed light or dark brown sugar • 3 large eggs, at room temperature • 2 tsp pure vanilla extract • 360 g (1 ½ c) buttermilk, at room temperature* Cream Cheese Frosting • 226 (8 oz) full-fat brick cream cheese, softened to room temperature • 113g ( ½ c; 8 Tbl) unsalted butter, softened to room temperature • 360g (3 c) confectioners’ sugar, plus an extra 1/4 cup if needed • 1 tsp pure vanilla extract • ⅛ tsp salt
METHOD
Preheat the oven to 350°F (177°C) and spray a 9×13-inch pan. Make the cake:
Mash the bananas using stand mixer with paddle on high speed for 1 minutes. Set mashed bananas aside.
Whisk the flour, baking powder, baking soda, cinnamon, and salt together. Set aside.
Using a handheld or stand mixer fitted with a paddle attachment, beat the butter on high speed until smooth and creamy—about 1 minute.
Add both sugars and beat on high speed for 2 minutes until creamed together. Scrape down the sides and up the bottom of the bowl with a rubber spatula as needed.
Add the eggs and the vanilla. Beat on medium-high speed until combined, then beat in the mashed bananas. Scrape down the sides and up the bottom of the bowl as needed. With the mixer on low speed, add the dry ingredients in three additions alternating with the buttermilk and mixing each addition just until incorporated. Do not over-mix. The batter will be slightly thick and a few lumps is OK.
Spread batter into the prepared pan. Bake for 45–50 minutes. Baking times vary, so keep an eye on yours. The cake is done when a toothpick inserted in the center comes out clean. If you find the top of the cake is browning too quickly in the oven, loosely cover it with aluminum foil.
Remove the cake from the oven and set on a wire rack. Allow to cool completely. After about 45 minutes, I usually place it in the refrigerator to speed things up. Make the frosting:
In a large bowl using a handheld or stand mixer fitted with a paddle or whisk attachment, beat the cream cheese and butter together on high speed until smooth and creamy. Add 3 cups confectioners’ sugar, vanilla, and salt. Beat on low speed for 30 seconds, then switch to high speed and beat for 2 minutes. If you want the frosting a little thicker, add the extra 1/4 cup of confectioners sugar (I add it). Spread the frosting on the cooled cake. Refrigerate for 30 minutes before serving. This helps sets the frosting and makes cutting easier.
Cover leftover cake tightly and store in the refrigerator for 5 days.
Not often, but on rare occasion I have a baking disaster. Yesterday I wanted blueberry muffins and unfortunately used an old recipe. Apparently, there was a major error in the recipe as after two attempts I binned the results (along with the recipe) and headed to my go-to baker, Sally McKenny. (“Binned” is a term from GBBO where whatever didn’t work is tossed in the trash.)
I wisely turned to Sally’s blueberry muffin recipe and they were overwhelmingly endorsed by the QC Cadre. (For any who do not know, the QC Cadre is composed of a number of my neighbors who volunteered to sample and review my bakes.)
As I mentioned, there are (at least) three problems with rainy days. First, I can’t play golf! Second, if I can’t golf, I WILL bake and third, lots of rain equals lots of baking which results in and increased waistline, which doesn’t help my golf swing any.
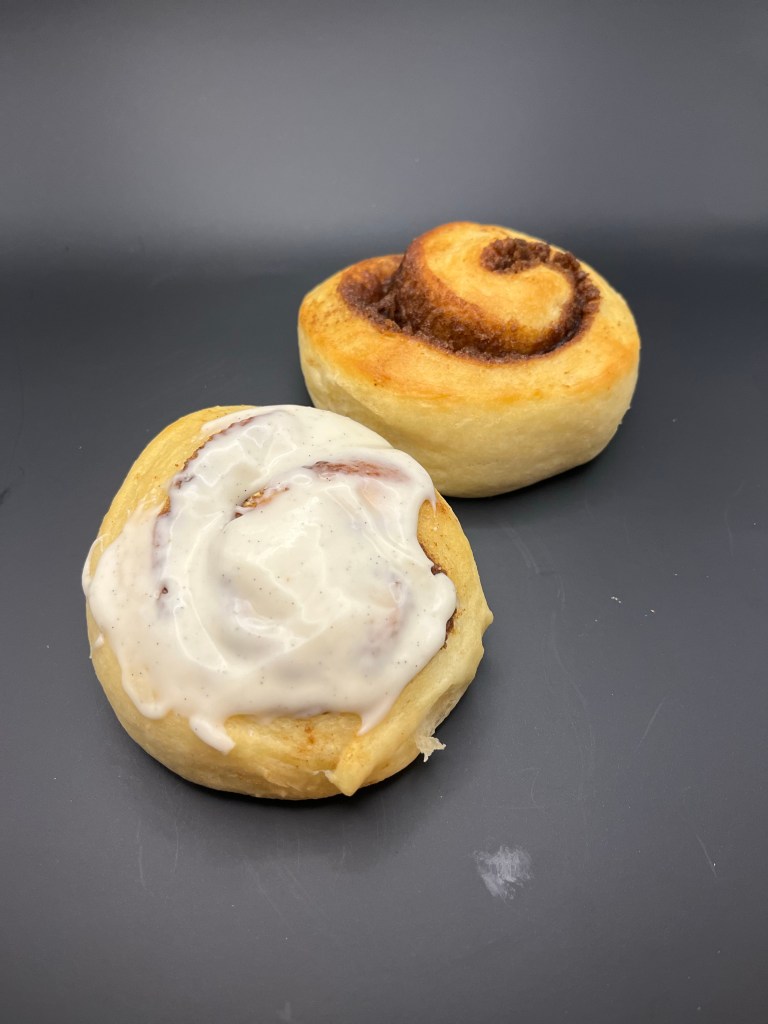
I craved these perfectly puffy cinnamon rolls (recipe from King Arthur) for a while, and when QC causally mentioned them, it was only a matter of time before I was rained out (again.) These atmospheric rivers are bad for my golf, and my waistline.
This recipe makes nine 1.5” thick cinnamon rolls. As usual, I gave several away and am trying hard not to eat the rest while watching golf for the next two straight days.
Sadly, we aren’t expecting a golfable day for the next 5 days. So much time, so much to bake.
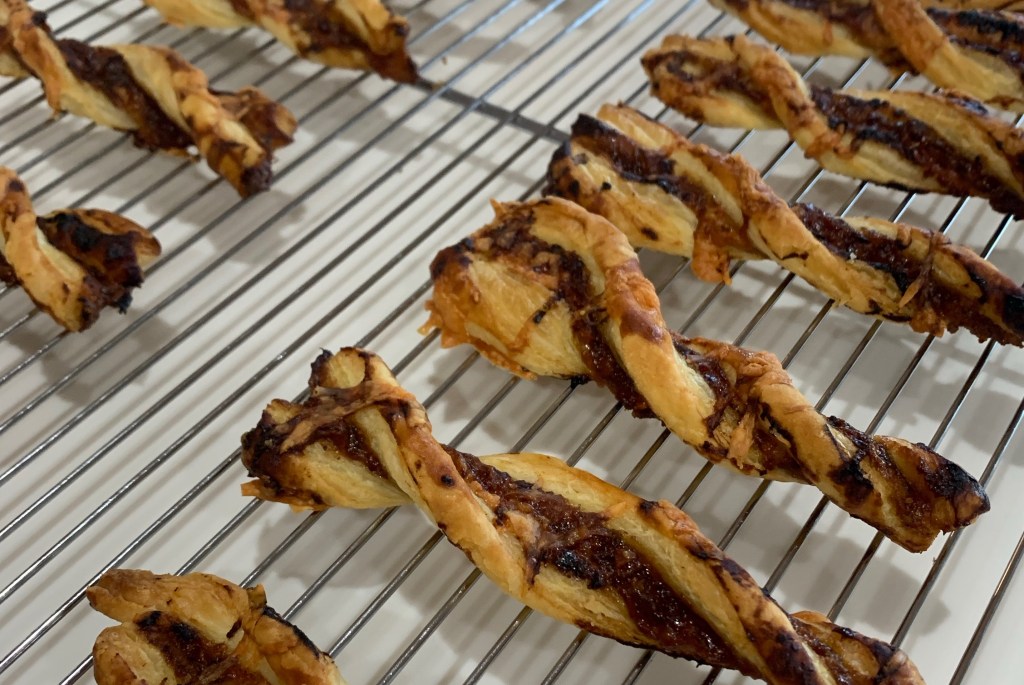
I watched Valerie Bertinelli make manchego cheese and fig puff pastry straws on YouTube so I said to myself …why not?
If you have read other posts of mine using puff pastry you know while I have made it from scratch before, I prefer either Pepperidge or Trader Joe’s puff pastry. Pepperidge Farms puffs up 2 or 3x more Trader Joe’s so choosing which to use depends on what you are making. This time, I used Pepperidge Farms puff pastry.
L: Fig coated layer and other ingredients – R: Cut and twisted straws
This recipe resulted in a flavorful treat with a good snap, provided you bake them long enough. They are best warm so if you have them in more than one sitting, warm them up in an oven or toaster-oven. Be sure they are warm!
Oh! I also made a batch of blueberry drop scones for freezing for quick breakfasts
Manchego Cheese and Fig Straws
INGREDIENTS
• All-purpose flour, for dusting • 1 sheet frozen puff pastry, thawed • 1 tablespoon fig jam • 1 cup grated manchego cheese, plus 2 tablespoons for sprinkling • 1 large egg
METHOD
Preheat the oven to 400 degrees F. Line two 18-by-13-inch sheet pans with parchment paper.
Dust a work surface lightly with flour. Roll out the puff pastry into a 14-by-12-inch rectangle. With the short side facing you, cut the dough in half horizontally: Measure 7 inches up the side, mark the dough and cut in half, using the mark as a guide.
Evenly spread the fig jam over the bottom half of the dough, leaving a little room at the edges. Sprinkle 1 cup of the cheese over the jam. Top with the other half of the dough, pressing down lightly to adhere to the cheese and jam. With a pizza cutter, cut into 1/2-inch strips (about 24 strips).
Twist each strip four or five times, then pinch the ends together to prevent unraveling while baking. Place the twists on the prepared baking sheets.
Mix the egg with 1 teaspoon water in a small bowl and brush onto the twists. Sprinkle with the remaining 2 tablespoons cheese.
Bake until golden brown, 12 to 15 minutes. Let cool slightly before releasing the straws from the parchment with an offset spatula. Let cool completely.
Serve immediately or store in an airtight container for up to 1 day.
I wanted to try a new recipe for blueberry muffins that purported to yield soft, moist, not dense muffins. I also had some new ‘tulip’ muffin papers to try. These were advertised to not need a muffin pan (read that as one less pan to wash.) In use, the papers were too thin, therefore too flimsy to not need the support of a muffin pan.
The papers would have been good had I squeezed them into a pan small enough to help them maintain a round shape. They weren’t bad, but not perfect. Perhaps a heavier paper, or using 2 or 3 of them to make the papers stiffer? On the positive side they did not leak resulting in a clean pan which require no washing.
The recipe was very good. The muffins were not stodgy, rather were moist, soft and just a bit crumbly. Nearly perfect, or at least very good.
While the oven was hot I also made a batch of apple/raisin ‘scones’. Scones are in quotes as they are un-traditional. I made them in an ring mold pan to force them to rise up the sides rather than spread horizontally. (They did.) The same brown sugar and cinnamon crumble was used on both the scones and muffins. It was a good experiment, but I prefer my standard, traditional drop berry scones topped with sparkling sugar.
I was bored as the scones baked so using Dan’s modified waffle recipe I made a batch of waffles to freeze and nuke for a quick breakfast before an early tee time.
I just cancelled golf for tomorrow due to a forecast 100% chance of 55 degree rain. Now… what to do with another day off? Hmmmm….
Blueberry Muffins
INGREDIENTS Streusel Topping • ½ cup (100g) packed light or dark brown sugar • 1 teaspoon ground cinnamon Muffins • 1¾ cups (220g) all-purpose flour • 1 teaspoon baking soda • 1 teaspoon baking powder • ½ teaspoon salt • ½ cup (115g) room temperature unsalted butter • ½ cup (100g) granulated sugar • ¼ cup (50g) packed light or dark brown sugar • 2 large room temperature eggs • ½ cup (120g) room temperature sour cream or plain/vanilla yogurt • 2 teaspoons pure vanilla extract • ¼ cup (60ml) room temperature milk • 1½ cups (250g) fresh or frozen blueberries METHOD
Preheat oven to 425°F (218°C). Spray a 12-count muffin pan with nonstick spray or use cupcake liners. Grease/line a second pan with 2 liners because this recipe yields about 14 muffins. Set aside.
Mix all of the streusel ingredients together. Set aside.
Whisk the flour, baking soda, baking powder, and salt together in a large bowl. Set aside.
Using a handheld or stand mixer fitted with a paddle or whisk attachment, beat the butter, granulated sugar, and brown sugar together on high speed until smooth and creamy, about 2 minutes. On medium speed, add the eggs one at a time, beating well after each addition. Beat in the sour cream and vanilla extract on medium speed until combined. By hand, add the dry ingredients and milk into the wet ingredients and stir gently, no more than 4 stirs. Gently, fold in the blueberries.
Spoon the batter into liners, filling them all the way to the top. Top each with streusel, gently pressing it down into the surface so it sticks. Bake for 5 minutes at 425 then, keeping the muffins in the oven, reduce the oven temperature to 350°F (177°C). Bake for an additional 18-20 minutes or until the internal temperature reaches 205-210 °F or a toothpick inserted in the center comes out clean. The total time these muffins take in the oven is about 23-25 minutes, give or take. Allow the muffins to cool for 5 minutes in the muffin pan, then transfer to a wire rack to continue cooling.
Muffins stay fresh covered at room temperature for a few days or in the refrigerator for up to 1 week.
Apple/Raisin Ring Scones
INGREDIENTS • 2 1/2 cups all purpose flour • 1 tablespoon baking powder • 3/4 teaspoon kosher salt • 1/3 cup sugar • Zest of 1 small lemon (I used a small mandarin orange) • 1/2 cup unsalted butter, chilled and cut into cubes • 1 cup diced apple • 1/2 cup raisins • 1 cup heavy cream • Brown sugar/cinnamon streusel (see above)
METHOD
Preheat oven to 400. Line a baking sheet with parchment paper.
In the bowl of a food processor, add the flour, baking powder, salt, sugar and zest. Pulse a few times to incorporate.
Add the cubed butter and pulse to incorporate. The mixture should resemble very coarse sand.
Empty the flour mixture into a mixing bowl. Add the cream and stir until just barely incorporated.
Dice the apples leaving the skin. Use the outside of the apple removing a majority of the inside without skin. The skin will add some color to the scone. The dough should just be moist, not wet, but also not crumbly or powdery looking. If it looks too dry, add a tablespoon of cold water.
Add and mix in the diced apple and raisins
Spoon the dough into 6 ring molds sprinkle some streusel over the top, if desired.
Bake for 16-19 minutes, rotating the pan halfway through. The scones should be lightly golden and cooked through.
Cool in the pan for 5-10 minutes then carefully remove to a cooling rack.
This afternoon’s ‘to do’ list contained nothing pressing. Tuesday I hard boiled eggs to include in our dinner salad and to make egg salad Wednesday. Today I baked a loaf of sandwich bread because I love egg salad on fresh baked bread. And as long as I was making bread I decided to replace the hamburger rolls I froze a few weeks ago. (I wasn’t happy with the rise of those whole wheat buns.) Today I mixed a double recipe of bread dough and shaped half into a loaf to bake at 425 deg and the rest into hamburger rolls to be baked at 375 deg.
To make a softer crust I coated the top of the loaf with melted butter before baking (hence the darker crust) and once again after it was baked, but still hot.
I also had a cup of heavy cream to use before it expired, and as long as the oven was on, I dropped the temperature and made some multi berry scones, baked at 400 deg.
Remember the hamburger rolls that baked at 375 deg? Well, as long as the oven was going to be dropped to 375 deg and as long as I had some frozen chocolate chip cookie dough that also bakes at 375 deg, I figured, what the heck.?
I have to find more chores to add to the ‘to do’ list. Today was exhausting.
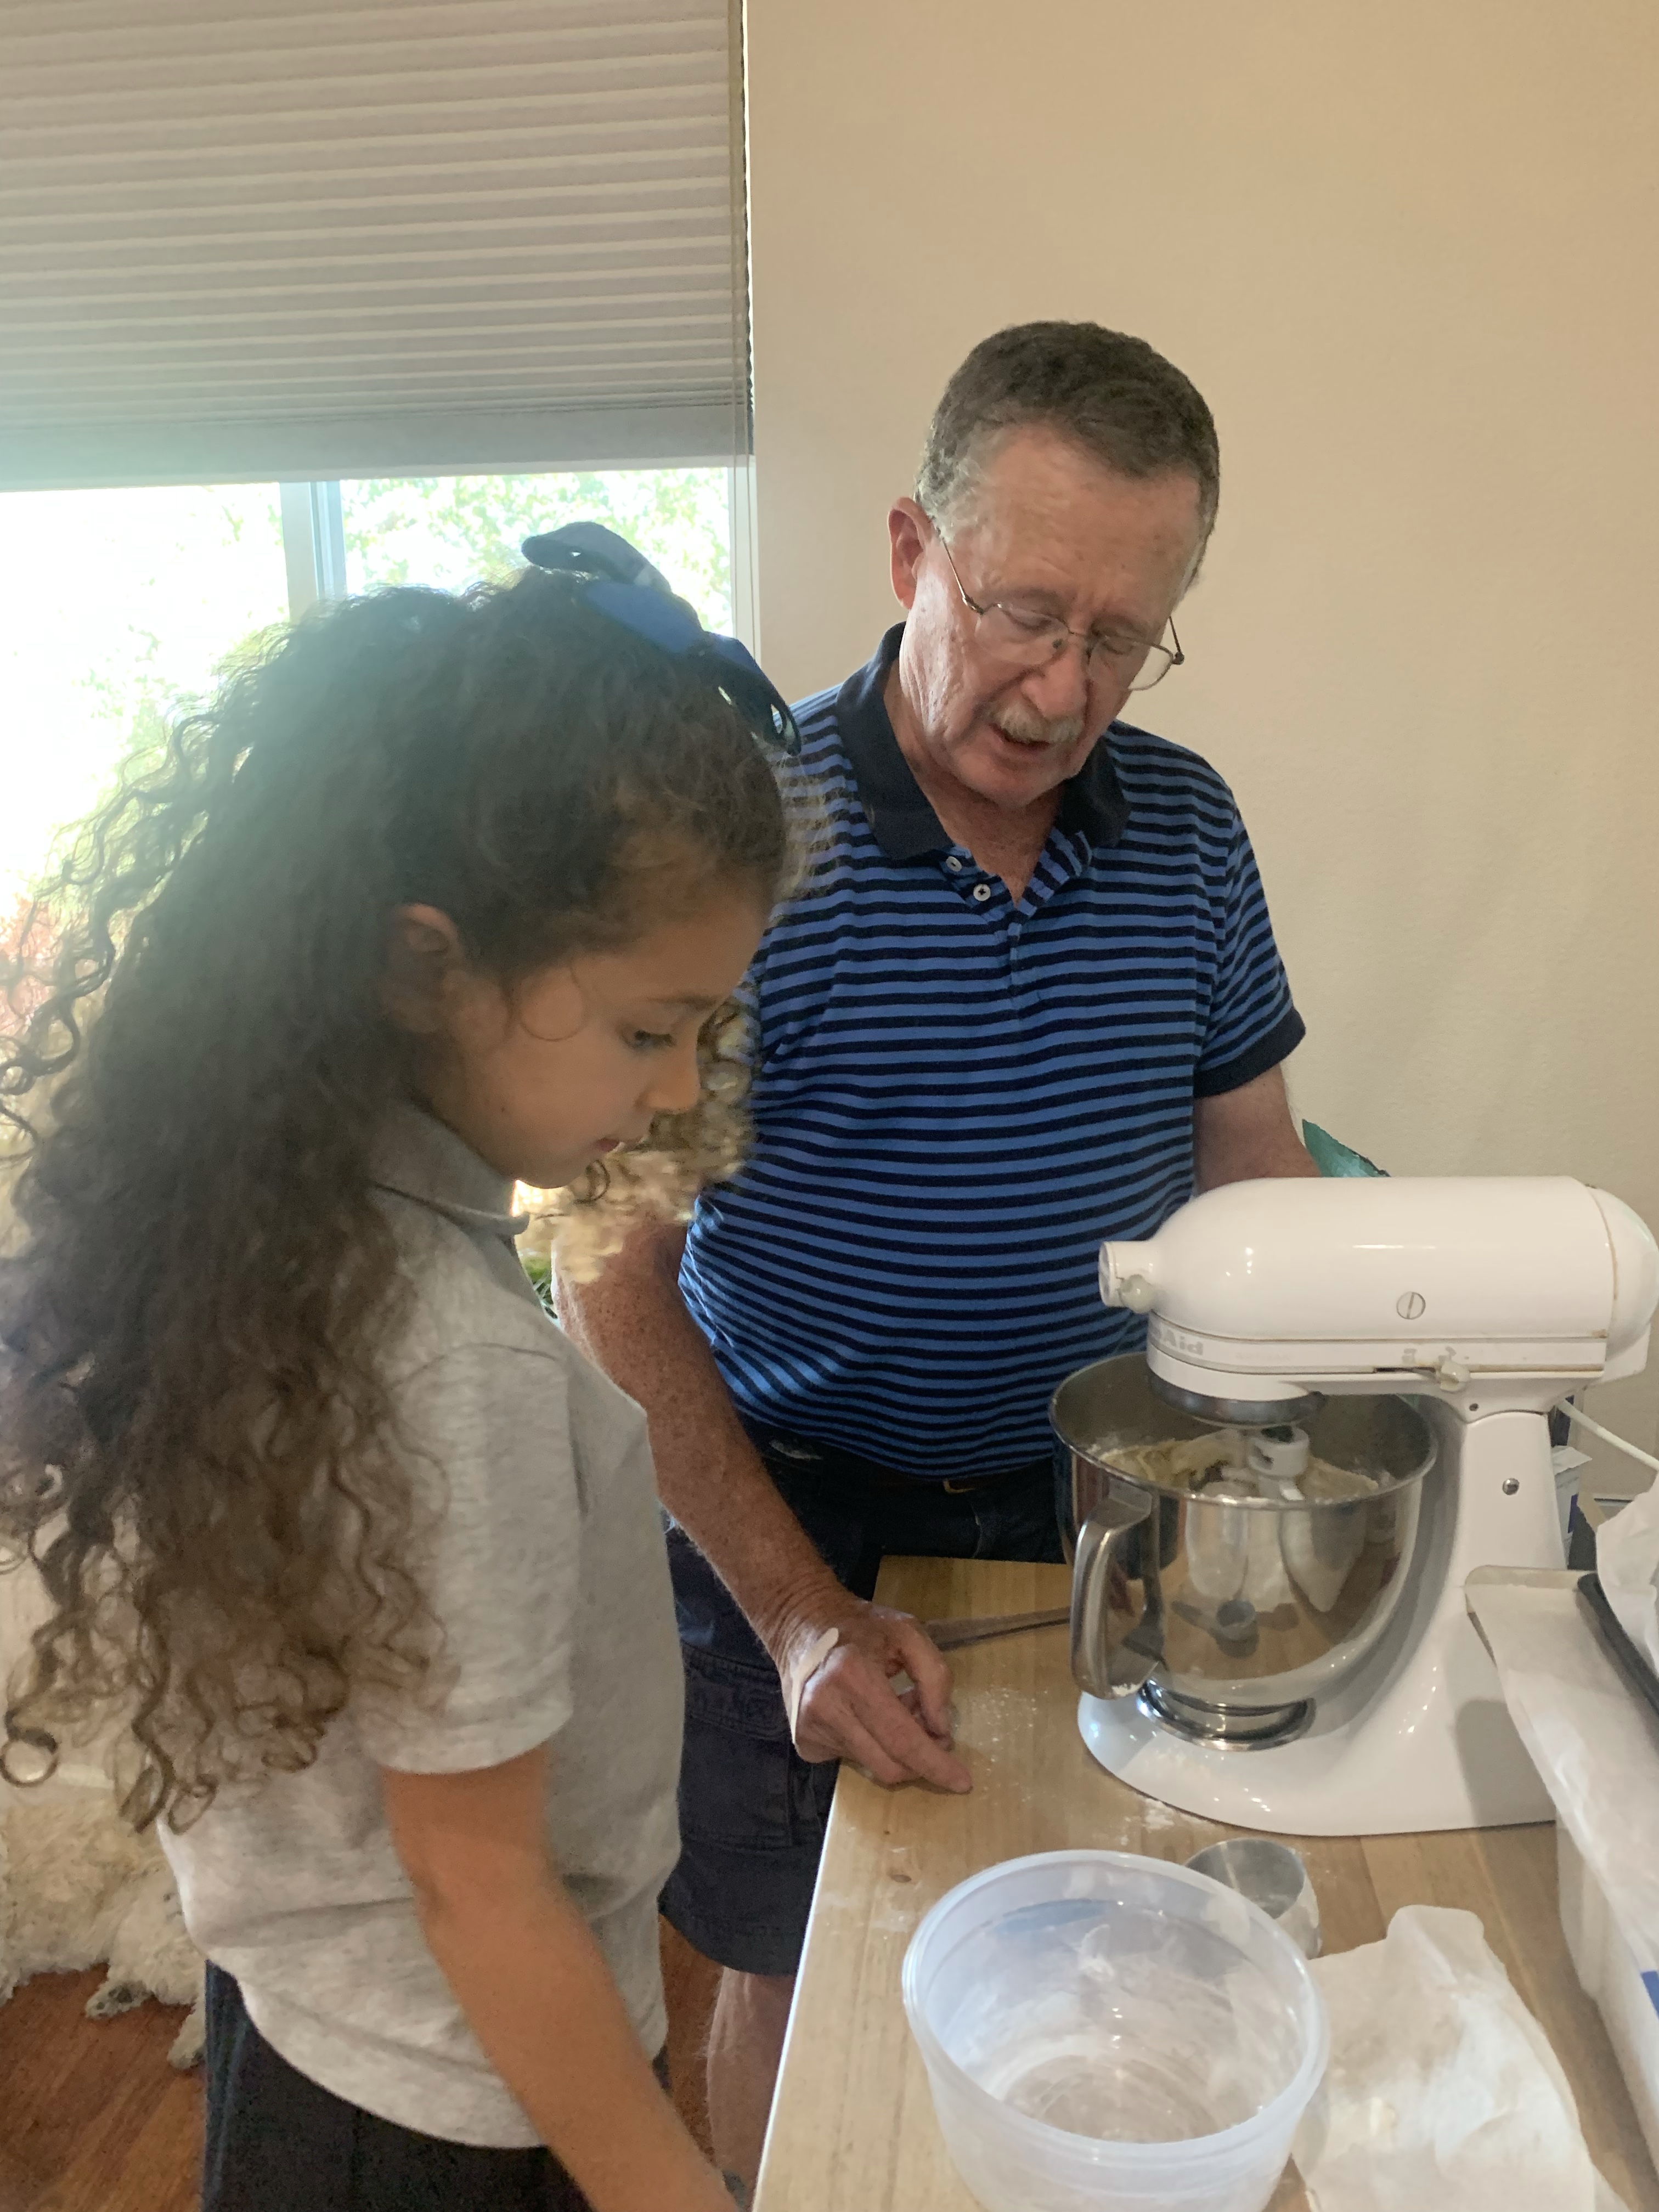
The best part of the day was participating in the Grandparents Drive-Thru Car Parade at Grace’s school! (Unicorn car. You can’t see the fuzzy pink tail.)
Speaking of Grace, here we are making the aforesaid chocolate chip cookies.
Raspberries were on sale ($2.99/package,) the forecast was for light rain, and it was a non-golf day. Whaddya expect? Scone morning everyone!
Dropped berry scones make a delicious, easy, breakfast in 30 minutes. This recipe makes 6 large free-formed scones. I formed these by hand shaping them into hamburger-like 3” diameter patties.
I froze half of them for a future breakfast. Scones can be frozen for up to 3 months, then thawed on the counter for an hour before reheating in the oven. Even easier is to microwave them, still frozen, in 30 second bursts, being careful not to overheat them.
Raspberries were on sale here last week so I bought a double pack to add to my Raisin Bran. Unfortunately, the weather changed about the same time and for me Raisin Bran is a summer breakfast. This weather deserves oatmeal with raisins and brown sugar… or perhaps some delicious raspberry dropped scones.
Don’t over mix the dough. If necessary add a tablespoon or two of water to make the dough stick together when trying to make a doughball, which is a snowball made of dough.
These scones are basically a free-form biscuit made by forming the dough into six or seven 200g balls, (each about the size of a small fist) placing on a parchment lined baking sheet and flattening to about an inch thick.
Raspberry Drop Scones
INGREDIENTS • 2 1/2 cups all purpose flour • 1 tablespoon baking powder • 3/4 teaspoon kosher salt • 1/3 cup sugar • Zest of 1 small lemon (I used a small mandarin orange) • 1/2 cup unsalted butter, chilled and cut into cubes • 150-175g fresh raspberries • 1 cup heavy cream • Coarse or turbinado sugar for topping METHOD
Preheat oven to 400. Line a baking sheet with parchment paper.
In the bowl of a food processor, add the flour, baking powder, salt, sugar and zest. Pulse a few times to incorporate.
Add the cubed butter and pulse to incorporate. The mixture should resemble very coarse sand.
Empty the flour mixture into a mixing bowl. Add the cream and stir until just barely incorporated.
Gently fold in the berries. It’s fine if the raspberries break up a little – it adds a nice pink stain to the dough. The dough should just be moist, not wet, but also not crumbly or powdery looking. If it looks too dry, add a tablespoon of cold water.
Spoon the dough into 12 equally-sized pieces on the parchment lined baking sheet. Sprinkle some coarse or turbinado sugar over the top, if desired.
Bake for 16-19 minutes, rotating the pan halfway through. The scones should be lightly golden and cooked through.
Cool in the pan for 5-10 minutes then carefully remove to a cooling rack.
In a continuing search for places to use chocolate I found Chocolate Torsades. The name derives from the French ‘tornado’ for ‘twist.’
There really isn’t a recipe for this. I used my creme patisserie recipe from the eclairs, (I had some left over.) I also had a leftover sheet of puff pastry, and of course lots of existing chocolate. (Still trying to exhaust the old stock.)
Cut, folded, filled pastries
Twisted pieces
Final Product
French Chocolate Torsades (Puff Pastry Twists)
INGREDIENTS • 4 egg yolks • 1/2 cup of sugar • 2 tablespoons of flour • 1 1/2 cups of milk • 1/2 tablespoons of vanilla • 1 tablespoon of butter • 1/4 teaspoon of salt • 1 sheet Puff pastry (270 g) • Chocolate chips dark or milk • 1 egg for egg wash • Sparkling sugar
METHOD For the custard
Whisk eggs and milk together and add to all other ingredients (except vanilla) to a medium saucepan.
Bring to boil whisking constantly
Cook until thickened (it will look lumpy, its ok)
Sieve lumpy mixture into a bowl and add 1 tsp vanilla, mix thoroughly
When incorporated, cover with plastic directly on the cream and cool.
For the Chocolate Torsades
Preheat oven to 410 degrees (215 Celsius)
Roll out puff pastry about 14 inches long or just use the store bought roll
Spread a thin layer of the vanilla custard on top
Sprinkle chocolate chips on top
Fold in half and cut into strips
Twist each strip a few times to create the twist
Whisk one egg in a small bowl and brush the tops of the twists with the egg wash
Place chocolate torsades on baking sheet with parchment paper
Sprinkle with sparkling sugar
Bake at 400 degrees (215 Celsius) for 15 minutes or until golden brown.
You don’t hear it mentioned often, but there is a major problem with the game of golf. Although it is possible the problem is with those who play golf.
I play three times a week, which means there are four mornings a week that I don’t play golf and therein lies the problem. What am I going to do with those four mornings?
Sadly, sort of, I saw a new recipe for cinnamon buns this week, and I am not playing golf this morning…. so.
King Arthur Baking published this recipe for Perfectly Pillowy Cinnamon Buns. Often, once the bun cools, while still flavorful, it becomes more dense. Not these! They remain soft and fresh up to four days after baking. The secret is using a tangzhong in the dough batter. Tangzhong is a mix of milk and flour which is mixed and heated to a thick paste before adding the rest of the dough ingredients. It’s easy, you only need to know to do it.
I made the recipe as listed below, except not having whole milk I mixed 2% milk and whipping cream in a 80:20 ratio. I also only used the cream for the icing. The result is outstanding! We are waiting for the QC report, but manufacturing gives these rolls a big thumbs up!
Tangzhong • 1/2 cup (113g) whole milk • 3 tablespoons (23g) King Arthur Unbleached Bread Flour
Dough • 2/3 cup (151g) whole milk, cold • 2 1/2 cups (300g) King Arthur Unbleached Bread Flour • 1 teaspoon salt • 2 tablespoons (25g) granulated sugar • 2 teaspoons instant yeast • 4 tablespoons (57g) unsalted butter, softened
Filling • 1 tablespoon (14g) butter, melted • 1/2 cup (107g) light brown sugar, packed • 2 tablespoons (15g) King Arthur Unbleached Bread Flour • 4 teaspoons (10g) cinnamon • 1/16 teaspoon (pinch) salt
Icing • 3 tablespoons (42g) butter, melted, divided • 1/2 teaspoon vanilla extract • 1/16 teaspoon (pinch) salt • 1 1/2 cups (170g) confectioners’ sugar, sifted • 1 to 2 tablespoons (14g to 28g) milk, cream, or buttermilk; enough to thin to desired consistency
METHOD
To make the tangzhong: Combine both the ingredients in a small saucepan, and whisk until no lumps remain.
Place the saucepan over medium heat and cook the mixture, stirring regularly, until thickened, paste-like, and the spoon or spatula leaves lines on the bottom of the pan. This should take 1 to 3 minutes, depending on the strength of your burner.
Remove from the heat and transfer to a large mixing bowl, the bowl of a stand mixer, or the bucket of a bread machine (whatever you plan to knead the dough in).
To make the dough: Add the ingredients to the mixing bowl in the order listed; the heat from the tangzhong will help to warm the cold milk.
Mix — by hand, on low speed of a stand mixer with the dough hook attachment, or in a bread machine set to the dough cycle — to bring the dough together. Next, knead the dough until it’s smooth, elastic, and tacky. This will take up to 15 minutes by hand, 10 to 12 minutes on medium-low speed of a mixer, or the length of the dough cycle in a bread machine.
Shape the dough into a ball, place it in a bowl, and cover the bowl with plastic wrap or a reusable cover.
Let the dough rise until puffy but not necessarily doubled in bulk, about 60 to 90 minutes (depending on the warmth of your kitchen).
To make the filling: While the dough is rising, put the melted butter into a medium bowl and add the remaining ingredients, stirring until the mixture is the texture of damp sand. Set aside.
To assemble the rolls: Lightly grease a baking sheet, or line it with parchment paper.
Transfer the dough to a lightly greased work surface and press it into a 10” x 12” rectangle that’s about 1/2” thick. For evenly shaped rolls, try to pat the dough into an actual rectangle (with corners), rather than an oval.
Sprinkle the filling over the dough, covering all but a 1/2” strip along one long side.
Starting with the filling-covered long side, roll the dough into a log.
Score the dough lightly into eight equal 1 1/2” to 2” pieces. Cut the dough at the score marks, using dental floss for the cleanest cut. If you don’t have dental floss, a bench knife or sharp knife will work.
Place the rolls onto the prepared baking sheet, spacing them so there’s at least 2” between each one and they’re 2” away from the edges of the pan; a 3-2-3 arrangement works well. To prevent them from unraveling while they rise and bake, tuck the ends of the spirals underneath the rolls so that they’re held in place.
Cover the rolls with lightly greased plastic wrap or a reusable cover and let them rise for 30 to 60 minutes (depending on the warmth of your kitchen). The rolls should be puffy and the dough shouldn’t bounce back immediately when gently pressed.
About 20 minutes before you’re ready to bake, position a rack in the top third of the oven. Preheat the oven to 375°F.
Bake the rolls for 14 to 18 minutes, until they’re a light golden brown and a digital thermometer inserted into the center of one roll reads 190°F. Bake for the lesser amount of time for extra-soft rolls, and the longer amount of time for rolls with a bit more color and slightly firmer texture.
Remove the rolls from the oven, place the pan on a rack, and brush the hot rolls with 1 1/2 tablespoons (21g) of the melted butter. Let the rolls cool for 10 to 15 minutes before icing.
To make the icing: Combine the remaining 1 1/2 tablespoons (21g) melted butter with the remaining icing ingredients in a medium bowl, mixing with a spatula until smooth.
Ice the rolls and serve immediately. If you’re planning to serve the rolls later, wait to ice them until just before serving. Store icing at room temperature, tightly covered, until you’re ready to use it.
Store completely cooled rolls, un-iced and well wrapped, for a couple of days at room temperature; or freeze for up to 1 month.
To reheat leftover rolls: These rolls stay wonderfully soft for at least 3 days. The best way to enjoy them for breakfast is to bake them the day before, store them tightly sealed (and un-iced) at room temperature overnight, then the next morning lightly cover the rolls with foil and warm them in a 300°F to 350°F oven for 5 to 10 minutes. Spread with icing and enjoy.
Tips from the KAB Bakers
With origins in Japan’s yukone (or yudane), tangzhong is a yeast bread technique popularized across Asia by Chinese cookbook author Yvonne Chen. Tangzhong involves cooking some of a bread recipe’s flour in liquid prior to adding it to the remaining dough ingredients. Bringing the temperature of the flour and liquid to 65°C (149°F) pre-gelatinizes the flour’s starches, which makes them more able to retain liquid — thus enhancing the resulting loaf’s softness and shelf life.
These rolls are bakery-sized, meaning big enough to enjoy as an indulgent breakfast or snack. For smaller-sized rolls perfect for a side dish at brunch, score and divide the dough into ten 1” to 1 1/2” pieces and bake for 13 to 16 minutes.
Do you enjoy your cinnamon rolls with tangy, thick cream cheese frosting instead of vanilla icing? Stir in 4 to 6 tablespoons (57g to 90g) softened cream cheese to the icing along with the other ingredients. The softer the cream cheese is, the easier this will be to do. Resist the urge to add more than 2 teaspoons of milk until the icing is fully mixed. If it’s too thick for your liking, add more milk a teaspoon at a time to get it to the consistency you prefer.
Wondering about all the liquid choices for thinning the frosting? Milk is certainly the most convenient, but if you have cream or buttermilk, the former will add an extra layer of richness, while the latter will add a subtle tang to balance out the sweetness.