When You Wish Upon A Star…


(a Cinnamon Star Bread that is,) “Makes no difference who you are.”
I saw this recipe on KAF as part of their CINNAMON STAR BREAD BAKEALONG: CHALLENGE #16.   These are fun ways to improve and augment anyones baking skills, no matter who you are, plus they result in a delicious product (when executed properly.)

Dusted Completed bread

INGREDIENTS

DOUGH

  • 2 cups Unbleached All-Purpose Flour
  • ¼ cup potato flour
  • ¼ cup nonfat dry milk
  • ¾ cup + 2 to 4 tablespoons lukewarm water, enough to make a soft, smooth dough
  • ¼ cup (4 tablespoons) unsalted butter, at room temperature
  • 1 teaspoon vanilla extract
  • 2 teaspoons instant yeast
  • 2 tablespoons sugar
  • 1 teaspoon salt

FILLING

  • 1 large egg, beaten
  • ½ cup sugar
  • 1 tablespoon cinnamon

METHOD

  1. First, measure the flour by gently spooning it into a cup, then sweeping off any excess. Next, sift the flour, potato flour, and dry milk through a strainer; this is an important step to prevent lumps in the dough. (If you’re using instant mashed potatoes rather than potato flour you can skip this sifting step.)
  2. To make the dough: Combine all of the dough ingredients and mix and knead —I use a mixer and dough hook — to make a soft, smooth dough.
  3. Place the dough in a lightly greased bowl, cover, and let it rise for 60 minutes, until it’s nearly doubled in bulk.
  4. Divide the dough into four equal pieces. Shape each piece into a ball, cover the balls, and allow them to rest for 15 minutes.
  5. On a lightly greased or floured work surface, roll one piece of dough into a 10″ circle. Place the circle on a piece of parchment, brush a thin coat of beaten egg on the surface, then evenly sprinkle with 1/3 of the cinnamon-sugar, leaving 1/4″ of bare dough around the perimeter.
  6. Roll out a second circle the same size as the first, and place it on top of the filling-covered circle. Repeat the layering process — egg, cinnamon sugar, dough circle — leaving the top circle bare.
  7. Place a 2 1/2″ to 3″ round cutter in the center of the dough circle as a guide. I used a 3/4 cup measuring cup and scored the center of the top ring. With a bench knife or sharp knife, cut the circle into 16 equal strips, from the cutter to the edge, through all the layers.
  8. Using two hands, pick up two adjacent strips and twist them away from each other twice so that the top side is facing up again. Repeat with the remaining strips of dough so that you end up with eight pairs of strips.
  9. Pinch the pairs of strips together to create a star-like shape with eight points. Be sure the ends are well pinched or they will separate.
  10. Transfer the star on the parchment to a baking sheet. Cover the star and let it rise until it becomes noticeably puffy, about 45 minutes.
  11. While the star is rising, preheat the oven to 400°F.
  12. Completed breadBrush the star with a thin coat of the beaten egg. Bake it for 12 to 15 minutes, until it’s nicely golden with dark brown cinnamon streaks; the center should register 200°F on a digital thermometer.
  13. Remove the loaf from the oven and allow it to cool for about 10 minutes before serving. Dust with confectioners’ sugar and serve warm or at room temperature.
  14. Store any leftover bread, well wrapped in plastic, at room temperature for several days. Freeze for longer storage.

3 Strikes In A Row!

As you may know, I often make a “practice” cake prior to producing the “public” cake. Thanksgiving Windtorte
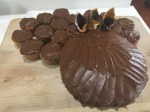
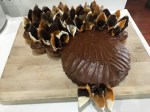
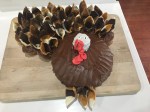
“Practice” cakes do not leave the kitchen, (unless they are good.) I made a practice Thanksgiving cake based on a Spanische Windtorte as seen on GBBO. It looked beautiful and tasted awful. It would have been easier to eat a half cup of sugar with a strawberry chaser.
I fell back to a standard chocolate cake but decorated with a Thanksgiving theme. The feathers are chocolate, white chocolate and butterscotch chips, warmed, mixed with corn syrup, rolled into long thick strings, braided, rolled and cut into equilateral triangles, about 2″ on each side. Fold one side and pinch together forming the feather.


Frost the chocolate cake using a spatula to make feathers across the top. Array 18 chocolate frosted cupcakes (I used white cake for variety for the guests) around the frosted chocolate cake. Place the feathers on the cupcakes and add a few to the front side of the turkey body.

Frost one cupcake with white buttercream, form some red dyed gum paste into the snood and waddle and invert a chocolate chip (pointy side down) into the top as an eye.

Boom!

Chocolate Cake

INGREDIENTS

  • 2 cups white sugar
  • 1 3/4 cups all-purpose flour
  • 3/4 cup unsweetened cocoa powder
  • 1 1/2 teaspoons baking soda
  • 1 1/2 teaspoons baking powder
  • 1 teaspoon salt
  • 2 eggs
  • 1 cup milk
  • 1/2 cup vegetable oil
  • 2 teaspoons vanilla extract
  • 1 cup boiling water
  • 3/4 cup butter
  • 1 1/2 cups unsweetened cocoa powder
  • 5 1/3 cups confectioners’ sugar
  • 2/3 cup milk
  • 1 teaspoon vanilla extract

 METHOD

  1. Preheat oven to 350 degrees F (175 degrees C). Grease and flour two 9 inch cake pans.
  2. Use the first set of ingredients to make the cake. In a medium bowl, stir together the sugar, flour, cocoa, baking soda, baking powder and salt. Add the eggs, milk, oil and vanilla, mix for 3 minutes with an electric mixer. Stir in the boiling water by hand. Pour evenly into the two prepared pans.
  3. Bake for 30 to 35 minutes in the preheated oven, until a toothpick inserted comes out clean. Cool for 10 minutes before removing from pans to cool completely.
  4. To make the frosting, use the second set of ingredients. Cream butter until light and fluffy. Stir in the cocoa and confectioners’ sugar alternately with the milk and vanilla. Beat to a spreading consistency.
  5. Split the layers of cooled cake horizontally, cover the top of each layer with frosting, then stack them onto a serving plate. Frost the outside of the cake.

Chocolate Frosting

INGREDIENTS

  • 1/2 cup butter
  • 3 (1 ounce) squares unsweetened chocolate
  • 1 pound confectioners’ sugar
  • 1/2 teaspoon vanilla extract
  • 3/4 cup milk

METHOD

  1. Melt chocolate and butter in the microwave, or in the top of a double boiler. In a large bowl, combine confectioners’ sugar, vanilla and 1/2 cup of the milk. Blend in the melted chocolate mixture. Add remaining milk, a little at a time, until desired consistency is achieved.
  2. Let stand until spreadable (frosting will thicken as it cools).

Heavenly White Cake (Cupcakes)

INGREDIENTS                                               

  • 2 3/4 cups sifted cake flour
  • 4 teaspoons baking powder
  • 3/4 teaspoon salt
  • 4 egg whites
  • 1 1/2 cups white sugar
  • 3/4 cup butter
  • 1 cup milk
  • 1 teaspoon vanilla extract

METHOD

  1. Measure sifted flour, baking powder, and salt; sift together three times.
  2. In a mixing bowl, beat egg whites until foamy. Add 1/2 cup sugar gradually, and continue beating only until meringue will hold up in soft peaks.
  3. Cream butter or margarine. Gradually add remaining 1 cup sugar, and cream together until light and fluffy. Add sifted ingredients alternately with milk a small amount at a time, beating after each addition until smooth. Mix in flavorings. Add meringue, and beat thoroughly into batter. Spread batter in a 15 x 10 x 1 inch pan which has been lined on the bottom with parchment paper.
  4. Bake at 350 degrees F (175 degrees C) for 30 to 35 minutes. Cool cake in pan 10 minutes, then remove from pan and transfer to a wire rack to finish cooling. This cake may also be baked in two 9 inch round pans for 30 to 35 minutes, or in three 8 inch round pans for 25 to 30 minutes.

Just a Pretty Face

As my regulars know, I am a big GBBO fan. For the past couple of years I have been mesmerized by Mary Berry’s Spanische Windtorte. When asked to bring a dessert of my choice to Thanksgiving dinner, I thought, “What a perfect opportunity to try the windtorte.” (Full disclosure, Fran suggested this, it was not my original thought.) Substituting pumpkins and colored leaves for the violets satisfied my sense of holiday decorum. Well, the result is that this was a very pretty cake and I think I would have done very well in the GBBO Technical Challenge. However, it would have been easier to eat a couple of tablespoons of pure sugar as that is exactly what it tasted like. If it weren’t for the whipped cream and berry mixture filling the cake, it would have no edible redeeming value. Pretty, but also, pretty disappointing.

I made the below recipe of French meringue and piped two 8″ diameter disks and three 8″ diameter rings onto parchment paper. These were baked at 200F for an hour. With some difficulty the meringue was lifted from the paper. One disk was used as the base and the three rings were stacked, one at a time, using several thick meringue mounds to “glue” them together. The whole structure was then baked for 45 min, again at 200F.

6 small

Once cooled, the balance of the meringue was used to “frost” the side of the cake. By this time the meringue was a bit thin and even vigorous beating could not thicken it. I should have made a new batch, but struggled on (this was just a practice cake after all.) The resultant side of the cake was not as smooth I would have liked, but was ok. I simply trimmed the bottom of the cake where meringue dripped.

The cake was filled with the whipped cream and berry mixture from the recipe below and the top added. This resulted in the very pretty cake seen above.

INGREDIENTS

For the French meringue shell

For the Swiss meringue decoration

For the filling

METHOD

  1. Line 3 large baking trays with baking parchment. Draw 2 x 20cm/8in circles on 2 of the trays and 1 x 20cm/8in circle on 1 of the trays. (You should end up with 5 x 20cm/8in circles). Preheat the oven to 200F.
  2. For the meringue shell, tip the egg whites and cream of tartar into a large spotlessly clean bowl and whisk with an electric mixer on high speed until the whites form stiff peaks. Add the caster sugar, a tablespoon at a time, whisking continuously to make a thick, glossy meringue.
  3. Spoon two-thirds of the meringue into a piping bag fitted with a 1.5cm/⅝in plain nozzle. Pipe a thick ring inside one of the circles on the baking tray and continue spiraling until the entire circle is filled. Repeat with a second circle. These create the base and the top of the meringue cake.
  4. Repeat the process with the 3 remaining circles, except don’t fill in the circles, so that you have three hoops of meringue – these create the sides of the meringue shell. Bake for 45 minutes. Remove from the oven and leave to cool.
  5. When the meringues are dry, gently slide 1 of the cooked, filled meringues onto a 30cm/12in heatproof (to 200F) serving plate. Spoon the remaining meringue into the piping bag and pipe 8 blobs of meringue, evenly spaced around the edge of the circle. Place 1 of the meringue hoops on top and press down very gently to stick the hoop to the base.
  6. Repeat the process with the remaining 2 hoops of meringue. Roughly pipe the remaining one-third of meringue around the sides to disguise the hoops. Using a spatula smooth out the meringue so that the sides are smooth and straight and look like a cake. Bake on the serving plate for 45 minutes. Remove from the oven and leave to cool.
  7. For the Swiss meringue decoration, set a large mixing bowl over a pan of gently simmering water. Tip the egg whites and sugar into the bowl and whisk until the sugar is dissolved and the meringue reaches 70C on a sugar thermometer.
  8. Remove from the heat and continue whisking until cool and stiff. Spoon the meringue into a piping bag fitted with a large star nozzle. Pipe a pretty border around the base, the middle and the top edge of the meringue shell. Pipe a border around the outside edge and the middle of the filled meringue circle that will become the lid. Bake for 30 minutes. Remove from the oven and leave to cool.
  9. For the filling, whip the cream and icing sugar together in a bowl until soft peaks form when the whisk is removed from the bowl. Whisk in the orange blossom water and gently fold in the strawberries and raspberries. Spoon into the cooled meringue cake shell. Top with the decorated meringue lid.

The Scarlet Pumpernickel

Well maybe not scarlet, but not dark brown either. I slowly bought all the ingredients (or so I thought) to make a pumpernickel boule. KAF had a recipe I liked and ordered all the odd ingredients (or so I thought) to make it on my Wednesday “me day.” Somehow I missed it was supposed to be “White Whole Wheat Flour,” well, I had normal off-white whole wheat flour and it would have to do. I did buy the Deli Rye Flavor and the “Vital Wheat Gluten.” I forgot the Pumpernickel Artisan Bread Flavor is currently out of stock at KAF and is only on my wish list. With inspir/desperation, I removed 1//2 cup of the specified flours, added 1/2 cup pumpernickel flour, crossed my fingers and hoped for the best. According to comments on the KAF recipe omitting the Pumpernickel Artisan Bread Flavor will cause the bread to be a lighter color than the expected (and desired) chocolate/coffee/pumpernickel brown. It is, in fact, a good rye bread color. Actually, the taste was pretty darned ok also.pumpernickel boule 1

PUMPERNICKEL BOULE

INGREDIENTS

  • 4 cups King Arthur Unbleached All-Purpose Flour
  • 1 cup King Arthur Unbleached White Whole Wheat Flour
  • 1/2 cup Pumpernickel Artisan Bread Flavor
  • 2 tablespoons vital wheat gluten, recommended to prevent a collapsed loaf
  • 1/2 teaspoon Deli Rye Flavor, optional, for more assertive rye flavor
  • 2 1/4 teaspoons salt
  • 2 teaspoons instant yeast
  • 2 cups lukewarm water

METHOD

  1. Combine all of the ingredients and mix and knead — by hand, mixer, or bread machine — until the dough is elastic and slightly sticky.
  2. Let the dough rise in a lightly greased, covered bowl for 1 to 2 hours; it should become puffy.
  3. Transfer the dough to a lightly oiled surface. Gently deflate it, and shape it into a ball.
  4. Place the shaped loaf into a round brotform covered with a flour dusted liner.
  5. Let the loaf rise for 60 to 90 minutes, until it’s almost doubled in size.
  6. Preheat the oven to 425°F with the stoneware baker (e.g., Emile Henry) inside to pre-heat it.
  7. Spray the bottom of the stoneware baker with olive oil and carefully tip the loaf into it.  The loaf will deflate slightly, so be careful.
  8. Slash the loaf diagonally in several places, and cover with the lid. .
  9. Bake the loaf for 30 to 40 minutes, remove the lid, and bake for another 5 minutes; the bread will be dark. When done, it’ll be crusty, and a digital thermometer inserted into the center will read 190°F to 200°F.
  10. Remove the bread from the oven, and transfer it to a rack to cool completely.

…Thrill on Blueberry Hill

Having just washed some rust and dirt from my hands caused by carrying some rebar I bought at Home Depot (for the uninformed, rebar is a steel rod with ridges for use in reinforced concrete, or in my case, stakes for anchoring wooden tripods framing  our frost blanket tripodnew citrus trees to hold frost blankets,) I caught up with Fran who was just leaving the produce section of the supermarket, when she said: “Look, I bought some blueberries.”


Hence:blueberry muffins cropped
Jordan Marsh BLUEBERRY MUFFINS
by KAF
INGREDIENTS

  • ½ cup (8 tablespoons) butter, at room temperature
  • 1 cup sugar
  • 2 large eggs
  • 2 teaspoons baking powder
  • ½ teaspoon salt
  • 1 teaspoon vanilla extract
  • 2 cups King Arthur Unbleached All-Purpose Flour
  • ½ cup milk
  • 2½ cups blueberries, fresh preferred
  • ¼ cup sugar, for topping

METHOD

  1. Preheat the oven to 375°F. Lightly grease a standard 12-cup muffin tin; or line the tin with papers, and grease the papers.
  2. In a medium-sized bowl, beat together the butter and sugar until well combined.
  3. Add the eggs one at a time, scraping the sides and bottom of the bowl and beating well after each addition.
  4. Beat in the baking powder, salt, and vanilla.
  5. Add the flour alternately with the milk, beating gently just to combine. Scrape the bottom and sides of the bowl.
  6. Mash 1/2 cup of the blueberries. Add the mashed and whole berries to the batter, stirring just to combine and distribute.
  7. Scoop the batter by the heaping 1/4-cupful into the prepared muffin pan; a muffin scoop works well here.
  8. Sprinkle about 1 teaspoon granulated sugar atop each muffin, if desired. It’s traditional — go for it!
  9. Bake the muffins for about 30 minutes, until they’re light golden brown on top, and a toothpick inserted into the middle of one of the center muffins comes out clean.
  10. Remove the muffins from the oven, loosen their edges from the pan, and after about 5 minutes transfer them to a rack to cool.

TOPPING

  • ½ cup sugar
  • 1/3 cup flour
  • ¼ cup butter
  • 1½ tsp cinnamon

Mix together sugar, flour, butter, and teaspoons cinnamon. Mix to a coarse granular consistency, and sprinkle over muffins before baking.