Temper, Temper

I tried something new today. I use my sous vide for many, many things, but never thought of using it for tempering chocolate. I researched online and the sous vide companies described several different techniques. The problem with them is they bag the chocolate, like you would a steak, and heat and cool it in the bag. I wanted to dip my chocolates, so decided to use a pan to hold the chocolate. I had to be careful as any water that splashed into the melted chocolate would seize and ruin it. (I managed to temper 3 batches with no failures.

I made sure the large pot, plus sous vide was just big enough to allow the sauce pan to sit in the water without tipping too much. It also let the water circulate from the sous vide without splashing.

By the third batch I had the timing down. Setting the sous vide temperature a few degrees higher, or lower, than the chocolate required compensated for our ambient room temperature of 64 deg. I was using dark chocolate so set the sous vide to 126 deg and let the chocolate heat to 122 deg F and hold until I was sure it was all at temperature. That’s the beauty of using the sous vide to temper. It will hold indefinitely at any temperature you select. I then removed the sauce pan containing the melted chocolate, wiped the pan dry and set it aside before replacing 5 cups of water with 5 cups of ice, dropping the temperature to 75 deg. Returning the saucepan to the water quickly cooled the chocolate to 80 deg. I then set the temperature to 95 which held the chocolate in temper at 90 deg for over an hour.

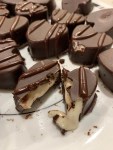
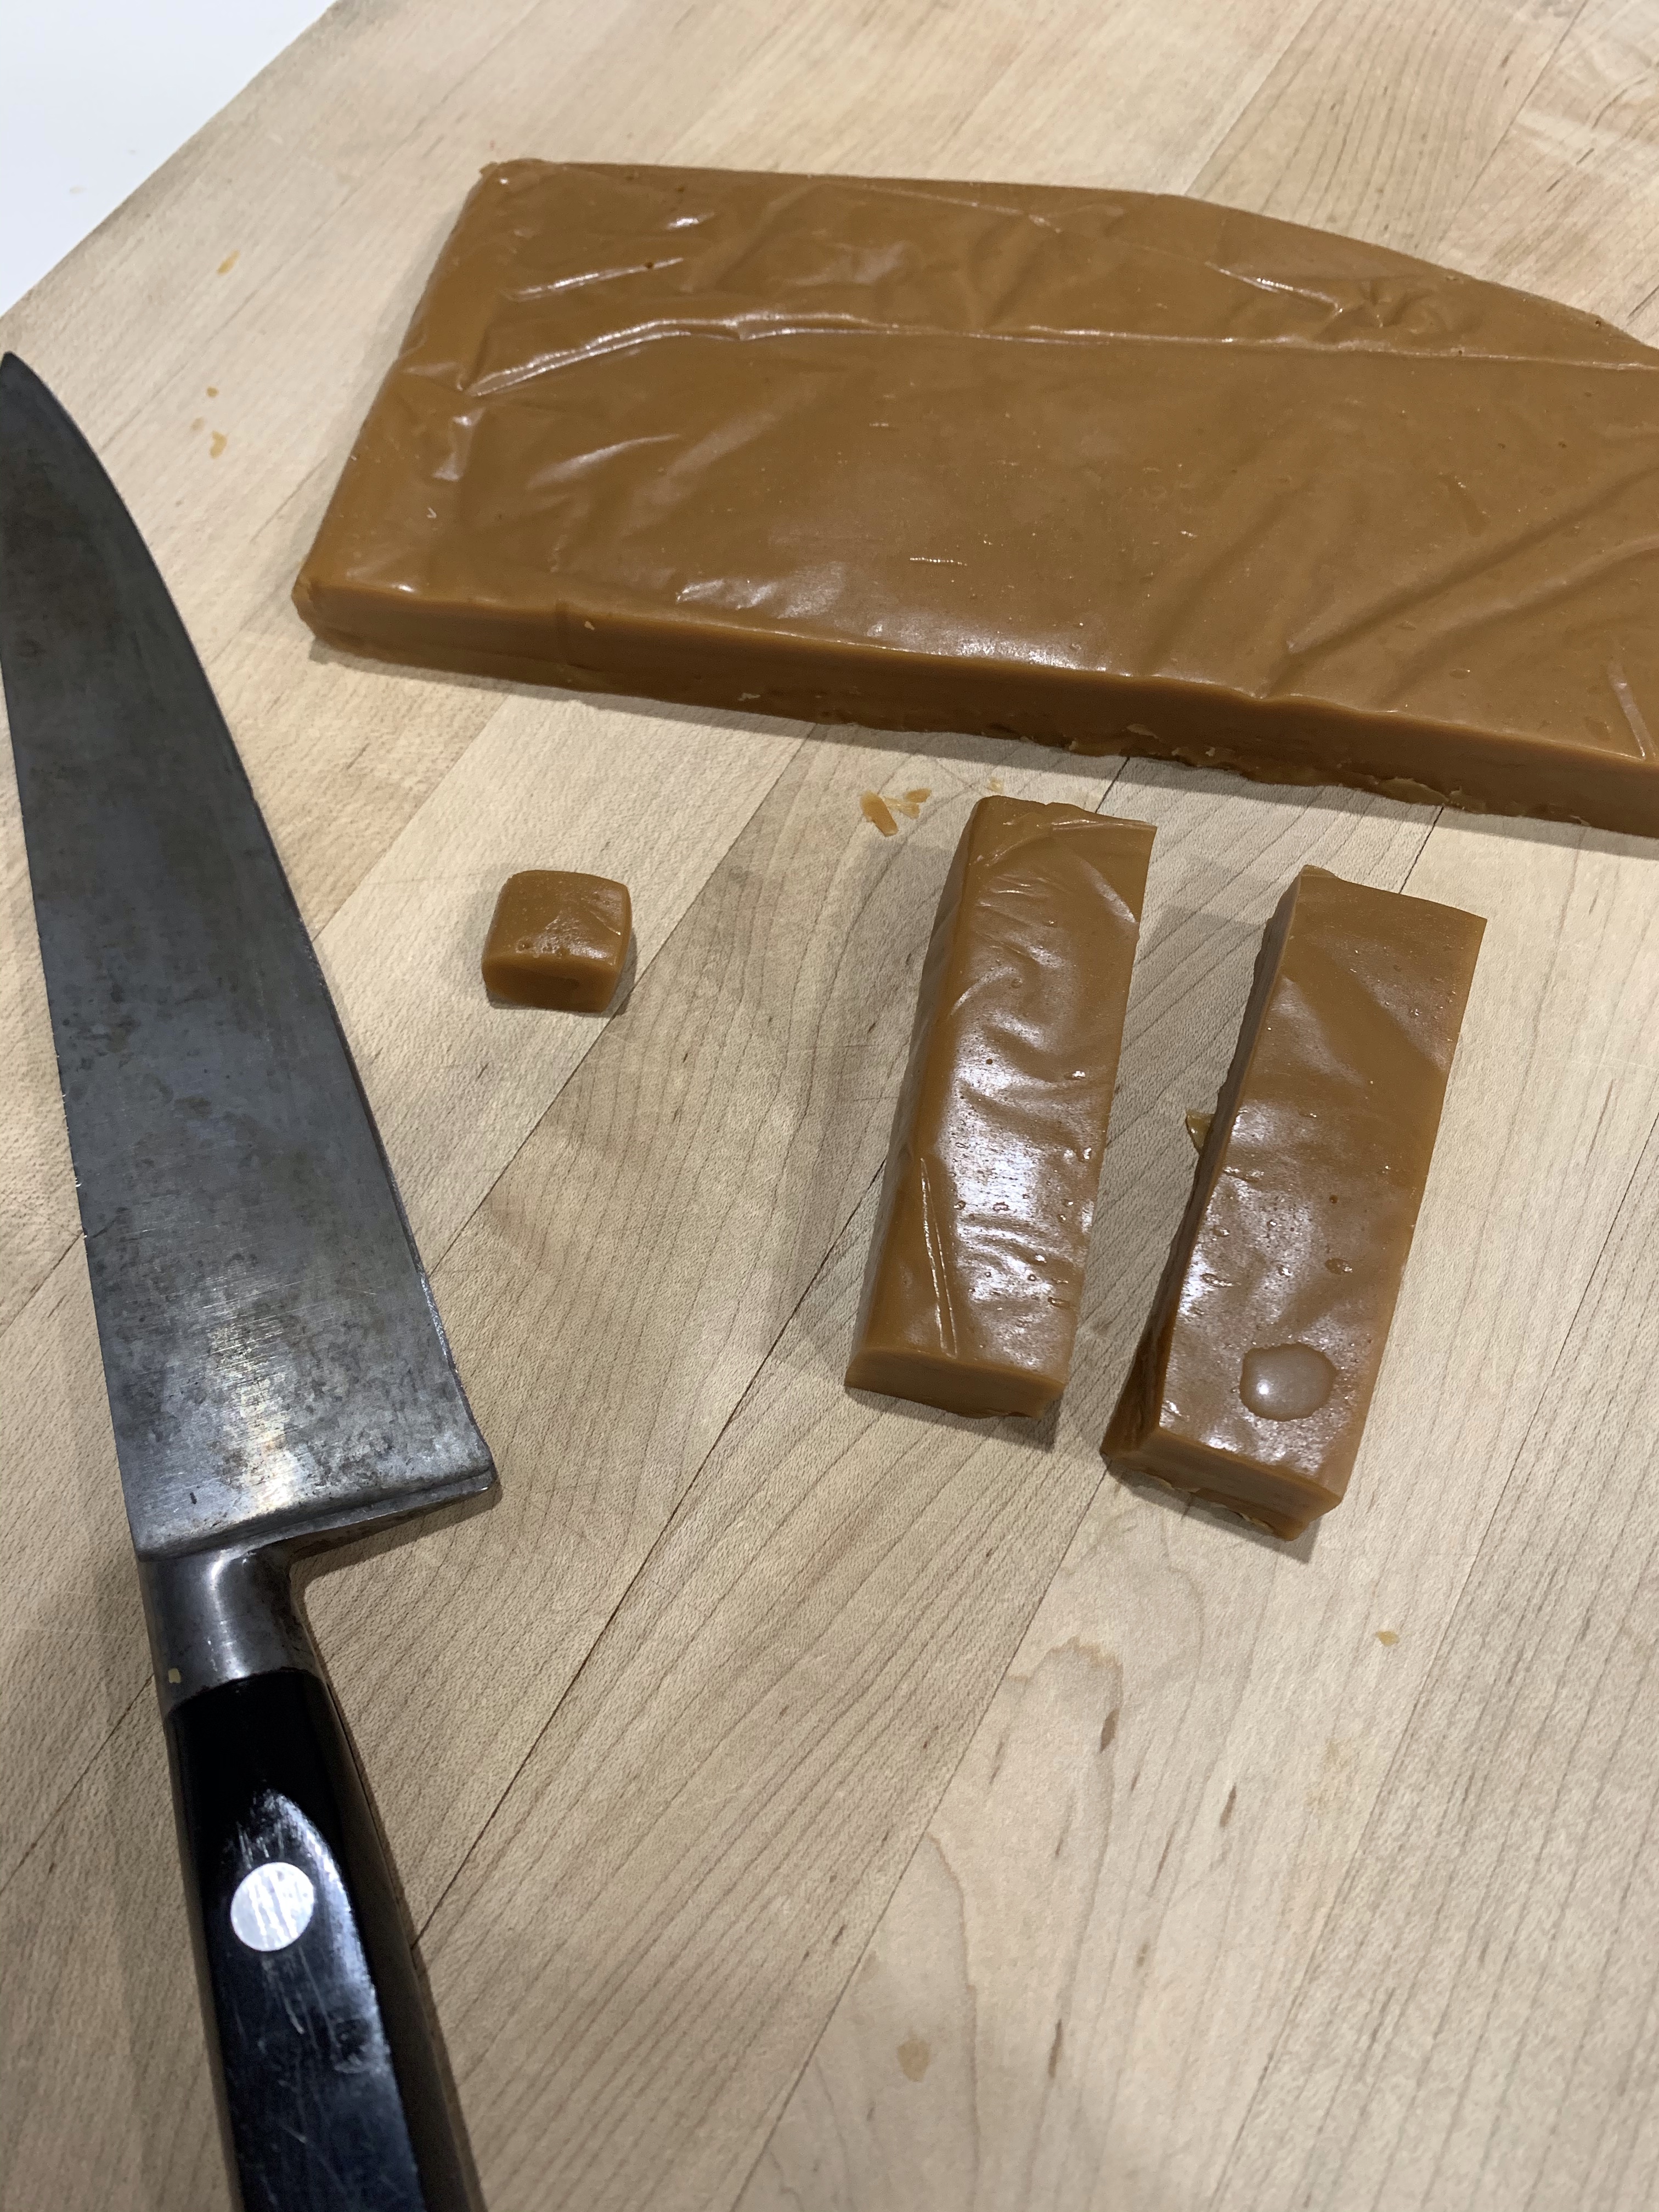
After making the centers by pouring the candy filling into a jelly roll pan, cooling and cutting into 1” x 2” pieces, I dipped to coat the Butterfingers candy bars. The resultant center was too thin for the candy bar. I then tried pouring it into a mold, but it was too thick. Nothing I have was “just right.” However, the flavor and texture was spot-on compared to the commercial candy bar.

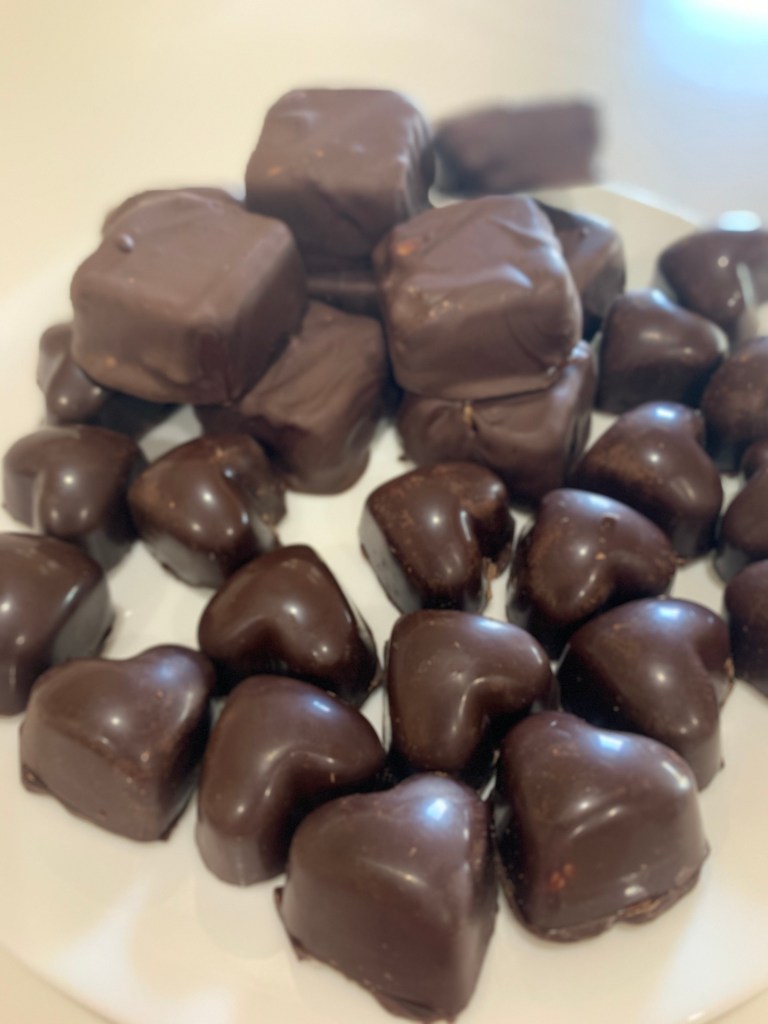
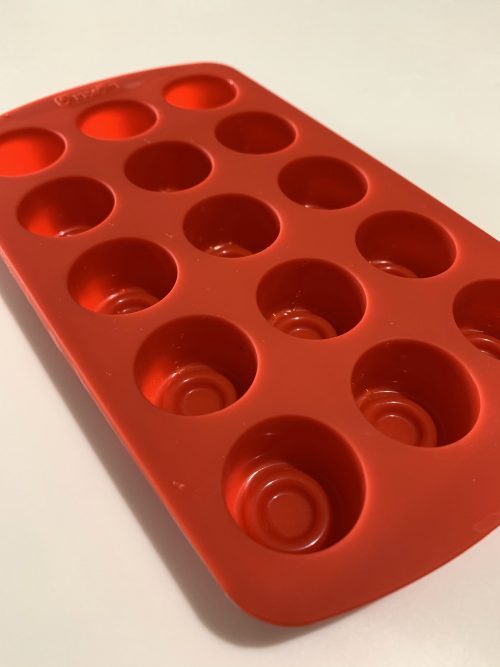
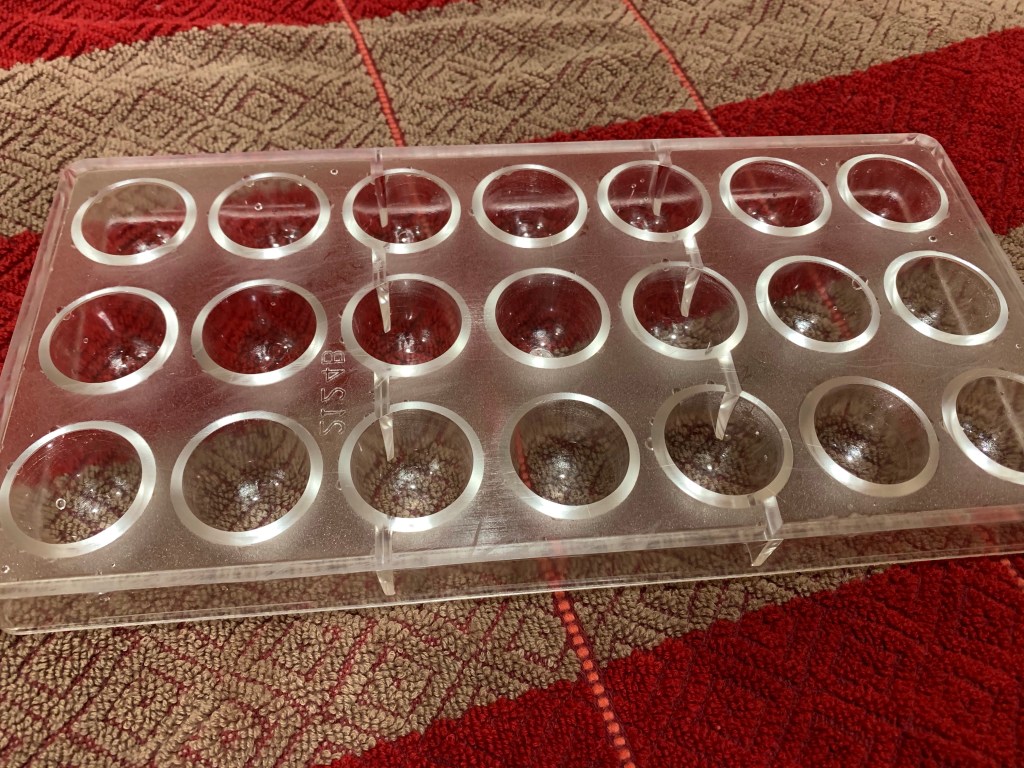
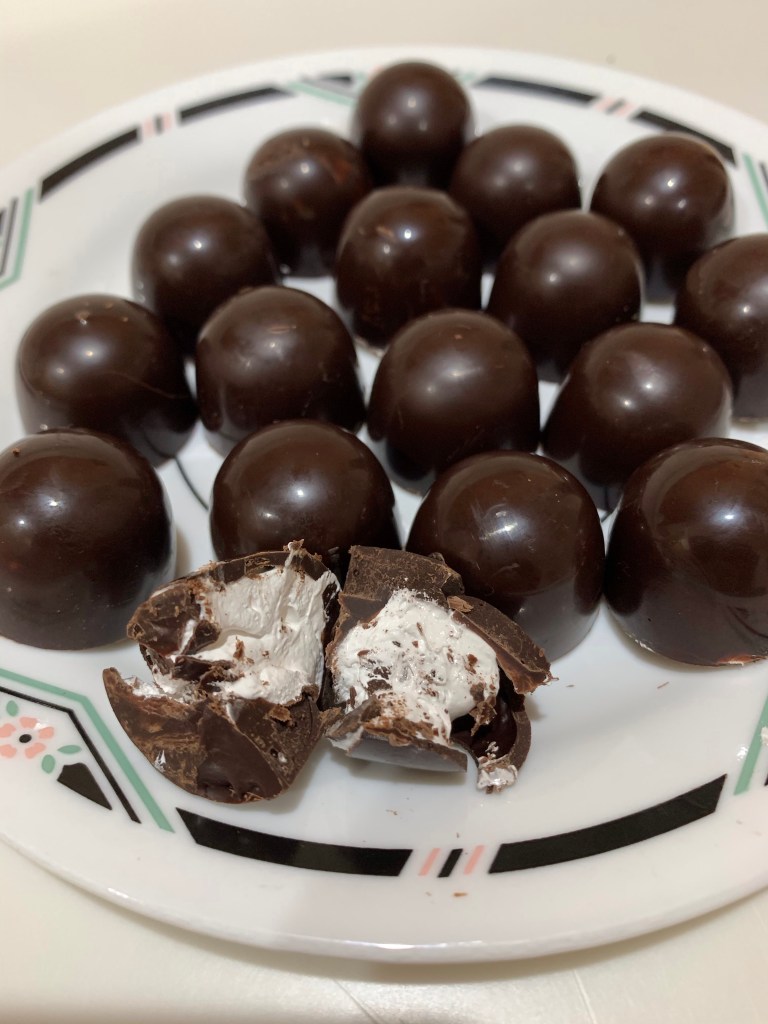
I used a heart shaped polycarbonate mold to make the vanilla cream and Mounds Bar clone. (It is almost Valentines Day after all.) I made a half recipe although the recipe below is for a full recipe Two coats of tempered chocolate painted into the mold made a shell for the filling.

The vanilla cream readily piped into the mold, but the coconut was too dense and lumpy with the coconut so I greased my hands and rolled small balls of the mixture then pressed them into the shell. (I warmed the coconut mixture for the second batch and was able to pipe it.)

Once filled, a layer of tempered chocolate was poured over the top and the excess was scraped off. Tapping the cooled mold on the table released the finished candies.

Mounds Bars

INGREDIENTS
• 5 oz condensed milk, sweetened
• 1 tsp vanilla extract
• 2 cups confectioners’ sugar
• 14 oz coconut, shredded
• 4 cups dark (64% cacao) couverture chocolate

METHOD

  1. Mix the condensed milk and vanilla extract in a bowl.
  2. Add the confectioners’ sugar a little at a time, blending until smooth.
  3. Stir in the coconut.
  4. Temper the chocolate and paint the inside of the mold. It will probably take 2 coats to completely cover the mold. Cool the chocolate between coats.
  5. Grease you hands and roll a small quantity of the mixture into a ball and force into the chocolate coated mold.
  6. Pour chocolate over the top and scrape off the excess. Chill until the top is firm.
  7. Scrape any residual chocolate from the mold and tap on the counter to release.

Vanilla Cream with Invertase

INGREDIENTS (HALF RECIPE)
• 3 tsp Meringue Powder (1 ½)
• 2 cups Fondant Sugar (1)
• 1 to 2 tsp Vanilla Extract (1)
• 1 tsp Invertase (½)
• Food Coloring (optional)
• 3 Tbsp Butter softened (1 ½)
• 3 Tbsp Light Corn Syrup (1 ½)
• 2 Tbsp Water (1)

METHOD

  1. Add the softened butter, meringue powder, light corn syrup, and water to your mixing bowl Using a stand mixer or a hand mixer beat until mixed completely, scraping the bowl to ensure everything is incorporated well.
  2. Add fondant sugar and mix on low speed until the sugar is incorporated, then, beat on medium speed for about 1 minute until it all creams together.
  3. Add invertase, and food coloring and mix well. This was my first recipe using invertase. It is a natural enzyme used to break down the sugar and change it from grainy to smooth.
  4. Scoop the cream filling into a disposable pastry bag and twist the end tightly, securing with a clip or a rubber band.

Butterfinger Candy Bars

(Yields about 96 miniature candy bars)
https://spinningsugar.wordpress.com/2007/11/05/homemade-butterfinger-candy-bars/

INGREDIENTS
• 1/3 cup light corn syrup
• 1/3 cup water
• 1 cup granulated sugar
• 1 cup peanut butter
• Spray Vegetable Oil (Pam, etc.) for keeping the knife lubricated in scoring
• 1 Pound of Tempered Semi-Sweet Chocolate for dipping

METHOD

  1. First begin by greasing a 12-by-17-inch jelly roll pan (with 1-inch sides) with safflower, vegetable or canola oil. Place the pan into a slightly warm oven to warm the pan while making the candy. (Don’t allow the pan to become hot, only barely warm to give you more time to spread and score the candy later.)
  2. In a heavy 2-quart saucepan, combine the corn syrup and water, stirring well to combine. Place over medium-low heat and add the sugar. Cook the mixture, stirring constantly, until it is clear and then stirring often until it reaches a full boil. Clip on your calibrated candy thermometer, raise the heat to medium-high and continue to cook – without stirring – until the mixture reaches 310 degrees (F). During this cooking period, should sugar crystals form above the boiling line, carefully wipe away using a damp pastry brush, but be careful not to touch the boiling mixture. Rinse the pastry brush well – and make certain to blot-dry the brush well – between each swipe.
  3. Remove your pan from the warming oven and place on your work surface.
  4. Remove the candy from heat and add the peanut butter, stirring to blend completely using a clean wooden spoon. Working quickly, pour the mixture onto your well-greased jelly roll pan, and spread as evenly as possible. Score the mass with an oiled, heavy chef’s knife into 1-inch by 2-inch pieces, cutting at least half way through the candy. (The more quickly you do this, the easier and deeper your scoring will be.) It is helpful to spray the knife with cooking oil occasionally to aide the knife in scoring.
  5. Allow the scored mixture to cool at room temperature about 2 hours. When cool and hard, complete cutting the scored pieces using a sharp, heavy knife (I like to use my Chinese cleaver here) and break into individual pieces.
  6. Place the cut candies into the refrigerator while you temper your dipping chocolate and allow to chill for 15 to 30 minutes. Remove the candies from the fridge and dip each piece into the chocolate, then place on parchment paper to allow the chocolate to harden completely (About 3 hours).
  7. Note: You can add a certain flair to the candy by taking a clean dinner fork and touching the tops of each freshly dipped piece raising lines of “peaks” (akin to meringue peaks). Just use the back of the fork laid parallel to the chocolate cops, touch, lift and slightly pull to one side. Looks pretty snazzy….
  8. Store on waxed-paper sheets in an airtight container for up to two weeks.

Twist and Shout – With Chocolate

In a continuing search for places to use chocolate I found Chocolate Torsades. The name derives from the French ‘tornado’ for ‘twist.’

There really isn’t a recipe for this. I used my creme patisserie recipe from the eclairs, (I had some left over.) I also had a leftover sheet of puff pastry, and of course lots of existing chocolate. (Still trying to exhaust the old stock.)

French Chocolate Torsades (Puff Pastry Twists)

INGREDIENTS
• 4 egg yolks
• 1/2 cup of sugar
• 2 tablespoons of flour
• 1 1/2 cups of milk
• 1/2 tablespoons of vanilla
• 1 tablespoon of butter
• 1/4 teaspoon of salt
• 1 sheet Puff pastry (270 g)
• Chocolate chips dark or milk
• 1 egg for egg wash
• Sparkling sugar

METHOD
For the custard

  1. Whisk eggs and milk together and add to all other ingredients (except vanilla) to a medium saucepan.
  2. Bring to boil whisking constantly
  3. Cook until thickened (it will look lumpy, its ok)
  4. Sieve lumpy mixture into a bowl and add 1 tsp vanilla, mix thoroughly
  5. When incorporated, cover with plastic directly on the cream and cool.

    For the Chocolate Torsades
  6. Preheat oven to 410 degrees (215 Celsius)
  7. Roll out puff pastry about 14 inches long or just use the store bought roll
  8. Spread a thin layer of the vanilla custard on top
  9. Sprinkle chocolate chips on top
  10. Fold in half and cut into strips
  11. Twist each strip a few times to create the twist
  12. Whisk one egg in a small bowl and brush the tops of the twists with the egg wash
  13. Place chocolate torsades on baking sheet with parchment paper
  14. Sprinkle with sparkling sugar
  15. Bake at 400 degrees (215 Celsius) for 15 minutes or until golden brown.

A Day In The Life – Act I

So, I started the morning with Pain Au Chocolat, (making, not eating.) I have some opened chocolate I need to use before I open the new bag. To me, baking is a hobby so I like to make everything I can from scratch. I don’t use mixes or other short cuts…. except for puff pastry. In the past I made puff pastry a few times and must admit that what I make is not nearly as good as what is available in the super market.

I buy two brands of puff pastry. Trader Joe sells a box with two 10”x10” sheets. TJ’s is good when you don’t want a huge puff when baked. If you knock it before baking it will puff less than 100%, which is what I used for todays pastry. Pepperidge Farms puff pastry also comes in two sheets per box, but each sheet is conveniently individually wrapped. This pastry puffs 200% if baked without knocking, a little less if you do. Pepperidge Farms is available year round, while TJ’s is only available from roughly Thanksgiving to New Year’s. Buy a few boxes and put them in the bottom of your freezer. I do.

Using Trader Joe’s puff pastry makes Pain Au Chocolat a snap. There is the added benefit it is also delicious.

Pain au Chocolate


INGREDIENTS
Puff pastry (Trader Joe’s)
Chocolate ( I used Guittard’s 63%)
Confectioner’s sugar

METHOD

  1. Roll out puff pastry
  2. Dust with confectioner’s sugar
  3. Cut into 2” wide (Trader Joe’s Puff Pastry – cut 5 long strips, then cut each in half)
  4. Lay chocolate at one end, roll one time, press down gently and roll again, press gently again
  5. Add second row of chocolate and roll one last time, press gently
  6. Chill overnight or at least 2 hours.
  7. Brush with egg wash
  8. Bake 360 deg 20-25 min on parchment lined baking sheet

Chocolat de Couverture Noir

On a visit to a Restaurant Depot my Q.C. Department convinced me to buy 11 lbs of bulk Chocolat de Couverture Noir. (64% is dark chocolate is not very bitter. I use 73% for dark bitter chocolate.) My question is… what should I make with it?

I am thinking Pain au Chocolat, chocolate croissants, chocolate chip cookies and/or brownies. Note the fluidity on the package. This chocolate is suitable for coating caramel, creams, berries and other confections.

Last year I made an over the top chocolate/orange tart. My neighbor’s orange tree has a abundance of oranges too high up for her to harvest. Hmmm……

Maybe something I made before: Eclairs? Chocolate Babka? Soufflés? Chocolate pudding? (Try the easy home made chocolate pudding recipe.) Chocolate chip scones? Lava Cake? Chocolate Fudge? Oh yes, chocolate fudge!!! (Maybe chocolate/peanut butter fudge, the QC department doesn’t like Chocolate/peanut butter fudge.)

Andy other suggestions?????

I care. You Care. Eclairs!

It’s Wednesday and I don’t (usually) play golf on Wednesday. What will I do to occupy my time? What will I do? Well, I froze some choux pastry a couple of months ago, just to have some for an emergency. Choux freezes well but should be used within a few months. Plus I had some leftover chocolate glaze. All I needed was some creme patisserie (which I made before dawn today,) and I could have some eclairs! (I also made a loaf of bread later in the morning.) A very full day!!

Recipe and technique are here: https://abatteredoldsuitcase.com/2016/12/19/a-b-c-d-eclairs/

White Chocolate Mousse

It’s Pi day, so in rebellion, I made white chocolate mousse for mirror glazing tomorrow and chocolate-chip/raspberry brownies with chocolate ganache for the chewy chocolate center of my galaxy mousse cakes.

Luckily, there was extra mousse today for quality control sampling tonight. I had mine with a raspberry coulis and Fran paired it with chocolate sauce. Excellent flavor and texture. Tomorrow I will mirror glaze them experimenting with a galaxy motif. Check back soon.

White Chocolate Mousse

INGREDIENTS
• 1 Envelope powdered gelatin
• 12 oz White chocolate chips
• 2 1/2 Cups Heavy cream

METHOD

  1. Dissolve gelatin in 1/4 cup cold water, and set aside for 5 minutes.
  2. Place chocolate in the bowl of a food processor, and pulse until very finely chopped.
  3. Fill a large bowl with cold water and ice and set aside.
  4. Place 3/4 cup cream in a small saucepan, and bring just to a boil over medium-high heat. Add
    the dissolved gelatin, and stir for 30 seconds to dissolve completely. Pour into food processor
    with the motor running, and process until chocolate mixture is smooth.
  5. Transfer to a medium bowl and place over ice water bath. Chill until mixture is thick enough to
    fall from a spoon and form ribbons on the top of the melted chocolate.
  6. Whip remaining 1 3/4 cups heavy cream to soft peaks. Fold into chocolate mixture. If not using immediately, refrigerate in an airtight container or fill individual dessert dishes cover and place
    in fridge.

Good for the Soul

Some people say confession is good for the soul. They may be right but there is no question chocolate is. However, I do have a confession to make. Actually, I have two (at least two) confessions to make.

Fran, my wife of nearly, well let’s just say many, years, frequently tells me due to my New England heritage and upbringing I am a frugal person. Actually, she uses another word, frugal is mine. I acknowledge she is correct, but I contend that’s not a bad thing. For example, I found three 6 ounce bags of Scharffen Berger bittersweet (70% cacao) chocolate that bloomed while stored in the cupboard. As everyone knows chocolate bloom can be repaired by melting the chocolate and allowing it to re-crystallize.

Now I confess (#1) it seemed a waste for me to spend the time and energy, meaning expensive natural gas, to melt and re-crystallize the chocolate with nothing to show for the effort. Not only would it be wasteful, according to Fran, it would be contrary to my nature. Luckily, I recently acquired a new chocolate mold and had all the ingredients in the cupboard to make some peppermint cream filling. This allowed me to finish up the chocolate and test the new mold.

New Bullet Shaped Poly Carbonate Mold

After golf this morning I frugally decided to make some filled chocolates. I tempered and thereby repaired, all 18 ounces and made some peppermint cream filled candies.

The round candy is peppermint from the new mold. The cubes are caramels.

Unfortunately, there was too much tempered chocolate left over, but with my lucky streak intact I had some extra caramel from another batch of candies I made a couple of weeks ago. I dipped 20 caramel cubes in the remaining chocolate and set them aside to cure.

At this point there was barely enough tempered chocolate to fill and seal the new mold to make one more batch. I now have peppermint and previously made vanilla and raspberry. I also confess (#2) what I never tried, but wanted to, was chocolate coated marshmallow creams. While “fluff” is very sweet, the bittersweet chocolate provides a nice balance, plus I have only made marshmallow at home once before and I like to practice. Unfortunately, I only needed a few ounces and the recipe I have makes almost 2 pints, most of which is now sealed and sitting on the counter.

The marshmallow filled chocolates didn’t cut well but the texture is evident

I was pleasantly surprised I could hold the chocolate in temper for the 30 minutes or so it took to make and cool the marshmallow. The chocolate temperature varied between 85 and 95 degrees as it sat on a double boiler. I checked the temperature frequently and turned the burner on briefly from time to time to keep the temperature fairly constant.

Marshmallow Recipe

INGREDIENTS
• 1/3 cup water
• 3/4 cup granulated sugar
• 3/4 cup corn syrup or honey
• 3 large egg whites room temperature
• 1/2 tsp cream of tartar
• 1 tsp vanilla extract

METHOD
1. Place water, sugar, and corn syrup (or honey) in a medium saucepan. Stir to combine.
2. Insert a candy thermometer into the pot and heat over medium-high. Do not stir from this point on as crystals will form.
3. Ensure mixer bowl and whisk are completely grease free.
4. Place egg whites and cream of tartar in the bowl of a stand mixer.
5. When the sugar syrup reaches about 225°F, start whipping the egg whites to soft peaks. Approx 3-4mins.
6. When the whites are ready, the sugar syrup should be at 240°F. Remove from the heat, turn mixer to medium and very slowly and carefully pour the sugar syrup into the whites in a thin, steady stream.
7. Once all of the syrup is in, set mixer to medium/high and continue whipping. The whites will deflate at first, but they will thicken and fluff up.
8. Continue to whip for 7-8 minutes, or until the mixture is thick and glossy.
9. Add in vanilla and whip until the fluff has cooled.
10. Pour into an airtight container and store for up to 2 weeks at room temperature.

There’s Chocolate, Then There’s Chocolate

Sigh, there are many, many varieties of chocolate, and so little time.

I am a fan of dark chocolate, (not intense 85%+ cacoa but a nice 52-70%.) I find the flavor more intense than milk chocolate (34%) and of course there are the currently purported health benefits of dark chocolate. Not only do I have to contend with percent cacao but also many different manufacturers. I should probably create a spreadsheet for them all.

I am also experimenting with fillings for chocolate candies, a tough job, but someone really should do it. Last month I made two new fillings, buttercream and fresh raspberry/chocolate ganache. Both were excellent, but I wanted some candies with a soft gooey filling.

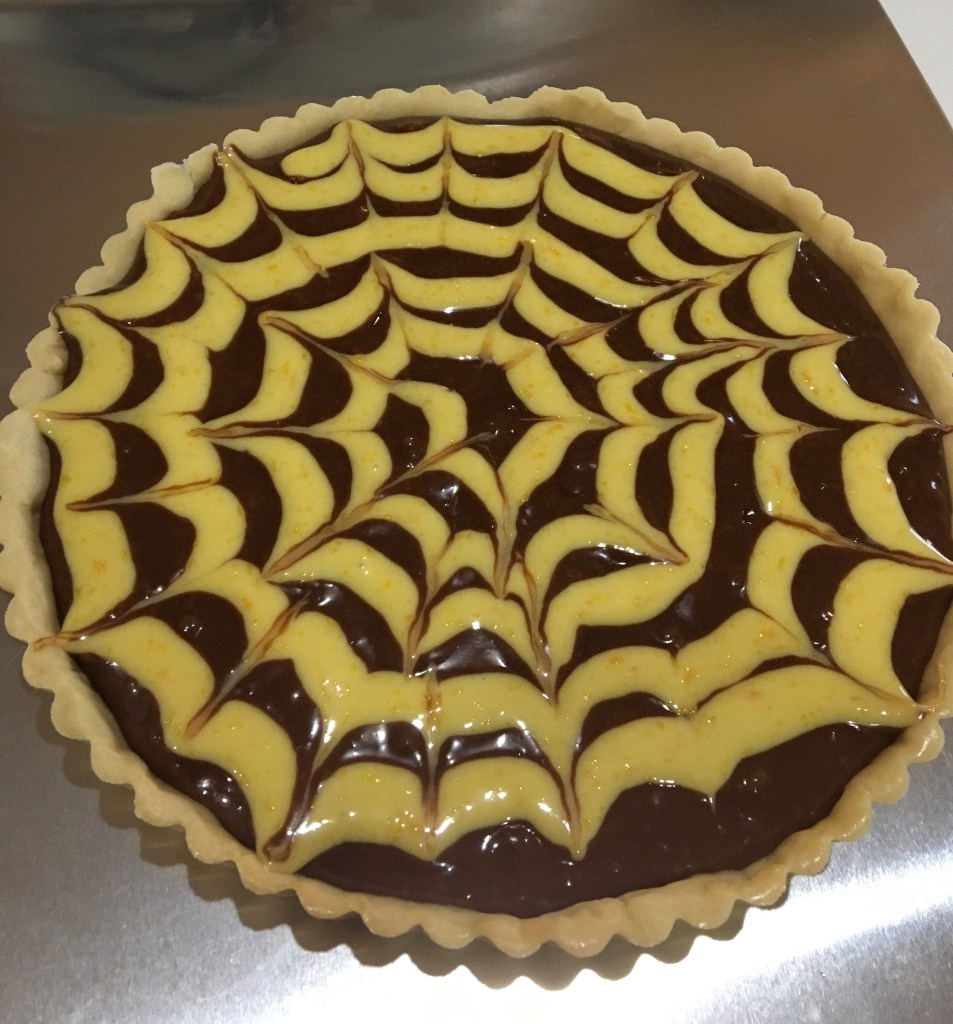
This morning I made a batch with some Guittard 46% semi-sweet baking chips I picked up at the grocery story a couple of weeks ago. I thought these might be a good compromise between the dark that I like and the milk chocolate that Fran prefers.

I tempered the chocolate, coated the inside of a heart shaped silicone mold and let it cure. This morning I made a batch of cream filling and divided it into two. One was flavored with peppermint to make some gooey peppermint patties, the other with vanilla for plain vanilla chocolates.

I want to make this same recipe but flavor with fresh strawberry or raspberry or orange ganache. I am experimenting with fillings as much as I am with different chocolates.

Homemade Peppermint or Vanilla Patties

INGREDIENTS

• ½ – ¾ cup sweetened condensed milk (amount depends on desired consistency)

• 1 ½ teaspoons peppermint extract (optional)

• 339g (3 cups) powdered sugar

Optional Dipping Chocolate or use tempered chocolate in mold

• 8 ounces dark chocolate chopped

• 2 teaspoons oil

METHOD

1. In a medium size bowl mix the sweetened condensed milk, peppermint extract, and powdered sugar together. Add more sweetened condensed milk until mixed to viscosity desired.

2. Divide dough into number of flavors desired and place each portion in a small bowl

3. Add flavorings and mix well.

4. Pipe filling to fill each chocolate well to within 1/8” of the top of the well

5. Let set for 10 minutes

6. Add enough tempered chocolate to each well to seal the filling inside.

7. Scape bottom of mold to remove excess chocolate

8. Store the peppermint patties in the fridge until ready to be served! Enjoy!

A Truffle Trifle

After I finished the caramels and before the chocolate lost its temper (and had a hissy fit) I coated the inside of a silicone candy mold with the leftover chocolate. I left it in the fridge until today. (I should have taken a picture before filling. Dang!)

Beyond what I used to coat the mold I had some chocolate left over from making the chocolate coated caramels and thought, “Hmmm… I also have some raspberries in the fridge that I need to use soon.” Well, one thing led to another so I made some chocolate covered raspberry/chocolate truffles.

I made the raspberry ganache using the recipe below, filled each well of the mold leaving some room at the top to cover with more chocolate. I didn’t bother re-tempering the tops of the chocolates and they seem fine. Actually, the tops become the bottoms of the chocolates once they are removed from the mold.

The ganache stays nice and soft and the raspberry/chocolate flavor was excellent. I may try less chocolate in the ganache next time to make the flavor a bit more raspberry forward.

I also want a nice chocolate covered vanilla cream center, and maybe a nice peppermint filling too.

Chocolate Raspberry Truffles Recipe
INGREDIENTS
• 1 package (10 oz.) fresh raspberries
• 1/4 cup powdered sugar
• 1 lb. semisweet chocolate chips – try with 1⁄2 lb. chocolate chips
• 3/4 cup cream
• 2 tbsp. light corn syrup
• One candy mold coated with tempered chocolate
OR Alternatively
• 1 lb. chocolate candy coating (for dipping)


METHOD

  1. Blend or food process the raspberries until they are liquid. Sieve the raspberry puree into a small saucepan.
  2. Add the powdered sugar to the raspberry puree and heat it over medium heat, stirring frequently, until it is thick and syrupy and reduced by about half. Remove the puree from heat and set aside.
  3. Place the chocolate chips in a large bowl and heat the cream (I microwave in 30 sec intervals) until bubbles start to form around the edges, but do not allow it to come to a full boil. Once simmering, pour the hot cream over the chopped chocolate and allow it to sit for a minute or two to soften and melt the chocolate before whisking the chocolate and cream together gently, until the chocolate is melted and the mixture is smooth and homogenous.
  4. Add the corn syrup and raspberry puree to the chocolate mixture, and whisk it all together. Cover the surface of the raspberry ganache with cling wrap, and refrigerate until it is thickened.
  5. Add enough raspberry ganache to each tempered chocolate coated mold to within 1/8” of the top. Cover the top of each mold well with melted chocolate. It doesn’t appear to need to be tempered at this point. Chill and when nearly softened scape the bottom of the mold to remove excess chocolate.
    If you are going to dip the raspberry ganache in chocolate chill until it can be formed in small balls (1” or less diameter) and placed on a lined cookie sheet
  6. Alternative coating method:
  7. Using dipping tools or a fork, dip a truffle into the chocolate. Bring it out of the chocolate and allow the excess to drip back into the bowl. Place the coated truffle back onto the baking sheet and repeat with remaining truffles and chocolate.
  8. Place the truffles in the refrigerator to set the candy coating for about 30 minutes. If desired, you can melt red candy coating (or tint white coating with red candy coloring) and drizzle a small amount over the truffles decoratively.
  9. Place the candy coating in a large microwave-safe bowl. Microwave in one-minute increments until melted, stirring after every minute to prevent overheating. Stir until the coating is completely smooth. Allow the coating to cool until it is barely warm. Do not let it start setting up, but let it cool down so that it does not melt the truffle fillings.
  10. Chocolate raspberry truffles can be stored in an airtight container in the refrigerator for up to two weeks.

Caramel on the Bay

It’s that time of year again. No, not a trip to Carmel, it’s time for chocolate covered caramel candies. I made a single recipe and formed it into a block 8”x8”x0.75”.

The block was cut into strips, about 1”x4” and those in turn were cut into small pieces for incorporation into the tempered chocolate. I have several silicone molds that require different sized caramels.

Each well of the mold was filled (about 4 at a time) and a piece of caramel was pushed into the well and covered. Once the chocolate hardened the excess was scraped off.

The extra caramel was cut into small pieces, wrapped in wax paper to be eaten, or given away.

CARAMELS

INGREDIENTS

  • 1 cup butter
  • 1 pound brown sugar (2 cups)
  • dash salt
  • 1 cup (288g) light corn syrup
  • 14 oz can sweetened condensed milk
  • 1 tsp vanilla

METHOD

  1. Melt the butter in 3 quart or larger saucepan.
  2. Add the brown sugar and salt and combine. Stir in the corn syrup, mix well.
  3. Gradually add the sweetened condensed milk, stirring constantly.
  4. Cook and stir over medium heat to firm ball stage (245°F) for harder caramels, 240°F for softer.
  5. Remove from heat, stir in vanilla. Pour into 9×9″ parchment-lined pan.
  6. Cool, cut into pieces and wrap in wax paper.

Tempering Chocolate

Stir constantly during the steps and avoid having moisture from coming in direct contact with the chocolate:

  1. Melt chocolate, in a double boiler, to the following temperatures as measured with a chocolate thermometer: Dark 120°F, Milk 115°F, White 110°F.
  2. Cool chocolate to the following temperatures: Dark 82°F, Milk 80°F, White 78°F.
  3. Reheat chocolate to the following temperatures: Dark 90°F, Milk 86°F, White 82°F.

It is now tempered.

KEEP CHOCOLATE IN TEMPER: Ideal temperatures are: Dark 88-90°F, Milk 86-88 degrees F, and white 82-84°F. If the chocolate hardens, you must start the tempering process again.