Grace’s sixth birthday is a space themed extravaganza so I made a galaxy cake. It’s more of a solar system cake, but not our solar system.
The cake is a six layer stacked extreme chocolate cake. A cardboard cake board separates each two layers to make cutting and serving easier. Each layer is a 9” round cake, and the “internal” cake board is 8” to allow a smooth buttercream transition between layers. The small white stars are tempered white chocolate made with a silicon mold. The larger stars, around the base, are various colors of white chocolate, again formed using a silicon mold.
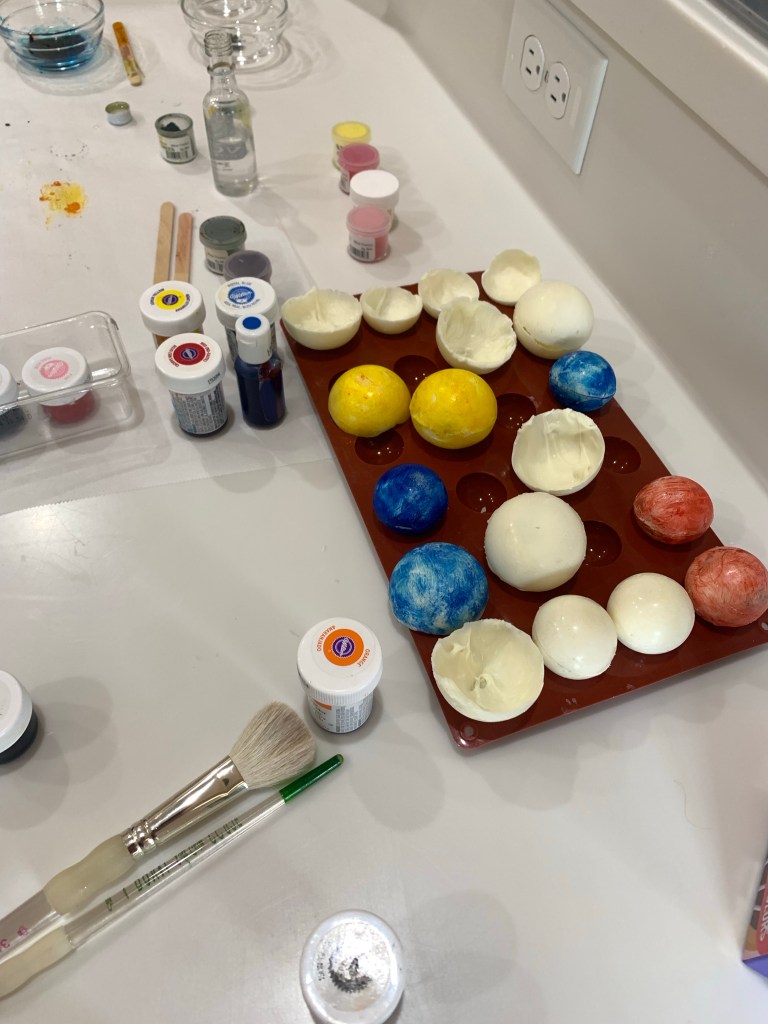
The planets are white chocolate made with a variety of hemispherical silicon molds and painted with decorating colors mixed with vodka. Some of them were fused together to make spheres, the ones on the side of the cake were left as hemispheres. Slightly melting the edges of the hemisphere or the bottom of the spheres helped them adhere to the blue buttercream.
Before adding the planets I splattered the cake with white food coloring. The “space woman” was purchased and a printable decal image of Grace was pasted on the silver faceplate of the space suit.
Chocolate bars do NOT grow on trees. Growing chocolate is labor intensive as most of the harvesting and processing of cocoa and production of chocolate is done by hand. We toured the Lavahola Cocoa farm yesterday (Monday, May 17,) in the rain.
The Lavahola Chocolate Farm maintains a small garden near the visitor center. It contains a variety of native plants, and houses a few ducks.
There are three types of cacao, Criollo, Forastero and Trinitario, all of which are grown at Lavahola.
Forastero is the hardiest, higher yield and most reliable strain. It is therefore the least expensive and most profitable. Unfortunately, it is bland and bitter and requires more additives to make it into a salable product.
Criolo is the connoisseurs go-to chocolate. It is quite rare and accounts for about 3% of the worlds supply, and therefore quite expensive.
The Trinitario bean was the happy result of a disaster in Trinidad. The Criollo plantations were destroyed by a hurricane (or disease) so the farmers replanted with the high yield Forastero to rebuild their industry. The new trees were planted on/near the roots of the Criollo trees and the resultant hybrid, Trinitario, is hardier than Criollo and tastier than Forastero.
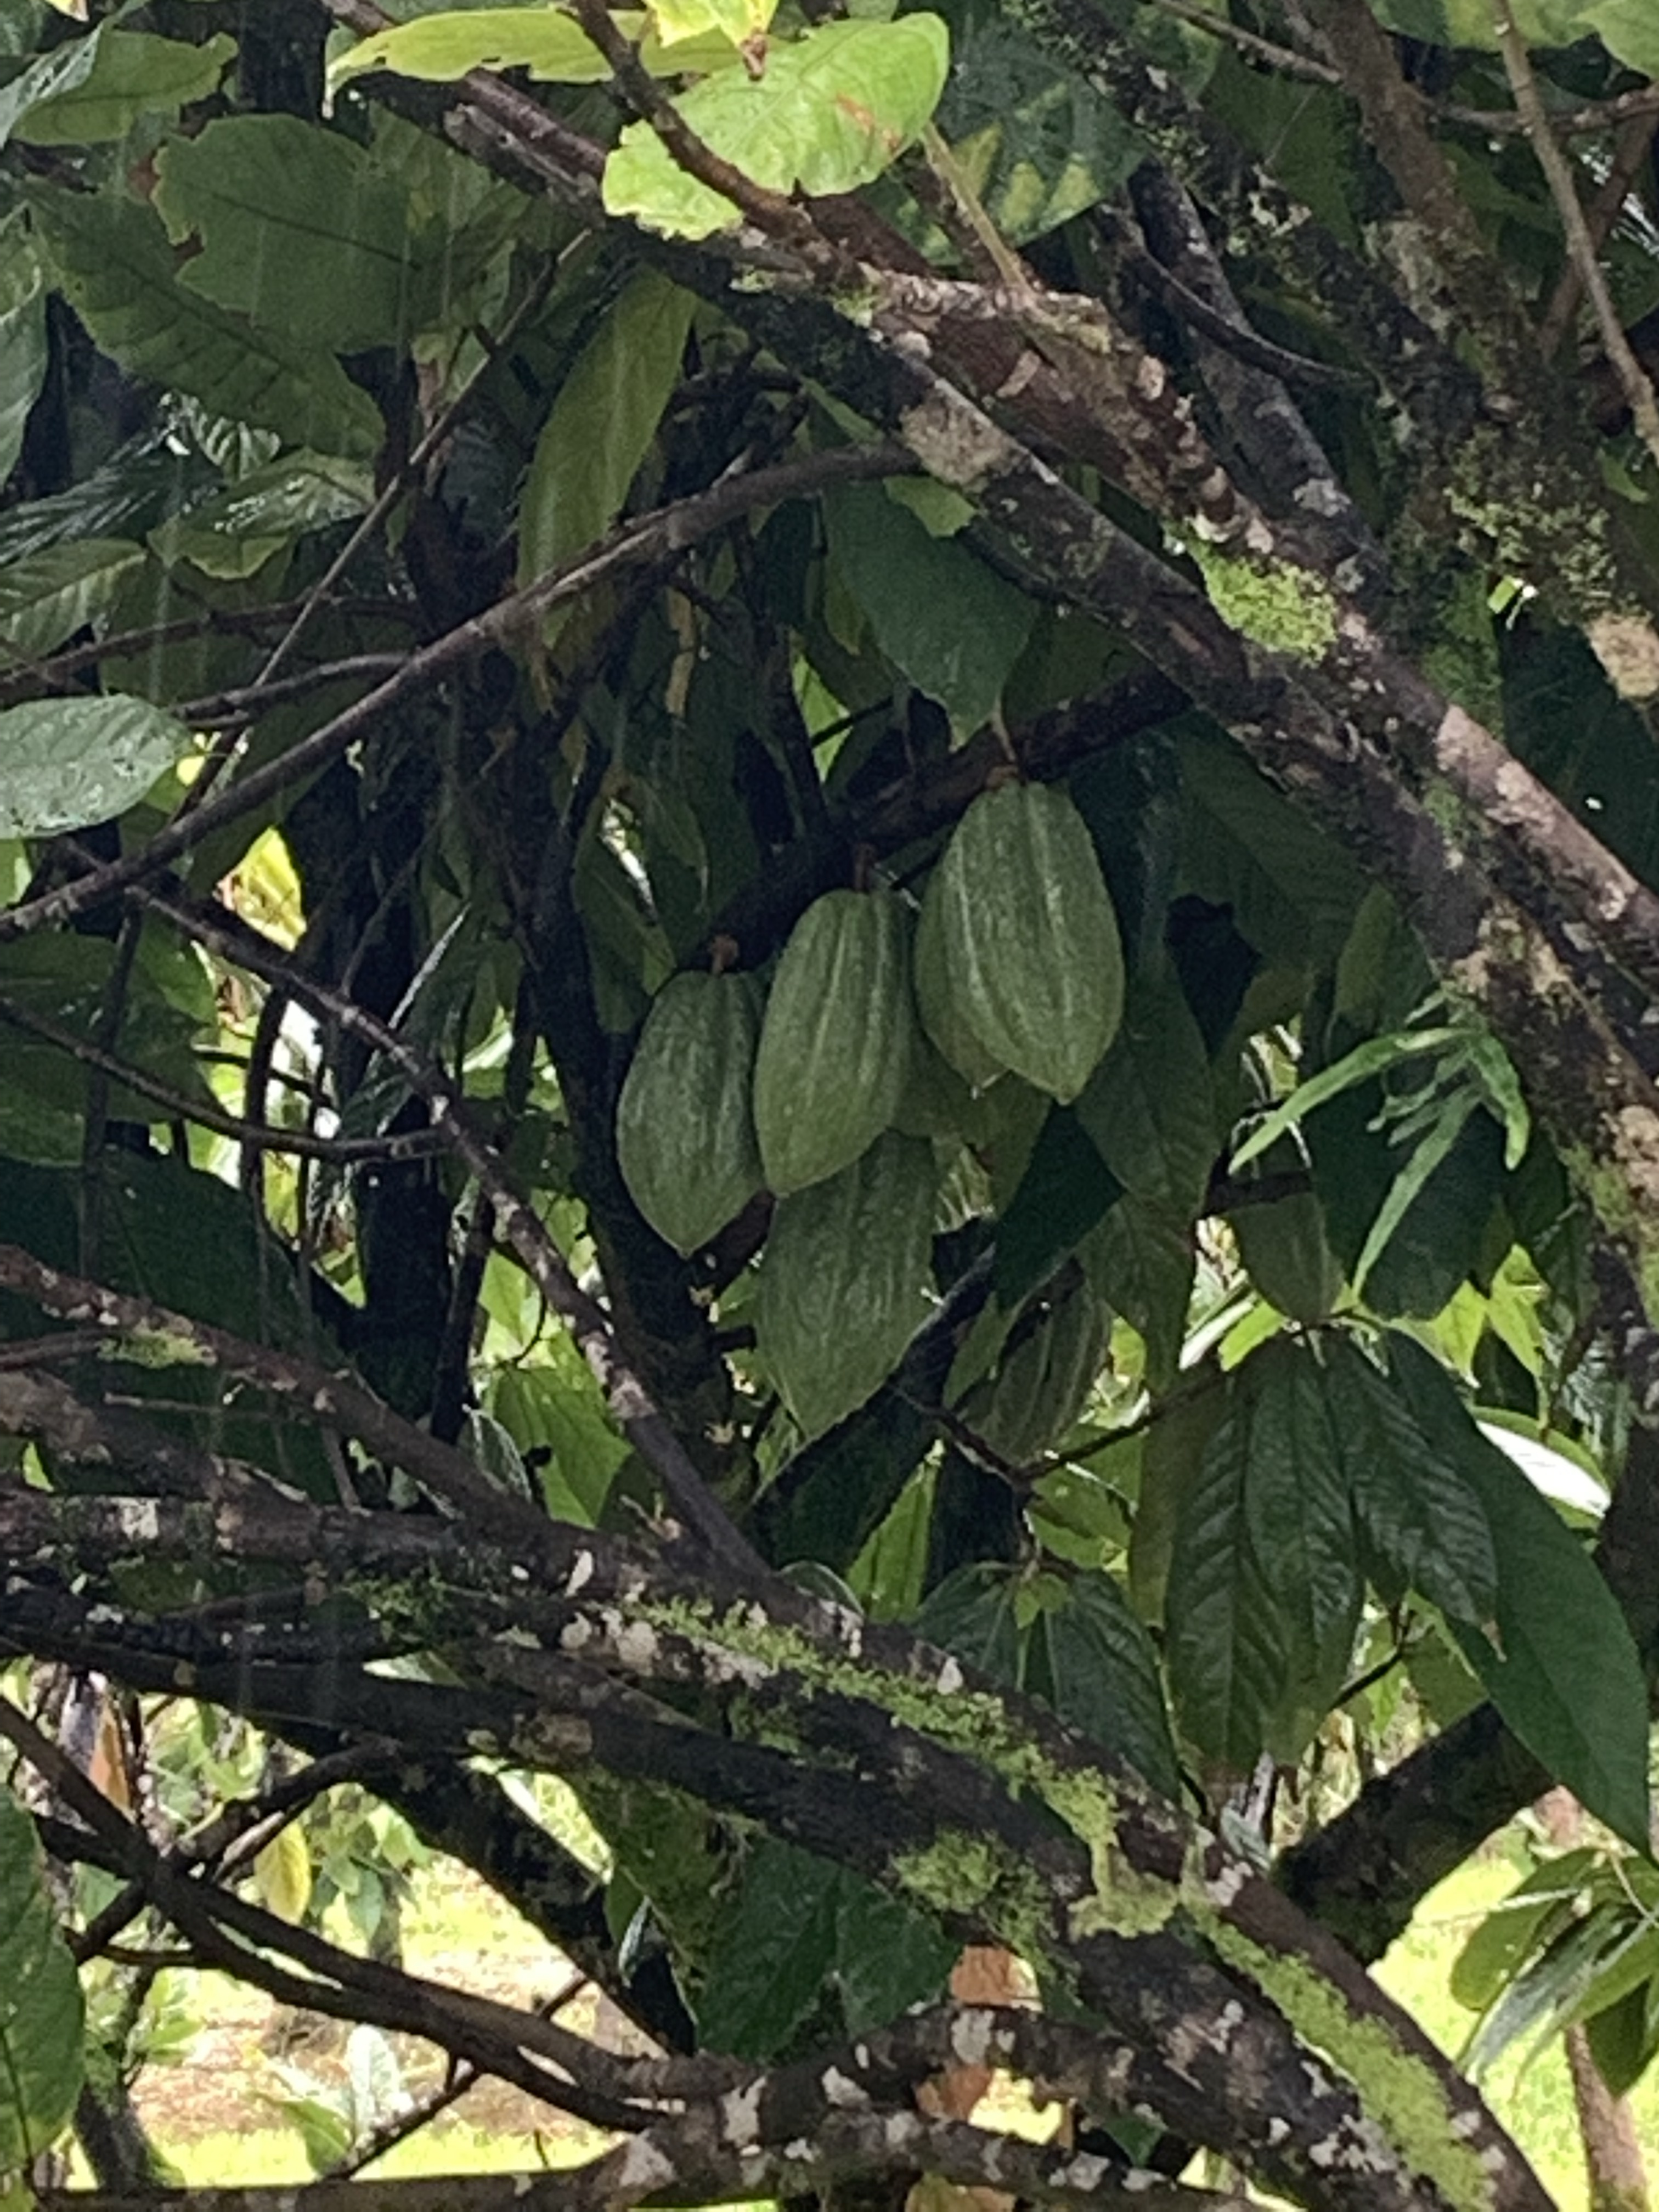
Cacao grows on small trees and start producing after about 4 years. It is climate sensitive and this latitude is as far north as cacao will grow. In fact the higher elevation (200’) on one end of the farm is too cool to grow cacao.
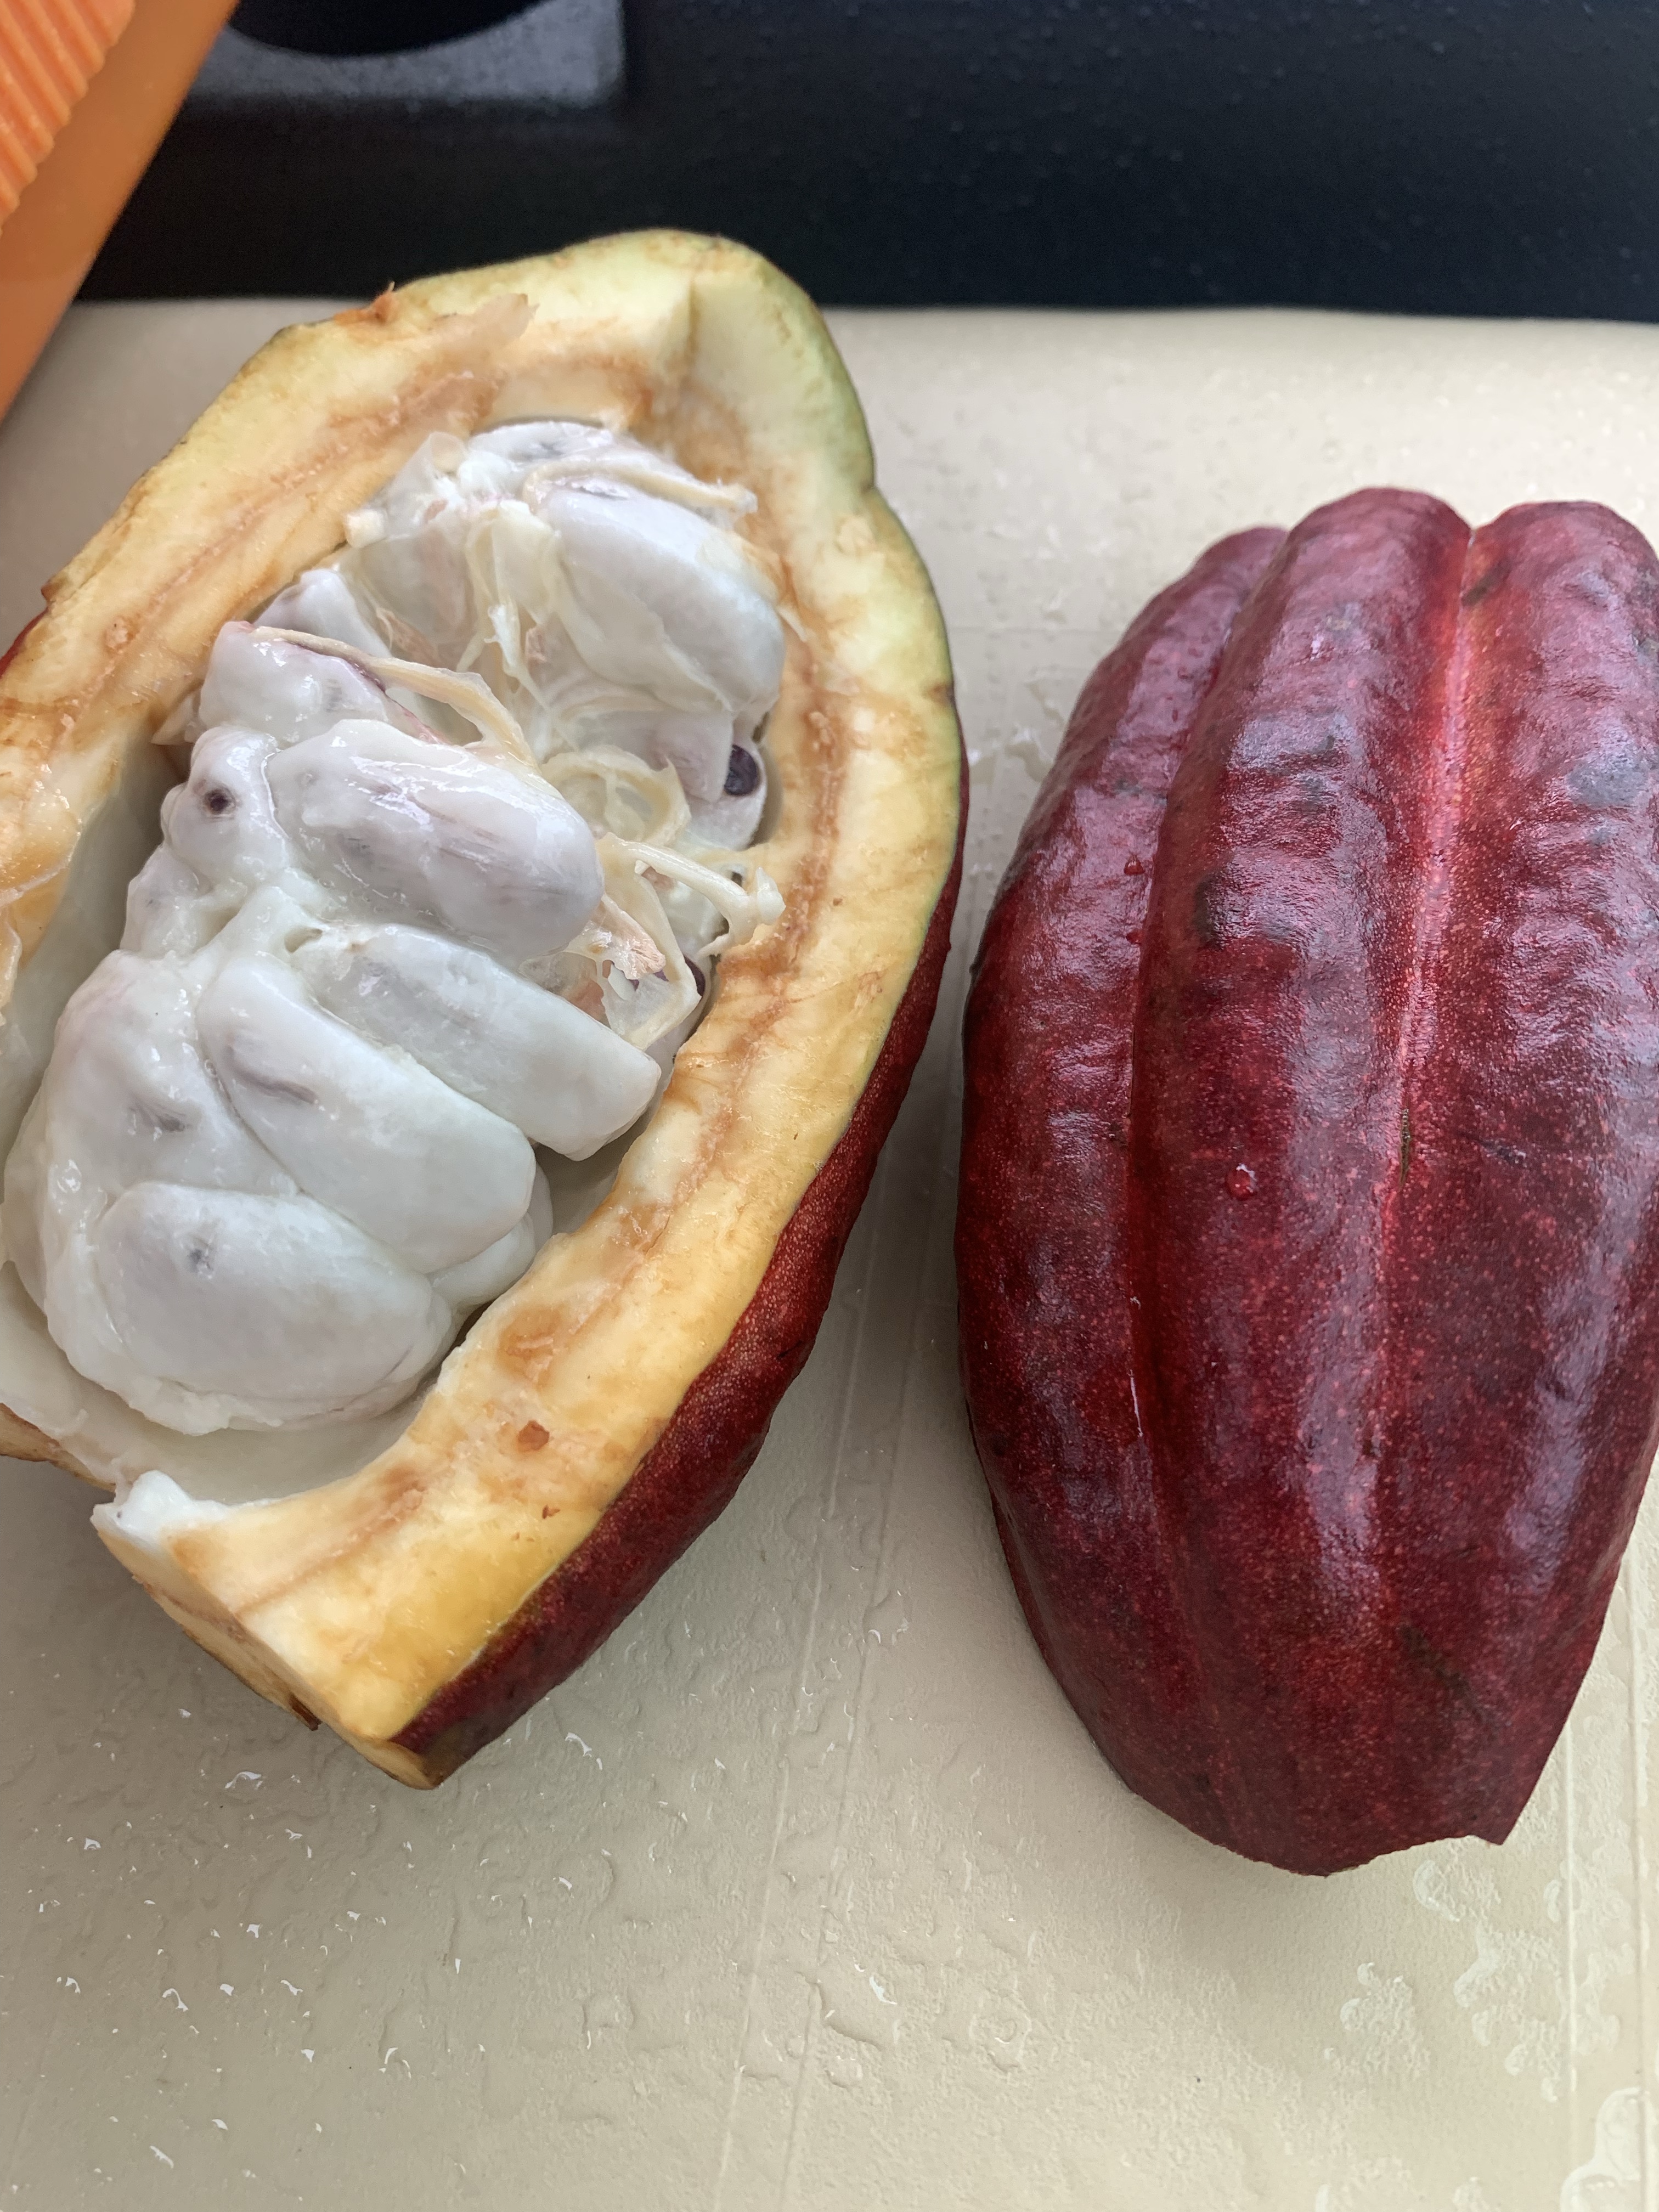
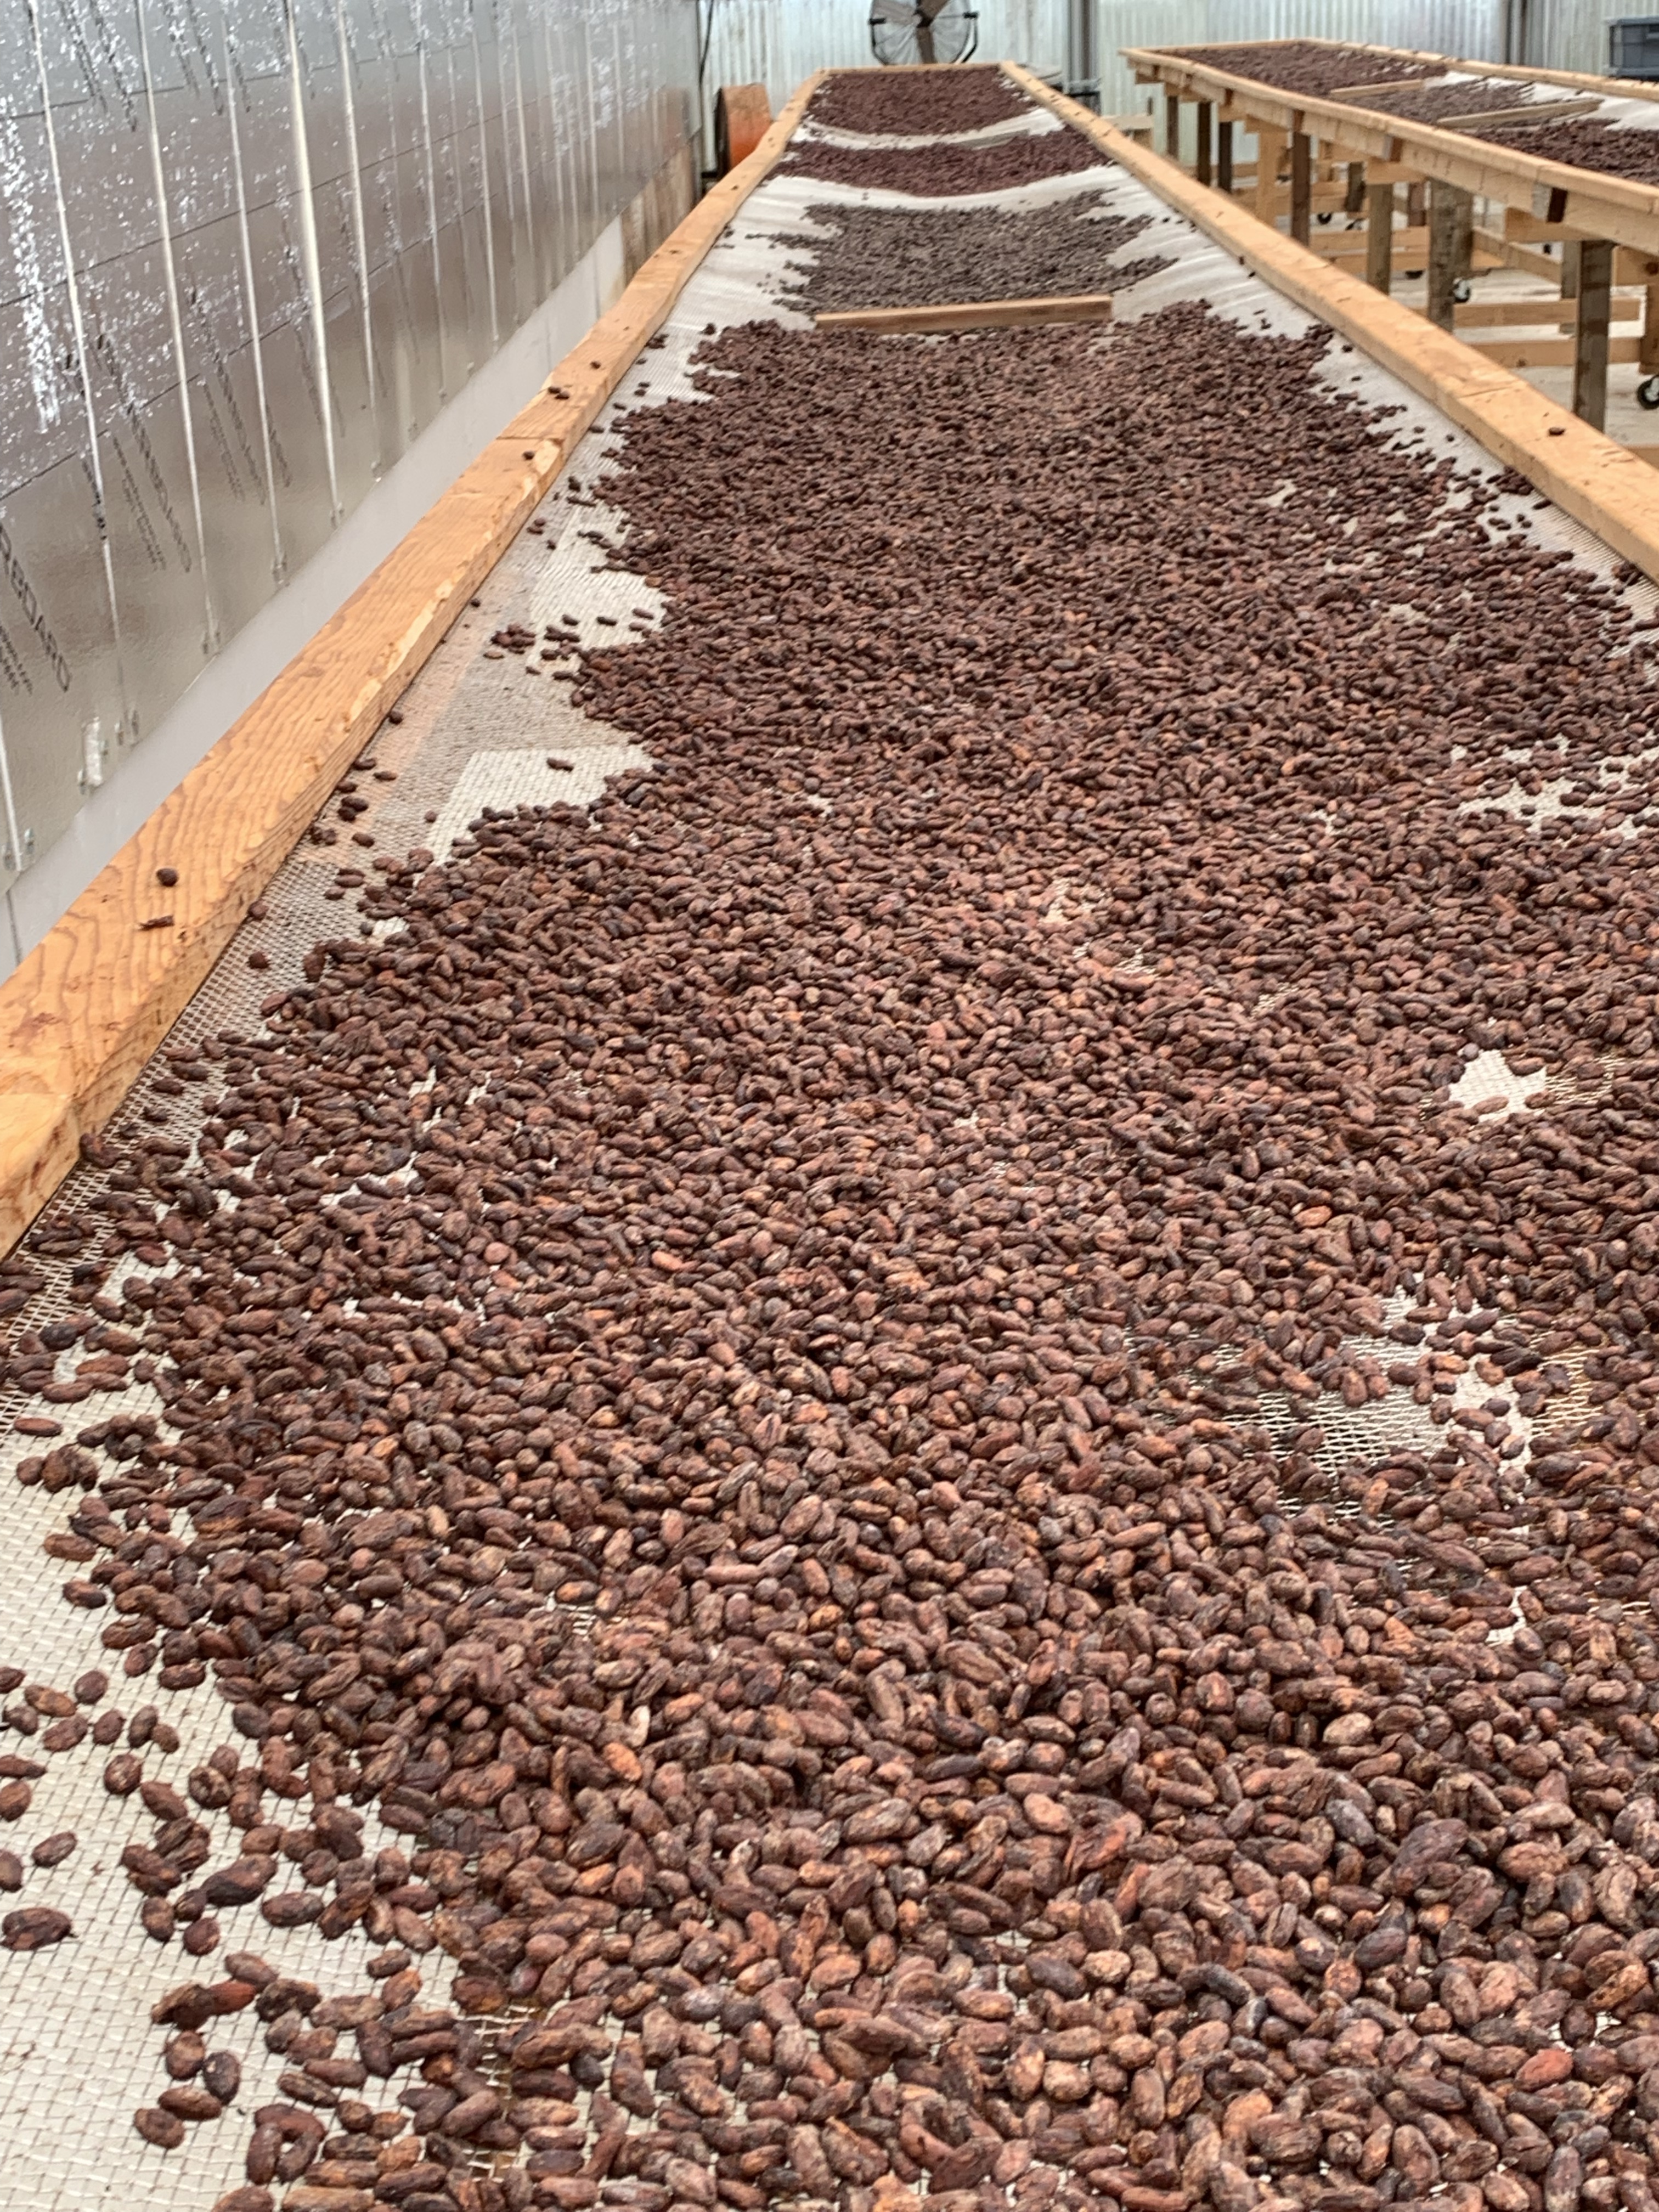
The pods are harvested after they turn red and when scraping the outside exposes a yellow interior. They are cut open and the beans are dried for several months before being examined and selected by the chocolatier. The highest quality beans are roasted and puréed in what looks like a peanut butter mill.
The thick shell protects the beans when grown in a cooler climate.
If you happen to be in Hilo on the Big Island take a trip up the mountain and visit Lavahola Chocolate Farm. It’s well worth investing the hour. The staff was knowledgeable, friendly and fun.
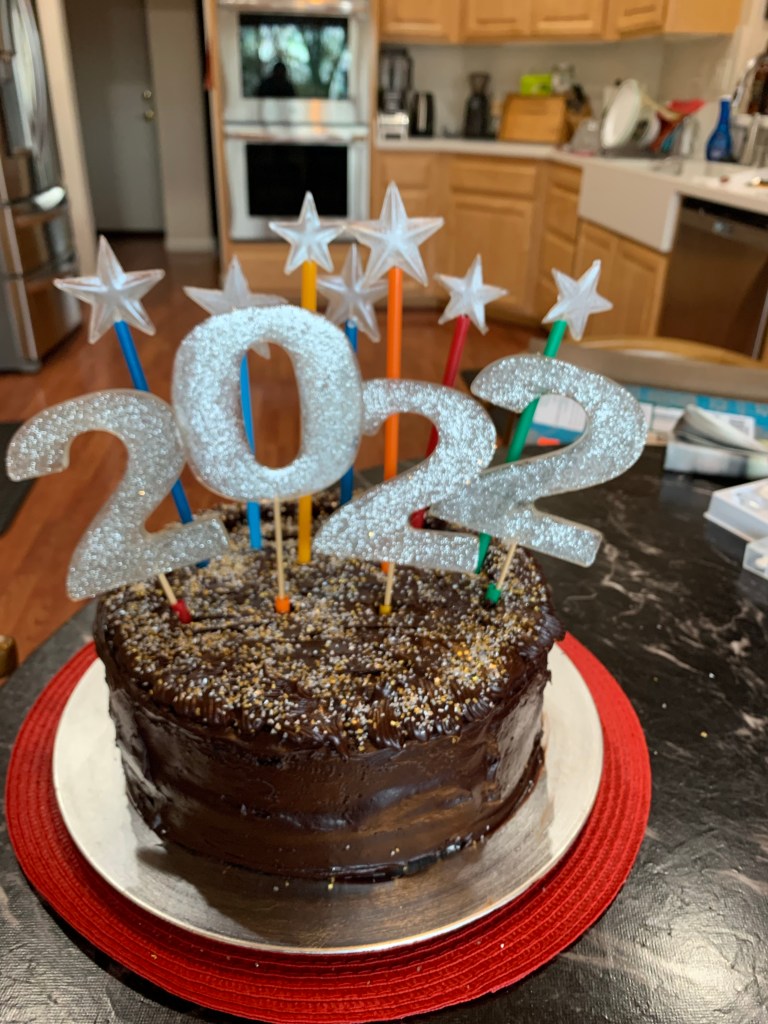
This year (as every year) New Year’s Eve party cake was requested (thankfully.) I love to make them. A couple of days later a follow up request for a silver 2022 topper which was an excellent suggestion. I decided to learn to work with isomalt to create the numbers, rather than buying some. It never hurts to add a new skill.
It took some practice to learn the method (how hot to boil it, the amount of water to add, how long to cool after it reaches the optimum temperature, and more.) It took a lot of practice and failures.
Some were boiled too long and discolored. Some were too thick, some never cleared.
Finally I found the correct combination. And the resulting sugar numbers were acceptable.
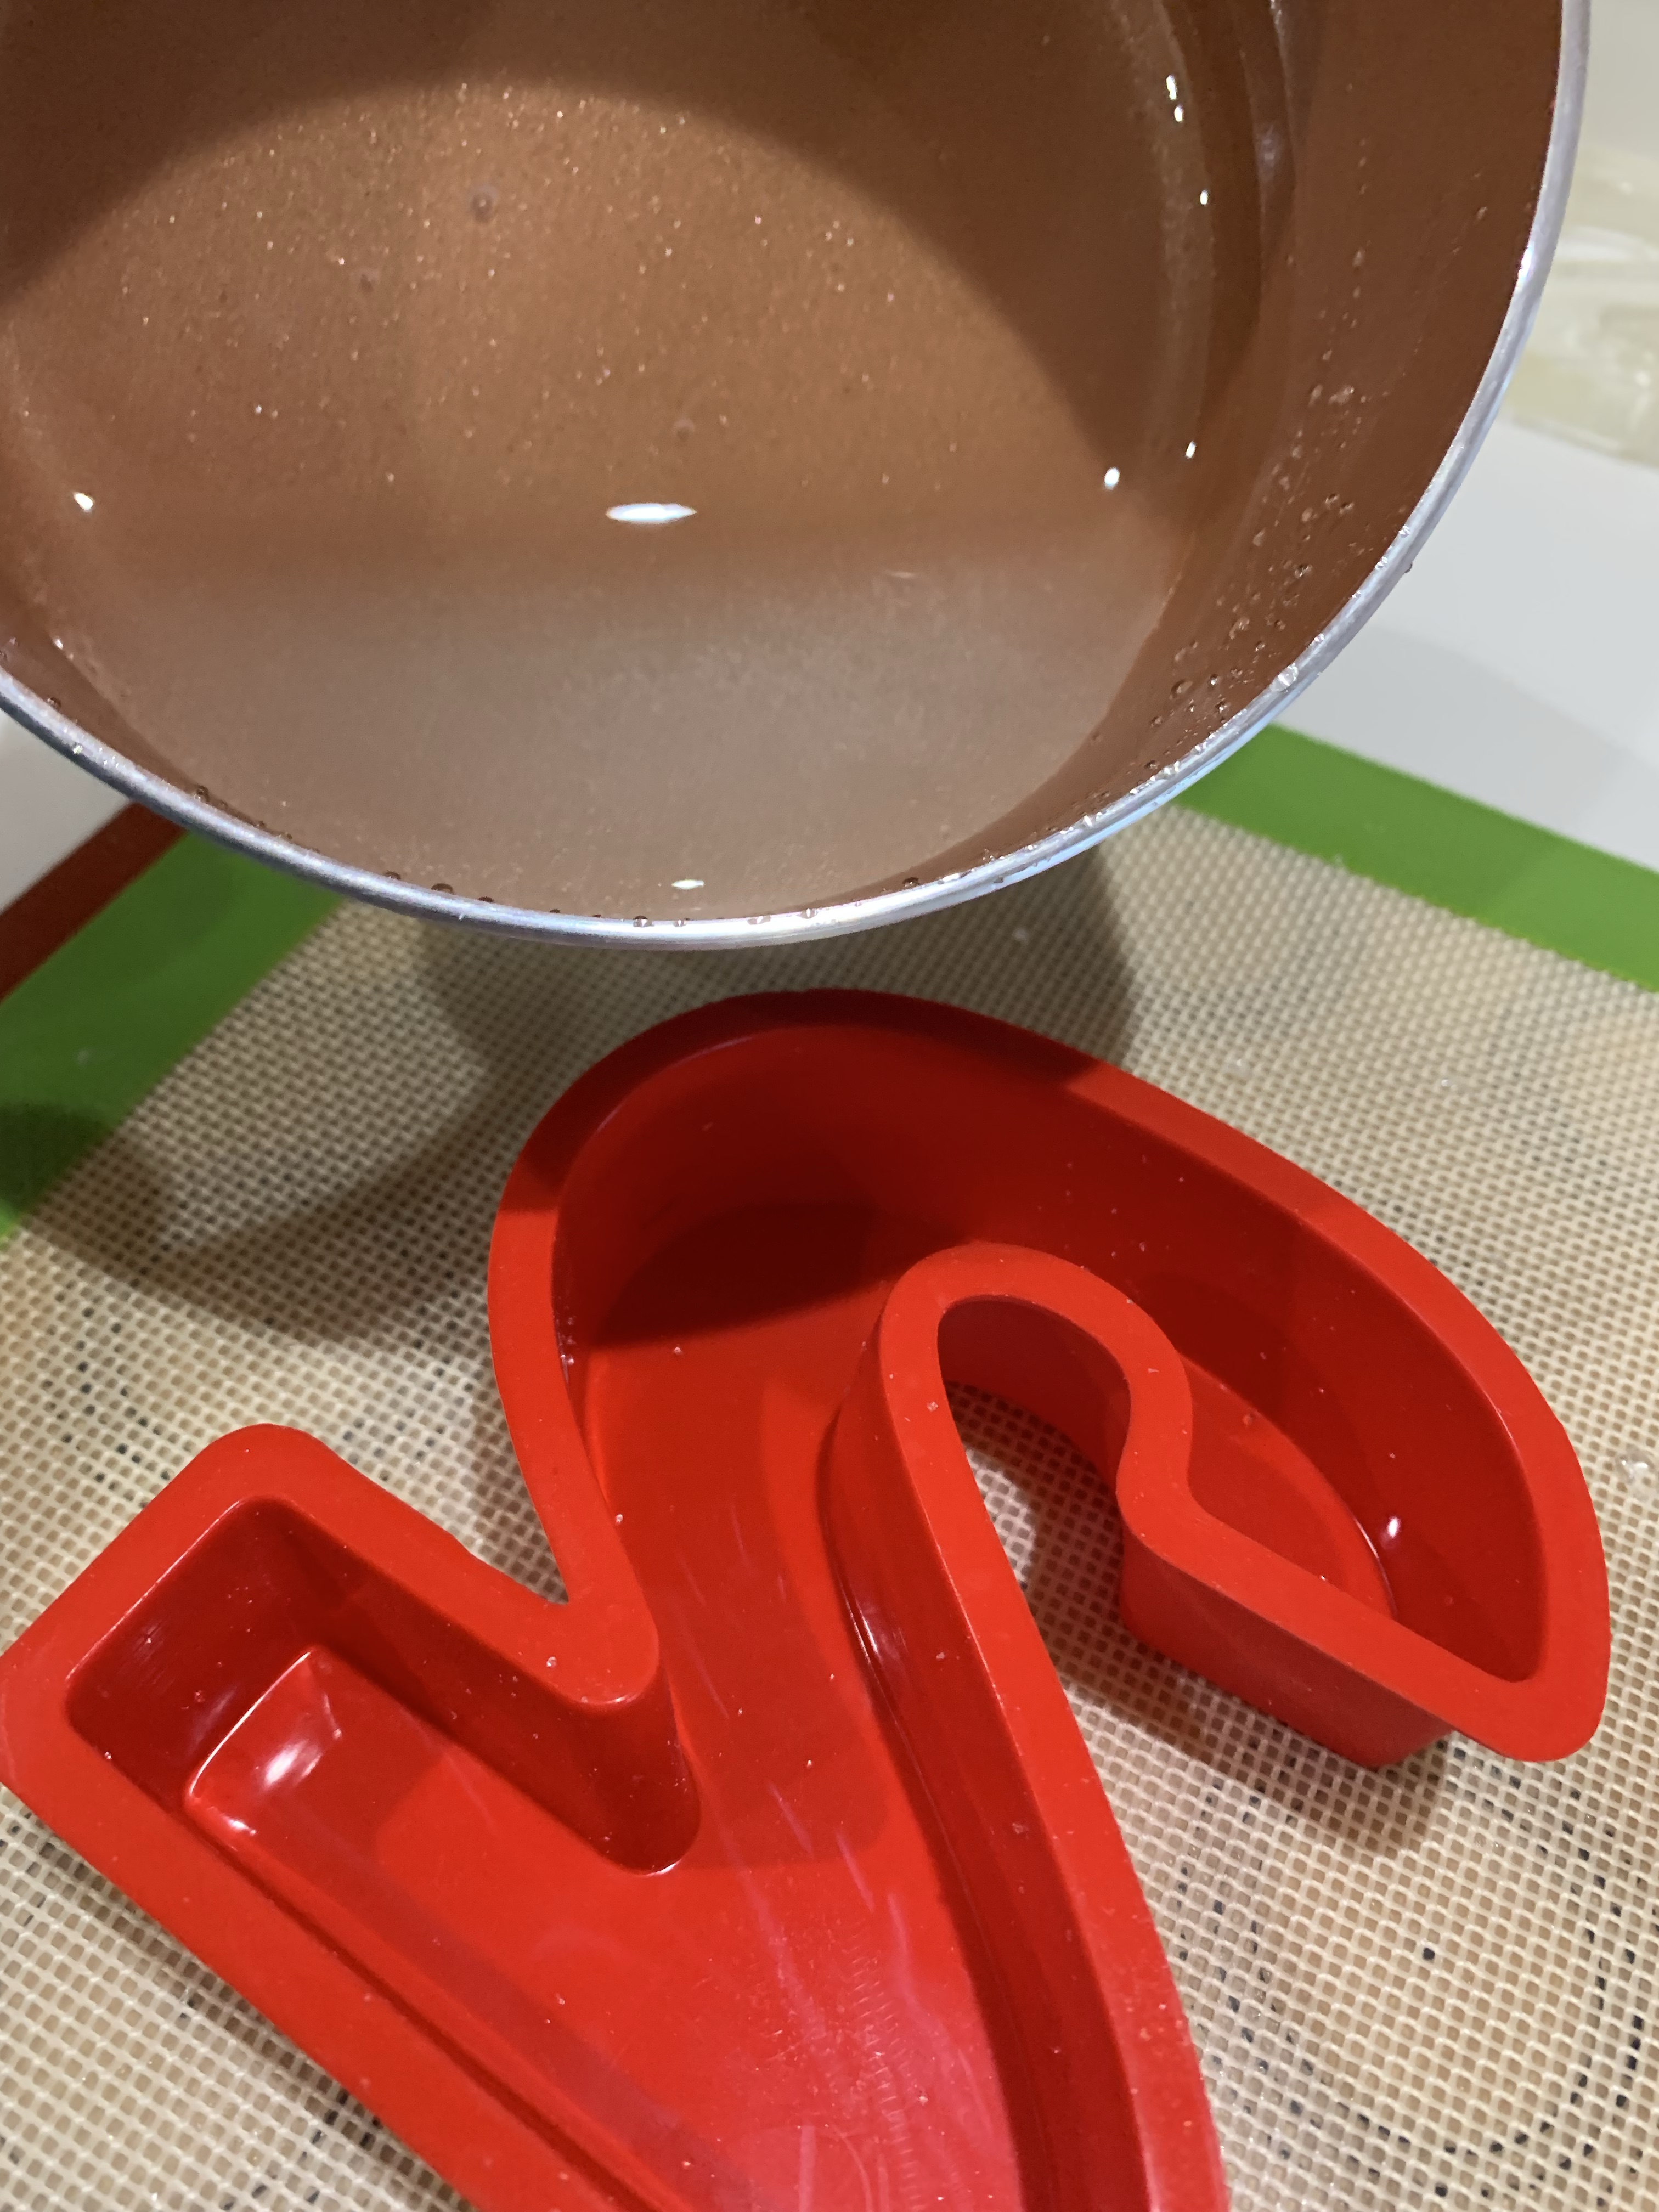
Note the photo was taken when the temperature was only 305 deg. Things happen fast when it reaches 320.
Once the temperature is 320 let the molten sugar sit for a few seconds to clear some of the bubbles then place the pan into cold water to stop the cooking.
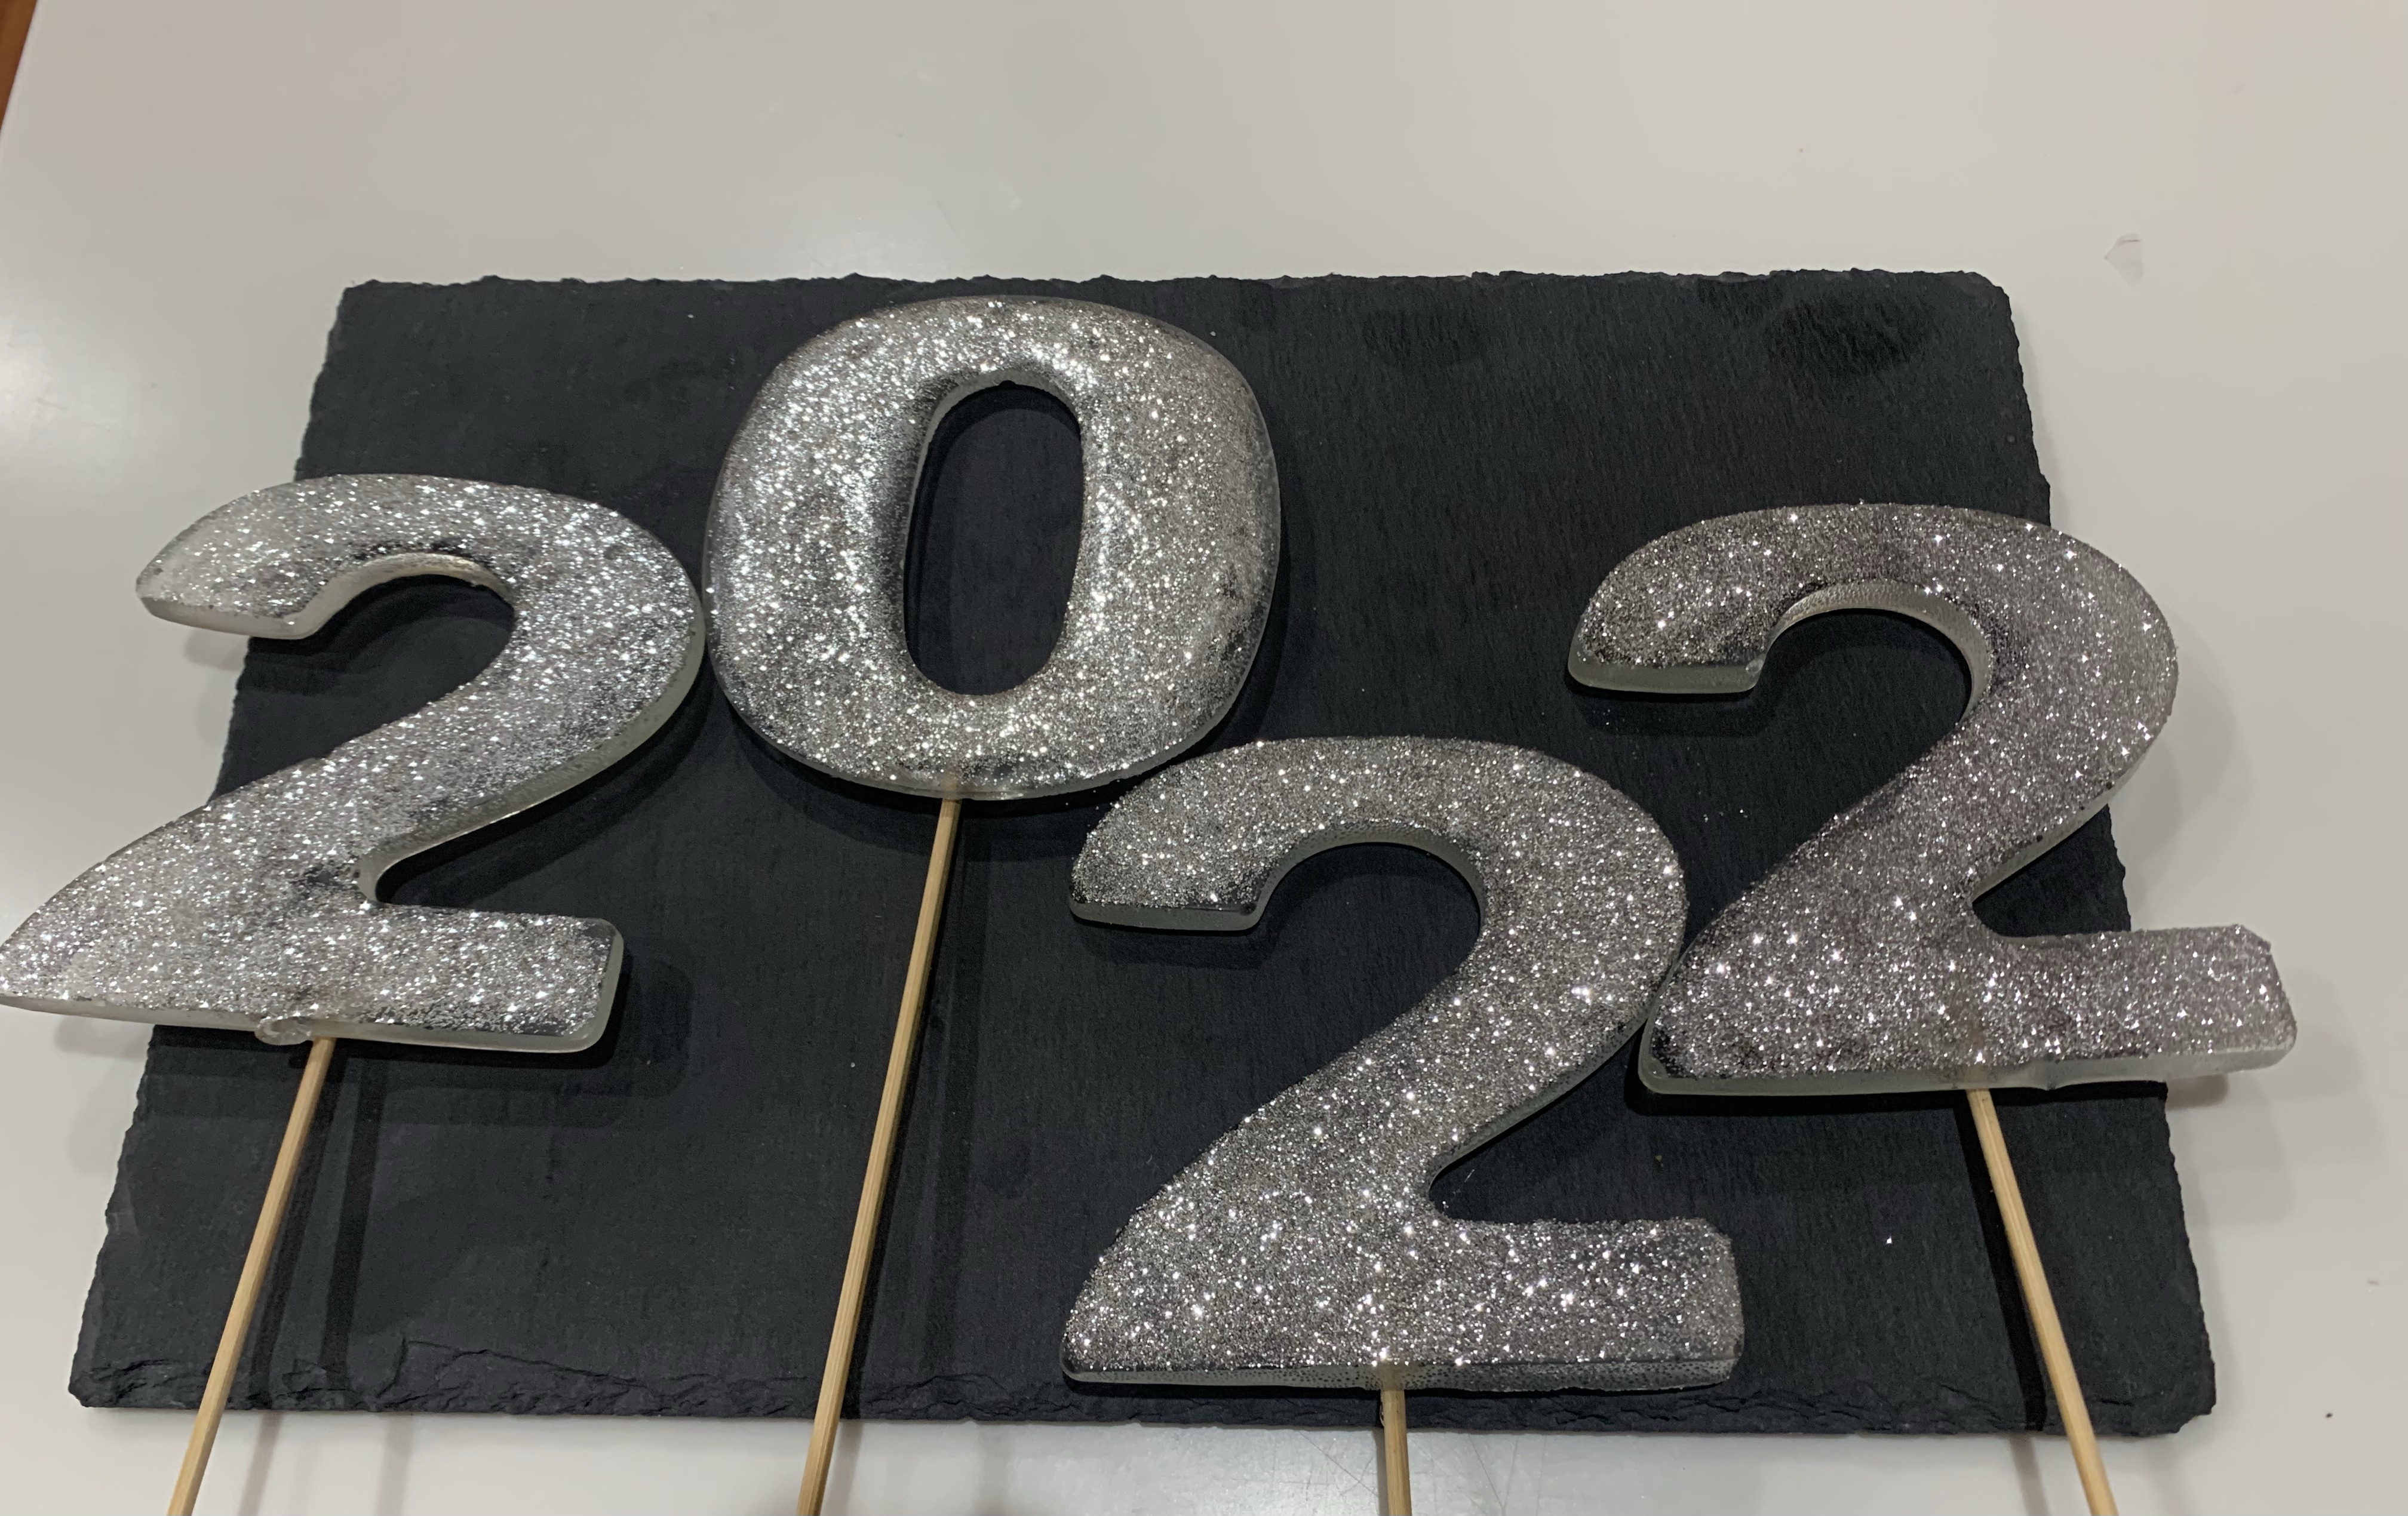
After the sugar is cold, place some sticks on the back and “glue” them in place with some molten sugar. Once they are cool turn the numbers (or stars) over and dampen slightly with your finger, then sprinkle sparkly glitter on the damp sugar and spread with a brush to cover completely and let dry.
In bright light this glitter really sparkles.
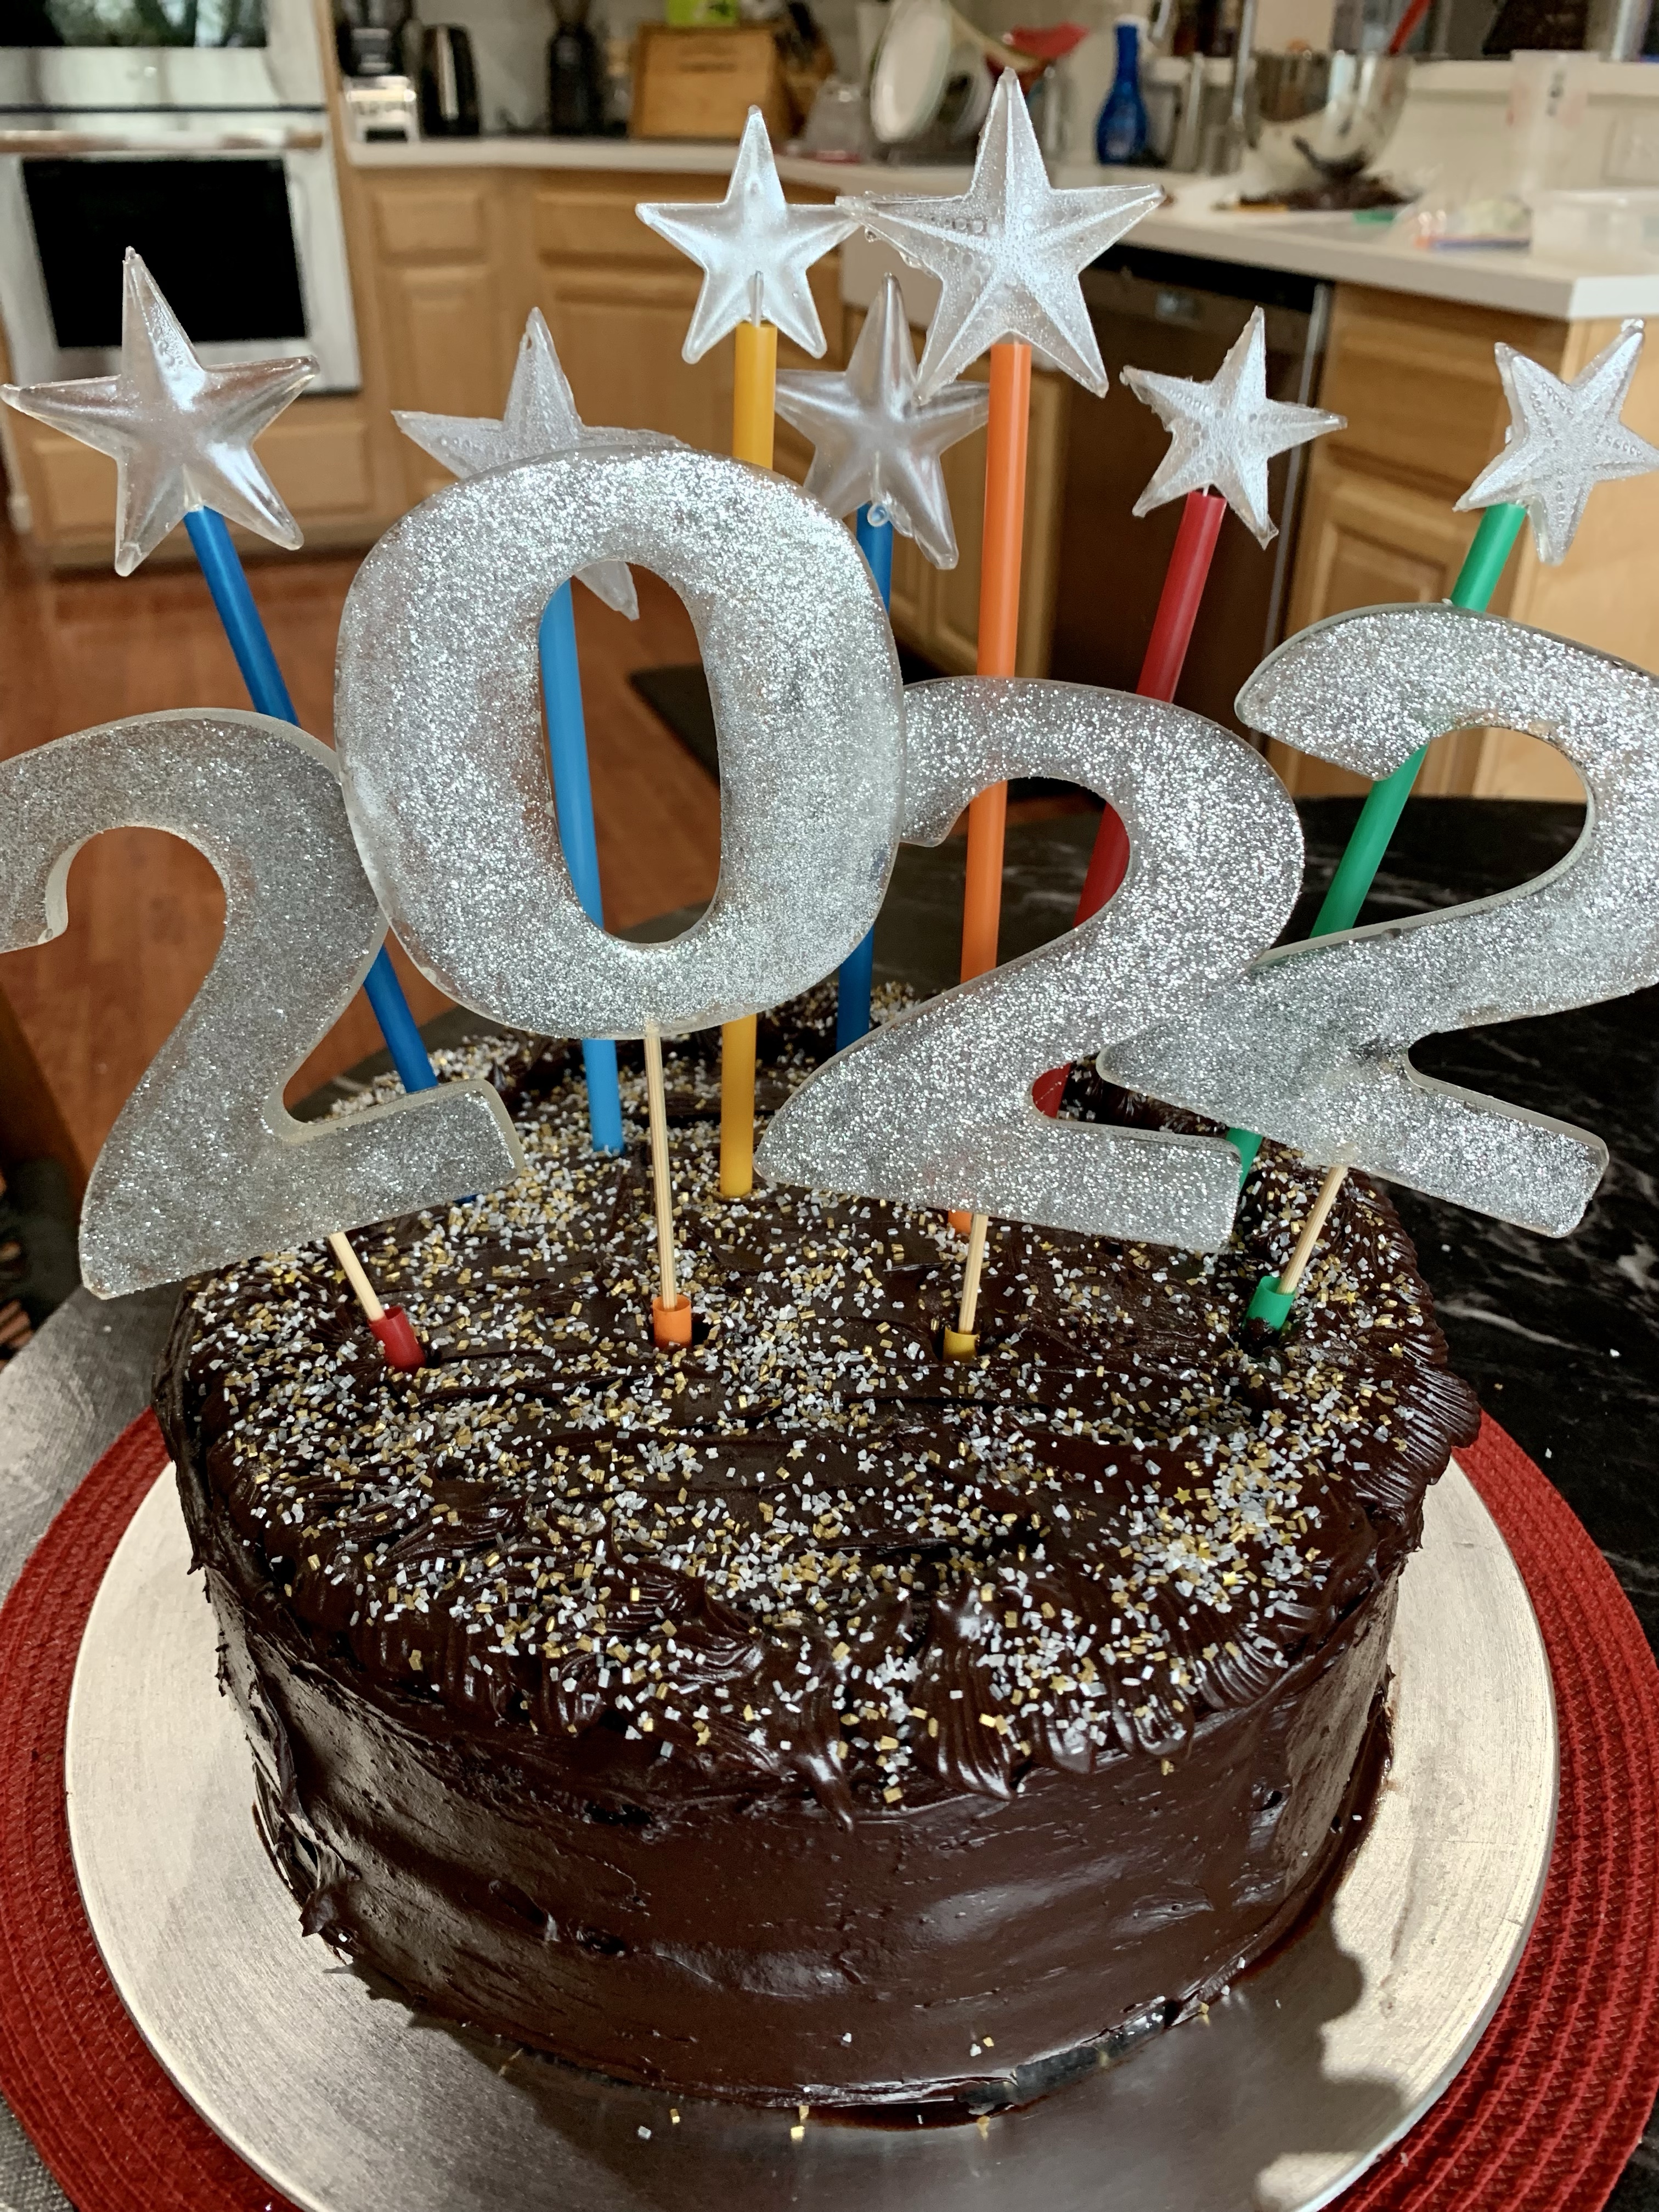
Frost the cake and add the numbers. I used plastic straws in the cake to give the numbers and stars more support. Once the numbers were in place I added the stars, staggering their height. The colored straws gave the impression of fireworks. (I hope.) Lots of fun and an opportunity to learn new skills.
Extreme Chocolate Cake
Makes two 9” round cakes INGREDIENTS (Makes one 10’ ROUND CAKE [and two 5”] – quantities are in parenthesis.) • 2 cups white sugar (3) • 1 3/4 cups all-purpose flour (2 2/3) • 3/4 cup unsweetened cocoa powder (1 ¼) • 1 1/2 teaspoons baking soda (2 ¼) • 1 1/2 teaspoons baking powder (2 ¼) • 1 teaspoon salt (1 ½) • 2 eggs (3) • 1 cup milk (1 ½) • 1/2 cup vegetable oil (¾) • 2 teaspoons vanilla extract (3) • 1 cup boiling water (1 ½) Frosting • 3/4 cup butter • 1 1/2 cups (125g) unsweetened cocoa powder • 5 1/3 cups confectioners’ sugar 624g (1c confectioners sugar = 117g) • 2/3 cup milk • 1 teaspoon vanilla extract
METHOD
Preheat oven to 350 degrees F (175 degrees C). Grease and flour two 9 inch cake pans. (SEE QTY FOR 10” CAKES)
Use the first set of ingredients to make the cake. In a medium bowl, stir together the sugar, flour, cocoa, baking soda, baking powder and salt. Add the eggs, milk, oil and vanilla, mix for 3 minutes with an electric mixer. Stir in the boiling water by hand. Pour evenly into the two prepared pans. (For cupcakes, portion ¼ scant cups in each cupcake paper.
Bake for 30 to 35 minutes in the preheated oven, until a toothpick inserted comes out clean or 205 internal temp. Cool for 10 minutes before removing from pans to cool completely.
To make the frosting, use the second set of ingredients. Cream butter until light and fluffy. Stir in the cocoa and confectioners’ sugar alternately with the milk and vanilla. Beat to a spreading consistency. (This recipe will frost 36 cupcakes.)
Split the layers of cooled cake horizontally, cover the top of each layer with frosting, then stack them onto a serving plate. Frost the outside of the cake.
Isomalt
Mix isomalt and water in a 4:1 ratio in a stainless steel or non stick pan
Heat under medium high heat until the isomalt reaches 320 deg F
Remove from heat and let sit for a few moments to allow the bubbles to subside then place the hot pan in water for a few seconds to stop the isomalt cooking.
Carefully pour the molten solution into dry molds and let cool.
(I wear heat proof silicone gloves while working with molten sugar. It is very hot!
NOTES a. Do NOT let the internal temp exceed 210 deg F or the cake will be overdone. b. Fill cupcake papers 2/3rds full. This will allow space for the cupcakes to expand and create a nice domed shape.
As the holidays approach, the baker often changes his spots from baker to chocolatier. Everyone seems to like my chocolate coated soft caramels dusted with some Maldon Sea Salt Flakes.
L: wrapped for the holidays and unwrapped QC samples – R: cut caramel
I ran out of my favorite Barry 64% cacao chocolate. This chocolate is both delicious and has a 4 out of 5 liquidity which makes a nice thin coating. I found some re-packaged bulk Barry Callebaut 70% dark chocolate which did not have a liquidity rating. After using it I would guess it is in the 2-3 range of 5. By not flowing as well yhis resulted in a thicker coating, but it was all that was available. Hopefully, my “go to” 64% will be back in stock soon!
Paying attention to the temperatures while tempering the chocolate really pays off. The chocolates don’t melt in your fingers and have an attractive, shiny appearance.
I hit the maximum temperature of the caramel perfectly. (238 deg) To cut it I put in in the refrigerator for about 30 minutes, then cut into about 1” squared. I still had to coat the knife with some baking spray to make cleanish cuts.
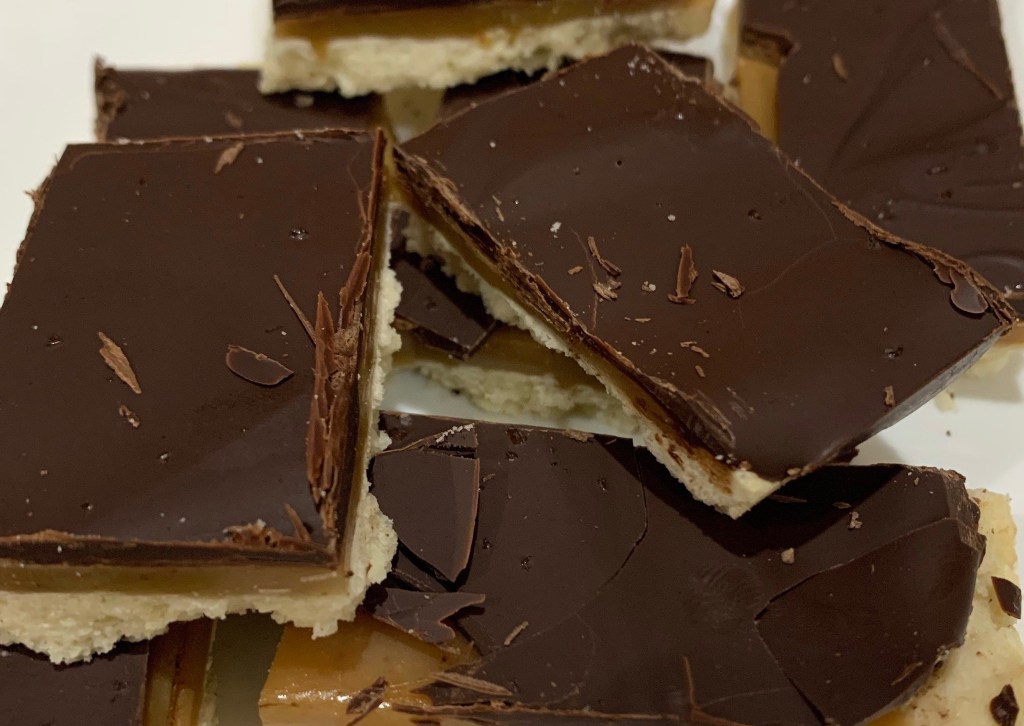
I saw these on GBBO and decided to give them a go. (Kind of English slang for “try to make them”.) Millionaires Bars are layers of shortbread, caramel and chocolate.
I used a jelly roll pan, which is about 25% bigger than the specified pan. This caused each layer to be thinner than I expected. As they were setting I considered increasing the recipe quantities by about 50%. After cutting and eating them I think I am going to leave them the way they are. They ended up being about 1/4” thick and if I cut them into 1” square pieces they will be perfect bite sized pieces.
Self induced problems: 1) Forgot to use the parchment paper making me worry about releasing the bar from the jelly roll pan. No problem. I cut around the outside and across the center. Each large piece came out easily. 2) I should have poured the chocolate on the caramel before it set. Not doing so caused the chocolate to not adhere to the caramel. Cutting the bars into 1” squares, so you can just pop them into your mouth without taking a bite and “breaking” them, converts the problem into an enhancement.
Overall, these are delicious cookies. The caramel was heated to 242 deg which made it a perfect softness and texture. The chocolate wasn’t tempered but resulted in a nice layer with a good snap. The short bread base was difficult to push to the edges of the pan, but perhaps rolling it out before placing in the pan would help. I also skipped the macadamia nuts as my pantry was bare. If you saw my pantry, you wouldn’t believe that possible.
INGREDIENTS • ⅓ cup granulated sugar • 1⅓ cups unsalted butter, softened and divided, plus more for greasing • 1¾ cups all-purpose flour • ½ tsp. table salt • ¾ cup packed light brown sugar • ⅓ cup sweetened condensed milk • 3 tbsp. golden cane syrup (or honey as a substitute) • 1 tsp. flaky sea salt • 7 oz. dark chocolate baking bar, chopped • ½ cup coarsely chopped macadamia nuts
METHOD
Preheat oven to 300°. Grease a shallow 11×7-inch baking dish with butter.
Line baking dish with parchment paper, allowing paper to extend by 2 inches on each side; grease parchment.
Beat granulated sugar and 2/3 cup butter in a large bowl with an electric mixer on medium speed until light and fluffy, 2 to 3 minutes. Add flour and table salt; stir with a spoon, and then combine with your hands to form a smooth dough (try not to overwork it). I ended up adding a couple of Tbl water to the dough so it would come together,
Press dough into pan in an even layer, and prick surface all over with a fork. Bake in preheated oven until pale golden and cooked through, 30 to 35 minutes. Cool completely in pan, about 45 minutes.
Combine brown sugar, condensed milk, golden syrup (or honey) and remaining 2/3 cup butter in a medium-size heavy saucepan over medium heat. Cook, stirring often, until butter melts and mixture is smooth, about 3 minutes. Bring to a boil, and cook, stirring constantly, until the caramel bubbles become larger, mixture thickens and turns a rich, glossy caramel color, about 10 to 12 minutes. Pour caramel evenly over the shortbread, and sprinkle with sea salt. Cool completely until set, about 1 hour.
Melt chocolate, stirring often, in a heatproof bowl suspended over a pan of simmering water, making sure the bottom of the bowl doesn’t touch the water. Pour melted chocolate evenly over caramel layer; spread with an offset spatula until level and smooth. Sprinkle with nuts. Let stand until chocolate is set, about 1 hour. Use a knife to release ends of bars from pan; use the parchment paper as handle to remove from pan. Cut into bars.
I tried something new today. I use my sous vide for many, many things, but never thought of using it for tempering chocolate. I researched online and the sous vide companies described several different techniques. The problem with them is they bag the chocolate, like you would a steak, and heat and cool it in the bag. I wanted to dip my chocolates, so decided to use a pan to hold the chocolate. I had to be careful as any water that splashed into the melted chocolate would seize and ruin it. (I managed to temper 3 batches with no failures.
I made sure the large pot, plus sous vide was just big enough to allow the sauce pan to sit in the water without tipping too much. It also let the water circulate from the sous vide without splashing.
By the third batch I had the timing down. Setting the sous vide temperature a few degrees higher, or lower, than the chocolate required compensated for our ambient room temperature of 64 deg. I was using dark chocolate so set the sous vide to 126 deg and let the chocolate heat to 122 deg F and hold until I was sure it was all at temperature. That’s the beauty of using the sous vide to temper. It will hold indefinitely at any temperature you select. I then removed the sauce pan containing the melted chocolate, wiped the pan dry and set it aside before replacing 5 cups of water with 5 cups of ice, dropping the temperature to 75 deg. Returning the saucepan to the water quickly cooled the chocolate to 80 deg. I then set the temperature to 95 which held the chocolate in temper at 90 deg for over an hour.
After making the centers by pouring the candy filling into a jelly roll pan, cooling and cutting into 1” x 2” pieces, I dipped to coat the Butterfingers candy bars. The resultant center was too thin for the candy bar. I then tried pouring it into a mold, but it was too thick. Nothing I have was “just right.” However, the flavor and texture was spot-on compared to the commercial candy bar.
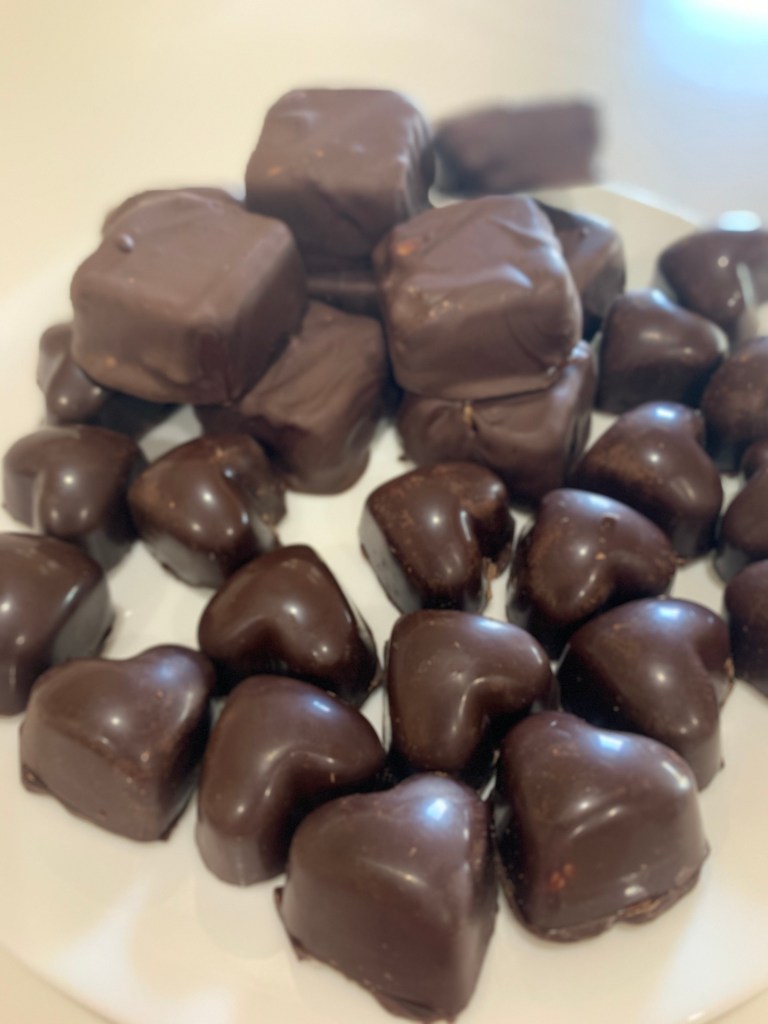
I used a heart shaped polycarbonate mold to make the vanilla cream and Mounds Bar clone. (It is almost Valentines Day after all.) I made a half recipe although the recipe below is for a full recipe Two coats of tempered chocolate painted into the mold made a shell for the filling.
The vanilla cream readily piped into the mold, but the coconut was too dense and lumpy with the coconut so I greased my hands and rolled small balls of the mixture then pressed them into the shell. (I warmed the coconut mixture for the second batch and was able to pipe it.)
Once filled, a layer of tempered chocolate was poured over the top and the excess was scraped off. Tapping the cooled mold on the table released the finished candies.
Mounds Bars
INGREDIENTS • 5 oz condensed milk, sweetened • 1 tsp vanilla extract • 2 cups confectioners’ sugar • 14 oz coconut, shredded • 4 cups dark (64% cacao) couverture chocolate
METHOD
Mix the condensed milk and vanilla extract in a bowl.
Add the confectioners’ sugar a little at a time, blending until smooth.
Stir in the coconut.
Temper the chocolate and paint the inside of the mold. It will probably take 2 coats to completely cover the mold. Cool the chocolate between coats.
Grease you hands and roll a small quantity of the mixture into a ball and force into the chocolate coated mold.
Pour chocolate over the top and scrape off the excess. Chill until the top is firm.
Scrape any residual chocolate from the mold and tap on the counter to release.
Add the softened butter, meringue powder, light corn syrup, and water to your mixing bowl Using a stand mixer or a hand mixer beat until mixed completely, scraping the bowl to ensure everything is incorporated well.
Add fondant sugar and mix on low speed until the sugar is incorporated, then, beat on medium speed for about 1 minute until it all creams together.
Add invertase, and food coloring and mix well. This was my first recipe using invertase. It is a natural enzyme used to break down the sugar and change it from grainy to smooth.
Scoop the cream filling into a disposable pastry bag and twist the end tightly, securing with a clip or a rubber band.
INGREDIENTS • 1/3 cup light corn syrup • 1/3 cup water • 1 cup granulated sugar • 1 cup peanut butter • Spray Vegetable Oil (Pam, etc.) for keeping the knife lubricated in scoring • 1 Pound of Tempered Semi-Sweet Chocolate for dipping
METHOD
First begin by greasing a 12-by-17-inch jelly roll pan (with 1-inch sides) with safflower, vegetable or canola oil. Place the pan into a slightly warm oven to warm the pan while making the candy. (Don’t allow the pan to become hot, only barely warm to give you more time to spread and score the candy later.)
In a heavy 2-quart saucepan, combine the corn syrup and water, stirring well to combine. Place over medium-low heat and add the sugar. Cook the mixture, stirring constantly, until it is clear and then stirring often until it reaches a full boil. Clip on your calibrated candy thermometer, raise the heat to medium-high and continue to cook – without stirring – until the mixture reaches 310 degrees (F). During this cooking period, should sugar crystals form above the boiling line, carefully wipe away using a damp pastry brush, but be careful not to touch the boiling mixture. Rinse the pastry brush well – and make certain to blot-dry the brush well – between each swipe.
Remove your pan from the warming oven and place on your work surface.
Remove the candy from heat and add the peanut butter, stirring to blend completely using a clean wooden spoon. Working quickly, pour the mixture onto your well-greased jelly roll pan, and spread as evenly as possible. Score the mass with an oiled, heavy chef’s knife into 1-inch by 2-inch pieces, cutting at least half way through the candy. (The more quickly you do this, the easier and deeper your scoring will be.) It is helpful to spray the knife with cooking oil occasionally to aide the knife in scoring.
Allow the scored mixture to cool at room temperature about 2 hours. When cool and hard, complete cutting the scored pieces using a sharp, heavy knife (I like to use my Chinese cleaver here) and break into individual pieces.
Place the cut candies into the refrigerator while you temper your dipping chocolate and allow to chill for 15 to 30 minutes. Remove the candies from the fridge and dip each piece into the chocolate, then place on parchment paper to allow the chocolate to harden completely (About 3 hours).
Note: You can add a certain flair to the candy by taking a clean dinner fork and touching the tops of each freshly dipped piece raising lines of “peaks” (akin to meringue peaks). Just use the back of the fork laid parallel to the chocolate cops, touch, lift and slightly pull to one side. Looks pretty snazzy….
Store on waxed-paper sheets in an airtight container for up to two weeks.
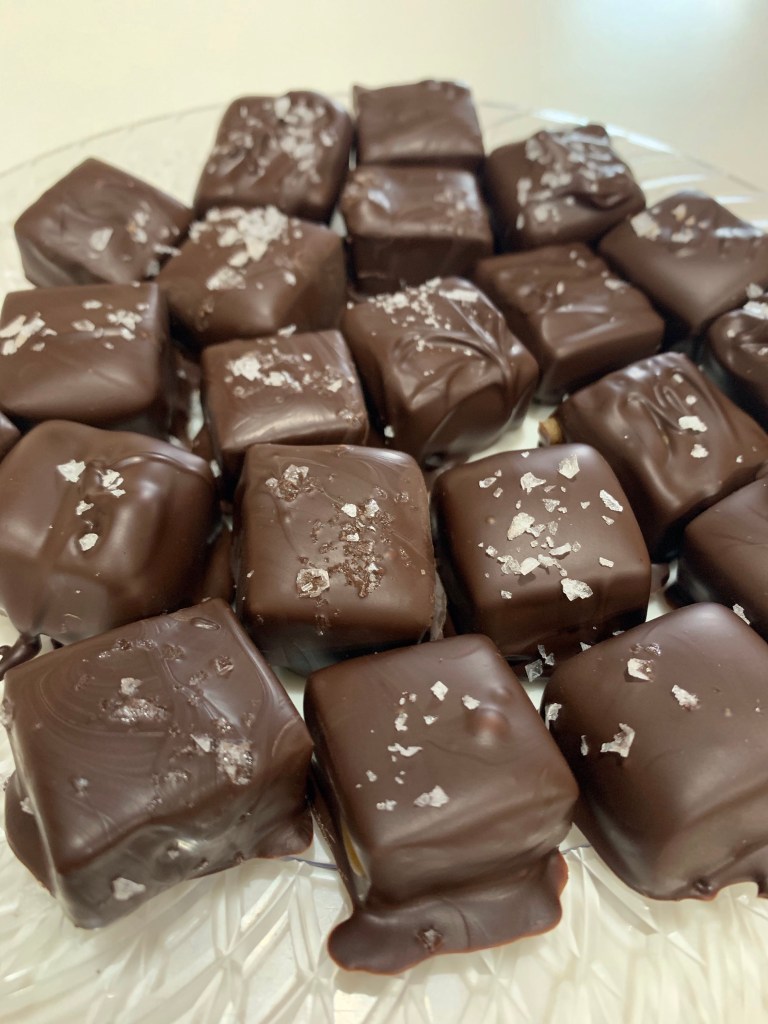
So, what do you do as you are waiting for your dinner rolls to proof? Well, If you have an 11 pound bag of chocolate, 60 pieces of 1”x1” caramel, making salted chocolate covered caramels is a good way to pass the time.
I cut the caramels a day ago, tempered the chocolate, dipped and drained the coated caramel and sprinkled some Maldon flaked sea salt on each.
The chocolates were setting as the first proof of the rolls completed. The proofed dough weighed 1,553 grams, so to make 24 rolls, each had to weigh about 63 g. I weighed each, formed them into a small ball and rolled them on the counter to tension the surface of the roll.
I arranged them 4×6 in a glass baking tray and baked at 375 deg until the internal temperature was 180 deg. (about 20 min.) Once out of the oven, a light brush with melted butter and boom. Excellent dinner rolls! The recipient and methods for both the dinner rolls and chocolates are found elsewhere in this blog.
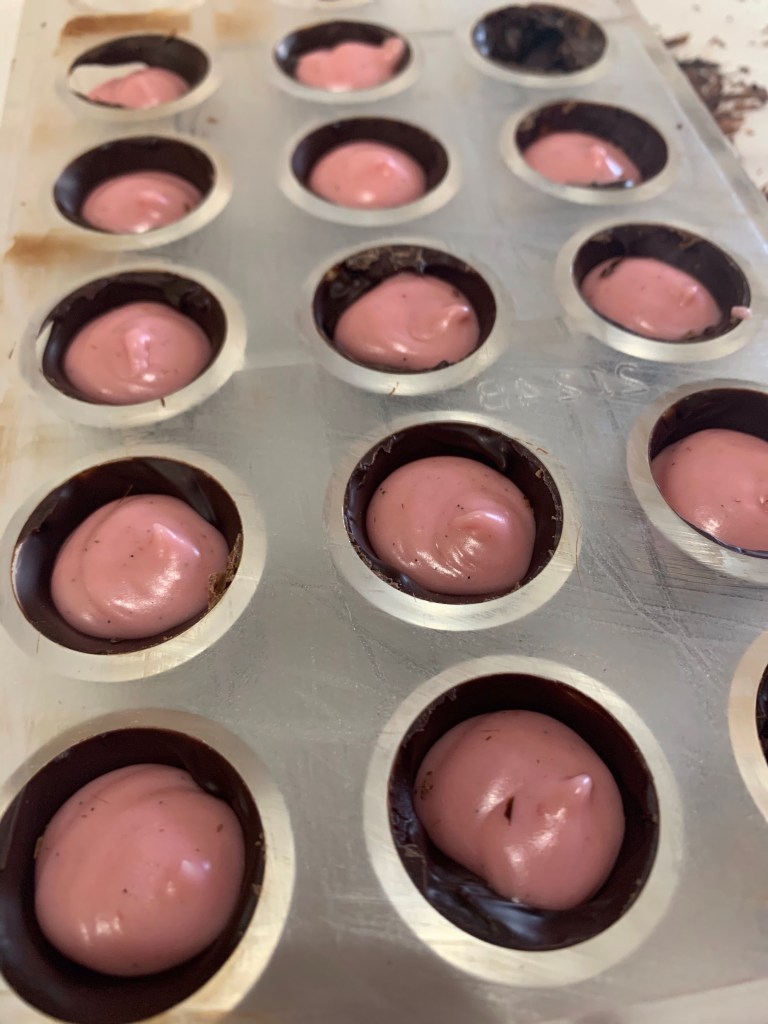
I figured there must be something I could do while my Rye Bread Part 2a a loaves were proofing. I also figured there must be something I could do with the 4 Tbl of seedless raspberry coulis I had in the fridge. Also, if you remember I want to use more of the 11 lbs of bittersweet chocolate I have, so I decided some nice raspberry fondant filled bonbons would be a good way to kill a couple of hours this morning.
I tempered a cup of chocolate and poured it into one of my molds before draining the extra back into the bowl of liquid chocolate.
While the tempered chocolate was setting I mixed the raspberry fondant. I only made a half recipe but doubled the amount of raspberry coulis and halved the amount of sugar. I wanted the filling to be very soft. The recipe below does NOT reflect my modifications.
Once complete, I piped each chocolate coated well about 2/3rds full and let it set. Once set, I re-tempered the chocolate, poured it over the filled chocolate and let it almost set before scraping the bottom clean. It’s always a challenge to bang the finished chocolates out of the mold, but just keep banging them and eventually they will release.
Raspberry (or any) fondant center
INGREDIENTS • 2½ tablespoons butter, softened • 2½ tablespoons light corn syrup • 1 teaspoon pure vanilla extract • ¼ teaspoon salt • ¼ cup seedless raspberry coulis, (but you can use your favorite.) • 3 cups powdered sugar
METHOD
In the bowl of a stand mixer fitted with the paddle attachment beat the butter, corn syrup, jam, vanilla extract and salt until smooth.
Add the powdered sugar and mix on slow until completely combined. Turn the mixer up to medium and beat the mixture until smooth.
Use the filling right away, or store in the fridge in an airtight container for up to a month. (I have it in a piping bag, sealed on both ends.)
I was shown a picture of a Jack ‘O Lantern cake, found the tutorial and more of less followed it. It is supposed to be one of those plastic buckets used to collect your spoils during Trick or Treat. I am satisfied with my first attempt. The recipe called for chocolate cake, so I used my Extreme Chocolate Cake. I also used my recipe for buttercream frosting and marshmallow fondant.
While a little time consuming, most of the individual elements can be prepared well in advance. I made the cakes almost a week early and frozen them. When thawed they are every bit as good as fresh. Fondant needs to rest overnight and buttercream will stay in the fridge for several days before use.
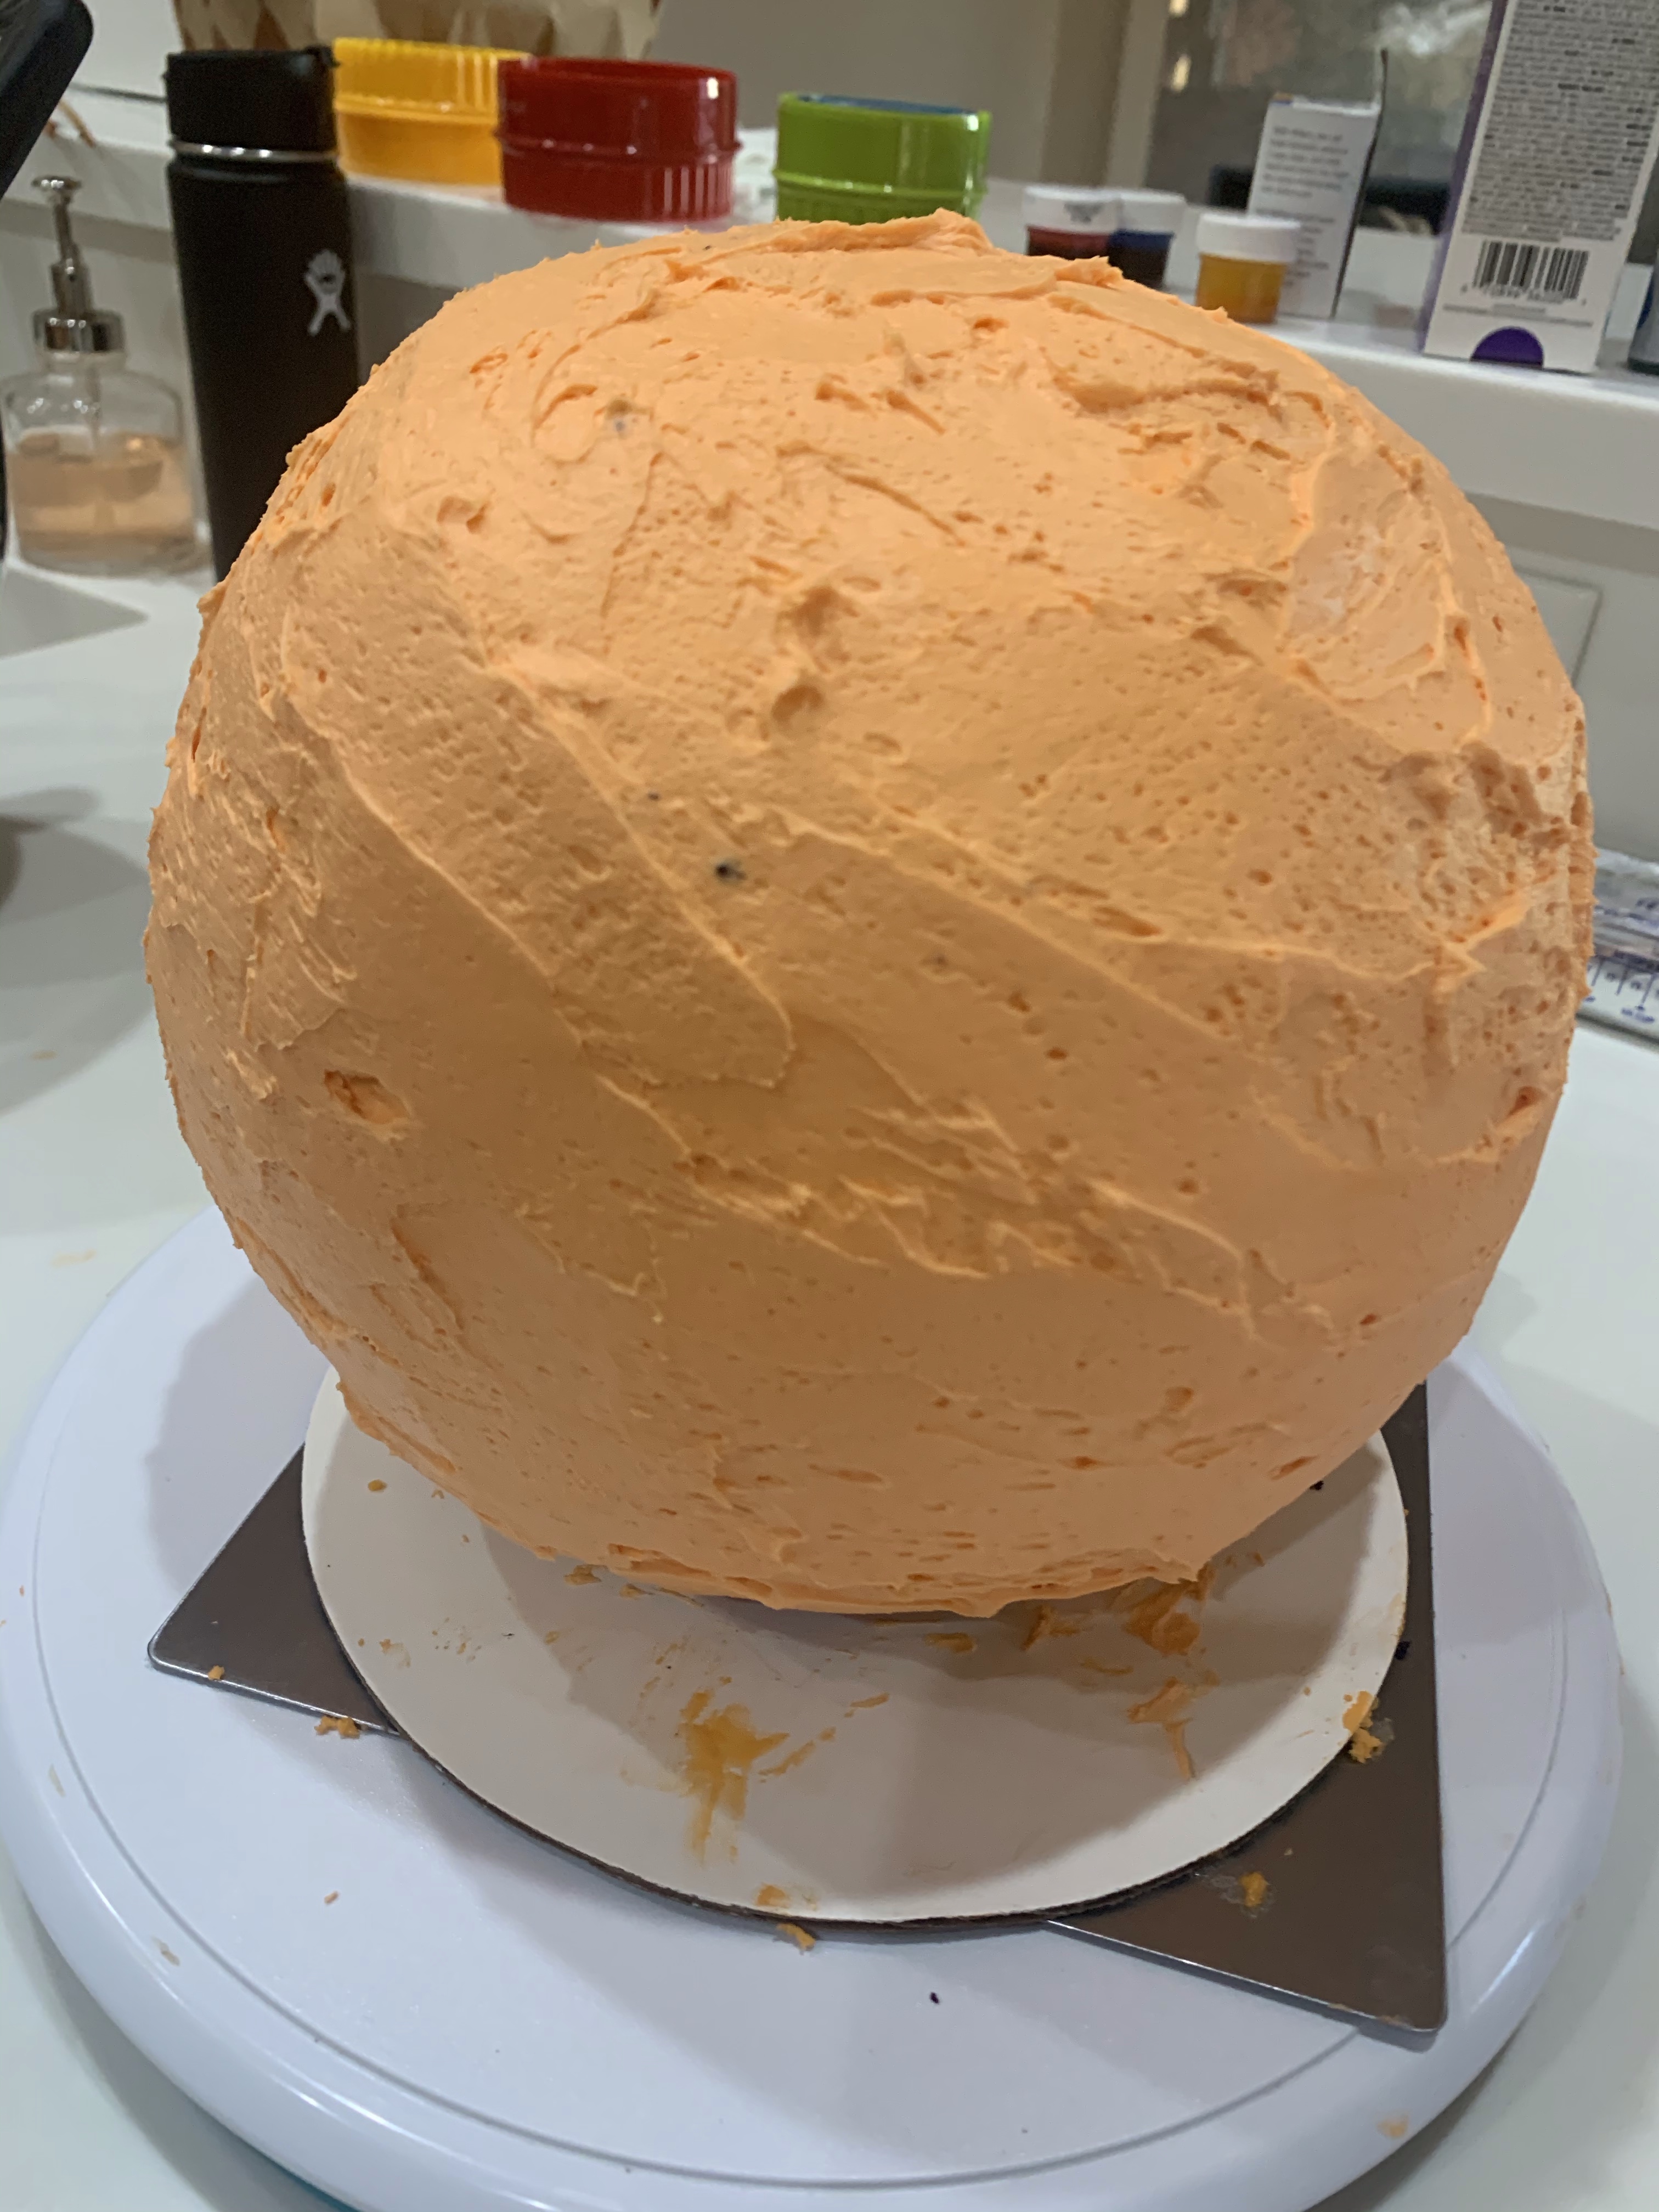
Mark a 4” circle on the top and the mid-point down the cake. Try your best to carve a half a sphere, evenly around the center of the cake. I put a 4” flat plastic disk to serve as a base. The QC department suggested the top of a round plastic storage container that worked perfectly. Take a deep breath, hold the cake tight and flip it end for end. Repeat the same carving on what will now be the top of the cake, making a perfect sphere, or in my case a slightly distorted, but acceptable, ovoid.
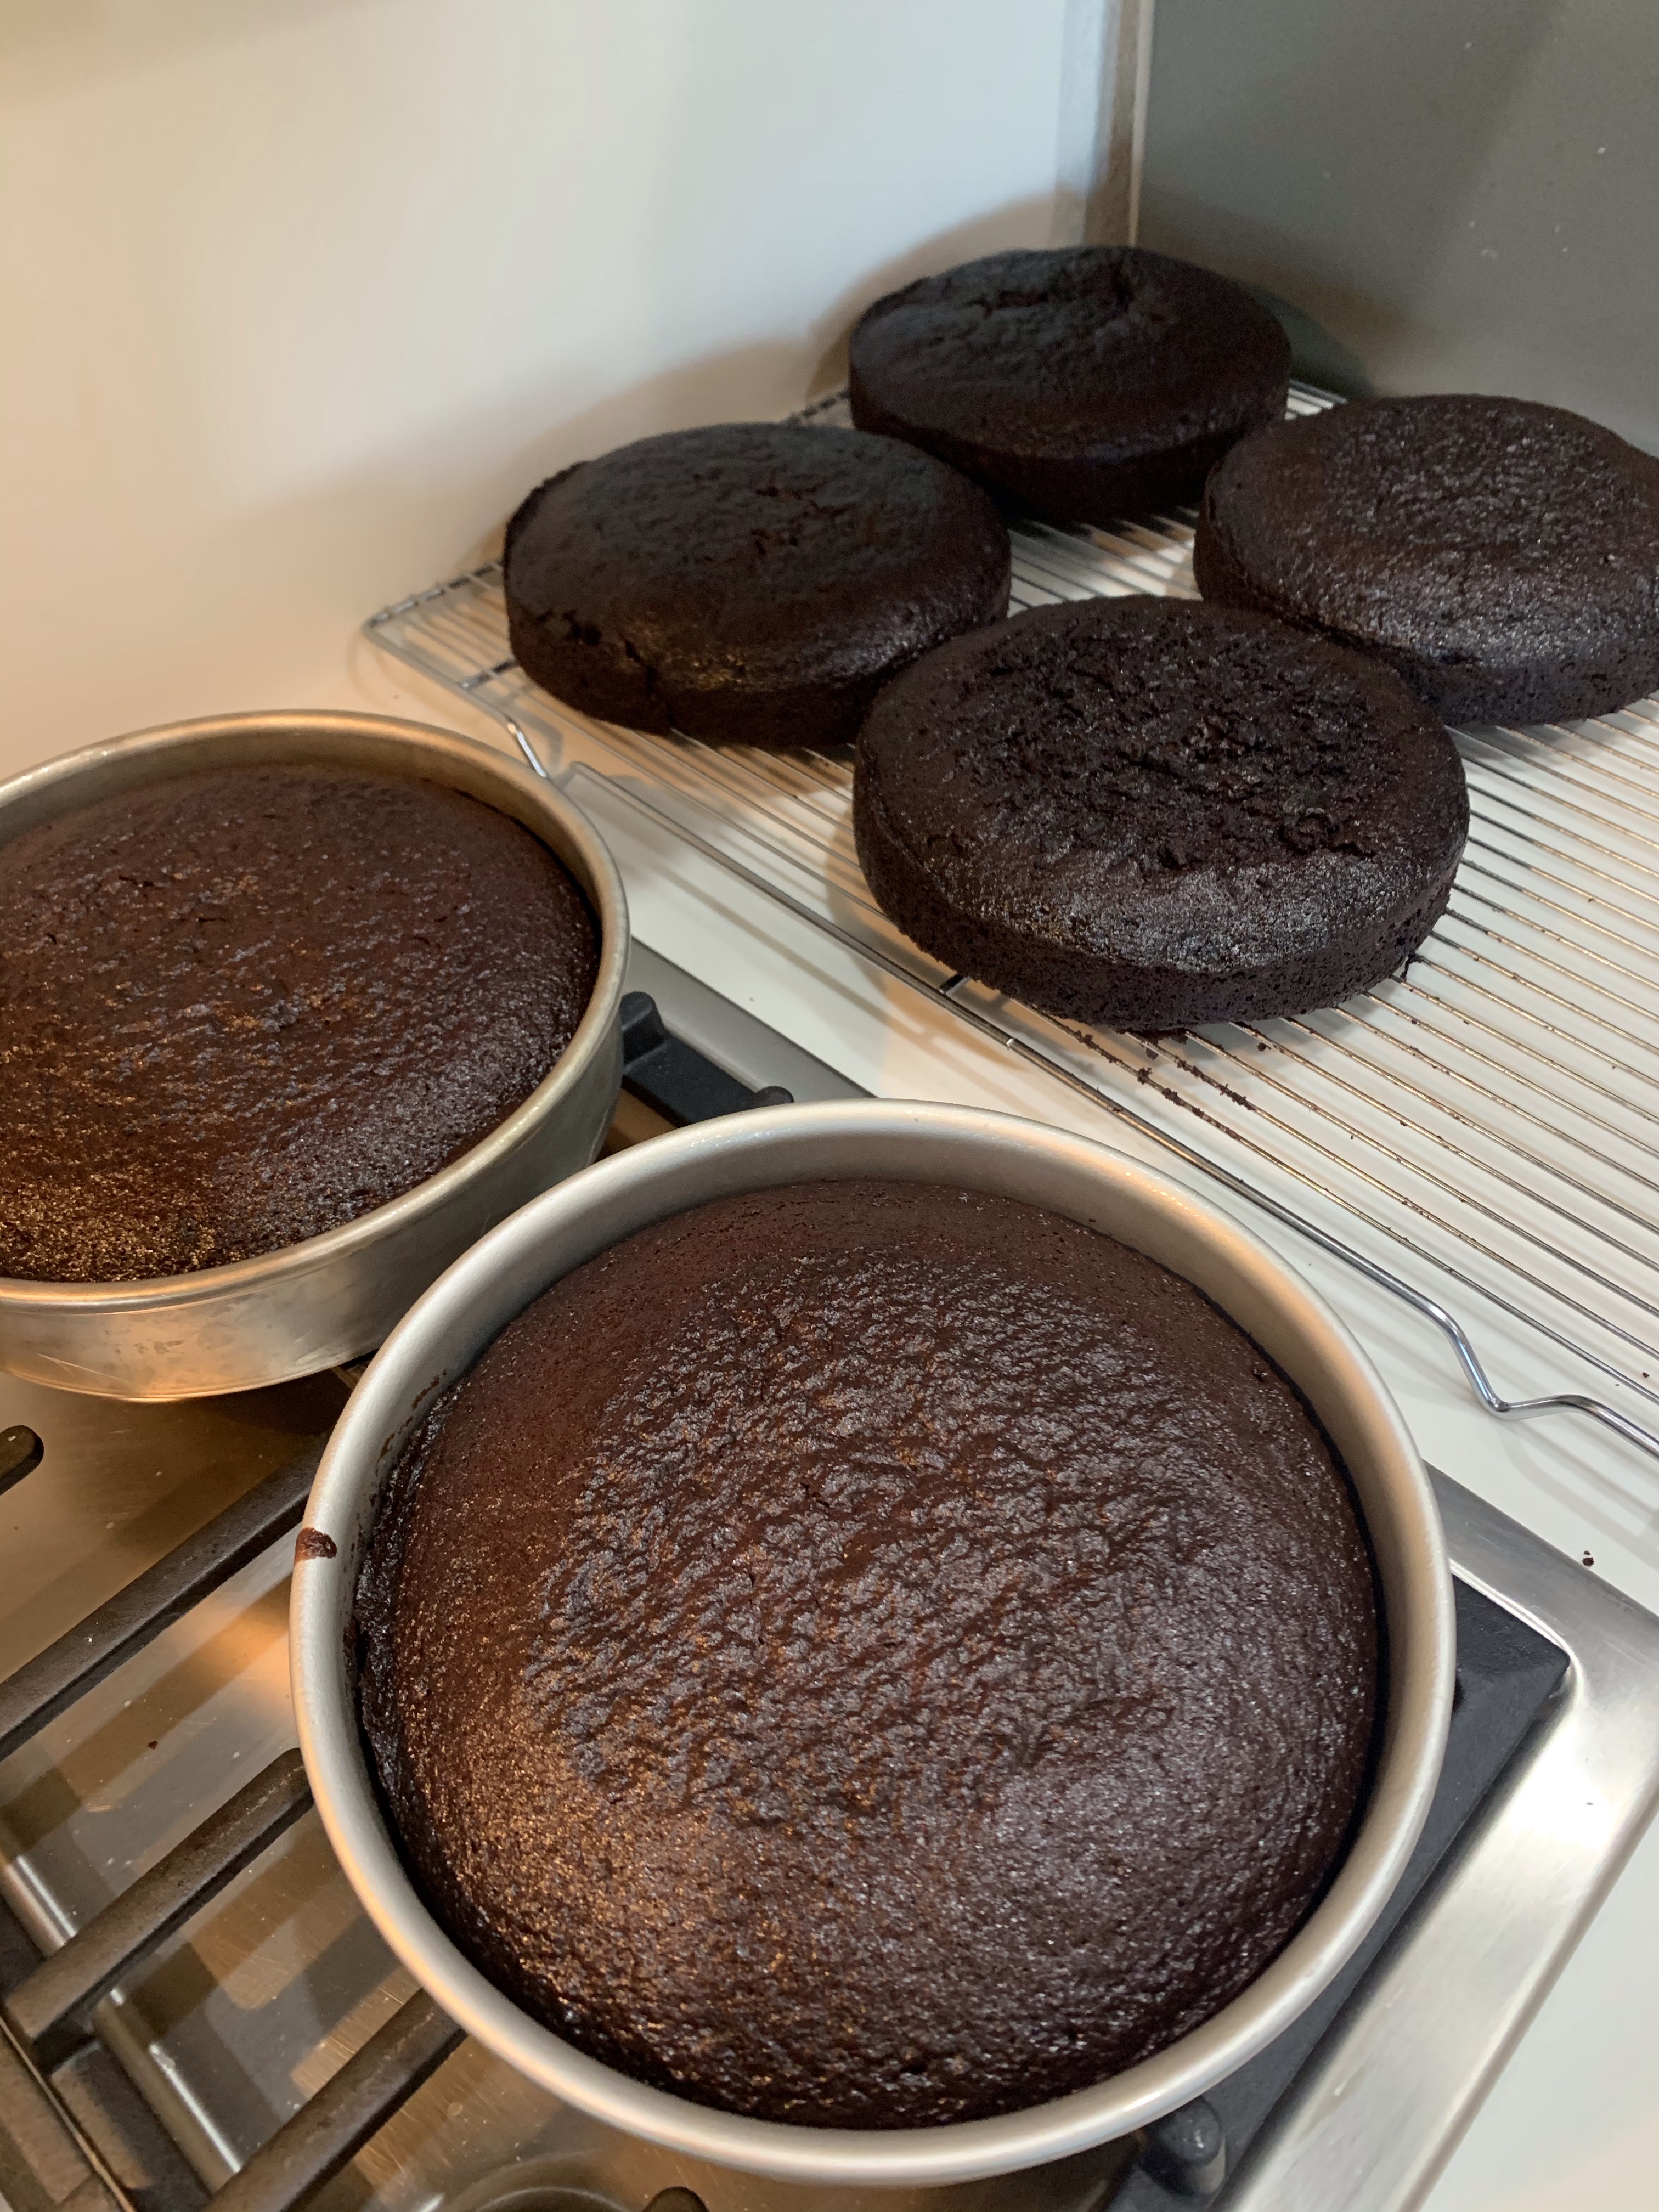
Cooling Cakes
Mixing Buttercream
Stacked Cakes
Carved Cake
Frosted
Beginning Fondant
Face Template
Completed Cake
Make the cakes and cool, or if frozen, let warm to room temp.
Mix the buttercream.
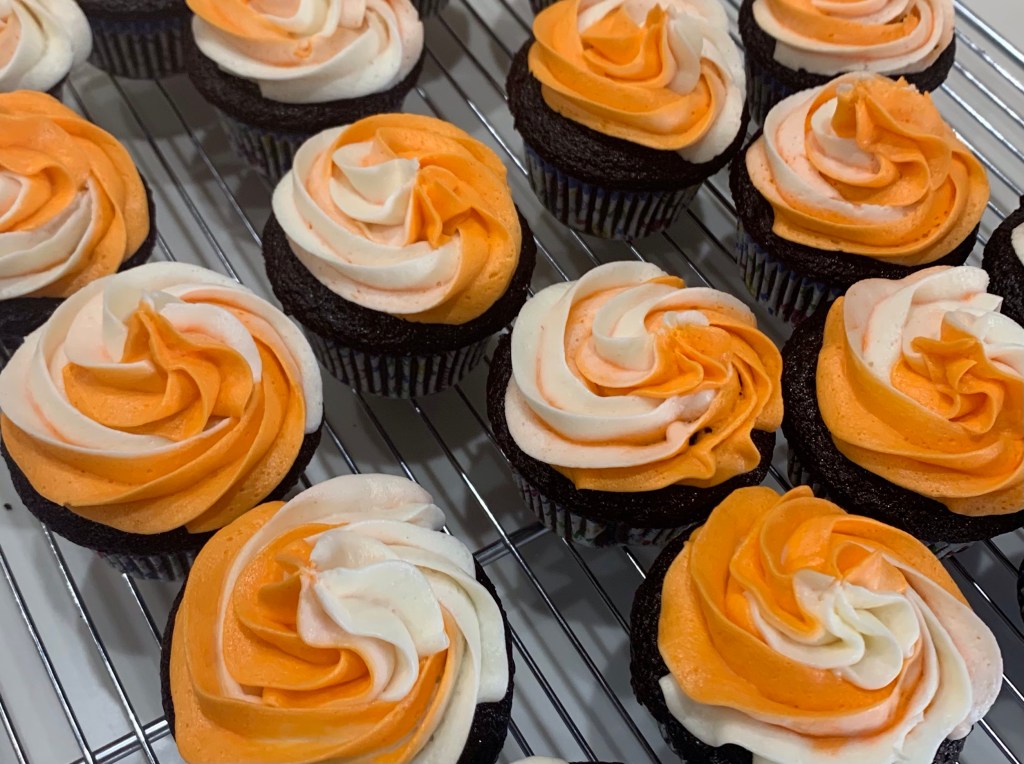
Before coloring I set a piping bag full aside to frost some birthday party cupcakes I made.
Frost between the layers, smooth any seepage and refrigerate overnight.
Carve the cool cake and crumb coat, back to the fridge.
Frost the cake and yup, refrigerate again.
Make the marshmallow fondant, break off some of the un-colored fondant and set aside.
Knead in the orange food coloring. Protect your work surface to avoid stains. I like to wear gloves for this.
Knead black food coloring for the face into the white piece set aside.
Find a face you like, or draw your own.
Cut it out, pin it to the cake and cut out holes for the black fondant.
Cut the black fondant to fit the template and fit into the holes on the cake.
Cut a 4” circle on the top about 1/2” deep and line with fondant. (Which ever color you have left over.)
Roll a piece of black fondant out into a long trip. Lay a piece of wire on it and wrap with the fondant, leaving a couple off inches of wire uncoated. Push the clean ends into each side of the top opening.
Place a few pieces of wrapped candy in the shallow hole on the top.
So, I had some puff pastry left over from the torsades last week, AND I had a half pint of fresh raspberries left over from my breakfast cereal. What am I to do?
I know! I can use some of my 11#s of chocolate for Pan Au Chocolat and puff pastry and raspberries for some hand pies. I posted both recipes and methods elsewhere in this blog so won’t bore you with repetition.