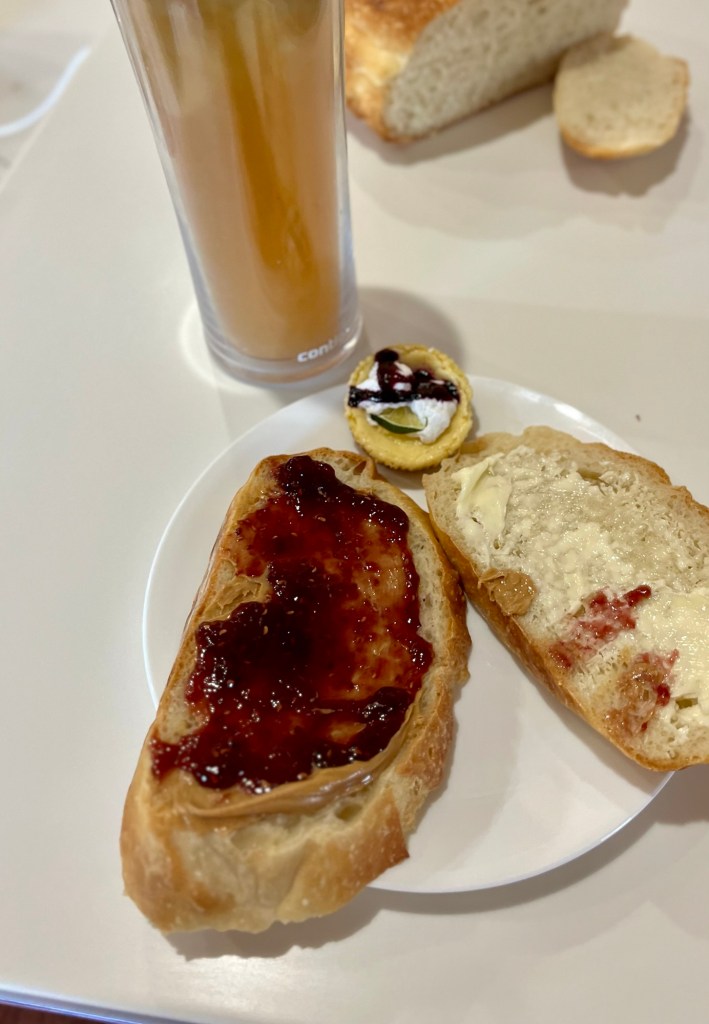
The artisan bread was still a bit warm at lunch time. I decided to make a PB&J sandwich with it. I know artisan bread should sandwich piles of lettuce, tomato, cucumbers and either meat or other veggies of your choice, but c’mon, I am talking FRESH bread with PEANUT BUTTER AND JELLY. It doesn’t get any better for me!
It’s only a “sandwich” after you add the two slices together.
In the background is Mr Arnold Palmer made with freshly squeezed lemons and sun tea and in the middle is one of the few surviving mini key lime pies. A lunch fit for… me!
After a grueling day of golf yesterday, praying to the golf gods the storms would stay away (they did) and preparing for another round tomorrow, I needed something to occupy my time today
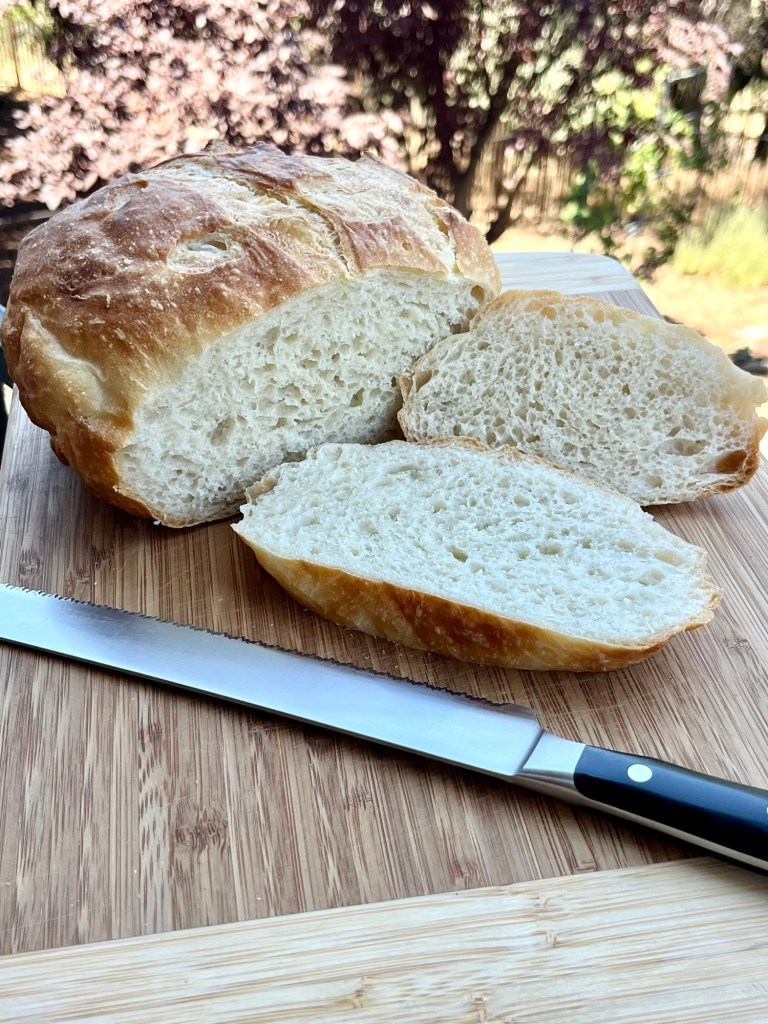
I haven’t made white sandwich bread in a while so I made the dough early this morning. It needs a minimum 8 hour refrigerated rest which will be over at 2:30 this afternoon. I can then shape and bake it. If the results are good there will be a second post later.
While waiting for the sandwich bread to rest and ferment I decided to make a recipe of honey Pumpernickel bread. I am glad I did. I made this once or twice before but never with such great results. Great flavor, texture and crumb.
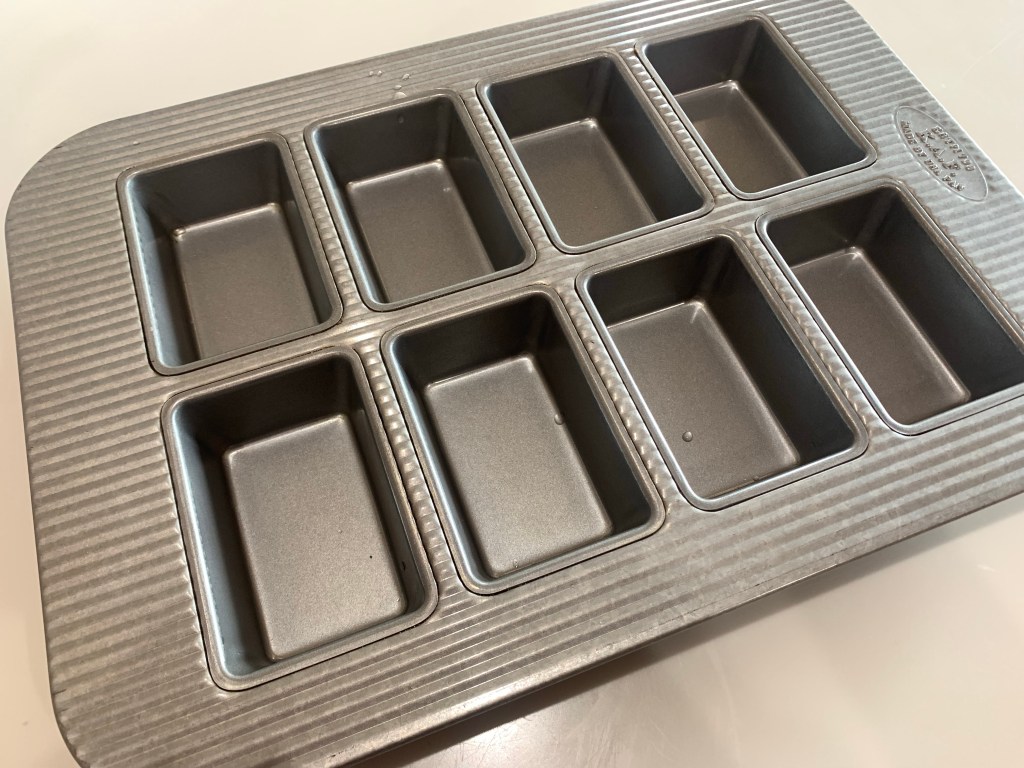
Mini Loaf Pan
HONEY PUMPERNICKEL BREAD
INGREDIENTS
• 2 ½ cups warm water (100°-110°F) • 50 g (1/4 cup) vegetable oil • 40 g (2 Tbl) molasses • 170 g (1/2 cup) honey • 3 ½ cups (400g) pumpernickel flour • 2 Tbl unsweetened cocoa powder • 2 Tbl Vital Wheat Gluten • 13.5 g (1 ½ tbl) instant yeast • 1 tsp (6g) salt • 240-360 g (2-3 cups) bread flour • rolled oats (for dusting loaves)
INSTRUCTIONS
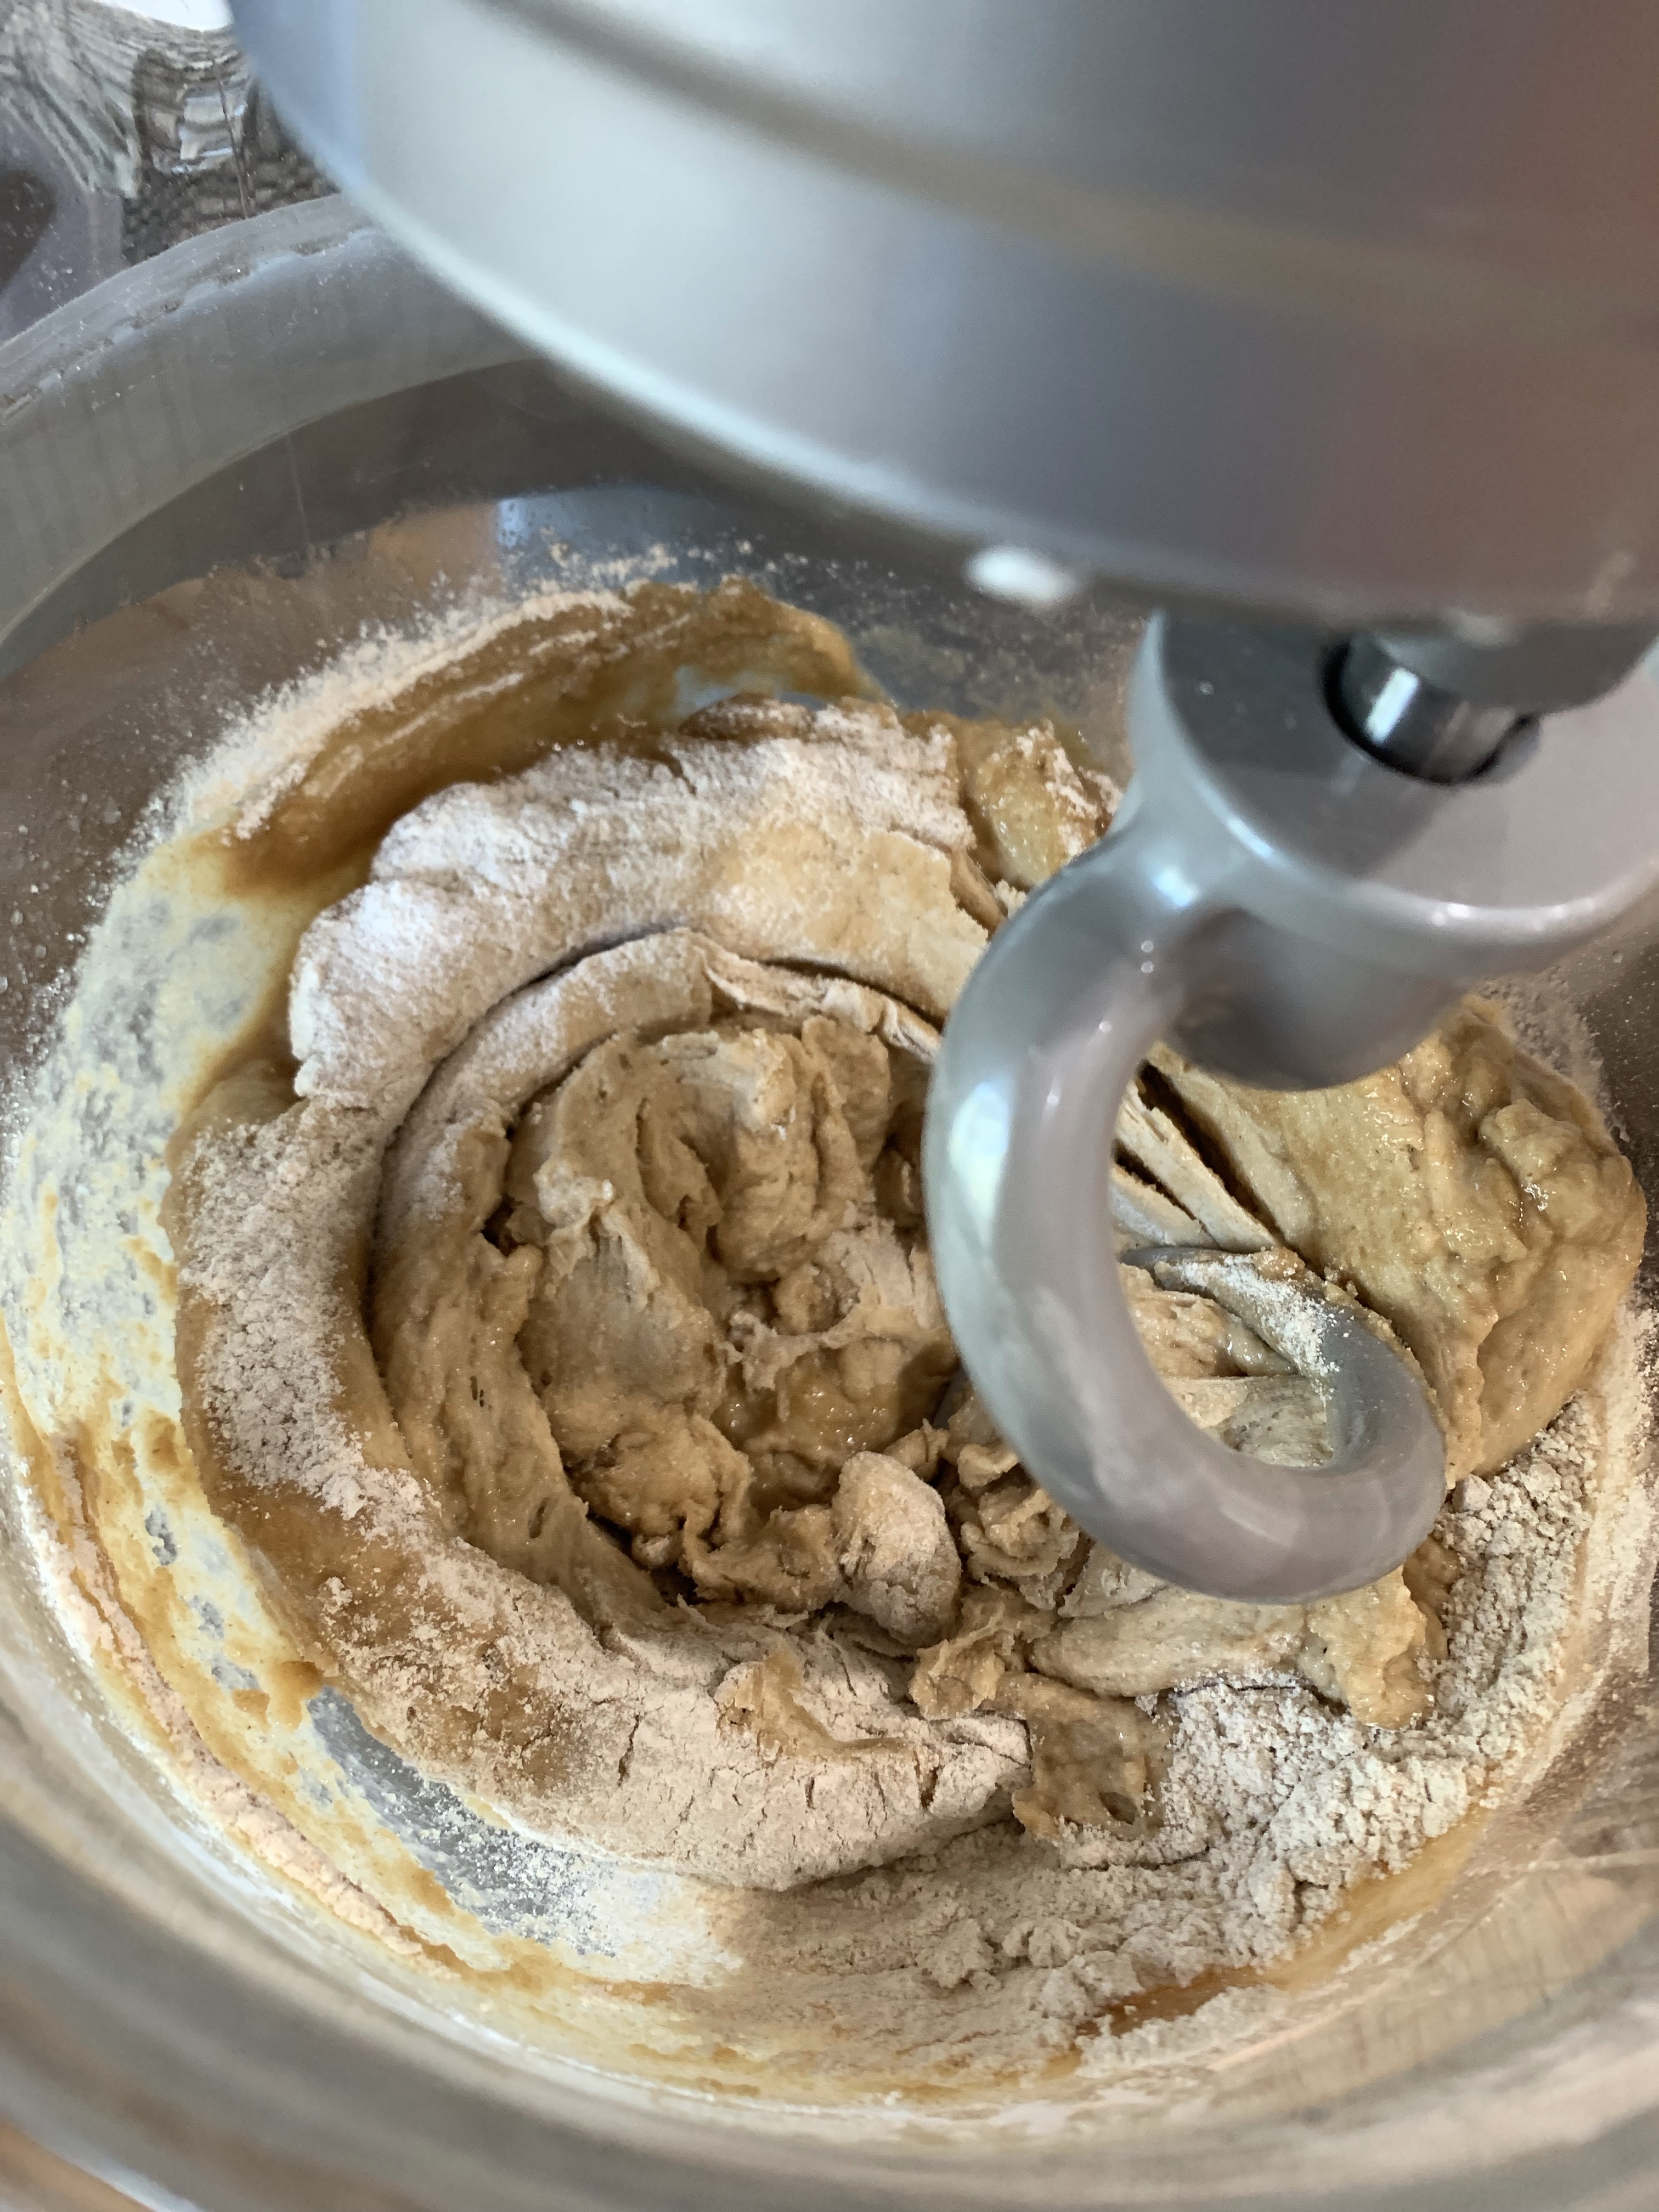
In the bowl of a stand mixer fitter with a dough hook, stir together water, oil, molasses, and honey until mixed well.
Add pumpernickel flour and Vital Wheat Gluten to water mixture.
Add cocoa, yeast, and salt, and stir until blended.
Allow mixture sit for 10 minutes.
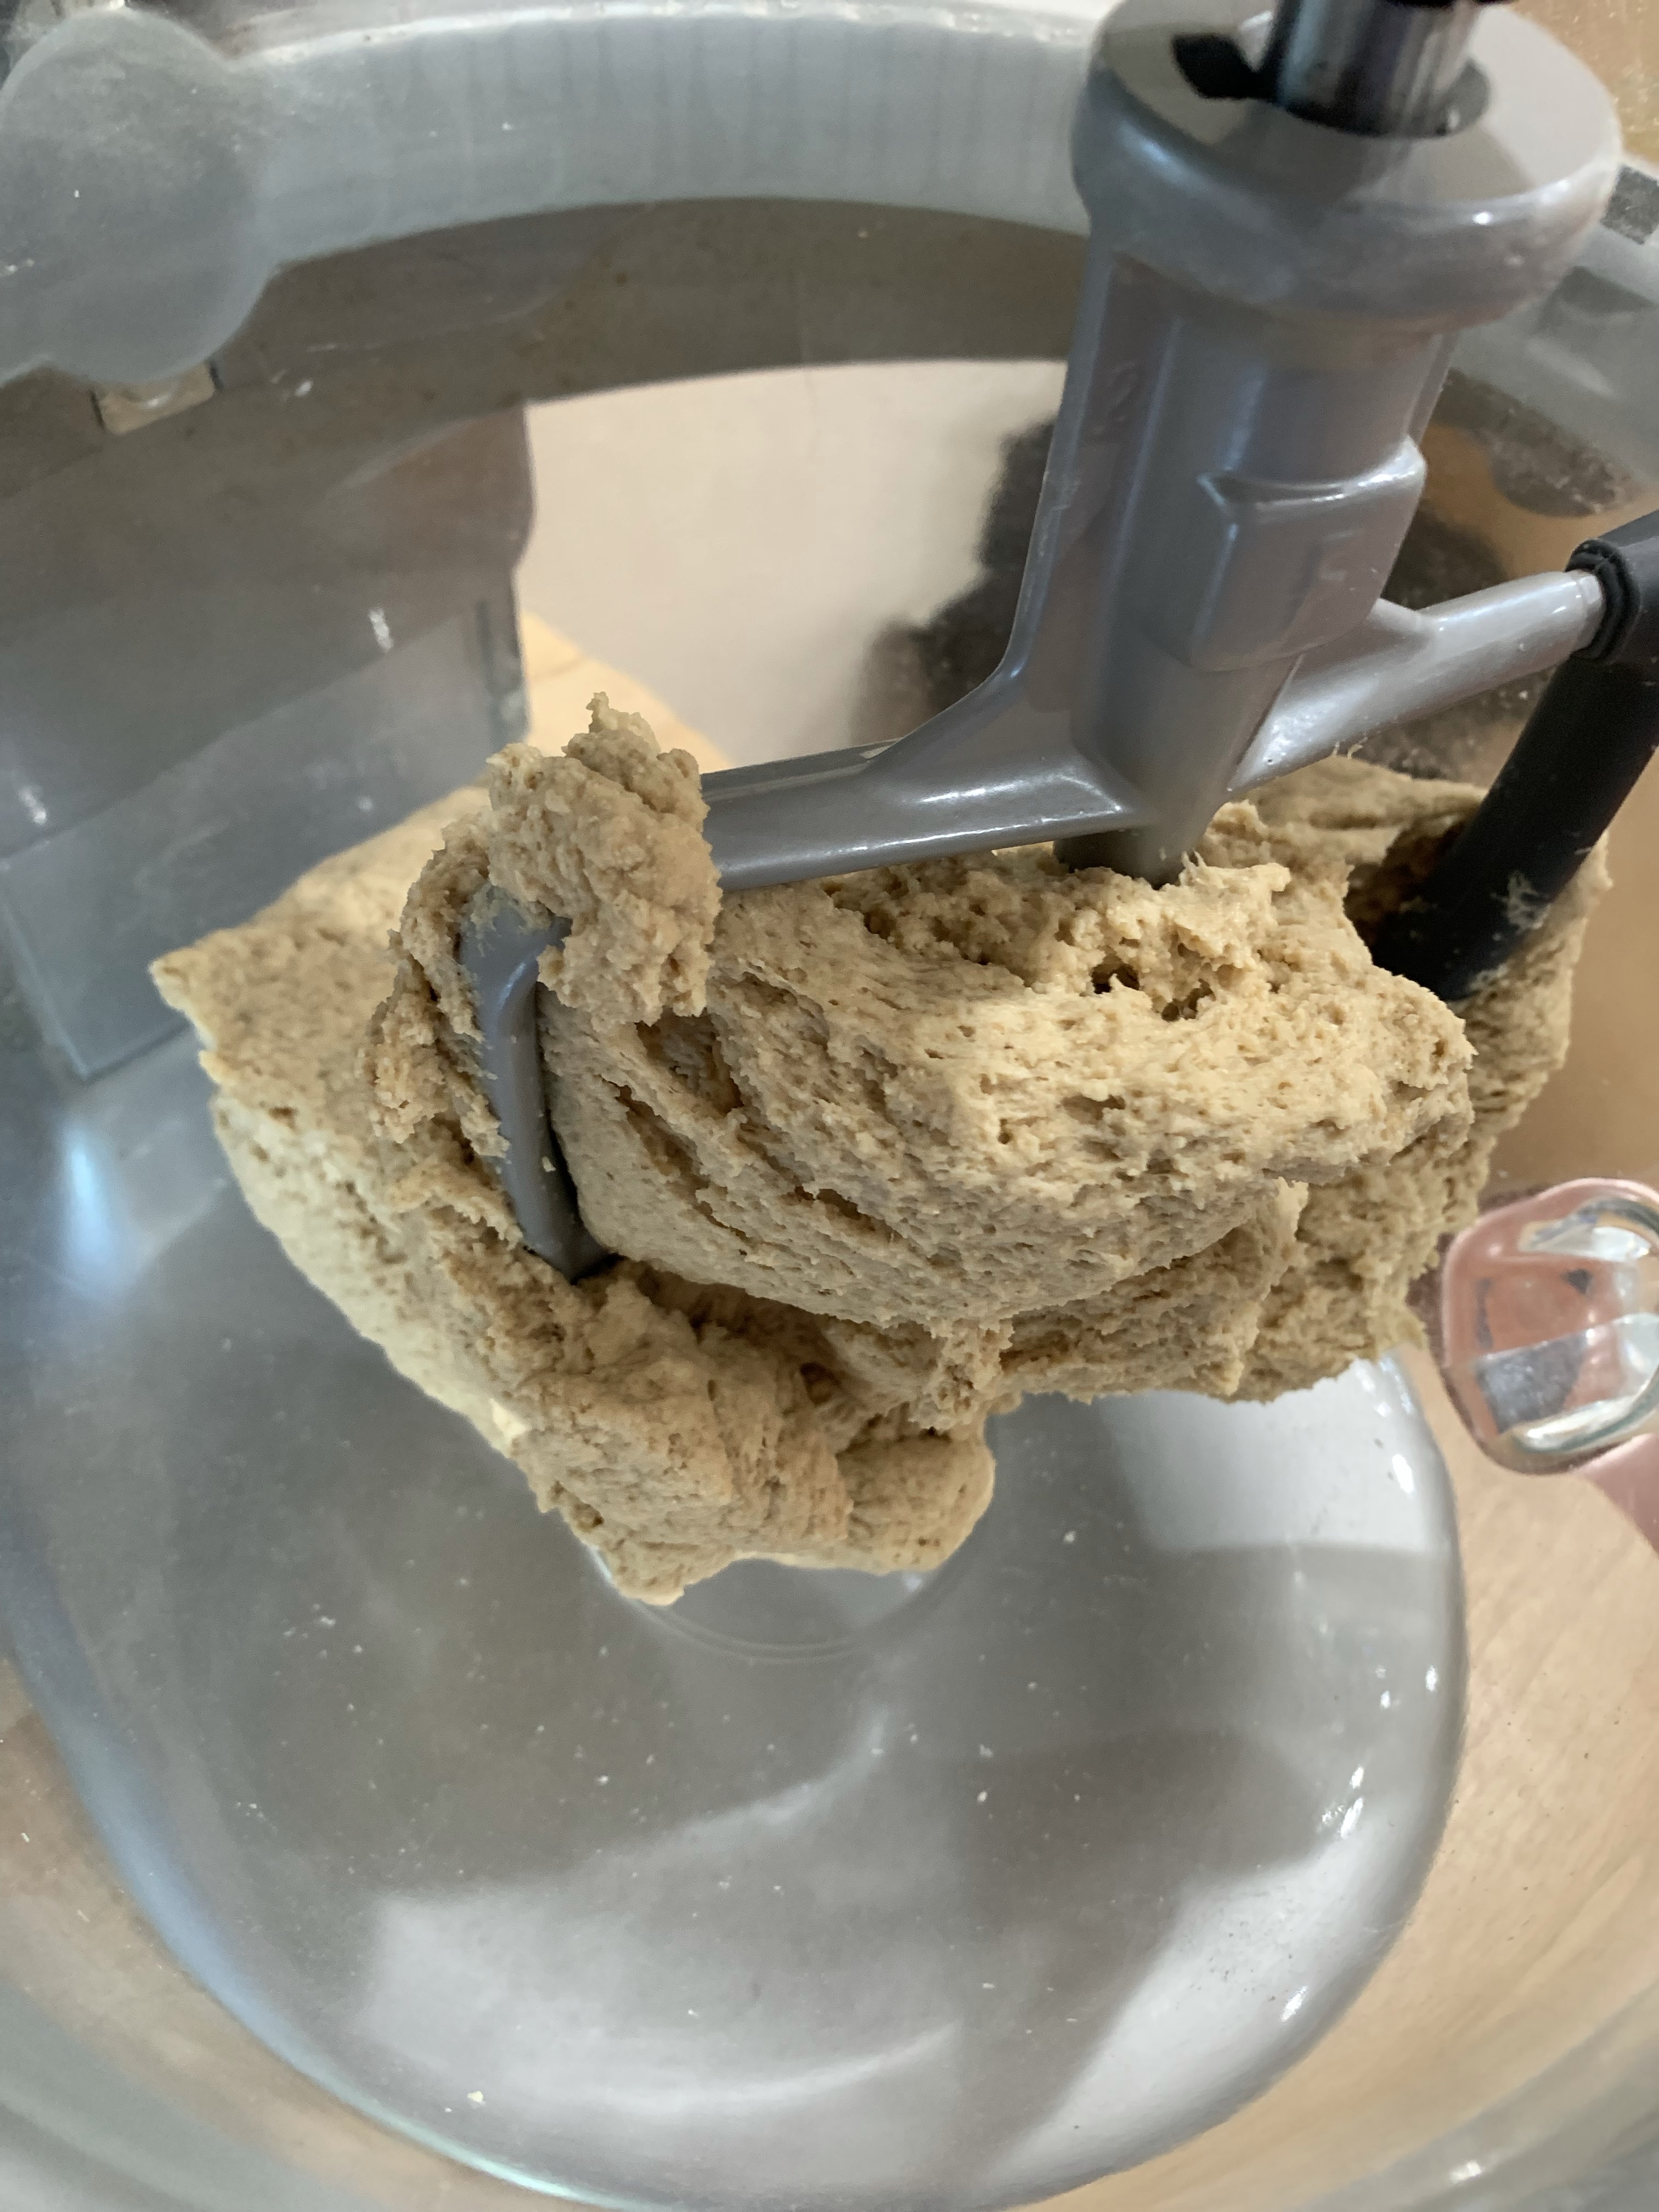
Stir in bread flour, one cup at a time, until dough clings to hook and almost clears the sides of mixer, about 3-4 minutes. The dough should weigh about 1880 g.
Cover bowl with greased plastic wrap.
Allow dough to rise in the bowl until doubled, about 30-60 minutes.
For two 9×5 loaves • Divide into 2 pieces.Each should weigh about 940g. • Cover each piece with greased plastic wrap, and let dough rest for 5 minutes. • Shape pieces into loaves, and sprinkle with oats. • Place each loaf in a greased 9×5-inch loaf pan. • Let dough rise until doubled, about 30-60 minutes. • Toward the end of the rising time, preheat oven to 350 F. • Bake for 30-40 minutes or until the internal temperature is about 200 F.
For 16 mini-loaves • Divide into 16 balls 112 g each. • Cover with greased plastic wrap, and let dough rest for 5 minutes. • Shape pieces into loaves, and sprinkle with oats. (Gently roll into a small cylinder, don’t deflate!) • Place 8 loaves in a greased 8 cell mini loaf pan. • Place the remaining 8 balls in the refrigerator. o Let dough rise until doubled, about 30-60 minutes. o Toward the end of the rising time, preheat oven to 350 F. o Bake for 20 minutes or until the internal temperature is about 200 F. o Cool on a cooling rack and remove the remaining balls from the refrigerator o Gently place the second batch in the still warm to touch baking sheet and repeat 20 minute baking. Don’t roll these. Just gently place in the mini baking sheet.
So what are you supposed to do when you wake early, and as you walk through the kitchen on you way to turn on the TV to watch the replay of the Olympics (that you slept through last night) and you see 3 small, very ripe bananas sitting there?
Answer: make raisin banana bread. As I opened the drawer where the bread pans live, I saw two small bread pans I bought to make some Tangzhong Pillowy White Bread. Knowing I would give half the bread away, I felt these would be a perfect size.
There is nothing exceptional or fancy about this bread other than it’s tender, has a great crumb, and is neither tough or dry. (Be sure to take it out of the oven when the internal temperature reaches 190 F. Over-baking can reverse all its good characteristics.)
Banana Raisin Bread
INGREDIENTS
2 cups flour
2 teaspoons baking powder
1 teaspoon salt
3⁄4 cup sugar
2 eggs
1⁄4 cup oil
1⁄4 cup milk
1 teaspoon vanilla
2 ripe bananas, mashed
1⁄2 cup raisins
1 tablespoon sparkling sugar
METHOD
Preheat oven to 350F
Mix dry ingredients in a mixing bowl.
Mix wet ingredients in another bowl.
Combine wet and dry ingredients.
Pour in loaf pan sprayed with Pam and sprinkle with 2 tablespoons coarse sparkling sugar.
Bake for about an hour, until golden brown. (In the small pans it only required 40 minutes of baking. Start checking internal temp at about 30 minutes.)
Hope everyone who celebrates Thanksgiving has a safe and peaceful one this year, a much needed culinary respite from life’s trials and tribulations. (Note: you have the means to read this, no doubt we are the most fortunate of all.)
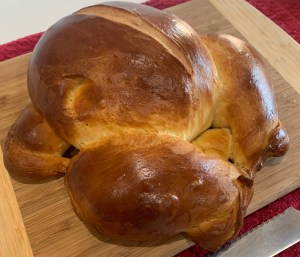
This year I decided to take a turkey to our family dinner.
Of course, it is a turkey made of bread. I also brought a couple of dozen dinner rolls and a high hydration honey bread as a hostess gift. This morning was another good baking session.
Amazingly, each batch of pumpernickel bread seems to be better than the previous. Today I enhanced my recipe with KAF Cake and Bread Enhancer.
This product is an emulsifier which “enhances” the ability of fats and liquids to combine more easily. This in turn makes the bread (or cake) softer, moister and stay fresh longer. Other than this addition (one Tbl per cup of flour) this recipe is the same as the last one. The result was exactly as advertised, great taste, soft, moist and delicious.
L: Enhanced Mini Loaves – R: Enhanced Mini Loaf Crumb
A quick story about how I came to have Cake and Bread Enhancer. I was visiting my home state which also happens to be the home of King Arthur Baking. We decided to take a road trip, not that I needed anything. Well, a couple of hours and -$395 later I had the mini loaf pan, enhancer and dozens of other baking items I did not need. QC no longer allows me to go into that store with any credit cards.☹️
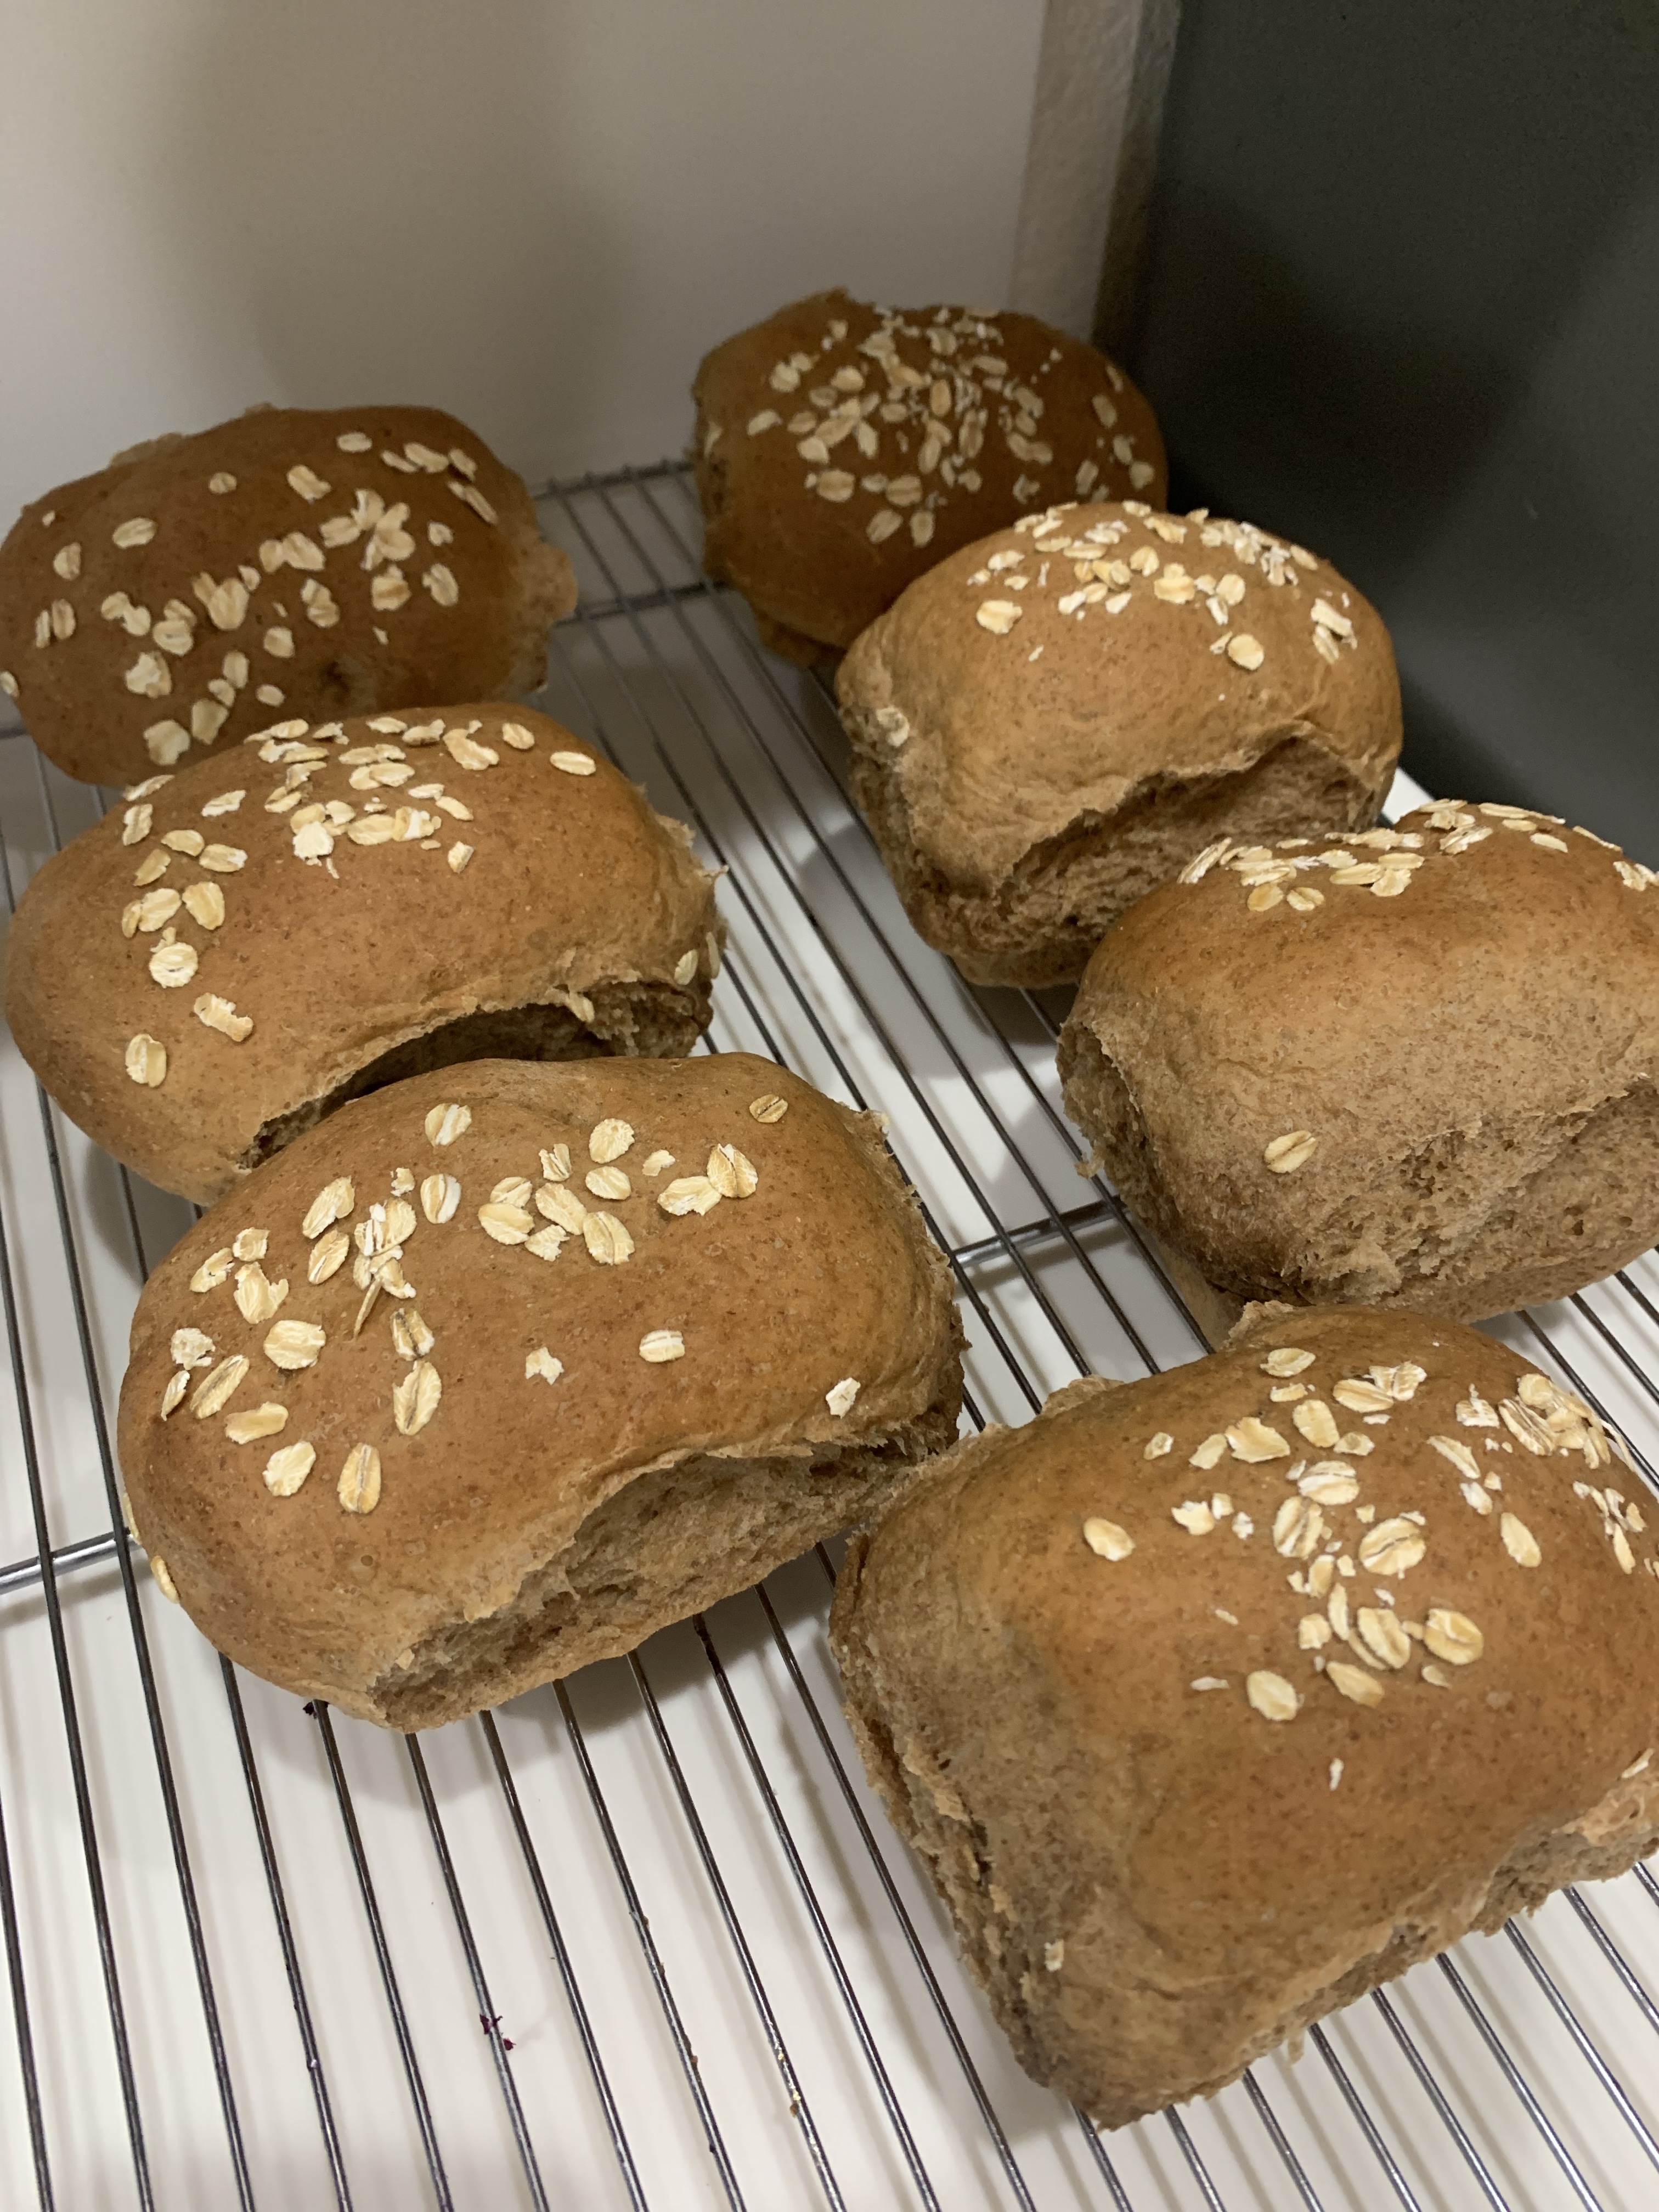
This afternoon’s ‘to do’ list contained nothing pressing. Tuesday I hard boiled eggs to include in our dinner salad and to make egg salad Wednesday. Today I baked a loaf of sandwich bread because I love egg salad on fresh baked bread. And as long as I was making bread I decided to replace the hamburger rolls I froze a few weeks ago. (I wasn’t happy with the rise of those whole wheat buns.) Today I mixed a double recipe of bread dough and shaped half into a loaf to bake at 425 deg and the rest into hamburger rolls to be baked at 375 deg.
To make a softer crust I coated the top of the loaf with melted butter before baking (hence the darker crust) and once again after it was baked, but still hot.
I also had a cup of heavy cream to use before it expired, and as long as the oven was on, I dropped the temperature and made some multi berry scones, baked at 400 deg.
Remember the hamburger rolls that baked at 375 deg? Well, as long as the oven was going to be dropped to 375 deg and as long as I had some frozen chocolate chip cookie dough that also bakes at 375 deg, I figured, what the heck.?
I have to find more chores to add to the ‘to do’ list. Today was exhausting.
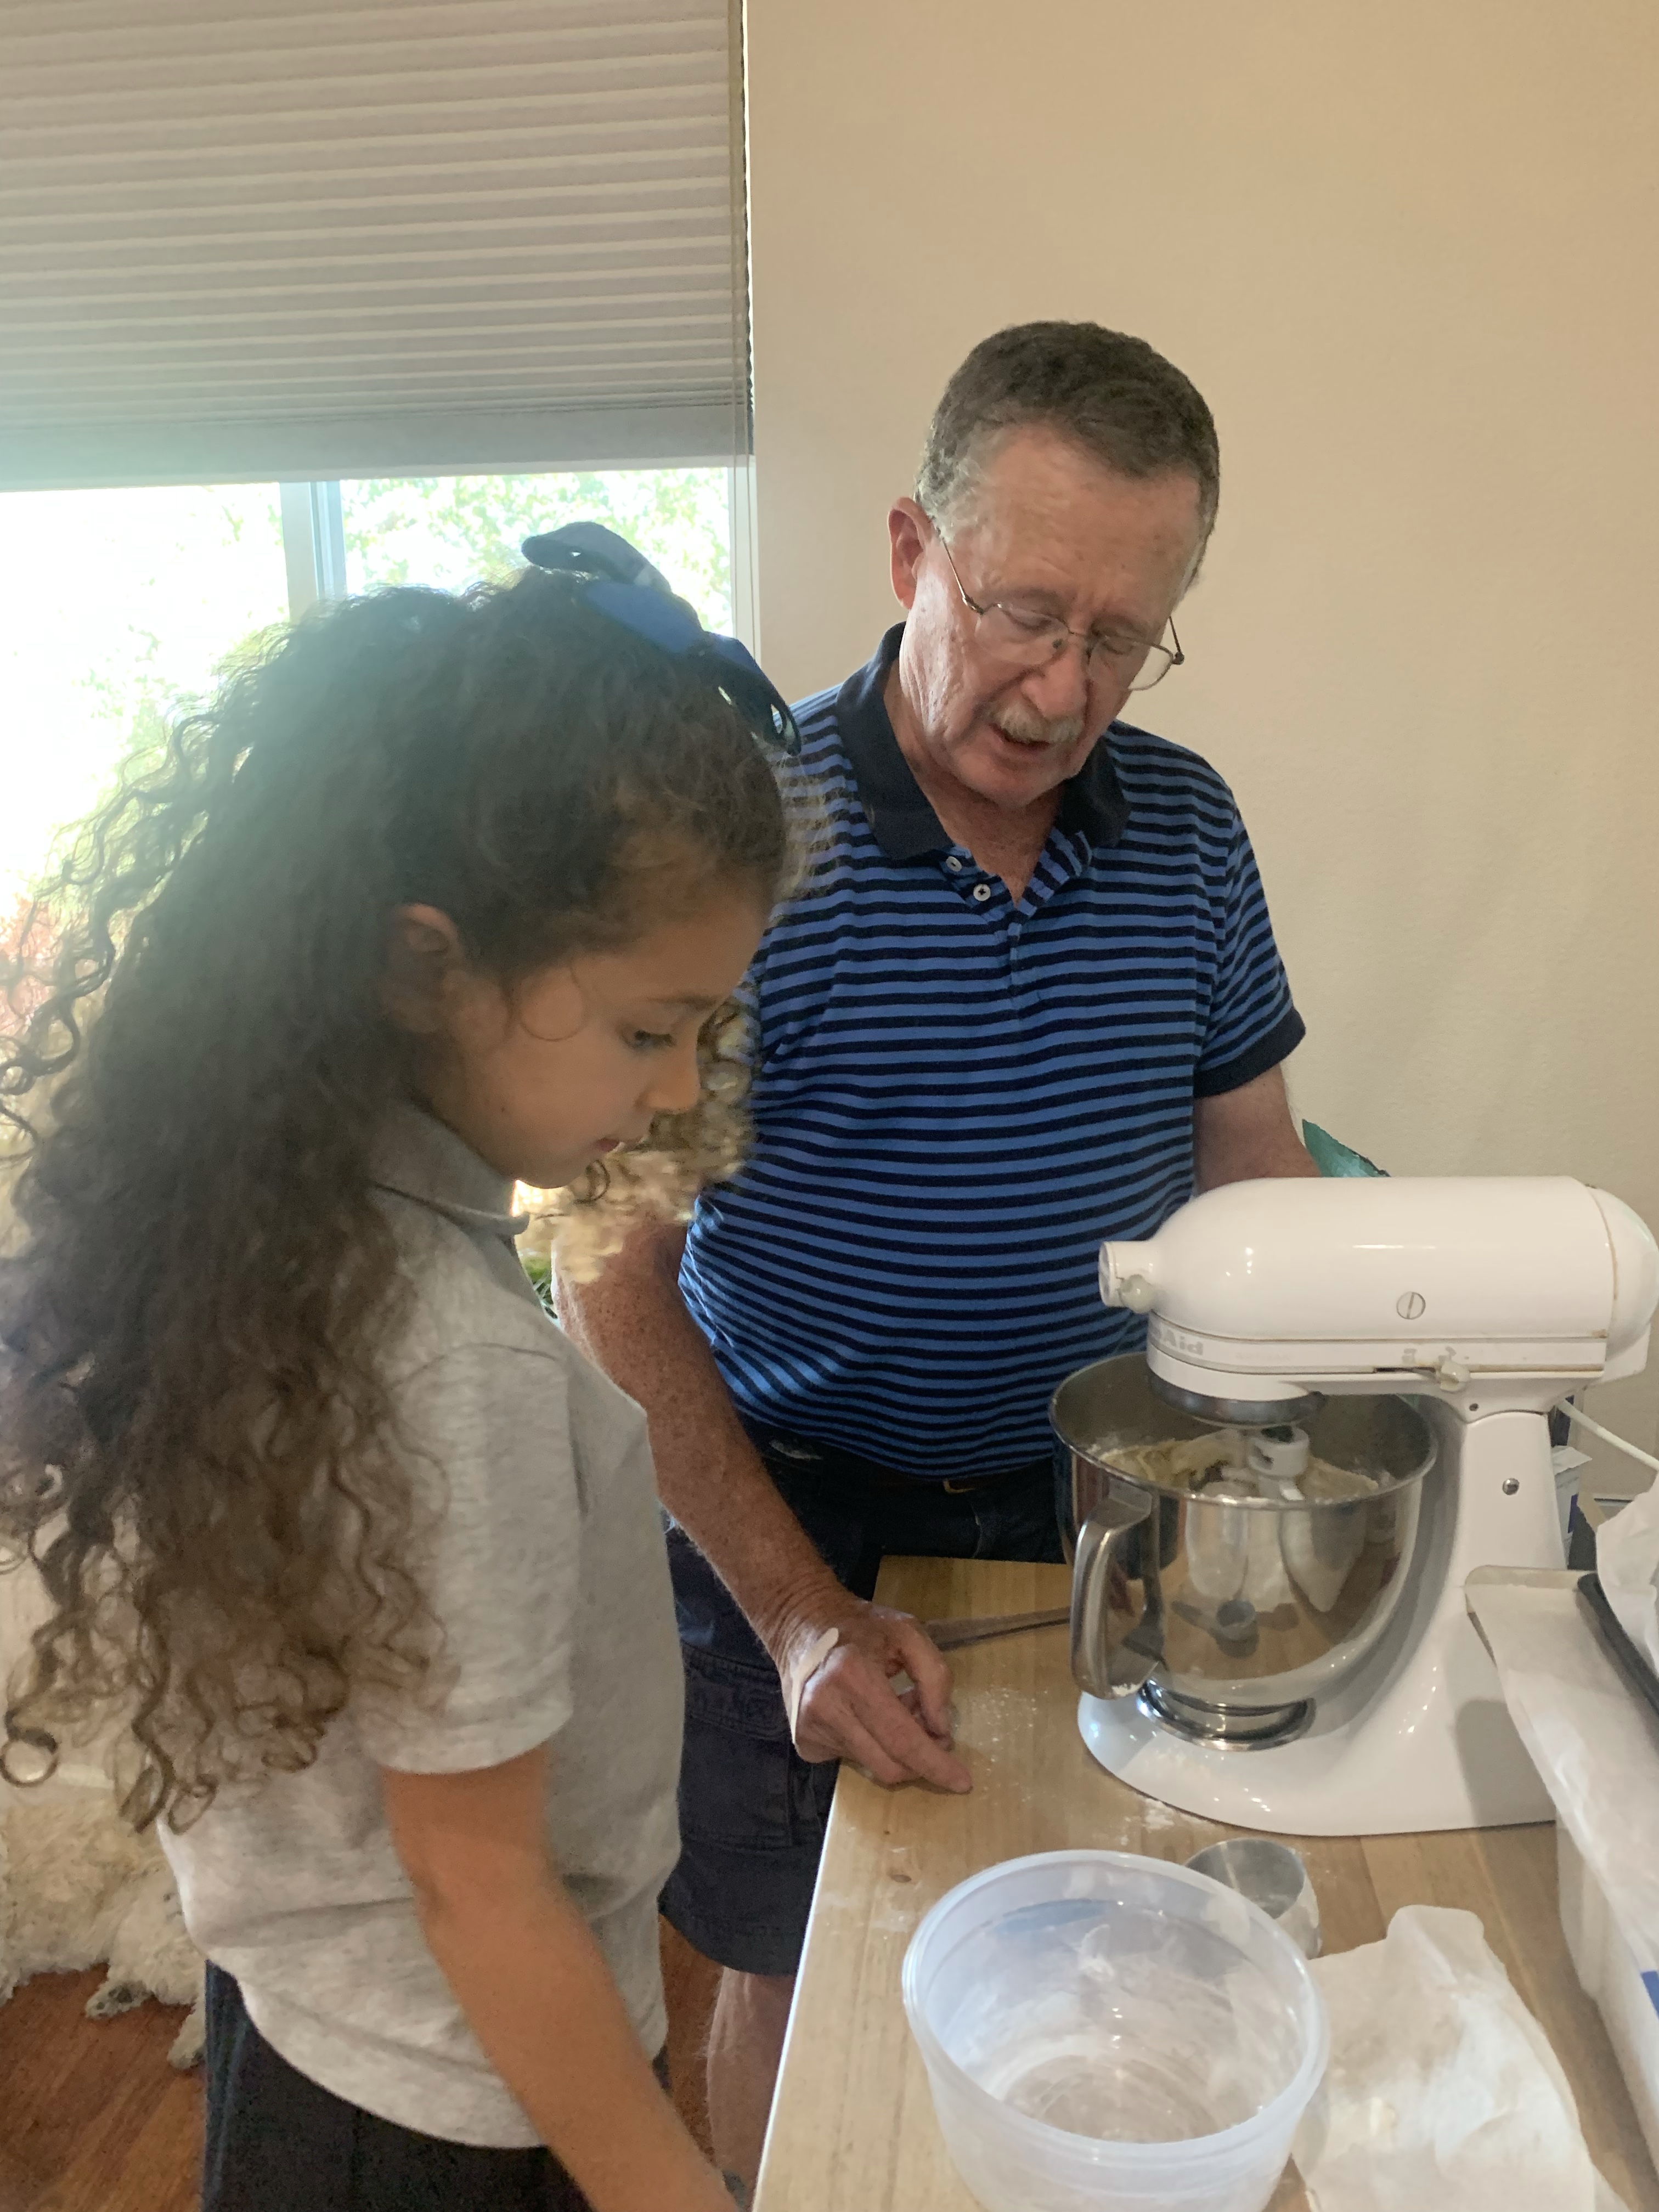
The best part of the day was participating in the Grandparents Drive-Thru Car Parade at Grace’s school! (Unicorn car. You can’t see the fuzzy pink tail.)
Speaking of Grace, here we are making the aforesaid chocolate chip cookies.
After my success with the whole wheat bread yesterday I bit the bullet and created my own pumpernickel bread recipe based on what I learned yesterday and two other recipes. The results were excellent. (Whew!)
INGREDIENTS • 2 ½ cups warm water (100°-110°F) • ¼ cup vegetable oil • 2 Tbl molasses • ¼ cup honey • 3 ½ cups (400g) pumpernickel flour • 2 Tbl unsweetened cocoa powder • ¼ cup Vital Wheat Gluten • 1 Tbl lemon juice • 1 ½ tbl (13.5g) instant yeast • 1 tsp (6g) salt • 2-3 cups (240-360g) bread flour • rolled oats (for dusting loaves)
METHOD
In the bowl of a stand mixer fitted with a dough hook, stir together water, oil, molasses, and honey until mixed well.
Add pumpernickel flour to water mixture.
Add cocoa, yeast, and salt, Vital Wheat Gluten, lemon juice and stir until blended.
Let mixture sit for 10 minutes.
Stir in bread flour, one cup at a time, until dough clings to hook and almost clears the sides of mixer, about 3-4 minutes.
Continue to knead with the dough hook for 6-8 minutes
Turn dough out on a lightly greased counter and knead by hand for 5-8 minutes until the dough is smooth and supple.
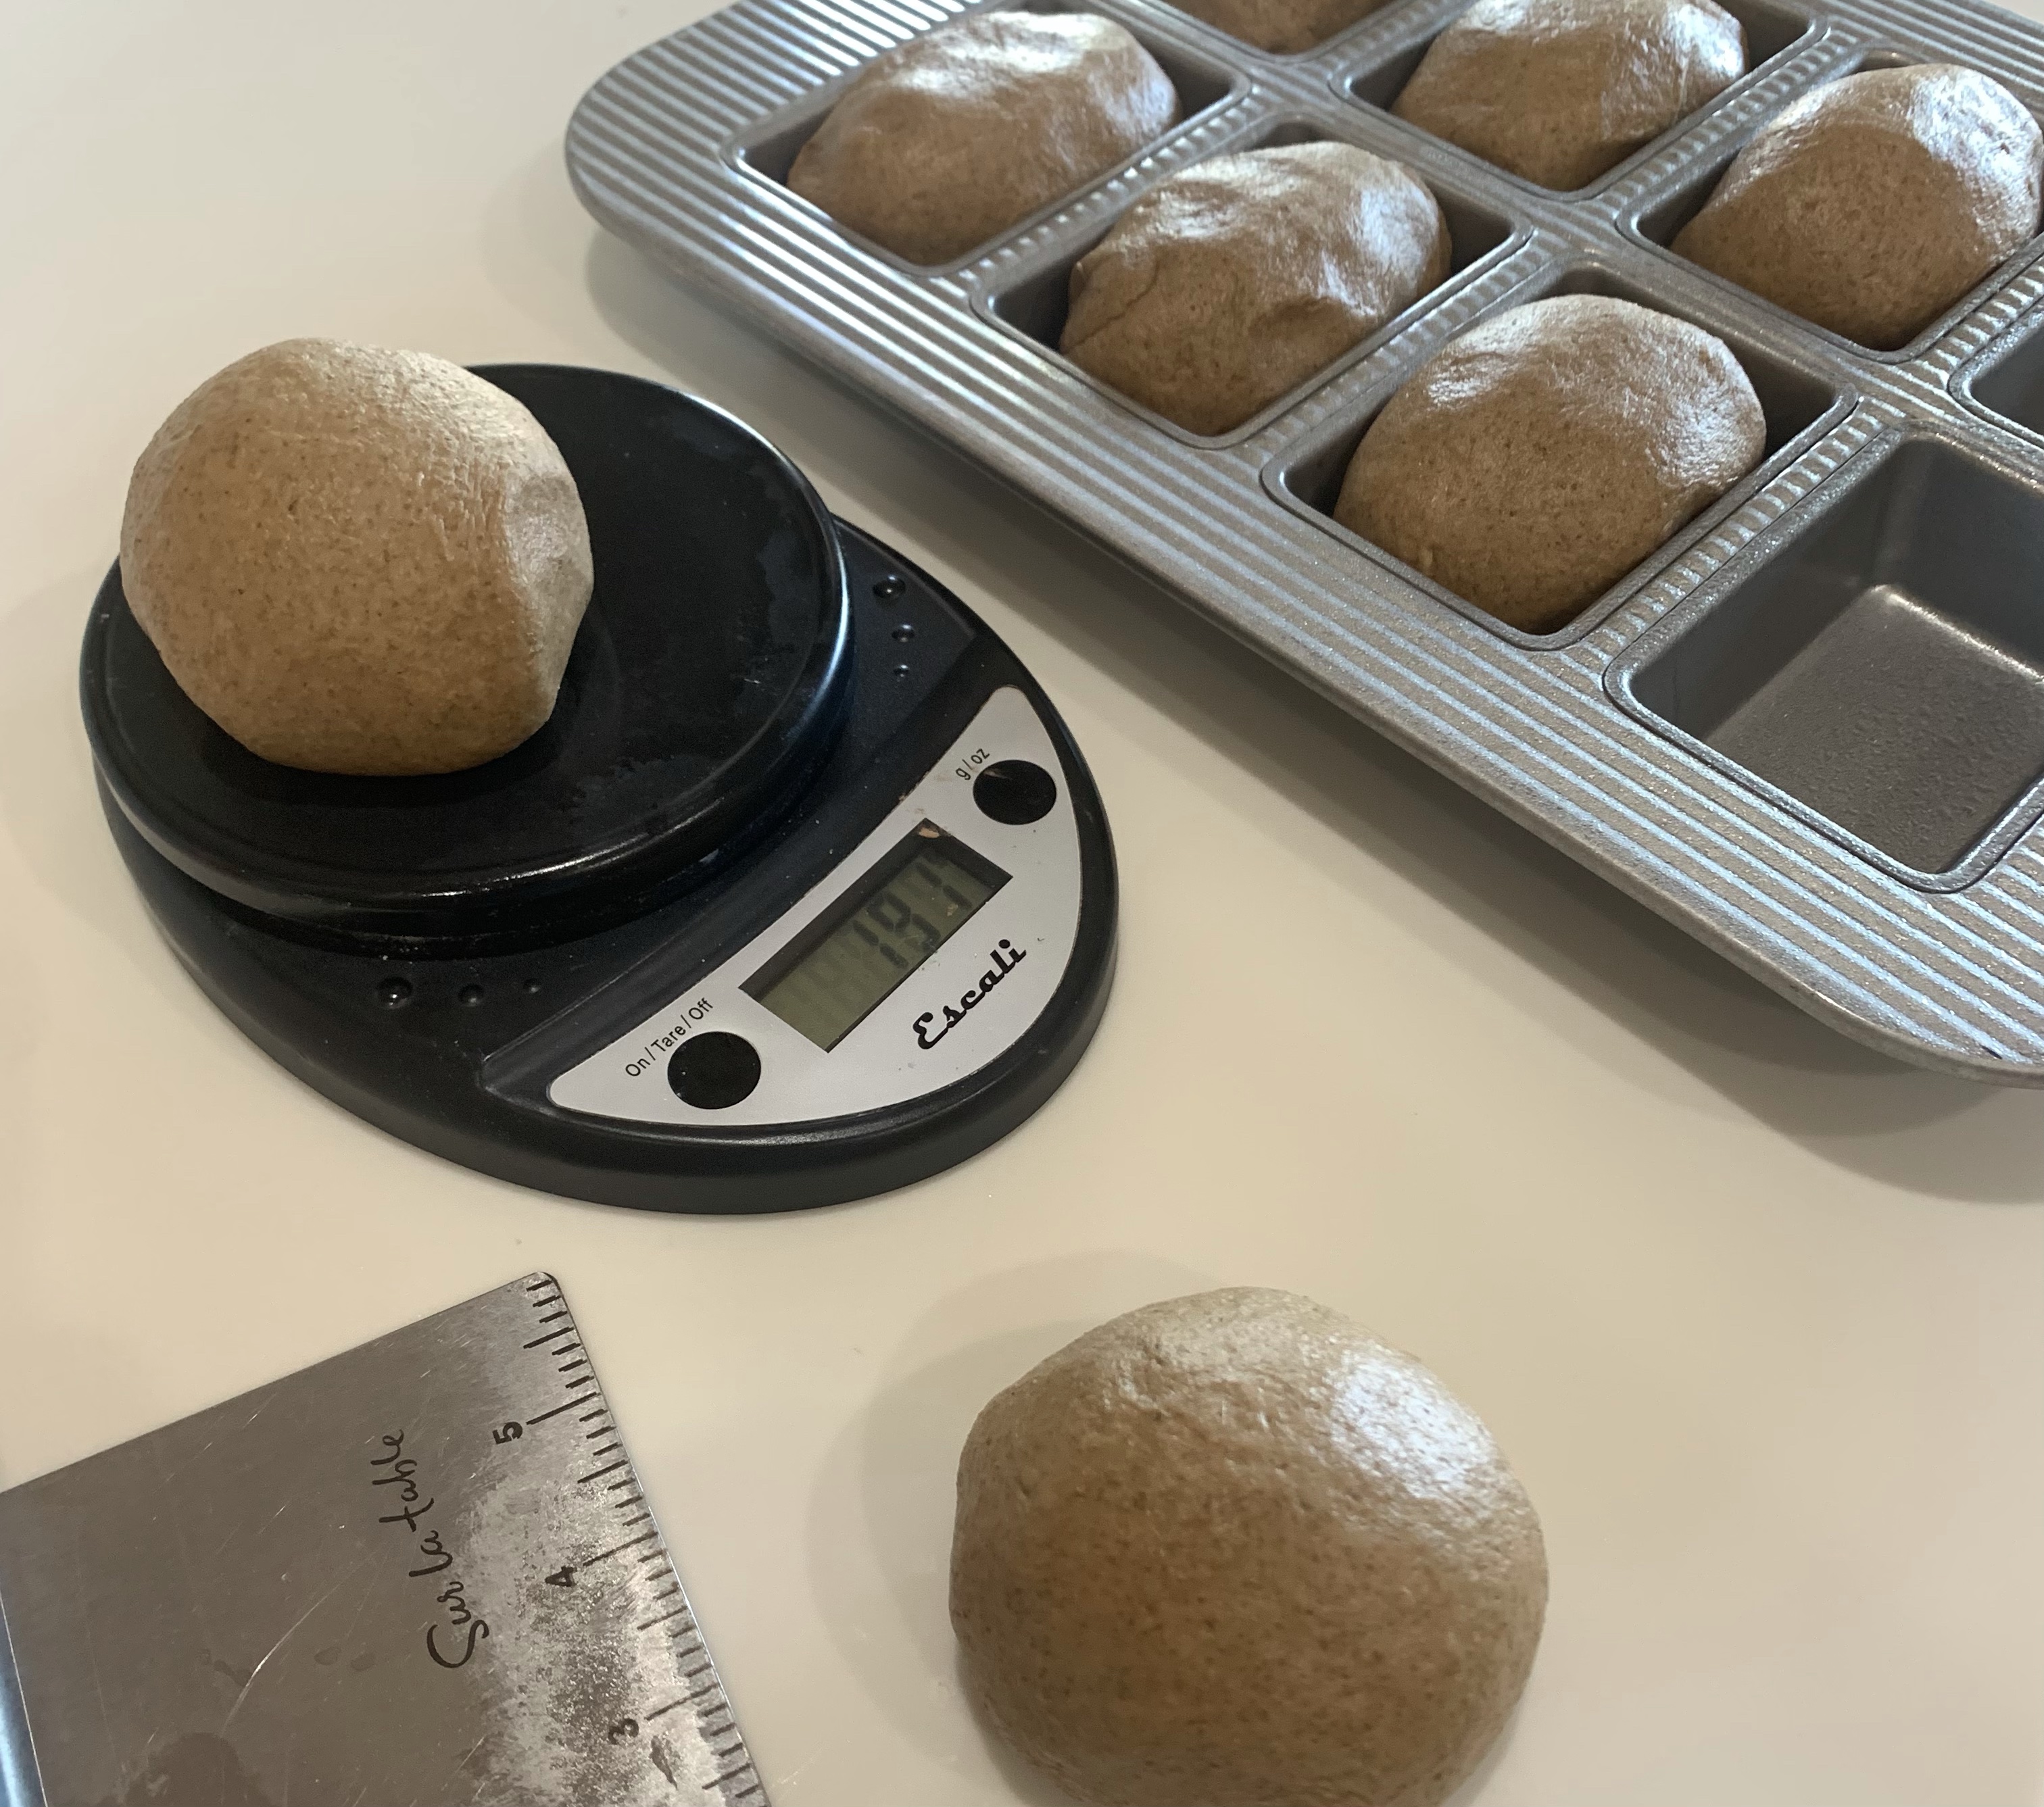
Divide dough by weight into 8 equal portions. Mine were 192 g each.
Place each portion into a mini loaf pan and dust with rolled oats.
Allow dough to rise in until it is about 1 inch above the the edge of the pan, about 30-60 minutes. Take note of how high the bread is before starting proof. Mine was almost an inch to begin and I let it rise to 1 1/2 to 2”. There was a lot of oven spring also.
Toward the end of the rising time, preheat oven to 350 F.
Bake at for 18-25 minutes. (Internal temp should be 190-200 deg. F)
While on vacation I stopped by King Arthurs store in Norwich, Vermont. They had lots of real cool stuff that I didn’t need, so only bought a shopping cart full. One pan that I didn’t need and bought was their mini-loaf pan. There will be more cool stuff to come.
I have a new recipe for soft, light, fluffy whole wheat bread. I rarely have any luck in making whole wheat bread light and fluffy, but keep trying.
This pan was excellent and the recipe even better. I believe one ingredient and two method instructions make the difference. The ingredient is Vital Wheat Gluten. I use this with any flour that doesn’t have high gluten content such as wheat, pumpernickel, etc. I needed to replenish my supply and luckily the KAF store had it in stock. (OK, this was one thing I needed.) The two method steps that helped were to let the dough rest for 15 minutes before adding the balance of the flour and second, after the mixer finishes kneading the dough, give it a 5-10 minute hand kneading.
INGREDIENTS • 5-6 cups whole wheat flour • 1 1/2 tablespoons instant yeast • 1/4 cup vital wheat gluten (see note) • 2 3/4 cups warm water • 1 tablespoon lemon juice (bottled or fresh) • 1/3 cup oil • 1/3 cup honey • 1 tablespoon salt
METHOD
In the bowl of a stand mixer fitted with the dough hook, mix together 3 cups of the whole wheat flour, yeast, and gluten. Add the warm water and mix well. Cover the bowl and let the mixture rest for 10-12 minutes.
Add the lemon juice, oil, honey, and salt. Mix on low speed.
With the mixer running on low speed, continue adding flour 1/2 cup at a time until the dough pulls away from the sides of the bowl (don’t over-flour! A little stickiness is ok as long as the dough forms a ball and doesn’t leave a lot of residue on your fingers).
Let the mixer knead the dough for 5-6 minutes until the dough is soft and smooth.
Turn the dough onto a lightly greased counter and divide in eights. (I found each loaf to be 159 g.) Shape each half into a taut loaf and place in a lightly greased mini-loaf pan (8 loaves per pan.)
Cover the loaf pan and let the loaves rise until they are 1-2 inches above the edge of the loaf pan.
Preheat the oven to 350 degrees F. Make sure an oven rack is in the middle/center position. Bake the loaves for 28-32 minutes until golden and baked through (an instant-read thermometer should register 180-190 degrees in the center of the loaf).
Turn the bread onto a wire rack. Brush the tops with butter, if desired. Let cool completely.
NOTES Letting the Dough Rise: this bread recipe does not require the dough to rise before being shaped into loaves and letting the loaves rise in the bread pans. However, if you find your bread is a little dense after baking and cooling, letting the dough rise after kneading may help with that, as well as making sure the dough isn’t over floured.
Vital Wheat Gluten: is often found in the baking aisle at the grocery store (near the flour). Many brands of vital wheat gluten have Vitamin C added; those are ok to use in this recipe. I buy mine at KAF.
RASPBERRY/PLUM JAM
Left: Simmering Fruit. Center: Spider Strainer Removing Skins. Right: Gel Test
INGREDIENTS • 1 lb raspberries (454 grams) • 3 lbs plums , sliced and pits removed (leave skins on) (1360 grams) (picked from our tree) • 5 cups granulated sugar (1000 grams) • ½ cup bottled lemon juice (120 ml) • Zest of 1 orange (picked from neighbors tree)
METHOD
Combine the raspberries, sliced plums, sugar, lemon juice, and orange zest in a large heavy-bottomed pot. Place over medium high heat and stir frequently as the sugar dissolves and the fruit begins to release its juices.
Continue to cook, stirring frequently as the jam simmers and thickens. Skim any foam off of the surface with a spoon.
While the jam is simmering, remove plum skins with a spider strainer. Clean the strainer often to reduce the amount of jam removed.
Place a plate in the freezer and when the jam thickens wipe a little on the plate and return to the freezer for 2 minutes. Repeat until the jam stops running and has the consistency you want. Mine heated to 220 deg F.
Once the jam is reduced and thickened, remove from heat and ladle jam into sterilized jars. Top with a lid and screw on with a ring. This recipe made 7 half pints.
Process jars in a water bath for 10 minutes (15 minutes for 5,000+ ft elevation). Remove from water bath and let cool. Check that lids have sealed by pressing down into the center of each one. It should not move.
Store jam in a cool dry place like a pantry and consume within 1 year.
Last week I made a light right sandwich rye. Good crumb, great taste, nice crust. Today I kicked up the percent pumpernickel flour and reduced the light rye flour. I added an egg wash to increase the color of the crust. Better taste, similar crumb and great crust!
Along with the rye experiment, I made another loaf of Honey White bread which has become our staple. I also made some raspberry scones and blackberry hand pies. Busy morning!
INGREDIENTS • 1 ½ cups (340g) lukewarm water • 2 1/3 cups (280g) Bread Flour • 1 cups (108g) light rye flour • ½ cups (54g) pumpernickel flour • 1/4 cup (28g) nonfat dry milk • 1 ½ teaspoons table salt • 1 ½ teaspoons instant yeast • 1 ½ teaspoons Deli Rye Flavor, optional • 2 tablespoons (25g) vegetable oil METHOD
Place the water in a large mixing bowl.
Combine the flours with the remaining ingredients in a large mixing bowl, or the bowl of your stand mixer. Mix until there are no dry spots. Using a stand mixer, mix at low speed until all of the flour is moistened. The texture of the dough will be soft and sticky due to the pumpernickel flour.
Cover the bowl and let the dough rise at room temperature for 2 hours. Then refrigerate overnight, or for up to 48 hours.
To bake bread: Grease your hands, and scoop the dough out onto a lightly greased or floured work surface. Shape it into a ball and place it, smooth side down, in a floured brotform; or in a bowl lined with a floured smooth cotton dish towel. Let the dough rise, covered, for 2 to 3 hours.
About 45 minutes before the end of the rising time, start preheating the oven to 450°F with a 4 to 4 ½ -quart baking pot or casserole with a lid inside.
When the loaf is fully risen, remove the hot casserole from the oven, carefully grease it, and tip the risen ball of dough into it. Make several slashes in the dough. Cover the pot with the lid, and place it on a middle rack in the oven.
Bake the bread for 25 minutes. Remove the lid and bake for an additional 5 to 10 minutes; the loaf should be lightly browned, and the interior should register at least 195°F on a digital thermometer.
Remove the bread from the oven and turn it out of the crock onto a rack. Cool for several hours before slicing
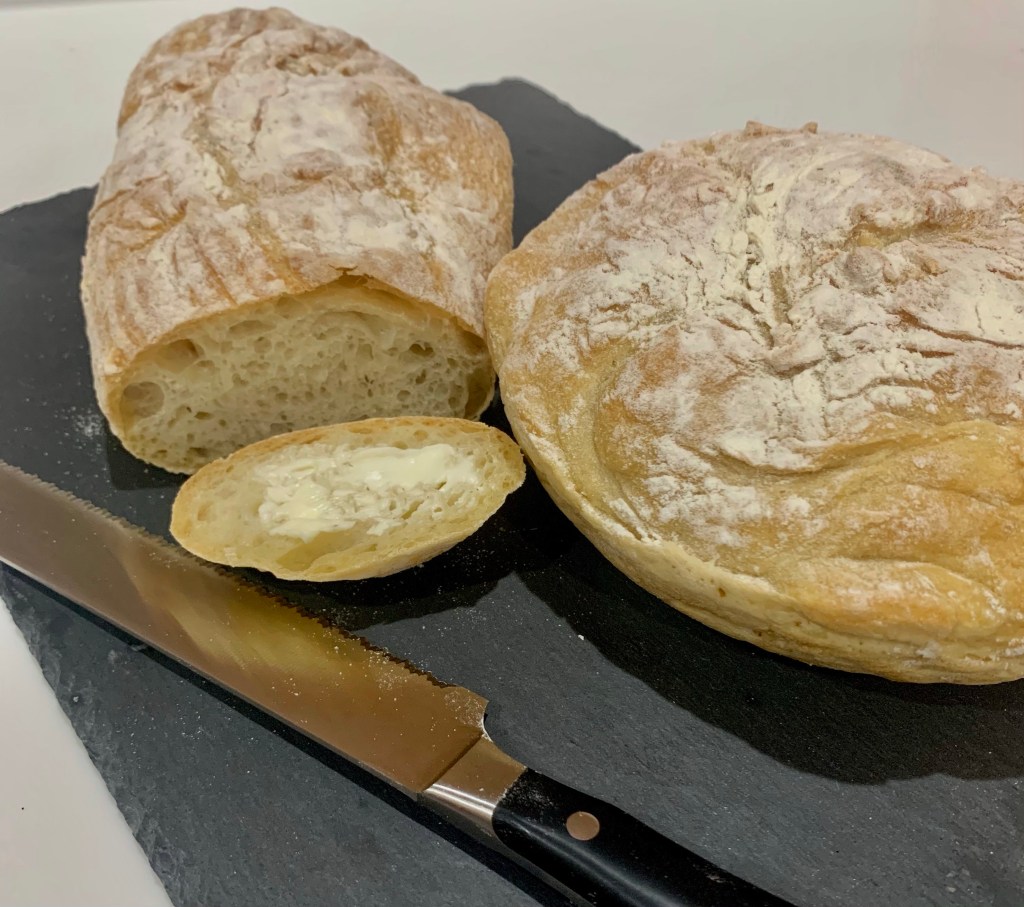
Pugliese is not the easiest of breads to make, but is one of the tastiest with wonderful crumb and crust. The recipe below calls for durum flour, but I substituted what I had on hand, which is Soft Wheat Flour Tipo “00”. This is a high hydration dough which means it is very hard to handle. It is very soft and very sticky and you don’t want to add extra flour to make it easier to handle as you will reduce the hydration.
Typically pugliese is made in round loaves, but I made one round and one batard, as those are the Dutch Ovens I have. Anyway, if you are up to it, and have some time, give this a try. It is one of the best breads I have ever made.
This is approx 82% (the recipe 3 X’s is approx 84%) total hydration dough. The recipe comes from Rose Levy Beranbaum ‘the bread bible’
INGREDIENTS Biga • 225 g – AP flour • 3/16th tsp – 0.6 g instant yeast • 177 g – water, at room temperature (70F to 90F) Dough • 213 g – All Purpose flour • 213 g – Duram Flour – or Soft Wheat Flour Tipo “00” • 1 ½ tsp – 4.8 g Instant Yeast • 15 g – salt • 354 g – water, at room temperature (70F to 90F) about 12 oz
METHOD
6 hours or up to 3 days ahead, make the biga. Use the “Ultimate Flavor” method (let the biga to ferment for 12-24 hours at 55-65 deg, then store in the fridge.)
Combine all the biga ingredients in a large bowl and stir the mixture until smooth and pulls away from the side of the bowl…3 to 5 minutes. It should be sticky enough to cling to your fingers. Cover the bowl, with oiled plastic or lid and set aside until tripled and filled with bubbles ~6 hours. Stir it down and use it, or refrigerate it up to 3 days.
In a large bowl, dissolve the biga in the water… a few little undissolved pieces are ok.
Whisk together flours, yeast. Add salt and whisk again.
Add the flour mixture to the biga and water and mix until wet and combined.
Autolyze for ~50 minutes
Stretch and fold 3 times.
Repeat stretch and fold 3 or 4 times -30 minutes apart,
After dough forms good gluten strands, (I cut the dough in half here as I didn’t have a proofing container big enough to proof this large a recipe,) form a ball, and cover, letting it rise in a (ideally 75F to 80F) until tripled…about 2 hours.
Preheat oven and Dutch ovens to 500F.
1 hour before baking pour the dough out of the bowl onto lightly floured surface and cut it in half. With very few gentle motions pull it over itself into a rough ball. Gently pick it up and drop it seam side up into the floured banneton. Sprinkle top lightly with flour, and cover with oiled plastic wrap. Allow to rise until it has increased by about 1 ½ times, up to 1 ½ hours. It will just start to push up the plastic. Dust with a little flour and score the top with 3 or 4 large slashes.
Bake with steam turning down the oven after the first five minutes and then continue baking with steam for 12 minutes total at 450F or adjusting your ovens temperature to bake the loaves for ~20 minutes, until deep golden brown….leave loaves in off oven with door ajar for 5 to 10 minutes