Homemade Cinnamon Swirl Bread – Sally’s September 2026 Challenge

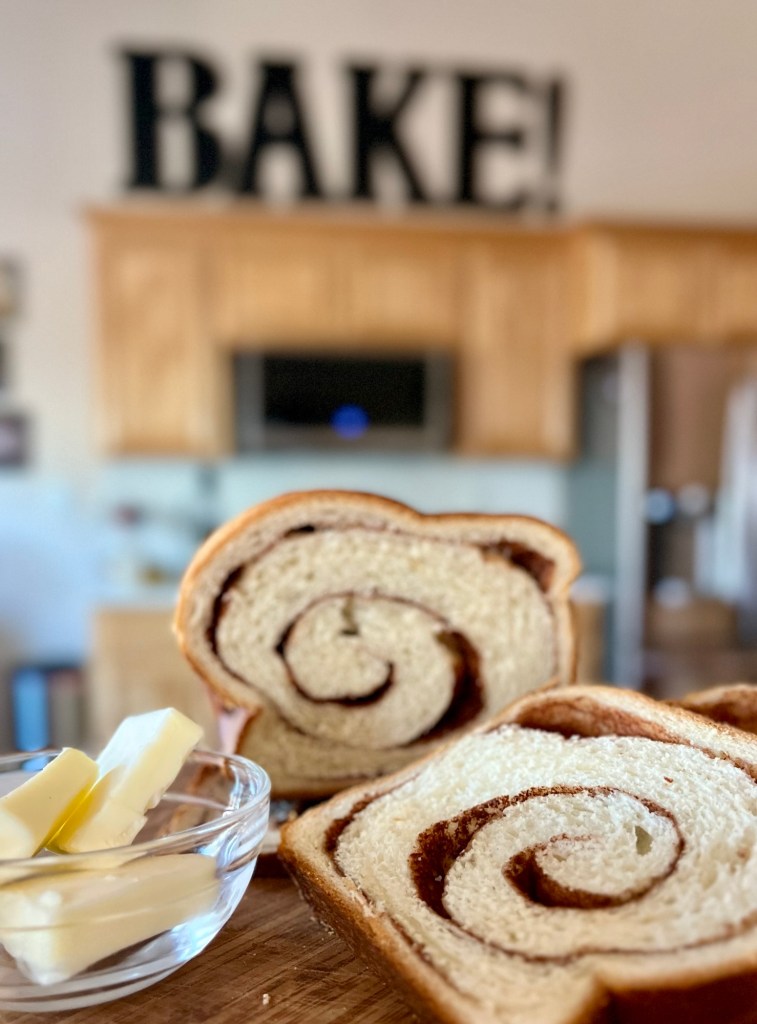
This months challenge(s) were apple fritters or Cinnamon Swirl Bread and I chose the latter. The initial critique was “If I wanted bread, I prefer your bread. If I wanted cinnamon buns, I prefer your KAB cinnamon buns.”

That is not to say there was anything wrong with this bake. It was tasty and easy to make, (despite several rookie brain-freeze mistakes, which I am too embarrassed to list here.)

Homemade Cinnamon Swirl Bread – Sally

INGREDIENTS
• 120g ( ½ c) water, warmed to about 110°F (43°C)
• 120g ( ½ c) whole milk, warmed to about 110°F (43°C)
• 7g (2 ¼ tsp) instant or active dry yeast
• 50g ( ¼ c) granulated sugar, divided
• 56g (4 Tbl) unsalted butter, softened to room temperature and cut in 4 pieces
• 390g (3 c) bread flour plus more as needed
• 1 teaspoon salt
For the Swirl & Topping
• 1 egg white, beaten
• 50g ( ¼ c) granulated sugar
• 2 tsp ground cinnamon
• 14g (1 Tbl) unsalted butter, melted

METHOD

  1. Whisk the warm water, warm milk, yeast, and 2 Tablespoons of sugar together in the bowl of your stand mixer fitted with a dough hook attachment. Loosely cover and allow to sit for 5–10 minutes until foamy and frothy on top.
  2. Add the remaining sugar, the butter, 1 cup flour (about 130g), and the salt. Beat on low speed for 30 seconds, scrape down the sides of the bowl with a silicone spatula, then add another cup of flour. Beat on medium speed until relatively incorporated (there may still be chunks of butter). Add the remaining flour and beat on medium speed until the dough comes together and pulls away from the sides of the bowl, about 2 minutes. If the dough seems too wet to a point where kneading (next step) would be impossible, beat in more flour 1 Tablespoon at a time until you have a workable dough. Dough should be soft and a little tacky, but still manageable to knead with lightly floured hands.
  3. Keep the dough in the mixer and beat for an additional 8–10 full minutes, or knead by hand on a lightly floured surface for 8–10 full minutes. If the dough becomes too sticky during the kneading process, sprinkle 1 teaspoon of flour at a time on the dough or on the work surface/in the bowl to make a soft, slightly tacky dough. Do not add more flour than you need; you do not want a dry dough. After kneading, the dough should still feel a little soft. Poke it with your finger—if it slowly bounces back, your dough is ready to rise. You can also do a “windowpane test” to see if your dough has been kneaded long enough.
  4. Lightly grease a large bowl with oil or nonstick spray. Place the dough in the bowl, turning it to coat all sides in the oil. Cover the bowl and allow the dough to rise in a relatively warm environment for 1 ½ -2 hours or until double in size. (I always let it rise on the counter. Takes about 2 hours.
  5. Grease a 9×5-inch loaf pan.
  6. In a small bowl, whisk ¼ cup (50g) sugar and the cinnamon together.
  7. When the dough is ready, punch it down to release the air. Lightly flour a work surface, your hands, and a rolling pin. Roll the dough out into a large 8×20 inch rectangle. Using a pastry brush, brush the surface with beaten egg white, then sprinkle on the cinnamon-sugar, leaving a 1-inch border uncovered. Roll it up into an 8-inch log. Place the loaf, seam-side down, into the prepared loaf pan. If any cinnamon-sugar filling spilled out of the sides, don’t waste it! Sprinkle it on top of the bread in the loaf pan.
  8. Cover the shaped loaf and allow to rise for 1 hour, or until it’s about 1 inch above the top of the loaf pan.
  9. Adjust oven rack to a lower position and preheat oven to 350°F (177°C). (It’s best to bake the bread towards the bottom of the oven so the top doesn’t burn.)
  10. After the dough rises, melt the remaining 1 Tablespoon of butter. Lightly brush the melted butter on top of the shaped loaf before baking. Bake for 35–45 minutes, or until golden brown. Check on the bread about halfway through baking—if the top of the loaf is browning too quickly, tent with aluminum foil. The bread is done when an instant-read thermometer inserted into the center of the loaf registers 195–200°F (90–93°C).
  11. Remove from the oven and allow bread to cool for a few minutes in the pan on a cooling rack. Remove loaf from the pan and cool it directly on a cooling rack for at least 10 minutes before slicing. Feel free to let it cool completely before slicing, too.
  12. Cover leftover bread tightly and store at room temperature for 6 days or in the refrigerator for up to 10 days.

NOTES

  1. Overnight Instructions: Prepare the dough through most of step 4, allowing the dough to rise overnight in the refrigerator instead of in a warm environment. The slow rise gives the bread wonderful flavor! In the morning, let the dough sit on the counter until it comes to room temperature, then continue with step 5. I don’t recommend shaping the bread the night before as it will puff up too much overnight.
  2. Freezing Instructions: Baked bread freezes wonderfully! Wrap the loaf in plastic wrap, then a layer of aluminum foil. Freeze for up to 3 months. Thaw overnight in the refrigerator or at room temperature, then warm to your liking. You can also freeze the bread dough. After punching down the dough in step 7, wrap the dough tightly in plastic wrap, then a layer of aluminum foil. Freeze for up to 3 months. Thaw overnight in the refrigerator, then bring to room temperature. Once at room temperature, punch the dough down again to release any air bubbles. Continue with the rest of step 7 (shaping the dough).

Apple Turnovers and Chocolate Mousse Pie Bites

Sally posted a number of recipes lately and her Apple Turnovers caught my eye, plus it is apple season! I followed her recipes for the turnovers and caramel topping. (The topping should have been cooler but I was under a time limit.

I saw how to make (I think it was on a FB Reel) mini pie shells by folding disks of rolled pie dough over the back side of a muffin pan and I had some frozen pie dough that I needed to use so….

I used a half recipe of Sally’s Chocolate Mousse as the filling and some stabilized whipped cream for the topping.

Blueberry Muffins – Sally

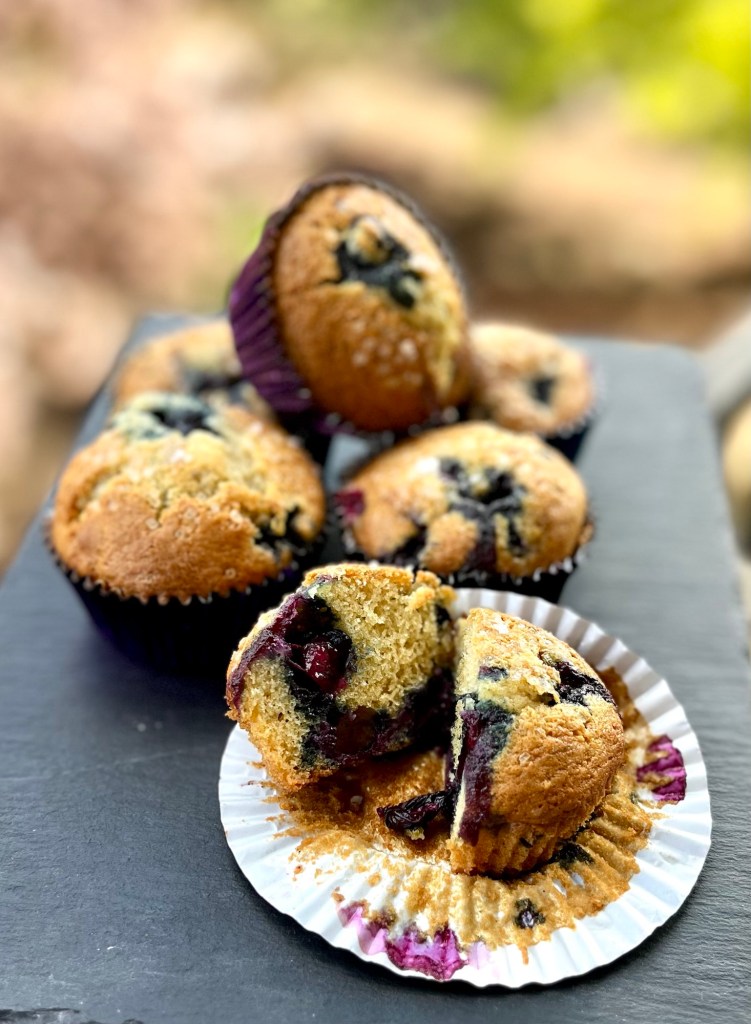
Sally’s post for these muffins looked sooooo good!

Blueberry Muffins – Sally


INGREDIENTS
Streusel Topping
• ½ cup (100g) packed light or dark brown sugar
• 1 teaspoon ground cinnamon
Muffins
• 1¾ cups (220g) all-purpose flour
• 1 teaspoon baking soda
• 1 teaspoon baking powder
• ½ teaspoon salt
• ½ cup (115g) room temperature unsalted butter
• ½ cup (100g) granulated sugar
• ¼ cup (50g) packed light or dark brown sugar
• 2 large room temperature eggs
• ½ cup (120g) room temperature sour cream or plain/vanilla yogurt
• 2 teaspoons pure vanilla extract
• ¼ cup (60ml) room temperature milk
• 1½ cups (250g) fresh or frozen blueberries

METHOD

  1. Preheat oven to 425°F (218°C). Spray a 12-count muffin pan with nonstick spray or use cupcake liners. Grease/line a second pan with 2 liners because this recipe yields about 14 muffins. Set aside.
  2. Mix all of the streusel ingredients together. Set aside.
  3. Whisk the flour, baking soda, baking powder, and salt together in a large bowl. Set aside.
  4. Using a handheld or stand mixer fitted with a paddle or whisk attachment, beat the butter, granulated sugar, and brown sugar together on high speed until smooth and creamy, about 2 minutes. On medium speed, add the eggs one at a time, beating well after each addition. Beat in the sour cream and vanilla extract on medium speed until combined. By hand, add the dry ingredients and milk into the wet ingredients and stir gently, no more than 4 stirs. Gently, fold in the blueberries.(Optional: Transfer batter to a glass bowl, cover with plastic wrap and refrigerate overnight.)
  5. Spray release spray on the muffin pan before putting cupcake papers in to reduce berries from sticking if they overflow the papers. Spoon the batter into liners, filling them all the way to the top. Top each with streusel, gently pressing it down into the surface so it sticks. Bake for 5 minutes at 425 then, keeping the muffins in the oven, reduce the oven temperature to 350°F (177°C). Bake for an additional 18-20 minutes or until the internal temperature reaches 205-210 °F or a toothpick inserted in the center comes out clean. The total time these muffins take in the oven is about 23-25 minutes, give or take. Allow the muffins to cool for 5 minutes in the muffin pan, then transfer to a wire rack to continue cooling.
  6. Muffins stay fresh covered at room temperature for a few days or in the refrigerator for up to 1 week.

Notes:

  1. This recipe made 7 muffins using tulip cups. Put the cups into something to help them stand. I used a 12 well entremet pan which was perfect.
  2. Doubling this recipe should be fine and if each tulip cup was filled to the top should make 12 muffins
  3. Baking time was extended to 45-55 minutes, checking the inside temperature every 5 minutes. I used my ThermoPro being sure to poke it all the way to the bottom, which cooks last, but be sure not to touch the metal of the entremet pan.