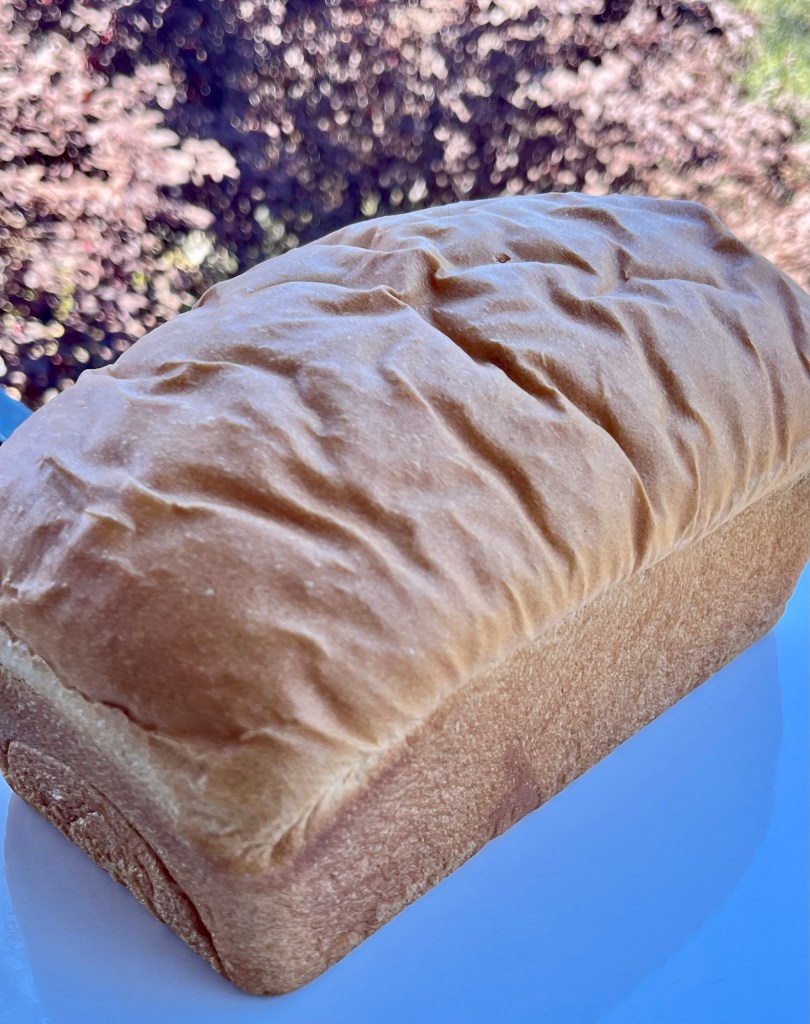
My previous sandwich breads,using recipes from bread experts, were good. However, Sally’s recipe, followed exactly as written, beats them all.
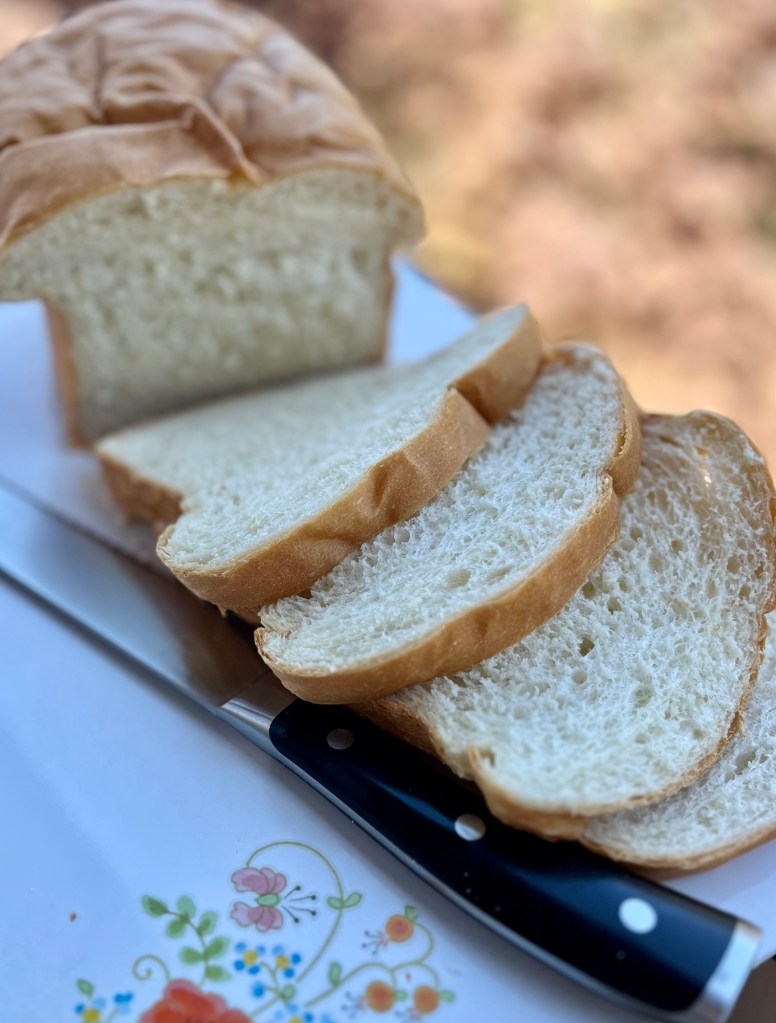
I made the bread this morning timing it to be ready for lunch. It was, but was still a little warm. Undaunted, I carefully cut four slices (it was very tender) and proceeded to make two sandwiches. The bread was so tender we each needed two hands to eat our lunches. Although the crumb was tender there was a nice crust, not a strong crust as is my typical artisan bread, but better than most other sandwich loaves.
The QC sampled end slice plus 4 slices for sandwiches used almost half the loaf. No worries about it going stale.
Sandwich Bread – Sally
INGREDIENTS • 240g (1 c) water, warmed to about 110°F • 60g ( ¼ c) whole milk, warmed to about 110°F • 7g (2 ¼ tsp) yeast • 25g (2 Tbl) granulated sugar • 56g ( ¼ c) unsalted butter, softened to room temperature • 9g (1 ½ tsp) salt • 420–430g (3 ⅓ c) all-purpose flour or bread flour (spooned & leveled), plus more as needed
METHOD
Whisk the warm water, warm milk, yeast, and sugar together in the bowl of your stand mixer fitted with a dough hook attachment. Cover and allow to sit for 5 minutes.
Add the butter, salt, and 1 cup flour. Beat on low speed for 30 seconds, scrape down the sides of the bowl with a silicone spatula, then add another cup of flour. Beat on medium speed until relatively incorporated (there may still be chunks of butter). Add the remaining flour and beat on medium speed until the dough comes together and pulls away from the sides of the bowl, about 2 minutes.
Knead the dough: Keep the dough in the mixer and beat for an additional 5–8 full minutes, or knead by hand on a lightly floured surface for 5–8 full minutes.
1st Rise: Lightly grease a large bowl with olive oil or nonstick spray. Place the dough in the bowl, turning it to coat all sides in the oil. Cover the bowl and allow the dough to rise in a relatively warm environment for 1-2 hours or until double in size. (I always let it rise on the counter.
Grease a 9×5-inch loaf pan.
Shape the bread: When the dough is ready, punch it down to release the air. Lightly flour a work surface, your hands, and a rolling pin. Roll the dough out into a large rectangle, about 8×15 inches. Roll into an 8 inch log and place in the greased loaf pan.
2nd Rise: Cover shaped loaf with aluminum foil, plastic wrap, or a clean kitchen towel. Allow to rise until it’s about 1 inch above the top of the loaf pan, about 1 hour.
Adjust oven rack to a lower position and preheat oven to 350°F.
Bake the bread: Bake for 32-36 minutes or until golden brown on top. If you notice the top browning too quickly, loosely tent the pan with aluminum foil. (I usually add aluminum foil over the loaf around the 20 minute mark.) To test for doneness, if you gently tap on the loaf, it should sound hollow. For a more accurate test, the bread is done when an instant-read thermometer reads the center of the loaf as 195–200°F.
Remove from the oven and allow bread to cool for a few minutes in the pan on a cooling rack before removing the bread from the pan and slicing. Feel free to let it cool completely before slicing, too.
Cover leftover bread tightly and store at room temperature for 6 days or in the refrigerator for up to 10 days.
Notes
Freezing Instructions: Prepare recipe through step 6. Place shaped loaf in a greased 9×5-inch loaf pan or disposable loaf pan, cover tightly, and freeze for up to 3 months. On the day you serve it, let the loaf thaw and rise for about 4-5 hours at room temperature. Bake as directed. You can also freeze the baked bread loaf. Allow the bread to cool completely, then freeze for up to 3 months. Thaw in the refrigerator or at room temperature, then reheat as desired.
Overnight Instructions: Prepare the recipe through step 6. Cover the shaped bread tightly and refrigerate for up to about 15 hours. At least 3 hours before you need the bread the next day, remove from the refrigerator, keep covered, and allow to rise on the counter for about 1-2 hours before baking. Alternatively, you can let the dough have its 1st rise in the refrigerator overnight. Cover the dough tightly and place in the refrigerator for up to 12 hours. Remove from the refrigerator and allow the dough to fully rise for 2 more hours. Continue with step 5
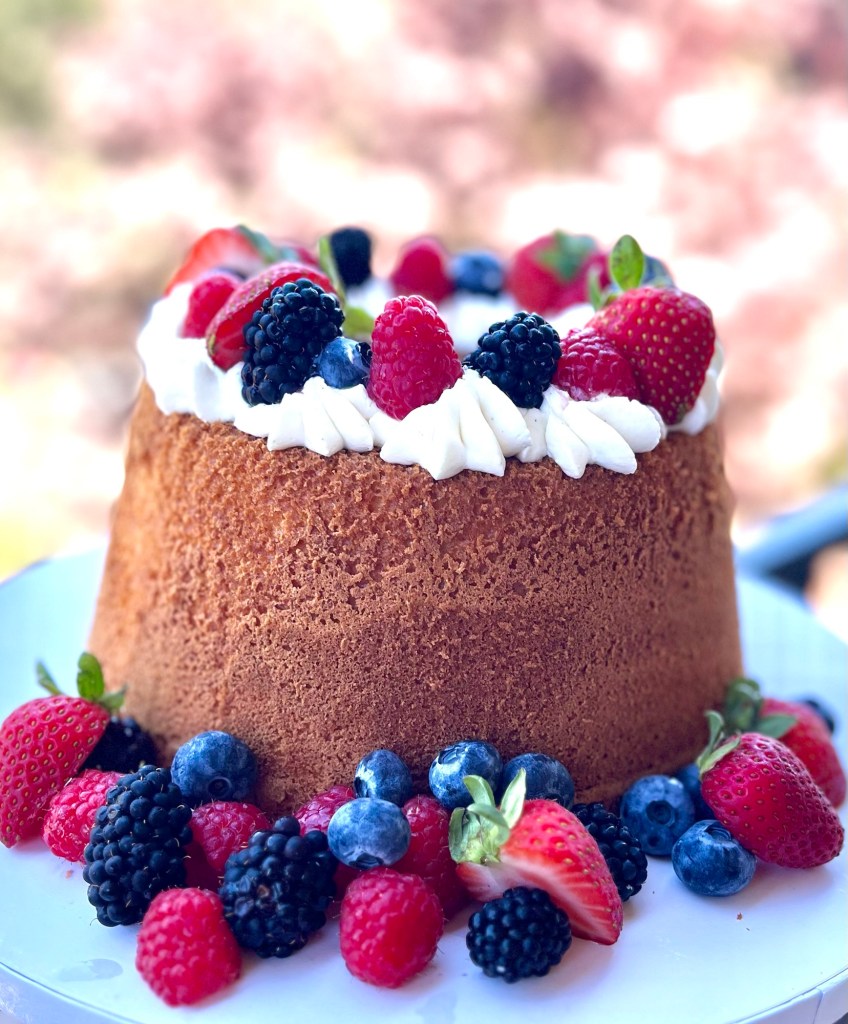
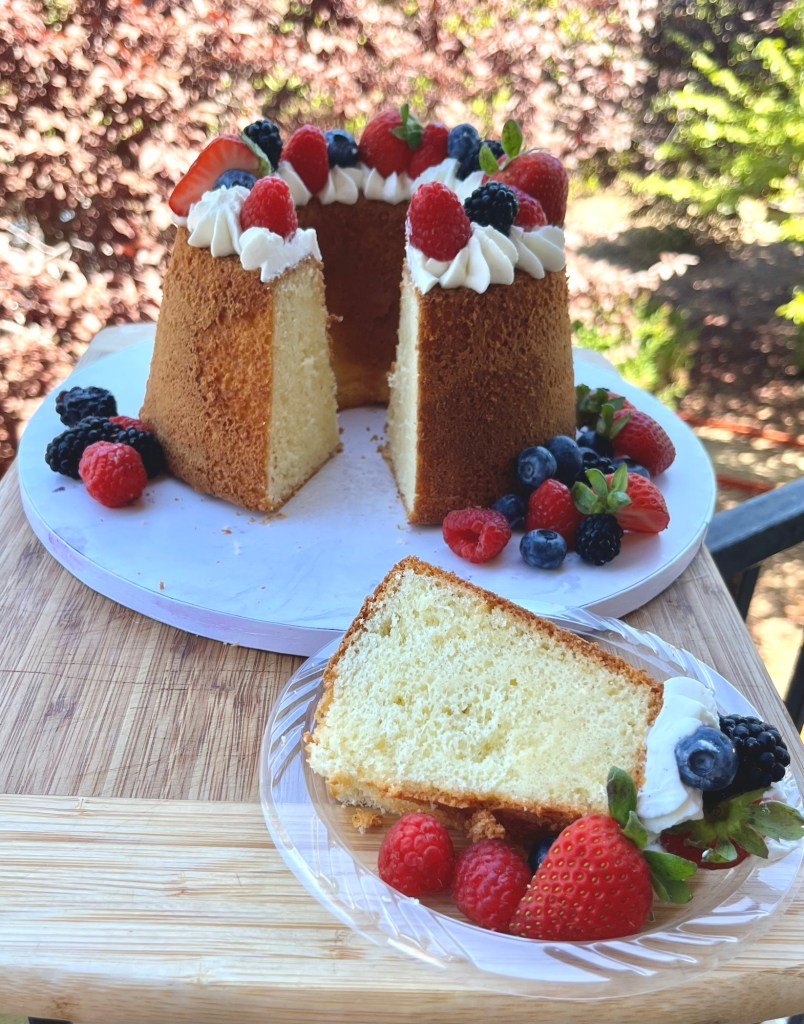
This months challenge was a Chiffon Cake (which I never made previously.) This is a tender crumb, tasty, moist cake. Fairly easy to make and the results were perfect
Chiffon Cake
INGREDIENTS Cake • 200g (1 ⅔ c) cake flour • 200g (1 c) granulated sugar, divided • 2 teaspoons baking powder • ½ teaspoon salt • 6 large eggs, separated, RT • ½ teaspoon cream of tartar • 160g ( ⅔ c) RT whole milk • 113g ( ½ c) canola oil or vegetable oil • 2 teaspoons vanilla
Cream Cheese Whipped Cream • 85g (3 oz) full-fat block RT cream cheese • 240g (1 c ) heavy cream, cold • 23g (3 Tbl) confectioners’ sugar • ½ teaspoon vanilla bean paste or pure vanilla extract • fresh berries, for garnish
METHOD
Preheat the oven to 325°F (163°C).
In a medium bowl, sift together the flour, 100g ( ½ c) of the sugar, the baking powder, and salt. Set aside.
In a stand mixer fitted with the whisk attachment, beat the egg whites and cream of tartar on medium-high speed until light and foamy, about 2 minutes. With the mixer still running, slowly pour in the remaining 100g ( ½ c) of sugar. Increase to high speed and whip until stiff, glossy peaks form, about 5 minutes. Transfer the meringue to another bowl and set aside.
Using a stand mixer fitted with the whisk, beat the egg yolks, milk, oil, and vanilla on medium-high speed until pale and frothy, about 2 minutes.
Sift the flour mixture into the egg yolk mixture, and whisk to combine. Add half of the meringue to the batter and use a spatula to gently fold it all together to incorporate. Then fold in the remaining meringue. Work slowly and gently so you don’t deflate the egg whites. The batter should be light and fluffy. Pour the batter into an ungreased 10-inch tube pan and smooth the top.
Bake for 45–55 minutes or until the top of the cake springs back when lightly pressed. Insert a toothpick near the center; if it comes out clean, the cake is done. (Our test cakes always took exactly 50 minutes.)
Immediately invert the cake pan onto a cooling rack and leave the cake upside down until completely cool. Run a thin knife around the edges to help loosen the sides. Gently tap the pan, upside down, on a serving stand or plate to release the cake.
Using a stand mixer fitted with the whisk attachment, beat the cream cheese on medium speed until smooth and creamy, about 1 minute. Add the confectioners’ sugar and vanilla, and beat until completely smooth (absolutely no lumps!). Add a few Tablespoons of the cold heavy cream, and beat until the mixture loosens and smooths out. With the mixer running on low speed, slowly stream in the remaining heavy cream. Increase to medium-high speed and whip until medium peaks form, about 3 minutes. Spread or pipe on the cake. In the pictured cake, I used Ateco 808 large round piping tip. Garnish with fresh berries, if desired. Slice and serve.
Store leftover cake covered at room temperature for up to 2 days or in the refrigerator for up to 5 days. If topped with the Cream Cheese Whipped Cream, store the cake covered in the refrigerator.
NOTES
Make-Ahead & Freezing Instructions: The baked and cooled cake can be covered tightly and stored at room temperature for up to 2 days or in the refrigerator for up to 5 days. If serving with whipped cream and fresh berries, garnish the cake on the day you plan to serve it. The cake freezes well for up to 3 months. Thaw overnight in the refrigerator, then bring to room temperature before serving. If using the Cream Cheese Whipped Cream topping, you can prepare it up to 1 day in advance and refrigerate it until ready to use.
Eggs: Eggs separate more easily when cold, but egg whites whip to greater volume when at room temperature. I recommend separating the eggs while they’re cold, then covering and letting them sit at room temperature for about 30–60 minutes before beginning the recipe.
Best Oil to Use: Use an oil that’s neutral in flavor, so the vanilla can shine, such as canola oil or vegetable oil. I also love using avocado oil in this cake. I have not tested it with other oils. Do not substitute with butter.
Milk: Whole milk is ideal because its fat content contributes richness and a soft, tender crumb. In a pinch, 2% or 1% milk will work, though the cake won’t be quite as rich. I do not recommend nonfat milk. I have not tested this cake with nondairy milk. Some chiffon cake recipes use water instead of milk, but I prefer milk for its flavor and texture benefits.
Layer Cake Instructions: Line three 8-inch round pans with parchment paper rounds; do not grease the pans. Bake time is around 20–23 minutes. The cakes are done when the top springs back when lightly pressed and a toothpick inserted near the center comes out clean. Invert the cake pans onto cooling racks and cool the cakes in the pans upside down for 45 minutes, or until completely cool. Run a knife around the edges to help loosen the sides, remove the cakes from the pans and peel off the parchment rounds, and place right side up on the cooling racks. If using the Cream Cheese Whipped Cream Topping to fill and frost the cake, double the topping recipe. This yields enough for a filling between the layers and a light coating on the top. Refrigerate the assembled cake until ready to serve.
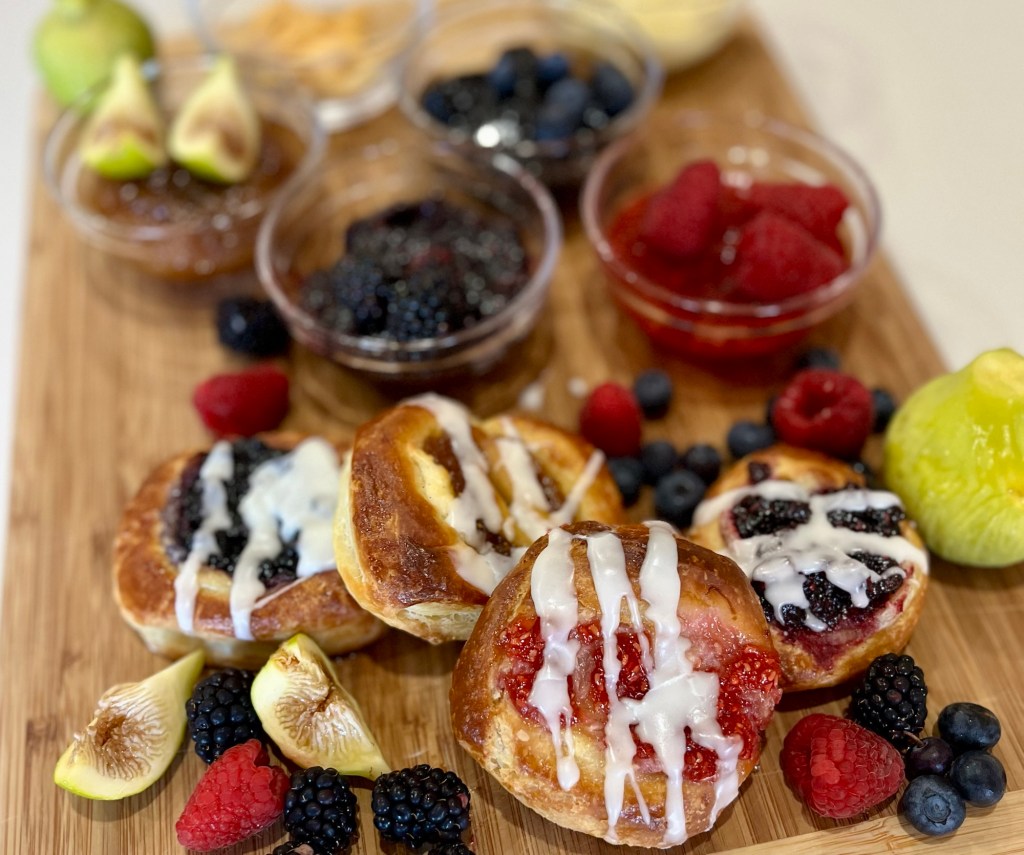
I know, I know… I need to be baking a chiffon cake for Sally’s July Baking Challenge, but these pastries were on my list for so long, and I have a surplus of blackberries and figs, so how could I not make these pastries.
The pastry is straight from Sally’s website but the fruit fillings are mine. A base of whipped cream cheese and sugar was applied to each pastry, then they were topped with a layer of berry or fig preserves. Vanilla Icing was drizzled on the cooled berry pastry and shards of smoked Gouda were added to the fig pastry.
QC and the QC Cadre seemed to like them all,
Danish Pastry – Sally
INGREDIENTS Pastry Dough • 60 g ( ¼ c) warm water (between 100-110°F, 38-43°C) • 2 and ¼ TSP • 50 g ( ¼ C) sugar • 120 g ( ½ c) RT whole milk • 1 large RT egg • 1 tsp salt • 196 g (14 Tbl) unsalted butter, cold • 313 g (2 ½ c) AP flour Filling • 2/3 cup filling (see recipe notes for options & cheese filling) Egg Wash • 1 large egg • 30g (2 Tbl) milk Vanilla Icing (Optional) • 120 g (1 c) confectioners’ sugar • 30 g (2 Tbl) milk or heavy cream • 1 tsp vanilla extract
METHOD Make the Pastry Dough:
Whisk the warm water, yeast, and 1 Tablespoon (6g) of sugar together in a large bowl. Cover and allow to rest until foamy on top, about 5 minutes. If the surface doesn’t have bubbles on top or look foamy after 15 minutes (it should if the yeast isn’t expired), start over with a fresh packet of yeast. Whisk in remaining sugar, the milk, egg, and salt. Once these wet ingredients are mixed together, lightly cover and set the bowl aside as you work on the next step.
Cut the cold butter into 1/4 inch slices and add to a food processor or blender. Top with 2 and 1/2 cups flour. Pulse the mixture 12-15 times, until butter is crumbled into pea-size bits. See photo below for a visual. Using a food processor or blender is best for this dough. Keeping that in mind, if you don’t have one, you can use a pastry cutter to work in the butter.
Pour the flour mixture into the wet yeast mixture. Very gently fold everything together using a rubber spatula or wooden spoon. Fold just until the dry ingredients are moistened. The butter must remain in pieces and crumbles, which creates a flaky pastry. Turn the sticky dough out onto a large piece of plastic wrap and form into a rough rectangle.
Wrap the dough/cover up tightly and refrigerate for at least 4 hours and up to 48 hours.
Roll & Fold:
Take the dough out of the refrigerator to begin the “rolling and folding” process. If the dough sat for more than 4 hours, it may have slightly puffed up and that’s ok. (It will deflate as you shape it, which is also ok.) Very generously flour a work surface. The dough is very sticky, so make sure you have more flour nearby as you roll and fold. Using the palm of your hands, gently flatten the dough into a small square. Flour the top of the dough and roll into a 15×8” rectangle. As needed, flour the work surface and dough as you are rolling. Fold the dough into thirds as if it were a business letter. Turn it clockwise and roll it out into a 15 inch long rectangle again. Then, fold into thirds again. Turn it clockwise. You’ll repeat rolling and folding 1 more time for a total of 3 times.
Wrap up/seal tightly and refrigerate for at least 1 hour and up to 24 hours. You can also freeze the dough at this point. See freezing instructions.
Line two large baking sheets with parchment paper or silicone baking mats. Rimmed baking sheets are best because butter may leak from the dough as it bakes. If you don’t have rimmed baking sheets, when it’s time to preheat the oven, place another baking sheet on the oven rack below to catch any butter that may drip.
Take the dough out of the refrigerator and cut it in half. Wrap 1 half up and keep refrigerated as you work with the first half. (You can freeze half of the dough at this point, use the freezing instructions below.)
Cut the first half of dough into 8 even pieces. This will be about 1/4 cup of dough per pastry. Roll each into balls. Flatten each into a 2.5 inch circle. Use your fingers to create a lip around the edges. See photos and video tutorial if needed. Press the center down to flatten the center as much as you can so you can fit the filling inside. (Center puffs up as it bakes.) Arrange pastries 3 inches apart on a lined baking sheet. Repeat with second half of dough.
Spoon 2 teaspoons of fruity filling or 1 Tablespoon of cheese filling inside each.
Whisk the egg wash ingredients together. Brush on the edges of each shaped pastry.
Chill the shaped pastries in the refrigerator, covered or uncovered, for up to 1 hour. You can preheat the oven as they finish up chilling.
Preheat oven to 400°F (204°C).
Bake for 19-22 minutes or until golden brown around the edges. Some butter may leak from the dough, that’s completely normal and expected. Feel free to remove the baking sheets from the oven halfway through baking and brush the dough with any of the leaking butter, then place back in the oven to finish baking.
Remove baked pastries from the oven. Cool for at least 5 minutes before icing/serving.
Whisk the icing ingredients together. If you want a thicker icing, whisk in more confectioners’ sugar. If you want a thinner icing, whisk in more milk or cream. Drizzle over warm pastries and serve.
Cover leftover iced or un-iced pastries and store at room temperature for 1 day or in the refrigerator for up to 5 days. Or you can freeze them for up to 3 months. Thaw before serving. Before enjoying, feel free to reheat leftover iced or un-iced pastries in the microwave for a few seconds until warmed. Notes
Make Ahead & Freezing Instructions: Prepare the dough as instructed in steps 2-4. At this point the dough can be refrigerated up to 48 hours. You can also prepare the dough through step 6. At this point the dough can be refrigerated up to 24 hours. During or after this second chilling time, you could also freeze the dough for up to 1 month. (I don’t recommend freezing the dough before the rolling and folding step.) Thaw overnight in the refrigerator, then continue with step 8. You can also freeze the unfilled pastries after shaping them in step 10. Thaw in the refrigerator, then continue with step 11.
Fruity Fillings: You need around 2/3 cup (about 200g) of filling for the entire recipe (16 pastries). Use jam or fruit preserves, pumpkin butter, apple butter, lemon curd, cherry pie filling, etc. Or even Nutella! You need 2 heaping teaspoons per pastry. Feel free to mix and match, making different flavors in your batch.
Cheese Filling: Using a handheld or stand mixer fitted with a paddle attachment on medium speed, beat one 8 ounce block (224g) of full-fat cream cheese that is softened at room temperature in a medium bowl until smooth. Beat in 1 large egg yolk, 1/3 cup (67g) granulated sugar, 1/2 teaspoon fresh lemon juice, and 1/2 teaspoon pure vanilla extract until smooth. Use 1 scant Tablespoon per pastry. Feel free to dot the cream cheese filling with fresh berries before baking or mix fruit preserves in with the cream cheese filling (still using 2-3 teaspoons of filling per pastry).
Optional Step (step 13): Chilling the shaped pastries in the refrigerator helps them maintain their shape in the oven. Remember, cold pastry dough is best. I usually refrigerate them for 15 minutes as the oven preheats. If you’re nervous to chill the baking sheets in the refrigerator then bake them (which can cause warping), you have two other options. You can simply assemble the pastries on parchment paper or silicone baking mats, lift the parchment/baking mat as a whole and place on another baking sheet or directly onto a shelf in the refrigerator. After chilling, carefully lift up and place the entire parchment/baking mat onto the baking sheets for baking. Or you can use a thin spatula and very carefully transfer the assembled unbaked pastries to a large plate to chill.
Raspberry Jam
INGREDIENTS • 356g raspberries (fresh or frozen) rinsed and dried if fresh • 312g cups granulated sugar • 65g lemon juice
METHOD
Put the raspberries, sugar and lemon juice into a sauce pan or similar.
Place pan over a gentle heat, stirring occasionally, until all the sugar crystals have dissolved.
Bring the pan to a rolling boil until the temperature reaches 118-220℉.
If there is foam on the surface of the jam mix it vigorously with a wooden spoon to mix it in to the jam.
Use a ladle funnel transfer the jam to sterilized jars and seal with lids immediately – makes 2 half pint canning jars
Once cool store in a cool, dry, dark place and refrigerate on opening.
Blueberry Jam – Preppy Kitchen
INGREDIENTS • 280g (2 c) blueberries, washed and picked over, divided • 100g ( ½ c) sugar • ½ Tbl lemon juice
METHOD
In a large pot over medium heat, add about 210g (1 ½c) of the berries and mash.
Add in the remaining berries, sugar, and lemon juice. Stirring constantly, bring to a rolling boil. If necessary, skim off excess foam.
Heat the jam to 218-220o F
Carefully ladle the hot berry mixture into the prepared jars, or use a funnel, leaving enough headroom—1/4 inch is recommended. Be mindful that the jars and jam are very hot.
With a clean dampened cloth, wipe the rims of the jars, and gently tap the jars to release any air bubbles.
Place the flat lids on the jars. Firmly close the caps with screw-on rings.
Fig Jam – The Food Network
INGREDIENTS • 6 lbs fresh figs. • 7 cups sugar • 1/3 cup lemon juice • ½+ tsp vanilla
METHOD
Chop the figs coarsely, and add them to a large stainless steel saucepan
Add 7 cups of granulated white sugar, then toss to combine.
Cover and let stand, refrigerated, for at least a few hours or overnight. The figs will naturally release some of their juices.
Place the pot on the stove and place on medium-low heat. Bring the figs to a boil slowly, stirring frequently to dissolve the sugar and prevent scorching on the bottom.
Raise the heat and cook briskly until the jam thickens and cascades from a spatula in sheets.
Add 1/3 cup bottled lemon juice.
½+ teaspoon vanilla extract. Stir to combine, and cook another minute longer.
Ladle the jam into hot sterilized jars. At this point the jam can be left to cool, then covered and stored in the refrigerator for up to one month. It can also be canned using the standard water bath canning method.