Key Lime Tart

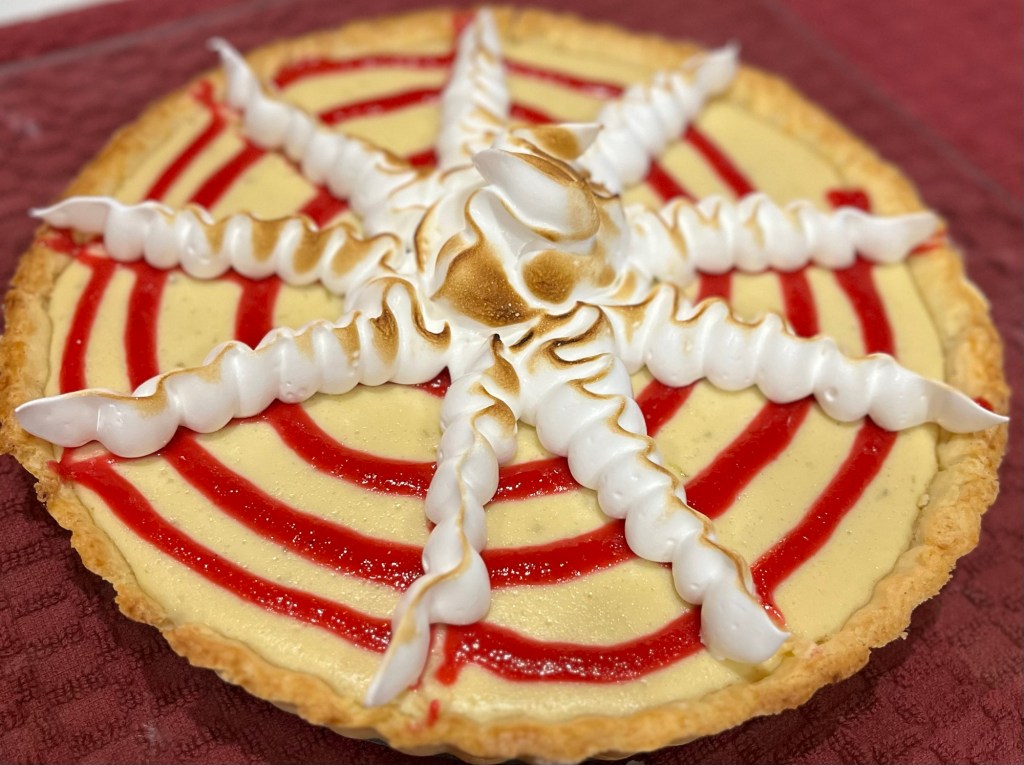
QC’s Mah Jongg group played at our house and you know what that means… an excuse to bake! This time I made an 8” key lime tart with raspberry coulis and Italian meringue.

(After I piped the meringue I realized I made an octopus-tart.)

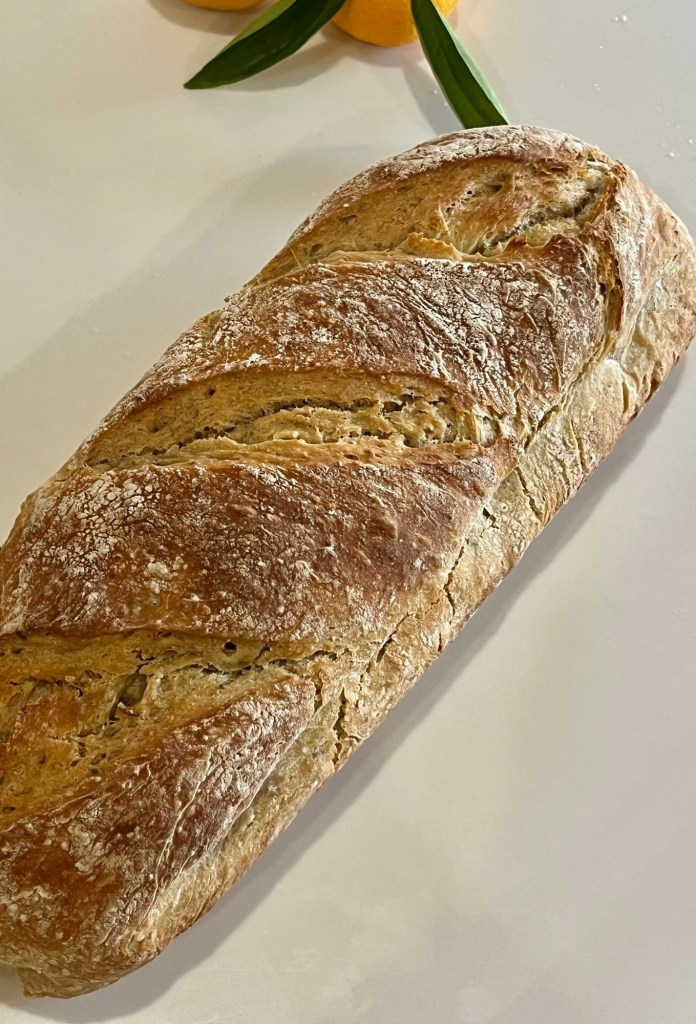
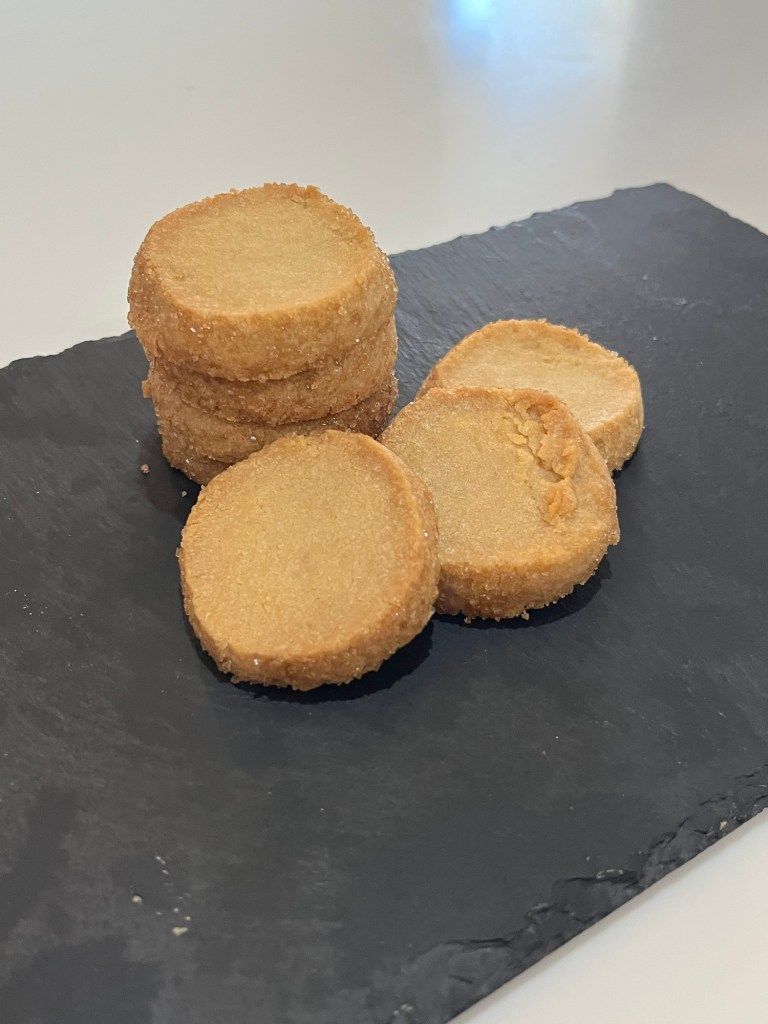
Gluten Free Key Lime Tart Using Kim’s Bread Flour

Yield: 12 – 2 ½“ tartlet shells or1 8” tart shell

INGREDIENTS
SHELL
• 100 g cold butter cut into small cubes
• 60 g icing sugar
• 200 g Kim’s Bread flour
• ½ tsp vanilla
• ¼ tsp salt
• 2 eggs – 1 for the dough and the other 1 reserved for an egg wash

FILLING
• zest (grated rind) of 1 lime
• 4 large egg yolks
• 14-ounce can (397g) sweetened condensed milk, (1 1/4 cups)
• 3/4 cup (170g) Key lime juice
• Juice of 1 lime
METHOD
SHELL

  1. Mix butter with sugar until well incorporated 3-5 min
  2. Add salt then vanilla.
  3. Add egg and mix 3-5 min
  4. Stir in flour. Mix by hand until incorporated and forms a thick smooth(ish) sticky dough
  5. Cover with plastic and refrigerate for 30 min.
  6. Butter or lightly spray tartlet pans or use non-stick pans.
  7. Roll dough between parchment paper to about ⅛” thick
  8. Refrigerate rolled dough still between parchment paper until firm: 20 – 30 minutes
  9. Remove from fridge and while still firm, cut dough to rounds about 1” larger diameter than the mold. 2 ½” tart mold requires a 3” cutter. Cut all the rounds at once while still firm. If necessary, return to the fridge to firm up. Again, if necessary, use an offset spatula to remove the circles from the parchment paper. Keep the spatula clean.
  10. Lay tart dough circles over molds. This allows the dough to thaw slightly, then gently press into the molds and fill all crevices.
  11. Pre-heat oven to 350 degrees
  12. Return to fridge for 15 – 20 min to firm up the shell
  13. Prick holes in bottom of formed dough
  14. Place a mini cupcake paper in each tart and fill with with pastry weights (or beans)
  15. Paint edges of the tartlet with an egg-white wash. (Whisk one egg white with 1 Tbl water)
  16. Bake in preheated oven 350 deg F (175 C) for 12 min until edges are dry
  17. Remove pastry weights and bake an additional 6-10 minutes to dry the bottoms. Bake until the edges begin to turn light brown and the bottom is nearly dry.
  18. Immediately remove from pans and cool on a wire rack

FILLING

  1. Whisk the lime zest and egg yolks at high speed of an electric mixer for about 4 minutes. The mixture will lighten in color and thicken somewhat, appearing similar to Hollandaise sauce.
  2. Stir in the sweetened condensed milk, mixing until smooth. Beat at high speed for 3 minutes; the filling will become slightly thicker and gain a bit of volume.
  3. Add the key lime juice, stirring just to combine. The mixture will thicken again. Add lime oil to taste.
  4. PIPE the filling into the crust and return the tart (on the baking sheet) to the oven. Bake the tart for 12 to 18 minutes, until it appears set around the edges though still a bit wobbly in the center. The center should read about 145°F on a digital thermometer.
  5. Remove the tart from the oven and cool to room temperature. Refrigerate for several hours before serving.
  6. Once chilled, serve the key lime pies cold with whipped cream, or merengue and a lime slice or zest, if desired.
  7. Store leftover pies in the refrigerator (covered) for up to 1 week. If they last that long!

ITALIAN MERINGUE (NOTE: Alternatively use whipped cream)

INGREDIENTS
• 80g (or 0.4 cup or 6.5 Tbl) granulated sugar
• 30ml (or 1/8 cup) water
• 60g (or ¼ cup) egg whites (about 2 large egg whites)
• 20 g icing sugar

METHOD

  1. Whisk the egg whites into a light and fluffy foam, using an electric (stand) mixer.
  2. Add the icing sugar and continue whipping until you’ve got a glossy stable foam. It should stay in place if you turn the bowl upside down. Set aside.
  3. Add the granulated sugar and water to a pan and bring to a boil. Once all the sugar has dissolved, refrain from stirring. Continue boiling at moderate/high heat while continuously keeping an eye on the temperature.
  4. Once the solution has reached 121°C (250°F), take it from the heat immediately*.
  5. While SLOWLY whisking the egg whites, gently, slowly, pour the hot sugar solution into the whipped egg whites (this is where the stand mixer comes in handy!).
  6. Once all the sugar syrup is in, turn up the speed to high and continue whisking until the foam is lukewarm.
  7. Use the meringue immediately to top whatever it is you want to cover.

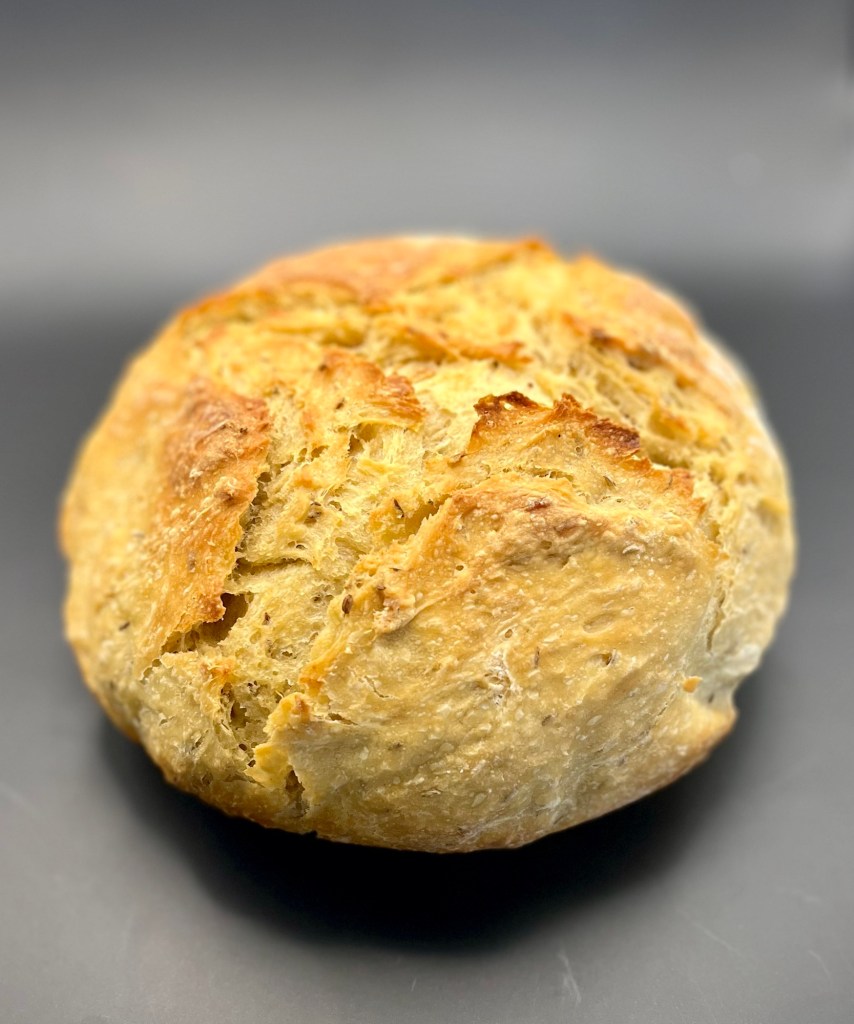
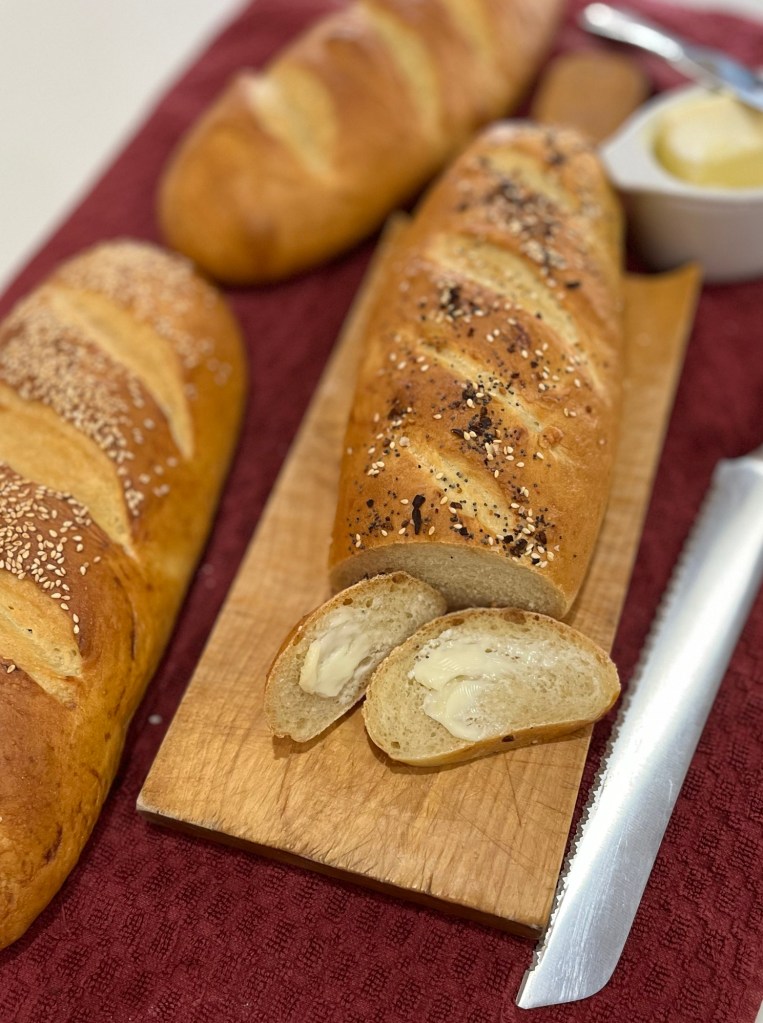
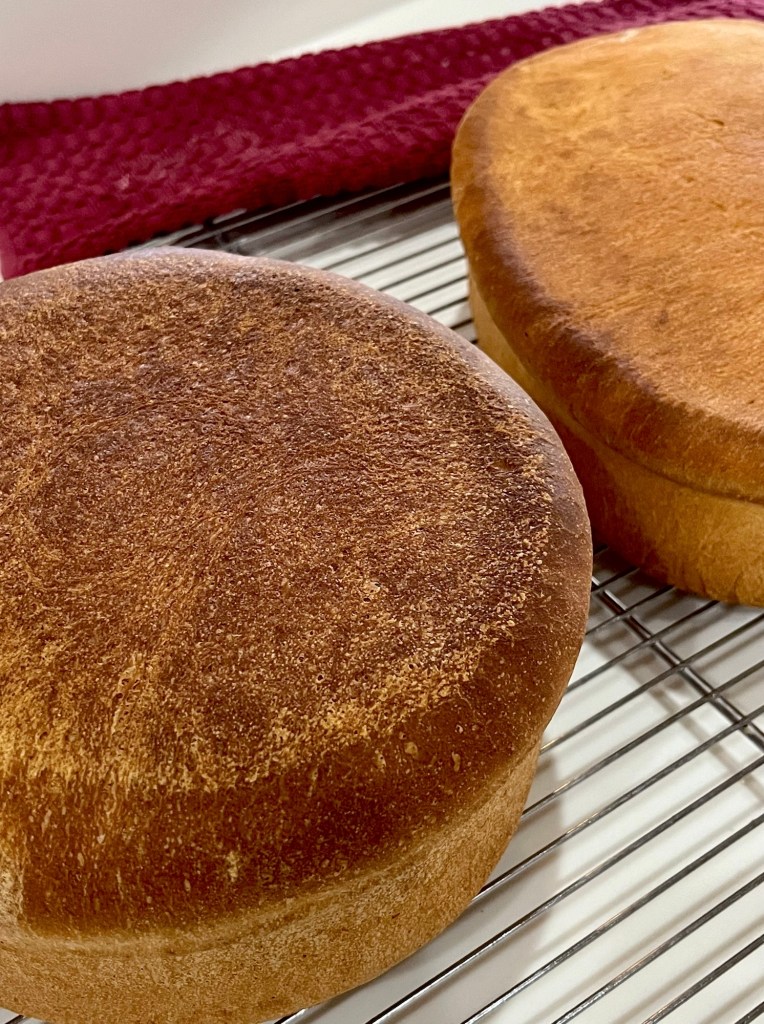
Kim’s Gluten Free Bread Flour Blend

Yield: 700g (5 c)
INGREDIENTS

  • 285g Bob’s Red Mill potato starch
  • 250g superfine white rice flour (DON’T use regular rice flour, ie Bob’s Red Mill)
  • 75g Tapioca flour
  • 75g Whey protein isolate or egg white protein.
  • 15g Xanthan gum

METHOD

  1. Weigh all ingredients and add to a stand mixer bowl
  2. Mix on low, with bowl covered for 30 seconds

“To crooked eyes truth may wear a wry face”

J. R. R. Tolkien used that phrase in The Two Towers and I modifyied it to a “rye face”. I decided to continue my rye bread recipe experiment and made a dark rye bread this morning using my new rustic rye “breadboard” recipe.

In the first experiment I used White Rye Flour and used Dark Rye Flour for the second round. I baked a loaf using Medium Organic Rye this morning and still and Organic Pumpernickel to go. (I am not endorsing any particular brand of flour, it’s simply what is my cupboard.)

The dark rye bread had a stronger rye flavor than the white rye (no surprise,) but was just as delicious with a similar soft interior. The medium rye (today’s loaf) has a great interior and crunchy crust and surprise, surprise, the flavors is between the white and dark ryes.

Next up will probably be the pumpernickel. Stay tuned.

White Rye Rustic Bread

I had some white rye flour in the cupboard and wanted to use it so… I gathered advice from a number of different websites to create this bread. It met my goal of a soft crumb, mild, rye bread with a nice firm crust. (To be fair, I have 20 different flours in my cupboards.)

This is my first attempt at creating (for the most part) a recipe and method to make bread. I am very pleased with the result.

With my first bite, I realized this would make a great template (a breadboard if you will) to experiment with other flours. As I said, I have a few to choose from including rye, whole wheat, pumpernickel and a variety of other wheat flours. This will make for hours and hours of baking enjoyment .

White Rye Rustic Bread

INGREDIENTS
• 384g (3 c) bread or all-purpose flour
• 96g (1 c) white rye flour. (This flour is very dense, so 1 c weighs less that other flours}
• 10g (2 tsp) kosher salt
• 10g (2 tsp) instant yeast
• 9g (1 Tbl) caraway seeds
• 395g (1 ¾ c) lukewarm water
• 42g (2 Tbl) honey (or maple syrup)
• 28g (2 Tbl) extra-virgin olive oil, divided
• 2 Tbl Bread and Cake Enhancer

METHOD

  1. In a large bowl, whisk together the flours, salt, instant yeast, and caraway seeds. In a medium bowl, whisk together the water and the honey until the honey is dissolved.
  2. Add to the flour, followed by 1 tablespoon of the oil. Using a rubber spatula or Dutch dough whisk, mix until the liquid is absorbed, and the flour is all moistened and the dough form a sticky mass.
  3. Cover the bowl with plastic wrap and set aside in a warm spot to rise for 2 to 3 hours, until the dough has doubled in volume.
  4. Line a brotform with parchment paper. It helps if you crumple the parchment paper into a small ball, then smooth it out and fit it to the brotform.
  5. When the dough has doubled, drizzle the remaining 1 Tbl of olive oil over the top and use your hand to rub the oil over the surface to coat. Use your hand again to release the dough from the sides of the bowl, then flip the ball over so that the oil side is down. Pour dough out of bowl onto a lightly floured counter. Form a boule, tensioning the surface as you shape.
  6. Preheat the oven and Dutch oven to 400ºF.
  7. Place the boule in the parchment paper lined round brotform and let it rise for 45 minutes until the finger punch test indicates it is proofed.
  8. Transfer the Dutch oven to the oven and bake for 30 minutes,
  9. After 30 minutes remove the cover and bake an additional 15 minutes, or until internal temperature is 205ºF) or until the top is evenly browned.
  10. Remove the pan from the oven and Dutch oven and carefully lift the loaf by the parchment paper out onto a cooling rack.
  11. Let the loaf cool for at least 30 minutes before slicing.

Just Another Day Off From Golf

It’s a dangerous thing taking a day off from golf. I wanted to make more berry drop scones for a couple of weeks, but never seemed to find the time, until today when there was no golf on my schedule..

We also had no snacks for after dinner so I decided to make Millionaires Shortbread Cookies this afternoon to be ready for dessert. It’s good to have a plan and to execute it properly.

Oh My Bread!

I know I post a lot of breads and I know I often say one bread is my favorite, but this is the first time I said “Oh My!” when I took the first bite, as this bread really is Oh My!

I have several artisan bread recipes and this may be my new favorite (until another comes along.)

Artisan bread refers to any properly prepared, fermented, and shaped hand-crafted bread. Fermenting the properly mixed ingredients to optimize the chemical reactions and then baking at the proper temperature for the correct time yields a crisp, nicely browned crust and great, chewy interior. Artisan bread contains carefully controlled amounts of flour, yeast, salt and water. That’s it (unless you want to add some flavorings or herbs or maybe even some olives, yumm.)

Artisan Bread by PreppyKitchen


https://preppykitchen.com/artisan-bread/

INGREDIENTS
• 3 ¾ cups bread flour divided (450 grams)
• 2 ¼ teaspoons instant yeast
• 1 ¾ teaspoons kosher salt (10 grams)
• 1 ½ cups warm water between 120°F and 130°F (360 grams)

METHOD

  1. In a large mixing bowl, whisk the flour, yeast, and salt to combine. Stir in water with a Dutch whisk until the mixture is very sticky, and no lumps of flour remain. Cover and place in a warm, draft-free area until doubled in size, about 1 ½ to 2 hours.
  2. Alternatively, for an overnight rise: After mixing the dough, cover and refrigerate until doubled in size. This will take about 8 hours but will keep in the fridge up to 24 hours total.
  3. Preheat the oven to 450°F. Place a large Dutch oven with a lid in the oven for at least 30 minutes.
  4. If refrigerated, remove the dough from the refrigerator and let rest at room temperature for 15 minutes.
  5. Instead of traditional kneading, use lightly floured hands, reach down one side of the dough to the bottom of the bowl, pull up, and stretch the edge of the dough over the center toward the opposite side. Turn the bowl 90 degrees and repeat the folding and turning, working in a circle around the dough until the dough starts to hold its shape, about 8 to 10 rotations. Pinch any seams together at the center of the dough ball.
  6. Turn out the dough onto a lightly floured surface, placing it seam side down. Shape into a round loaf or batard for a long loaf. Transfer the dough onto parchment paper and sprinkle it with flour. Loosely cover with plastic wrap or a tea towel for 10 minutes.
  7. Using a sharp knife or bread lame, cut a slit about ¼-inch deep across the top of the dough. Very carefully place the dough with the parchment paper directly into the preheated Dutch oven. Cover with the lid.
  8. Bake for 30 minutes. Remove the lid and bake until deeply golden brown, about 15 to 17 minutes more. Carefully remove the bread from the Dutch oven using the parchment paper to help, and place on a wire rack to cool for at least 20 minutes before slicing

Demerara Encrusted Brown Sugar Shortbread Cookies

SallysBakingAddiction strikes again! Once again I need refreshments for QCs Mah Jongg ladies tomorrow so, of course, I made these Demerara encrusted brown sugar cookies today to be sure they were worthy of this esteemed group.

I baked these in two batches. Both of them were baked 2-4 minutes too long. The cookies should still be a little soft and not firm in the last few minutes in the oven. REALLY good though. We will cut these in half to prevent any dental distress when eating them.

Brown Sugar Shortbread Cookies

INGREDIENTS
• 3/4 cup (12 Tbsp; 170g) unsalted butter, softened to room temperature
• 1 cup (200g) packed light or dark brown sugar
• 1 1/2 teaspoons pure vanilla extract
• 2 1/4 cups (281g) all-purpose flour (spooned & leveled)
• 1/4 teaspoon salt
For Rolling
• 1/2 cup (100g) Demerara sugar or Turbinado (Sugar in the Raw)

METHOD

  1. In a large bowl using a handheld mixer or a stand mixer fitted with a paddle attachment, beat the butter and brown sugar together on medium-high speed until completely smooth and creamy. Add the vanilla and beat until combined.
  2. Add the flour and salt and beat on low speed until incorporated. Turn the mixer up to medium-high speed and beat until the dough comes together. If the dough is too crumbly and won’t come together after a couple minutes of beating, stop the mixer, pour the dough crumbles on a work surface, and use your hands to bring it together. (I often have to do this, so don’t worry.) You can also try sprinkling the dough with a few drops of water and then beat again; or get your hands wet, then press the dough clumps together tightly until it forms one large clump of thick dough.
  3. With lightly floured hands, divide the dough in two. (If you want to be precise, the dough should weigh about 650g, so each half will be about 325g.) Roll and shape each piece of dough into an 8-inch log.
  4. For Rolling: Pour coarse sugar onto a large plate. One at a time, roll the logs in the sugar until the exterior is fully coated.
  5. Tightly wrap the logs in plastic wrap and chill in the refrigerator for at least 4 hours and up to 5 days. Chilling is mandatory for this cookie dough. I always chill mine overnight.
  6. Preheat oven to 350°F (177°C). Line two large baking sheets with parchment paper or silicone baking mats. (Always recommended for cookies.) Set aside.
  7. Remove logs from the refrigerator. Slice each log into 16 equally thick cookies and place cookies on baking sheets about 2 inches apart. Bake the cookies for 14–16 minutes, or until set and lightly browned around the edges. Do not over-bake. Allow to cool for 5 minutes on the baking sheet, then transfer to cooling rack to cool completely.
  8. Cover and store leftover cookies at room temperature for up to 1 week. After day 1, the cookies will taste crunchier.

Notes

  1. Make Ahead Instructions: Baked cookies freeze well up to 3 months. Thaw overnight in the refrigerator and bring to room temperature, if desired, before serving. You can make/assemble the cookie dough logs and chill in the refrigerator for up to 5 days (see step 5). Cookie dough logs freeze well too, up to 3 months. Allow the logs to thaw overnight in the refrigerator, then continue with step 6. See How to Freeze Cookie Dough if you’d like to see a video tutorial for freezing various types of doughs.
  2. Special Tools (affiliate links): Electric Mixer (Handheld or Stand) | Coarse Sparkling Sugar | Baking Sheets | Silicone Baking Mats or Parchment Paper | Cooling Rack
  3. Old Version: The old recipe called for: 2 and 1/4 cups (281g) all-purpose flour; 1/4 teaspoon salt; 1 cup (2 sticks; 226g) unsalted butter, softened to room temperature; 1 cup (200g) packed light brown sugar; 1/3 cup (67g) packed dark brown sugar; 1 and 1/2 teaspoons pure vanilla extract; optional: 2/3 cup (135g) coarse sugar, for rolling. Same baking instructions. The cookies usually over-spread, so I updated the amounts of ingredients.
  4. Be sure to check out my top 5 cookie baking tips AND these are my 10 must-have cookie baking tools.
  5. Find it online: https://sallysbakingaddiction.com/brown-sugar-shortbread/

Versatile Bread Recipe

The recipe I used for the bread soup bowls is so versatile I also used it to make a pizza crust and these loaves of bread. For variety, I added some sesame seeds to one and bagel everything seasoning to another. One poor loaf was left plain. I did add some steam to the bake to increase the chewiness of the crust. It was delicious.

Homemade Bread Bowls

INGREDIENTS
• 4 ½ teaspoons active dry yeast
• 2 ¼ cups (540ml) warm water (110°F – 115°F)
• 2 tsp granulated sugar
• 2 tsp salt
• 2 Tablespoons (30ml) olive oil
• 780 g (6 c) bread flour
• egg wash: 1 large egg beaten with 1 Tablespoon water or milk

METHOD

  1. Pour the warm water over yeast in the bowl of a stand mixer fitted with a dough hook attachment. Cover the bowl with a towel. The mixture should be frothy and foamy after 5 minutes.
  2. With the stand mixer running on low speed, add the sugar, salt, olive oil, 4 cups of bread flour, and seasonings. Beat on low speed for 1 minute, then add remaining 2 cups of flour.
  3. Keep the dough in the mixer and knead for an additional 5-6 full minutes. If the dough becomes too sticky during the kneading process, sprinkle 1 teaspoon of flour at a time on the dough or on the work surface/in the bowl to make a soft, slightly tacky dough. Do not add more flour than you need because you do not want a dry dough. After kneading, the dough should still feel a little soft.
  4. Turn it out onto a lightly floured surface and form into a ball. Then place into a large, greased bowl, turning once to grease the top. (I just use the same mixing bowl—remove the dough, grease it with nonstick spray or olive oil, put the dough back in.) Cover the bowl with plastic wrap and place it in a warm environment to rise until doubled, about 90 minutes. Poke it with your finger—if it slowly bounces back, your dough is ready to rise.
  5. Once doubled in size, punch down the dough to release any air bubbles. Remove dough from the bowl and turn it out onto a lightly floured surface. Punch down again to release any more air bubbles if needed.
  6. Using a sharp knife or dough scraper, cut into 6 even pieces. Form each into a large ball.
  7. Line 2 large baking sheets with parchment paper or silicone baking mats. Place 3 dough balls onto each. Cover lightly and set aside to rest for 20 minutes as the oven preheats.
  8. Preheat oven to 400°F (204°C). Brush each dough ball with egg wash and, using a sharp knife, score an X into the tops of each.
  9. Bake for 30 minutes or until golden brown. For a more accurate test for doneness, the bread bowls are done when an instant-read thermometer reads the center as 195°F (90°C).
  10. Cool until ready to handle. The longer you cool, the easier they are to cut open. For serving, cut a large round out of the top of each bread bowl. Scoop out the center (save the center to dunk into soup!) and fill with soup.
  11. Cover and store leftover bread bowls at room temperature for a couple days or in the refrigerator for 1 week. You can also freeze the baked bread bowls for up to 3 months, then thaw overnight in the refrigerator. Bring to room temperature before serving.

Make Ahead Instructions: After dough has risen in step 3, punch down the dough inside the mixing bowl and cover the bowl tightly with plastic wrap. Refrigerate overnight or for up to 2 days, then remove from the refrigerator and continue with step 4. OR freeze for up to 2 months, then allow to thaw overnight in the refrigerator and continue with step 4.

Pizza Dough: Makes 4 12-inch pizza crusts, which is likely more than you need, but you can freeze half of the dough for later. Prepare dough through step 4. Instead of forming into 6 balls in step 5, divide the dough in half. Freeze half of the dough for later use (see make ahead tip) and form the other half into 2 large balls. Cover lightly and set aside to rest for 20 minutes. Flatten each ball of dough 1 at a time on a lightly floured surface or on a silicone baking mat. You could also do this directly on your greased pizza pan. Flatten and stretch into a 12-inch round circle. Brush with a little olive oil (no need for egg wash). Add toppings and bake in a super hot oven at 475°F (246°C). Pizzas typically take 12-15 minutes.

Crusty Bread Loaves: Makes about 3 loaves of crusty bread. Prepare dough through step 4. Instead of forming into 6 balls in step 5, divide the dough into 3 pieces. You can freeze 1 or 2 pieces for later use (see make ahead tip). Round into a ball as best you can and place onto a lined baking sheet. Cover lightly and set aside to rest for 30 minutes. The dough will spread out a bit. Brush with egg wash, score with an X, and bake at 400°F (204°C) for 30 minutes or until the tops and edges are golden brown.

Vive la France!

I gotta stop reading all those recipes on Facebook! It’s just they look so appetizing.😒

These french bread rolls are a basic bread dough, slightly enriched by 20 g of butter. They was easy to make and only required 2 1/2 hours of elapsed time and 30 minutes of hands on. Next time I may form the logs and batards a little longer. These were 6” and I think 7” might be better.

In any event, they were flavorful, had a good crust and crumb.

French Bread Rolls

INGREDIENTS
Starter
• 35g Bread flour
• 7g Instant dry yeast
• 40g Warm water

Dough
• 380g AP flour
• 10g Sugar
• 7g Salt (1 ½ tsp)
• 20g Unsalted butter
• 210g Cold water

METHOD
Starter

  1. Mix 40g water with 7g yeast, stir to mix
  2. Add 35g bread flour, mix thoroughly then cover and set aside for 20 minutes
    Bread dough
  3. In a large bowl mix 380g AP flour and 10g sugar, mix thoroughly
  4. Add 210g cold water, sponge from above, and mix thoroughly
  5. Knead the dough in the bowl for 2-3 minutes
  6. Add 7g salt and continue to knead/mix for 2-3 minutes
  7. Cover and let rest 20 minutes
  8. Transfer dough to a floured counter and spread into a thick rectangle
  9. Spread 20g room temperature butter over the rectangle
  10. Knead until smooth 8-10 minutes
  11. Cover and rest 20 minutes
  12. Transfer to a floured counter and divide into 6 equal parts, each ~120g
  13. Spread into a rough circle 5-6” diameter. Fold edges to center in 6 places, fold together and form a ball.
  14. Roll ball against the counter with an open cupped hand to tension the surface
  15. Roll into an oval log ~ 5×2”, cover and rest 20 minutes
  16. Flatten log and roll into an oval ~ 4×7”. Starting at the furthest short end fold the “shoulders” inward toward the center, followed by folding the top center down to meet the folded shoulders. Repeat until fully rolled up
  17. Pinch the seams, including the ends tightly together, roll back and forth under a cupped hand to tension the surface
  18. Rest until doubled in size
  19. Score each batard with a razor, lame or sharp knife. One long cut the length of the batard with a very slight curve
  20. Bake in preheat 400⁰ F oven for 13 – 15 minutes

Baa, Baa AP Flour Sheep Have You Any Butter?

From a special request from QC, here is a first time bread for me: Sheepherders Bread.

During the California Gold Rush, Basque immigrants in the Owen’s Valley missed their home country’s bread. The loaves were hand shaped and baked in stone ovens. They still do so in bakeries where this traditional bread is produced.

I, on the other hand, used a stand mixer to mix and knead the bread and a built-in oven to bake it. Time rolls on.

I changed the measurements to grams from volume, because that is who I am. I also divided the dough into two loaves after proofing. This made it easier to distribute the finished bread to my QC Cadre (neighbors.) Also, this bread is enormous and I don’t have a baking vessel large enough to handle it.

Sheepherders Bread AP Flour

INGREDIENTS
• 708 g (3 c) water (110 -120⁰F)
• 112 g (½ c) butter or ½ cup shortening
• 67 g (1/3 c) sugar
• 15 g (2 ½ tsp) salt
• 13.5 g (4 ½ tsp) active dry yeast
• 1330 g (9 ½ c) AP unsifted

METHOD

  1. In a bowl, combine water, butter, sugar and salt. Stir until butter melts and cool to 110-115⁰ F. Stir in yeast, cover and set in warm place until bubbly, about 15 minutes.
  2. Add 700 g (5 cups) flour and beat to form thick batter. Stir in enough of remaining flour (about 490g or 3 ½ cups) to form stiff dough. Turn out on floured board and knead until smooth and elastic (about 10 minutes), adding flour as needed to prevent sticking.
  3. Turn dough into greased bowl, cover and let rise in warm place until doubled, about 1 ½ hours. Punch down and knead to form smooth ball.
  4. Grease inside of dutch oven and inside of lid with olive oil. Place dough in dutch oven and cover with lid to let rise in a warm place for ~30 min, until dough pushes up lid about ½ inch (watch closely).
  5. Bake covered with lid in 375⁰ F oven for 12 minutes, carefully remove lid and bake for another 30 to 35 minutes, or until loaf is golden brown and sounds hollow when tapped. Remove from oven and turn out on rack to cool.

Apple Cheese Danish

For months I ignored a single sheet of puff pastry in the fridge. Today, after making two apple pie fillings I had apples remaining…

What could I do?

Pretty simple pastry to make. The directions from ACozyKitchen were spot on. (I used Trader Joe’s puff pastry for this, but plan on making my own later this week, time permitting.)

Apple Cheese Danish

INGREDIENTS
For the Filling:
• 4 oz cream cheese room temperature
• 2 Tbl ricotta or mascarpone cheese
• 1 lemon zest and juice, divided
• Pinch kosher salt
• 5 Tbl white granulated sugar divided
• 2 apples (such as Honey crisp, Braeburn or Gala)
• ½ tsp ground cinnamon
For the Assembly and Icing:
• 1 box puff pastry
• ¾ cup powdered sugar sifted
• 1 tablespoon whole milk

METHOD
To Make the Filling:

  1. Preheat the oven to 400⁰ F.
  2. In a medium bowl, place the cream cheese, ricotta, lemon zest, vanilla, salt, 4 tablespoons of sugar and mix until smooth, using an electric mixer fitted with a paddle attachment. Set aside.
  3. Peel and slice your apples into 1/4-inch slices. In a small bowl toss them with the remaining 1 tablespoon of juice from the one lemon, sugar, and cinnamon.
    To Assemble the Cheese Danish:
  4. Carefully unfold 1 sheet of defrosted puff pastry and roll slightly with a floured rolling pin until it’s about 1/4-inch in thickness. I trimmed mine so it was a 11″ x 8″ rectangle. Transfer the sheet of puff pastry to a piece of parchment that’s on a baking sheet.
  5. At an angle, slice off the top corners and cut two notches in the bottom. Slice 1-inch strips diagonally down both sides of the puff pastry, leaving the center uncut. Try to cut the same number of strips on both sides. I had about 8 strips per side.
  6. Add three tablespoons of cream cheese filling, spreading it evenly down the center of the puff pastry. Top with apple slices.
  7. Fold in the bottom and top flaps. Braid the puff pastry, by folding the strips over the filing, alternating sides, until you’ve worked your way down the puff pastry. Using your knife, trim off any leftover strips or extra dough.
  8. Transfer the danish to the freezer to chill for 15 minutes.
  9. Brush with egg wash liberally.
  10. Transfer baking sheet to oven and bake for about 20 minutes, or until puffed up and golden brown.