Look Ma! (I wish) I Did It Myself!

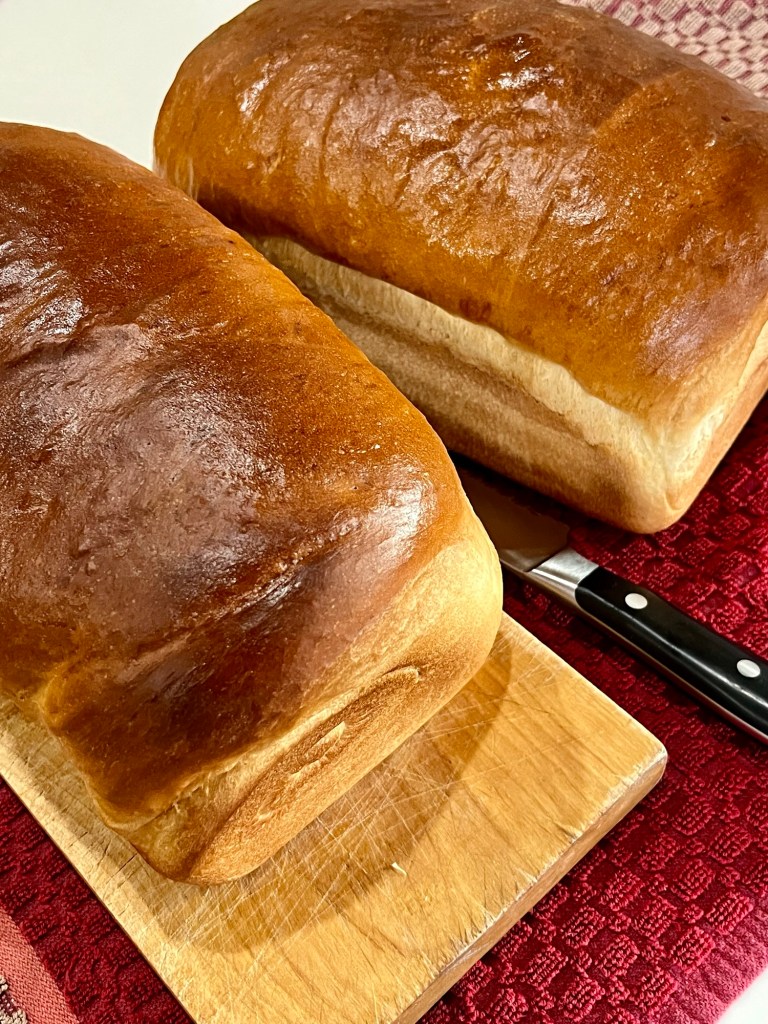
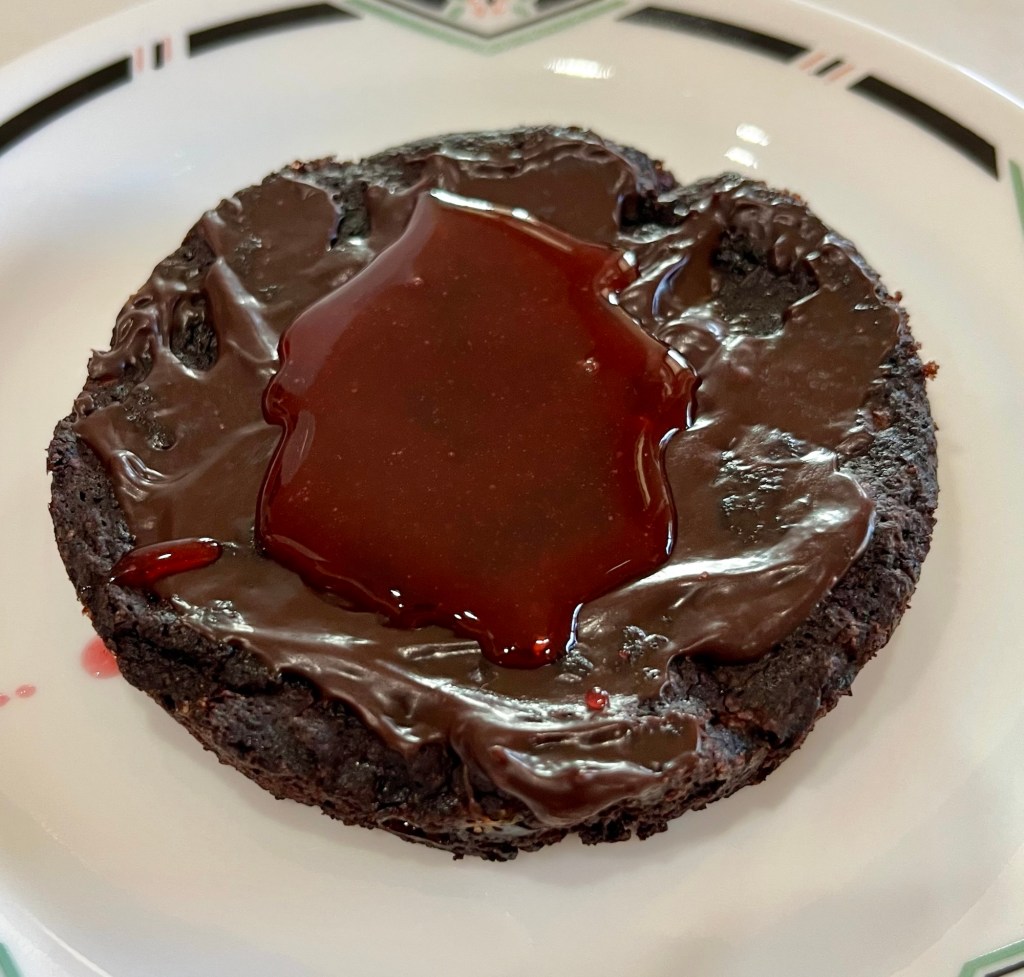
QC and I rarely have desserts out, but last week it was included in our meal, so what’s a person to do? We had “pizookies” at BJ’s and I instantly thought: “You know, this could be even better if….”

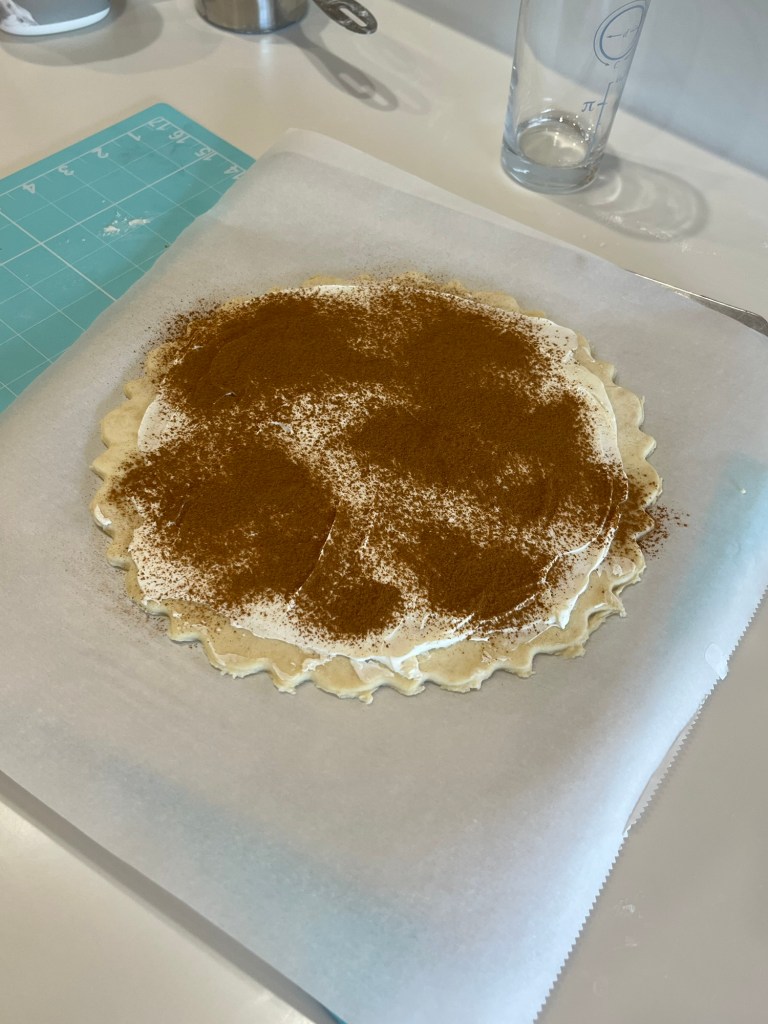
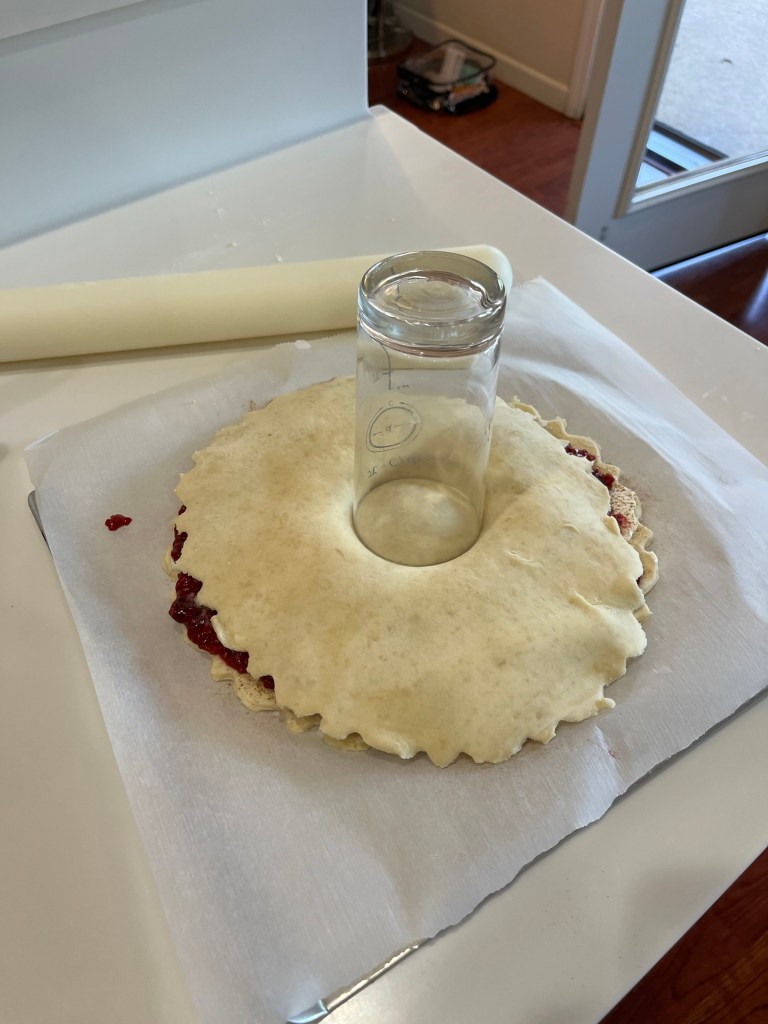
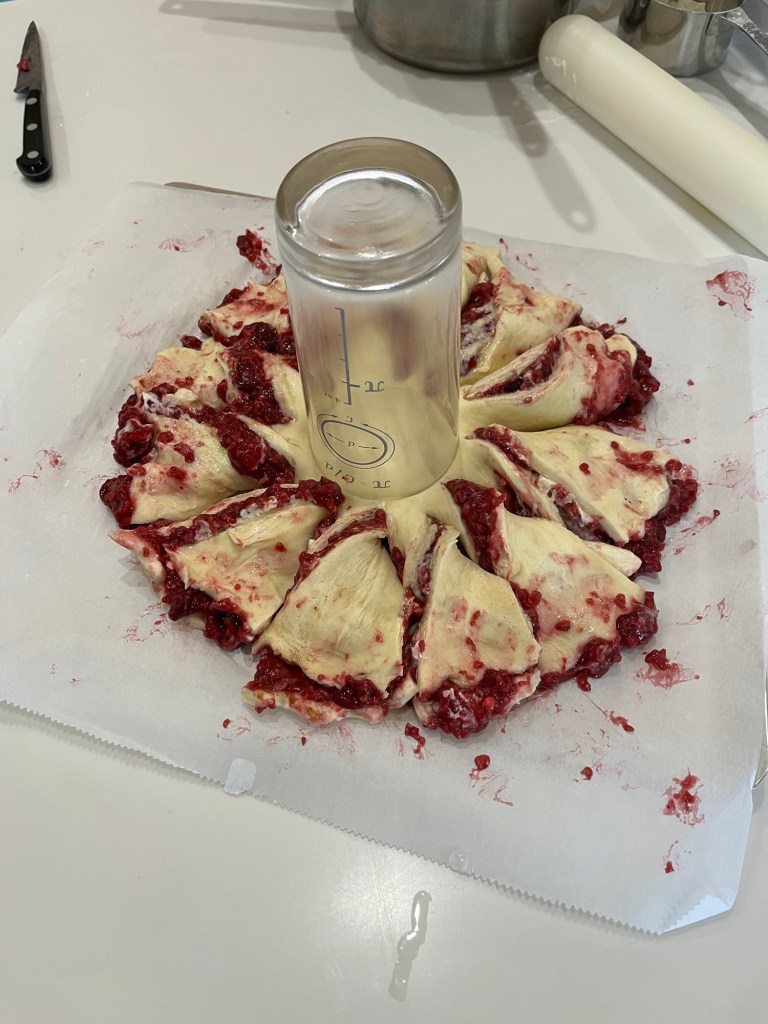
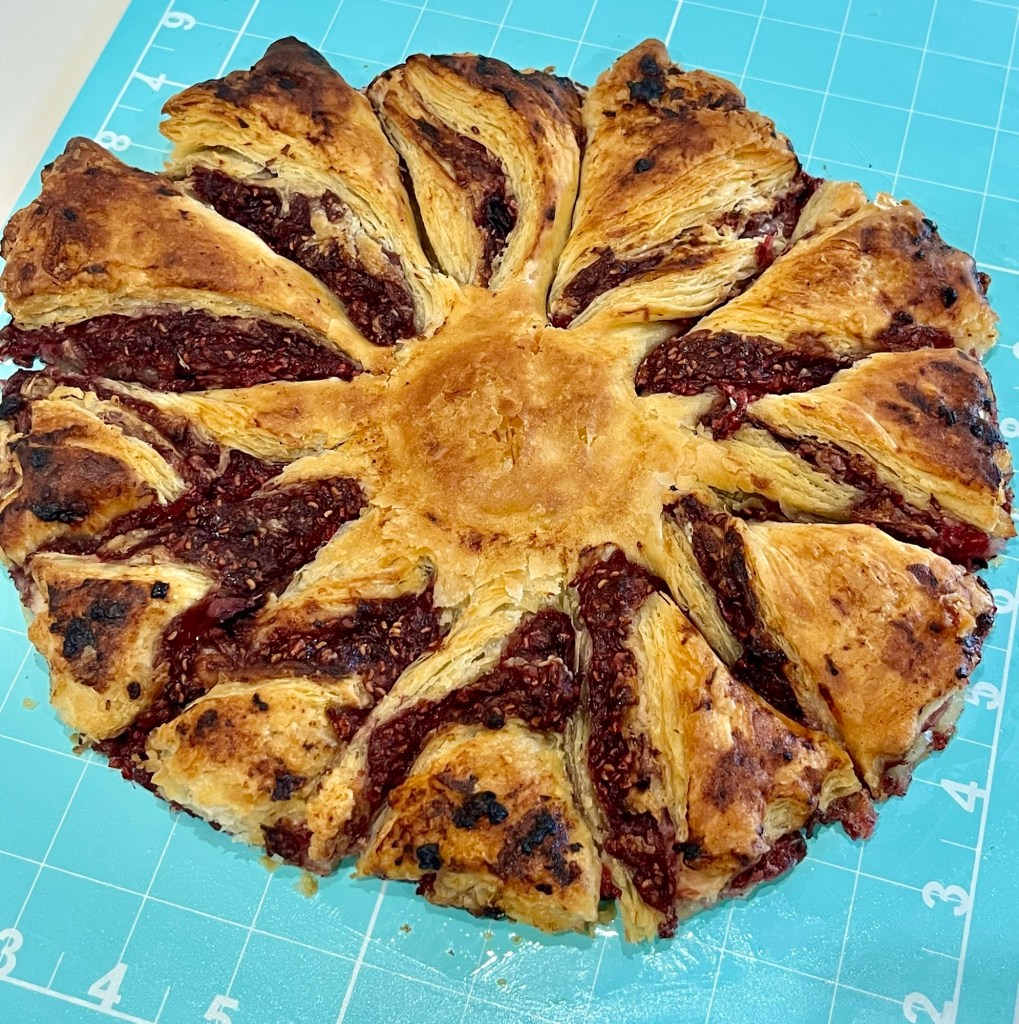
I made my chocolate and raspberry brownie tart free standing, not in a tin. I also add raspberry Jammie bits to the batter, raspberry coulis and whole raspberries because, as you might guess, I like raspberries.

The amount of raspberry stood up to the otherwise overwhelming dominant chocolate. I also made the hot fudge, caramel sauce and coulis.

Chocolate and Raspberry Brownie Tart with Raspberry Coulis, Hot Fudge and Caramel Sauce Drizzles.

Chocolate And Raspberry Brownie Tart

INGREDIENTS
BROWNIES
• 2 large eggs
• ½ cup + 2 Tbl dark cocoa
• ½ tsp salt
• ½ tsp baking powder
• 1 tsp vanilla extract
• 1 cup + 2 Tbl sugar
• ½ cup unsalted butter, melted
• ½ cup + 2 Tbl AP flour
• ½ cup chocolate chips
• ½ cup jammy bits
• 1 ½ Tbl honey or seedless raspberry jam
• ½ Tbl water
CHOCOLATE GANACHE GLAZE
• ½ cup heavy cream
• 20 g (½ Tbl) light corn syrup
• 200 g (1⅓ c) semisweet or bittersweet chocolate, chopped
• ½ tablespoon vanilla extract

METHOD

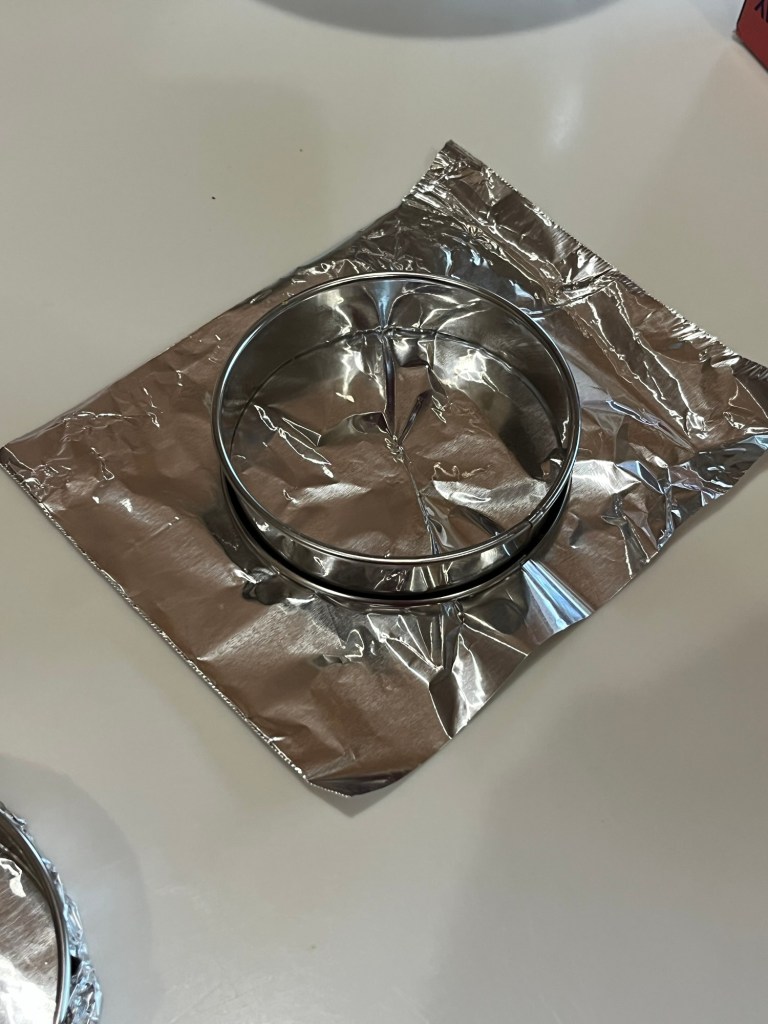
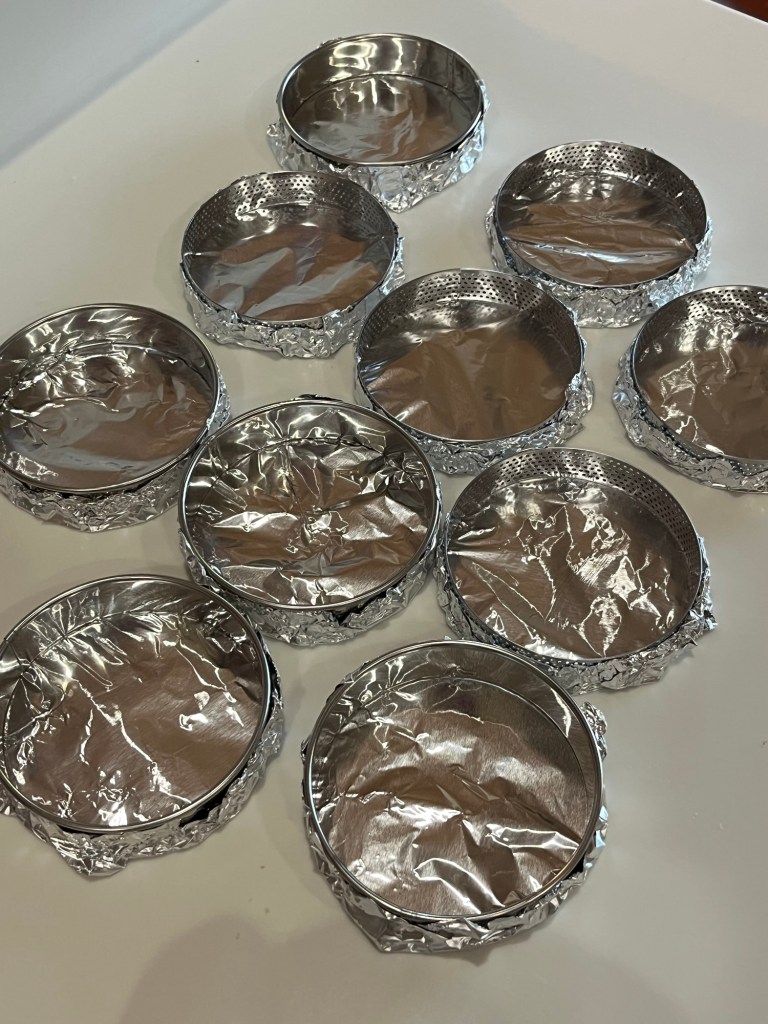
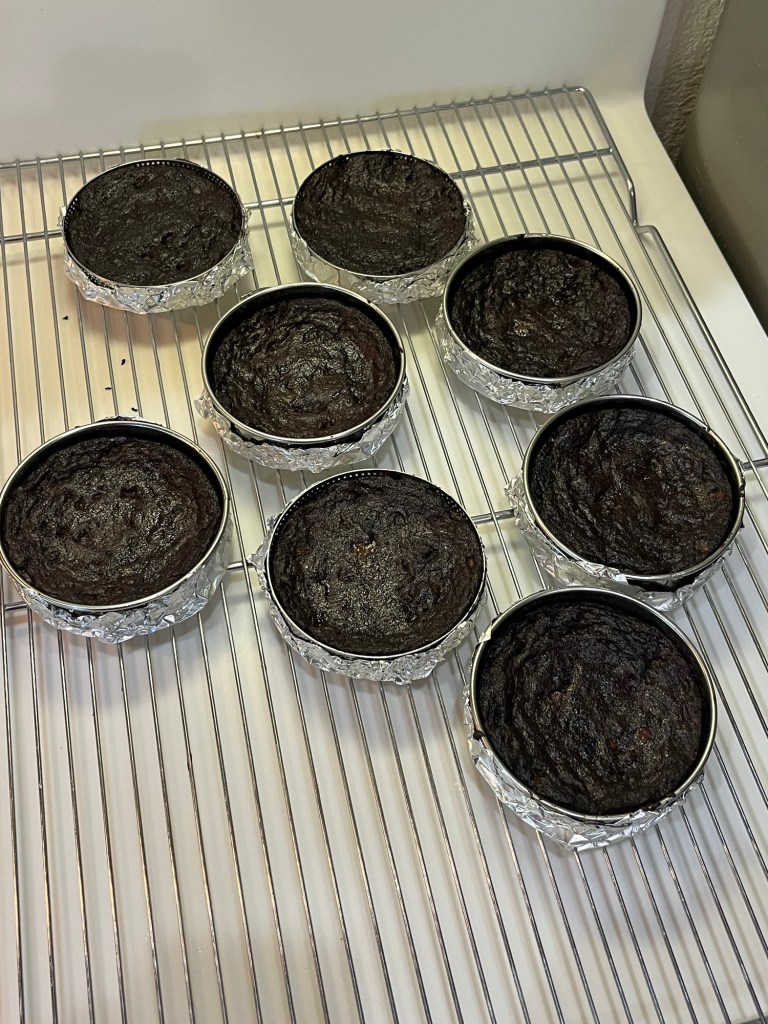
  1. Preheat the oven to 350°F. Lightly grease eight 4” tart rings and cover the bottom and outside with aluminum foil. (Spray the sides of the tart ring and foil on the bottom cooking spray.)
  2. Crack the 2 eggs into a bowl, and beat them with the cocoa, salt, baking powder, and vanilla until smooth.
  3. Add the sugar and melted butter, stirring until smooth.
  4. Add the flour, chips, and Jammy Bits, again stirring well. The batter will be very thick.
  5. Spoon 90 g of batter to half fill each tart ring and smooth with a small offset spatula
  6. Bake the brownies for 12-16 minutes, checking the temperature after 8 minutes. The brownies are done when a cake tester inserted into the center comes out clean (200 degrees,) or with just a few moist crumbs clinging to it. The brownies should feel set on the edges, and the center should look moist, but not uncooked. Do not over bake! Remove them from the oven.
  7. Heat the honey or seedless raspberry jam with 1 Tbl of water and stir until smooth. Brush over the warm brownies. Set aside to cool for an hour or longer before topping with the ganache.
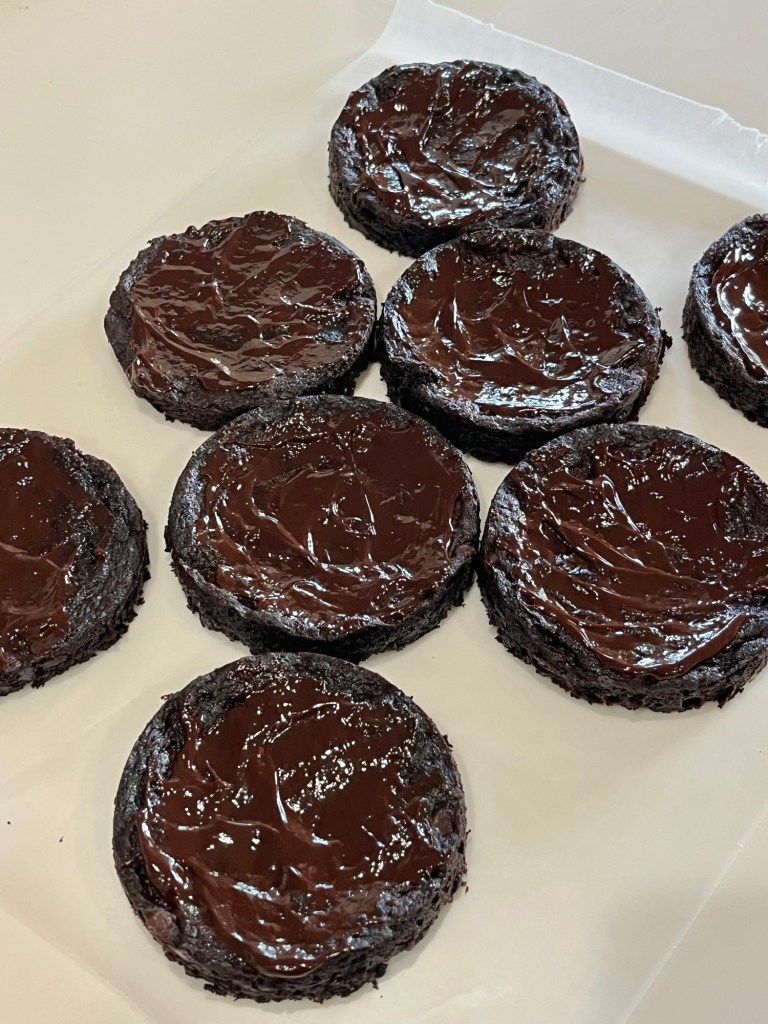
  8. Loosen the brownies from the rings by running a knife around the brownie. Carefully peel the aluminum foil from the brownie and release the brownie from the ring.
  9. To make the ganache, heat the cream and corn syrup until they begin to steam (60 sec in 1000W microwave.) Pour over the chopped chocolate in a bowl. Let sit for 5 minutes, add any flavorings, and whisk until smooth. Let cool for 15 minutes or so.
  10. Spread ganache over the brownies while it’s still warm but has begun to thicken — reheat if it thickens too much as you work. Allow several hours for the ganache to set up fully. You may refrigerate the brownies to hasten the setting of the ganache.
  11. Spread a tablespoon of raspberry sauce on the ganache, top with a scoop of ice cream and drizzle sauce(s) of your choice, i.e. hot fudge, raspberry, caramel or marshmallow. Garnish with fresh raspberries.

Hot Fudge

INGREDIENTS

  • ⅔ c heavy cream
  • 144 g (½ c) light corn syrup
  • 70 g (⅓ c) light brown sugar – not packed
  • ¼ c unsweetened natural cocoa powder
  • ¼ tsp salt
  • 170 g dark or bittersweet chocolate, finely chopped
  • 2 Tbl unsalted butter
  • 2 tsp vanilla extract
    METHOD
  1. Bring cream, corn syrup, brown sugar, cocoa powder, optional salt, and half the
    chopped chocolate to a boil in a 1½-quart heavy saucepan over moderate heat,
    stirring, until chocolate is melted. Reduce heat and cook at a low boil for 5 minutes,
    stirring frequently.
  2. Turn off the heat and add butter, vanilla, remaining chocolate, and stir until smooth.
  3. Cool slightly before serving.
  4. Cooled sauce can be stored in a jar with a lid or in airtight container in the
    refrigerator for many weeks. Reheat sauce before using by placing the desired
    portion in a microwave-safe bowl and heating for about 10 to 15 seconds, or reheat
    on the stovetop

Caramel Sauce
INGREDIENTS
• 112 g (½ c) RT butter
• 106 g (½ c) light brown sugar
• dash salt
• 144g (½ c) light corn syrup
• 7 oz (½ can) sweetened condensed milk
• 1 tsp vanilla
METHOD

  1. Melt the butter in 1½ quart or larger saucepan.
  2. Add the brown sugar and salt and combine. Stir in the corn syrup, mix well.
  3. Gradually add the sweetened condensed milk, stirring constantly. It can take 10-15 minutes to add the milk. Go very slowly!
  4. Cook and stir over medium heat to 220°F for sauce viscosity.
  5. Remove from heat, stir in vanilla.
  6. Store in sealable container when cool

Seedless Raspberry Coulis

INGREDIENTS
• 480 g fresh washed and dried raspberries
• 200 g (1 c) caster sugar
• 60 g (1/4 c) cold water
• 2 Tbl lemon juice

METHOD

  1. Add all ingredients to a 1 ½ quart saucepan
  2. Cook while stirring and mashing over medium heat until it thickens (~220 F)
  3. Strain the coulis through a fine mesh sieve.
  4. Pour into an airtight container and cool before sealing

White Sandwich Bread

It’s been a while since I made any basic, traditional sandwich bread, but that ended this afternoon.

At 3:30 we decided to have BLT’s for dinner, except we didn’t have any bread. In her infinite wisdom QC said, “It’s only 3:30. Can’t you make bread before dinner?” Usually I start baking around 6am, but in a crisis I can be flexible.

We bought some “B” at the market this noon, and had one “T” left over from our favorite roast beef wraps. (Flour tortillas, mayo, lettuce, tomato, roast beef and in QC’s case, cheese and in mine pickled jalapeños.) My garden lettuce is starting to bolt and grew very tall over the last week, so it needs to be eaten right away, hence the “L” in our sandwich. (I gave “stalks” of lettuce to the QC Cadre.) The head lettuce has another week or two.

I used to make this bread as my standard, until I found the artisan breads that have nicer crust and crumb.

Bread – White Gold Medal Recipe

INGREDIENTS
2 Loaves
Bread flour • 6 to 7 cups
Sugar • 3 Tbl
Salt • 1 Tbl
Shortening • 2 Tbl
Yeast • 4 ½ Tsp
Warm water • 2 ¼ cups (120° to 130°F)

METHOD

  1. In large bowl, stir ½ of the flour, the sugar, salt, shortening and yeast until well mixed. Add warm water. Beat with electric mixer on low speed 1 minute, scraping bowl frequently. Beat on medium speed 1 minute, scraping bowl frequently. Stir in enough remaining flour, 1 cup at a time, to make dough easy to handle.
  2. Place dough on lightly floured surface. Knead about 10 minutes or until dough is smooth and springy. Grease large bowl with shortening. Place dough in bowl, turning dough to grease all sides. Cover bowl loosely with plastic wrap and let rise in warm place 30 to 40 minutes or until dough has doubled in size. Dough is ready if indentation remains when touched.
  3. Grease bottoms and sides of 8×4-inch or 9×5-inch loaf pans with shortening or spray with cooking spray.
  4. Gently push fist into dough to deflate. Divide dough in half. Flatten each half with hands or rolling pin into 18×9-inch rectangle on lightly floured surface.
  5. Roll dough up tightly, beginning at 9-inch side. Press with thumbs to seal after each turn. Pinch edge of dough into roll to seal. Pinch each end of roll to seal. Fold ends under loaf.
  6. Place seam side down in pan. Brush loaves lightly with butter. Cover loosely with plastic wrap and let rise in warm place 20 to 30 minutes or until dough has doubled in size.
  7. Move oven rack to low position so that tops of pans will be in center of oven. Heat oven to 425°F.
  8. Bake 20 to 30 minutes or until loaves are deep golden brown and sound hollow when tapped and internal temperature is 195 deg. (Tent the bread with aluminum foil if the brown too soon.) Remove from pans to wire rack. Brush loaves with butter; cool.

Puff Pastry Berry Dessert

Here’s another nice looking dessert. It had the advantage of using puff pastry and I wanted another excuse to make more Sally’s puff pastry. My first attempt went well so I tried it again. (It went well also.)

The dessert also uses berries, and if you know me, that is a deal maker!

The published recipe used too much jam filling for me. It made the pastry too wet which resulted in a messy final product. I cut the berry jam contents in half for future bakes, as noted below.

Baked Puff Pastry Berry Dessert

As I said, the final product was messy but Sally’s puff pastry is perfect. (Find her recipe in the link above.) It is light, flaky and as GBBO demands, has excellent layers.

Puff Pastry Berry Dessert

INGREDIENTS
• 800 g puff pastry ( two 400 g sheets = 2 of Sally’s recipes)
• 100 g spreadable cheese cream
• 3 g cinnamon
• 200 g berries
• 50 g water
• 25 g honey
• 20 g cornstarch
• 20 g melted butter
Note: The quantities of berry jam were halved from the published recipe

METHOD

  1. Cut 2 circles from the puff pastry as big as possible
  2. Spread cream cheese over the entire area of one piece of pastry
  3. Sprinkle with cinnamon
  4. Add berries to 100g of water and boil for 20 minutes
  5. Add honey and corn starch mix well
  6. Preheat oven to 425⁰F
  7. Cover the dough with jam then add the second layer of puff pastry
  8. Place an inverted glass at the center of the tart and cut radially into 12 strips
  9. Prick with a fork
  10. Twist each triangle
  11. Return to refrigerator for 30 minutes
  12. Brush with melted butter
  13. Bake 35 minutes at 425⁰F

New Bread Recipe to Try Today

If you know, or follow me, you know I am always looking for new recipes, even if I already use a great one. Case in point is the No-Knead Artisan Bread I found a PreppyKitchen.com. It’s wonderful bread with a nice crunchy crust and soft, chewy interior and excellent flavor. Plus it is easy to make, uses few dishes and only takes a couple of hours. However, I do often find alternate recipes and occasionally give one a try. Hence, today’s experiment.

I found a recipe called “Homemade 25 Minute Bread” and made a loaf exactly following the instructions (even though I knew they were wrong.) At this point I am an experienced bread baker and am comfortable with my abilities to distinguish what will work and what will not, but you never know. I bake to learn.

I modified the published recipe, and for expediency used a stand mixer rather than kneading by hand. I enjoy hand kneading, (when I have the time,) but I was making 2 sequential loaves this morning, before I made a batch of rough puff pastry, and watched the RBC Heritage Golf Championship.

The basic difference in the two breads involves handling the dough. The original specified a 5 minute hand knead until the dough was “smooth and elastic.” I increased the kneading time to 8 minutes so it would just about pass the windowpane test. It also only had a 10 minutes “rise” rather than a full “normal” proof, which was 45 minutes at ~90°F. It also did not suggest a lame or sharp knife slash. This gives the dough someplace to expand rather than burst through the sides of the loaf during baking.

The published recipe resulted in a very dense, not very pleasant loaf. ( I see French toast in my future.) The altered recipe was much lighter. While the crumb was very similar it was light and soft with a good crust. The final result is, back to PreppyKitchen!

I renamed the recipe “Homemade 45-Minute Bread – Dede’s Version. It’s slightly more accurate. (The time does not include proofing time.)

Homemade 25-Minute Bread

INGREDIENTS :
• 360g 3 cups all-purpose flour
• 15g 1 tablespoon sugar
• 15g 1 tablespoon salt
• 11g 1 tablespoon instant yeast
• 236g 1 cup warm water (110°F)
• 23g 2 tablespoons olive oil

METHOD

  1. In a large mixing bowl, combine the flour, sugar, salt, and instant yeast. Mix well.
  2. Add the warm water and olive oil to the dry ingredients. Stir until a dough forms.
  3. Knead the dough on a floured surface for about 5 minutes until smooth and elastic.
  4. Preheat your oven to 425°F.
  5. Shape the dough into a ball and place it in a lightly greased bowl. Cover with a clean towel and let it rise for 10 minutes.
  6. After the dough has rested, punch it down and shape it into a loaf or divide it into smaller rolls.
  7. Place the shaped dough onto a baking sheet lined with parchment paper.
  8. Bake for 15-20 minutes or until the bread is golden brown and sounds hollow when tapped on the bottom.
  9. Allow to cool slightly before slicing and serving.

Homemade 45-Minute Bread – Dede’s Version

INGREDIENTS :
• 360g 3 cups all-purpose flour – Divided
• 15g 1 tablespoon sugar
• 15g 1 tablespoon salt
• 11g 1 tablespoon instant yeast
• 236g 1 cup warm water (110°F)
• 23g 2 tablespoons olive oil

METHOD

  1. In a stand mixer bowl, combine the flour (less 4 Tbl) , sugar, salt, and instant yeast. Whisk well.
  2. Add the warm water and olive oil to the dry ingredients. Stir with a dough hook until a dough forms.
  3. Knead the dough for about 10 minutes until smooth and elastic. The dough is very sticky. Add the reserved flour one tablespoon at a time until the sides of he bowl begin to clean.
  4. Shape the dough into a ball and place it in a lightly greased bowl. Cover with a clean towel and let it rise for 45 minutes. The dough weighs ~684g at this point
  5. Preheat your oven to 425°F.
  6. After the dough has rested, punch it down and shape it into a loaf or divide it into smaller rolls.
  7. Place the shaped dough onto a baking sheet lined with parchment paper.
  8. Slash with a lame or knife
  9. Bake for 15-20 minutes or until the internal temperature is ~195⁰F and bread is golden brown and sounds hollow when tapped on the bottom.
  10. Allow to cool slightly before slicing and serving.

Pastéis de Nata – Portuguese Custard Tarts

Somewhere I came across Pastéis de Natas, so I researched online for a suitable recipe. I had 6 left-over egg yolks and an extra sheet of puff pastry. Doing the maths I calculated if I used two more sheets of puff pastry and made 18 tarts I should about run out of left overs.

Well, I was once semester short of graduating with a math minor, but somehow I ended up with two small bowls of custard. This isn’t a problem as it is smooth and delicious. (I have some raspberries that need to be used soon so a nice raspberry coulis could be used here.)

Pastéis de Nata

INGREDIENTS

• 296 g (1⅓ c) granulated sugar
• 115 g (½ c) water
• ½ tsp cinnamon
• 225 g (1 c) whole milk
• ½ cup (115ml) double cream
• 5 large egg yolks
• 1 large egg
• 1 tablespoon vanilla extract
• 28 g (¼ c) cornstarch/cornflour
• 1 pack frozen puff pastry

METHOD

  1. Preheat oven to 500°F.
    Making the Custard:
  2. In a small pan, add the sugar, water, and cinnamon stick. Bring to a simmer and allow to simmer for 3 minutes. Turn off the heat and set it aside to infuse.
  3. In a separate saucepan, combine milk and cream and place over medium heat. Allow the mixture to come to a simmer, then remove from the heat and set aside to cool down.
  4. To a large bowl, add the egg yolks, whole egg, vanilla extract, and cornflour. Whisk until fully combined and no lumps remain.
  5. Temper the egg mixture by slowly pouring the hot milk to it briskly whisking as you go.
  6. Return this egg mixture to the saucepan and place over low-medium heat. Whisk continually until mixture thickens, around 3-4 minutes. Remove from the heat.
  7. Whisk in the cooled cinnamon sugar syrup. Set the custard aside.
    Assembling the Tarts:
  8. Lightly flour a work surface and cut puff pastry into roughly 14 equal rounds using a 3 ½ inch cookie cutter.
  9. To a lightly greased muffin tin, push each piece of puff pastry down and up into the sides of the muffin holes until evenly distributed.
  10. Pour custard into each muffin tin so each one is three-quarters full. Bake for roughly 15 minutes or until golden brown on top.
  11. Serve warm as is or with a dollop of cream on top, or dusted with confectioners sugar.

Seven-Strand Plaited Wreath

Mostly I followed Paul Hollywood’s recipe. I wanted a larger wreath so I extended each strand by a few inches. I plan to add some Easter eggs to the center for our brunch next Sunday. Hopefully there is room enough for an egg for each kids in attendance.

Paul Hollywood’s Seven-Strand Plaited Wreath

INGREDIENTS
• 500g bread flour
• 7g fast-action dried yeast
• 10g fine salt
• 340ml of water
• 1½ tbsp olive oil, plus extra for greasing
• 1 egg, lightly beaten with a pinch of salt

METHOD

  1. Make the dough. Place the flour in a large mixing bowl. Add the yeast and salt, and stir to mix.
  2. Pour three-quarters (225ml) of the water into the flour mixture. Add the olive oil and mix by hand until combined, then mix in the rest of the water to form a dough.
  3. Turn out the dough onto a lightly floured work surface and knead by hand for about 10 minutes, until the dough looks silky and stretchy. Place the dough in a lightly oiled mixing bowl. Cover with a tea towel and leave to rise for about 45 minutes, until doubled in size.
  4. Turn out the dough onto a lightly floured work surface again and knead it to knock it back. Shape the dough into a ball. It should weigh ~930 g. Divide the ball into 7 equal pieces, (~133g each) then roll each piece into a strand about 80cm long.
  5. Make the plait. Lay out the strands on a lightly floured work surface like an octopus, with the legs fanned out from a central, top point, stretching towards you. Stick all the ends at the central point to the work surface with your thumb. Take the outside strand on the right and cross it over 3 strands towards the middle while gently stretching it, then take the outside strand on the left and cross it over 3 strands towards the middle. Stretching the strands makes a slightly tighter braid.
  6. Repeat this process, always taking the outside strand (first on the right and then on the left) and crossing it over 3 strands into the middle until you have plaited all of the strands.
  7. Shape the plait. Trim each end of the plait to neaten, then form the plait into a wreath, pinching the ends together to join them and tucking the join underneath to give a neat finish. Trim enough off so the join is about the same diameter as the rest of the plait. Optionally put a small oven safe bowl in the center of the wreath to maintain the size and shape. As a treat roll the end trimmings into a ball and bake on the same sheet as the wreath. Don’t forget to egg wash it.
  8. Place on the parchment paper lined baking tray, then into a proving bag and leave the shaped loaf to prove for 45 minutes, until almost doubled in size.
  9. Heat the oven to 425°F. Brush the top of the loaf with the beaten egg and bake for 25 minutes, until golden brown, and the loaf sounds hollow when tapped underneath.

They are Berry, Berry Good

I make these drop scones with whatever berries I have on hand. I would rather spend a half hour making scones, than throwing slightly old berries away.

I made some Caramel Coconut Macaroon Thumbprints for Sally’s Baking Addiction April Challenge and had some strawberries left over. (They were BOGO.) Waste not, want more.

Berry Drop Scones

INGREDIENTS

  • 2 ½ cups (312g) all-purpose flour
  • 1 tablespoon baking powder
  • 3/4 teaspoon kosher salt
  • 1/3 cup (67g) sugar
  • Zest of 1 small lemon (or orange or lime)
  • ½ cup (115g) unsalted butter, chilled and cut into cubes
  • 150-175g berries. Use any berries that you like.
  • 1 cup heavy cream + extra if required
  • Coarse or turbinado sugar for topping

METHOD

  1. Preheat oven to 400. Line a baking sheet with parchment paper.
  2. In the bowl of a food processor, add the flour, baking powder, salt, sugar and zest. Pulse a few times to incorporate.
  3. Add the cubed butter and pulse to incorporate. The mixture should resemble very coarse sand.
  4. Empty the flour mixture into a mixing bowl. Add the cream and stir until just barely incorporated. Add additional cream by the tablespoon to help the dough come together
  5. Gently fold in the berries. (It’s fine if the raspberries or blackberries break up a little – it adds a nice pink stain to the dough.) The dough should just be moist, not wet, but also not crumbly or powdery looking. If it looks too dry, add a tablespoon of cold water.
  6. Spoon the dough into 12 equally sized pieces on the parchment lined baking sheet. Sprinkle some coarse or turbinado sugar over the top, if desired.
  7. Bake for 16-19 minutes, rotating the pan halfway through. The scones should be lightly golden and cooked through. I rotate the pan after 10 minutes
  8. Cool in the pan for 5-10 minutes then carefully remove to a cooling rack.

Deep Dish Pan Pizza

While not exactly a baking item, my deep dish pan pizza does incorporate a home made pizza dough, which combined with the other ingredients makes an easy, delicious meal.

Pan Pizza

INGREDIENTS

Crust
• 2 cups (240g) King Arthur Unbleached All-Purpose Flour
• 3/4 teaspoon salt
• 1/2 teaspoon instant yeast or active dry yeast
• 3/4 cup (170g) lukewarm water
• 1 tablespoon (13g) olive oil + 1 1/2 tablespoons (18g) olive oil for the pan
Topping
• 6 ounces (170g) mozzarella, grated (about 1 1/4 cups, loosely packed)*
• 1/3 to 1/2 cup (74g to 113g) tomato sauce or pizza sauce, homemade or store-bought
• freshly grated hard cheese and fresh herbs for sprinkling on top after baking, optional*
• *See “tips,” below.

Weigh your flour; or measure it by gently spooning it into a cup, then sweeping off any excess.

METHOD

  1. Place the flour, salt, yeast, water, and 1 tablespoon (13g) of the olive oil in the bowl of a stand mixer or other medium-large mixing bowl.
  2. Stir everything together to make a shaggy, sticky mass of dough with no dry patches of flour. This should take 30 to 45 seconds in a mixer using the beater paddle; or about 1 minute by hand, using a spoon or spatula. Scrape down the sides of the bowl to gather the dough into a rough ball; cover the bowl.
  3. After 5 minutes, uncover the bowl and reach a bowl scraper or your wet hand down between the side of the bowl and the dough, as though you were going to lift the dough out. Instead of lifting, stretch the bottom of the dough up and over its top. Repeat three more times, turning the bowl 90° each time. This process of four stretches, which takes the place of kneading, is called a fold.
  4. Re-cover the bowl, and after 5 minutes do another fold. Wait 5 minutes and repeat; then another 5 minutes, and do a fourth and final fold. Cover the bowl and let the dough rest, undisturbed, for 40 minutes. Then refrigerate it for a minimum of 12 hours, or up to 72 hours. It’ll rise slowly as it chills, developing flavor; this long rise will also add flexibility to your schedule.
  5. About 3 hours before you want to serve your pizza, prepare your pan. Pour 1 1/2 tablespoons (18g) olive oil into a well-seasoned cast iron skillet that’s 10” to 11” diameter across the top, and about 9” across the bottom. Heavy, dark cast iron will give you a superb crust; but if you don’t have it, use another oven-safe heavy-bottomed skillet of similar size, or a 10” round cake pan or 9” square pan. Tilt the pan to spread the oil across the bottom, and use your fingers or a paper towel to spread some oil up the edges, as well.
  6. Transfer the dough to the pan and turn it once to coat both sides with the oil. After coating the dough in oil, press the dough to the edges of the pan, dimpling it using the tips of your fingers in the process. The dough may start to resist and shrink back; that’s OK, just cover it and let it rest for about 15 minutes, then repeat the dimpling/pressing. At this point the dough should reach the edges of the pan; if it doesn’t, give it one more 15-minute rest before dimpling/pressing a third and final time.
  7. Cover the crust and let it rise for 2 hours at room temperature. The fully risen dough will look soft and pillowy and will jiggle when you gently shake the pan.
  8. About 30 minutes before baking, place one rack at the bottom of the oven and one toward the top (about 4″ to 5″ from the top heating element). Preheat the oven to 450°F.
  9. When you’re ready to bake the pizza, sprinkle about three-quarters of the mozzarella (a scant 1 cup) evenly over the crust. Cover the entire crust, no bare dough showing; this will yield caramelized edges. Dollop small spoonfuls of the sauce over the cheese; laying the cheese down first like this will prevent the sauce from seeping into the crust and making it soggy. Sprinkle on the remaining mozzarella.
  10. Bake the pizza on the bottom rack of the oven for 18 to 20 minutes, until the cheese is bubbling and the bottom and edges of the crust are a rich golden brown (use a spatula to check the bottom). If the bottom is brown but the top still seems pale, transfer the pizza to the top rack and bake for 2 to 4 minutes longer. On the other hand, if the top seems fine but the bottom’s not browned to your liking, leave the pizza on the bottom rack for another 2 to 4 minutes. Home ovens can vary a lot, so use the visual cues and your own preferences to gauge when you’ve achieved the perfect bake.
  11. Remove the pizza from the oven and place the pan on a heatproof surface. Carefully run a table knife or spatula between the edge of the pizza and side of the pan to prevent the cheese from sticking as it cools. Let the pizza cool very briefly; as soon as you feel comfortable doing so, carefully transfer it from the pan to a cooling rack or cutting surface. Sprinkle with a few basil leaves.
  12. Serve the pizza anywhere from medium-hot to warm. A pizza cutter, kitchen shears or a large pair of household scissors are good tools for cutting this thick pizza into wedges.

Gateau St. Honoré

St. Honoré cake is a pastry dessert named for the French patron saint of bakers and pastry chefs and when created correctly is amazing.

The various components of my cake were delicious. The size of the patisserie cream filled profiteroles were slightly large. I will know better next time. Bake and learn,

The cake is basically a circular (7” diameter) base of puff pastry with a ring of choux pastry about 1/2” thick piped around the perimeter. With the excess choux pastry a dozen or so profiteroles (about 1” to 1.5” diameter. are piped on the same baking sheet. This is baked, then cooled.

While the base is cooling make the cream patisserie and chantilly cream. Fill the profiteroles with cream patisserie and set aside. Using a St Honoré piping tip fill the base with a nice pattern of the traditional piping style.

Make the caramel and use it to stick the profiteroles to the edges of the round base. Add another filled profiterole to the center then drizzle caramel over all the profiteroles.

Gateau St. Honoré With Salted Caramel

Based on: https://www.monpetitfour.com/gateau-st-honore/

INGREDIENTS
Puff Pastry
• 1 sheet of puff pastry
• Or home made rough puff pastry
Pate a Choux
• 1/4 cup unsalted butter
• 1/2 cup water
• 1/2 tsp granulated sugar
• 1/4 tsp salt
• 1/2 cup all-purpose flour
• 2 eggs
Creme patisserie
• 1 cup milk
• 1/4 tsp vanilla bean paste, or 1/2 tsp vanilla extract
• 1/3 cup granulated sugar
• 2 tbsp cornstarch
• 2 tbsp all-purpose flour
• 1 egg
• 1 egg yolk
Chantilly cream
• 1/2 cup heavy whipping cream
• 2 tbsp powdered sugar
• 1/4 tsp vanilla extract
Salted Caramel
• 2/3 cup granulated sugar
• ¼ c water
• 1/3 cup heavy cream
• 1/2 tsp salt, or more to taste

METHOD
Pate a Choux

  1. Preheat the oven to 425°F. In a medium saucepan over medium heat, warm the water, unsalted butter, sugar and salt together. Once the butter has melted, remove the saucepan from the heat.
  2. Pour in the all-purpose flour and stir together to combine. Move the saucepan over to low heat, and stir the now-formed dough/paste until it no longer sticks to the bottom of the pan (about 30 seconds to 1 minute).
  3. Remove the saucepan from the heat and stir in the eggs, one at a time. It will be slightly difficult to mix the egg into the dough, but just keep vigorously stirring and eventually they’ll become incorporated. Temporarily set this aside.
    Puff Pastry Base and Pastry Puffs
  4. Cut out a 7″ round from the puff pastry. You can use a bowl, pan, pot lid – whatever you have that will help you cut out a nice 7″ circle (or simply trace it after measuring with a ruler – perfection isn’t necessary!). Place this puff pastry circle on one side of a baking sheet fitted with parchment paper or a silicone mat.
  5. Fill a pastry bag (with no tip) with the pate a choux dough that you created in your saucepan. In one continuous motion, pipe the dough out along the edge of the puff pastry circle (creating a sort of wall for the puff pastry). Now, pipe out approximately 16 small mounds on the open side of the baking sheet, spacing the mounds slightly apart. Smooth out any ridges or pointed tips using your fingers.
  6. Bake the pastry for 10 minutes at 425°F, then WITHOUT opening the oven door, bake the pastry for another 12-16 minutes at 375°F, until they’re a deep golden color. Place the pastry ring and pastry puffs on a wire cooling rack to cool completely.

    Creme Patisserie
  7. Meanwhile, heat the milk in a medium saucepan over medium-low heat. In a medium bowl, whisk the sugar, cornstarch, flour, egg, and egg yolk together.
  8. Once the milk is hot and steam is beginning to rise from it, stir in the vanilla bean paste (if using extract, hold off for now). Then, pour half of the milk into the egg mixture, whisking the egg mixture vigorously as you do. Pour the rest of the milk in, and continue to whisk vigorously.
  9. Transfer the entire batter back into the saucepan and whisk over medium heat. It will take about 5 minutes for the cream to thicken up into a pudding-like consistency. Just keep whisking the whole time.
  10. Once the cream is starting to look like pudding, quickly remove the cream from the heat. If you’re using vanilla extract, stir the extract in now. If there are any lumps in your cream, just whisk the cream really vigorously to smooth them out.
  11. Transfer the cream to a clean bowl and cover the cream with a sheet of plastic wrap placed directly onto the cream (this will prevent a filmy layer from forming). Chill the pastry cream in the refrigerator.

    Chantilly Creme
  12. In the bowl of a stand mixer, whisk the heavy cream on high speed until indentations begin to appear. Pour in the vanilla extract and powdered sugar, then whisk on high speed until a frosting-like consistency is formed.

    Caramel
  13. In a medium saucepan, add the sugar and 1/4 cup of water. Do NOT stir the two together. Simply place the saucepan over medium-high heat, and allow the mixture to come to a simmer. Watch the sugar-water bubble for approximately 7 to 8 minutes, watching it go from white-ish/clear to a medium amber color. Do NOT step away from the caramel as it can burn in a matter of seconds.
  14. Once the caramel has reached a medium amber color and is JUST beginning to smoke, quickly remove the caramel from the heat. Carefully pour the heavy cream into the caramel (it will bubble), then stir to combine. Add the salt, and again stir to combine.
    Assembly
  15. Fit a pastry bag with a long, narrow filling tip. Fill the pastry bag with the creme patisserie and then pipe this into the pastry puffs. Flip the pastry puff upside down so that the flat side is facing you, then dip the top in the salted caramel. Gently give it a shake to pour off excess caramel, then carefully dip the bottom of the pastry puff in caramel too.
  16. Place the pastry puff onto the pate a choux wall that you created on top of the puff pastry circle. The caramel will act like a glue. Continue until you’ve got a ring of pastry puffs.
  17. Scoop the remaining creme patisserie onto the center of the puff pastry. Fill a new pastry bag fitted with whatever tip you like (plain, star, st. honore) with the creme Chantilly, and pipe the creme on top of the pastry cream.
  18. Stick one final pastry puff in the center of the dessert, then drizzle caramel all over. Refrigerate until ready to serve.

Boston Cream-ish Cupcakes

Two more days before I can return to golfing! This forced time off is not helping my health.

I wanted to improve the cake in the Lady Baltimore cupcakes I am making for a friends birthday tbis weekend, but was not a fan of the traditional filling and frosting. Today I re-made the cake (3rd time is a charm) but filled the cupcake with creme patisserie and frosted them with my favorite chocolate frosting, topped with a white chocolate curl.

This modification of the cake recipe was excellent and what could be wrong with the rest?

Boston Cream-ish Cupcakes

INGREDIENTS
Cupcakes:
• 171 g (1½ c) cake flour
• 150 g (¾ c) sugar
• 2 tsp baking powder
• ¼ tsp of salt
• 84 g ( 6 Tbl) unsalted RT butter, cut into small pieces
• 90 g (3) egg whites
• 113 g (½ c) whole milk
• 2 Tbl KAB Bread and Cake Enhancer
• 1 Tbl sour cream
• ¾ teaspoon vanilla
• Optional: 1 Tbl vanilla pudding mix OR
• Optional: 1 Tbl vegetable oil
Frosting
• 62 g (3 Tbl) butter
• 63 g (¾ c) unsweetened cocoa powder
• 312 g (2⅔ c) confectioners’ sugar
• ⅓ c milk
• ½ teaspoon vanilla extract
Crème Patisserie
• ¾ c 2% milk + 2 Tbl heavy cream
• 2 (40g) egg yolks
• ¼ cup sugar
• 2 Tbl corn starch
• Pinch salt
• 1 Tbl butter
• ½ tsp vanilla

METHOD

  1. Heat an oven to 350⁰ F. Line 12 wells of a muffin pan with paper liners and set the pan aside.
  2. Add the flour, sugar, baking powder, and salt to a large bowl and whisk to combine.
  3. Add the butter and mix by hand with a Danish whisk until the mixture resembles coarse crumbs, about 5 minutes.If necessary use you hands to break up butter balls as if you were making pastry.
  4. Mix the egg whites, milk, and vanilla in a small bowl, then pour it into the mixer bowl.
  5. Beat vigorously with a Danish whisk for 5 minutes until the batter is creamy and homogeneous. (Makes 2 c batter)
  6. Evenly distribute the batter among the lined muffin tins (50g/tin) and bake until the edge of the cupcakes are light golden brown and a toothpick comes out clean, 14-16 minutes.
  7. Set the pan on a wire rack and let the cupcakes cool in the pan for 15 minutes, then remove them from the pan and let them completely cool on the rack.
  8. Use an apple corer to to cut a cylinder out of the top of the cupcake. Slice the removed cylinder so that you have a ¼” thick disk of cake. Reserve the disk and discard (or eat) the rest of the cylinder.

    Frosting
  9. Cream butter until light and fluffy.
  10. Stir in the cocoa and confectioners’ sugar alternately with the milk and vanilla.
  11. Beat and add additional milk to achieve a spreading or piping consistency

    Crème Patisserie
  12. Whisk eggs and milk together and add to all other ingredients (except vanilla) to a medium saucepan.
  13. Bring to boil whisking constantly
  14. Cook until thickened (it will look lumpy, its ok)
  15. Vigorously whisk mixture, add vanilla, and vigorously whisk thoroughly
  16. When incorporated, cover with plastic directly on the crème patisserie and cool about an hour.
  17. Alternatively, slide the piping tip you would use to fill the pâte à choux into the piping bag but don’t cut off the tip. Spoon the hot batter directly into the piping bag with sealed end.
  18. When the crème patisserie is cool, cut the tip off, force the bag around the piping tip and squeeze the crème pat to fill the end.
  19. Pipe crème patisserie into each cylinder. Place a reserved cake disk on top of the filling and press down on it to seal the cupcake.
  20. Frost the cupcakes with the chocolate frosting.

For Flavored Cream Patisserie with Liqueur
Replace vanilla with 3 Tbl banana liqueur or an other flavored liqueu