Fresh Peach Cobbler- Sally

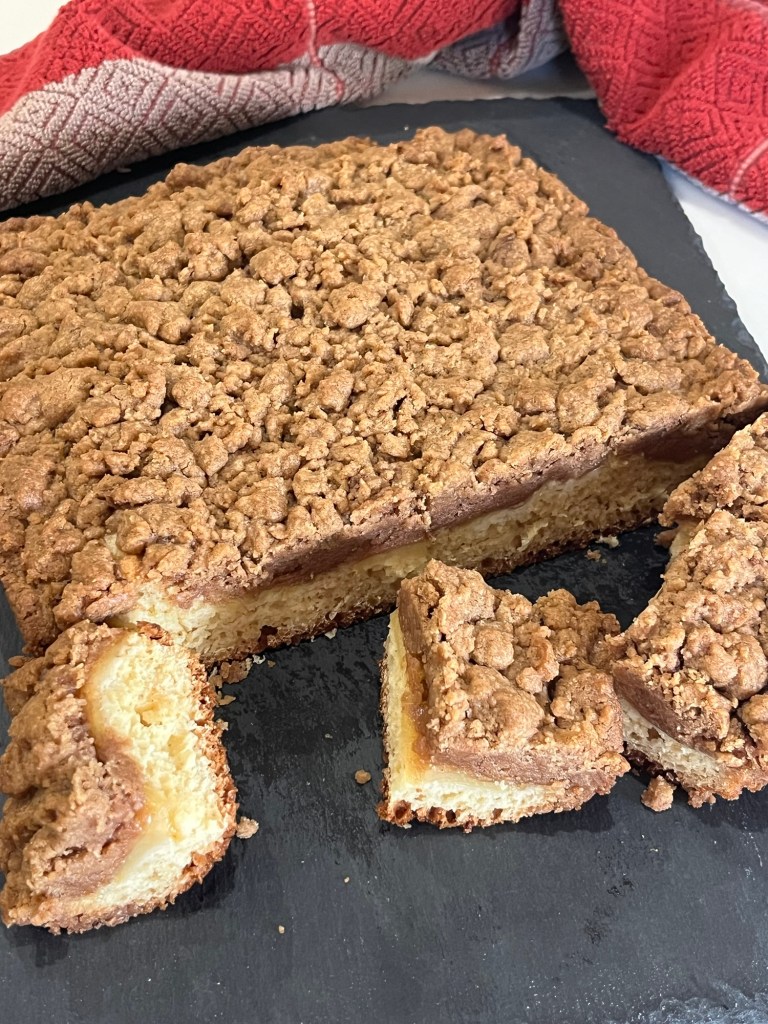
My neighbors, Donna and Alex (QC Cadre members,) gave me some huge peaches from their tree. I could barely finish the smallest so I decided to use two pounds of the rest to make Sally’s Fresh Peach Cobbler. Her recipe calls for about four pounds which would be baked in a 9”x13” dish, so I scaled it in half, used two pounds and used a 8”x8” dish. (I knew a full recipe would be too much for us to eat.)

Other than the scaling down I followed the recipe exactly and it was (and still is) delicious.

Fresh Peach Cobbler- Sally

INGREDIENTS
Peach Filling
• 0.9kg (~2 lbs) fresh peaches, peeled and cut into 1- to 1.5-inch chunks
• 25g (⅛ c) packed light or dark brown sugar
• ½ Tbl cornstarch
• 8ml (½ Tbl) fresh lemon juice
• ½ tsp pure vanilla extract
• ¼ tsp ground cinnamon
• 1/16 tsp ground nutmeg
• 1/16 tsp ground ginger
• 1/16 tsp salt
Biscuit Topping
• 125g (1 c) all-purpose flour
• 50g (½ c) granulated sugar
• ¾ tsp baking powder
• 1/8 tsp baking soda
• ¼ tsp salt
• 56g (1/8 c; 4 Tbl) unsalted butter, cold and cubed
• ¼ cup (120ml) buttermilk, cold*
• egg wash: 1 large egg beaten with 1 Tablespoon (15ml) milk or buttermilk
• optional: 2 Tablespoons (25g) granulated sugar mixed with 1/2 teaspoon ground cinnamon

METHOD

  1. Preheat oven to 350°F (177°C). Lightly grease a 9×13-inch baking pan. Any 3- to 4-quart baking dish works.
  2. For the filling: Mix all of the filling ingredients together in a large bowl, then spread into the baking pan. Bake for 10 minutes. Remove from the oven and set aside as you prepare the topping. Keep the oven on.
  3. For the topping: Whisk the flour, sugar, baking powder, baking soda, and salt together in a large bowl. Using a pastry cutter or 2 forks, cut in the cold butter until the mixture resembles coarse pea-sized crumbles. A pastry cutter makes this step very easy and quick! You could also pulse in a food processor. Pour in the buttermilk, and gently mix until evenly combined. Dough should be slightly sticky once completely combined, but if it’s too dry, add 1 more Tablespoon of buttermilk.
  4. Assemble the cobbler: Take handfuls of dough and use your hands to gently flatten out into patties. Place dough all over the top of the warm peach filling. There’s no special trick to this—just flatten the dough in sections and cover most of the peaches.
  5. Brush the top of the biscuit dough with egg wash, then sprinkle with cinnamon-sugar, if using.
  6. Bake for 40–50 minutes, or until the biscuit topping is golden brown and peach filling is bubbling around the edges. To test for doneness, stick a toothpick into the biscuit topping; if it comes out clean, it’s done.
  7. Remove cobbler from the oven, and set the pan on a cooling rack. Cool for 5 minutes before serving. Serve warm with vanilla ice cream or whipped cream.
  8. Cover and store leftovers in the refrigerator for up to 5 days.

New Jersey Crumb Cake

QC wanted a New Jersey Crumb Cake and who am I to object? She asked for a layer of apples sandwiched between the cake and crumble topping. It was suggested, next time, to make the layer of apples thicker, so I adjusted the recipe accordingly.

The finished cake was quite sweet, due to the very thick layer of crumble topping, (no complaint, just fact.)

The overall cake was very good and well worth making again.

New Jersey Crumb Cake

INGREDIENTS
Topping
• 1 ½ c brown sugar
• 1 ½ Tbl ground cinnamon
• ¾ tsp kosher salt
• 2 ¼ c cake flour
• ¾ c RT butter melted (1 ½ sticks)
• 2 sweet apples, sliced ¼” thick
Cake
• 1 ½ cups all-purpose flour
• ½ c sugar
• 2 tsp baking powder
• ¼ tsp baking soda
• ½ tsp kosher salt
• 1 RT large egg
• ½ c RT buttermilk
• Spray canola oil
• 2 tsp vanilla
• Confectioners sugar

METHOD
Preheat oven to 325°

  1. Cut 16-inch length parchment paper or aluminum foil and fold lengthwise to 8-inch width. Cut excess. Spray 9-inch square baking pan with nonstick cooking spray and fit parchment into pan, pushing it into corners and up sides.
  2. Let excess paper hang over the sides of the pan. Affix to the sides of the pan with metal binder clips. Spray the piece of parchment paper and repeat with a piece of parchment laying in the opposite direction.
    Crumb topping
  3. Whisk sugar, cinnamon, salt, and all purpose flour in medium bowl to combine. Add melted butter and mix with sturdy rice paddle or wooden spoon until mixture resembles thick, crumbly dough. Refrigerate while you make the cake batter.
    Cake batter
  4. Sauté apples to at denté in a frying pan with 1 tablespoon butter
  5. Whisk flour, sugar, baking powder, baking soda, and kosher salt together in a medium bowl. Set aside.
  6. Mix buttermilk, vanilla and egg until combined.
  7. Pour the wet ingredients into the dry ingredients and fold until just combined.
    Assemble and bake
  8. Transfer the batter to the prepared pan. Spread evenly.
  9. Add sautéed apples evenly in two layers across the batter.
  10. Break crumb topping apart, with your fingers, into pea-sized and slightly larger pieces and spread in even layer over batter, beginning with edges and then working toward center. It will seem like a lot of topping, but it’s worth it!
  11. Bake for 40 to 45 minutes, or until a toothpick comes out clean, rotating the pan after 20 minutes then continue baking.
  12. Let cool at least 15 minutes. Remove cake from pan by lifting parchment overhang. Dust powdered sugar over the top of the cake.

Black Chocolate Cookies

I find it hard to believe I never posted theses Black Chocolate Cookies. They are among our favorite 5… um… 6…um… 10, yeah thats the ticket. They are among our 10 favorite cookies.

KAB says “black cocoa powder is ultra-Dutch processed, meaning it is treated with an alkaline solution to reduce its acidity. This gives it a smooth texture, dark color, and unsweetened-chocolate highlights.”

Whatever the reason, we really, really, really like these cookies.

Black Chocolate Cookies

INGREDIENTS
• 1 ½ cups (195g) AP flour
• ¾ cup (70g) unsweetened black cocoa powder
• 1 teaspoon baking soda
• ¼ teaspoon kosher salt
• ½ teaspoon espresso powder
• 1 stick (110g) unsalted butter, room temperature
• ¾ cup (150g) sugar
• 1 large egg
• 1 ½ teaspoons vanilla
• 1 teaspoon molasses

METHOD

  1. In a large bowl, vigorously whisk together the flour, cocoa, baking soda, salt, and espresso powder.
  2. Cream the butter and sugar until light and fluffy, (2-3 min on medium.)
  3. Beat in the egg, vanilla, and molasses.
  4. Add the dry ingredients to the wet in 3 additions. When well mixed, remove the dough from the mixer, and form it into a ball. It should have the consistency of soft clay. If it’s stiff and unmanageable, massage some water into it, a tablespoon at a time until easily pliable.
  5. Wrap it in plastic wrap, and chill it in the refrigerator for at least one hour.
  6. When you are ready to roll-out the dough, preheat the oven to 350°F (175° C). Break off a chunk of dough from the ball of dough (about a quarter of it) and place it between two pieces of parchment paper. Use a rolling pin to roll the dough out to an even 1/2-inch thickness.
  7. Use a cookie cutter or the rim of a small glass to cut out cookie shapes from the rolled out dough. Place on a parchment paper or silicone-lined baking sheet, allowing at least 1 inch between cookies on the cookie sheet.
  8. Bake at 350°F (175° C) in the middle rack for 12 to 14 minutes, less or more, depending on the size and thickness of the cookies.
  9. The cookies should bounce back when you press on their centers and be a little dark around the edges. When cool, they should be crispy.
  10. Remove from oven and let cool for 5 minutes before removing the cookies from the tray to cool on a rack.

Back Home Day 2 in Dede’s Bakery

While we were away my blackberry bushes flourished. I needed 6 cups to make a blackberry pie, but only harvested 4 cups from the bushes this morning. Luckily, I had 2 cups of fresh frozen raspberries in the freezer, so I compromised my desired blackberry pie into a “berry” pie. It’s all good.

Don’t be afraid or intimidated by the thought of making a delicious, flaky pie crust. John Kanell’s Preppy Kitchen will calm your nerves. Every time I made this pie crust, including the very first time, the result was a perfect crust, and a perfect companion to any pie.

I also had one sheet of puff pastry left over from a bake prior to our Vermont trip and needed to use it up. At my brothers we were fortunate enough to sample some traditional Portuguese palmiers, which are puff pastry coated with granulated sugar, rolled and baked. Once again John Kanell solved my problem with a spare piece of puff pastry.

I need to remember to use the convection oven to achieve a more even bake.

Back Home and Back in the Bakery!

It was a great vacation, returning to my native Vermont. I love my family and friends, but am happy back in Dede’s Bakery.

I needed a loaf of bread so made our favorite Artisan No-Knead Bread, and while it was rising and baking I made a batch of Sally’s Striped Fudge Cookie Sandwiches. I saw this recipe on the flight home and it instantly jumped to the top of my “to-do” list. What’s great about this recipe is the cookie is a perfect carrier for whatever filling you want. This one is chocolate, but a berry/fruit or fig jam.

Striped Fudge Cookie Sandwiches -Sally

INGREDIENTS
• 281 (2 ¼ c) all-purpose flour (spooned & leveled), plus more as needed for rolling and work surface
• ½ tsp baking powder
• ¼ tsp salt
• 170g (¾ c = 12 Tbl) unsalted butter, softened to room temperature
• 150g (¾ c) granulated sugar
• 1 large egg, at room temperature
• 2 tsp pure vanilla extract
Chocolate Ganache + Topping
• 170g (6 oz) semi-sweet chocolate, coarsely chopped and divided
• 45g (3 Tbl) heavy cream
• Optional: if needed to thin out topping: splash vegetable oil or melted coconut oil

METHOD
To make the cookies:

  1. Whisk the flour, baking powder, and salt together in a medium bowl. Set aside.
  2. In a large bowl using a handheld or a stand mixer fitted with a paddle attachment, beat the butter and sugar together on high speed until completely smooth and creamy, about 2 minutes. Add the egg and vanilla and beat on high speed until combined, about 1 minute. Scrape down the sides and up the bottom of the bowl and beat again as needed to combine.
  3. Add the dry ingredients to the wet ingredients and mix on low until combined. Dough will be a bit soft. If the dough seems too soft and sticky for rolling, add 1 more Tablespoon of flour.
  4. Divide the dough into 2 equal parts. Place each portion onto a piece of lightly floured parchment paper or a lightly floured silicone baking mat. With a lightly floured rolling pin, roll the dough out to about 1/4-inch thickness. Use more flour if the dough seems too sticky. The rolled-out dough can be any shape, as long as it is evenly 1/4-inch thick.
  5. Lightly dust one of the rolled-out doughs with flour. Place a piece of parchment on top. (This prevents sticking.) Place the 2nd rolled-out dough on top. Cover with plastic wrap or aluminum foil, then refrigerate for at least 1-2 hours and up to 2 days.
  6. Once chilled, preheat oven to 350°F (180°C). Line 2-3 large baking sheets with parchment paper or silicone baking mats.
  7. Remove one of the slabs of dough from the refrigerator and, using a 2-inch round cookie cutter, cut into circles. Re-roll the remaining slab and continue cutting until all is used. Repeat with second slab of dough. You should have about 64 circles. Using a 1-inch round cookie cutter, cut a hole into the center of 32 of them. Let’s call these 32 cookies the “donut cookies” because of that center hole. Place the whole circles and the donut cookies on separate baking sheets (because the donut cookies take 1 less minute to bake), placing all cookies 2 inches apart from one another.
  8. Bake the whole circles for about 10 minutes, or until lightly browned around the edges, and the donut cookies for about 9 minutes. Rotate the baking sheets halfway through bake time. Remove from the oven. Allow cookies to cool on the baking sheets for 5 minutes, then transfer to a wire rack to cool completely before assembling.

    To make the ganache:
  9. Place 85g (3 oz) of chopped chocolate for the ganache into a small heatproof bowl. Heat the cream in a small saucepan over medium heat, stirring occasionally. Once cream begins to boil, immediately remove from heat and pour over the chocolate. Stir gently and slowly until the ganache is smooth. Allow it to cool for 10 minutes before adding to cookies. During this time, it will slowly thicken.
  10. Once the ganache is ready, spread about ½ teaspoon on each whole circle. Carefully top each with a donut cookie and press down gently to create a cookie sandwich.

    To make the topping:
  11. Melt the remaining chopped chocolate in the microwave in 15-second increments, stopping and stirring after each until completely smooth. Add a splash of vegetable oil or melted coconut oil if chocolate isn’t thin enough to drizzle. Drizzle over each sandwich. Allow chocolate to set completely, about 30 minutes.
  12. Cookies will stay fresh in an airtight container at room temperature for 2 days or in the refrigerator for up to 1 week.

Fresh Fruit Tart with Vanilla Mascarpone Cream – Sally

The June 2025 Sally’s Baking Challenge was the above mentioned tart and it was fantastic. The look and taste were perfect. I am harvesting the blackberries in my garden so added a few, because I could.

Removing the pith from the mandarin oranges was challenging. I ended up dipping them for a few seconds in near boiling water then gently rubbing with a soft brush. Not perfect, but not bad either.

Fresh Fruit Tart with Vanilla Mascarpone Cream – Sally

INGREDIENTS
Crust
• 188g (1 ½ c) all-purpose flour, plus more as needed
• 45g (6 Tbl) confectioners’ sugar
• ⅛ teaspoon salt
• 113g ( ½ c (8 Tbl) unsalted butter, at room temperature and cut into 8 pieces
• 1 large egg, cold
Vanilla Mascarpone Cream
• 120g ( ½ c) heavy cream, cold
• 60g ( ½ c) confectioners’ sugar, divided, 45g:15g
• ½ tsp fresh lemon zest
• 1½ tsp vanilla bean paste
• 8 ounces (226g) mascarpone, cold
Fruit Topping
• assorted fresh sliced fruit
• 2 Tablespoons orange, peach, or apricot preserves
• 1 Tablespoon water

METHOD

  1. Lightly grease a 9-inch tart pan with a removable base with nonstick spray.
  2. Make the crust: In a food processor, combine the flour, confectioners’ sugar, and salt and pulse or process on low speed to combine. Add the butter, 1 Tablespoon at a time, pulsing a few times after each addition. Add the egg and pulse only until the dough comes together in a clump. The dough should be soft. Transfer it to a lightly floured surface and press it into a 1-inch-thick disc.
  3. Place the soft dough in the prepared pan and use your hands to press it evenly into the pan and up the sides. It may seem like you don’t have enough dough at first, but keep pressing. Use the bottom of a metal measuring cup to press the edges firmly against the rim of the pan. (Refrigerate for 10 minutes to make the dough firmer and easier to press into the sides of the pan.) Flatten the top edge so it’s even with the rim of the pan, or use a paring knife to trim. Save the scraps to patch up any thin-looking areas. Prick the bottom of the crust all over with a fork. Cover and freeze for at least 30 minutes or up to 1 day.
  4. Preheat the oven to 350°F (177°C). Remove the crust from the freezer and place the tart pan on a large baking sheet for easy handling.
  5. Bake for 25 minutes (rotation half way through) or until the crust appears set. Place on a cooling rack to cool completely.
  6. Make the cream filling: Using a handheld or stand mixer fitted with a whisk attachment, beat the heavy cream, 6 Tbsp (45g) confectioners’ sugar, the lemon zest, vanilla extract, and vanilla bean seeds until stiff peaks form, about 3–4 minutes. In a small bowl using a fork, gently mix the mascarpone with the remaining confectioners’ sugar. Don’t over-mix; you only want to smooth out the mascarpone here. Over-mixing will result in a separated mixture.
  7. Transfer the mascarpone mixture to the whipped cream mixture. Fold together with a silicone spatula or beat on low speed until combined. Use right away (next step), or cover and refrigerate the filling for up to 3 days before using.
  8. Spread the filling into the cooled crust. I usually use a small offset spatula for this. Refrigerate until ready to garnish with fruit, or garnish right away.
  9. Top the tart: Garnish the tart with fresh fruit. Use a fork to whisk together the jam and water in a small microwave-safe bowl. Warm for about 15 seconds in the microwave, then brush the glaze on top of the fruit.
  10. Slice and enjoy! Store leftover fruit tart, covered, in the refrigerator for up to 3 days.