I needed a dessert to take to someone house today, and I was in the middle of making 4 dozen filled chocolates, so wanted something quick and easy. My daughter-in-law, Frances, sent me this recipe at the perfect moment!
I had one Trader Joe’s package of puff pastry in the freezer (I now make my own) and lots of scraps of 54% dark chocolate left over from making the confections. Easy peasy!
I let the puff pastry thaw in the fridge overnight and crushed the left over chocolate with my hands.
I am really chuffed (very pleased from GBBO) with the number of unsolicited compliments I received at the lunch.
This is the second attempt. I consider the first one a practice round.
There really is no ingredients list beyond puff pastry and chocolate. The method is to cut diagonal slits along 1/3 of each side of the puff pastry sheet, then put the chocolate on the middle third and weave the edges into the center alternating overlaps. (Search YouTube for more help.)
Sally’s Rough Puff Pastry is near perfect (my only changes are to tweak it for my baking style. Sally is catering to a larger, international audience while I am catering to myself and my QC Cadre neighbors.)
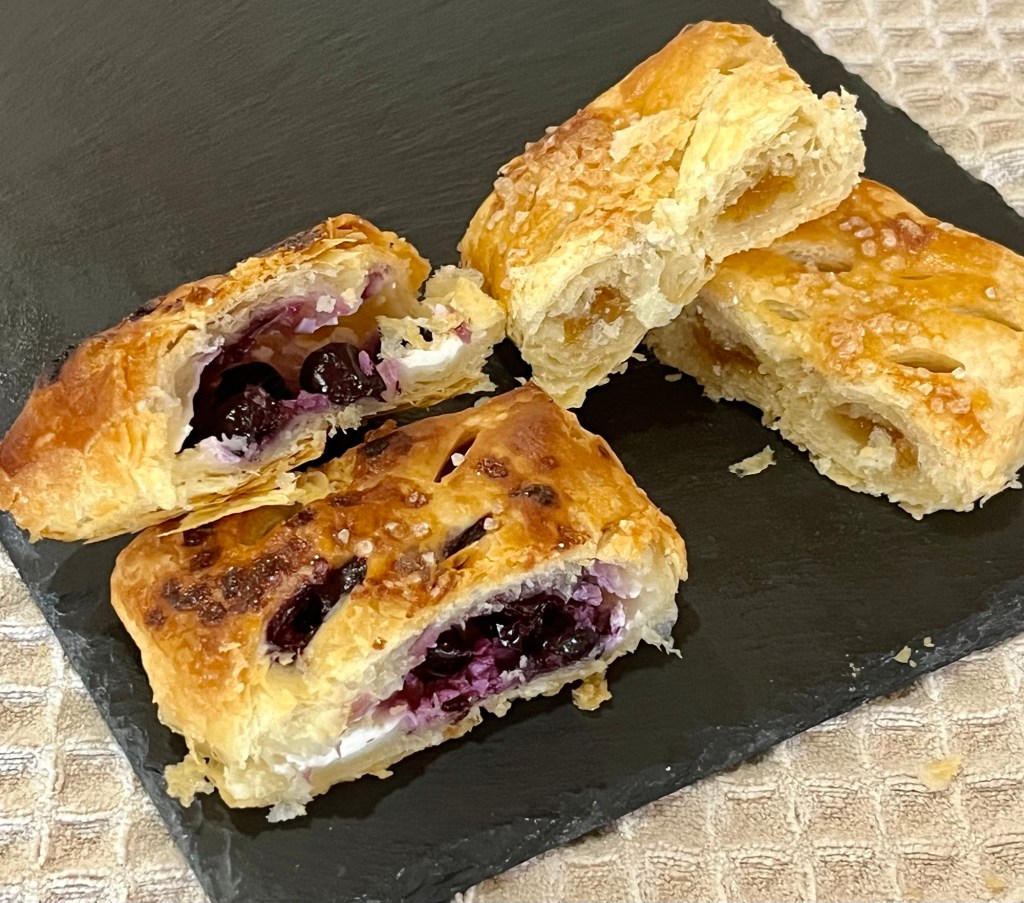
This bake required a little planning and forethought for me to make/create these pastries, (i.e. where to put the cream cheese or fig, where to place the berries and where/when to slit the dough.) I actually made a life size paper model.
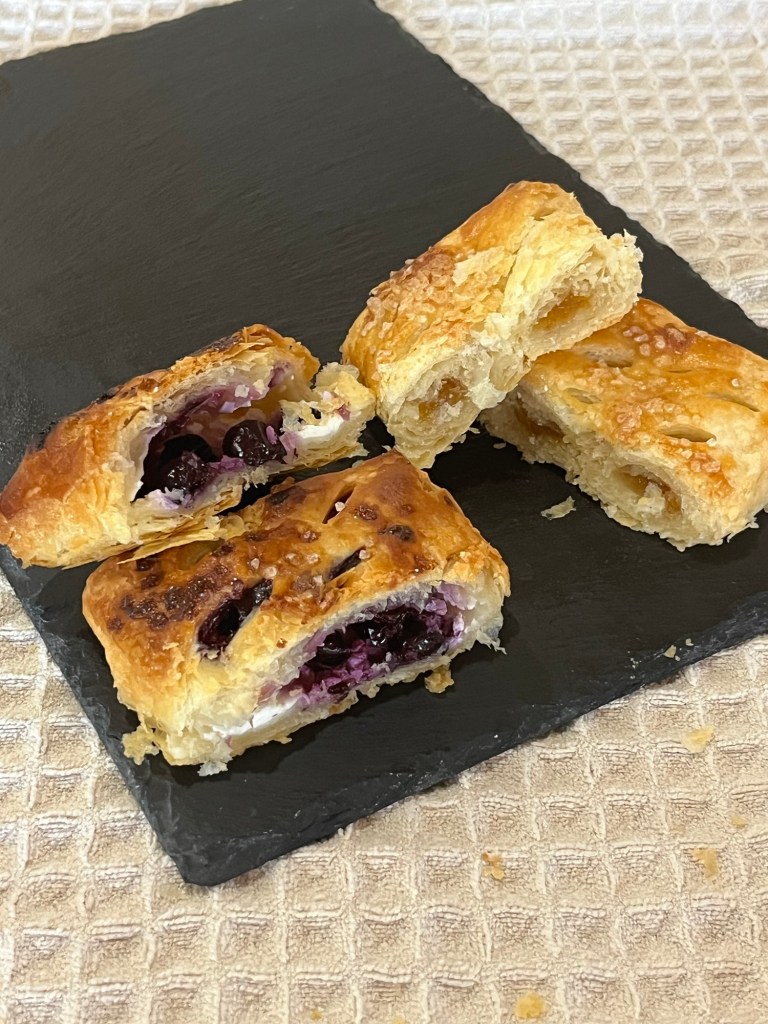
The proof is in the pudding, err… pastry. The Cadre returned a unanimous decision: “Delicious”, “Flakey and Good”, “Wow. Very delicious!! They leave a lingering taste of warm sweetness ! Good job!”
Spread Cream Cheese, Blueberries and folded pastrySpread Fig Preserves, Slits and folded pastryFig Pasty in front, Blueberry in backBoth Pastries cut in half to show layers.
Blueberry-Cream Cheese or Fig Puff Pastry
INGREDIENTS • Puff Pastry (either store bought or recommended rough puff from recipe below) • 1 Tbl Sugar • ~ ½ c. Blueberries (~9 blueberries/pastry) • Cream Cheese (It’s easiest to use spreadable cream cheese) • (For fig pastry replace sugar, blueberries and cream cheese with fig preserves)
METHOD
Wash blueberries and toss with a tablespoon of sugar.
Roll puff (or rough puff) pastry out to a 13”x13” square.
Measure and cut with a pizza cutter six 4”x6” rectangles and position horizontally. (There will be some left over after squaring up the sides.)
Cut staggered diagonal slits on middle 3” of the rectangle
Spread cream cheese on 1½” x 4” edge of the rectangle, being careful not to coat the edges of the pastry.
Place blueberries on the center of the pastry (over the slits). I used ~ 12 blueberries per pastry.
Use your finger to wet the outer 4” edge of the pastry and fold over to the center of the pastry. Repeat with the other cream cheese coated edge, butting the end up against the first fold. Press gently to seal.
Use your fingers, with a little flour if the dough is sticky, to seal the ends. Turn over and place on a parchment paper line baking sheet.
Bake at 400 F for 25-30 minutes, rotating the pans midway.
Rough Puff Pastry
INGREDIENTS • 166 g (1⅓ c) all-purpose flour, plus more for flouring hands, surface, and dough • 1 tsp granulated sugar • ½ tsp salt • 170 g (¾ c or 1½ sticks) unsalted Kerry Gold butter, very cold and cubed • 6–8 Tbl ice cold water
METHOD
Cut the butter into ~1/4” cubes then return to the fridge to chill for 30 minutes.
Whisk the flour, sugar, and salt together in a large bowl. Place the cold and cubed butter on top. Gently toss the flour and butter together with your hands, and then briefly rub the butter into the flour to begin combining. Do not break down the butter too much in this step. This step is only possible if the butter is very cold.
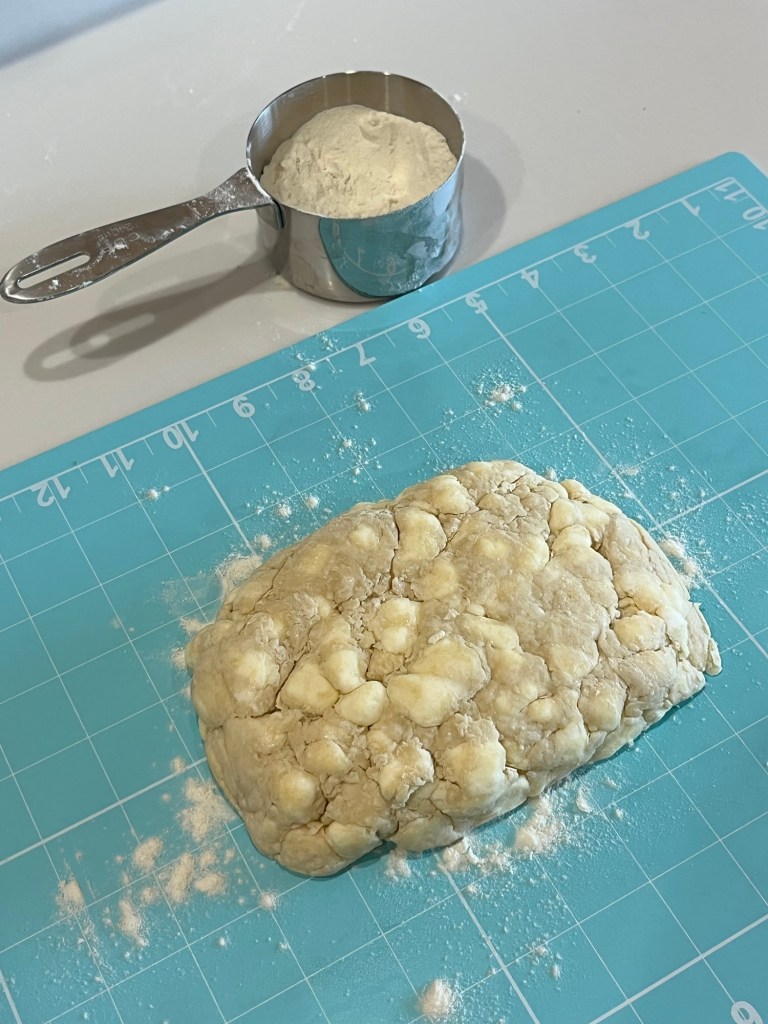
Begin adding the ice cold water 1 Tablespoon at a time until dough forms 1 large shaggy clump with big chunks of butter in your bowl. Use your hands to toss the mixture together after you add each Tablespoon. (Start with 2 Tablespoons of water before tossing together.) As the dough begins to hydrate after about 4 Tablespoons of water, you can start lightly squeezing or clumping the dough together with your hands to help bring it together. Mixture will still be very shaggy. If your dough feels sticky and wet before adding 6 Tablespoons of water, your butter was likely too warm– you can continue with the recipe, but the dough will not be as flaky.
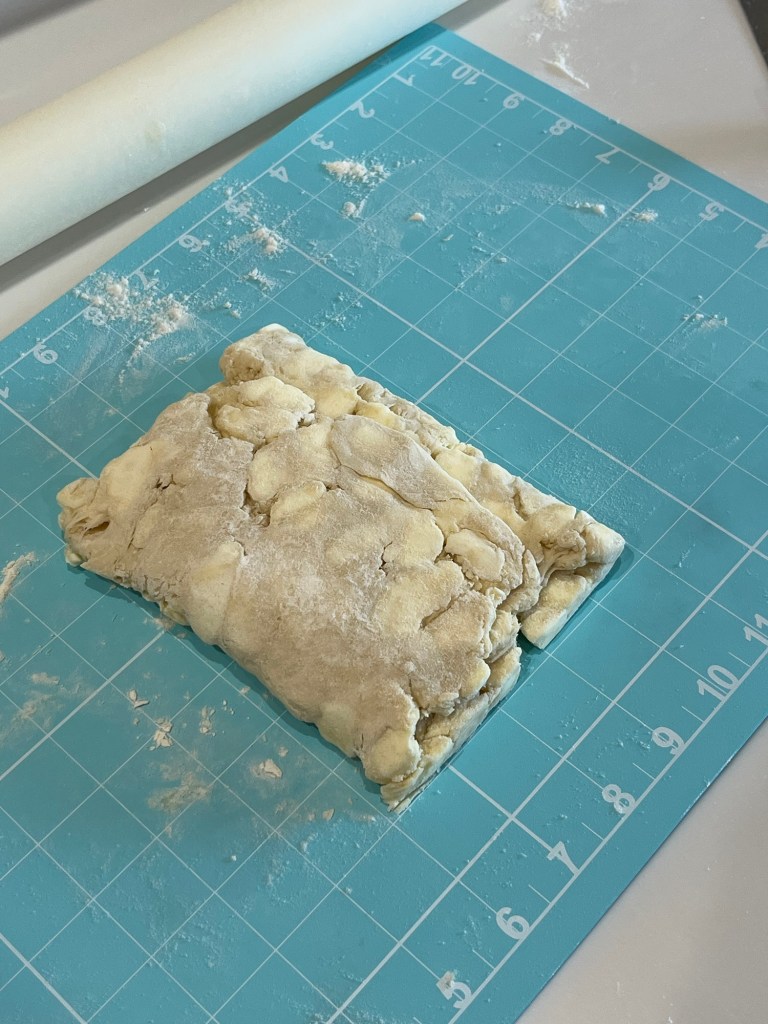
Pour the shaggy clump of dough out onto a lightly floured work surface. There will still be large chunks of butter at this point and that’s a good thing. Begin patting the dough down with lightly floured hands until it’s ¾ – 1” thick, about a 5×8” rectangle. Fold the dough into thirds as if you were folding a business letter. Use your hands to gently flatten and smooth out any cracks in your dough. Wrap it up tightly in plastic wrap.
1st refrigeration: Refrigerate dough for at least 2 hours and up to 24 hours.
Roll & Fold: Take the dough out of the refrigerator to begin the “rolling and folding” process. If the dough chilled for longer than about 3 hours, it’s likely very stiff so let it rest for about 5 minutes before you begin rolling. Lightly flour a work surface. The dough gets sticky, so make sure you have more flour nearby as you roll and fold. Use your hands to gently flatten the dough into a small square. Using a rolling pin, roll the dough into a 6”×12”x ½” thick. The exact dimensions are not important, but the thickness is. As you roll, it’s best to flip the dough over once or twice to make sure it’s not sticking to your work surface. Lightly flour your work surface as needed. Fold the rectangle into thirds as if it were a business letter. Turn it clockwise or counter clockwise and roll it out into a 6”×12”x ½” thick rectangle again. Then, fold into thirds again. Turn it clockwise or counter clockwise. You’ll repeat rolling and folding 4 more times for a total of 6 times.
2nd Refrigeration: Wrap up/seal tightly and refrigerate for at least 15 minutes and up to 24 hours before using in your recipe. You can also freeze the dough at this point. See freezing instructions.
Use wherever you would use frozen store-bought puff pastry. To bake plain, roll pastry dough into a 10×16” rectangle and cut into desired portions. Fill if desired, and paint with an egg wash (1 egg beaten with 1 Tbl water.)
Bake 400°F until golden brown and puffy, about 25-28 minutes.
NOTES
Make Ahead & Freezing Instructions: Prepare as instructed in steps 1-3. At this point the dough can be refrigerated up to 24 hours (see step 4). You can also prepare the dough through step 5. At this point the dough can be refrigerated for up to another 24 hours (see step 6).
During or after this second chilling time, you could also freeze the dough for up to 1 month. (I don’t recommend freezing the dough before the rolling and folding step.) Thaw overnight in the refrigerator before using in a recipe that calls for 1 lb puff pastry dough (or 1 store-bought package with 2 sheets puff pastry).
I made Sally’s rough puff pastry for the first time about three weeks ago. It was delicious, and while a little time consuming, totally worth it. My first attempt was a puff pastry wrapped Brie cheese, topped with fig jam and covered with roasted plum compote. EVERYONE including those who professed to not like plum, and/or Brie loved it.
I used Sally’s recipe again to make some “cover versions” of a blueberry/cream cheese pastry and a Feuillete au Chocolat (puff pastry and chocolate.)
Today, I used yet another third batch of her pastry to make my own version of the blueberry/cream cheese pastry and a fig filled (figs are ripe in my backyard) pastry.
Over the course of these bakes I mildly modified Sally’s recipe. In the first two trials I used high fat content (and expensive) Kerrygold butter. Today I used my standard Costco unsalted butter. I could not discern and difference in baking, taste of flake.
I also cut the butter into 1/4” cubes, then return it to the refrigerator for 30 minutes to really firm up and chill the butter. (It’s worth it.)
I try to turn, roll and fold the dough 6-8 times, I really do, but usually lose count and simple repeat until it feels right. I chilled it overnight and I chilled it for 3 hours, other than it’s being hard to roll, no difference. I also froze one batch for 3 days and when thawed could not tell the difference between it and the unthawed batch.
Since I do all the measuring I can in grams, my version lists weights before volumes, but other than that, I follow her recipe to the letter.
Rough Puff Pastry – Sally
INGREDIENTS • 166 g (1⅓ c) all-purpose flour, plus more for flouring hands, surface, and dough • 1 tsp granulated sugar • ½ tsp salt • 170 g (¾ c or 1½ sticks) unsalted Kerrygold butter, very cold and cubed • 6–8 Tbl ice cold water
METHOD
Cut the butter into ~1/4” cubes return to the fridge to chill.
Whisk the flour, sugar, and salt together in a large bowl. Place the cold and cubed butter on top. Gently toss the flour and butter together with your hands, and then briefly rub the butter into the flour to begin combining. Do not break down the butter too much in this step. This step is only possible if the butter is very cold.
Begin adding the ice cold water 1 Tablespoon at a time until dough forms 1 large shaggy clump with big chunks of butter in your bowl. Use your hands to toss the mixture together after you add each Tablespoon. (Start with 2 Tablespoons of water before tossing together.) As the dough begins to hydrate after about 4 Tablespoons of water, you can start lightly squeezing or clumping the dough together with your hands to help bring it together. Mixture will still be very shaggy. If your dough feels sticky and wet before adding 6 Tablespoons of water, your butter was likely too warm– you can continue with the recipe, but the dough will not be as flaky.
Pour the shaggy clump of dough out onto a lightly floured work surface. There will still be large chunks of butter at this point and that’s a good thing. Begin patting the dough down with lightly floured hands until it’s ¾ – 1” thick, about a 5×8” rectangle. Fold the dough into thirds as if you were folding a business letter. Use your hands to gently flatten and smooth out any cracks in your dough. Wrap it up tightly in plastic wrap.
1st refrigeration: Refrigerate dough for at least 2 hours and up to 24 hours.
Roll & Fold: Take the dough out of the refrigerator to begin the “rolling and folding” process. If the dough chilled for longer than about 3 hours, it’s likely very stiff so let it rest for about 5 minutes before you begin rolling. Lightly flour a work surface. The dough gets sticky, so make sure you have more flour nearby as you roll and fold. Use your hands to gently flatten the dough into a small square. Using a rolling pin, roll the dough into a 6”×12”x ½” thick. The exact dimensions are not important, but the thickness is. As you roll, it’s best to flip the dough over once or twice to make sure it’s not sticking to your work surface. Lightly flour your work surface as needed. Fold the rectangle into thirds as if it were a business letter. Turn it clockwise or counter clockwise and roll it out into a 6”×12”x ½” thick rectangle again. Then, fold into thirds again. Turn it clockwise or counter clockwise. You’ll repeat rolling and folding 4 more times for a total of 6 times.
2nd Refrigeration: Wrap up/seal tightly and refrigerate for at least 15 minutes and up to 24 hours before using in your recipe. You can also freeze the dough at this point. See freezing instructions.
Use wherever you would use frozen store-bought puff pastry. To bake plain, roll pastry dough into a 10×16” rectangle and cut into desired portions. Fill if desired, and paint with an egg wash (1 egg beaten with 1 Tbl water.)
Bake 400°F until golden brown and puffy, about 25-28 minutes.
NOTES
Make Ahead & Freezing Instructions: Prepare as instructed in steps 1-3. At this point the dough can be refrigerated up to 24 hours (see step 4). You can also prepare the dough through step 5. At this point the dough can be refrigerated for up to another 24 hours (see step 6).
During or after this second chilling time, you could also freeze the dough for up to 1 month. (I don’t recommend freezing the dough before the rolling and folding step.) Thaw overnight in the refrigerator before using in a recipe that calls for 1 lb puff pastry dough (or 1 store-bought package with 2 sheets puff pastry).
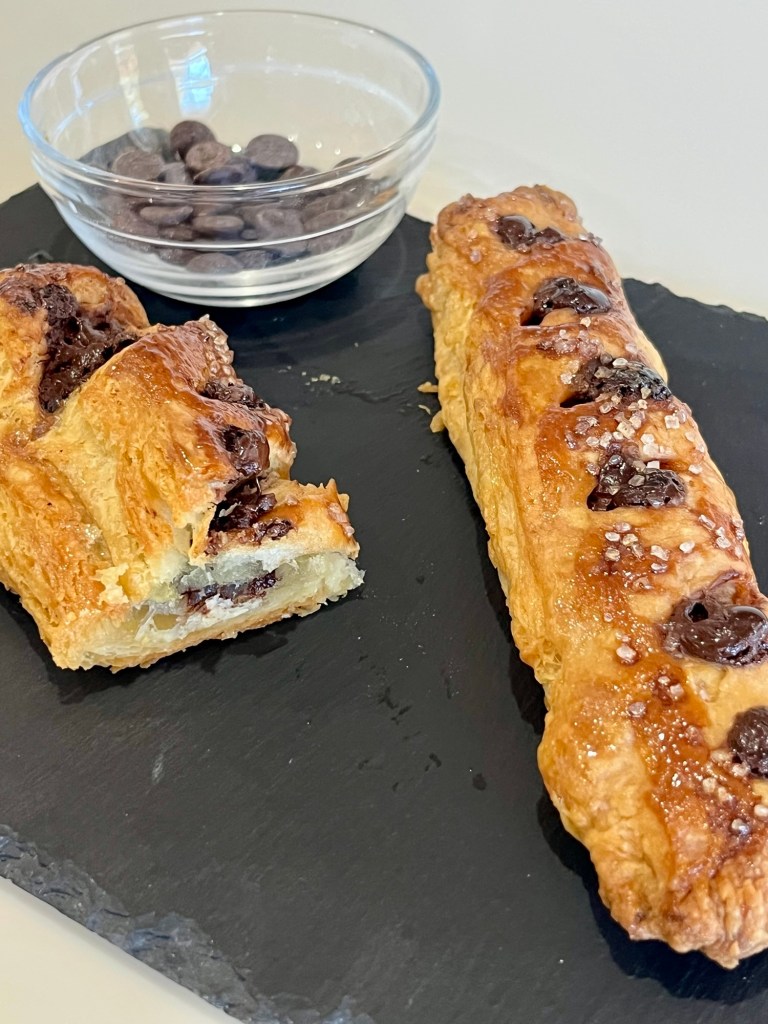
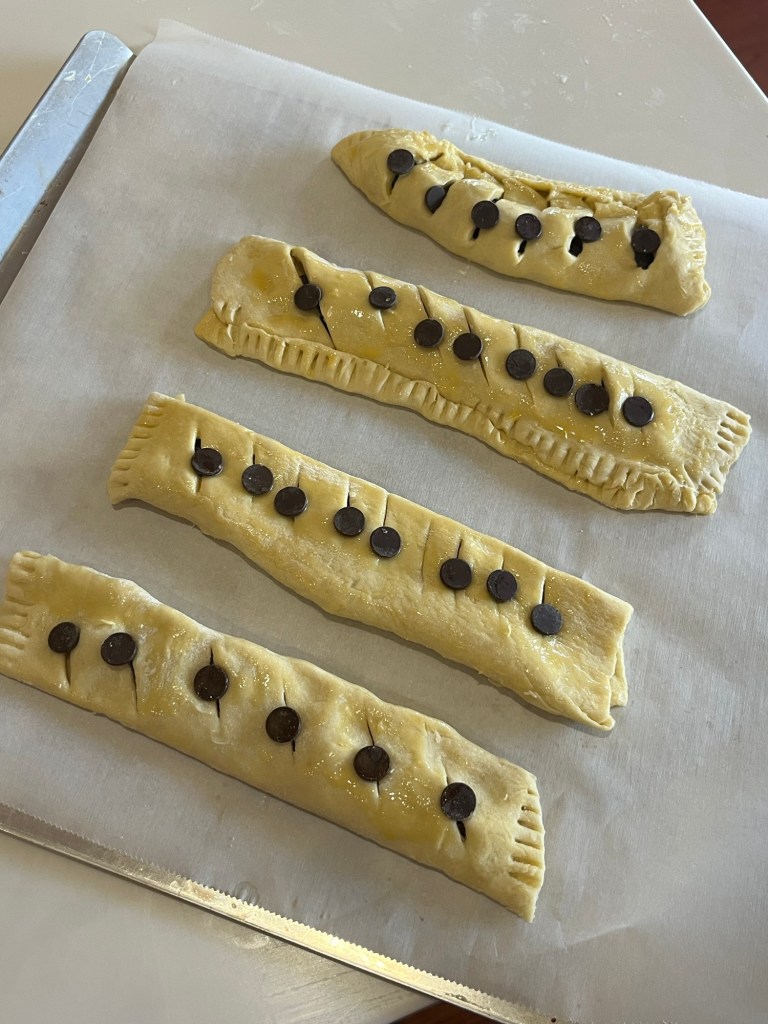
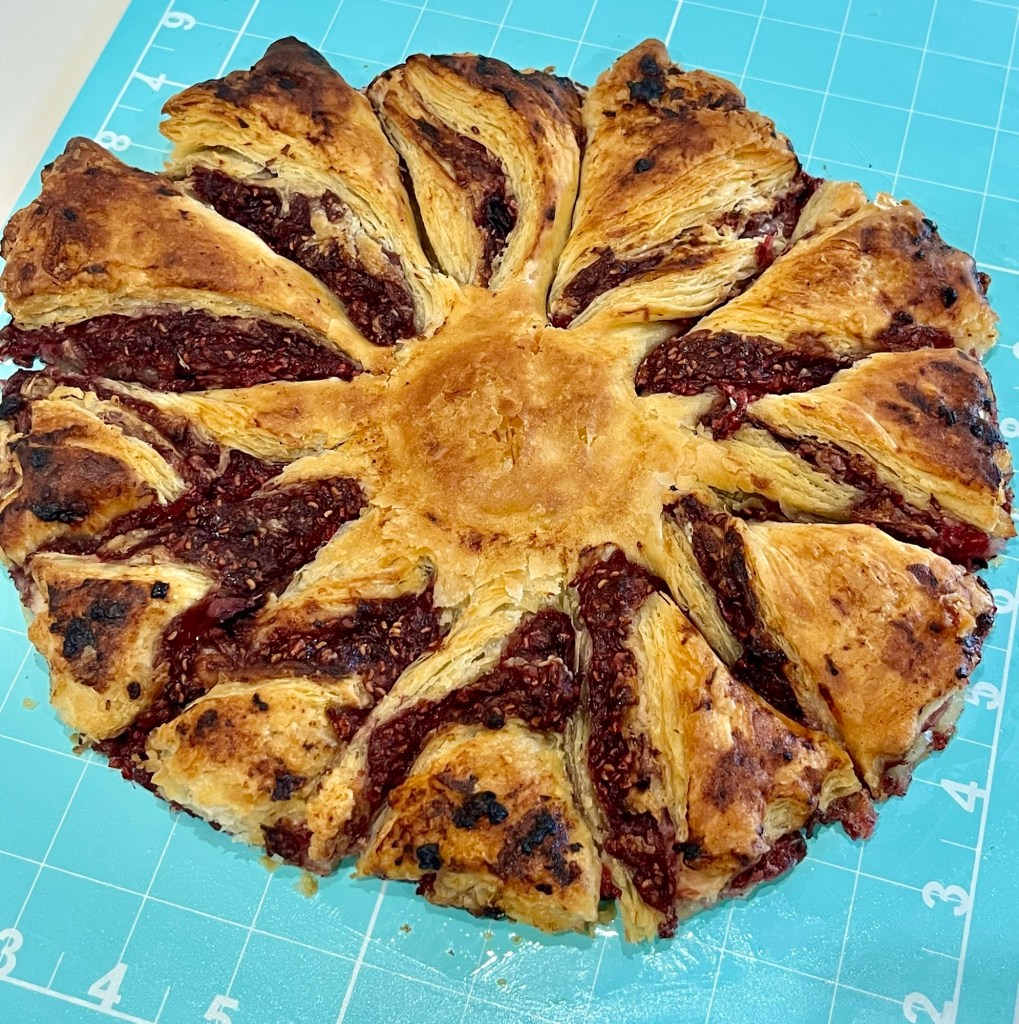
Another desirable looking (and delicious) pastry at Paris Baguette is this Feuillete au Chocolat. This is my first attempt to make something similar. It was very good, but will take a couple of more practice to bakes for me to be satisfied. (Oh darn!)
Feuillete au Chocolat translates as Chocolate Puff Pastry. More accurately feuillete translates to “leaf through” which is a pretty accurate description of puff pastry, (especially when it is this good and flaky.)
Feuillete au Chocolat
INGREDIENTS • Puff Pastry • High Quality dark chocolate callets • 1 egg for wash For pastry glaze • ¼ c water • ¼ c sugar • ¼ c corn syrup
METHOD
Roll puff pastry to a 6”X24”rectangle then cut into four 6”x8” pieces. Most important is the dough must be ~ 1/16” thick. If the dough shrinks back cover it and let it rest 5 minutes to allow the gluten to relax.
Place a row of chocolate 1” from one side, then cut 6 slits ~1” long at and angle and centered between the row of chocolate and the edge of the pastry. Do not cut through the edge (away from the chocolate) of the pastry.
Trim the pastry above and below the chocolate leaving ~ ½ “ of dough.
Fold the wide edge of pastry over so the slits will align with the chocolate. Leave the excess pastry loose and refrigerate while the oven pre-heats to 400⁰ F.
Once the oven is at 400⁰ F remove the pastries from the refrigerator, flip over and egg wash the perimeter of the loose flap before folding it over the bottom of the pastry and above and belo the chocolate row. Press firmly to seal.
Flip pastry over, egg wash and sprinkle sparkling sugar on top.
Bake 30 minutes, tenting after 20 minutes if the pastry is darkening.
Next Step – make pastry custard and spread a line under where the chocolate will go. There is some disagreement over whether you should use crème patisserie or custard. Experimentation awaits. Even without the custard this pastry was wonderful.
I keep referring to Sally’s Rough Puff Pasty but I made a few changes to reflect my personal quirks and how I use the recipe. Here is my version, which is, of course Sally’s.
Rough Puff Pastry – Sally
INGREDIENTS • 166 g (1⅓ c) all-purpose flour, plus more for flouring hands, surface, and dough • 1 tsp granulated sugar • ½ tsp salt • 170 g (¾ c or 1½ sticks) unsalted Kerry Gold butter, very cold and cubed • 6–8 Tbl ice cold water
METHOD
Cut the butter into ~1/4” cubes return to the fridge to chill.
Whisk the flour, sugar, and salt together in a large bowl. Place the cold and cubed butter on top. Gently toss the flour and butter together with your hands, and then briefly rub the butter into the flour to begin combining. Do not break down the butter too much in this step. This step is only possible if the butter is very cold.
Begin adding the ice cold water 1 Tablespoon at a time until dough forms 1 large shaggy clump with big chunks of butter in your bowl. Use your hands to toss the mixture together after you add each Tablespoon. (Start with 2 Tablespoons of water before tossing together.) As the dough begins to hydrate after about 4 Tablespoons of water, you can start lightly squeezing or clumping the dough together with your hands to help bring it together. Mixture will still be very shaggy. If your dough feels sticky and wet before adding 6 Tablespoons of water, your butter was likely too warm– you can continue with the recipe, but the dough will not be as flaky.
Pour the shaggy clump of dough out onto a lightly floured work surface. There will still be large chunks of butter at this point and that’s a good thing. Begin patting the dough down with lightly floured hands until it’s ¾ – 1” thick, about a 5×8” rectangle. Fold the dough into thirds as if you were folding a business letter. Use your hands to gently flatten and smooth out any cracks in your dough. Wrap it up tightly in plastic wrap.
1st refrigeration: Refrigerate dough for at least 2 hours and up to 24 hours.
Roll & Fold: Take the dough out of the refrigerator to begin the “rolling and folding” process. If the dough chilled for longer than about 3 hours, it’s likely very stiff so let it rest for about 5 minutes before you begin rolling. Lightly flour a work surface. The dough gets sticky, so make sure you have more flour nearby as you roll and fold. Use your hands to gently flatten the dough into a small square. Using a rolling pin, roll the dough into a 6”×12”x ½” thick. The exact dimensions are not important, but the thickness is. As you roll, it’s best to flip the dough over once or twice to make sure it’s not sticking to your work surface. Lightly flour your work surface as needed. Fold the rectangle into thirds as if it were a business letter. Turn it clockwise or counter clockwise and roll it out into a 6”×12”x ½” thick rectangle again. Then, fold into thirds again. Turn it clockwise or counter clockwise. You’ll repeat rolling and folding 4 more times for a total of 6 times.
2nd Refrigeration: Wrap up/seal tightly and refrigerate for at least 15 minutes and up to 24 hours before using in your recipe. You can also freeze the dough at this point. See freezing instructions.
Use wherever you would use frozen store-bought puff pastry. To bake plain, roll pastry dough into a 10×16” rectangle and cut into desired portions. Fill if desired, and paint with an egg wash (1 egg beaten with 1 Tbl water.)
Bake 400°F until golden brown and puffy, about 25-28 minutes.
NOTES
Make Ahead & Freezing Instructions: Prepare as instructed in steps 1-3. At this point the dough can be refrigerated up to 24 hours (see step 4). You can also prepare the dough through step 5. At this point the dough can be refrigerated for up to another 24 hours (see step 6).
During or after this second chilling time, you could also freeze the dough for up to 1 month. (I don’t recommend freezing the dough before the rolling and folding step.) Thaw overnight in the refrigerator before using in a recipe that calls for 1 lb puff pastry dough (or 1 store-bought package with 2 sheets puff pastry).
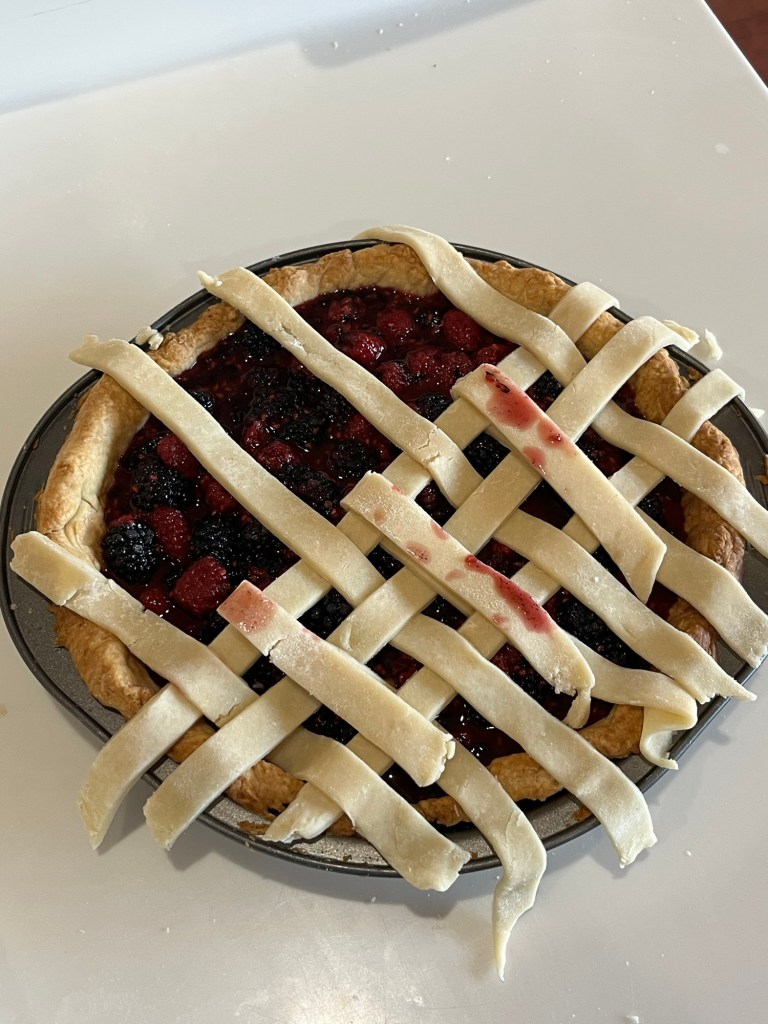
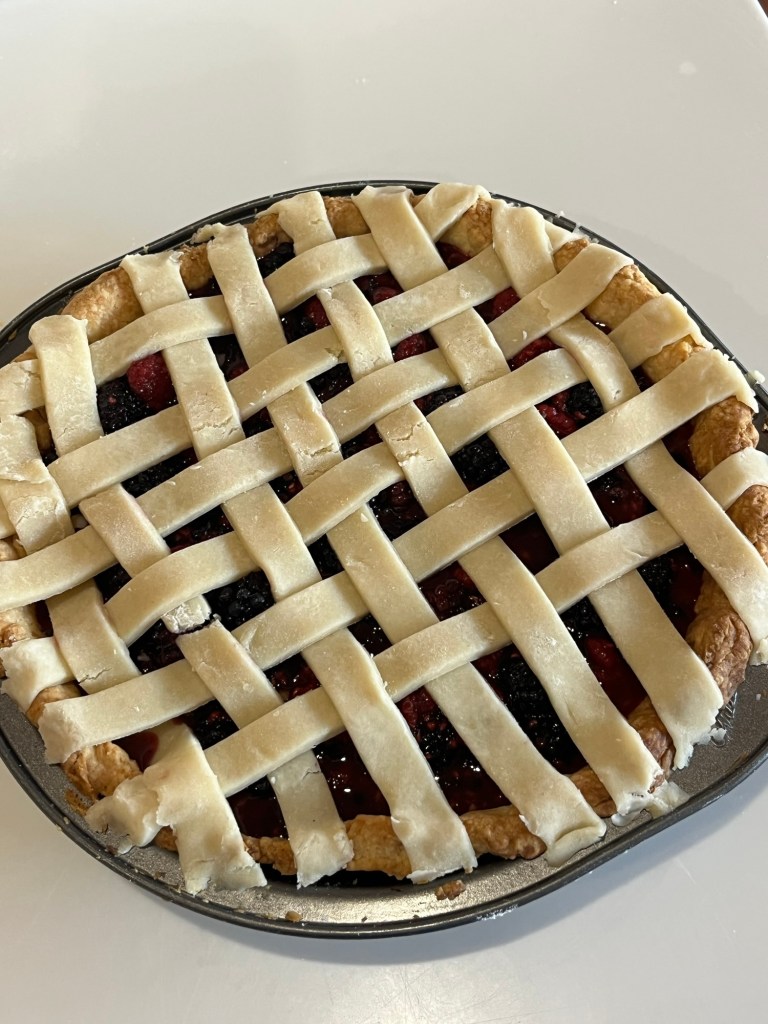
While we were away my blackberry bushes flourished. I needed 6 cups to make a blackberry pie, but only harvested 4 cups from the bushes this morning. Luckily, I had 2 cups of fresh frozen raspberries in the freezer, so I compromised my desired blackberry pie into a “berry” pie. It’s all good.
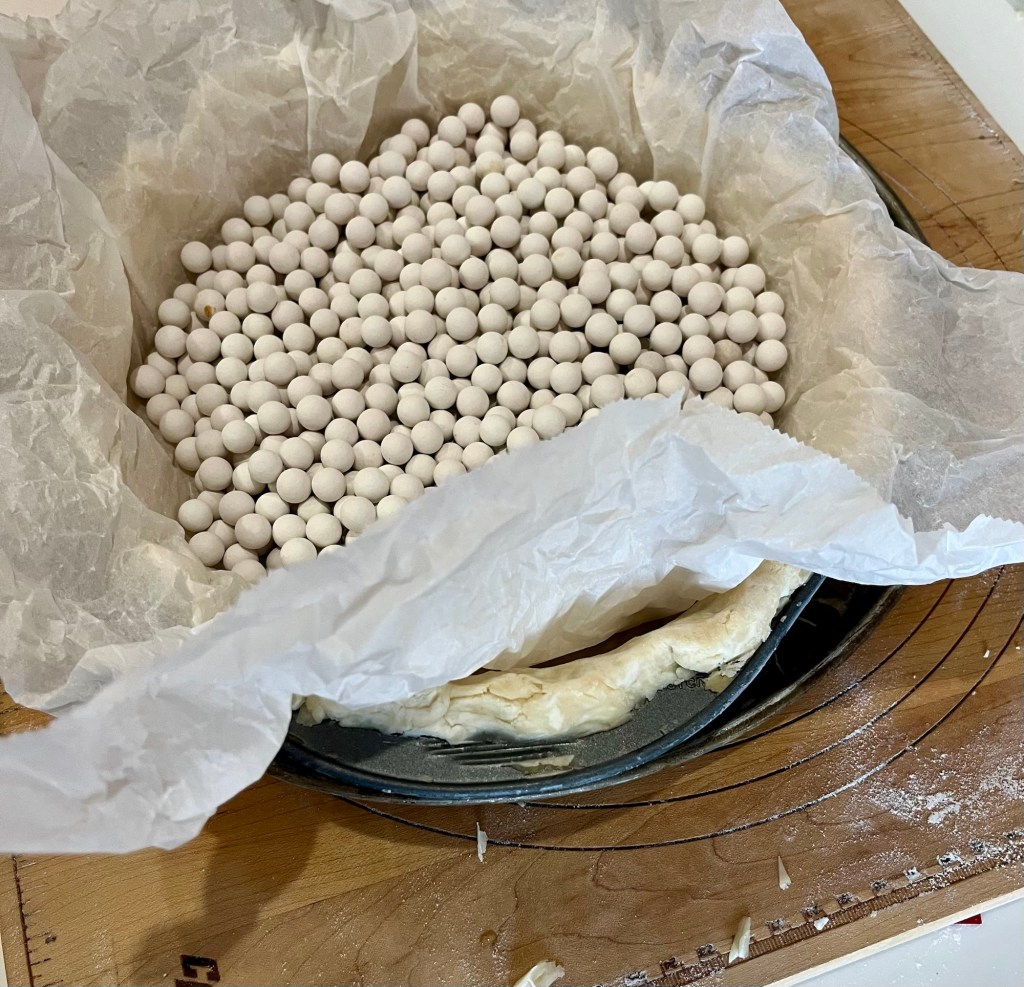
Don’t be afraid or intimidated by the thought of making a delicious, flaky pie crust. John Kanell’s Preppy Kitchen will calm your nerves. Every time I made this pie crust, including the very first time, the result was a perfect crust, and a perfect companion to any pie.
This is all you needPlus some pie weightsTo make a perfect pie crustWhich can be filled with whatever you want.Fresh berriesMixed berries with other pie stuffMaking the lattice topCompleted lattice topCompleted pie
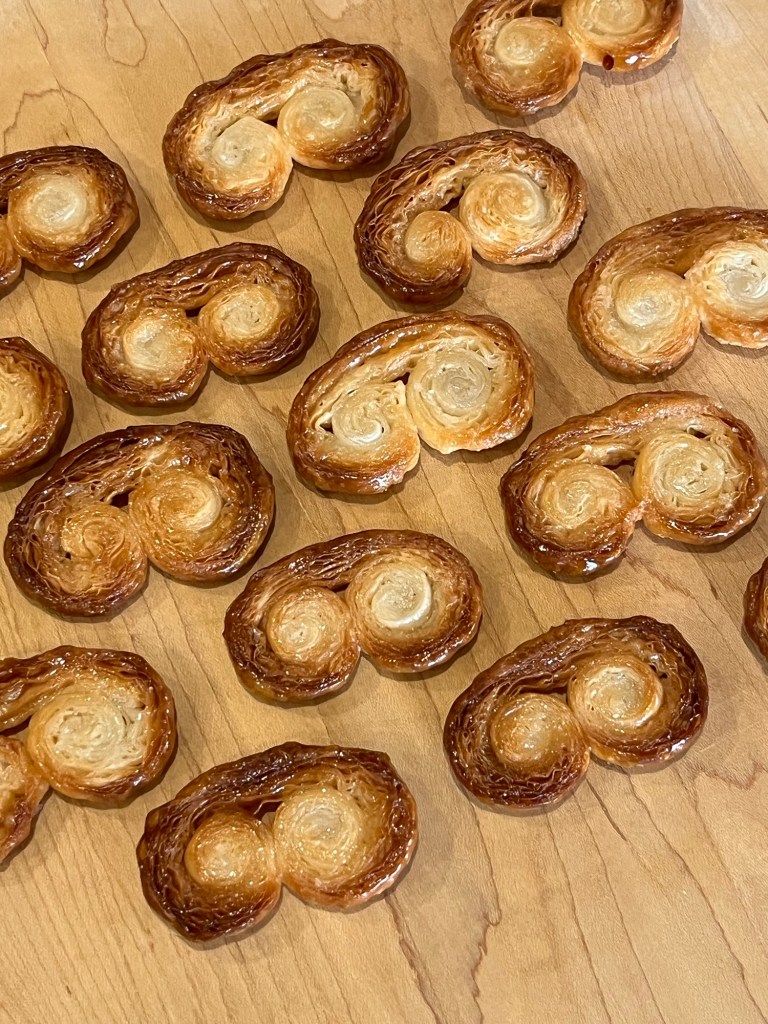
I also had one sheet of puff pastry left over from a bake prior to our Vermont trip and needed to use it up. At my brothers we were fortunate enough to sample some traditional Portuguese palmiers, which are puff pastry coated with granulated sugar, rolled and baked. Once again John Kanell solved my problem with a spare piece of puff pastry.
I need to remember to use the convection oven to achieve a more even bake.
Here’s another nice looking dessert. It had the advantage of using puff pastry and I wanted another excuse to make more Sally’s puff pastry. My first attempt went well so I tried it again. (It went well also.)
The dessert also uses berries, and if you know me, that is a deal maker!
The published recipe used too much jam filling for me. It made the pastry too wet which resulted in a messy final product. I cut the berry jam contents in half for future bakes, as noted below.
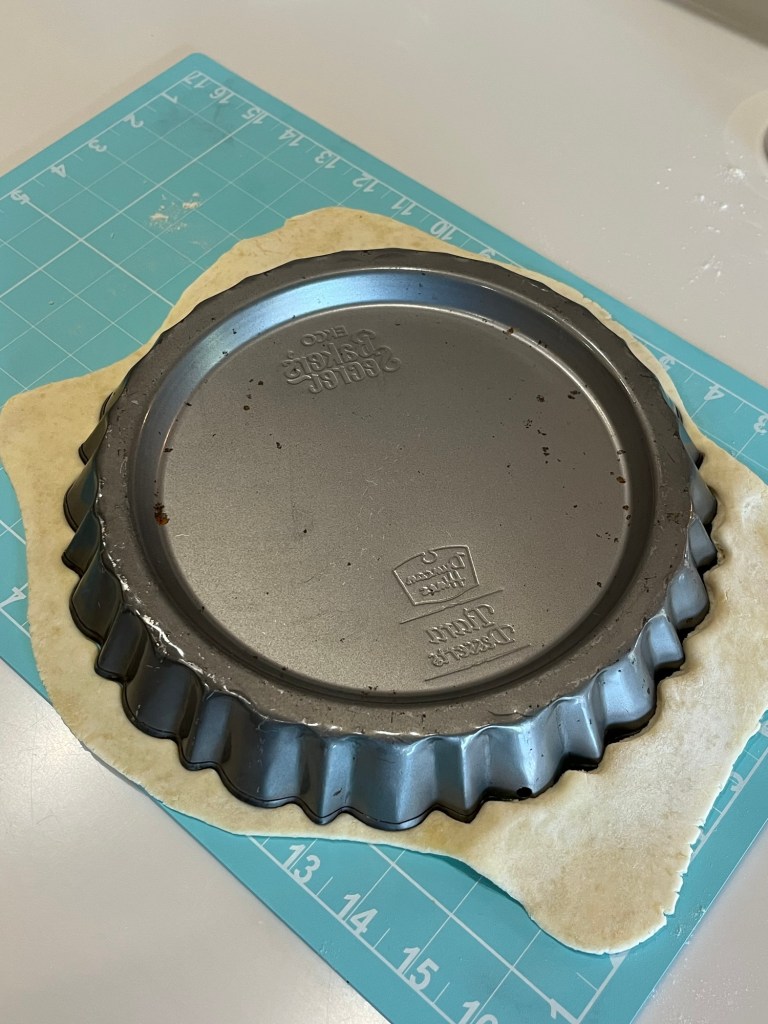
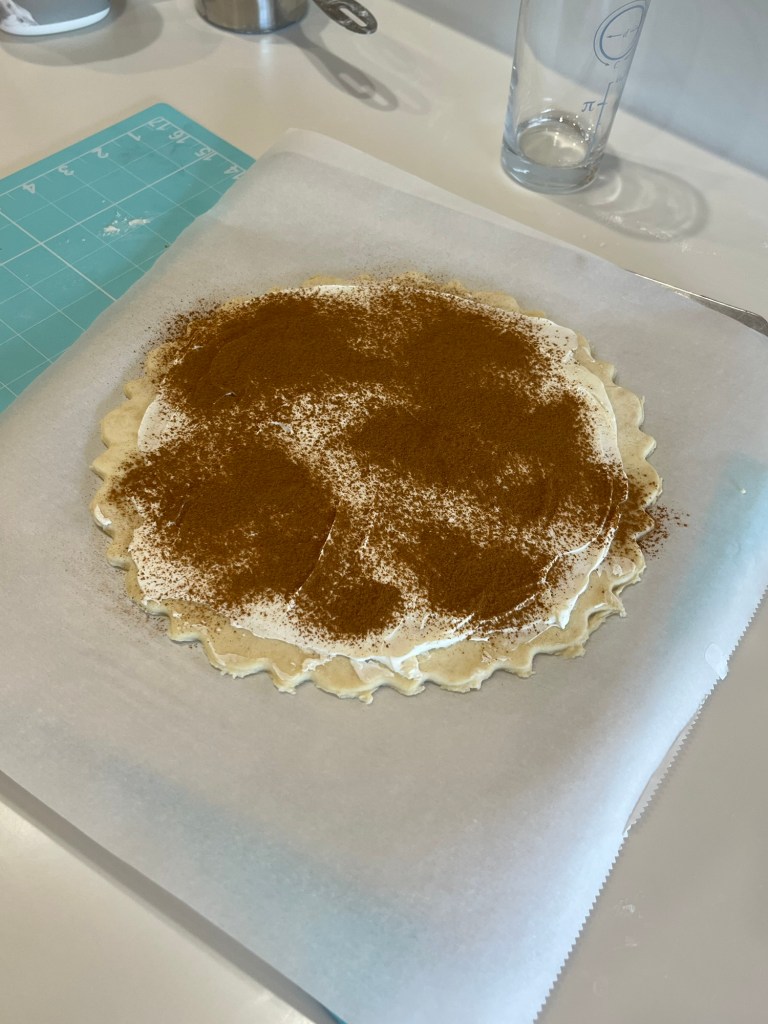
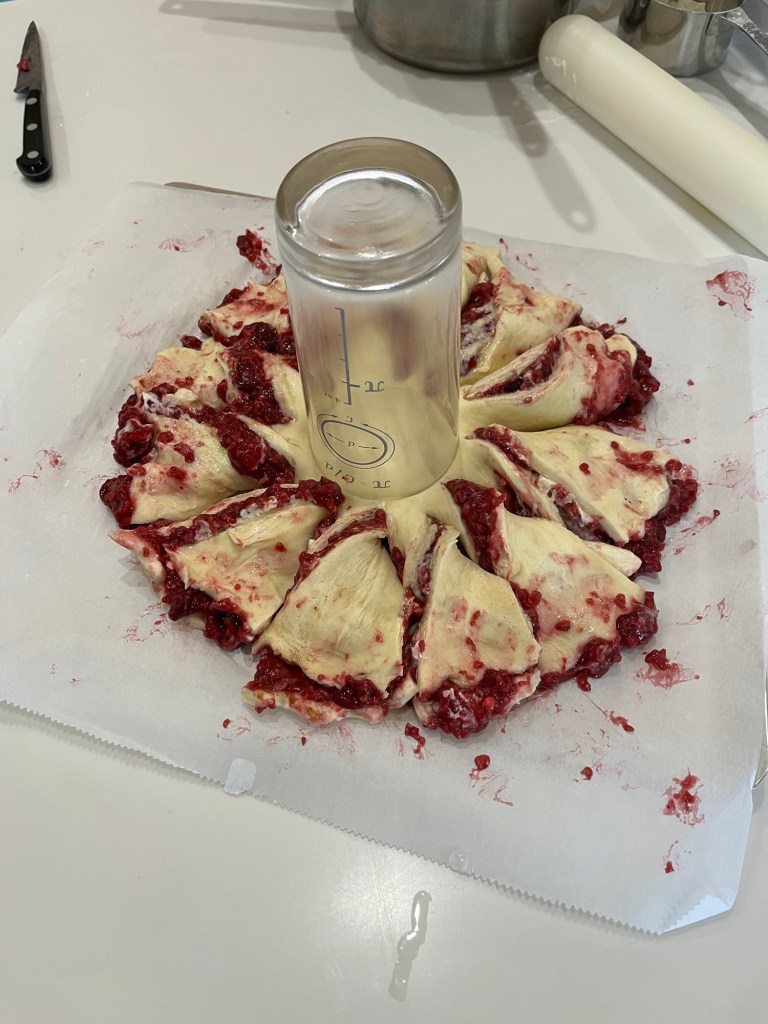
Wet mixture prior to first chillingFirst roll after first chillingFirst fold after first chillingAfter 6 “roll and folds” the pastry was smooth and elasticUsing tart pan to cut 2 “circles” of pastryCoat one circle with cream cheeseCoat the cream cheese with cinnamon Cutting pastry into 12 sections, protecting the centerAfter filling and cutting, twist each section. (This is where it got messy.)Baked Puff Pastry Berry Dessert
As I said, the final product was messy but Sally’s puff pastry is perfect. (Find her recipe in the link above.) It is light, flaky and as GBBO demands, has excellent layers.
Puff Pastry Berry Dessert
INGREDIENTS • 800 g puff pastry ( two 400 g sheets = 2 of Sally’s recipes) • 100 g spreadable cheese cream • 3 g cinnamon • 200 g berries • 50 g water • 25 g honey • 20 g cornstarch • 20 g melted butter Note: The quantities of berry jam were halved from the published recipe
METHOD
Cut 2 circles from the puff pastry as big as possible
Spread cream cheese over the entire area of one piece of pastry
Sprinkle with cinnamon
Add berries to 100g of water and boil for 20 minutes
Add honey and corn starch mix well
Preheat oven to 425⁰F
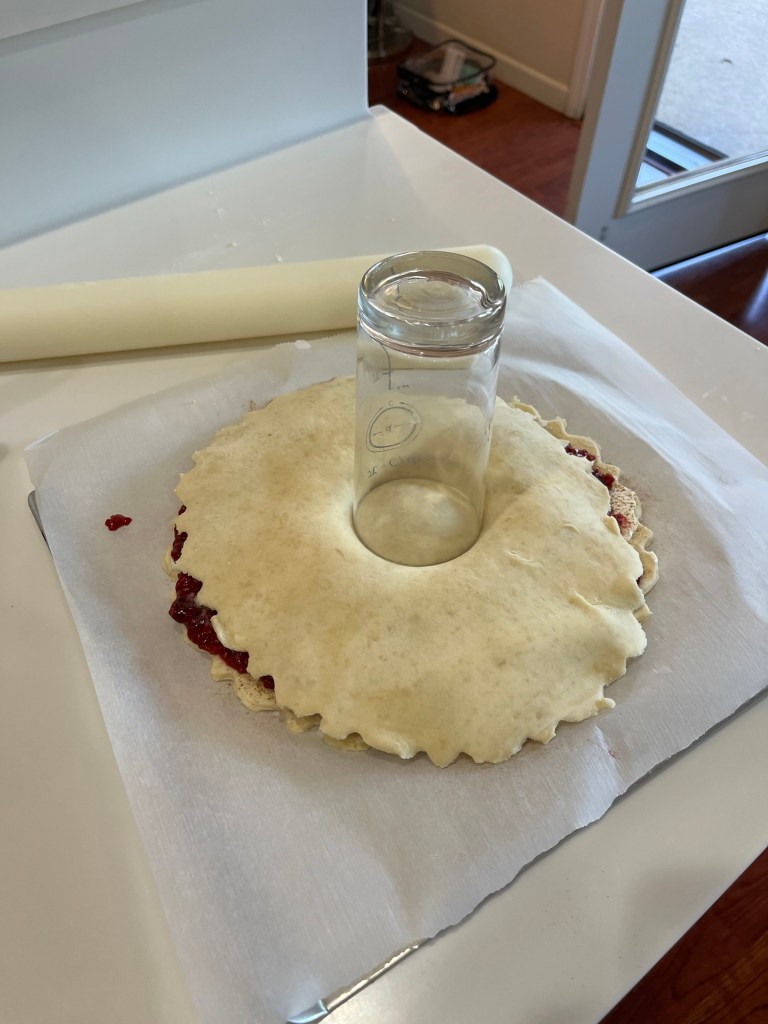
Cover the dough with jam then add the second layer of puff pastry
Place an inverted glass at the center of the tart and cut radially into 12 strips
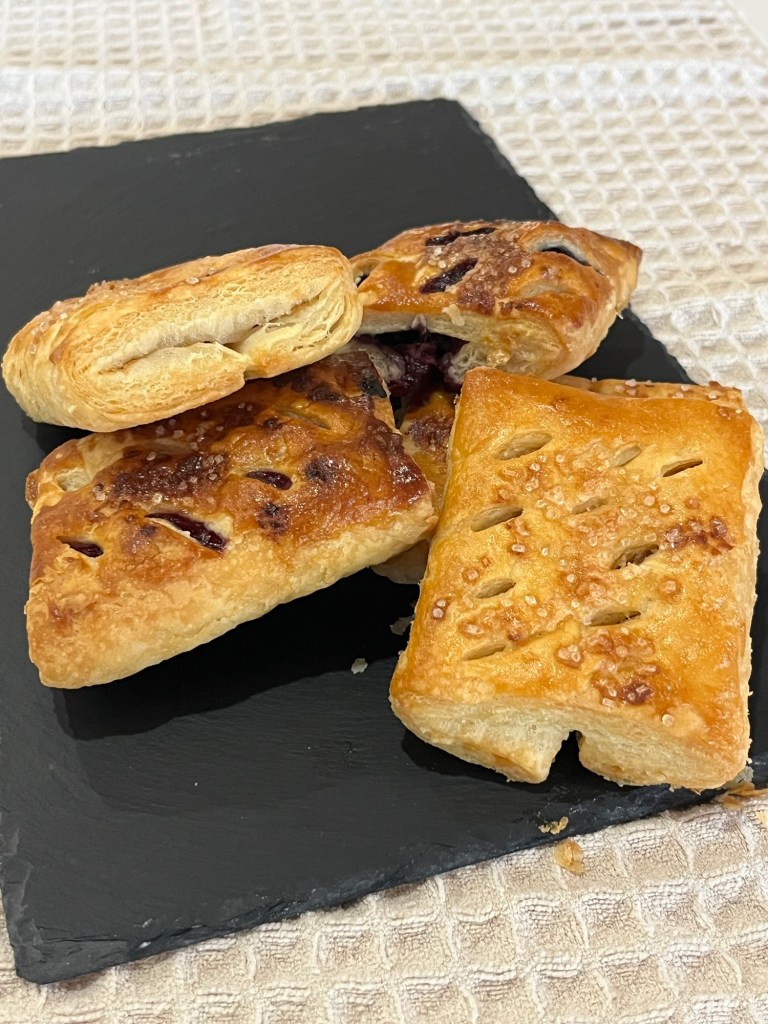
I really think every pastry baker needs to know how to make puff pastry. The easiest version is rough puff, which I made a couple of days ago. It is as easy, delicious, flakey and buttery as the Daring Gourmet claims ( find her recipe here: daringgourmet.com).
I had some issues turning and rolling to develop a smooth pastry, but after 8 turns it looked pretty good. Kept in the fridge for a couple of days and rolled out to about 1/8th inch thick this morning it looked great. I cut 3” circles, filled them with a cream cheese, sugar, white chocolate chip mixture and topped with a small raspberry. The edges were egg washed, folded and crimped with a fork before coating the top with more egg wash and sparkling sugar.
Actually, I both over-filled and under-sealed them so they are a mess. (See step #5 regarding my disregard of my own advice.) That in no way affects their taste. Using a 4” cutter might help. As advertised the puff pastry was excellent, the filling (my recipe) was likewise excellent, but then, the combination of chocolate and raspberries is hard to beat.
Ignore the artisan bread in the background. I had to heat up the oven anyway so why not?
Berry Hand Pie
INGREDIENTS • 1 egg • 1 tablespoon water • 2 tablespoons all-purpose flour • 1 sheet puff pastry, thawed but cool. • 2 ounces cream cheese, softened • 1 tablespoons granulated sugar or decorating sugar • ¼ cup white chocolate chips • 3 ounces berries • 2 tablespoons coarse white sugar or decorating sugar METHOD
Heat the oven to 400°F. Beat the egg and water in a small bowl with a fork.
Stir the cream cheese and granulated sugar in a medium bowl until the mixture is smooth. Stir in the white chocolate chips.
Cut large berries in half.
Sprinkle the flour on the work surface. Unfold the pastry sheet on the work surface. Roll the pastry sheet into a ~12-inch square. Using a round cutter, cut into as many 3 -inch circles as you can. (Try a 4” cutter and settle for fewer, better looking pastries.)
Brush the edges of the pastry circles with the egg mixture. Place about ½ tablespoon cream cheese mixture in the center of each. (Don’t overfill.) Top each with about one small or two halves of a large berry. Fold the circles in half, pinching the edges together. Crimp both edges with a fork. If you don’t seal them adequately or have to much filling it will leak out of the sides of the finished pastry.
Brush the pastries with the egg mixture and sprinkle with the coarse sugar. Using a sharp knife cut small slits in the tops of the filled pastries. Place the pastries onto a silicone or parchment paper lined baking sheet.
Bake for 20 minutes or until the pastries are golden brown. Remove the pastries from the baking sheets and let cool on wire racks for 10 minutes.
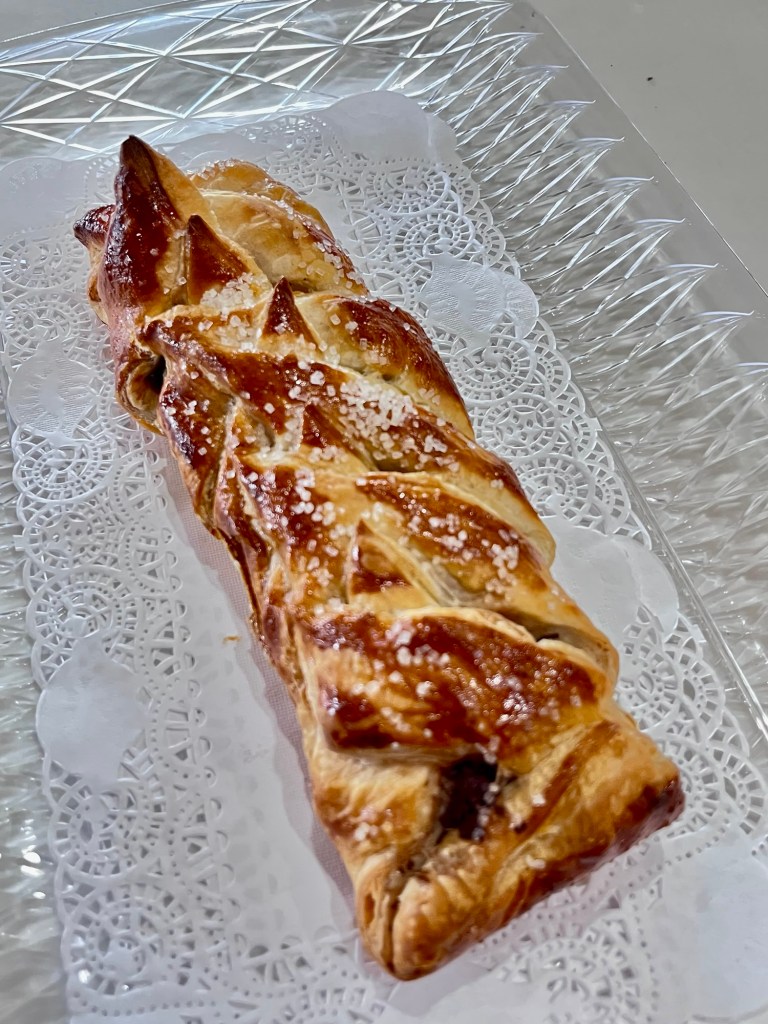
For months I ignored a single sheet of puff pastry in the fridge. Today, after making two apple pie fillings I had apples remaining…
What could I do?
Pretty simple pastry to make. The directions from ACozyKitchen were spot on. (I used Trader Joe’s puff pastry for this, but plan on making my own later this week, time permitting.)
Apple Cheese Danish
INGREDIENTS For the Filling: • 4 oz cream cheese room temperature • 2 Tbl ricotta or mascarpone cheese • 1 lemon zest and juice, divided • Pinch kosher salt • 5 Tbl white granulated sugar divided • 2 apples (such as Honey crisp, Braeburn or Gala) • ½ tsp ground cinnamon For the Assembly and Icing: • 1 box puff pastry • ¾ cup powdered sugar sifted • 1 tablespoon whole milk
METHOD To Make the Filling:
Preheat the oven to 400⁰ F.
In a medium bowl, place the cream cheese, ricotta, lemon zest, vanilla, salt, 4 tablespoons of sugar and mix until smooth, using an electric mixer fitted with a paddle attachment. Set aside.
Peel and slice your apples into 1/4-inch slices. In a small bowl toss them with the remaining 1 tablespoon of juice from the one lemon, sugar, and cinnamon. To Assemble the Cheese Danish:
Carefully unfold 1 sheet of defrosted puff pastry and roll slightly with a floured rolling pin until it’s about 1/4-inch in thickness. I trimmed mine so it was a 11″ x 8″ rectangle. Transfer the sheet of puff pastry to a piece of parchment that’s on a baking sheet.
At an angle, slice off the top corners and cut two notches in the bottom. Slice 1-inch strips diagonally down both sides of the puff pastry, leaving the center uncut. Try to cut the same number of strips on both sides. I had about 8 strips per side.
Add three tablespoons of cream cheese filling, spreading it evenly down the center of the puff pastry. Top with apple slices.
Fold in the bottom and top flaps. Braid the puff pastry, by folding the strips over the filing, alternating sides, until you’ve worked your way down the puff pastry. Using your knife, trim off any leftover strips or extra dough.
Transfer the danish to the freezer to chill for 15 minutes.
Brush with egg wash liberally.
Transfer baking sheet to oven and bake for about 20 minutes, or until puffed up and golden brown.
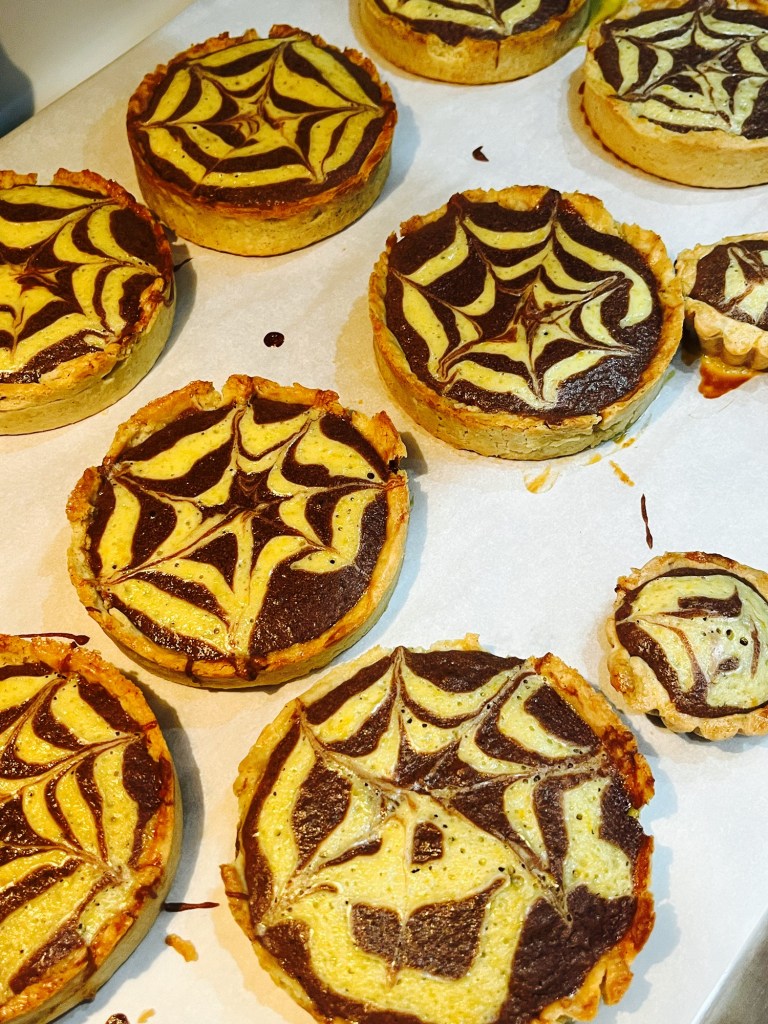
My neighbors gave me a BIG bag of oranges from their trees. The navel oranges in the markets have been very disappointing this year, but these are wonderful.
Usually I give them something made with their oranges in appreciation of their generosity. This time I made chocolate/orange tarts with a vanilla custard base. They tasted good, but looked poor to fair. They baked well with all the components done perfectly. The problem is the top, and therefore the appearance has no “snap.” They would not catch your eye in a patisserie (I will re-make them on the next rained out golf day.)
A 1/8” layer of vanilla custard was poured into the bottom of each tart shell. The tart was baked for 10 minutes at 450° F to set the custard. A layer of chocolate filling was piped over the custard followed by a spiral of the orange crème. A toothpick was used to feather the orange crème.
Before BakingAfter Baking
Chocolate Orange Tart with Vanilla Custard
Yield: Five 4” tarts. INGREDIENTS Tart Shell • 100 g cold butter cut into small cubes • 60 g icing sugar • ½ tsp vanilla • ¼ tsp salt • 2 egg – 1 for the dough and the other 1 egg white reserved for an egg wash • 200 g all-purpose flour Chocolate Filling • 75g butter • 115g dark chocolate (no more than 60% cocoa solids), finely chopped • 115g caster sugar • 55g AP flour • 4 medium eggs Orange Crème • 25g butter • 50g white chocolate • 1 orange, finely grated zest only • 35g caster sugar • 25g AP flour • 2 medium egg yolks Cream Custard • 1 ½ cups (350 ml) whole/full fat milk (1 ¼ c 2% plus ¼ c heavy cream) • 6 large egg yolks • ¼ cup (45 grams) granulated/caster sugar • 1 teaspoon grated nutmeg • ¼ teaspoon pure vanilla extract METHOD Tart Shell
Mix butter with sugar
Add salt then vanilla
Add egg and mix until incorporated
Stir in flour. Mix by hand like you are kneading bread until incorporated
Pre-heat oven to 350° F
Cover with plastic and refrigerate for 30 min
Butter tartlet pans, or use non-stick pans
Roll dough to about ⅛” thick
Lay over tart mold and press into all crevices
Roll top to cut off excess
Prick holes in bottom and sides of formed dough
Fill tarts with pastry weights. For mini tartlet pans I put beans in a cupcake paper. For large pans use crumpled parchment paper filled with beans. Remove 5 minutes before the end of the bake.
Paint edges of the tartlet with the egg wash.
Bake in preheated oven 350° F (175 C) for 15 min
Immediately remove from pans and cool on a wire
Chocolate Filling
Melt the butter and chocolate in a heatproof bowl set over a pan of gently simmering water until melted and smooth. Remove from the heat and stir in the sugar and flour. Beat in the eggs, one at a time, and leave to stand.
Orange Crème
Melt the butter and white chocolate in a heatproof bowl set over a pan of gently simmering water until melted and smooth. Remove from the heat and stir in the orange zest, sugar and flour. Beat in the egg yolks, one at a time and pour the mixture into a jug. Cream Custard
Add the milk to a saucepan over medium heat. Just heat until it starts to lightly simmer, do not boil. Turn off the heat.
Add egg yolks and sugar to a separate mixing bowl, vigorously whisk (or use a hand blender) until pale and bubbly. Remove the milk from the heat and very slowly drizzle into the egg yolks while whisking. Whisk in the vanilla if using. Transfer the mix to a container with a spout.
ASSEMBLY
Pipe a ¼” layer of custard into each tar shell and smooth
Pipe a ½“ layer of chocolate crème on the mousseline layer and smooth
Pipe concentric ⅛“ wide circles of orange cream and feather the orange cream with a toothpick
Bake tarts 14-16 minutes at 350°F. (Start checking at 10 minutes.)