I “kneaded” something simple and not too stressful this morning so I decided on this Italian bread. (Adding steam to the baking makes it crusty.)
I don’t know if it is experience, laziness or trying to be quiet, but I recently tend to hand-knead my doughs rather than use the stand mixer dough hook. I like to feel the dough come together and would rather slightly under-knead than over-knead. (The bakes tend to come out better.)
I almost always use weights rather than volumes to measure ingredients, but there is some controversy regarding how much a cup of AP flour weighs. Opinions vary from 120g/c to 150g/c which is enormous. I fluffed, scooped and leveled the flour and ended up adding about 3 1/2 cups then more as needed to knead. I probably ended up with the 500g or 4c as noted in the recipe.
Also Crusty Italian Bread v2.1 will likely have double the amount of salt. While QC hasn’t tested it yet, Dede feels it could use it. I also switched the whole egg/water egg wash to egg yolk/milk. I liked the shine and color on the pretzels I made earlier this week so I decided to go with it again. Probably the right move. It is beautiful.
Egg washed – scored doughLoaf, outta the over and cooledCooled and ready for QC’s evaluation
Crusty Italian Bread
INGREDIENTS • 314 g (1⅓ c) warm water • 7 g (2¼ tsp) yeast • 16 g (1 Tbl) brown sugar • 12 g (2 tsp) salt • 21 g (1½ tsp) olive oil • 500 g (~4 c) AP flour • 1 egg yolk for wash • 1 Tbl sesame seeds (if desired)
METHOD
Combine warm water, yeast, and brown sugar in a stand mixer bowl, stir and let stand ~8-10 minutes until it begins activate
Add olive oil and salt, mix well.
Gradually add the flour and mix with a Danish Dough Whisk until the sides and bottom of the bowl come clean.
Knead knead by had for ~8 minutes until the dough is soft, smooth and not sticky. The dough should weigh ~865g
Cover the dough and let rise until doubled, ~30 minutes.
Punch it down, shape into an oval and book-fold into a boule
Tension by rolling back and forth with a cupped hand. Pinch seams and continue to tension to blend.
Cover the loaf with a damp cloth and let it rise until doubled, ~20 min. Over-proofing will cause the loaves to flatten.
Preheat oven to 375ᵒF degrees.
Brush top of loaf with an egg wash (whisked 1 egg yolk and 1 Tbl milk)
Sprinkle top of loaf with sesame seeds (if desired)
Score with a few, quick, cuts diagonally across the loaf.
Pour 1 cup of hot water in a shallow pan on the rack underneath the bread in the oven.
After 20 minutes put an oven-safe digital thermometer into the loaf.
Continue baking for an additional 5-10 minutes (internal temp reaches 190ᵒF) or until the loaf turn golden brown and produces a hollow sound when tapped.
Today was the fourth attempt to perfect my large, soft and chewy bagels. Let’s say, 4 times is a charm, It’s gin to move on to other
In the past I altered the type of flour, I changed the rising and proofing times, I developed a new way to poach the pretzel dough, I changed the hydration ratio, but ultimately it was advise from the King Arthur Baking chat line that made the day.
This time I followed the directions below and couldn’t be happier. The texture, taste and appearance are all spot-on to my vision.
Pretzels Higher Hydration and Improved Method
INGREDIENTS • 1 cup water • ½ cup 2% milk including 2 Tbl heavy cream • 4½ tsp. white sugar • 1½ tsp. salt • 2¼ tsp active dry yeast • 575 (5½ c) bread flour • 50g (3½ Tbl) unsalted butter, melted – cooled slightly • Vegetable oil or spray • 12 cups water • 2 Tbl light malt powder • 5 Tbl baked baking soda • 1 large egg yolk • 1 Tbs. Milk • Kosher salt METHOD
Melt the 50g of butter and set aside to cool.
Heat the water in the microwave for 20-30 sec to achieve a temperature of about 120-130 deg then combine with the cold milk in a large measuring cup for a resulting solution temperature of 110 to 115 degrees F.
Add the sugar and salt to the warmed water and milk and stir to combine. Sprinkle in the yeast and mix with a fork. Allow the mixture to sit for about 5 minutes or until it becomes foamy.
Pour the foamy mixture into a large bowl and add the melted, cooled, unsalted butter and flour a cup at a time. Mix by hand with a Dutch style hand mixer until no dry flour remains in the bowl. If necessary, add one or two tablespoons of water the be sure the dough comes together as a smooth ball, Knead by hand for 7 minutes. It’s done kneading when it is smooth and firm to the touch and not sticky. Don’t over-knead.
Remove the dough from the bowl and form into a ball. Wipe out the bowl and grease it with 1-2 tablespoons of oil. Place the dough ball back into the bowl and turn over a couple of times to coat thoroughly with the oil. Cover the bowl with a dish towel or plastic wrap and place in a warm area, free from drafts or cool air for about 1 hour, until the dough has risen and doubled in size.
When the dough is ready, preheat the oven to 450○F and position the oven rack in the upper third of the oven. Line a large (15″ x 20″) baking sheet with parchment paper and spray with Bakers Joy. Set aside.
In a small bowl, whisk together the egg yolk with 1 tablespoon of milk (egg wash). Set aside.
In a large, wide pot (6-8 quarts) add 12 cups of water, baked baking soda and malt powder. Stir to combine and bring to a full boil.
In the meantime, dampen a kitchen towel with water and set aside. Lightly grease a clean work surface with some vegetable oil (spraying with Bakers Joy worked well too). Remove the dough from the bowl and de-gas by punching down the dough. The dough should weigh ~925g. Place it on the work surface and divide into 2, 3 or up to 8 equal pieces. [For large pretzels, divide dough into 2 or 3 pieces.] Cover the pieces that you’re not rolling with plastic wrap or a damp kitchen towel, so they don’t become dry. Using the palms of your hands, roll each piece of dough to a 24-30” [40” for large pretzel] long rope and then shape into a “U”. If the dough will not roll out to the desired length, set aside, under a damp cloth, and let rest for 10-15 minutes, then try rolling again.
Grab the ends of the rope and cross them over each other twice, then bring the ends down to the bottom of the ‘U” and press them down to seal, forming the shape of a pretzel. Lay the pretzel top-side down in the sieve/strainer
Lower the sieve containing the pretzel into the boiling water mixture for about 30 seconds. Either push it down underwater or baste it. The pretzel will puff up while boiling. Flip the pretzel onto the parchment lined, (now top side up) sprayed baking sheet a few inches apart. Repeat for the other pretzels.
Using a pastry brush, brush the top and sides of each pretzel with the egg wash and then sprinkle with coarse salt.
Place the pretzel filled baking sheet on the upper oven rack and bake for about 7 minutes.
Open the oven and quickly rotate the baking sheet so that the pretzels that were facing the front are now facing the rear of the oven. It may seem like a pain, but it’s quick and easy and will ensure even baking.
Continue to bake for another 7 minutes or until pretzels are dark golden brown.
Remove sheet from oven and place pretzels on a wire rack to cool slightly before serving.
Outrageously good if served warm. Mildly spectacular if served later.
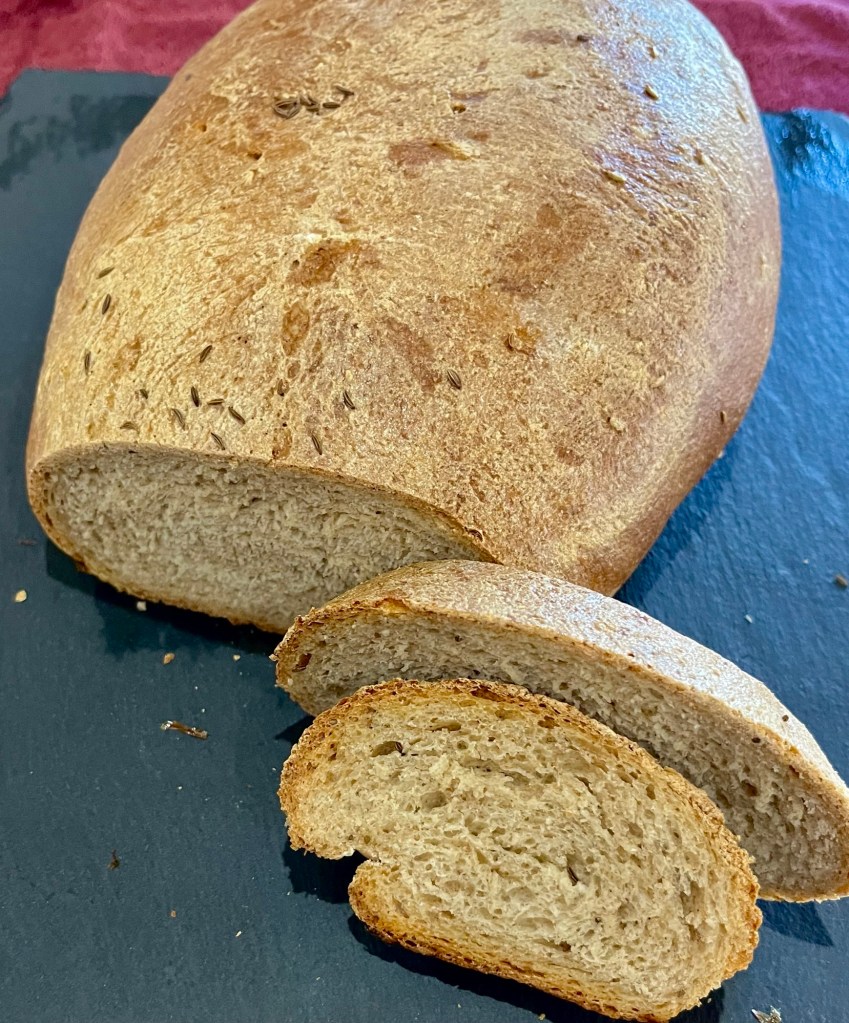
Surprise! I didn’t see this recipe first this time. I decided to make a rye bread and since we went to New York this spring for both baseball and friends, I said to myself, “Self, why not make a NY rye bread, even though we didn’t go to Rye, New York?” Ta da!
I made good rye breads before but this time I search for alternative recipes. (As my golf friends know, I am one of those who is never satisfied. My baking QC squad would agree, but since they receive bakes from me, they don’t bring it up.)
The PreppyKitchen is one of my go to baking recipe sites. John Kanell explains his techniques beautifully and they are great to watch.
However, my first change was to add the rye bread improver from King Arthur. This add a boost of great rye flavor, stronger rise and improved texture, and it works!
I also formed the loaf as a boule. I would never make a rye bread in a standard bread pan and would only reluctantly use my unglazed stoneware baking pan. By tensioning the boule before the second rise it allows the loaf to rise up instead of flatten out. Again, it works.
This may be my best rye bread ever.
Yup, that’s what I am talking about!
Rye Bread (Modified) PreppyKitchen Recipe
Author John Kanell My modifications in italics
INGREDIENTS • 1½ c warm water 105 to 110°F (360mL) • 2 Tbl honey (or molasses for a deeper color) • 2 tsp active dry yeast • 2¾ c bread flour 330g • 1½ c rye flour 160g • 4 Tbl Rye Bread Improver • 1 tablespoon vegetable oil • 1 tablespoon caraway seeds • 1¾ teaspoons salt
METHOD
In the bowl of a stand mixer fitted with the dough hook attachment, whisk together the warm water, honey and yeast until combined. Let it stand for 5 minutes, until very foamy.
To the bowl with the yeast mixture, add both flours, rye bread improver, oil, caraway seeds and salt. Using a wooden spoon or rubber spatula, mix the ingredients together until no dry flour from the bottom and sides of the bowl remains and a shaggy dough forms.
With the stand mixer, mix on medium-low speed for 6 to 8 minutes until most of the dough balls up around the dough hook and it is smooth and slightly sticky.
Transfer the dough to a lightly floured surface and gently shape into a ball.
Place the ball of dough in a clean, lightly oiled bowl. Flip the dough over once so that the top also has a coating of oil. Scrape down the sides of the bowl to shape the dough into a ball. Cover the bowl with plastic wrap and let it rise in a warm, draft-free spot (75°F) for 30 to 45 min, until doubled in size.
Turn the dough out onto a very lightly floured surface. With moist hands, stretch and shape it into a 9-inch square. Fold the dough using an envelope fold, sealing each fold with the side of your hand. Pinch the seams on the sides and ends together tightly to seal.
With a gentle motion and an open hand, roll the log to tension the surface.
Place the dough on a lightly sprayed piece of parchment paper seam side down. Spray a piece of plastic wrap with nonstick spray, cover the loaf and let it rise in a warm, draft-free spot (75°F) for 35 to 45 minutes. Use the finger poke test to check the rise is complete.
After 15 minutes of the second rise, preheat the oven and baking stone to 350°F.
Bake the bread for 35 to 40 minutes, until the top of the loaf is golden brown, and it sounds hollow when tapped. The internal temperature should be 195°F to 200°F.
Let it cool in the pan for a couple of minutes, then turn it onto a wire rack to cool completely before slicing.
Allow the no-knead rye bread to cool completely before slicing. Waiting to slice freshly baked bread is really difficult, but the cooling time is important for the crumb to set.
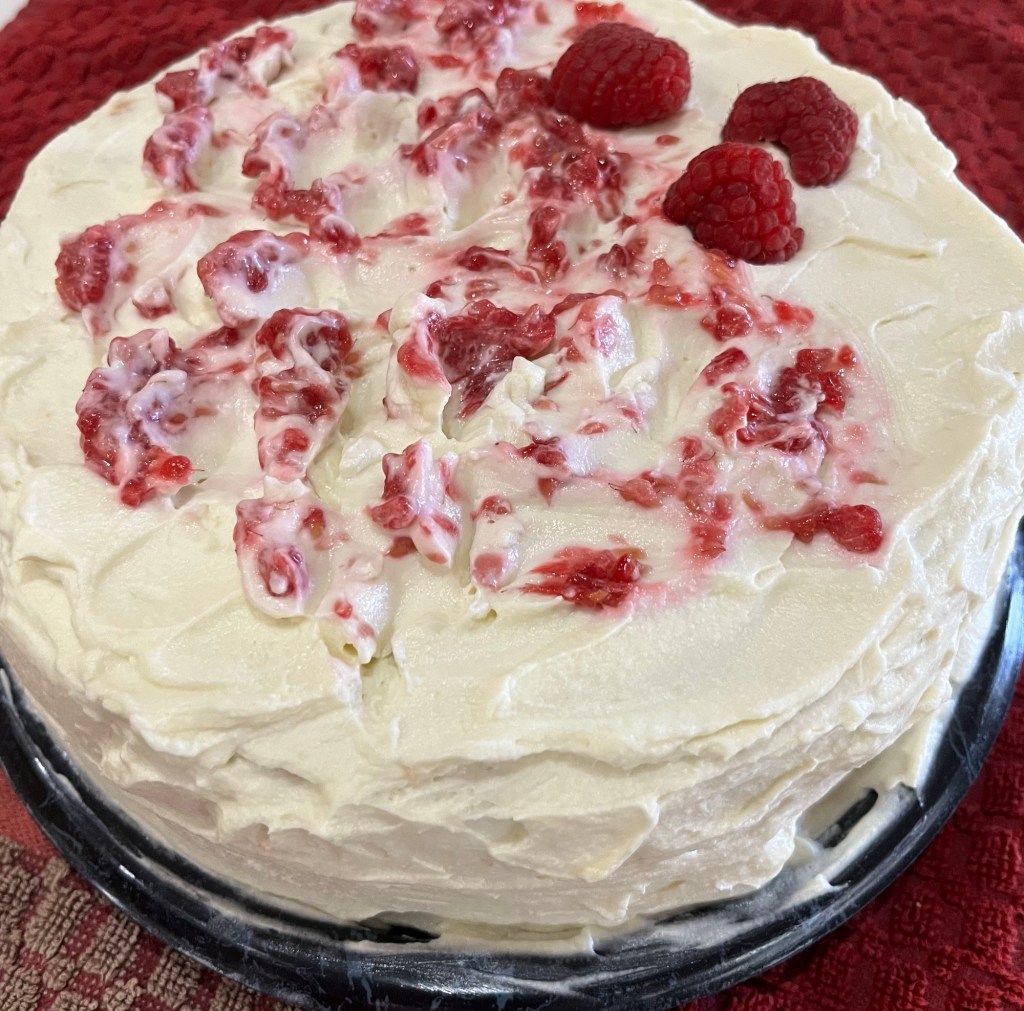
I had no reason whatsoever to make a cake, then fortuitously I ran across two new recipes, one for a supposedly moist, tender sponge cake, and the other for a less (than buttercream) sweet white chocolate ganache frosting.
I made the cakes yesterday and wrapped them in heavy plastic wrap then this morning made the frosting. I was amazed both the cakes and frosting were as light and tasty as promised.
I was surprised beating the egg yolks into the initial meringue would result in the promised light fluffy batter, but it did. I was equally surprised after chilling the diluted white chocolate ganache it whisked into a light, spreadable frosting, but it did.
I did a poor job of adding some raspberry drizzle, sorry. It won’t hurt the taste!
Sponge Cake
INGREDIENTS • 6 large eggs, separated and at room temperature • ½ teaspoon white vinegar • 175 g (¾ c plus 2 tbsp) granulated sugar • ¼ teaspoon salt • 142 g (1 c) all-purpose flour • 30 g (¼ c) tapioca starch • 80 ml (⅓ c) 35% heavy cream, heated to just below simmering • 1 tsp (5ml) pure vanilla extract
METHOD
Preheat the oven to 350°F. Lightly grease and flour two 8-inch round cake pans and line them with rounds of parchment paper.
First separate the eggs: Place the yolks in a small bowl and place the egg whites in the bowl you intend to whip them in – in a large mixing bowl if using an electric hand mixer or the bowl of a stand mixer.
Sift the dry ingredients: Sift flour and tapioca starch into a medium bowl and whisk to blend evenly.
Heat the cream: Place the cream in a small saucepan and heat it until it almost simmers. It should be hot but not boiling. Set it aside, but keep warm.
Whip egg whites: Place the room temperature egg whites in the bowl of a stand mixer fitted with the whisk attachment (or in a large bowl if using a hand mixer), add the vinegar and beat on high speed for 1-2 minutes until very frothy and doubled in volume.
Add sugar gradually in about 3 or 4 stages while beating for 1-2 minutes after each addition. After the last addition, beat until the meringue is thick and glossy and holds firm peaks, a total of 7 minutes at least. Yhe meringue is whipped sufficiently when you lift up the beaters and the meringue holds a peak that just curls over slightly. If it is still very soft and curls down immediately, then whip it longer.
Whip in salt and egg yolks 2 at a time until evenly combined and the mixture is pale yellow and fluffy.
Add dry ingredients. Place a fine mesh sieve over the bowl and sift half of the flour and tapioca starch again over the egg mixture. Whisk to gently fold it in until just until combined. Sift the remaining dry ingredients on top and fold it in.
Add the hot cream. Pour the hot cream around the sides of the bowl, add the vanilla extract and gently fold it in with a wide spatula. The batter should weigh ~728 g.
Divide the batter evenly between the prepared pans and then run a knife around in the batter to pop any very large air bubbles. Bake for 20 minutes until evenly golden and it springs back when pressed gently. It should feel slightly firm when you press the surface. Transfer pan to a wire rack to cool for a few minutes, then while the cake is still hot, gently run a knife or offset spatula gently around the sides in an up and down motion and invert the cakes on a wire rack while warm.
Vanilla Whipped White Chocolate Ganache Frosting
INGREDIENTS
200 g (7 oz) pure white chocolate
355 ml (1 ½ c) 35% heavy whipping cream
2 tsp vanilla bean paste
½ tsp pure vanilla extract METHOD
Chop the chocolate: Finely chop the white chocolate and place it into a large bowl. Or, use couverture white chocolate chips.
Heat the cream: Pour ½ cup of cream into a 1-quart stainless steel saucepan with the vanilla bean paste and place over medium heat. Watch it as it comes to a simmer.
Make the ganache: Once simmering, immediately pour the hot cream over the chopped chocolate, cover the bowl and let stand for 2 minutes. Uncover the bowl and whisk until the chocolate is completely melted and the mixture is smooth and silky. Let it cool for 5 minutes so it is no longer hot.
Add cold cream: Pour in the remaining cold cream while whisking until combined.
Chill the ganache: Place the bowl in the fridge and chill for at least 2 hours or overnight until completely cold. If you choose to chill overnight, then cover the bowl after 20 minutes.
Whip it until thick and fluffy: Once thoroughly chilled, add the vanilla extract and beat with an electric hand mixer or stand mixer fitted with the whisk attachment on medium speed until thick, airy and fluffy. This will take about 2 minutes, depending on your mixer.
I made this dark rye loaf 4 years ago. A lot of water and experience passed under the bridge since 2020. I decided to make this bread after lunch, when we finished the oat bread I made a few days ago. In 4 hours, most of which was proofing and baking, this was the result.
I made two loaves from the recipe below. The longer one was in a covered, unglazed, stoneware baking pan, the other was a free standing boule baked on a baking stone.
The crumb was perfect, the crust wonderful and the flavor exceptional. Although that is only my opinion, however, QC totally agrees with me. It was impossible to resist slicing and sampling the bread before it cooled adequately.
DON’T OVER MIX, OVER-KNEAD, OVER PROOF DON’T OVER BAKE.
Homemade Rye Bread
Makes 2 loaves
INGREDIENTS 16 g (4½ tsp) packages active dry yeast 592 g (2 ½ c) warm water (just barely warm to the touch) 2/3 (225 g) cup molasses 2 Tbl caraway seeds (optional) 1 Tbl salt 50 g (¼ c) vegetable oil 20 g (¼ c) cocoa powder 1 Tbl Rye Bread Improver 3 Tbl Bread and Cake Enhancer 240 g (2 c) rye flour 700 g (5 c) bread flour Egg wash (optional)
METHOD
Dissolve the yeast in the warm water with the molasses. Put yeast mixture into a stand mixer bowl.
Add the caraway seeds, salt, vegetable oil, cocoa powder, 2 cups of rye flour and then 2 cups of bread flour, mixing into the yeast mixture after each addition with a silicone spoon.
Add Rye Bread Improver and Bread and Cake Enhancer
Add more bread flour, a cup at a time, until the dough is not so sticky and is too hard to mix it with the silicone spoon.
Knead the dough with a Kitchen-aide bench mixer using the dough hook. Add more bread flour in small amounts until the dough begins to pull away from the sides of the bowl. Once the sides of the bowl are mostly clean then knead 8 minutes.
Transfer dough to a lightly floured surface and knead by hand until the dough is soft and springs back when poked.
Let the dough rise: Spread some vegetable oil around a large bowl and place the dough in it, turning it to coat it with oil.
Cover the bowl with plastic wrap or a damp cloth. Let rise at room temperature until it has doubled in size, 1 to 1 ½ hours.
Gently press down on the risen dough to release some of its air. Turn the dough out onto a lightly floured piece of parchment paper, knead the dough a few turns and then divide it in half with a sharp knife. The full loaf should weigh ~1910 g.
Shape each half into loaf. Place dough loafs into either oiled 8×4-inch bread loaf pans, or onto a flat baking sheet or peel that was sprinkled with corn meal, depending if you want to cook the loaves in pans or directly on a baking stone. Cover with plastic or a damp cloth.
Let the loaves rise: Let the bread rise again, this time not doubling in volume, but rising by about half of its volume, about 30 to 45 minutes, half as long as the first rising. The dough should be peeking over the top of the loaf pan if using a loaf pan. (Over-proofing the bread may cause it to collapse as the yeast will be exhausted and not have any more energy when placed in the oven.)
If you are using a Dutch Oven or baking stone, place it in the oven and preheat oven to 350°F for at least half an hour before baking.
If baking in a Dutch Oven lift the dough by the corners of the parchment paper and place the dough and parchment paper into the Dutch Oven or directly on the baking stone. (Brush with optional egg wash. Whole eggs and water for a crisp shiny crust, egg whites and water for a crisp crust only.) Score the loaves a few times on the top of the dough right before putting it in the oven. Be careful, the Dutch Oven or baking stone will be hot!
Put loaves in the oven. If you have a mister, mist the dough with a little water the first 10 minutes of baking. Bake for 40-50 minutes, or until done. The internal temperature should be ~200F. The bread should sound hollow when tapped.
There is nothing like a fresh peach frosty. Early in the season peel and cut fresh peaches into wedges, spread them on a cookie sheet, or two and freeze overnight. After they are frozen solid bag them into freezer bags.
When I want s refreshing dessert I allow some (~200g) of the peaches thaw slightly. If you don’t soften them the blender has trouble blending the peaches and vanilla ice cream (~100g.) Add 4-6 Tbl of milk (to desired viscosity) and enjoy. This makes about 12 oz of refreshing, delicious peach frosty.
The 2:1 ratio of peach to ice cream is about right for me.
INGREDIENTS
200 g fresh frozen peach wedges
100 g vanilla ice cream
4-6 Tbl milk
METHOD
Partially thaw the frozen peach wedges,either on the counter or with a microwave,
Add ice cream and milk and blend, adding milk until the desired viscosity is attained.
Last week we went to dinner at Kathrin’s Biergarten with a friend from Florida. They have amazing big pretzels, so of course I had to try my hand. My “normal” sized pretzels are soft and chewy with great pretzel taste so how hard could BIG pretzels be? (More than you would think.)
My first batch this morning was made using the same recipe as my normal pretzels except instead of cutting the dough into 8 pieces, I only cut it into 2. The problem came with rolling each piece into looooonnnngggg logs. To make a 10” diameter pretzel the log needed to be 31” plus the extra to for the knot. (Remember C= Pi x D?) I thought 42” long would be about right. The problem is I couldn’t roll it out longer than about 32’ resulting in a thick 8” diameter “Hulk” of a pretzel. Great taste, great chew, but thick and not very pretzely.
With the second batch I cut back on the amount of flour (600 g instead of 687g) hoping the dough would be more flexible and elastic. It was better, but still would only roll to about 38” long.
Upon reading how to reduce the amount of gluten which should increase the stretchiness, next time I will double the amount of butter. This is supposed to coat the gluten strands and increase the stretchinenss of the dough. (Two batches of these bad boys was enough for today.)
I made up enough words for today. In any event the pretzels were all delicious. Just sayin’.
First BatchSecond Batch
Pretzels
Note: the dough was too firm. It needs to be slacker to roll out to the desired length. Try 1¼ cups water OR 5 cups of flour
INGREDIENTS • 1 cup water • ½ cup regular milk (not fat-free milk) • 4 ½ tsp. white sugar – regular table sugar • 1 ½ tsp. salt • 2 ¼ tsp active dry yeast • 687g (5 ½ c) flour – poured & leveled – not scooped flour! (Second Batch – 625g or 5 c) • 50g (3 ½ Tbl) unsalted butter, melted – cooled slightly • Vegetable oil or spray • 8 cups water • 1 Tbl light malt powder • 4 Tbl baked baking soda • 1 large egg yolk • 1 Tbs. water • Kosher salt METHOD
Melt the 50g of butter and set aside to cool.
Heat the water in the microwave for 20-30 sec to achieve a temperature of about 120-130 deg then combine with the cold milk in a large measuring cup for a resulting solution temperature of 110 to 115 degrees F.
Add the sugar and salt to the warmed water and milk and stir to combine. Sprinkle in the yeast and mix with a fork. Allow the mixture to sit for about 5 minutes or until it becomes foamy.
Pour the foamy mixture into the bowl of a stand mixer fitted with a dough hook and add the melted, cooled, unsalted butter and flour. (I add the flour a cup at a time to be sure it mixes well.) Mix on low speed for until combined and no dry flour remains in the bowl. Scrape the bowl as needed. If necessary add one or two tablespoons of water the be sure the dough comes together as a smooth ball, Continue to mix for about another 7 minutes or until the dough pulls away from the sides of the bowl and is smooth. Scrape the dough from the hook if it comes up to far. Note: The dough may begin to pull away from the bowl after only 2 minutes but may look a bit pulled or shaggy and still be sticky. The dough should clean the sides of the mixer bowl. It’s not done kneading until it is smooth and firm to the touch and not sticky.
Remove the dough from the bowl and form into a ball. Wipe out the bowl and grease it with 1-2 tablespoons of oil. Place the dough ball back into the bowl and turn over a couple of times to coat thoroughly with the oil. Cover the bowl with a dish towel or plastic wrap and place in a warm area, free from drafts or cool air for about 1 hour, until the dough has risen and doubled in size.
When the dough is ready, preheat the oven to 450○F and position the oven rack in the upper third of the oven. Line a large (15″ x 20″) baking sheet with parchment paper and spray with Bakers Joy. Set aside. Note: You may need 2 baking sheets to avoid crowding the pretzels. If only one small, puny sheet is available, make one batch of pretzels and keep the remaining dough covered, so it does not become dry. Between batches, allow the baking sheet to cool, before filling with remaining pretzels.
In a large, wide pot (6-8 quarts) add 8 cups of water, baked baking soda and malt powder. Stir to combine and bring to a full boil. Place a plate lined with paper towels nearby, as well as the kitchen spider or slotted spoon.
In the meantime, dampen a kitchen towel with water and set aside. Lightly grease a clean work surface with some vegetable oil (spraying with Bakers Joy worked well too). Remove the dough from the bowl, place it on the work surface and divide into 8 equal pieces. [For large pretzels, divide dough into two pieces.] Cover the pieces that you’re not rolling with plastic wrap or a damp kitchen towel, so they don’t become dry. Using the palms of your hands, roll each piece of dough to a 24-30” [40” for large pretzel.] long rope and then shape into a “U”. Grab the ends of the rope and cross them over each other once or twice and then bring the ends down to the bottom of the ‘U” and press them down to seal, forming the shape of a pretzel. Place the pretzels onto the greased parchment-lined baking sheet and cover with a damp kitchen towel to prevent the dough from drying out, while you continue to roll the remaining dough. You can also cut some of them into 1 ½” logs to make nuggets
In a small bowl, whisk together the egg yolk with 1 tablespoon of water (egg wash). Set aside.
One at a time, lower each pretzel into the boiling water mixture for about 30 seconds. I push them down underwater a few times to assure the top is treated as well. The pretzels will puff up while boiling. Using a kitchen spider or slotted spoon, carefully remove the pretzel from the water, blot slightly on paper towels and then place back onto the parchment lined greased or sprayed baking sheet a few inches apart.
Using a pastry brush, brush the top and sides of each pretzel with the egg wash and then sprinkle with coarse salt.
Place the pretzel filled baking sheet on the upper oven rack and bake for about 7 minutes. (12 minutes for large pretzels.)
Open the oven and quickly rotate the baking sheet so that the pretzels that were facing the front are now facing the rear of the oven. It may seem like a pain, but it’s quick and easy and will ensure even baking.
Continue to bake for another 7 minutes or until pretzels are dark golden brown. (12 minutes for large pretzels.)
Remove sheet from oven and place pretzels on a wire rack to cool slightly before serving.
Outrageously good if served warm. Mildly spectacular if served later.
I had a couple of cups of blueberries in the fridge that were complaining about being ignored, so I made them into drop scones for breakfast yesterday. Actually, I froze half of them so they will continue to be enjoyed for a while. They thaw on the counter and are as fresh as new.
Berry Drop Scones
INGREDIENTS
2 ½ cups (312g) all-purpose flour
1 tablespoon baking powder
3/4 teaspoon kosher salt
1/3 cup (67g) sugar
Zest of 1 small lemon (or orange or lime)
½ cup (115g) unsalted butter, chilled and cut into cubes
150-175g berries. Use any berries that you like.
1 cup heavy cream + extra if required
Coarse or turbinado sugar for topping
METHOD
Preheat oven to 400. Line a baking sheet with parchment paper.
In the bowl of a food processor, add the flour, baking powder, salt, sugar and zest. Pulse a few times to incorporate.
Add the cubed butter and pulse to incorporate. The mixture should resemble very coarse sand.
Empty the flour mixture into a mixing bowl. Add the cream and stir until just barely incorporated. Add additional cream by the tablespoon to help the dough come together
Gently fold in the berries. (It’s fine if the raspberries or blackberries break up a little – it adds a nice pink stain to the dough.) The dough should just be moist, not wet, but also not crumbly or powdery looking. If it looks too dry, add a tablespoon of cold water.
Spoon the dough into 12 equally sized pieces on the parchment lined baking sheet. Sprinkle some coarse or turbinado sugar over the top, if desired.
Bake for 16-19 minutes, rotating the pan halfway through. The scones should be lightly golden and cooked through. I rotate the pan after 10 minutes
Cool in the pan for 5-10 minutes then carefully remove to a cooling rack
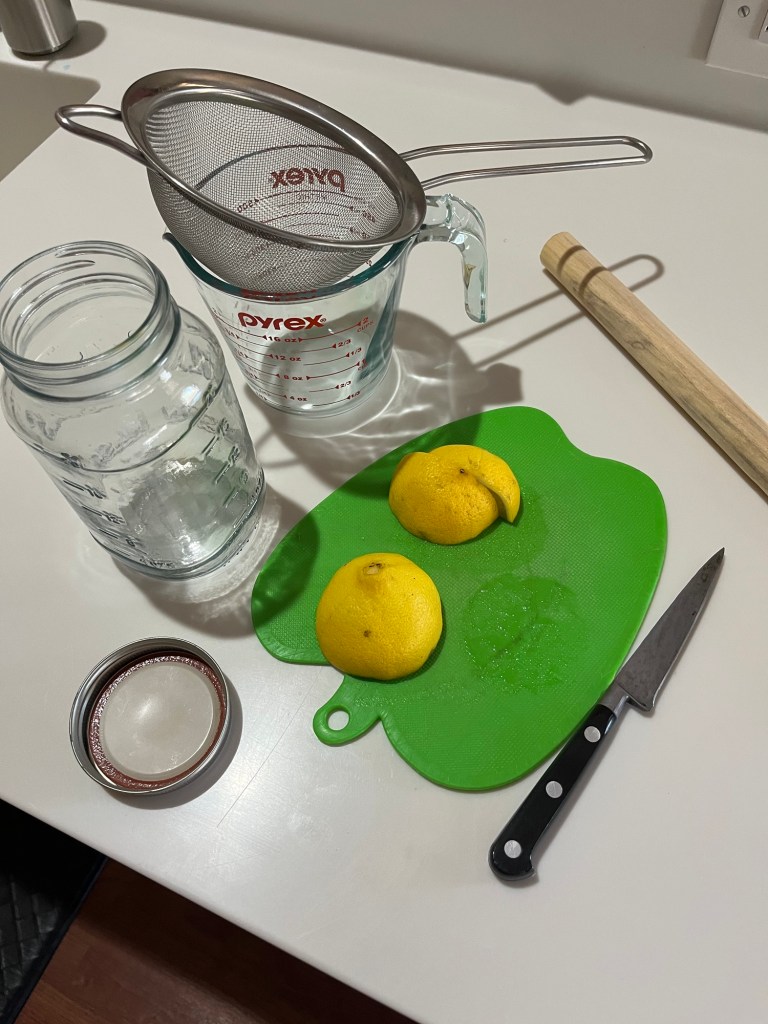
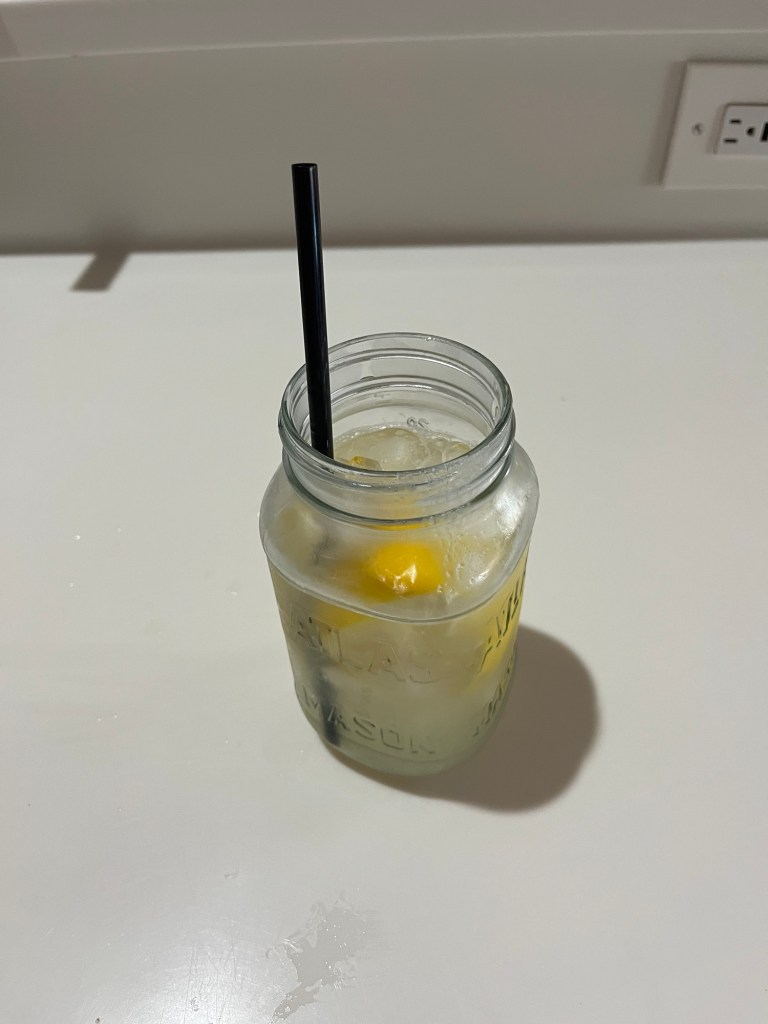
Here is my method for beating the heat and thirst on these hot, occasionally blistering summer days. First, turn on the AC and set the thermostat to a temperature comfortable for you. That fixes the heat, but not the thirst. My go-to quencher this summer is fresh carnival lemonade, then, after drinking about half of it, I re-fill the bottle with iced tea to make (IMHO) the best Arnold Palmer ever.
Get ReadyGet SetAlmost Go!!
I know that everyone reading this post has their own method for making lemonade, iced tea and Arnold Palmers, but this is mine. Make sun-tea by adding two cold brew tea bags to a container and let it sit in the sun. Depending on where you live that could be anywhere from 10 minutes (here in July) to overnight (here right now.) Make country fair lemonade by putting a whole, quartered, lemon into a 20 oz mason jar, add 3 teaspoons (or to taste) sugar, and pound it with a muddler. Don’t have a muddler you say? You could use the end of a wooden spoon, but I found that unacceptable. I happen to have a one foot length of 1” diameter dowel. I cleaned it and sealed the ends with some butcher block wax. It works great.
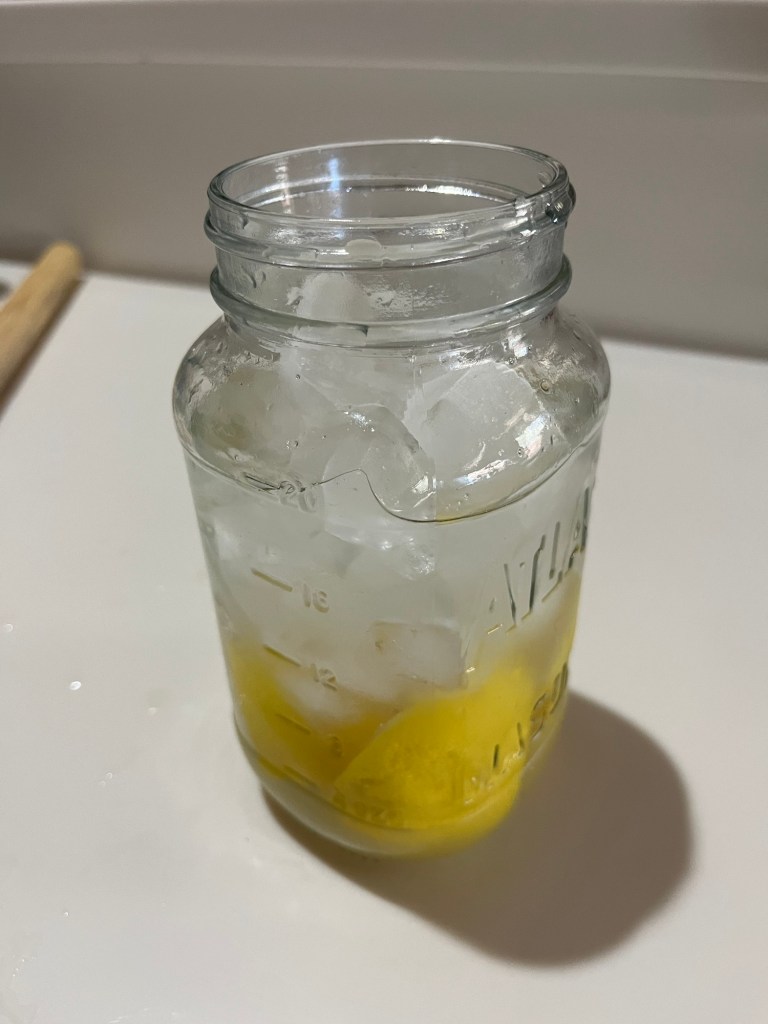
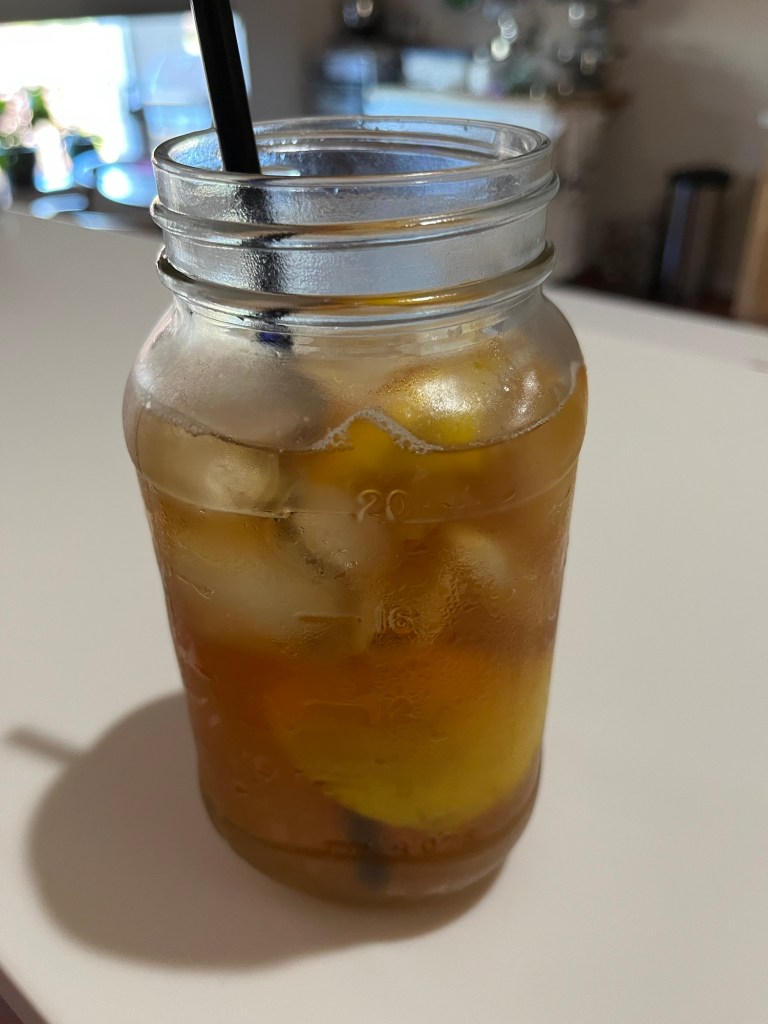
Add some iceAdd some waterAdd a strawAnd make an Arnold Palmer.
Once muddler-ed, I like to strain the muddle to remove the lemon seeds. I also squeeze out more lemon juice before tossing everything (less seeds) back into the mason jar. Add ice to nearly fill the jar, then water to within an inch of the top. Put the top on and shake like crazy for one full minute. I like to wrap the jar in a kitchen towel as it becomes very, very cold. Remove the top, add a straw and you will have fantastic lemonade.
But there is only 20 oz (including the ice and lemons) so after drinking between 1/2 and 2/3rds of the lemonade, add iced tea to fill the jar back up. You may want to experiment with ratios to yield and Arnold Palmer with the tartness you like.
Yes, it is still hot and yes, I am sitting in the AC right now, but I am enjoying a great drink as I write this.
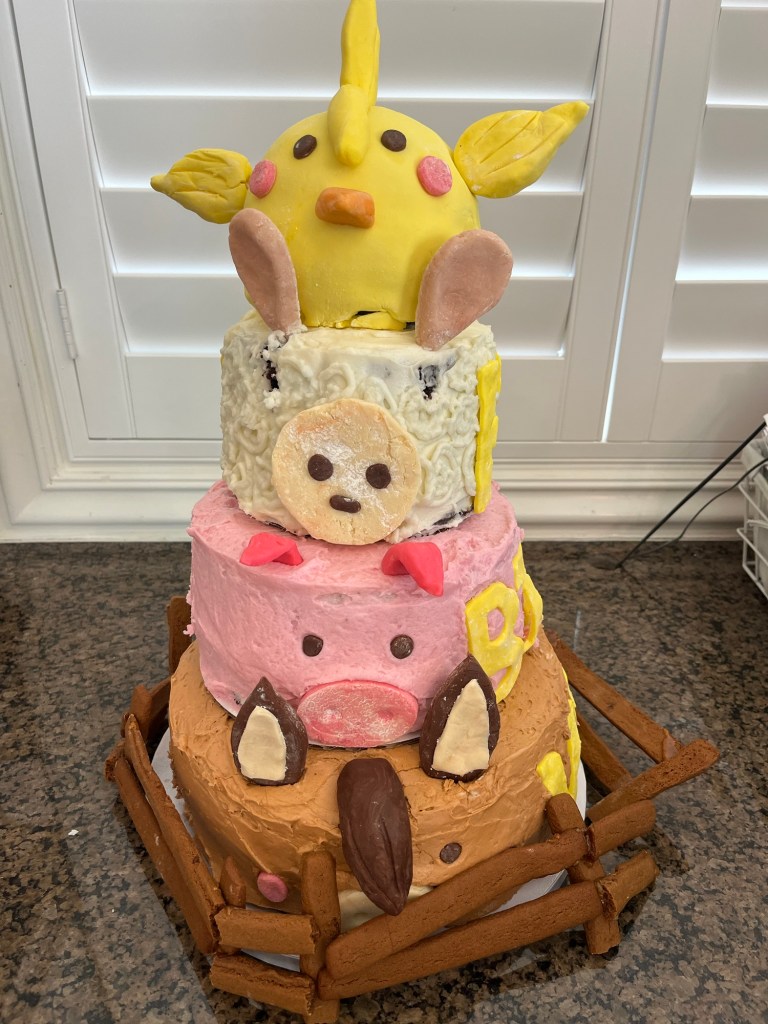
It’s not every day you are able to make a “Farm Animal” birthday cake for your granddaughter’s 6th birthday! I made a horse, a pig, a sheep and a chick and surrounded them with a barnyard fence.
I was directed to make all the cakes chocolate, but that was the only order… er.. guidance I was give. All but the chick were frosted with a basic buttercream and the chick was coated with marshmallow fondant and adorned with fondant wings, comb, beak and eyes. The other animals features are semisweet and white modeling chocolate and held on with embedded toothpicks (which were all removed before slicing.
The barnyard fence is gingerbread with hot caramel gluing the parts together. (The blisters on my fingers and hands attest to the temperature of the caramel.)
(Note to self: stabilize cakes above 4 layers with a dowel driven down the center of the cakes. This should reduce the sadness when the cake collapses in the heat. Oh well, stuff happens.)
THE BEST BUTTERCREAM FROSTING
INGREDIENTS • 452 g (4 cups) of powdered sugar (or 1 box) • 1 Cup (2 sticks) of softened butter • 2-3 teaspoons of vanilla • 1-2 tablespoons of whipping cream (for crumb coat frosting add cream as needed) Optional • 2 Tbl Meringue Powder to make crusting frosting. • Violet food coloring (a very small amount will make the frosting white)
METHOD
Add powdered sugar to mixing bowl.
Add softened sticks of butter
Add vanilla. If you want white frosting add a very small amount of violet food coloring
Add 1 tbsp of cream.
Beat on low until powdered sugar is incorporated. Then move mixer up to medium-high speed. Scrape sides and bottom of bowl often. When completely mixed the frosting may appear dry. (See option below.)
Add more cream, a little bit at a time, beating at slowest speed, until frosting is the proper consistency. For optional raspberry flavor
Add raspberries and 2 Tbl sugar to a food processor and pulse to macerate the berries
Sieve to remove pulp and seeds. You should have about ½ cup puree.
Add puree to soft peak mixture and red food coloring if desired.
Modeling Chocolate With Real Chocolate
INGREDIENTS Dark modeling chocolate • 1 ⅓ cups (227g) chopped semisweet chocolate (not chips)* • ⅓ cup (103g) light corn syrup White modeling chocolate • 1 ⅓ cups (227g) chopped white chocolate (not chips)* • ⅓ cup (103g) light corn syrup
METHOD
In a heatproof bowl set over simmering water (or in a double boiler), melt the chocolate. Stir constantly until melted; don’t let its temperature rise above 110°F. Remove from the heat.
Warm the corn syrup to 110°F, (10 seconds in a 1000W microwave for a full recipe) add to the melted chocolate, and stir until the mixture is uniform. It will look grainy at first but smooth out as you keep stirring.
Allow the mixture to cool, then cover and let rest at room temperature for 2 hours. It will set up and become quite stiff.
When you’re ready to use it, take a chunk and work it in your hands until it softens. From this point you can tint it with gel colors, roll it out and cut it with decorative cutters, or shape it any way you choose, like modeling clay; the chocolate will set once more as it cools. See our blog post, Modeling chocolate 101, for step-by-step instructions on how to make chocolate roses, letters, and other kinds of decorations.
Carmel Glue
INGREDIENTS • 200g caster sugar • 60ml cold water
METHOD
Put the sugar and water in a large, low-sided frying pan over a medium-high heat. Without stirring, bring to 320°F on a sugar thermometer. If you don’t have one, the syrup is ready when the sugar has dissolved, and it turns a light golden color.
Swirl the syrup gently in the pan to even out the color. Take the pan off the heat and leave to cool for a few moments to thicken slightly to the consistency of honey.
If the syrup begins to harden in the pan, put it back over a gentle heat until it has returned to the required consistency.
Gingerbread Cookies
INGREDIENTS • 3 ½ cups (440g) all-purpose flour • 1 teaspoon baking soda • 1/2 teaspoon salt • 1 Tablespoon ground ginger • 1 Tablespoon ground cinnamon • ½ teaspoon ground allspice • ½ teaspoon ground cloves • 10 Tablespoons (2/3 cup; 145g) unsalted butter, softened to room temperature • 3/4 cup (150g) packed light or dark brown sugar • 2/3 cup (160ml; about 200g) unsulphured or dark molasses • 1 large egg, at room temperature • 1 teaspoon pure vanilla extract
METHOD
In a large bowl, whisk together the flour, baking soda, salt, ginger, cinnamon, allspice, and cloves. Set aside.
In a large bowl using a handheld mixer or stand mixer fitted with a paddle attachment, beat the butter for 1 minute on medium speed until completely smooth and creamy. Add the brown sugar and molasses and beat on medium high speed until combined and creamy. Scrape down the sides and bottom of the bowl as needed. Next, beat in egg and vanilla on high speed for 2 full minutes. Scrape down the sides and bottom of the bowl as needed. The butter may separate; that’s ok.
Add the flour mixture to the wet ingredients and beat on low speed until combined. The cookie dough will be quite thick and slightly sticky. Divide dough in half and place each onto a large piece of plastic wrap. Wrap each up tightly and pat down to create a disc shape. Chill discs for at least 3 hours and up to 3 days. Chilling is mandatory for this cookie dough. I always chill mine overnight.
Preheat oven to 350°F (177°C). Line 2-3 large baking sheets with parchment paper or silicone baking mats. Set aside.
Remove 1 disc of chilled cookie dough from the refrigerator. Generously flour a work surface, as well as your hands and the rolling pin. Roll out disc until 1/4-inch thick. Tips for rolling—the dough may crack and be crumbly as you roll. What’s helpful is picking it up and rotating it as you go. Additionally, you can use your fingers to help meld the cracking edges back together. The first few rolls are always the hardest since the dough is so stiff, but re-rolling the scraps is much easier. Cut into shapes. Place shapes 1 inch apart on prepared baking sheets. Re-roll dough scraps until all the dough is shaped. Repeat with remaining disc of dough.
Bake cookies for about 9-10 minutes. If your cookie cutters are smaller than 4 inches, bake for about 8 minutes. If your cookie cutters are larger than 4 inches, bake for about 11 minutes. My oven has hot spots and yours may too—so be sure to rotate the pan once during bake time. Keep in mind that the longer the cookies bake, the harder and crunchier they’ll be. For soft gingerbread cookies, follow my suggested bake times.
Allow cookies to cool for 5 minutes on the cookie sheet. Transfer to cooling rack to cool completely. Once completely cool, decorate as desired.
Cookies stay fresh covered at room temperature for up to 1 week.
Extreme Chocolate Cake
Makes two 9” round cakes (double for this cake) INGREDIENTS (Makes one 10’ ROUND CAKE [and two 5”] – quantities are in parenthesis. Or one 11”x15”x2” sheet cake.) • 2 cups white sugar (3) • 1 3/4 cups all-purpose flour (2 2/3) • 3/4 cup unsweetened cocoa powder (1 ¼) • 1 1/2 teaspoons baking soda (2 ¼) • 1 1/2 teaspoons baking powder (2 ¼) • 1 teaspoon salt (1 ½) • 2 eggs (3) • 1 cup milk (1 ½) • 1/2 cup vegetable oil (¾) • 2 teaspoons vanilla extract (3) • 1 cup boiling water (1 ½)
METHOD
Preheat oven to 350 degrees F (175 degrees C). Grease and flour two 9 inch cake pans.
Use the first set of ingredients to make the cake. In a medium bowl, stir together the sugar, flour, cocoa,baking soda, baking powder and salt. Add the eggs, milk, oil and vanilla, mix for 3 minutes with an electric mixer. Stir in the boiling water by hand. Pour evenly into the two prepared pans. (For cupcakes,portion ¼ scant cups in each cupcake paper.
Bake for 30 to 35 minutes in the preheated oven, until a toothpick inserted comes out clean or 205F internal temp. Cool for 10 minutes before removing from pans to cool completely.