Cleaning Up After Yesterday

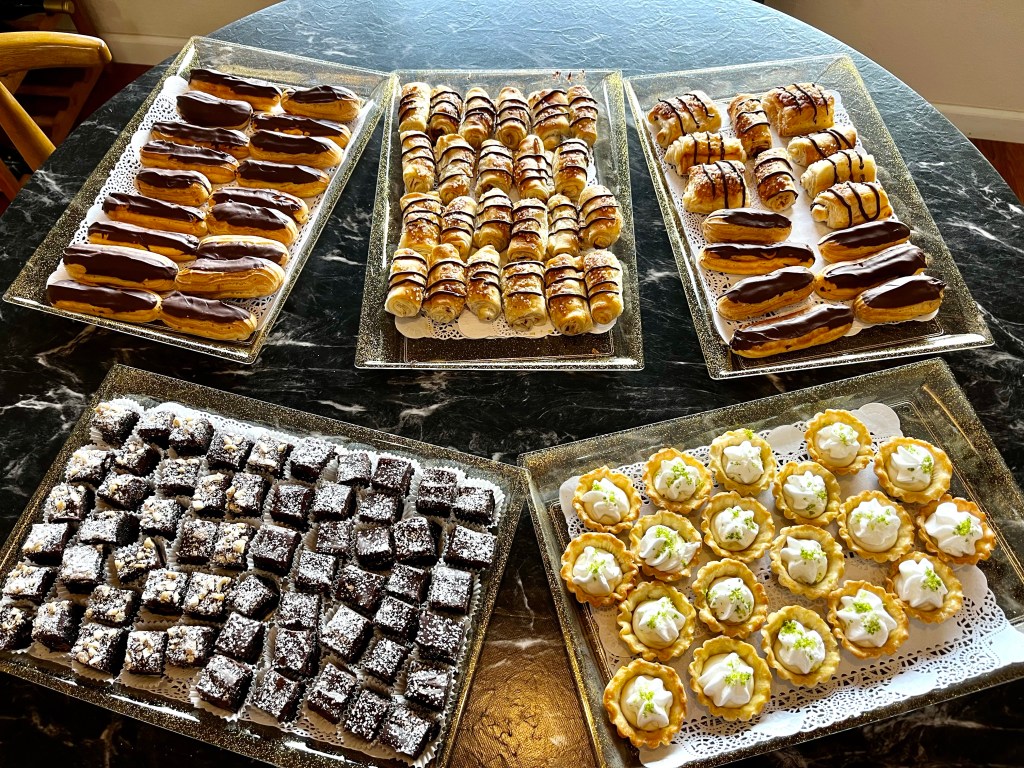
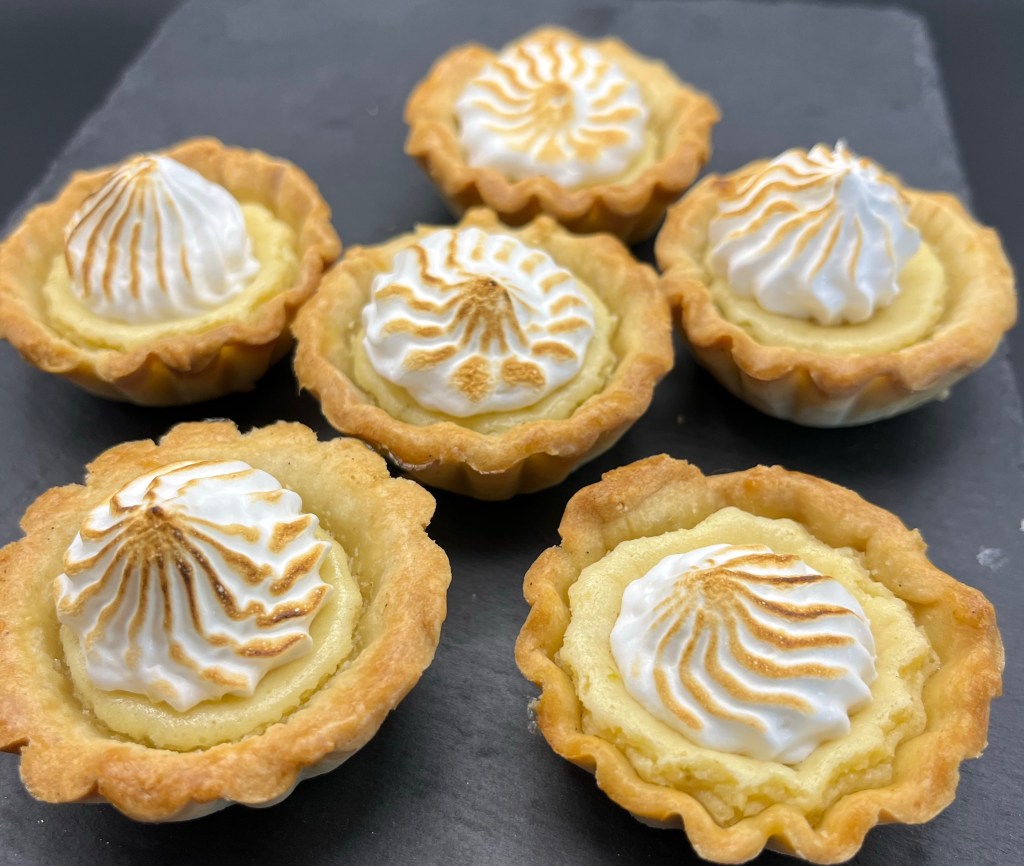
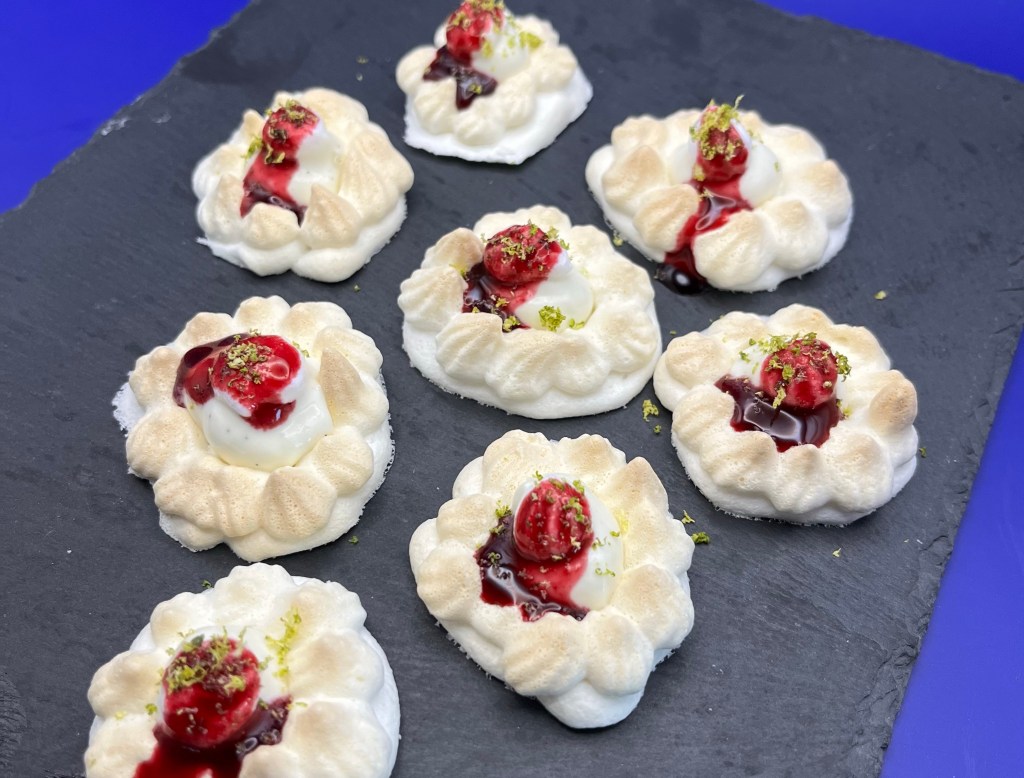
I had some key lime mousse left over from yesterday and didn’t want to waste it, so I made more key lime tartlets this morning. I did NOT have any tart shells left over so I decided to experiment with meringue “tart shells.” I needed to do that anyway as I am making them for Passover in April. I made some fresh blueberry syrup to add some color. I also need to “tart up” these tarts and the meringue is very sweet.

I also didn’t have room on my serving trays for all the eclairs I made so I finished them this morning.

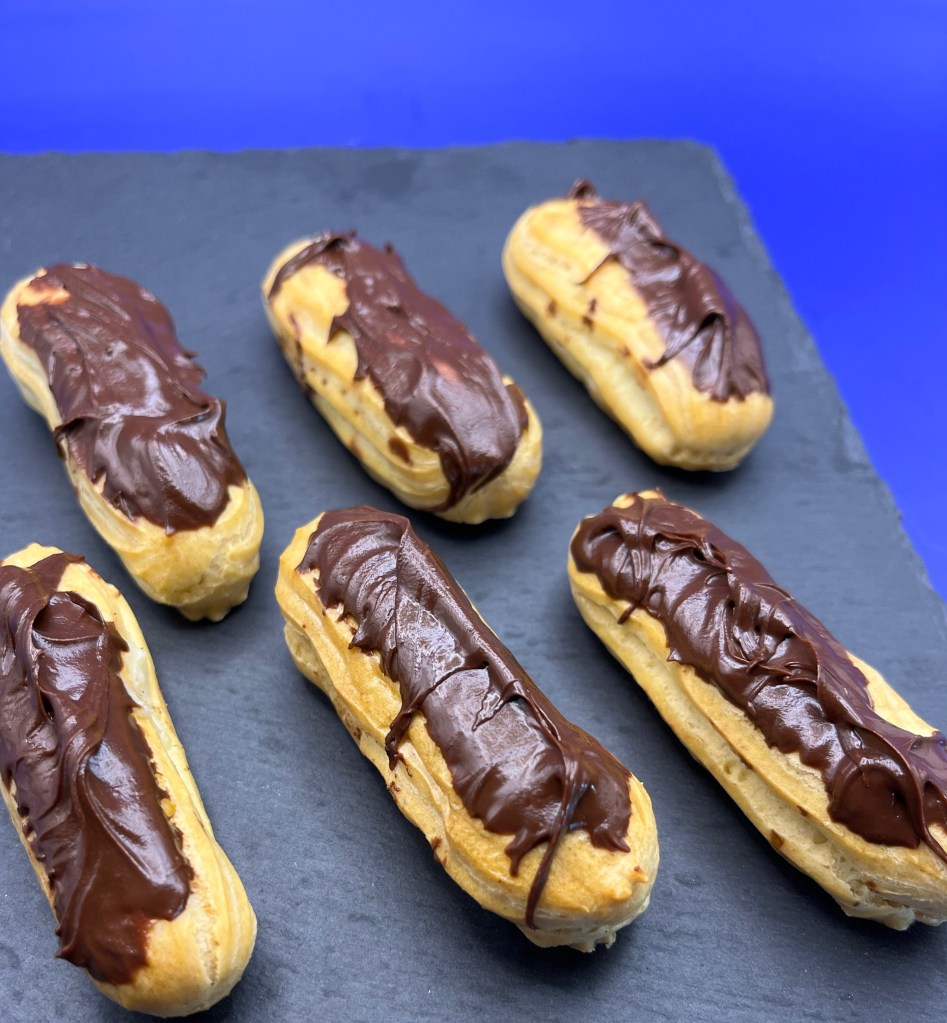
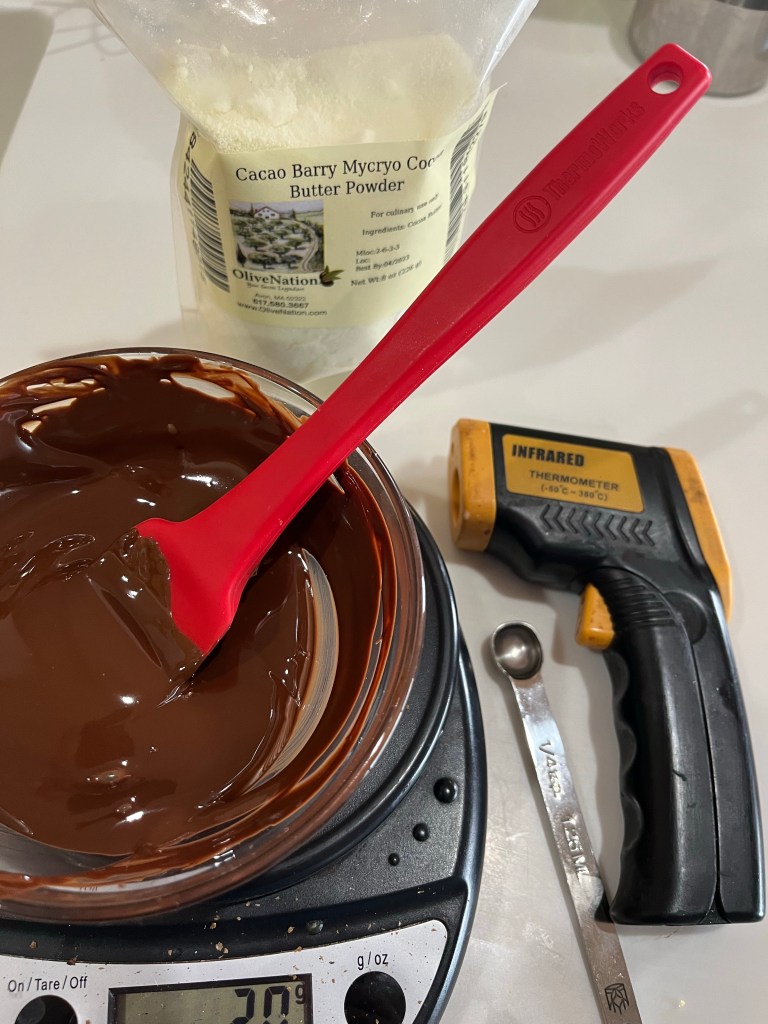
The chocolate was a little thick but I managed to coat the eclairs with a nice, thick layer of chocolate. It’s a shame.

Time to update the Next Up in DeDe’s Bakery!

Key Lime Mousse Meringue Tartlets

INGREDIENTS

MERINGUE
• 80g (or 0.4 cup or 6.5 Tbl) granulated sugar
• 30ml (or 1/8 cup) water
• 60g (or ¼ cup) egg whites (about 2 large egg whites)
• ¼ tsp cream of tartar
MOUSSE
• 1 ½ c. heavy cream
• ¼ c. powdered sugar
• 1 c. sweetened condensed milk
• 1/3 c. freshly squeezed key lime juice
• Juice of one lime
• Zest of the same lime
• 1 tsp. pure vanilla extract
• Key lime zest , for garnish

METHOD
ITALIAN MERINGUE

  1. Whisk the egg whites into a light and fluffy foam, using a stand mixer.
  2. Add the cream of tartar and continue whipping until you’ve got a glossy stable foam. It should stay in place if you turn the bowl upside down. Set aside.
  3. Add the granulated sugar and water to a pan and bring to a boil. Once all the sugar has dissolved, refrain from stirring. Continue boiling at moderate/high heat while continuously until the solution has reached 240°F, then remove from the heat.
  4. While SLOWLY beating the egg whites, gently pour the hot sugar solution into the whipped egg whites.
  5. Once all the sugar syrup is in, turn up the speed to high and continue whisking until the foam is lukewarm. This may take 15 minutes.

MOUSSE

  1. In the bowl of a stand mixer fitted with the whisk attachment, beat cream and powdered sugar into stiff peaks.
  2. Zest the lime, then squeeze and collect the juice.
  3. In a medium bowl, combine condensed milk, key lime juice, lime juice, lime zest and vanilla. Add to bowl of whipped cream. Gently fold in until just combined.
  4. Keep refrigerated until ready to serve.
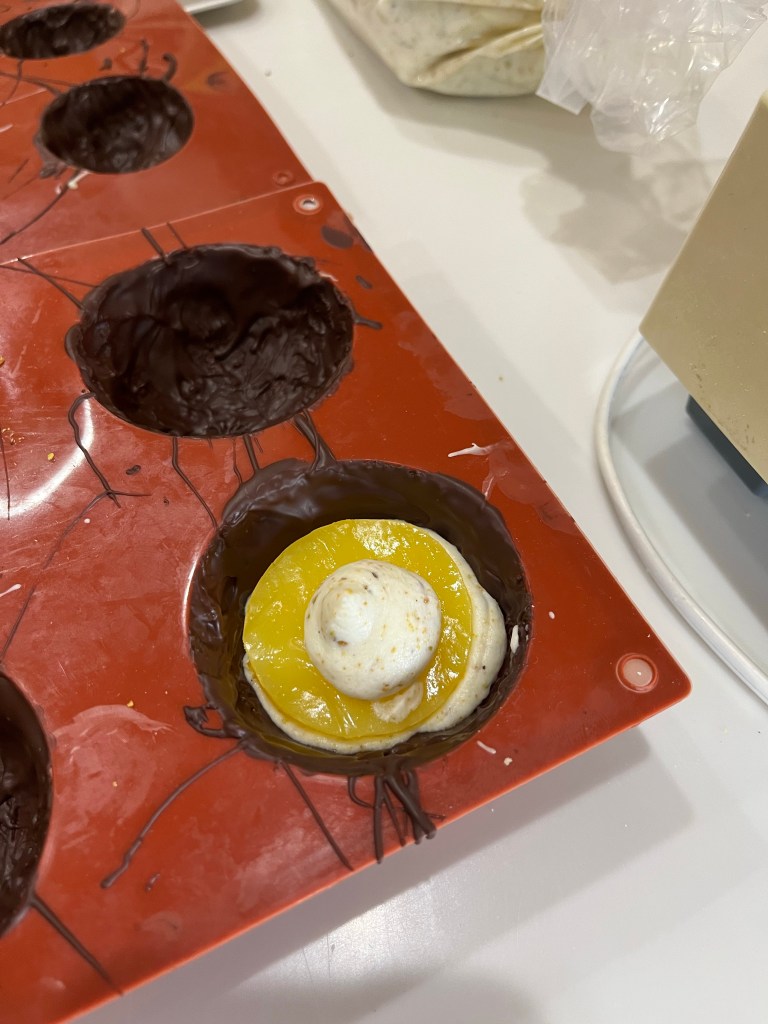
TARTLETS

  1. Pipe meringue into disks about ¼ “ thick and 3” diameter. Bake at 200F for 45 minutes, until they are dry to the touch.
  2. Remove from oven and let cool, then pipe kisses of meringue around the edges of the disks. Each kiss should be ¼” – ½” high. Bake at 200F for 45 – 60 minutes, not letting the tips of the kisses brown. Turn the oven off and leave the meringue in the oven to cool before removing.
  3. When cool, pipe the mousse into the well of each tart shell.
  4. Pipe (or place, see NOTE) a small kiss on each tart. NOTE: After making these tartlets I realized making individual small ( ¼” – ½”) diameter kisses could be placed on the piped mousse. Pipe them at the same time, with the same piping tip as the edges of the tartlets. Then, just place them on the piped mousse.)
  5. Spoon a small amount of berry juice (I used blueberry juice, but any tart juice would work.)
  6. Sprinkle some lime zest on top of the tart.
  7. Serve and enjoy.

Dede’s Bakery and Confectionery- Estd 2016

Our synagogue’s fundraiser is tonight and the administrator asked me to provide some of the deserts and something for the auction. To identify my goods I asked Dan to create a logo for me. For those who do not know, DeDe is my granddaughters name for me because they couldn’t pronounce Zayde (Yiddish for grandfather) when they were younger and it just stuck.

Over the last week or so I made and froze choux pastry for the eclairs and shells for the tarts. I made all the fillings yesterday and assembled everything this morning except the pain au chocolat which I made in its entirety this morning. (They don’t take very long.)

I made the chocolate covered caramels a few days ago, wrapped them and set them aside, (after sampling several.)

Key Lime Tartlets Re-revisited

I am making key lime tartlets for a Gala/fundraiser in a week and wanted to practice. It’s a good thing I did. The meringue never whipped to peaks. I binned the first attempt and made some minor changes to the second, which resulted in perfect, smooth, silky Italian meringue.

I used a kitchen blowtorch to brown the tops. The lime zest incorporated in the filling and lightly dusted on the top added the tartness to balance the meringue.

Key Lime Tartlets

Gluten Free suggestions at the end

INGREDIENTS
SHELL
• 100 g cold butter cut into small cubes
• 200 g all-purpose flour
• 60 g icing sugar
• ½ tsp vanilla
• ¼ tsp salt
• 2 eggs – 1 for the dough and the other 1 reserved for an egg wash (try egg white only for Almond flour.)

FILLING
• zest (grated rind) of 1 lime
• 4 large egg yolks
• 14-ounce can (397g) sweetened condensed milk, (1 1/4 cups)
• 3/4 cup (170g) Key lime juice or lime juice
• 1/8 to 1/4 teaspoon lime oil, optional
METHOD
SHELL

  1. Mix butter with sugar until well incorporated 3-5 min
  2. Add salt then vanilla
  3. Add egg and mix 3-5 min – for almond flour: suggest using only the egg white to reduce the moisture in the dough
  4. Stir in flour. Mix by hand until incorporated and forms a thick smooth(ish) sticky dough
  5. Cover with plastic and refrigerate for 30 min
  6. Pre-heat oven to 350 degrees
  7. Butter tartlet pans, or use non-stick pans
    For AP Flour
    a. Roll dough on floured surface
    b. Cut into circles 1” larger diameter than the mold
    c. Press into molds filling all parts of the mold
    For Almond Flour
    a. Roll dough between parchment paper to about ⅛” thick
    b. Freeze rolled dough still between parchment paper until firm: 20 – 30 minutes
    c. Cut frozen dough to rounds about 1” larger diameter than the mold. Cut all the rounds at once while still frozen. I used an offset spatula to remove the circles from the parchment paper. Keep the spatula clean.
    d. Lay tart dough circles over molds. This allows the dough to thaw slightly and be pressed into the molds and fill all crevices.
  8. Pinch off excess with wet fingers. (Dough is sticky)
  9. Prick holes in bottom and sides of formed dough
  10. Fill tarts with pastry weights (I put beans in mini cupcake papers
  11. Paint edges of the tartlet with the egg wash.
  12. Bake in preheated oven 350 deg F (175 C) for 6-8 min
  13. Remove pastry weights and bake an additional 4-6 minutes to dry the bottoms. Bake until the edges are begin to turn light brown
  14. Immediately remove from pans and cool on a wire rack

FILLING

  1. Whisk the lime zest and egg yolks at high speed of an electric mixer for about 4 minutes. The mixture will lighten in color and thicken somewhat, appearing similar to Hollandaise sauce.
  2. Stir in the sweetened condensed milk, mixing until smooth. Beat at high speed for 3 minutes; the filling will become slightly thicker and gain a bit of volume.
  3. Add the lime juice, stirring just to combine. The mixture will thicken again. Add lime oil to taste.
  4. PIPE the filling into the crust and return the tart (on the baking sheet) to the oven. Bake the tart for 12 to 18 minutes, until it appears set around the edges though still a bit wobbly in the center. The center should read about 145°F on a digital thermometer.
  5. Remove the tart from the oven and cool to room temperature. Refrigerate for several hours before serving.
  6. Once chilled, serve the key lime pies cold with whipped cream, or merengue and a lime slice or zest, if desired.
  7. Store leftover pies in the refrigerator (covered) for up to 1 week. If they last that long!

Notes
Make Ahead & Freezing Instructions: Up to 1 day in advance, you can prepare the crust ingredients and the filling ingredients separately. Store each covered tightly in the refrigerator until ready to assemble and bake. You can bake the key lime pies and store in the refrigerator for 1 day before serving. Key lime pies freeze well, up to 2–3 months. Thaw overnight in the refrigerator before serving.

Gluten Free:
Substitute Almond flour for AP flour or 1:1 Almond and coconut flours
Add 1 Tbl psyllium husk per cup of almond flour.

ITALIAN MERINGUE

INGREDIENTS
• 80g (or 0.4 cup or 6.5 Tbl) granulated sugar
• 30ml (or 1/8 cup) water
• 60g (or ¼ cup) egg whites (about 2 large egg whites)
• 20 g icing sugar

METHOD

  1. Whisk the egg whites into a light and fluffy foam, using an electric (stand) mixer.
  2. Add the icing sugar and continue whipping until you’ve got a glossy stable foam. It should stay in place if you turn the bowl upside down. Set aside.
  3. Add the granulated sugar and water to a pan and bring to a boil. Once all the sugar has dissolved, refrain from stirring. Continue boiling at moderate/high heat while continuously keeping an eye on the temperature.
  4. Once the solution has reached 121°C (250°F), take it from the heat immediately*.
  5. While SLOWLY beating the egg whites, gently pour the hot sugar solution into the whipped egg whites (this is where the stand mixer comes in handy!).
  6. Once all the sugar syrup is in, turn up the speed to high and continue whisking until the foam is lukewarm.
  7. Use the meringue immediately to top whatever it is you want to cover.

NOTES
Italian meringue can be made two days in advance and stored in the fridge until needed (covered with plastic wrap). Store in a piping bag, sealing the tip,

It’s Raining, And There Are Clouds In The Sky…

As I mentioned, there are (at least) three problems with rainy days. First, I can’t play golf! Second, if I can’t golf, I WILL bake and third, lots of rain equals lots of baking which results in and increased waistline, which doesn’t help my golf swing any.

I craved these perfectly puffy cinnamon rolls (recipe from King Arthur) for a while, and when QC causally mentioned them, it was only a matter of time before I was rained out (again.) These atmospheric rivers are bad for my golf, and my waistline.

This recipe makes nine 1.5” thick cinnamon rolls. As usual, I gave several away and am trying hard not to eat the rest while watching golf for the next two straight days.

Sadly, we aren’t expecting a golfable day for the next 5 days. So much time, so much to bake.

Supermarket Italian Bread

For some reason I had a craving for Italian Bread. To the best of my knowledge I never made King Arthur Baking’s Supermarket Italian Bread, so it was time to give it a try.

I followed KAF’s (I know it should now be KAB’s, but old dogs and all that…) recipe and made two loaves almost identical both inside and out to what KAF published on their website.

Very nice flavor, good crumb and great crust!

Italian Supermarket Bread

KAF
INGREDIENTS

Dough
• 4 cups (482g) AP Flour
• 2 tablespoons (21g) potato flour or 1/4 cup (21g) dried potato flakes
• 1/4 cup (35g) nonfat dry milk
• 2 teaspoons salt
• 2 teaspoons sugar
• 2 teaspoons instant yeast
• 1 1/3 cups (301g) lukewarm water
• 3 tablespoons (35g) olive oil (I use spray olive oil)
Topping
• 1 egg white, beaten with 1 tablespoon water, or substitute Quick Shine
• sesame seeds

METHOD

  1. In your stand mixer bowl combine the yeast, sugar and water and allow to rest for 10 minutes
  2. Add half of the flour and all of the rest of the dough ingredients till cohesive. Add the rest of the flour mixing between each addition
  3. Knead the dough for 5 to 8 minutes, until it’s smooth and supple, adding more water or flour as needed.
  4. Cover the dough and allow it to rise for 1 hour, or until it’s doubled in bulk.
  5. Transfer the dough to a lightly greased work surface and divide it into two pieces. Shape each piece into a smooth 16″ log. Place the logs into the two wells of a lightly greased Italian bread pan, cover, and let the loaves rise until very puffy, about 1 hour.
  6. Brush the loaves with the egg wash (or spray them with Quick Shine), then sprinkle heavily with sesame seeds. Slash the loaves diagonally, making 3 slashes in each, and immediately put them in the oven. Bake in a preheated 400°F oven for about 25 minutes, until the loaves are golden brown. For the crispiest crust, turn off the oven, prop the door open, and allow the bread to cool in the oven

Roadhouse Rolls

Here is the next bake of the “Next Up” list!

During our “Springsteen Concert Tour” we stopped at a Logan’s Roadhouse for a meal. (We love roadhouse rolls.) Logan’s rolls are formed into round, buttery, enriched rolls, while Texas Roadhouse rolls share the same characteristics but are formed as squares. I opted for round.

In a compromise I rolled the dough into a rectangle, 12” x 8”, and cut it into 24 pieces (6×4). I then rolled each into a sphere using the same technique I used to make dinner rolls. (Place the roll on a barely floured surface, cup you hand over it and roll in a circulate motion until it forms a nice ball and there are no creases.

The taste was spot-on, but QC felt they weren’t as light and fluffy as the commercial roadhouse rolls. Next time I will make the dough a slightly higher hydration and perhaps proof a little longer. Any other suggestions are welcome!

Roadhouse Rolls

INGREDIENTS
• 1 (2 ¼ tsp) packet packet active dry yeast
• 1 ¼ c. warm milk (about 105-110 degrees F)
• ⅓ c. granulated sugar
• ¼ c. unsalted butter room temperature, (½ stick)
• 1 large egg room temperature
• 1 tsp kosher salt
• 3 ½ – 4 c. all-purpose flour plus more for kneading
• 3 Tbsp unsalted butter melted

METHOD

  1. In your stand mixer bowl, add milk and sugar, sprinkle yeast over it.
  2. Let the yeast set until foamy, about 5 minutes.
  3. Then add ¼ cup butter, egg, salt and 2 cups flour to the yeast mixture. Beat on medium speed until batter is smooth.
  4. Gradually add flour until soft ball of dough forms. Then increase speed on mixer to medium high and beat for 2-3 minutes longer. Dough should be tacky, but not sticky. If too sticky, add more flour 1 tablespoon at a time.
  5. Lightly grease large bowl and place dough in ball, turning once to coat. Cover the bowl with clean dish towel and set in warm place to rise until doubled in size, about 45-60 minutes.
  6. Punch the dough down dough gently. Lightly flour the work surface and turn dough out of bowl. Knead lightly if necessary.
  7. Let set a few minutes while you prepare the baking sheets with a silicone mat or by spraying with non-stick cooking spray.
  8. Roll dough out to 12×8 inch rectangle, ½ inch thick.
  9. Cut the dough into even pieces using a pizza cutter so you have 24 pieces of dough. It’s optional to roll the squares into spheres if you like.
  10. Transfer rolls to prepared baking sheets, separated by at least 1”. Cover with dish towel and let rise in a warm place until almost doubled in size, about 45-60 minutes.
  11. 20 minutes prior to rising being done, preheat oven to 350 F.
  12. Place the rolls in the preheated oven at 350 F. Bake rolls for 12-15 minutes or until golden brown.
  13. Remove from oven and brush with melted butter.

Happy Valentine’s Day 2023

For your (meaning our) indulgence I prepared filled chocolates and a tri-colored macaron tower for this years Valentine’s Day.

Macaron Tower

I had problems with the macaron tower. Being frugal, I used left over almond flour. Mistake! The flour was too coarse, even after running through a fine mesh sieve. The resultant batter was grainy and too thick to pipe properly. However, the taste was fine and they were crisp on the outside, had good legs, and were chewy on the inside.

I thought building the tower on my parchment-lined-styrofoam-cone would be easy if I started with a nice even base, then add macarons in a logical sequence row by row. Let’s just say it failed, not due to any ineptitude on my part but rather from geometrical issues with the cone. (It becomes smaller as you go up. Who knew?) I deconstructed the tower (breaking several macarons in the process) and re-built it by placing a single color in a spiral from bottom to top. (The nice teal one.) This method was better, but next time (and there will be a next time) I need to compensate the spiral with basic Euclidean geometric principles.

The teal macarons are filled with homemade plum jam, the pink with plum/raspberry jam and the white with hazelnut butter. They all taste good, but the hazelnut butter didn’t adhere well and the cookies tended to separate. QC suggests using a tart filling like lime or lemon curd to balance the sweetness of the macaron.

Filled Chocolates

I made three trays of chocolates, each with a different shape. To make them a bit special I piped lines of tempered white chocolate in two of the molds and let it cool before filling with tempered 64% chocolate. For the third, I piped some white chocolate into the bottom of each well and used a toothpick to made a star pattern. It worked reasonably well but led to my major mistake with this treat.

I attended a seminar on working with chocolate in Hawaii last year. The most important takeaway was the use of Mycryo to temper chocolate. I changed how to heat the chocolate and now use the microwave. 200g of dark chocolate requires 90 – 120 seconds with a 1000w microwave. After 60 seconds use small bursts and check the temperature between each one. If the temperature exceeds 104F it’s ok, just don’t go too high.

I failed to allow enough time between my golf round in the morning and our traditional happy hour dinner/drinks at our favorite pizza/bar. I tried to un-mold the chocolates too soon and broke many. In fact only six of the orange jelly confections survived. I should have allowed time to put the in the freezer for a few minutes to help them release. Oh well.

Notice the lack of shine on the macarons, and the points. Plus they were too thick, but had good feet. You can see a chip in the chocolate in the center candy, but also see how the white chocolate lines came out.

The confection with the faint stripes (left) are filled with fresh orange juice jelly, the hearts with soft caramel and the dome shaped ones (right) with coconut cream (think the inside of a Mounds bar. )

Overall, everything tasted good and that’s the most important!

JAFFA DOME “CAKE”

I had a few oranges left over from “poaching” my neighbors, John and Amy’s, trees. Luckily, I saw a Jaffa cake on GBBO which gave me the idea of created a Jaffa-ish dessert. Populate in Britain, Jaffa cakes include sponge, orange and chocolate.

I also had some pistachios left over from another project so I made the “cake” a pistachio flavored one. Actually, I didn’t make a cake, I made cookies, where they should have been biscuits. Whew! That’s a convoluted way to say I made pistachio flavored – mouse filled – cookie based tempered chocolate domes. Hmmm, that’s not much shorter, is it?

The orange paired nicely with the chocolate but the combination of those flavors overpowered the pistachio. I made some plain pistachio cookies with leftover dough and they were excellent. To make the pistachio cookies leave the rolled dough about 1/4” thick.

JAFFA DOME “CAKE”

Procedure Outline:

  1. Make orange jelly 1/8” thick – refrigerate
  2. Make whipped cream – refrigerate
  3. Streak silicone molds with melted white chocolate – allow to cool
  4. Coat white chocolate streaked silicone molded with tempered dark chocolate – 2x – allow to cool between each coating
  5. Make pistachio biscuit 1/8” thick – allow to rest a couple of minutes
    a. While warm, cut into appropriately sized disks to fit in silicone molds –
    b. allow to cool. They should snap like a biscuit.
  6. Make vanilla mousse
  7. Fill domes ~ ¼ full with mouse (piping is easiest)
  8. Insert appropriately sized cut disk of orange jelly into each mold
  9. Cover jelly with vanilla mousse
  10. Fit pistachio biscuit over bottom of mold
  11. Cover biscuit with vanilla mousse
  12. Pipe tempered chocolate around the edge of the bottom.
  13. Cover bottom with a layer of tempered dark chocolate – approx 1/8” thick.

(Note: my orange jelly and biscuit were too thick (1/4” each) so I reduced the amount of mousse in each cup and couldn’t cover the bottom of the dome with chocolate. The directions reflect appropriate changes. Next time!)

Orange Jelly

INGREDIENTS

  • 600 ml (2½ c) Orange juice, about 5-6 oranges
  • Orange zest from 3 oranges
  • 50 g ( ¼ c) Sugar
  • ¼ teaspoon Salt
  • 65 g( ½ c) Cornstrach
    METHOD
  1. Grease 9-inch (24cm) square pan or similar size pan with oil and set aside.
  2. Zest two oranges and place it in a sauce pan.
  3. Squeeze the juice from the oranges and measure 2½ cups (600ml). pour the juice into the pan.
    Add the sugar, salt and cornstarch.
  4. Place the saucepan over medium heat and cook, stirring constantly until thickened, about 6-8
    minutes.
  5. Pour the mixture into prepared pan, spread to 1/8” thick, allow to cool to room temperate, then refrigerate for at least 2 hours, or overnight.

Vanilla Mousse – Vegetarian

INGREDIENTS
WHIPPED CREAM – YIELDS 1 ½ CUPS OF WHIPPED CREAM
• 1 c whipping cream
• 4 tbl confectioners sugar
• 1 ½ tsp Cream of tartar
• 1 tsp vanilla
WHITE CHOCOLATE
• 1 cup white chocolate chips
• 3 tbl whipping cream
AGAR AGAR
• 2 tsp Agar Agar
• 2 tbl warm water

METHOD

WHIPPED CREAM

  1. Before beginning with the recipe, place the mixing bowl and whisk in the freezer for at least 10 minutes to chill.
  2. Once the bowl has chilled, add heavy cream and vanilla and beat on low speed until the cream starts to thicken slightly.
  3. Add the cream of tartar and powdered sugar and beat with increasingly higher speed until stiff peaks form. Once done, set it in the fridge to chill.

AGAR AGAR MIX

  1. Mix 2 tsp Agar agar powder with 2 Tbl lukewarm water
  2. Whisk to combine
  3. Let set 4 – 5 minutes for the agar agar to bloom

VANILLA MOUSSE

  1. Heat the white chocolate in a glass bowl in the microwave. Start with one minute, stir. If not melted try 15 seconds and stir again, then 10 seconds.
  2. Add agar agar mix and stir for 5 minutes. It will be thick like jelly, that’s ok. The white chocolate and agar agar will turn smooth and shiny.
  3. Add 2-5 Tbl warm milk and mix until the chocolate is thick but runny. Don’t add too much
  4. If desired add a few drops of white food coloring to lighten the yellowish mixture and mix well
  5. Gently fold the cool to touch white chocolate [and agar] mixture into the cool whipped cream until combined. Do not beat and deflate the mousse
  6. Add remaining 1/3 cup of ground pistachios and gently fold into vanilla mousse.

Pistachio Shortbread Cookie

INGREDIENTS
• 1 cup (230g) unsalted butter, softened to room temperature
• 1/2 cup (100g) granulated sugar
• 1/4 cup (50g) light brown sugar
• 1 teaspoon pure vanilla extract
• 1 teaspoon salt
• 2 and 1/4 (281g) cups all-purpose flour
• 1 cup (100g) finely chopped pistachios, divided

METHOD

  1. Preheat oven to 325°F (163°C). Line a double layer cookie sheet with parchment paper.
  2. Using a hand mixer or a stand mixer fitted with paddle attachment, beat the butter on high speed until completely smooth, about 1 minute. Add the granulated sugar and brown sugar and beat together until smooth and creamy, about 1 minute. Add the vanilla, salt, and flour and beat on low speed, gradually increasing to high speed as the mixture combines. Don’t over mix. Add 2/3 cup of the finely chopped pistachios, reserving the rest to add to the mousse.
  3. Roll the dough out between sheets of parchment paper on the cookie sheet.
  4. Bake the shortbread for 15-20 minutes or until lightly browned on top and around the edges.
  5. Remove from the oven and allow to cool slightly.
  6. Cut appropriate sized circles. Be sure the circles are ¼” less diameter than the molds, allowing 1/8” space around the cookie for chocolate.
  7. I ended up cutting 1/8” bits off the circumference of the large cookies.

No Nothin’ Rustic Bread

I often make a no knead bread which uses the stretch and fold technique and is delicious, has a good crumb, crust and air holes.

I saw this recipe in my Facebook feed and I was skeptical it could compete with my usual recipe/method.. After a trial bake it was every bit as good as my go-to recipe with NO stretch and fold or kneading. Prep time was about 10 minutes. Total “hands-on” time was about 15 minutes.

We all know you don’t need to knead (I love saying that) to create gluten. Gluten development starts on hydration of the dough. Thorough mixing equals good hydration which enables gluten formation.

I mixed the three ingredients (plus water) with my danish dough whisk assuring all the dry ingredients were well hydrated before covering and placing in the fridge overnight.

In the morning I let the dough warm to room temperature and rise for about 3 hours. I placed it on a well floured parchment paper, folded it into a round boule, flipped it over so the folded side is down. Before placing in the Dutch oven I cut a deep X in the top.

No Knead Bread – 3 Ingredient

INGREDIENTS

  • 3 1/2 cups bread flour
  • 2 teaspoons sea salt
  • 1 teaspoons instant yeast
  • 1 2/3 cups water (100 degrees F

METHOD

  1. Mix dry ingredients in a large bowl. Using a wooden spoon or Dutch dough whisk blend warm water into the dry ingredients. This dough will be wet and shaggy, also very forgiving. Mix until
    no dry flour is seen. Cover with plastic wrap and put a towel on top to proof for 8-10 hours at room temperature or for several days in the fridge.
  2. If refrigerated, take the dough out and place on parchment before heating the oven so it gets to room temperature, then preheat the oven to 450 F with the covered Dutch oven inside.
  3. Dust a large square of parchment paper with flour and turn out the dough carefully. (It will be sticky but try to preserve the proof.) Dust the top with flour and using a dough scraper gently
    fold the dough over and create a round boule. Use the sharp edge of the scraper to score lines in the dough. Cover with the plastic wrap and let rest until pot and oven are up to temperature.
  4. Remove the pot from the oven. Place the parchment paper and dough into the Dutch oven and replace lid. Bake, covered, for 35 minutes. Then, anywhere from 5 to 10 minutes uncovered
    (this is a personal taste issue about the crispness of the crust). Let the bread rest 30 minutes. It will be hard, but you will wreck the loaf by cutting into it immediately.

In The Beginning…

ABatteredOldSuitcase.com

was created for a post-wedding cake. Daniel and Frances were married in Sacramento, then honeymooned in Egypt. Upon returning to the States they stopped by South Florida for a second reception for our friends and family who couldn’t travel to California. I made my first “wedding” cake for that party. It shares the colors of Boston College and the University of Florida. I then continued making cakes for various occasions before expanding into pastries and entrees.

ToaHotelSomeplace.com

is my writer’s portal. Short stories and novellas are described and listed with links to Amazon and Kindle for purchase, or Kindle Unlimited Members to read for free. Backstreets, my collection of imaginary backstories of a number of my favorite songs will be available shortly.

GhostsThatSellMemories.com

2018 saw Fran and Dave’s Big Adventure as we took three weeks to drive across country, from Sacramento to Vermont. I blogged each day, pretending our Poodle/Havanese rescue Rosalita was with us. This turned into the book “Road Trip! Rosie Goes ‘There and Back Again.’” I wrote it primarily for the friends we visited on the trip and my family members. GhostsThatSellMemories contains my trip blog and additional travel adventures post Road Trip. I also used Ghosts to catalog our fall 2022 trip to Italy and France. I posted every day for about three weeks. A lot of fun, but a bit of a chore after a while. (Header photo of our hometown, Middlebury, Vermont by my life long friend David Griggs.