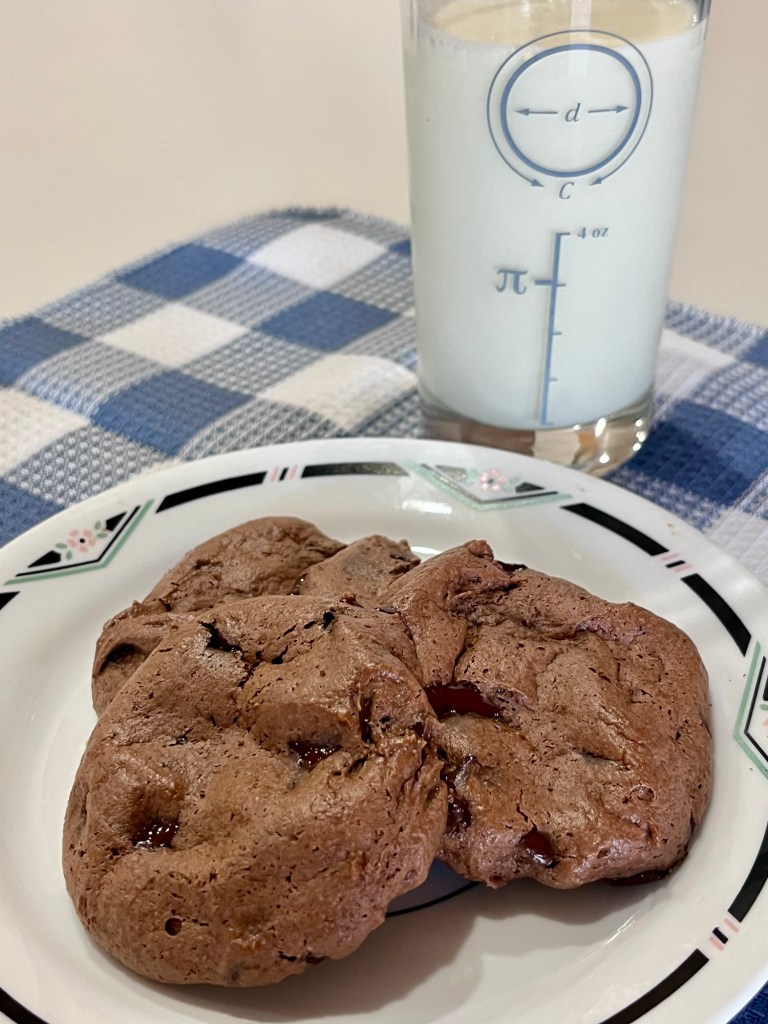
This will be my last Gluten Free recipe (at least for now.) It is a sandwich bread from White Gold Gluten Free flour.
I used their recipe with minimal changes (Calcium free milk and butter replacing the original ingredients.) I also use an egg-white wash rather than a full egg wash.
The crumb and texture are excellent and the flavor approaches a wheat flour loaf. Use a digital thermometer and remove from oven when the interior temp reaches 200F.
(Tent the bread when it browns at about 20 minutes of baking.)
Gluten Free Sandwich Bread (White Gold)
INGREDIENTS: • 1 package (1.1 Lb) Extra White Gold gluten free bread flour • 1 Tbsp. dry yeast (1 envelope) • 2 tablespoons honey • 3 eggs • 1 c. lukewarm almond milk • 3 Tbl softened butter (replacing ¼ cup vegetable oil) • ½ tsp salt (replacing 1 ½ tsp. salt) • 1 egg for egg wash • Sesame seeds (optional)
METHOD:
Add the flour, honey and yeast to a stand mixer bowl. Mix for 3 minutes with a paddle attachment.
Add the eggs and almond milk and mix for 3 minutes. (NOTE: I used ¼ cup heavy cream and ¾ c 2% calcium free milk.)
Add butter (or vegetable oil) and salt and mix on low speed for 4 minutes. The dough should be sticky.
Let it rise for 90 minutes, in the mixer bowl, covered, in a warm dry place. (Such as a proofing oven)
Pour/scape the dough in a bread loaf. (A narrower bread pan will help shape the bread.)
Let the dough rise for 20 minutes.
Pre-heat the oven to 375 deg. Place a shallow dish in the lower part of the oven
Brush the bread gently with an egg wash and sprinkle sesame seeds (optional).
Place the bread pan on a center rack and pour 1 cup of water into the shallow dish.
Bake for 40-45 minutes, until golden brown. (Don’t over bake!)
Continuing the thread of gluten free bakes, this one provides a nice gluten free snack or breakfast without being “breads.”
The only changes I made to the original recipe are including xanthan gum and substituting milk and cream for almond milk.
Gluten Free Berry Drop Scones
INGREDIENTS
2 1/2 cups Bob’s Red Mill Gluten Free AP flour
1 tablespoon baking powder • 3/4 teaspoon kosher salt • 1/3 cup sugar • 1 ½ tsp xanthan gum (optional) • Zest of 1 small lemon • 1/2 cup vegetable shortening chilled and cut into cubes • 150-175g fresh raspberries • 1 cup almond milk (See NOTE below) • Coarse or turbinado sugar for topping
METHOD
Preheat oven to 400F. Line a baking sheet with parchment paper.
In the bowl of a food processor, add the flour, baking powder, xanthan gum (optional), salt, sugar and zest. Pulse a few times to incorporate.
Add the cubed Crisco and pulse to incorporate. The mixture should resemble very coarse sand.
Empty the flour mixture into a mixing bowl. Add the almond milk and stir until just barely incorporated. (NOTE: I use ¼ c heavy cream and ¾ c 2% calcium free milk)
Gently fold in the berries. It’s fine if the raspberries break up a little – it adds a nice pink stain to the dough. The dough should just be moist, not wet, but also not crumbly or powdery looking. If it looks too dry, add a tablespoon of cold water.
Spoon (I used my hands, wetted if necessary to form small balls of dough) the dough into 9-12 equally sized pieces on the parchment lined baking sheet. Sprinkle some coarse or turbinado sugar over the top, if desired.
Bake for 16-19 minutes, rotating the pan halfway through. The scones should be lightly golden and cooked through.
Cool in the pan for 5-10 minutes then carefully remove to a cooling rack.
Continuing my gluten free string, this is an artisan bread recipe (mostly) from Kim, the creator of Kim’s Gluten Free Bread Flour.
While preparing the dough I was skeptical of the outcome. The dough was VERY wet (why wouldn’t it be with 100% hydration?) It fermented well and rose as expected but the shaping and proofing was… challenging.
I forgot that the best way to prepare the dough for proofing is to stretch and fold it in a bowl, rather than knead it on a floured surface. I made the change to Kim’s method below.
I also thought that after proofing the dough was very wet and wouldn’t score well, but I was wrong. I also thought that the scored bread wouldn’t have any oven spring, but was also wrong. I also, also thought that adding an extra 10 minutes to the baking time would be sufficient, but was also, also wrong. It probably needed another 30, or even 40 minutes for a total of 90-100 minutes. Not an also, but I should have taken the breads temperature near the end of the bake, but I didn’t, resulting in an underbaked center.
The taste was good, definitely LIKE bread, but certainly not like a typical wheat/gluten bread. The crumb and texture was good, just different. For our gluten free friend, she thought it was wonderful, besides all its faults because it was, indeed bread.
Gluten Dairy Soy Free Artisan Bread
INGREDIENTS • 3 cups (420 g) Kim’s gluten free bread flour blend • 1½ tsp xanthan gum (in addition to what’s already in the blend) • 1 ½ tsp psyllium husk powder • 1 tbsp (9 g) instant/rapid rise/fast-acting yeast (not active dry yeast) • 1 tsp kosher salt • 1¾ cups (420 ml) water* • 2 tbsp (26 ml) olive oil • 1 tbsp (21 g) honey
METHOD
In the bowl of a stand mixer fitted with the dough hook, add all dry ingredients and whisk using a handheld wire whisk. Add the honey, olive oil, and water. Place on mixer and mix briefly to incorporate. Turn the mixer up to medium high and knead for 5 minutes. Remove the dough hook and scrape the dough into a cohesive mass using a plastic dough scraper or a rubber spatula (or scrape into another bowl). Cover and place the bowl in a warm, draft-free area and allow it to rise (proof) for 1-2 hours, or until doubled in volume.
Refrigerate for at least 6 hours, preferably overnight, but up to 10 days.
On baking day, remove the dough from refrigerator and dump it out onto well-floured surface.
Loosely cover with plastic wrap (the piece that covered the bowl in the fridge.) Let the dough warm to room temperature.
Place the dough in a medium sized bowl and stretch and fold until fairly smooth, wetting your fingers as necessary. It will be a somewhat sticky dough so keep a small bowl of water on hand to wet your fingers.
To shape into a boule, simply form into a round ball, pulling the dough up and under the ball and pinching on the bottom. Place on parchment paper. To shape into a baguette, smooth the dough and roll into a rope shape, tapering it at the ends, adding more flour as necessary. Roll out as thick or thin as you’d like and as long as you’re able to fit in your oven (make sure it will fit on your pizza steel or stone). Place it on a sheet of parchment paper.
Place the loaf or loaves, covered loosely with plastic wrap, in a warm, draft-free area to rise until visibly puffed and slightly larger, but not doubled in size, about 1/2 to 1 hour. This time will vary depending on the warmth of your proofing area. DO NOT over proof!
BAKING STEEL OR STONE METHOD: Set up your oven for baking. Place a baking steel or stone (or overturned baking sheet) onto the middle rack with a shallow pan on a rack underneath. Preheat the oven to 450° F.
DUTCH OVEN METHOD: Place a Dutch oven with a tight-fitting lid into the oven and preheat it to 500° F. You won’t need the shallow pan with steam as enough steam will be created in the Dutch oven once the bread goes in. NOTE: This will only work with boules or loaves that can fit into the Dutch oven. If you’re making a longer batard or baguette, you’ll need to use the first method.
When the dough has finished rising and is visibly puffed, run a serrated knife under hot tap water and cut slits in the dough swiftly but uniformly, about ½-¾ inch deep.
BAKING STEEL OR STONE METHOD: Fill a measuring cup with one cup of very hot water (from the tap is fine). Using a pizza peel (paddle), slide the loaf (or loaves) onto the baking steel (or stone), parchment and all. Immediately pour the cup of very hot tap water into the shallow pan. Quickly shut the oven door.
DUTCH OVEN METHOD: Remove the lid carefully and carefully lower the dough, parchment and all, into the Dutch oven. Replace the lid and shut the oven door. Immediately reduce the temperature down to 450° F.
BAKING STEEL OR STONE METHOD: Bake for about 30 minutes for baguettes, or about 40 minutes for boules, OR longer for larger boules (some larger boules can take up to an HOUR or more). If the loaves are getting too browned, you can cover them loosely with foil. The loaves will look crusty and done on the outside, but will feel light when picked up. If they feel heavy, they’re not done yet. Allow them to bake for another 5-10 minutes and then check again, picking up the loaf with two gloved hands. If they’re still feeling heavy, allow them to bake for another 5 minutes and check again.
DUTCH OVEN METHOD: Bake the bread for 60 minutes with the lid on. Remove the cover and continue to bake for another 20 minutes. Check for doneness with a digital thermometer. The bread will be done when the temperature in the center is 200-205F..
Remove from the oven and place on a cooling rack. Allow to cool COMPLETELY before cutting (or it will be gummy on the inside).
Kim’s Gluten Free Bread Flour Blend
Yield: 700g (5 c)
INGREDIENTS • 285g Bob’s Red Mill potato starch • 250g superfine white rice flour (DON’T use regular rice flour, ie Bob’s Red Mill) • 75g Tapioca flour • 75g Whey protein isolate or egg white protein. • 15g Xanthan gum
METHOD
Weigh all ingredients and add to a stand mixer bowl
I was not a fan of my previous pretzel experiment using KAB Measure For Measure gluten free flour. While the taste was acceptable, the texture was wrong and the resulting pretzels (both dough and baked) were very fragile. That batch ended up being binned.
This batch used Kim’s Flour Blend, the flour used to make the Artisan nGDS bread a few days ago. This flour provided the correct texture and dough strength for the pretzels to hold their shape, although the taste was not as close to a traditional pretzel as the Measure For Measure flour. As an extra precaution I cut the parchment paper under each un-baked pretzel and used a large spatula to carefully slide the pretzel and paper into the alkaline bath. The paper slid off the boiled pretzel and was discarded.
This recipe required a longer bake time. Depending on your oven, bake 9 to 10 minutes, rotate the baking tray, then bake another 9 to 10 minutes.
nGDS Soft Chewy Pretzels with Kim’s Flour
Ingredients: • 3 cups (420g) Kim’s blend GF flour – weighed or poured & leveled • 1 ½ tsp xanthan gum • 1 ½ tsp psyllium husk powdered • 1 tbl active dry yeast • 1 tsp salt • 1 cup water • 3/4 cup almond milk • 2 tbl olive oil • 1 tbl honey • 3 ½ tbl red palm and coconut oils shortening (Nutivia) melted – cooled slightly
Directions:
Heat the water in the microwave for 20-30 sec to achieve a temperature of about 120-130 deg then combine with the cold milk in a small bowl for a resulting solution temperature of 110 to 115 degrees F. Add the sugar and salt to the warmed water and milk and stir to combine. Sprinkle in the yeast and mix with a fork. Allow the mixture to sit for about 5 minutes or until it becomes foamy.
Pour the foamy mixture into the bowl of a stand mixer fitted with a dough hook and add the melted, cooled, unsalted butter and flour. (I add the flour a cup at a time to be sure it mixes well.) Mix on low speed for until combined and no dry flour remains in the bowl. Scrape the bowl as needed. Continue to mix for about another 7 minutes or until the dough pulls away from the sides of the bowl and is smooth. Scrape the dough from the hook if it comes up to far. Note: The dough may begin to pull away from the bowl after only 2 minutes, but may look a bit pulled or shaggy and still be sticky. It is not done kneading until it is smooth to the touch and no longer sticky.
Remove the dough from the bowl and form into a ball. Wipe out the bowl, if necessary and grease it with 1-2 tablespoons of oil. Place the dough ball back into the bowl and turn over a couple of times to coat thoroughly with the oil. Cover the bowl with a dish towel or plastic wrap and place in a warm area , free from drafts or cool air (a microwave, turned off is a good location), for about 1 hour, until the dough has risen and doubled in size.
Refrigerate covered for at least 6 hours, preferably overnight, but up to 10 days.
On baking day, remove the dough from refrigerator and dump it out onto well-floured surface. Loosely cover with plastic wrap (the piece that covered the bowl in the fridge) and let the dough warm to room temperature.
When the dough is ready, preheat the oven to 450 F and position the oven rack in the upper third of the oven. Line a large (15″ x 20″) baking sheet with parchment paper and spray with Bakers Joy. Set aside. Note: You may need 2 baking sheets to avoid crowding the pretzels. If only one small, puny sheet is available, make one batch of pretzels and keep the remaining dough covered, so it does not become dry. Between batches, allow the baking sheet to cool, before filling with remaining pretzels.
Place in proofing oven (or other draft free, warm location such as an oven, turned off, with the light on) for 1 hour
In a large, wide pot (6-8 quarts) add 8 cups of water, baked baking soda and malt powder. Stir to combine and bring to a full boil. Place a plate lined with paper towels nearby, as well as the kitchen spider or slotted spoon.
In the meantime, dampen a kitchen towel with water and set aside. Heavily dust your work surface with Kim’s Blended Flour, remove the dough from the bowl, place it on the work surface and divide into 8 equal pieces. Cover the pieces that you’re not rolling with plastic wrap or a damp kitchen towel, so they don’t become dry. Using the palms of your hands, roll each piece of dough to a 24-30 inch long rope and then shape into a “U”. Don’t be afraid to use plenty of flour. The dough is sticky! Grab the ends of the rope and cross them over each other once or twice and then bring the ends down to the bottom of the ‘U” and press them down to seal, forming the shape of a pretzel. Place the pretzels onto the greased parchment-lined baking sheet and cover with a damp kitchen towel to prevent the dough from drying out, while you continue to roll the remaining dough. You can also cut some of them into 1 ½” logs to make nuggets.
Place the formed pretzels in a warm, draft free location (such as a proofing oven, or regular oven (Off) with the oven light on to proof for an hour.
The lack of gluten results in a more fragile structure than a traditional gluten pretzel dough. To help maintain the pretzel shape I cut the parchment paper around each pretzel and gently lowered them into the mixture as described in the next paragraph. The paper floats off when the pretzel is flipped. The boiling gave the dough more structure and helped they stay in shape.
One at a time, lower each pretzel into the boiling water mixture for about 30 seconds. I push them down underwater a few times to assure the top is treated as well. The pretzels will puff up while boiling. Using a kitchen spider or slotted spoon, carefully remove the pretzel from the water, blot slightly on paper towels and then place back onto the parchment lined greased or sprayed baking sheet a few inches apart.
Using a pastry brush, brush the top and sides of each pretzel with the almond milk wash and then sprinkle with coarse salt.
Place the pretzel filled baking sheet on the upper oven rack and bake for about 7 minutes. Open the oven and quickly rotate the baking sheet so that the pretzels that were facing the front are now facing the rear of the oven. It may seem like a pain, but it’s quick and easy and will ensure even baking. Continue to bake for another 7 minutes or until pretzels are dark golden brown.
Remove sheet from oven and place pretzels on a wire rack to cool slightly before serving. Outrageously good if served warm. Mildly spectacular if served later.
Kim’s Gluten Free Bread Flour Blend 700g (5 c) 1.4kg (10 c) 2.1kg (15 c) 2.8kg (20 c) Bob’s Red Mill potato starch 285 g 570 g 855 g 1140 g superfine white rice flour (DON’T use 250 g 500 g 750 g 1000 g regular rice flour, ie Bob’s Red Mill) Tapioca flour 75 g 150 g 225 g 300 g Egg white protein 75 g 150 g 225 g 300 g Xanthan gum 15 g 30 g 45 g 60 g
When I research a new recipe from someone else’s blog or website, I alway read both the good and bad reviews to find any possible problems. This recipe had very few less than 5 star reviews and were primarily due to the reviewer not reading the instructions. (I gave it 5 stars.)
The “burst” on the lower right side of the bread is due to under proofing.
I made this excellent bread as printed, except I substituted the recommended whey protein isolate with egg white protein. I also used the baking-stone/steam method.
The only change I would make to the method would be to let the dough warm to room temperature before shaping and resting for the second proof. I let the bread rest in my proofing oven for almost 90 minutes at 115F and it was still under proofed. I will try this on the second loaf.
Here is another version in my search for excellence in gluten, dairy and soy free sandwich bread. The universal acclaim indicated this version was “incredible.” Personally, QC and I thought it was pretty darn good. Nearly comparable to “regular” bread.
Two more versions to go to “perfection!”
Gluten Free Sandwich Bread (White Gold)
INGREDIENTS: • 1 package (1.1 Lb) Extra White Gold gluten free bread flour • 1 Tbsp. dry yeast (1 envelope) • 2 tablespoons honey • 3 eggs • 1 c. lukewarm almond milk • ¼ cup vegetable oil • 1 ½ tsp. salt • 1 egg for egg wash • Sesame seeds (optional)
METHOD:
Add the flour, honey and yeast to a stand mixer bowl. Mix for 3 minutes with a paddle attachment.
Add the eggs and almond milk and mix for 3 minutes.
Add vegetable oil and salt and mix on low speed for 4 minutes. The dough should be sticky.
Let it rise for 90 minutes, in the mixer bowl, covered, in a warm dry place. (Such as a proofing oven)
Pour/scape the dough in a bread loaf. (A narrower bread pan will help shape the bread.)
Let the dough rise for 20 minutes.
Pre-heat the oven to 375 deg. Place a shallow dish in the lower part of the oven
Brush the bread gently with an egg wash and sprinkle sesame seeds (optional).
Place the bread pan on a center rack and pour 1 cup of water into the shallow dish.
Bake for 40-45 minutes, until golden brown. (Don’t overtake!)