Well, Sally did it again. I subscribe to the sallysbakingaddiction.com mailing list. Along with its featured content it contains links to other enticing bakes and I found one yesterday. First of all “no-knead” always catches my attention. It requires much less hands on action. “Oat” is a second tick in the box as I bought oats at Costco a couple of weeks ago and have lots and lots and lots to use. And finally, “honey” is my go-to sweetener. Plus, the smallest amount Costco sells is three jars!
This is a 92% hydration bread (360g water::390g flour) so do not expect it to behave like the way a 65% hydration bread will. The dough is so soft the lame (or knife) tears it, rather than cuts. You cannot tension the surface as you can with lower hydration bread, but I found freezing it for 30 minutes before baking then slashing helped.
All that being said, this is a delicious honey oat bread. (I am eating a QC test slice right now.) The hint-o-cinnamon sets it off perfectly. (To confirm the evaluation, I had to have a second slice.)
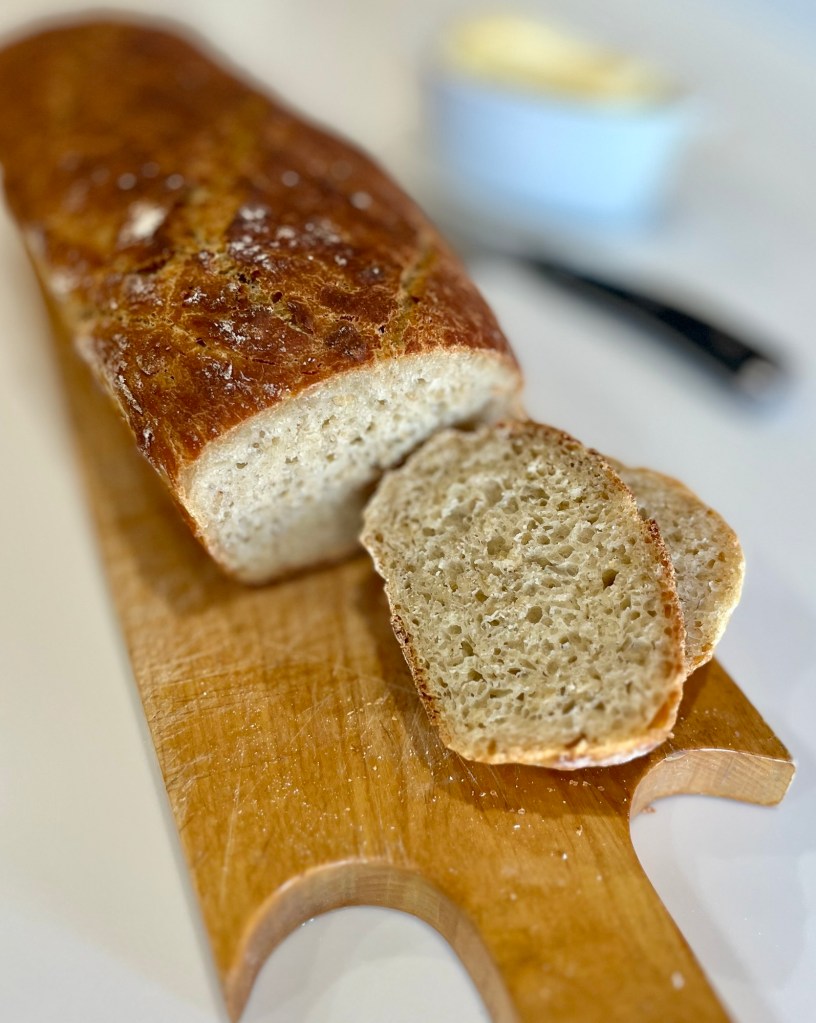
No-Knead Honey Oat Bread
https://sallysbakingaddiction.com/no-knead-homemade-honey-oat-bread/print/76423/
(Modified for my use.)
INGREDIENTS
• 390g (3 c) bread flour
• 85g (1 c) old-fashioned whole oats
• 1½ tsp Platinum Yeast from Red Star or any instant or active dry yeast
• 1½ tsp salt
• ½ tsp ground cinnamon
• 360g (1 ½ c water, close to room temperature at about 70°F (21°C)
• 128g (6 Tbl) honey
• 25g (30ml or 2 Tbl) vegetable oil (or other neutral tasting oil)
METHOD
- The evening before baking: In a large ungreased bowl, whisk 3 cups (390g) bread flour, the oats, yeast, salt, and cinnamon together. Set aside. In a medium bowl or large liquid measuring cup, whisk the water, honey, and oil together. Pour water mixture into flour mixture and gently stir together with a dutch dough whisk, silicone spatula or wooden spoon to combine. Dough will be heavy and very wet/sticky. Do not overwork dough.
- 1st rise: Cover the dough tightly with plastic wrap or aluminum foil and set on the counter at room temperature for 12-18 hours. (See note if you need to extend this time.) You want it to almost double in size during this time.
- Gently shape: Turn the dough out onto a lightly floured work surface and, using lightly floured hands, shape into a ball as best you can. Transfer dough to a large piece of parchment paper. Lift the parchment paper and dough up and place it all into a banneton (oval or round depending on the shape of your dutch oven.) Using a very sharp knife or bread lame, gently score an X into the top. Cover dough lightly with plastic wrap and leave alone for 30 minutes. (The dough is very slack, typical of a 90+% hydration bread. To firm the surface of the dough I put it, still in the banneton, into the freezer for 30 minutes, then slashed it.
- Bake: Heat the oven, with dutch oven and lid inside, to 425°F (218°C) for 30 minutes. After 30 minutes place the dough inside the dutch oven by lifting it up with the parchment paper and sticking it all–the parchment paper included–inside the pot.
- Cover with the lid. Bake for 30 minutes with the lid on. Carefully remove the lid and continue baking for 10-12 more minutes or until the bread is golden brown. The bread is done when an instant read thermometer reads the center of the loaf as 195°F (90°C).
- Remove dutch oven from the oven, carefully remove the bread, and allow to cool on the counter for 30 minutes before breaking/slicing/serving.
- Cover leftover bread and store at room temperature for up to 3 days or in the refrigerator for up to 10 days.
NOTES
- Make Ahead Instructions: This recipe is wonderful for making ahead because the 1st rise time (step 2) is so long. If needed, you can extend the 1st rise time by letting the dough rest in the refrigerator instead of at room temperature for up to 18 hours. Then, after refrigerating, let the dough sit at room temperature to warm and rise, about 4-6 hours. You want it to mostly double in size during this time. Do not extend these times further because the dough may begin to deflate.
- Freezing Instructions: Prepare recipe through step 4 and feel free to use a disposable loaf pan since it will be going into the freezer. Cover loaf tightly and freeze for up to 3 months. On the day you serve it, let the loaf thaw and rise for about 5 hours at room temperature. Bake as directed. You can also freeze the baked bread loaf. Allow the bread to cool completely and then freeze for up to 3 months. Thaw in the refrigerator or at room temperature and reheat if/as desired.
- If You Want to Top with Oats or Cinnamon-Sugar: If you want to top the dough with oats prior to baking, carefully brush the dough after the 2nd rise (step 5) with 1 egg white beaten with 1 Tbsp water, and then sprinkle 2 Tbsp of oats on top. (The oats do not stick without the egg white and the bread will no longer be egg-free by doing this.) You can skip the egg white/oats and sprinkle cinnamon-sugar on top instead. Combine 1 Tablespoon granulated sugar and 1/8 teaspoon cinnamon. Sprinkle on top of the loaf right before baking.