Dede’s bakery opened early this morning. QC (Fran) loves the smell of fresh bread when she wakes. It had been a while since I made the hi-hydration honey bread, so… I also made some shortbread cookies which will be part of the decorations for a cake this weekend
I need to flood the cookies to finish them, but I have lots of time. I also need to practices some Italian buttercream as I had major issues the last time I made some.
I made two loaves in a steam oven without a Dutch ovenThese are traditional shortbread cookies w/o chocolate.
Both bakes were excellent and a good treat for elevensies.
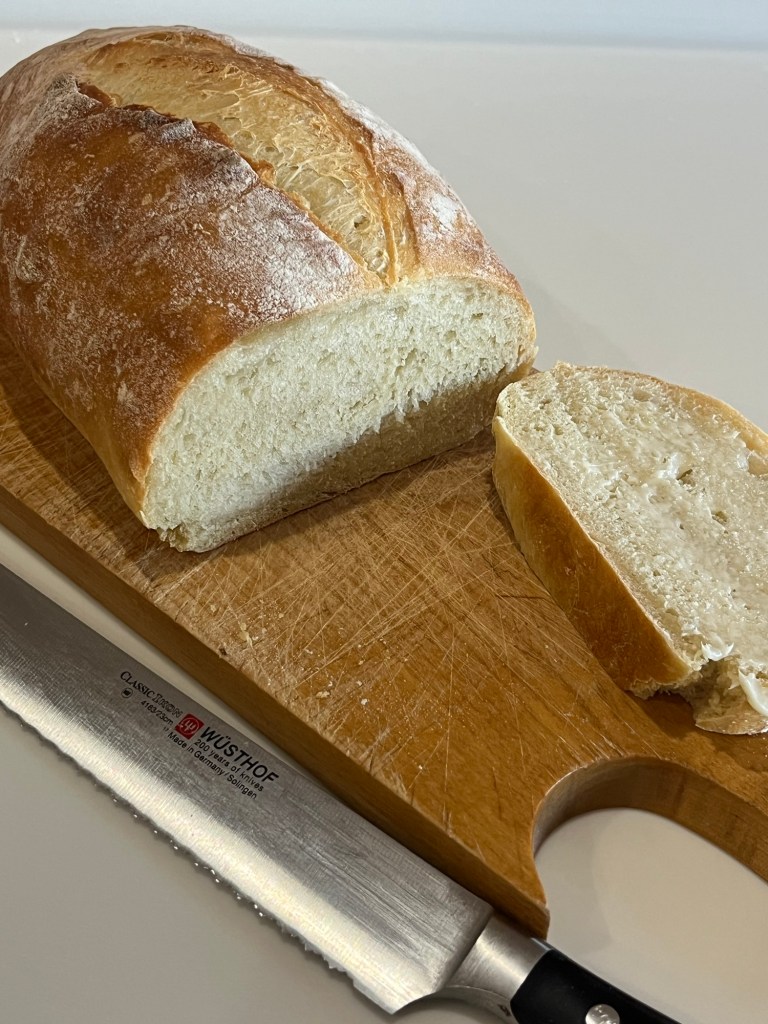
I decided to make a white cake this morning, until I saw this recipe for crusty Italian bread in my files. Didn’t need no stinkin’ cake anyway, This bread is very easy to make and doesn’t use any special flour (like bread flour.) If you have yeast in your cupboard (and who doesn’t) and about two hours (15 min hands on) you should be ready to go!
Crusty Italian Bread
INGREDIENTS • 314 g (1⅓ cups) warm water • 7 g (2¼ tsp) yeast • 16 g (1 Tbl) brown sugar • 12 g (2 tsp) salt • 21 g (1½ tsp) olive oil • 500 g (4 c) AP flour • 1 egg for wash
METHOD
Combine warm water, yeast, and brown sugar in a stand mixer bowl, stir and let stand ~8-10 minutes until it begins activate
Add olive oil and salt, mix well.
Gradually add the flour until the sides and bottom of the bowl come clean.
Knead using the dough hook to knead for 8 minutes.
Cover the dough and let rise until doubled, ~30 minutes. (I use a proofing oven that was warmed to temperature, then turned off.)
Punch it down, form into an oval and shape it into a loaf. Tuck ends under.
Cover the loaf with a damp cloth and let it rise (in the still warm oven) until doubled. ~20 min. Over-proofing will cause the loaves to flatten.
Preheat oven to 375ᵒF degrees.
Brush top of loaf with an egg wash (1 egg and 1 tablespoon water)
Score with a single, quick, long cut down the center.
Pour 1 cup of hot water in a shallow pan on the rack underneath the bread in the oven.
Bake for 25-30 minutes (internal temp reaches 190ᵒF) or until the loaf turn golden brown and produces a hollow sound when tapped.
QC asked for some pretzels for her Maj Jongg game tomorrow and after 18 holes of poorly played golf this morning, that was exactly what I needed to do.
The Soft Chewy Pretzels I make are pretty easy and only take a couple of hours.
Forgive my hubris, but these pretzels are wonderful. Definitely worth making more often,
QC and I are going to a St. Patrick’s Day dinner and I was asked if I ever made Irish Soda Bread. I replied that I had not.
The next morning, before an 8:30am golf tee time, I made a loaf as a test. It was delicious so I texted back saying after further thought I had made Irish Soda Bread before.
I made two loaves for dinner tonight, one with raisins and one without. Equally delicious.
Irish Soda Bread
INGREDIENTS • 1 and 3/4 cups (420ml) buttermilk* • 1 large egg (optional, see note) • 4 and 1/4 cups (531g) all-purpose flour (spooned & leveled), • 3 Tablespoons (38g) granulated sugar • 1 teaspoon baking soda • 1 teaspoon salt • 5 Tablespoons (71g) unsalted butter, cold and cubed* • optional: 1 cup (150g) raisins
METHOD
Preheat oven & pan options: Preheat oven to 400°F (204°C). Bake in a seasoned 10–12-inch cast iron skillet (no need to preheat the cast iron unless you want to).
Whisk the buttermilk and egg together. Set aside.
Whisk the flour, granulated sugar, baking soda, and salt together in a large bowl. Cut in the butter using a pastry cutter, a fork, or your fingers. Mixture is very heavy on the flour but do your best to cut in the butter until the butter is pea-sized crumbs.
Stir in the raisins. Pour in the buttermilk/egg mixture. (*Adding all of the mixture yielded an overly wet dough. Try reserving ½ cup, adding more as necessary.) Gently fold the dough together until dough it is too stiff to stir.
Pour crumbly dough onto a lightly floured work surface. With floured hands, work the dough into a ball as best you can, then knead for about 30 seconds or until all the flour is moistened. If the dough is too sticky, add a little more flour.
Transfer the dough to the prepared skillet. Using a very sharp knife or bread lame, score the dough with a slash or X about 1/2 inch deep. (“Score” = shallow cut.)
Bake until the bread is golden brown, and center appears cooked through, about 45-55 minutes. Loosely tent the bread with aluminum foil if you notice heavy browning on top. The bread is done when an instant read thermometer reads the center of the loaf as 195°F.
Remove from the oven and allow bread to cool for 10 minutes, and then transfer to a wire rack. Serve warm, at room temperature, or toasted with desired toppings/spreads.
Cover and store leftover bread at room temperature for up to 2 days or in the refrigerator for up to 1 week. We usually wrap it tightly in aluminum foil for storing.
NOTES
Freezing Instructions: Baked and cooled bread freezes well up to 3 months. Freeze the whole loaf or individual slices. Thaw in the refrigerator or at room temperature, then reheat as desired.
Buttermilk: Using cold buttermilk is best. Buttermilk is key to the bread’s flavor, texture, and rise. The bread will not rise without it. If you don’t have any buttermilk on hand, you can make a homemade “DIY” version. Whole milk or 2% milk is best, though lower fat or nondairy milks work in a pinch. Add 1 Tablespoon of lemon juice or white vinegar to a liquid measuring cup. Add enough cold milk to make 1 and 3/4 cups. Whisk together, then let sit for 5 minutes before using in the recipe.
Egg: 1 egg adds richness and density. Feel free to skip it to make a slightly lighter loaf. No other changes necessary, simply leave out the egg.
Cold Butter: The colder the butter, the less sticky the dough will be. Make sure it’s very cold, even frozen cubed butter is great.
Smaller Loaves: You can divide this dough up to make smaller loaves. The bake time will be shorter, depending how large the loaves are. An instant read thermometer will be especially helpful. Bake the loaves until an instant read thermometer reads the center of the loaf as 195°F (90°C).
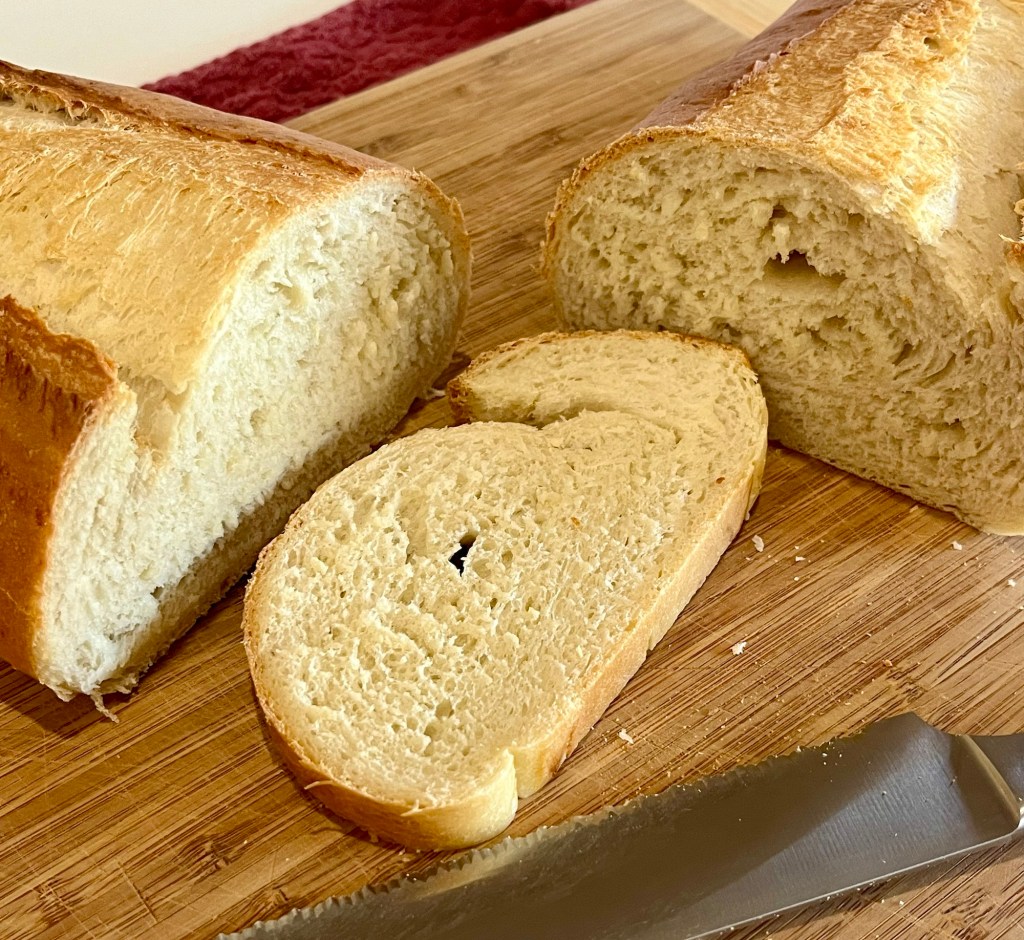
YouTube posted a video demonstrating how someone’s Grandmother made an easy french bread. Well, apparently my Grammie wasn’t French.
My bread tasted fine and was fairly fast and easy to make. My problem was with fermenting and proofing the dough. Although I followed the directions and used the standard “poke test,” my loaves were under-proofed.
When I mixed the water, milk, sugar and yeast I didn’t see the usual activation of the yeast. To test it I mixed a tablespoon of water with teaspoons of sugar and yeast. Within 5 minutes the yeast was bubbly so, it tested good.
I continued on with the instructions, while in retrospect, should have extended the proofing time.
The final baked bread resulted in a good color, a minimal rise, nice crust and flavor. It needed a better, more open structure to be a good loaf.
French Bread from a French Grandmother
INGREDIENTS • 200 ml of warm water. • 200 ml of warm milk. • 1 Tbl of sugar. • 8g (2½ tsp) dry yeast. • 1 egg, separated • 90 ml of vegetable oil. • 700 g of bread flour, divided (600g & 100g) • 1 tsp of salt. METHOD
Whisk water, milk, sugar and yeast, cover, and leave for 5 minutes until the yeast dissolves.
Separate the egg, cover the yolk with cling film for later use.
Add egg white and vegetable oil to bowl and mix well with a spoon.
Sift in 600 g of bread flour and 1 teaspoon of salt mix well with a spoon
Sift in the remaining 100 g of flour and mix by hand.
Sprinkle the table with flour.
The dough should be medium soft and formed into a large ball.
Coat the bowl with vegetable oil, place ball, smooth side, up in the oiled bowl, cover and set aside in a warm place for 40 minutes.
Place on lightly floured table, de-gas, roll into a ball and divide into 3 parts and roll each part into a ball, cover, and leave to rise for 20 minutes.
Roll out the dough into a ~12 x 16” rectangle on the lightly floured table.
Roll from the smaller side into a batard, pinch the edges and ends together, place on parchment paper, cover and leave for 15 minutes.
Coat the surface with milk. (Or egg wash?)
Make 6 diagonal cuts on each batard, dust top with flour.
Bake in a preheated oven at 180°C/360°F for 35-40 minutes.
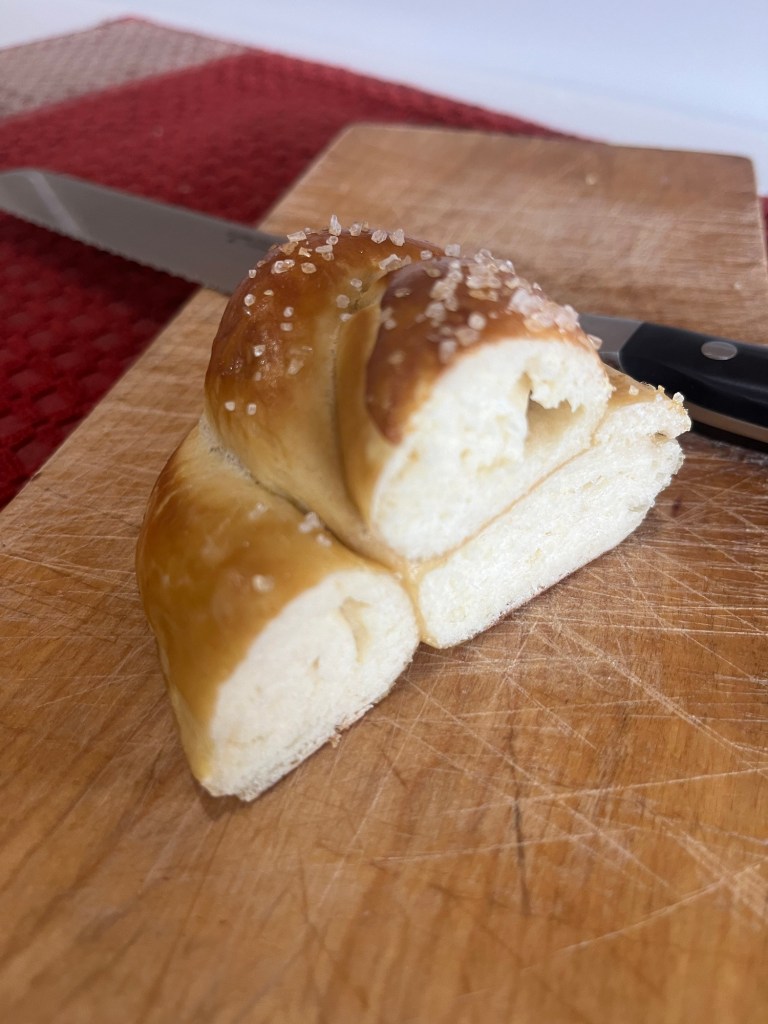
I saw a video on YouTube on how to make Turkish Bread. It caught my attention because of the “sauce” baked inside each loaf. The sauce is a mixture of water, flour and oil painted on the flattened circle of dough before it is rolled up.
The bread is soft, flavorful with a crisp crackling crust.
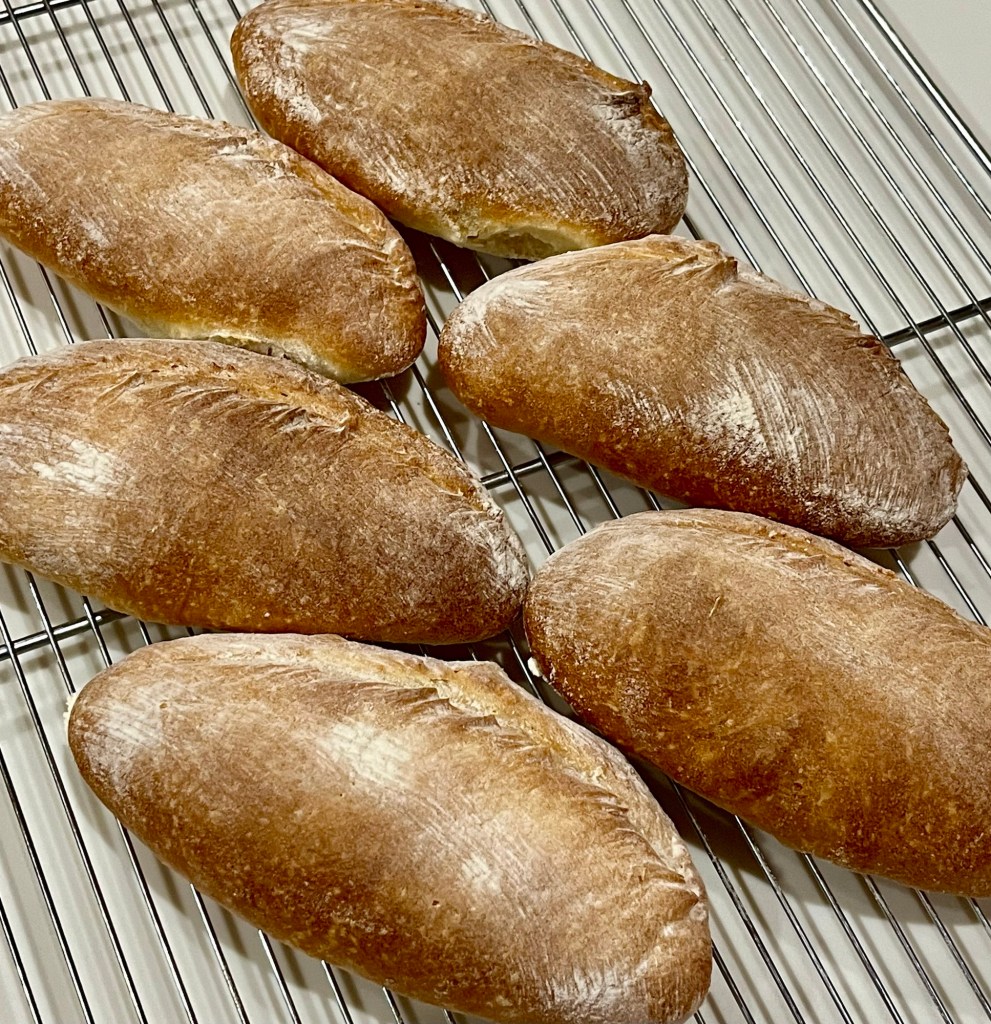
The published recipe instructed me to make 12 loaves, but after forming the first two I combined them to make six larger loaves (as pictured.) These are about 6” long .
Turkish Bread – Francala – Somum Ekmek
INGREDIENTS For the dough: • 10 g (1 Tbl) dry yeast • 20 g (1 Tbl) sugar • 100 ml milk • 200 ml water • 420 g (3.5c) bread flour • 8 g (1 tsp) salt • 20 ml (2 Tbl) oil For the sauce: • 20 g (1 Tbl) flour • 10 ml (1 Tbl) oil • 30 ml (3 Tbl) water
METHOD
Add all ingredients to a medium sized bowl and mix into a shaggy mass
Knead in the bowl to a smooth sticky dough then cover and let ferment until it doubles in size
Add the flour, oil and water in a small bowl and mix until it is a smooth consistency
Deflate the dough on a lightly floured surface then form into a ball and divide it into 6 pieces
Shape each piece into a ball then use your fingers to pat the dough into a flat bumpy circle about 5” diameter turn over and repeat
Coat the dough with the sauce and fold it over pressing the seam as you go. Pinch the ends and seam together and roll out slightly to taper the ends
Place on a baking sheet, cover and let sit for an hour
After 30 minutes preheat the oven to 450ᵒF
Sprinkle flour on top then cut with a curve, lengthwise score with a lame
Add a cup of hot water to a container in the oven
Drop the temperature to 375ᵒF and bake for ~20-30 min? Check internal temperature after 20 min.
KAB to the rescue! I made their No Knead Crusty White Bread this morning. Mix ingredients, let sit 2 hours, refrigerate 2 (and more) hours shape, let rise, bake, enjoy.
This is a very easy 75% hydration bread that takes very little hands on time and is exceptional. I made half (630g) on a stone today and will make the other half in a day or two, but use a Dutch Oven.
Combine all of the ingredients in a large mixing bowl, or a large (6-quart), food-safe plastic bucket. “Lukewarm” means about 105°F.
Mix and stir everything together for a minute in a stand mixer with blade to make a very sticky, rough dough. It will weigh roughly 1225g.
Transfer to a greased plastic proofing bucket and let the dough rise for 2 hours at room temperature.
Then refrigerate it for at least 2 hours, or for up to about 7 days. (If you’re pressed for time, skip the room-temperature rise, and stick it right into the fridge). The longer you keep it in the fridge, the tangier it’ll get; if you chill it for 7 days, it will taste like sourdough. Over the course of the first day or so, it’ll rise, then fall. That’s OK; that’s what it’s supposed to do.
When you’re ready to make bread, sprinkle the top of the dough with flour; this will make it easier to grab a hunk. Grease your hands and pull off about 1/4 to 1/3 of the dough — a 400g to 540g piece, if you have a scale. It’ll be about the size of a softball, or a large grapefruit.
Plop the sticky dough onto a floured work surface, and round it into a ball, or a longer log. Roll around the table to tension the surface.
Place the loaf on a piece of parchment (if you’re going to use a baking stone); or onto a lightly greased or parchment-lined baking sheet. Sift a light coating of flour over the top; this will help keep the bread moist as it rests before baking. Drape the bread with greased plastic wrap or cover it with a reusable cover.
Let the loaf warm to room temperature and rise; this should take about 60 minutes (or longer, up to a couple of hours, if your house is cool). It won’t appear to rise upwards that much; rather, it’ll seem to settle and expand. Preheat your oven to 450°F while the loaf rests. If you’re using a baking stone, position it on a middle rack while the oven preheats. Place a shallow metal or cast iron pan (not glass, Pyrex, or ceramic) on the lowest oven rack, and have 1 cup of hot water ready to go.
When you’re ready to bake, take a sharp knife and slash the bread 2 or 3 times, making a cut about 1/2″ deep. The bread may deflate a bit; that’s OK, it’ll pick right up in the hot oven.
Place the bread in the oven — onto the baking stone, if you’re using one, or simply onto a middle rack, if it’s on a pan — and carefully pour the 1 cup hot water into the shallow pan on the rack beneath. It’ll bubble and steam; close the oven door quickly.
Bake the bread for 25 to 35 minutes, until it’s a deep, golden brown.
Remove the bread from the oven and cool it on a rack.
Store leftover bread in a plastic bag at room temperature
Notes: • To freeze the dough, divide into 2 parts, deflate, roll into balls, wrap in plastic wrap and label. Store in freezer for up to 2 weeks
I first made this bread about two years ago. I was hesitant to make it again as it isn’t the easiest loaf to make. It’s 100% hydration which means equal parts flour and water. This makes a very soft, slack, tricky dough to handle, However, this weekend I saw a great tutorial on YouTube by Martin Philip at King Arthur Baking. He demonstration how to make it much easier, I decided to give it another try. (My no golf weekend is not over.)
Watch his tutorial and give it a try. It still isn’t the easiest, even with his help, but it is well worth the effort. It has a crisp crust and the texture of air inside. A little butter, or some oil and vinegar REALLY sets this bread off.
Pan de Cristal
INGREDIENTS • 500g water (80 F in warm weather, 100F if cold) • 500g Bread Flour • 2.5g (3/4 teaspoon) instant yeast • 10g salt • 15g olive oil
METHOD
To make the dough: Weigh your flour; or measure it by gently spooning it into a cup, then sweeping off any excess.
In a medium bowl, mix the water, flour, yeast, and salt until thoroughly combined and homogenous. Note: The dough starts off very slack and wet. That’s OK; it will transform itself through time and folds.
Oil a two-quart rectangular baking dish (10” x 7”) with the olive oil. If you don’t have a 2-quart dish, an 8” or 9” square pan will work. Don’t worry about any pan you use being oven-safe; you won’t be baking the bread in it.
Pour the dough into the pan. Check the dough’s temperature by inserting a digital thermometer into the center. If it’s less than 72°F, move the pan to a warmer spot, e.g., your oven with the light turned on.
Cover the pan and allow the dough to rest for 20 minutes.
Start with a bowl fold: Use your wet hands to grab a section of dough from one side, lift it up, then press it down into the middle. Repeat this around the pan eight to 12 times.
Cover the dish and allow the dough to rest for 20 minutes.
Then do a coil fold: With wet hands, reach under the dough and stretch the middle upward until the dough releases from the dish. Roll it forward off your hands, allowing it to fold over (or “coil”) on itself. This is called a coil fold. Rotate the dish 90 degrees (a quarter turn) and repeat. Continue performing this folding action until the dough feels like it won’t stretch and elongate easily, usually four to five times initially. Note: You’ll be doing this three more times, each time building strength and developing the dough.
Cover the pan and allow the dough to rest for 20 minutes.
Repeat the coil fold. Cover the bowl and allow the dough to rest for 20 minutes.
At this point, the dough should be easier to handle and feel tighter. Repeat the coil fold using only two or three folds this time. Cover the bowl and allow the dough to rest for 20 minutes.
Repeat the coil fold one last time, using only one or two folds if the dough is relatively strong. Cover the bowl and allow the dough to rest for about 80 minutes.
To divide the dough: As gently as possible, turn the dough out onto a heavily floured surface, maintaining the rectangle or square shape – be careful not to deflate the delicate dough. Sprinkle a generous amount of flour on top of the dough, leaving no exposed sticky spots. Then, working as gently as possible, use a bench knife or other sharp knife to divide it into four pieces. Gently place two pieces on a piece of parchment, leaving space between them. Repeat with the remaining two pieces of dough, placing them on another piece of parchment.
Allow the loaves to rest at room temperature for 2 hours, uncovered. While the loaves are resting, preheat the oven to 475°F with a baking stone or steel on a lower rack. Allow the oven to preheat for 1 hour to ensure it’s thoroughly heated. The loaves are ready for the oven when there are a few large bubbles on the surface of each loaf and they feel light and airy.
To bake the bread: Carefully slide the two loaves (still resting on the parchment) into the oven onto the preheated stone or steel. If space is tight and the full sheet of parchment won’t fit on the stone or steel, cut the parchment between the two loaves and arrange them as best you can. Allow the other two loaves to continue to rest.
Bake the loaves for 15 minutes, then transfer them, from the stone or steel, directly onto a rack in the upper third of the oven for an additional 13 to 15 minutes. Moving them allows the baking stone or steel to become hot again in preparation for the next two loaves. After a total of 30 minutes of baking, remove the loaves from the oven and allow them to cool on a rack.
Repeat the process with the two remaining loaves. Cool the bread fully before slicing.
Storage information: Wrap the bread loosely and store it at room temperature for up to several days; freeze for longer storage.
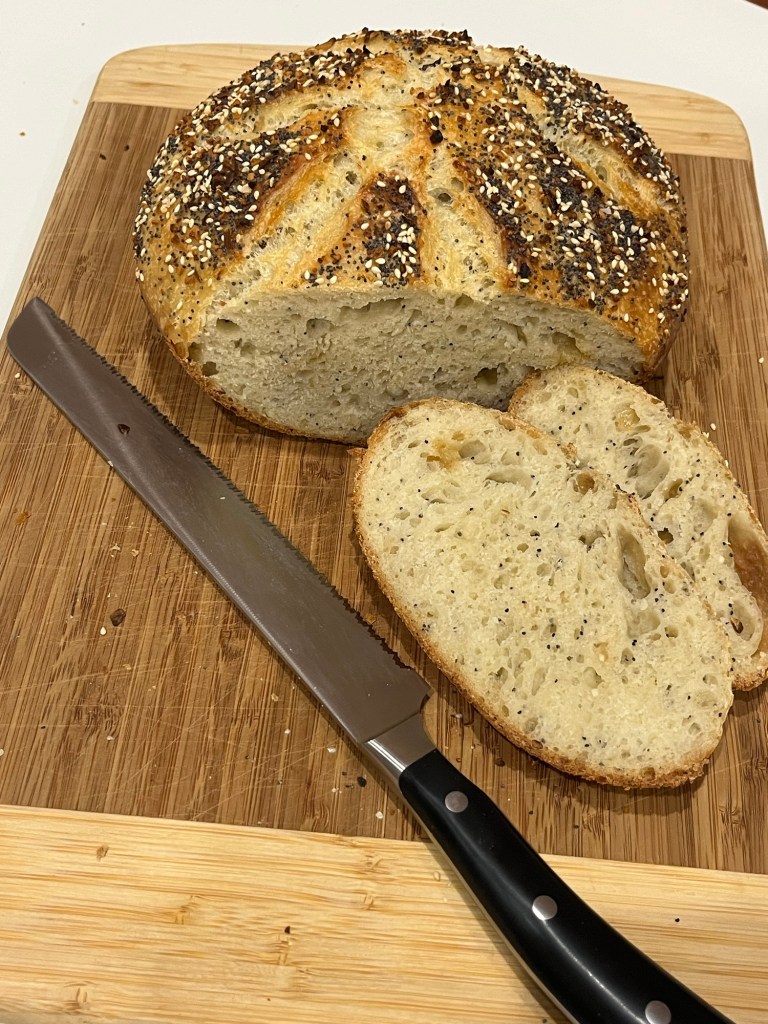
Another winning recipe from King Arthur Baking – Everything No-Knead Bread.
What’s nice about this bread is how easy it is to prepare and bake. It has a fantastic flavor and texture. It took about 30minutes to mix the ingredients (by hand), before it fermented, covered for 8 hours. It’s shaped, popped into a Dutch oven to proof for 1.5 – 2 hours, then baked for about an hour. That it! (Check the proofing by using the poke test. The first loaf was over proofed after 2 hours.)
Weigh your flour; or measure it by gently spooning it into a cup, then sweeping off any excess. Mix the dough ingredients in a large bowl to make a sticky dough. Or beat in a stand mixer for 3 minutes.
Cover with plastic wrap, and let rest at room temperature overnight, or for at least 8 hours; the dough will become bubbly and rise quite a bit, so make sure it’s in a large bowl.
Lightly grease a 14″ to 15″ long lidded stoneware baker, or 9″ to 10″ round lidded baking crock. Our bread baking crock and bread pot are both great choices.
Turn the dough onto a generously floured surface; the dough will be slack. To shape the loaf, fold the dough over onto itself using a bench knife or well-floured hands. Because the dough is slightly sticky, it’s best to work quickly.
Place the dough in the prepared pan, smooth side up.
Cover and let rise at room temperature for about 2 hours, until a slight indentation remains when you poke it with your finger.
Just before baking, spritz or brush the dough with water and sprinkle with about 1 tablespoon Everything topping over the dough. Using kitchen scissors, make several 1/2″ deep cuts in a decorative pattern on the top of the dough to allow the bread to expand.
Replace the lid on the pot and put it in a cold oven; set the temperature to 450°F.
Bake the bread for 50 minutes (start the timer once the bread goes into the oven), then remove the lid and continue to bake for another 5 to 10 minutes, until it’s deep brown in color, and a digital thermometer inserted into the center registers about 205°F.
Remove the bread from the oven, turn it onto a rack, and cool before slicing.
Covid sucks. No sense in beating around the bush, Covid just plain sucks. It totally disrupted our holiday today, and tomorrow and…
We were invited to a family dinner tonight and I was asked if I could bring my dinner rolls and one of my desserts, to which I said “Of course!” I decided to make rolls in the shape of a Christmas tree and eclairs suitable for a Christmas dinner.
When I contacted our relative and begged off due to possible Covid exposure she said I shouldn’t bring the rolls and dessert. I told her how I was looking forward to baking and making them and would be very disappointed to not be able to. (I dropped them off this afternoon.)
I know her husband loves the my eclairs so I modified my usual ones to be “Christmasy.” I glazed a few with my normal dark chocolate and made colored white chocolate for the rest, I reserved some of the white chocolate glaze and colored it using oil based food coloring. I “painted” the faces etc and realized in the future I need to make the eclairs larger to have a larger “canvas” to paint on. I call this “Tim Burton’s Eclairs for Christmas” eclairs.
Christmas Tree Dinner Rolls
INGREDIENTS • 488 g (2 cups) warm milk • 2 tablespoons instant dry yeast • 50 g white granulated sugar • 2 teaspoons salt • 6 tablespoons salted butter softened • 2 large eggs • 750-850 g (6-7c) all-purpose flour • 1 tablespoon melted butter • 1 egg and 1 Tbl water for an egg wash • ½ c fresh cranberries – choose the most uniform • Several sprigs fresh rosemary. • ½ c water • 1 ½ c sugar, divided 1:½
METHOD
In the Pro600 stand mixer bowl, combine and mix all ingredients except the flour. (This is to remind me to use my larger mixer.)
Add in 5 ½ cups of flour. Using a dough hook, turn the mixer on and increase speed slowly to keep the flour from flying all over. Slowly add the remaining flour until the dough pulls away from the sides of the bowl. (I watch the bottom of the bowl and add flour until the dough just comes clean from the bottom.) Once the dough clears, knead for 8 minutes. The dough mixture should be sticky and soft.
Transfer the dough to a lightly greased bowl. (I dump the dough on the counter, spray the stand mixer bowl with some olive oil and return the dough, cover and let rise 45 – 60 minutes, until doubled.)
Form the the dough into into 45g balls.
Arrange the balls into 8 rows, 3 for the base of the tree, then 7, 6, 5, 4, 3, 2, 1.
Reserved one ball to shape the star. (I used a star cookie cutter.)
Cover and let rise 45 – 60 min.
Preheat oven to 375⁰F 15 minutes before the end of the final proof.
Mix egg and water to make an egg wash and lightly brush the rolls.
Bake the rolls for 12 to 14 minutes, until lightly browned.
Remove rolls from oven and brush with melted butter. Best when served warm. To cool, let rest in the pan for 15 minutes then transfer to a wire rack. Once cooled completely, store in a plastic bag.
Sparkling sugar cranberries and Rosemary
Wash cranberries and put in a heat proof bowl
Bring the water and 1 c sugar to a simmer
Let the mixture cool for 5 minutes then pour over the cranberries
Cool for 1-2 hours in the fridge.
Strain the berries and let dry
Roll in granulated sugar, spread on parchment paper and let dry