Buchteln Sweet Austrian Yeast Rolls

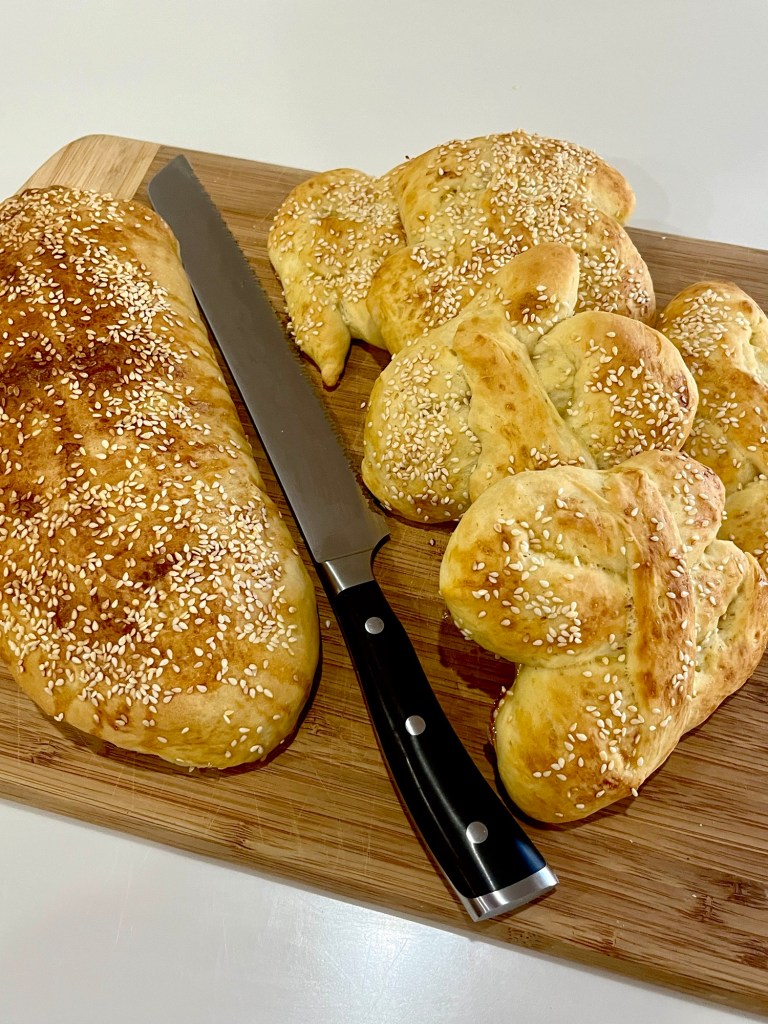
Well, I should have put quotes around “Austrian” because they are not authentic sweet rolls. I used gluten free flour and apple compute in the first batch and AP flour and fresh made raspberry jelly in the second batch. What can I say, I didn’t have any apricot filling.

The texture of the apple filled resembled a biscuit more than bread, but a friend whose mother is Austrian said they were very close (except it should be filled with apricot jam.) The raspberry filed Buchteln were delicious, tender and above all, had raspberry in them.

Buchteln – Sweet Austrian Yeast Buns

Yield: 12 Buchteln

INGREDIENTS
• 150 ml (½ c plus 2 Tbl) warm milk
• 5 g (1 ½ tsp g) active dry yeast
• 40 g (3 Tbl) sugar
• 1 large egg
• 77 g (5 ½ Tbl) melted butter
• ½ tsp vanilla extract
• ¼ tsp salt
• 325 g (about 2 ½ c) all-purpose flour
Filling
• About 5 Tbl apple compote with fine texture (no chunks)
• 3 Tbl melted butter for the pan
• Confectioners sugar for dusting

METHOD

  1. In a large mixing bowl sprinkle the yeast over the warm milk and set it aside for 10 minutes for the yeast to dissolve and activate.
  2. Stir in sugar, egg, melted (lightly cooled) butter, vanilla and salt with a hand whisk.
  3. Stir in about 1 ½ cups (200 g) of the flour to get a thick batter and stir vigorously with the whisk until no lumps remain. Time to change your tools: Get rid of the whisk and use a sturdy (wooden) cooking spoon to gradually stir in the rest of the flour.
  4. When all ingredients come together bowl fold the edges into the center for a couple of minutes. The dough will be sticky but refrain from adding more flour. It helps if you oil your clean hands before you knead a sticky dough. Knead until smooth, about 5 minutes.
  5. Let the dough rise, covered at warm room temperature until doubled in volume (about 3/4 to 1 hour).
  6. Transfer the dough onto a lightly floured surface and divide it into 10-12 60 g portions. Keep pieces you don’t need right away covered.
  7. Fold the edges of each piece into the middle a couple of times so you will get a nice ball with a smooth surface on the bottom side. Flatten each ball with your palm to a circle with a diameter of 3 to 3 ½ inch, keeping the center slightly thicker than the edges. Usually this part works without using any additional flour. If the dough keeps sticking to your countertop, add some.
  8. Put 1/2 teaspoon of filling (not more) in the center of every circle. Wrap the dough around the filling, pinching and sealing it tightly. Round the buns again, creating a bit of surface tension. If you use too much filling, it’s difficult to seal them. Also avoid getting filling onto your edges, because this way it is almost impossible to seal them.
  9. Put every Buchtel (singular of Buchteln) with the sealed side down onto a lightly floured surface until you have finished filling all of them.
  10. Brush a baking pan (I used a round 9-inch ceramic pan) with melted butter, just until coated.
  11. Place the Buchteln in your baking pan. You can do this tightly packed (traditional way) or give them a little, but not too much space. They will still rise during the second proofing and baking. If you feel there are too many of them, you can place the remaining in a lined muffin tin.
  12. Let them proof a second time for about 20-30 minutes at warm room temperature until puffy. It is best to cover the whole pan with a lid or cling wrap in this step. If you have a rather shallow pan, don’t cover the Buchteln, since they will stick to the plastic wrap. Brush with melted butter.
  13. Bake them at 375 °F/ 190 °C in the preheated oven (center) for about 25 minutes (minimum 20 minutes). When they are golden-brown in color, take them out of the oven.
  14. Let the Buchteln cool for 5-10 minutes and serve them dusted with confectioner’s sugar. Enjoy!

Mafalda Sicilian Bread

Continuing my European Bread Journey today’s selection s Mafalda, a popular bread in Sicily.

This bread uses semolina flour which is made from ground durum wheat. It’s high protein and fiber and makes a denser texture than bread or AP flour. It is a nice crumb and good firm texture and excellent flavor.

On my first attempt I added more water during the mixing/kneading to help the dough come together. This resulted in a very slack risen dough that was difficult to shape. Next time I will use the amount noted in the recipe, otherwise the plan was executed perfectly .

Mafalda Sicilian Sandwich Bread

INGREDIENTS
• 500 g re-milled durum wheat semolina flour (I use Mulino Caputo)
• 2 ¼ tsp (7 g) dry instant yeast (If baking the next day use 1 ¼ tsp instead of 2 tsp)
• 35 g (30 ml) extra virgin olive oil
• 15 g salt
• 7 g (1 tsp) honey
• 1 ¼ c (300 ml) room temperature water (1st try I used 350 ml and the dough was too slack)
• 1 egg yolk + 1 Tbl milk well mixed for wash
• Sesame seeds

METHOD

  1. Mix oil and honey and set aside
  2. In the bowl of a stand mixer, mix the sifted flour and yeast.
  3. Add the water and mix well, then add oil and honey. Use the paddle in these first steps of mixing.
  4. When it is all combined (3 mins), add salt and mix to incorporate it.
  5. Cover the bowl with a kitchen towel and leave it for 15/20 mins to give the flour the time to hydrate.
  6. Switch to the hook attachment and knead the dough at medium-low speed (Kitchen Aid is speed 2), until smooth, ~5-8 mins. (The dough should weigh ~875 g)
  7. At this point, the Mafalda dough can be refrigerated and baked the next day after. (Be sure the bowl is well oiled and tightly covered.
  8. Put the dough in a well-oiled bowl, flip over to coat the dough with oil and cover tightly, and let the Mafalda bread rise until it doubles (~ 1 hour).
  9. After the first rise, punch down the dough, cut it into 8-9 pieces of 100 g each.
  10. Roll each piece out to Form one piece into a boule to make a small sandwich loaf, or two sandwich buns.
  11. Shape into the classic Mafalda shape (a 2 humped snake and fold the “tail” back on top and pressed into the far side, again like a pretzel.) Place well separated on a parchment paper line baking sheet.
  12. Cover the buns with oiled cling wrap and let rise a second time in a warm place like in the oven turned off with the light on. My kitchen was 76⁰ F and the dough required 60 min to double in size,
  13. Egg wash the rolls and sprinkle with sesame seeds.
  14. Place a pan suitable for steaming on the bottom of the oven then pre-heat the oven to 400⁰F, and when hot, add one cup of boiling water to the steam pan and bake small buns for 15-20 mins, a bigger loaf 30-40 mins.
  15. Halfway through cooking time, rotate the pan, and if your bread is still pale (which may happen with a gas oven), switch to convection mode for the rest of the baking time for a nice golden-brown color. Watch closely; it might color too quickly.

Glasnost, Nyet. Glass Bread

Pan de Cristal is an open structure, high hydration, crispy-crust bread from the Catalonian region (Barcelona) of Spain. The great crust and soft chewy interior make it perfect for dipping in oil and vinegar or coating with some good butter.

For those who are not “breadies,” high hydration bread is not for the faint of heart. The entire bake will require about 6 1/2 hours start to finish. Most of the time is resting the dough, but the day is broken up with bowl and coil folds every 20 minutes.

I like to start 2 timers at the beginning. One for 20 minutes and I restart that after every fold. The other is for 3 hours so I don’t need to keep track of all the subsequent folds, just coil fold every 20 minutes until the second timer rings.

Pan de Cristal

INGREDIENTS
• 500g water (80 F in warm weather, 100F if cold)
• 500g Bread Flour
• 3 g (1 tsp) instant yeast
• 10g salt
• 15g olive oil (for the casserole pan)

METHOD
Below is KAB’s method, slightly modified.

  1. To make the dough: Weigh your flour.
  2. In a medium bowl, mix the water, flour, yeast, and salt until thoroughly combined and homogenous. Note: The dough starts off very slack and wet and resembles pancake batter. It will transform itself through time and folds.
  3. Oil a two-quart rectangular baking dish, or casserole pan, (10” x 7”) with the olive oil. The sides should be greater than 1.5” high.
  4. Pour the dough into the pan. Check the dough’s temperature by inserting a digital thermometer into the center. If it’s less than 72°F, move the pan to a warmer spot, e.g., your oven with the light turned on. The dough MUST ferment at a constant 72-78 F.
  5. Cover the pan and allow the dough to rest for 20 minutes.
  6. Start with a bowl fold: Use your wet hands to grab a section of dough from one side, lift it up, then press it down into the middle. Repeat 8 to 12 times going around the periphery of the baking dish 2 or 3 times.
  7. Cover the dish and allow the dough to rest for 20 minutes.
  8. Next do a coil fold: With wet hands, reach under the dough and stretch the middle upward until the dough releases from the dish. Roll it forward off your hands, allowing it to fold over (or “coil”) on itself. Rotate the dish 90 degrees (a quarter turn) and repeat. Continue performing this folding action until the dough will stretch and elongate easily, usually four to five times initially.
  9. Cover the pan and allow the dough to rest for 20 minutes.
  10. Repeat the coil fold: Note: Do coil folds three more times, covering each time, to build strength and developing the dough. (60 more minutes.)
  11. At this point, the dough should be easier to handle and feel tighter. Repeat the coil fold using only two or three folds this time. Cover the bowl and allow the dough to rest for 20 minutes.
  12. Repeat the coil fold one last time, using only one or two folds if the dough is relatively strong and large bubbles should have formed. Transfer the dough to a larger, oil coated dish, cover the dish and allow the dough to rest for about 80 minutes. It should about triple in size. After this rest 4 hours should have elapsed.
  13. Divide the dough: Coat the top of the dough with flour. Use a bowl scraper to gently release the dough from the sides of the pan.
  14. As gently as possible, turn the dough out onto a heavily floured surface, keeping the rectangle or square shape – be careful not to deflate the delicate dough. Sprinkle a generous amount of flour on top of the dough, leaving no exposed sticky spots.
    a. For four small loaves: Working as gently as possible, use a bench knife or other sharp knife to divide it into four pieces. Gently place two pieces on a piece of parchment, leaving space between them.
    b. For two long loaves: lay two pieces of parchment paper, overlapping 2”. Carefully divide the dough in half lengthwise. Using a bench knife carefully slide some flour under each loaf and shape into regular rectangles. As gently as possible slide the loaves onto separate pieces of parchment paper.
  15. Allow the loaves to rest at room temperature for 2 hours, uncovered until large bubbles appear on the sides and surface. The dough flattened out while proofing for 2 hours. Try a shorter time and watch for bubbles. While the loaves are resting, preheat the oven to 475°F with a baking stone on a lower rack. The loaves are ready for the oven when there are a few large bubbles on the surface of each loaf, and they feel light and airy.
  16. To bake the bread: Carefully slide the two loaves (still resting on the parchment) into the oven onto the preheated stone or steel. If space is tight and the full sheet of parchment won’t fit on the stone or steel, cut the parchment between the two loaves and arrange them as best you can. Allow the other two loaves to continue to rest.
  17. Bake the loaves for 15 minutes, then transfer them, from the stone or steel, directly onto a rack in the upper third of the oven for an additional 13 to 15 minutes. Moving them allows the baking stone or steel to become hot again in preparation for the next two loaves. After a total of 30 minutes of baking, remove the loaves from the oven and allow them to cool on a rack.
  18. Repeat the process with the two remaining loaves or loaf. Cool the bread fully before slicing.
  19. Storage information: Wrap the bread loosely and store it at room temperature for up to several days; freeze for longer storage.

Pain Français et l’Europe

I decided to bake a tour of Europe. Over the past month I made Russian Dark Rye, German Light Rye and Italian bread and today was French Bread

I made them all before but randomly, not with a plan. As with the pretzels having a plan and executing it is very rewarding.

The French bread is good but not exceptional when compared to the two ryes and Italian breads. I don’t find a distinctive flavor, but the texture and crust is very good

French Bread

INGREDIENTS
Starter
• 1 c (227g) cool to lukewarm water (90°F to 100°F)
• ½ teaspoon active dry yeast
• 1 ¼ c (149g) Unbleached Bread Flour
• ¼ c (28g) Premium 100% Whole Wheat Flour
Dough
• all of the starter (above)
• 1 cup (227g) lukewarm water (100°F to 115°F)
• ¾ tsp active dry
• 1 Tbl (14g) sugar
• 3 ¾ to 4 c (450g to 480g) Unbleached Bread Flour
• 1 ½ to 2 ¼ tsp salt, to taste
• Egg wash (1 egg yolk and 1 Tbl milk)

METHOD

  1. To make the starter: Stir all the starter ingredients together to make a thick, pudding-like mixture. Cover with plastic wrap and let it rest for at least 2 hours. For best flavor, let the starter rest longer; overnight (up to 16 hours) is best.
  2. To make the dough: Stir down the starter with a spoon and add the water, yeast, sugar, 3 ¼ cups (390g) of the flour, and the salt. The dough will be a loose, messy mass. Let it rest for 12 to 15 minutes, then stir it again; it should become more cohesive and a bit smoother. Dough handles better once it’s had time for the flour to absorb the water while resting and relaxing. By using this method, you’ll tend to add less flour and have much bigger holes in your finished bread.
  3. Knead the dough, adding up to an additional ¾ cup (90g) flour (as necessary to make a soft dough), 10 to 12 minutes. The dough should weigh ~1100g.
  4. Place the dough in a lightly greased bowl or plastic container, cover with lightly greased plastic wrap, and let it rise until almost doubled (depending on the weather, this could be 1 to 2 hours). If you’re going out, or if you prefer, let the dough rise slowly in the fridge. If your dough was refrigerated, allow it to come to room temperature before shaping; it’ll warm up and rise at the same time. I used my proofing oven with only the light on for warmth. The same for the final proof below.
  5. Deflate the dough gently, but don’t knock out all the air. This will create those “holes” so important to French bread. For one large loaf, form the dough into a round ball; for two loaves, divide the dough in half and shape into two balls. For loaves, form into a batard (~500g) and a longer thin batard about 2” diameter and 4” shorter than bread tray (~600g). Place on semolina floured or parchment paper lined French bread tray to rise.
  6. Place a semolina or cornmeal-dusted piece of parchment paper onto a baking sheet. (Note to self: Don’t go crazy with semolina. It WILL fall off the paper and onto the floor when transferring the loaves from the peel onto the baking stone in the oven.) Gently place the ball(s) of dough on the baking sheet, seam-side down. It is easiest to roll the loaves onto the baking peel.
  7. Cover the bread gently with lightly greased plastic wrap, and let it rise until it’s puffy and about 50% larger, anywhere from 30 to 45 minutes if using the proofing drawer.
  8. Preheat your oven to 475°F.
  9. Dust each loaf with a little flour. Slash or crosshatch it with a sharp knife or lame. Coat with egg wash, then spritz water into the oven with a clean plant mister and place the bread in the oven. Reduce the heat to 425°F and spritz with water every few minutes for the first 15 minutes of baking.
  10. If you are using parchment paper, remove it after the first 15 minutes of baking.
  11. Bake the bread for about 25 to 30 minutes, or until it’s a rich golden brown, and its interior temperature registers at least 190°F on a digital thermometer. The smaller loaves will bake more quickly, so keep your eye on them.
  12. Remove the bread from the oven and cool it on a rack. Store bread, loosely wrapped in paper, for a couple of days at room temperature; wrap it in plastic and freeze for longer storage.

Crusty Italian Bread v2.0

I “kneaded” something simple and not too stressful this morning so I decided on this Italian bread. (Adding steam to the baking makes it crusty.)

I don’t know if it is experience, laziness or trying to be quiet, but I recently tend to hand-knead my doughs rather than use the stand mixer dough hook. I like to feel the dough come together and would rather slightly under-knead than over-knead. (The bakes tend to come out better.)

I almost always use weights rather than volumes to measure ingredients, but there is some controversy regarding how much a cup of AP flour weighs. Opinions vary from 120g/c to 150g/c which is enormous. I fluffed, scooped and leveled the flour and ended up adding about 3 1/2 cups then more as needed to knead. I probably ended up with the 500g or 4c as noted in the recipe.

Also Crusty Italian Bread v2.1 will likely have double the amount of salt. While QC hasn’t tested it yet, Dede feels it could use it. I also switched the whole egg/water egg wash to egg yolk/milk. I liked the shine and color on the pretzels I made earlier this week so I decided to go with it again. Probably the right move. It is beautiful.

Crusty Italian Bread

INGREDIENTS
• 314 g (1⅓ c) warm water
• 7 g (2¼ tsp) yeast
• 16 g (1 Tbl) brown sugar
• 12 g (2 tsp) salt
• 21 g (1½ tsp) olive oil
• 500 g (~4 c) AP flour
• 1 egg yolk for wash
• 1 Tbl sesame seeds (if desired)

METHOD

  1. Combine warm water, yeast, and brown sugar in a stand mixer bowl, stir and let stand ~8-10 minutes until it begins activate
  2. Add olive oil and salt, mix well.
  3. Gradually add the flour and mix with a Danish Dough Whisk until the sides and bottom of the bowl come clean.
  4. Knead knead by had for ~8 minutes until the dough is soft, smooth and not sticky. The dough should weigh ~865g
  5. Cover the dough and let rise until doubled, ~30 minutes.
  6. Punch it down, shape into an oval and book-fold into a boule
  7. Tension by rolling back and forth with a cupped hand. Pinch seams and continue to tension to blend.
  8. Cover the loaf with a damp cloth and let it rise until doubled, ~20 min. Over-proofing will cause the loaves to flatten.
  9. Preheat oven to 375ᵒF degrees.
  10. Brush top of loaf with an egg wash (whisked 1 egg yolk and 1 Tbl milk)
  11. Sprinkle top of loaf with sesame seeds (if desired)
  12. Score with a few, quick, cuts diagonally across the loaf.
  13. Pour 1 cup of hot water in a shallow pan on the rack underneath the bread in the oven.
  14. After 20 minutes put an oven-safe digital thermometer into the loaf.
  15. Continue baking for an additional 5-10 minutes (internal temp reaches 190ᵒF) or until the loaf turn golden brown and produces a hollow sound when tapped.
  16. Remove from the oven and cool on racks.

Time To Move On

Today was the fourth attempt to perfect my large, soft and chewy bagels. Let’s say, 4 times is a charm, It’s gin to move on to other

In the past I altered the type of flour, I changed the rising and proofing times, I developed a new way to poach the pretzel dough, I changed the hydration ratio, but ultimately it was advise from the King Arthur Baking chat line that made the day.

This time I followed the directions below and couldn’t be happier. The texture, taste and appearance are all spot-on to my vision.

Pretzels Higher Hydration and Improved Method

INGREDIENTS
• 1 cup water
• ½ cup 2% milk including 2 Tbl heavy cream
• 4½ tsp. white sugar
• 1½ tsp. salt
• 2¼ tsp active dry yeast
• 575 (5½ c) bread flour
• 50g (3½ Tbl) unsalted butter, melted – cooled slightly
• Vegetable oil or spray
• 12 cups water
• 2 Tbl light malt powder
• 5 Tbl baked baking soda
• 1 large egg yolk
• 1 Tbs. Milk
• Kosher salt
METHOD

  1. Melt the 50g of butter and set aside to cool.
  2. Heat the water in the microwave for 20-30 sec to achieve a temperature of about 120-130 deg then combine with the cold milk in a large measuring cup for a resulting solution temperature of 110 to 115 degrees F.
  3. Add the sugar and salt to the warmed water and milk and stir to combine. Sprinkle in the yeast and mix with a fork. Allow the mixture to sit for about 5 minutes or until it becomes foamy.
  4. Pour the foamy mixture into a large bowl and add the melted, cooled, unsalted butter and flour a cup at a time. Mix by hand with a Dutch style hand mixer until no dry flour remains in the bowl. If necessary, add one or two tablespoons of water the be sure the dough comes together as a smooth ball, Knead by hand for 7 minutes. It’s done kneading when it is smooth and firm to the touch and not sticky. Don’t over-knead.
  5. Remove the dough from the bowl and form into a ball. Wipe out the bowl and grease it with 1-2 tablespoons of oil. Place the dough ball back into the bowl and turn over a couple of times to coat thoroughly with the oil. Cover the bowl with a dish towel or plastic wrap and place in a warm area, free from drafts or cool air for about 1 hour, until the dough has risen and doubled in size.
  6. When the dough is ready, preheat the oven to 450○F and position the oven rack in the upper third of the oven. Line a large (15″ x 20″) baking sheet with parchment paper and spray with Bakers Joy. Set aside.
  7. In a small bowl, whisk together the egg yolk with 1 tablespoon of milk (egg wash). Set aside.
  8. In a large, wide pot (6-8 quarts) add 12 cups of water, baked baking soda and malt powder. Stir to combine and bring to a full boil.
  9. In the meantime, dampen a kitchen towel with water and set aside. Lightly grease a clean work surface with some vegetable oil (spraying with Bakers Joy worked well too). Remove the dough from the bowl and de-gas by punching down the dough. The dough should weigh ~925g. Place it on the work surface and divide into 2, 3 or up to 8 equal pieces. [For large pretzels, divide dough into 2 or 3 pieces.] Cover the pieces that you’re not rolling with plastic wrap or a damp kitchen towel, so they don’t become dry. Using the palms of your hands, roll each piece of dough to a 24-30” [40” for large pretzel] long rope and then shape into a “U”. If the dough will not roll out to the desired length, set aside, under a damp cloth, and let rest for 10-15 minutes, then try rolling again.
  10. Grab the ends of the rope and cross them over each other twice, then bring the ends down to the bottom of the ‘U” and press them down to seal, forming the shape of a pretzel. Lay the pretzel top-side down in the sieve/strainer
  11. Lower the sieve containing the pretzel into the boiling water mixture for about 30 seconds. Either push it down underwater or baste it. The pretzel will puff up while boiling. Flip the pretzel onto the parchment lined, (now top side up) sprayed baking sheet a few inches apart. Repeat for the other pretzels.
  12. Using a pastry brush, brush the top and sides of each pretzel with the egg wash and then sprinkle with coarse salt.
  13. Place the pretzel filled baking sheet on the upper oven rack and bake for about 7 minutes.
  14. Open the oven and quickly rotate the baking sheet so that the pretzels that were facing the front are now facing the rear of the oven. It may seem like a pain, but it’s quick and easy and will ensure even baking.
  15. Continue to bake for another 7 minutes or until pretzels are dark golden brown.
  16. Remove sheet from oven and place pretzels on a wire rack to cool slightly before serving.

Outrageously good if served warm. Mildly spectacular if served later.

NY Rye Bread

Surprise! I didn’t see this recipe first this time. I decided to make a rye bread and since we went to New York this spring for both baseball and friends, I said to myself, “Self, why not make a NY rye bread, even though we didn’t go to Rye, New York?” Ta da!

I made good rye breads before but this time I search for alternative recipes. (As my golf friends know, I am one of those who is never satisfied. My baking QC squad would agree, but since they receive bakes from me, they don’t bring it up.)

The PreppyKitchen is one of my go to baking recipe sites. John Kanell explains his techniques beautifully and they are great to watch.

However, my first change was to add the rye bread improver from King Arthur. This add a boost of great rye flavor, stronger rise and improved texture, and it works!

I also formed the loaf as a boule. I would never make a rye bread in a standard bread pan and would only reluctantly use my unglazed stoneware baking pan. By tensioning the boule before the second rise it allows the loaf to rise up instead of flatten out. Again, it works.

This may be my best rye bread ever.

Yup, that’s what I am talking about!

Rye Bread (Modified) PreppyKitchen Recipe

Author John Kanell
My modifications in italics

INGREDIENTS
• 1½ c warm water 105 to 110°F (360mL)
• 2 Tbl honey (or molasses for a deeper color)
• 2 tsp active dry yeast
• 2¾ c bread flour 330g
• 1½ c rye flour 160g
4 Tbl Rye Bread Improver
• 1 tablespoon vegetable oil
• 1 tablespoon caraway seeds
• 1¾ teaspoons salt

METHOD

  1. In the bowl of a stand mixer fitted with the dough hook attachment, whisk together the warm water, honey and yeast until combined. Let it stand for 5 minutes, until very foamy.
  2. To the bowl with the yeast mixture, add both flours, rye bread improver, oil, caraway seeds and salt. Using a wooden spoon or rubber spatula, mix the ingredients together until no dry flour from the bottom and sides of the bowl remains and a shaggy dough forms.
  3. With the stand mixer, mix on medium-low speed for 6 to 8 minutes until most of the dough balls up around the dough hook and it is smooth and slightly sticky.
  4. Transfer the dough to a lightly floured surface and gently shape into a ball.
  5. Place the ball of dough in a clean, lightly oiled bowl. Flip the dough over once so that the top also has a coating of oil. Scrape down the sides of the bowl to shape the dough into a ball. Cover the bowl with plastic wrap and let it rise in a warm, draft-free spot (75°F) for 30 to 45 min, until doubled in size.
  6. Turn the dough out onto a very lightly floured surface. With moist hands, stretch and shape it into a 9-inch square. Fold the dough using an envelope fold, sealing each fold with the side of your hand. Pinch the seams on the sides and ends together tightly to seal.
  7. With a gentle motion and an open hand, roll the log to tension the surface.
  8. Place the dough on a lightly sprayed piece of parchment paper seam side down. Spray a piece of plastic wrap with nonstick spray, cover the loaf and let it rise in a warm, draft-free spot (75°F) for 35 to 45 minutes. Use the finger poke test to check the rise is complete.
  9. After 15 minutes of the second rise, preheat the oven and baking stone to 350°F.
  10. Bake the bread for 35 to 40 minutes, until the top of the loaf is golden brown, and it sounds hollow when tapped. The internal temperature should be 195°F to 200°F.
  11. Let it cool in the pan for a couple of minutes, then turn it onto a wire rack to cool completely before slicing.
  12. Allow the no-knead rye bread to cool completely before slicing. Waiting to slice freshly baked bread is really difficult, but the cooling time is important for the crumb to set.

He Said With a “Rye” Smile

I made this dark rye loaf 4 years ago. A lot of water and experience passed under the bridge since 2020. I decided to make this bread after lunch, when we finished the oat bread I made a few days ago. In 4 hours, most of which was proofing and baking, this was the result.

I made two loaves from the recipe below. The longer one was in a covered, unglazed, stoneware baking pan, the other was a free standing boule baked on a baking stone.

The crumb was perfect, the crust wonderful and the flavor exceptional. Although that is only my opinion, however, QC totally agrees with me. It was impossible to resist slicing and sampling the bread before it cooled adequately.

DON’T OVER MIX, OVER-KNEAD, OVER PROOF DON’T OVER BAKE.

Homemade Rye Bread


Makes 2 loaves

INGREDIENTS
16 g (4½ tsp) packages active dry yeast
592 g (2 ½ c) warm water (just barely warm to the touch)
2/3 (225 g) cup molasses
2 Tbl caraway seeds (optional)
1 Tbl salt
50 g (¼ c) vegetable oil
20 g (¼ c) cocoa powder
1 Tbl Rye Bread Improver
3 Tbl Bread and Cake Enhancer
240 g (2 c) rye flour
700 g (5 c) bread flour
Egg wash (optional)

METHOD

  1. Dissolve the yeast in the warm water with the molasses. Put yeast mixture into a stand mixer bowl.
  2. Add the caraway seeds, salt, vegetable oil, cocoa powder, 2 cups of rye flour and then 2 cups of bread flour, mixing into the yeast mixture after each addition with a silicone spoon.
  3. Add Rye Bread Improver and Bread and Cake Enhancer
  4. Add more bread flour, a cup at a time, until the dough is not so sticky and is too hard to mix it with the silicone spoon.
  5. Knead the dough with a Kitchen-aide bench mixer using the dough hook. Add more bread flour in small amounts until the dough begins to pull away from the sides of the bowl. Once the sides of the bowl are mostly clean then knead 8 minutes.
  6. Transfer dough to a lightly floured surface and knead by hand until the dough is soft and springs back when poked.
  7. Let the dough rise: Spread some vegetable oil around a large bowl and place the dough in it, turning it to coat it with oil.
  8. Cover the bowl with plastic wrap or a damp cloth. Let rise at room temperature until it has doubled in size, 1 to 1 ½ hours.
  9. Gently press down on the risen dough to release some of its air. Turn the dough out onto a lightly floured piece of parchment paper, knead the dough a few turns and then divide it in half with a sharp knife. The full loaf should weigh ~1910 g.
  10. Shape each half into loaf. Place dough loafs into either oiled 8×4-inch bread loaf pans, or onto a flat baking sheet or peel that was sprinkled with corn meal, depending if you want to cook the loaves in pans or directly on a baking stone. Cover with plastic or a damp cloth.
  11. Let the loaves rise: Let the bread rise again, this time not doubling in volume, but rising by about half of its volume, about 30 to 45 minutes, half as long as the first rising. The dough should be peeking over the top of the loaf pan if using a loaf pan. (Over-proofing the bread may cause it to collapse as the yeast will be exhausted and not have any more energy when placed in the oven.)
  12. If you are using a Dutch Oven or baking stone, place it in the oven and preheat oven to 350°F for at least half an hour before baking.
  13. If baking in a Dutch Oven lift the dough by the corners of the parchment paper and place the dough and parchment paper into the Dutch Oven or directly on the baking stone. (Brush with optional egg wash. Whole eggs and water for a crisp shiny crust, egg whites and water for a crisp crust only.) Score the loaves a few times on the top of the dough right before putting it in the oven. Be careful, the Dutch Oven or baking stone will be hot!
  14. Put loaves in the oven. If you have a mister, mist the dough with a little water the first 10 minutes of baking. Bake for 40-50 minutes, or until done. The internal temperature should be ~200F. The bread should sound hollow when tapped.

The BIG Pretzel Experiment

Last week we went to dinner at Kathrin’s Biergarten with a friend from Florida. They have amazing big pretzels, so of course I had to try my hand. My “normal” sized pretzels are soft and chewy with great pretzel taste so how hard could BIG pretzels be? (More than you would think.)

My first batch this morning was made using the same recipe as my normal pretzels except instead of cutting the dough into 8 pieces, I only cut it into 2. The problem came with rolling each piece into looooonnnngggg logs. To make a 10” diameter pretzel the log needed to be 31” plus the extra to for the knot. (Remember C= Pi x D?) I thought 42” long would be about right. The problem is I couldn’t roll it out longer than about 32’ resulting in a thick 8” diameter “Hulk” of a pretzel. Great taste, great chew, but thick and not very pretzely.

With the second batch I cut back on the amount of flour (600 g instead of 687g) hoping the dough would be more flexible and elastic. It was better, but still would only roll to about 38” long.

Upon reading how to reduce the amount of gluten which should increase the stretchiness, next time I will double the amount of butter. This is supposed to coat the gluten strands and increase the stretchinenss of the dough. (Two batches of these bad boys was enough for today.)

I made up enough words for today. In any event the pretzels were all delicious. Just sayin’.

Pretzels

Note: the dough was too firm. It needs to be slacker to roll out to the desired length. Try 1¼ cups water OR 5 cups of flour

INGREDIENTS
• 1 cup water
• ½ cup regular milk (not fat-free milk)
• 4 ½ tsp. white sugar – regular table sugar
• 1 ½ tsp. salt
• 2 ¼ tsp active dry yeast
• 687g (5 ½ c) flour – poured & leveled – not scooped flour! (Second Batch – 625g or 5 c)
• 50g (3 ½ Tbl) unsalted butter, melted – cooled slightly
• Vegetable oil or spray
• 8 cups water
• 1 Tbl light malt powder
• 4 Tbl baked baking soda
• 1 large egg yolk
• 1 Tbs. water
• Kosher salt

METHOD

  1. Melt the 50g of butter and set aside to cool.
  2. Heat the water in the microwave for 20-30 sec to achieve a temperature of about 120-130 deg then combine with the cold milk in a large measuring cup for a resulting solution temperature of 110 to 115 degrees F.
  3. Add the sugar and salt to the warmed water and milk and stir to combine. Sprinkle in the yeast and mix with a fork. Allow the mixture to sit for about 5 minutes or until it becomes foamy.
  4. Pour the foamy mixture into the bowl of a stand mixer fitted with a dough hook and add the melted, cooled, unsalted butter and flour. (I add the flour a cup at a time to be sure it mixes well.) Mix on low speed for until combined and no dry flour remains in the bowl. Scrape the bowl as needed. If necessary add one or two tablespoons of water the be sure the dough comes together as a smooth ball, Continue to mix for about another 7 minutes or until the dough pulls away from the sides of the bowl and is smooth. Scrape the dough from the hook if it comes up to far. Note: The dough may begin to pull away from the bowl after only 2 minutes but may look a bit pulled or shaggy and still be sticky. The dough should clean the sides of the mixer bowl. It’s not done kneading until it is smooth and firm to the touch and not sticky.
  5. Remove the dough from the bowl and form into a ball. Wipe out the bowl and grease it with 1-2 tablespoons of oil. Place the dough ball back into the bowl and turn over a couple of times to coat thoroughly with the oil. Cover the bowl with a dish towel or plastic wrap and place in a warm area, free from drafts or cool air for about 1 hour, until the dough has risen and doubled in size.
  6. When the dough is ready, preheat the oven to 450○F and position the oven rack in the upper third of the oven. Line a large (15″ x 20″) baking sheet with parchment paper and spray with Bakers Joy. Set aside. Note: You may need 2 baking sheets to avoid crowding the pretzels. If only one small, puny sheet is available, make one batch of pretzels and keep the remaining dough covered, so it does not become dry. Between batches, allow the baking sheet to cool, before filling with remaining pretzels.
  7. In a large, wide pot (6-8 quarts) add 8 cups of water, baked baking soda and malt powder. Stir to combine and bring to a full boil. Place a plate lined with paper towels nearby, as well as the kitchen spider or slotted spoon.
  8. In the meantime, dampen a kitchen towel with water and set aside. Lightly grease a clean work surface with some vegetable oil (spraying with Bakers Joy worked well too). Remove the dough from the bowl, place it on the work surface and divide into 8 equal pieces. [For large pretzels, divide dough into two pieces.] Cover the pieces that you’re not rolling with plastic wrap or a damp kitchen towel, so they don’t become dry. Using the palms of your hands, roll each piece of dough to a 24-30” [40” for large pretzel.] long rope and then shape into a “U”. Grab the ends of the rope and cross them over each other once or twice and then bring the ends down to the bottom of the ‘U” and press them down to seal, forming the shape of a pretzel. Place the pretzels onto the greased parchment-lined baking sheet and cover with a damp kitchen towel to prevent the dough from drying out, while you continue to roll the remaining dough. You can also cut some of them into 1 ½” logs to make nuggets
  9. In a small bowl, whisk together the egg yolk with 1 tablespoon of water (egg wash). Set aside.
  10. One at a time, lower each pretzel into the boiling water mixture for about 30 seconds. I push them down underwater a few times to assure the top is treated as well. The pretzels will puff up while boiling. Using a kitchen spider or slotted spoon, carefully remove the pretzel from the water, blot slightly on paper towels and then place back onto the parchment lined greased or sprayed baking sheet a few inches apart.
  11. Using a pastry brush, brush the top and sides of each pretzel with the egg wash and then sprinkle with coarse salt.
  12. Place the pretzel filled baking sheet on the upper oven rack and bake for about 7 minutes. (12 minutes for large pretzels.)
  13. Open the oven and quickly rotate the baking sheet so that the pretzels that were facing the front are now facing the rear of the oven. It may seem like a pain, but it’s quick and easy and will ensure even baking.
  14. Continue to bake for another 7 minutes or until pretzels are dark golden brown. (12 minutes for large pretzels.)
  15. Remove sheet from oven and place pretzels on a wire rack to cool slightly before serving.

Outrageously good if served warm. Mildly spectacular if served later.

Yes Need No-Knead Oat Bread

King Arthur Baking occasionally sends me catalogs containing lots of cool stuff. I am not a fan of the mixes, but understand why they’re treading towards them. I have LOTS of their equipment and some supplies, but my favorite part are the recipes.

I know I could go online and search for ideas, but the catalog provides inspiration for new bakes.

This no-knead oat bread is delicious. It has a nice soft, chewy crumb, (which is not a given with 25% of the dough being whole wheat flour,) plus the crust was crunchy.

The dough is ready in 15-20 minutes which is perfect for a quick after dinner “chore”. It ferments and doubles in size overnight at room temperature, proofs in the morning, and is ready for breakfast, (depending on when you rise and eat.) It also made a killer roast beast, lettuce and tomato sandwich. Definitely a keeper

No-Knead Oat Bread


https://www.kingarthurbaking.com/recipes/no-knead-oat-bread-recipe
(Edited to suit my technique)

INGREDIENTS
• 1/3 c (71g) light brown sugar or dark brown sugar, packed
• 4 c (480g) unbleached bread flour
• 4 Tbl (57g) butter, softened
• 1 c (113g) whole wheat flour
• 1 1/2 c (134g) old-fashioned rolled oats
• 2 tsp (12g) table salt
• 1/2 tsp instant yeast
• 2 1/4 c (510g) water, cool

METHOD

  1. Put all of the ingredients into a large bowl. Stir, then use a stand mixer to mix up a sticky dough. Continue to beat for several minutes in a stand mixer to incorporate all the flour.
  2. Cover the bowl with plastic wrap, and let it rest at room temperature overnight, or for at least 8 hours; it will become bubbly and rise quite a bit, so be sure your bowl is large enough.
  3. Turn the dough out onto a lightly floured surface. To make a single loaf, choose a 14″ to 15″ long lidded stoneware baker.
  4. Shape the dough to fit and place it in the lightly greased pan of your choice, smooth side up. Cover and let rise at room temperature for about 1 hour, until dough has become puffy and fills the pan about 3/4 full. (I used an oblong Dutch oven.)
  5. Garnish by sprinkling a handful of oats on top. (If baking a round loaf, slash a hash mark pattern (#) on top.)
  6. Place the pan into a cold oven. To keep the bread’s bottom crust from burning, set the rack in the middle, not at or near the bottom. Set the oven temperature to 450°F. Bake the bread for 45 to 50 minutes, then remove the lid and continue to bake for another 5 to 15 minutes, until the bread is deep brown, and an instant-read thermometer inserted into the center registers about 205°F.
  7. Remove the bread from the oven, turn out onto a rack, and cool before slicing.