Gluten & Dairy & Soy Free Artisan Bread

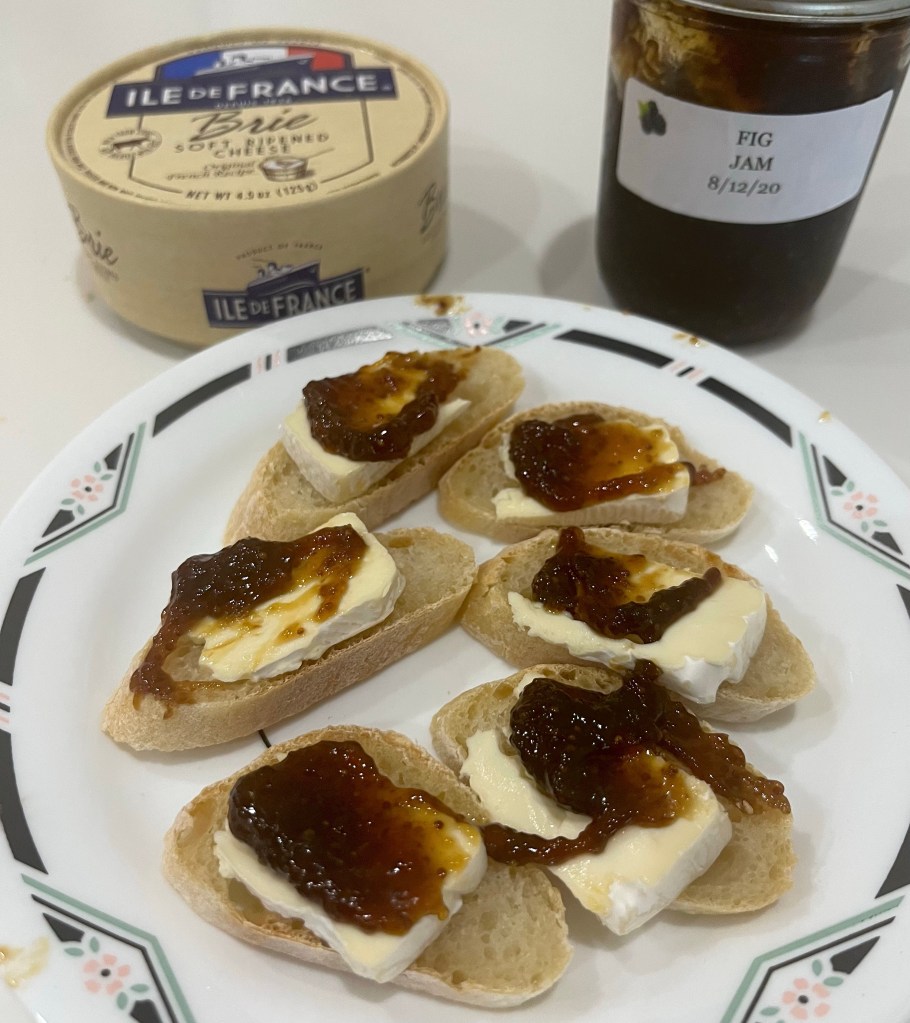
Continuing my gluten free string, this is an artisan bread recipe (mostly) from Kim, the creator of Kim’s Gluten Free Bread Flour.

While preparing the dough I was skeptical of the outcome. The dough was VERY wet (why wouldn’t it be with 100% hydration?) It fermented well and rose as expected but the shaping and proofing was… challenging.

I forgot that the best way to prepare the dough for proofing is to stretch and fold it in a bowl, rather than knead it on a floured surface. I made the change to Kim’s method below.

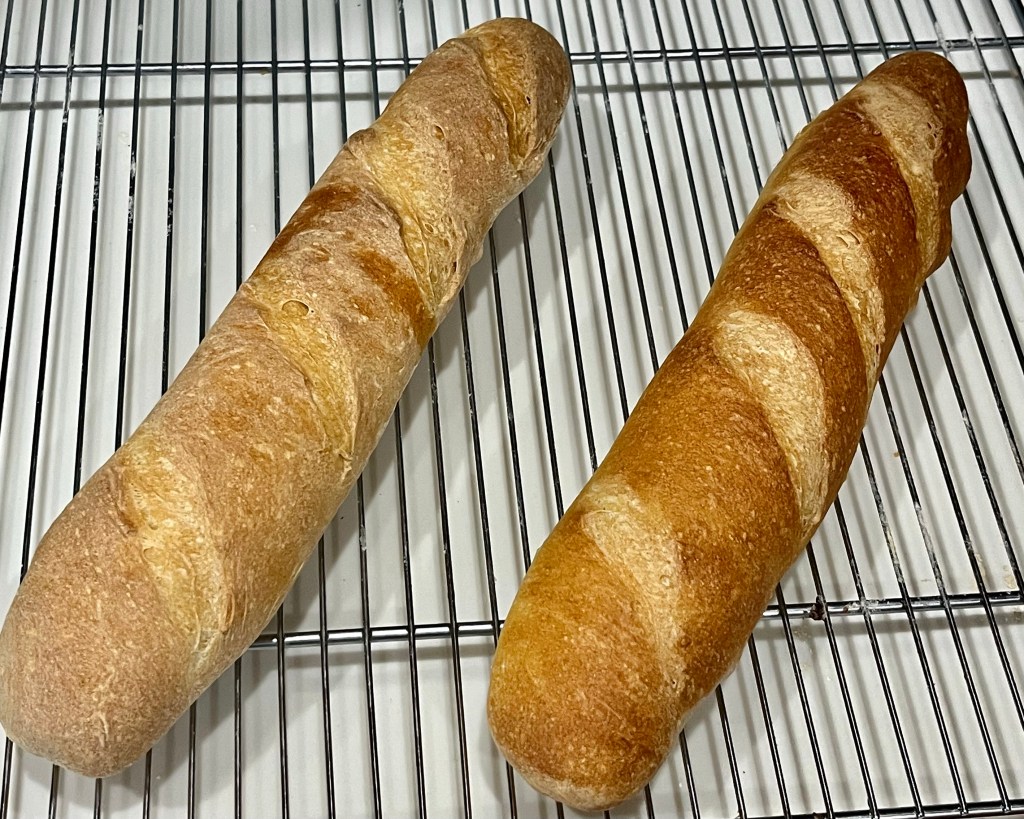
I also thought that after proofing the dough was very wet and wouldn’t score well, but I was wrong. I also thought that the scored bread wouldn’t have any oven spring, but was also wrong. I also, also thought that adding an extra 10 minutes to the baking time would be sufficient, but was also, also wrong. It probably needed another 30, or even 40 minutes for a total of 90-100 minutes. Not an also, but I should have taken the breads temperature near the end of the bake, but I didn’t, resulting in an underbaked center.

The taste was good, definitely LIKE bread, but certainly not like a typical wheat/gluten bread. The crumb and texture was good, just different. For our gluten free friend, she thought it was wonderful, besides all its faults because it was, indeed bread.

Gluten Dairy Soy Free Artisan Bread

INGREDIENTS
• 3 cups (420 g) Kim’s gluten free bread flour blend
• 1½ tsp xanthan gum (in addition to what’s already in the blend)
• 1 ½ tsp psyllium husk powder
• 1 tbsp (9 g) instant/rapid rise/fast-acting yeast (not active dry yeast)
• 1 tsp kosher salt
• 1¾ cups (420 ml) water*
• 2 tbsp (26 ml) olive oil
• 1 tbsp (21 g) honey

METHOD

  1. In the bowl of a stand mixer fitted with the dough hook, add all dry ingredients and whisk using a handheld wire whisk. Add the honey, olive oil, and water. Place on mixer and mix briefly to incorporate. Turn the mixer up to medium high and knead for 5 minutes. Remove the dough hook and scrape the dough into a cohesive mass using a plastic dough scraper or a rubber spatula (or scrape into another bowl). Cover and place the bowl in a warm, draft-free area and allow it to rise (proof) for 1-2 hours, or until doubled in volume.
  2. Refrigerate for at least 6 hours, preferably overnight, but up to 10 days.
  3. On baking day, remove the dough from refrigerator and dump it out onto well-floured surface.
  4. Loosely cover with plastic wrap (the piece that covered the bowl in the fridge.) Let the dough warm to room temperature.
  5. Place the dough in a medium sized bowl and stretch and fold until fairly smooth, wetting your fingers as necessary. It will be a somewhat sticky dough so keep a small bowl of water on hand to wet your fingers.
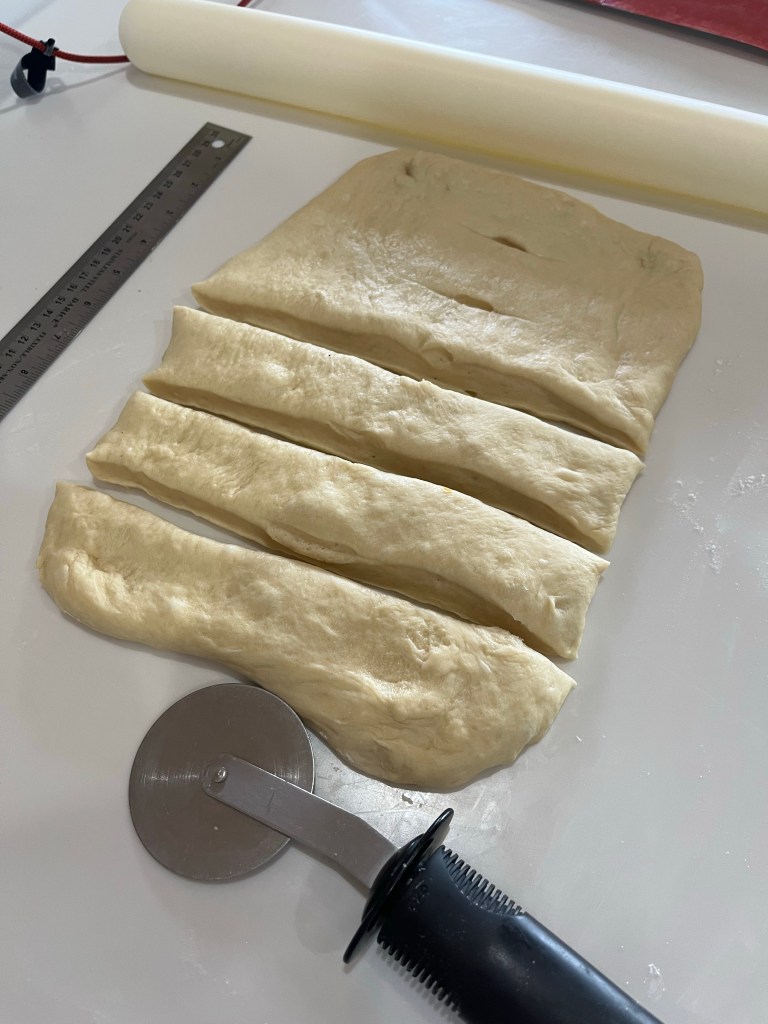
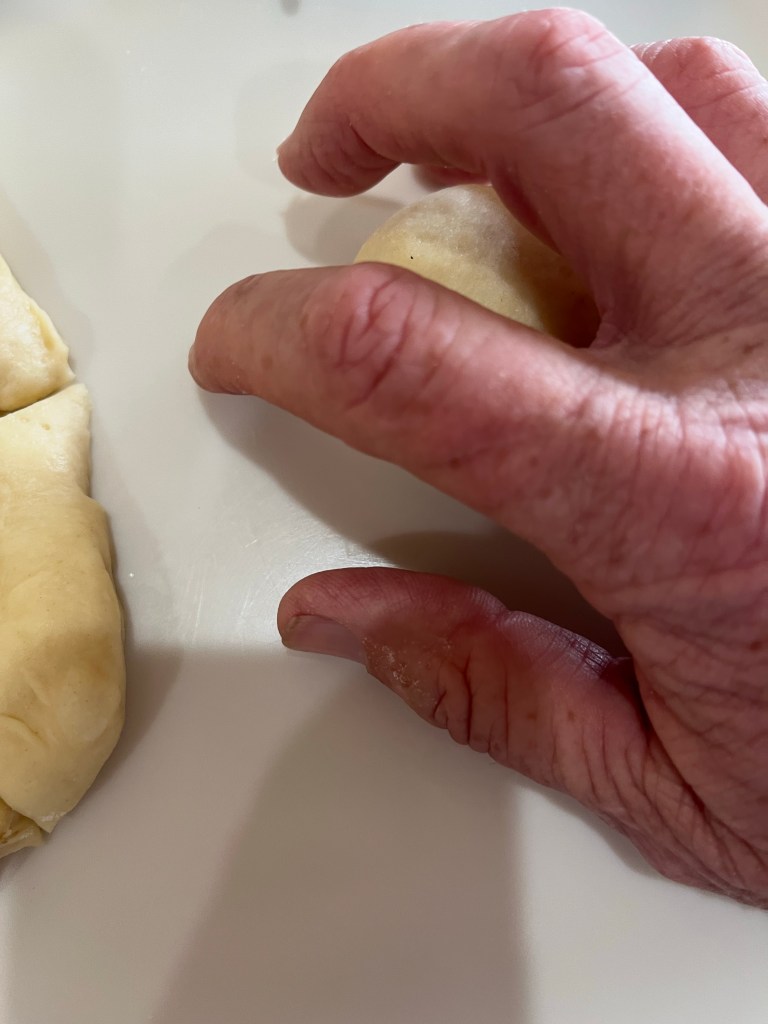
  6. To shape into a boule, simply form into a round ball, pulling the dough up and under the ball and pinching on the bottom. Place on parchment paper. To shape into a baguette, smooth the dough and roll into a rope shape, tapering it at the ends, adding more flour as necessary. Roll out as thick or thin as you’d like and as long as you’re able to fit in your oven (make sure it will fit on your pizza steel or stone). Place it on a sheet of parchment paper.
  7. Place the loaf or loaves, covered loosely with plastic wrap, in a warm, draft-free area to rise until visibly puffed and slightly larger, but not doubled in size, about 1/2 to 1 hour. This time will vary depending on the warmth of your proofing area. DO NOT over proof!
  8. BAKING STEEL OR STONE METHOD: Set up your oven for baking. Place a baking steel or stone (or overturned baking sheet) onto the middle rack with a shallow pan on a rack underneath. Preheat the oven to 450° F.
  9. DUTCH OVEN METHOD: Place a Dutch oven with a tight-fitting lid into the oven and preheat it to 500° F. You won’t need the shallow pan with steam as enough steam will be created in the Dutch oven once the bread goes in. NOTE: This will only work with boules or loaves that can fit into the Dutch oven. If you’re making a longer batard or baguette, you’ll need to use the first method.
  10. When the dough has finished rising and is visibly puffed, run a serrated knife under hot tap water and cut slits in the dough swiftly but uniformly, about ½-¾ inch deep.
  11. BAKING STEEL OR STONE METHOD: Fill a measuring cup with one cup of very hot water (from the tap is fine). Using a pizza peel (paddle), slide the loaf (or loaves) onto the baking steel (or stone), parchment and all. Immediately pour the cup of very hot tap water into the shallow pan. Quickly shut the oven door.
  12. DUTCH OVEN METHOD: Remove the lid carefully and carefully lower the dough, parchment and all, into the Dutch oven. Replace the lid and shut the oven door. Immediately reduce the temperature down to 450° F.
  13. BAKING STEEL OR STONE METHOD: Bake for about 30 minutes for baguettes, or about 40 minutes for boules, OR longer for larger boules (some larger boules can take up to an HOUR or more). If the loaves are getting too browned, you can cover them loosely with foil. The loaves will look crusty and done on the outside, but will feel light when picked up. If they feel heavy, they’re not done yet. Allow them to bake for another 5-10 minutes and then check again, picking up the loaf with two gloved hands. If they’re still feeling heavy, allow them to bake for another 5 minutes and check again.
  14. DUTCH OVEN METHOD: Bake the bread for 60 minutes with the lid on. Remove the cover and continue to bake for another 20 minutes. Check for doneness with a digital thermometer. The bread will be done when the temperature in the center is 200-205F..
  15. Remove from the oven and place on a cooling rack. Allow to cool COMPLETELY before cutting (or it will be gummy on the inside).

Kim’s Gluten Free Bread Flour Blend

Yield: 700g (5 c)

INGREDIENTS
• 285g Bob’s Red Mill potato starch
• 250g superfine white rice flour (DON’T use regular rice flour, ie Bob’s Red Mill)
• 75g Tapioca flour
• 75g Whey protein isolate or egg white protein.
• 15g Xanthan gum

METHOD

  1. Weigh all ingredients and add to a stand mixer bowl
  2. Mix on low, with bowl covered for 30 seconds

Baguette, Brie and Fig Jam

This past week we bought a baguette at a local supermarket with the intent to have some baguette, Brie and jam snacks. Sadly, we had to replace the first less than acceptable baguette with one from a more “upscale” market. (You get what you pay for.) It was a good move and the snack quality increased substantially. Unfortunately, half of the baguette was lost to being stale the second day.

Today, I made my own baguettes, and in all humility, they were better than either of the store bought. Of course, they were fresh and warm, which never hurts.

Paired with some home made jam from our fig tree and a fresh wheel of Brie we had a great treat this afternoon. (And perhaps tonight!)

Fig Jam

Makes approx 10 half pint jars

Ingredients
• 3 pounds fresh figs (washed, stems removed) (6#)
• 2 cups granulated sugar (4 cups)
• ½ cup water (1 cup)
• 1 (2 Tbl) lemon (juice and finely grated zest) (4 Tbl)

METHOD

  1. In a large, heavy-bottomed saucepan, combine the figs, sugar, water,lemon juice, and lemon zest.
  2. Bring to a simmer over medium-low heat, stirring constantly. Cover and simmer over low heat for 1 hour, stirring occasionally.
  3. Remove the cover, attach a candy thermometer to the side of the pan making sure the bottom of the thermometer doesn’t touch the pan’s bottom, and continue simmering, stirring frequently, until the mixture thickens. When the mixture gets quite thick, begin to stir constantly to keep from scorching.
  4. Cook to 220 F and remove from the heat. Or, test a small amount on a very cold saucer by putting the saucer in the freezer for a few minutes, put a little of the fig mixture on it, then returning it to the freezer for 1 minute. When a good gel stage is reached (220 F), the surface of the fruit mixture will wrinkle slightly when pushed with a finger.
  5. While figs are cooking, prepare the jars and lids. Put the glass jars in a boiling water canner about half-filled with water. Bring to a boil, reduce heat, and keep jars in the water.
  6. Put water in a separate saucepan, bring to a simmer, reduce heat to low, and add the jar lids. Keep in the hot water until ready to use. Do not boil.
  7. Fill the jars with the hot fig jam mixture, leaving 1/2-inch headspace. Wipe jar rims and threads with a wet paper towel. Place lids on jars using tongs or a jar magnet then screw on the rings.
  8. Place on a rack in the hot water in the canner. Lower into the water and add enough hot or boiling water to bring the water level to 1 to 2 inches above the jars. Bring jars to a boil for 10 minutes.
  9. Using canning tongs, remove the jars to a clean towel on a flat work surface. Listen for the popping sound which indicates a good seal and tighten the rings.

Baguettes

INGREDIENTS

Starter (poolish)
• 1/2 cup (113g) cool water
• 1/16 teaspoon active dry yeast or instant yeast
• 1 cup (120g) AP Flour
Dough
• 1 1/2 teaspoons active dry yeast or instant yeast
• 1 cup + 2 tablespoons (255g) lukewarm water
• all of the starter
• 3 1/2 cups (418g) AP flour
• 2 teaspoons salt
Egg wash
• 1 egg white
• 1 Tbl water
• Pinch of salt

METHOD

  1. To make the starter: Mix everything together to make a soft dough. Cover and let rest at room temperature for about 14 hours, overnight works well. The starter should have expanded and become bubbly.
  2. To make the dough: Mix and knead everything (including the poolish) together for about 4 minutes on medium-low speed (speed 2 on a KitchenAid); the finished dough should stick a bit at the bottom of the bowl.
  3. Place the dough in a lightly greased medium-sized bowl, cover the bowl, and let the dough rest and rise for 45 minutes. Gently deflate the dough and fold its edges into the center, then turn it over in the bowl before letting it rise for an additional 45 minutes, until it’s noticeably puffy.
  4. Turn the dough out onto a lightly greased work surface. Gently deflate it and divide into three equal pieces. (They should be about 310g each.)
  5. Round each piece of dough into a rough ball by pulling the edges into the center. Cover with greased plastic wrap and let rest for 15 minutes; or for up to 1 hour, if that works better with your schedule.
  6. Working with one piece at a time, flatten the dough slightly then fold it nearly (but not quite) in half, sealing the edges with the heel of your hand. Turn the dough around, and repeat: fold, then flatten. Repeat this whole process again; the dough should have started to elongate itself.
  7. With the seam side down, cup your fingers and gently roll the dough into a 16″ log. Your goal is a 15″ baguette, so 16″ allows for the slight shrinkage you’ll see once you’re done rolling. Taper each end of the log slightly to create the baguette’s typical “pointy” end.
  8. Place the logs seam-side down onto a lightly greased or parchment-lined sheet pan or pans; or into the folds of a heavily floured cotton dish towel (or couche). Cover them with lightly greased plastic wrap and allow the loaves to rise until they’re slightly puffy. The loaves should certainly look lighter and less dense than when you first shaped them but won’t be anywhere near doubled in bulk. After 20 minutes egg wash the loaves (if doing this)
  9. Using a baker’s lame (a special curved blade) or a very sharp knife held at about a 45° angle, make three to five long lengthwise slashes in each baguette, re-cover and let continue proofing for another 12 minutes or until the oven reaches temperature.
  10. At this time, preheat your oven to 450°F with a cast iron pan on the floor of the oven, or on the lowest rack. If you’re using a baking stone, place it on a middle rack. Start to heat 1 1/2 cups water to boiling. When the over temperature is above 300F add the water to the pan.
  11. If your baguettes have risen in a dish towel or couche, gently roll them (seam side down) onto a lightly greased (or parchment-lined) baking sheet. If you plan on baking them on a baking stone, roll them onto a piece of parchment, and lift the parchment onto a baker’s peel.
  12. Load the baguettes into the oven. If you’re baking on a stone, use a baker’s peel to transfer the baguettes, parchment and all, onto the hot stone. Carefully spray the inside of the oven with water. The billowing steam created by the boiling water and sprat will help the baguettes rise, and give them a lovely, shiny crust.
  13. Bake the baguettes — on the pan, or on a stone — for 24 to 28 minutes, or until they’re a very deep golden brown. Remove them from the oven and cool them on a rack. Or, for the very crispiest baguettes, turn off the oven, crack it open about 2″, and allow the baguettes to cool completely in the oven, until both baguettes and oven are at room temperature.
  14. Store any leftover baguettes in a paper bag overnight; freeze for longer storage. Thaw and reheat just before serving.

Pane Italiano For my friend Rita

My friend Rita, and her daughter Sarah, recently returned from an Italian vacation. This bread’s for them!

I woke up this morning and decided to cut the Next Up list in Dede’s Bakery and Confectionary list with Italian bread. This loaf has a nice crumb, open structure, good chewy crust and great taste. “ ‘O sole mio!”

Italian Bread

INGREDIENTS
• 2 ¼ tsp (7g) active dry yeast
• 1 ¾ c (413g) warm water
• 1 tsp (4g) sugar
• 3 ¼ c (455g) bread flour
• 2 tsp (12g) salt
• 1 egg white

METHOD

  1. In the bowl of your stand mixer, mix your yeast, warm water, and sugar. Allow the mixture to sit until the yeast becomes frothy, about 5 minutes.
  2. Once the yeast is ready, add the flour and salt to the bowl. using the dough hook attachment, mix on low speed until the dough comes together, about 3-4 minutes. Increase the speed to medium and mix it for 3-5 minutes to develop the gluten. Add additional flour by the Tbl until the dough barely cleans the sides of the bowl.
  3. Once the dough is done mixing, remove it from the mixer and place it into an oiled bowl. Cover and let the dough rest until it has doubled in size, about 1 hour. Prepare a baking sheet by lining it with parchment paper. It should weigh ~862g.
  4. Dump the dough out onto a floured surface and pound the air out of it, fold it back in on itself into a round and place it back into the bowl, seam side down. Cover and let it rest for another 30-40 minutes.
  5. Once it has rested and risen back up again, dump it out onto a lightly floured surface and degas it again. Cut the dough in half and toll them both up into 10 inch baguette-like loaves. Place the loaves onto your prepared baking sheet, seam side down and cover them. Preheat your oven to 375F.
  6. Whisk egg white and 1 tbl water to use as an egg wash
  7. Proof your loaves until they are nearly double in size about 30-45 minutes. Once the loaves are ready, score your loaves and bake them for 25-30 minutes After the first 15 minutes brush egg wash on the bread, sprinkle with sesame seeds and return to finish baking.
  8. They should have a light golden crust and bake to interior temp of 190F.

Bicolor Brioche

I originally saw this brioche on FB. It was published by Cookist. I tried it as presented and it was a disaster. I decided to try again using my own brioche recipe and it was good. Maybe not good enough to make again, but perhaps with more modification it could be a success.

My brioche recipe is easy to make. It’s a basic bread recipe enriched by adding eggs and milk. To make the bicolor, divide the dough in half and add 2-3 tablespoons of cocoa, (enough to make a solid chocolate dough.) To incorporate the cocoa and end up with a soft pliable texture I added two more tablespoons of butter and two tablespoons of milk, You should have a soft, pliable but slightly sticky dough.

The resultant brioche crumb was tighter that this type of bread should have, however it was a nice soft bread with a pleasant taste. It’s probably not worth making again, however I plan to replace the chocolate component was a pumpernickel brioche. Stay tuned.

BiColor Brioche

INGREDIENTS
• 1 c milk –
• 3 Tbl sugar
• 5 g yeast
• 2 eggs, separated
• 4 Tbl softened butter –
• 4 1/3 c AP flour
• ½ tsp salt
• 3 Tbl cocoa powder

METHOD

  1. Whisk milk, sugar and yeast together in a stand mixer bowl
  2. Add and whisk one egg
  3. Cube butter and add with salt and flour
  4. Mix with dough hook 8 minutes
  5. Divide in half
  6. Add cocoa powder to one of the halves and knead to mix thoroughly
  7. Cover both halves (in separate bowls) for 2 hours
  8. Roll the white dough into a rectangle approx 12×14”
  9. Roll the chocolate dough into a rectangle 11×13”
  10. Lay the chocolate dough over the white leaving ½” border
  11. Roll the two layers together.
  12. Use pizza cutter, cut approximately 1” wide cuts though half the rectangle
  13. Add hazelnut cream to the uncut half of the dough. Spread to approximately 3” wide and 1” from the ends
  14. Twist each 1” cut portion of the dough approx 8 times
  15. Start rolling from the uncut end, carefully pick up and place in a bread pan
  16. Preheat oven to 360 degrees
  17. Let rest 30 minutes
  18. Coat with egg wash
  19. Bake 360 deg for 35 minutes
  20. After 10 minutes, remove from bread pan to let cool
  21. Best if eaten warm.

Supermarket Italian Bread

For some reason I had a craving for Italian Bread. To the best of my knowledge I never made King Arthur Baking’s Supermarket Italian Bread, so it was time to give it a try.

I followed KAF’s (I know it should now be KAB’s, but old dogs and all that…) recipe and made two loaves almost identical both inside and out to what KAF published on their website.

Very nice flavor, good crumb and great crust!

Italian Supermarket Bread

KAF
INGREDIENTS

Dough
• 4 cups (482g) AP Flour
• 2 tablespoons (21g) potato flour or 1/4 cup (21g) dried potato flakes
• 1/4 cup (35g) nonfat dry milk
• 2 teaspoons salt
• 2 teaspoons sugar
• 2 teaspoons instant yeast
• 1 1/3 cups (301g) lukewarm water
• 3 tablespoons (35g) olive oil (I use spray olive oil)
Topping
• 1 egg white, beaten with 1 tablespoon water, or substitute Quick Shine
• sesame seeds

METHOD

  1. In your stand mixer bowl combine the yeast, sugar and water and allow to rest for 10 minutes
  2. Add half of the flour and all of the rest of the dough ingredients till cohesive. Add the rest of the flour mixing between each addition
  3. Knead the dough for 5 to 8 minutes, until it’s smooth and supple, adding more water or flour as needed.
  4. Cover the dough and allow it to rise for 1 hour, or until it’s doubled in bulk.
  5. Transfer the dough to a lightly greased work surface and divide it into two pieces. Shape each piece into a smooth 16″ log. Place the logs into the two wells of a lightly greased Italian bread pan, cover, and let the loaves rise until very puffy, about 1 hour.
  6. Brush the loaves with the egg wash (or spray them with Quick Shine), then sprinkle heavily with sesame seeds. Slash the loaves diagonally, making 3 slashes in each, and immediately put them in the oven. Bake in a preheated 400°F oven for about 25 minutes, until the loaves are golden brown. For the crispiest crust, turn off the oven, prop the door open, and allow the bread to cool in the oven

Roadhouse Rolls

Here is the next bake of the “Next Up” list!

During our “Springsteen Concert Tour” we stopped at a Logan’s Roadhouse for a meal. (We love roadhouse rolls.) Logan’s rolls are formed into round, buttery, enriched rolls, while Texas Roadhouse rolls share the same characteristics but are formed as squares. I opted for round.

In a compromise I rolled the dough into a rectangle, 12” x 8”, and cut it into 24 pieces (6×4). I then rolled each into a sphere using the same technique I used to make dinner rolls. (Place the roll on a barely floured surface, cup you hand over it and roll in a circulate motion until it forms a nice ball and there are no creases.

The taste was spot-on, but QC felt they weren’t as light and fluffy as the commercial roadhouse rolls. Next time I will make the dough a slightly higher hydration and perhaps proof a little longer. Any other suggestions are welcome!

Roadhouse Rolls

INGREDIENTS
• 1 (2 ¼ tsp) packet packet active dry yeast
• 1 ¼ c. warm milk (about 105-110 degrees F)
• ⅓ c. granulated sugar
• ¼ c. unsalted butter room temperature, (½ stick)
• 1 large egg room temperature
• 1 tsp kosher salt
• 3 ½ – 4 c. all-purpose flour plus more for kneading
• 3 Tbsp unsalted butter melted

METHOD

  1. In your stand mixer bowl, add milk and sugar, sprinkle yeast over it.
  2. Let the yeast set until foamy, about 5 minutes.
  3. Then add ¼ cup butter, egg, salt and 2 cups flour to the yeast mixture. Beat on medium speed until batter is smooth.
  4. Gradually add flour until soft ball of dough forms. Then increase speed on mixer to medium high and beat for 2-3 minutes longer. Dough should be tacky, but not sticky. If too sticky, add more flour 1 tablespoon at a time.
  5. Lightly grease large bowl and place dough in ball, turning once to coat. Cover the bowl with clean dish towel and set in warm place to rise until doubled in size, about 45-60 minutes.
  6. Punch the dough down dough gently. Lightly flour the work surface and turn dough out of bowl. Knead lightly if necessary.
  7. Let set a few minutes while you prepare the baking sheets with a silicone mat or by spraying with non-stick cooking spray.
  8. Roll dough out to 12×8 inch rectangle, ½ inch thick.
  9. Cut the dough into even pieces using a pizza cutter so you have 24 pieces of dough. It’s optional to roll the squares into spheres if you like.
  10. Transfer rolls to prepared baking sheets, separated by at least 1”. Cover with dish towel and let rise in a warm place until almost doubled in size, about 45-60 minutes.
  11. 20 minutes prior to rising being done, preheat oven to 350 F.
  12. Place the rolls in the preheated oven at 350 F. Bake rolls for 12-15 minutes or until golden brown.
  13. Remove from oven and brush with melted butter.

No Nothin’ Rustic Bread

I often make a no knead bread which uses the stretch and fold technique and is delicious, has a good crumb, crust and air holes.

I saw this recipe in my Facebook feed and I was skeptical it could compete with my usual recipe/method.. After a trial bake it was every bit as good as my go-to recipe with NO stretch and fold or kneading. Prep time was about 10 minutes. Total “hands-on” time was about 15 minutes.

We all know you don’t need to knead (I love saying that) to create gluten. Gluten development starts on hydration of the dough. Thorough mixing equals good hydration which enables gluten formation.

I mixed the three ingredients (plus water) with my danish dough whisk assuring all the dry ingredients were well hydrated before covering and placing in the fridge overnight.

In the morning I let the dough warm to room temperature and rise for about 3 hours. I placed it on a well floured parchment paper, folded it into a round boule, flipped it over so the folded side is down. Before placing in the Dutch oven I cut a deep X in the top.

No Knead Bread – 3 Ingredient

INGREDIENTS

  • 3 1/2 cups bread flour
  • 2 teaspoons sea salt
  • 1 teaspoons instant yeast
  • 1 2/3 cups water (100 degrees F

METHOD

  1. Mix dry ingredients in a large bowl. Using a wooden spoon or Dutch dough whisk blend warm water into the dry ingredients. This dough will be wet and shaggy, also very forgiving. Mix until
    no dry flour is seen. Cover with plastic wrap and put a towel on top to proof for 8-10 hours at room temperature or for several days in the fridge.
  2. If refrigerated, take the dough out and place on parchment before heating the oven so it gets to room temperature, then preheat the oven to 450 F with the covered Dutch oven inside.
  3. Dust a large square of parchment paper with flour and turn out the dough carefully. (It will be sticky but try to preserve the proof.) Dust the top with flour and using a dough scraper gently
    fold the dough over and create a round boule. Use the sharp edge of the scraper to score lines in the dough. Cover with the plastic wrap and let rest until pot and oven are up to temperature.
  4. Remove the pot from the oven. Place the parchment paper and dough into the Dutch oven and replace lid. Bake, covered, for 35 minutes. Then, anywhere from 5 to 10 minutes uncovered
    (this is a personal taste issue about the crispness of the crust). Let the bread rest 30 minutes. It will be hard, but you will wreck the loaf by cutting into it immediately.

The Baguette Challenge – #1

I was in Versailles, Fr last month and had what was undoubtedly the best baguette of my life. The crust had the exact right crunch and the interior was soft and light. Then and there I decided I needed to perfect my baguette baking to at least approach this level of perfection.

My go-to recipe is from King Arthur and it served me well. Upon returning home I searched for differences in recipe ingredients and methods keying on authors who tauted the bread qualities that I wanted.

From what I understand the hydration level, (this recipe is 72%) at least in part, determines the size of the holes in the bread. By using the stretch and fold technique with a long rest (45 min) between each helps develop the gluten. These two properties contribute to the characteristics I desire.

This is the first attempt of “perfecting” my baguette. Do you remember my five attempts at baking an acceptable rye bread? Well, here we go again,

Classic French Baguettes

INGREDIENTS

• 500 g all purpose flour
• 360 g water
• 10 g salt
• 3 g instant yeast about 1 tsp
• 25 g honey about 1 Tbsp

METHOD

  1. Mix all ingredients in a bowl, cover with a plastic wrap and let rest for 15 minutes.
  2. Stretch and fold every 45 minutes and repeat at 3 times, flipping the dough upside down after each set. The rest time between stretch and folds is important.
  3. Cover the bowl with a plastic wrap and place in refrigerator overnight for about 12-14 hours.
  4. Turn the dough on a lightly floured work surface. Divide into 3 equal parts and gently shape into rectangles without knocking the air out of the dough. Cover and let rest for 45-60 minutes.
  5. Preheat the oven to 500F, with a baking stone positioned in the upper half the oven. I like to use a small cast iron skillet with water to provide steam. Add the water below when the loaves are put into the oven.
  6. Stretch each dough rectangle slightly and fold into a cylinder, sealing the seams as you roll. Using your hands, roll the cylinders gently stretching them from the center towards the ends to desired length, about 14-15 inches.
  7. Place each loaf on a lightly floured couche, seam side up. Cover and proof at a room temperature for about 30-60 minutes, or until the dough has sufficiently proofed. Press dough with a finger. If it springs back slowly it is properly proofed. If it never springs back it is over proofed and if it springs back quickly it is under proofed.
  8. Transfer the baguettes to a piece of parchment paper, seam side down and dust off excess flour. I like to use a serrated break knife to make 5 scores on each baguette. Don’t cut straight across the loaf, but with a shallow long cut down the length. Each cut should be 4-5” longWhen scoring, use a swift and firm motion to ensure nice and clean cuts.
  9. Carefully open the oven, and slide the rack with the baking stone out. Slide the baguettes off the parchment paper and onto the baking stone. Add a cup of water to the cast iron skillet, close the oven and reduce temperature to 475F. Bake for 15 minutes.
  10. Remove the water pan, rotate the baguettes, drop the temperature to 450F and continue baking for another 10- 15 minutes, Check how brown the baguettes are after 10 minutes and every couple of minutes thereafter. They should be a nice dark brown, but not too dark. Over baking will make the crust and interior too hard. Experience will tell you when it is Goldilocks just right.

nGDS Pretzels with Kim’s Flour Blend

(nGDS – Non Gluten/Dairy/Soy)

I was not a fan of my previous pretzel experiment using KAB Measure For Measure gluten free flour. While the taste was acceptable, the texture was wrong and the resulting pretzels (both dough and baked) were very fragile. That batch ended up being binned.

This batch used Kim’s Flour Blend, the flour used to make the Artisan nGDS bread a few days ago. This flour provided the correct texture and dough strength for the pretzels to hold their shape, although the taste was not as close to a traditional pretzel as the Measure For Measure flour. As an extra precaution I cut the parchment paper under each un-baked pretzel and used a large spatula to carefully slide the pretzel and paper into the alkaline bath. The paper slid off the boiled pretzel and was discarded.

This recipe required a longer bake time. Depending on your oven, bake 9 to 10 minutes, rotate the baking tray, then bake another 9 to 10 minutes.

nGDS Soft Chewy Pretzels with Kim’s Flour

Ingredients:
• 3 cups (420g) Kim’s blend GF flour – weighed or poured & leveled
• 1 ½ tsp xanthan gum
• 1 ½ tsp psyllium husk powdered
• 1 tbl active dry yeast
• 1 tsp salt
• 1 cup water
• 3/4 cup almond milk
• 2 tbl olive oil
• 1 tbl honey
• 3 ½ tbl red palm and coconut oils shortening (Nutivia) melted – cooled slightly

Directions:

  1. Heat the water in the microwave for 20-30 sec to achieve a temperature of about 120-130 deg then combine with the cold milk in a small bowl for a resulting solution temperature of 110 to 115 degrees F. Add the sugar and salt to the warmed water and milk and stir to combine. Sprinkle in the yeast and mix with a fork. Allow the mixture to sit for about 5 minutes or until it becomes foamy.
  2. Pour the foamy mixture into the bowl of a stand mixer fitted with a dough hook and add the melted, cooled, unsalted butter and flour. (I add the flour a cup at a time to be sure it mixes well.) Mix on low speed for until combined and no dry flour remains in the bowl. Scrape the bowl as needed. Continue to mix for about another 7 minutes or until the dough pulls away from the sides of the bowl and is smooth. Scrape the dough from the hook if it comes up to far. Note: The dough may begin to pull away from the bowl after only 2 minutes, but may look a bit pulled or shaggy and still be sticky. It is not done kneading until it is smooth to the touch and no longer sticky.
  3. Remove the dough from the bowl and form into a ball. Wipe out the bowl, if necessary and grease it with 1-2 tablespoons of oil. Place the dough ball back into the bowl and turn over a couple of times to coat thoroughly with the oil. Cover the bowl with a dish towel or plastic wrap and place in a warm area , free from drafts or cool air (a microwave, turned off is a good location), for about 1 hour, until the dough has risen and doubled in size.
  4. Refrigerate covered for at least 6 hours, preferably overnight, but up to 10 days.
  5. On baking day, remove the dough from refrigerator and dump it out onto well-floured surface. Loosely cover with plastic wrap (the piece that covered the bowl in the fridge) and let the dough warm to room temperature.
  6. When the dough is ready, preheat the oven to 450 F and position the oven rack in the upper third of the oven. Line a large (15″ x 20″) baking sheet with parchment paper and spray with Bakers Joy. Set aside. Note: You may need 2 baking sheets to avoid crowding the pretzels. If only one small, puny sheet is available, make one batch of pretzels and keep the remaining dough covered, so it does not become dry. Between batches, allow the baking sheet to cool, before filling with remaining pretzels.
  7. Place in proofing oven (or other draft free, warm location such as an oven, turned off, with the light on) for 1 hour
  8. In a large, wide pot (6-8 quarts) add 8 cups of water, baked baking soda and malt powder. Stir to combine and bring to a full boil. Place a plate lined with paper towels nearby, as well as the kitchen spider or slotted spoon.
  9. In the meantime, dampen a kitchen towel with water and set aside. Heavily dust your work surface with Kim’s Blended Flour, remove the dough from the bowl, place it on the work surface and divide into 8 equal pieces. Cover the pieces that you’re not rolling with plastic wrap or a damp kitchen towel, so they don’t become dry. Using the palms of your hands, roll each piece of dough to a 24-30 inch long rope and then shape into a “U”. Don’t be afraid to use plenty of flour. The dough is sticky! Grab the ends of the rope and cross them over each other once or twice and then bring the ends down to the bottom of the ‘U” and press them down to seal, forming the shape of a pretzel. Place the pretzels onto the greased parchment-lined baking sheet and cover with a damp kitchen towel to prevent the dough from drying out, while you continue to roll the remaining dough. You can also cut some of them into 1 ½” logs to make nuggets.
  10. Place the formed pretzels in a warm, draft free location (such as a proofing oven, or regular oven (Off) with the oven light on to proof for an hour.
  11. The lack of gluten results in a more fragile structure than a traditional gluten pretzel dough. To help maintain the pretzel shape I cut the parchment paper around each pretzel and gently lowered them into the mixture as described in the next paragraph. The paper floats off when the pretzel is flipped. The boiling gave the dough more structure and helped they stay in shape.
  12. One at a time, lower each pretzel into the boiling water mixture for about 30 seconds. I push them down underwater a few times to assure the top is treated as well. The pretzels will puff up while boiling. Using a kitchen spider or slotted spoon, carefully remove the pretzel from the water, blot slightly on paper towels and then place back onto the parchment lined greased or sprayed baking sheet a few inches apart.
  13. Using a pastry brush, brush the top and sides of each pretzel with the almond milk wash and then sprinkle with coarse salt.
  14. Place the pretzel filled baking sheet on the upper oven rack and bake for about 7 minutes. Open the oven and quickly rotate the baking sheet so that the pretzels that were facing the front are now facing the rear of the oven. It may seem like a pain, but it’s quick and easy and will ensure even baking. Continue to bake for another 7 minutes or until pretzels are dark golden brown.
  15. Remove sheet from oven and place pretzels on a wire rack to cool slightly before serving. Outrageously good if served warm. Mildly spectacular if served later.

Kim’s Gluten Free Bread Flour Blend 700g (5 c) 1.4kg (10 c) 2.1kg (15 c) 2.8kg (20 c)
Bob’s Red Mill potato starch 285 g 570 g 855 g 1140 g
superfine white rice flour (DON’T use 250 g 500 g 750 g 1000 g
regular rice flour, ie Bob’s Red Mill)
Tapioca flour 75 g 150 g 225 g 300 g
Egg white protein 75 g 150 g 225 g 300 g
Xanthan gum 15 g 30 g 45 g 60 g

Soft, Chewy Pretzels

We needed a thank you gift for a friend, who happens to love my soft, chewy pretzels and as my golf was cancelled due to rain…

I had trouble rolling the dough into long enough ropes to make good pretzel “knots.” I believe the dough wasn’t wet enough to allow the 24”-30” rope. Today’s was only about 18”.

That aside the flavor and texture was wonderful. QC gave it a big thumbs up.