Prepare two 5-inch cake pans with parchment paper circles in the bottom and baking spray or grease the sides. Preheat oven to 350°F (176°C).
Combine the flour, baking powder and salt in a medium sized bowl and set aside.
Add the butter, sugar, oil and vanilla extract to a large mixer bowl and beat together until light in color and fluffy, about 2-3 minutes. Do not skimp on the creaming time.
Add the eggs one at a time, mixing until mostly combined after each. Scrape down the sides of the bowl as needed to be sure all ingredients are well incorporated.
Add half of the dry ingredients to the batter and mix until mostly combined.
Slowly add the milk and mix until well combined. The batter will look curdled, but that’s ok.
Add the remaining dry ingredients and mix until well combined and smooth. Scrape down the sides of the bowl as needed to be sure all ingredients are well incorporated. Do not over mix the batter.
Wrap each pan with wet cake pan strips then divide the batter evenly between the cakes pans (~320g per cake pan.) and bake for ~28 minutes, or until a toothpick comes out with a few crumbs. (205°F) If the tops of the cakes brown too much, cover with foil after ~20 minutes.
Remove the cakes from the oven and allow to cool for about 2-3 minutes, then remove to cooling racks to cool completely.
Always a fan of Chef Jacques Pepin who scores a home run again with this cake. It’s easy to make, the directions are spot on and it’s delicious to boot!
My only change was to substitute 1/2 cup of yogurt for 1/2 cup of sour cream. Who knew a container of yogurt was only 1/2 cup?
Blueberry Cake —Cake Chef Jacques Pepin
Active time: 15min Total Time: 2 hours
INGREDIENTS
1 ½ c plus 1 Tbl AP flour divided.
2 tsp baking powder
3 large eggs
1 c granulated sugar
½ c plain yogurt (or 1 c yogurt and no sour cream)
½ c sour cream (or 1 c sour cream and no yogurt)
½ tsp salt
½ tsp vanilla
½ c vegetable oil
2 tsp lemon zest
1 ½ c fresh or frozen blueberries Lemon Glaze/Syrup
3 Tbl lemon juice
1 c sifted confectioner’s sugar
METHOD
Preheat the oven to 350F
Grease the sides and bottom of a loaf pan
Sift together all dry ingredients for the bread
In a large bowl, mix together all the moist ingredients
Slowly add in the dry ingredients
In a separate bowl, add the Tbl of flour to the blueberries and toss to coat the fruit.
Fold gently into the batter
Pour the batter into the prepared pan
Bake for 50 to 55 minutes. If a toothpick comes out clean the bread is done
Remove from the oven and let cool for 10 minutes
Remove loaf from pan and allow to cool on a cooling rack
In a small saucepan on low heat, add the powdered sugar to the lemon juice and let it dissolve. Simmer for 3 minutes
Using a toothpick, poke holes all over the loaf, top and sides
Use a pastry brush to brush the lemon syrup on the top and the sides.
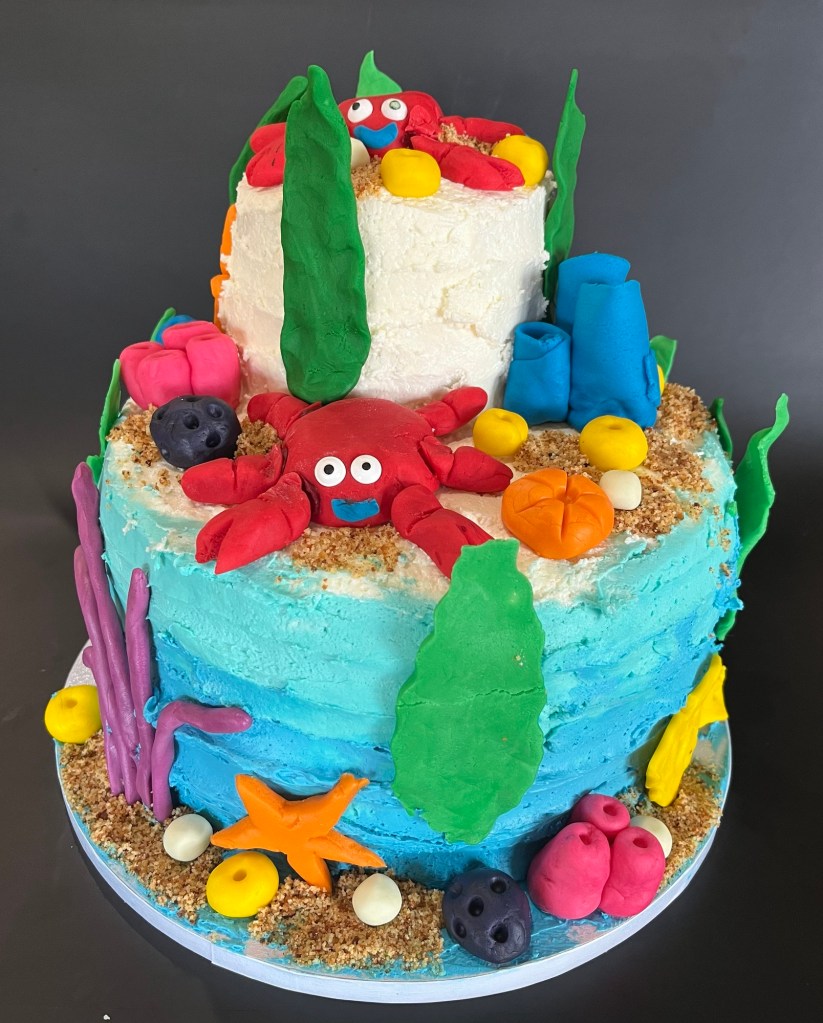
This week was our son, Neil’s, birthday. He is a coffee Q Grader, cat owner and competitive pin ball player. This cake was in honor of one of his many accomplishments?
It’s based on my extreme chocolate cake, shortbread cookies and added a new meringue buttercream frosting. It was a relatively small cake so the decorations were somewhat oversized, but overall it was acceptable.
The red and white is royal icing. The black and yellow is fondant.
Swiss Meringue Buttercream – From Sally’s Baking Addiction
INGREDIENTS • 6 large egg whites (approximately 230g) • 2 cups (400g) granulated sugar • 1 and 1/2 cups (3 sticks; 350g) unsalted butter, softened but still cool (60°F and firm) and cut into Tbsp size pieces • 2 teaspoons pure vanilla extract • 1/8 teaspoon salt
METHOD
Make sure all the tools you are using are completely cleaned, dried, and grease-free. A quick wipe with a little lemon juice or white vinegar is very helpful.
Separate the eggs 1 at a time into a small bowl, then transfer to the metal stand mixer bowl. Repeat with the remaining egg whites. This way, if a yolk breaks in one of them, you don’t waste the whole batch.
Whisk sugar into the egg whites, then set the bowl over a saucepan filled with two inches of simmering water over medium heat assuring the bottom of the egg whites bowl don’t touch the water.
Whisk the whites and sugar constantly until sugar is dissolved and mixture has thinned out, about 4 minutes. The mixture will be thick and tacky at first, then thin out and be frothy white on top. To test that it’s ready, you can use your finger, or an instant read thermometer. Lightly and quickly dip your finger (it’s very hot, be careful) and rub the mixture between your thumb and finger. You shouldn’t feel any sugar granules. If using a thermometer, the temperature should read 160°F (71°C).
Don’t let it cool down to start this next step– it’s important to begin mixing while it is still warm. On medium-high speed, beat the mixture until stiff glossy peaks form and the meringue is no longer warm to the touch, at least 10-15 minutes. On particularly humid days, this has taken me up to 17-18 minutes. If it’s still not reaching stiff peaks, stop the mixer, place the bowl–uncovered–in the refrigerator for 10 minutes, then return to the mixer and continue beating until stiff peaks form.
If the bowl and meringue still feel warm, wait until both cool to room temperature (around 70°F (21°C)) before adding the butter in the next step. Feel free to place it in the refrigerator. A warm bowl and meringue will melt the butter.
Switch the stand mixer to the paddle attachment. On medium-high speed, add the butter 1 Tablespoon at a time. Wait for the butter to fully mix in before adding the next Tablespoon. After all the butter has been added, turn the mixer down to medium speed and fully beat in the vanilla and salt, about 30 seconds.
Add any color the beat until uniform. (Gel food coloring only.)
Your Swiss meringue buttercream should be thick, creamy, and silky smooth.
Notes Too Thick or Too Thin:
If your meringue has separated, curdled, or is too thick at any point after you mix in all of the butter, place the mixture in your heat-proof bowl back over a pot of 2 inches of simmering water.
Without stirring, let the edges of the meringue warm up and become liquid (the center of the meringue will still be solid), about 1-2 minutes.
Remove from heat and return to the mixer. Beat meringue on low speed for 30 seconds, then switch to medium-high speed and beat until smooth, about 2 minutes. Works every time.
If your mixture has become too thin and soupy after you add the butter, place the entire bowl in the refrigerator (covered or uncovered, doesn’t matter) for 20 minutes to cool down, then return it to the mixer and beat on medium-high speed until thickened. Any longer than this will solidify the butter, so only refrigerate in 20 minute spurts. If it’s still soupy, place back in the refrigerator for longer before re-whipping again.
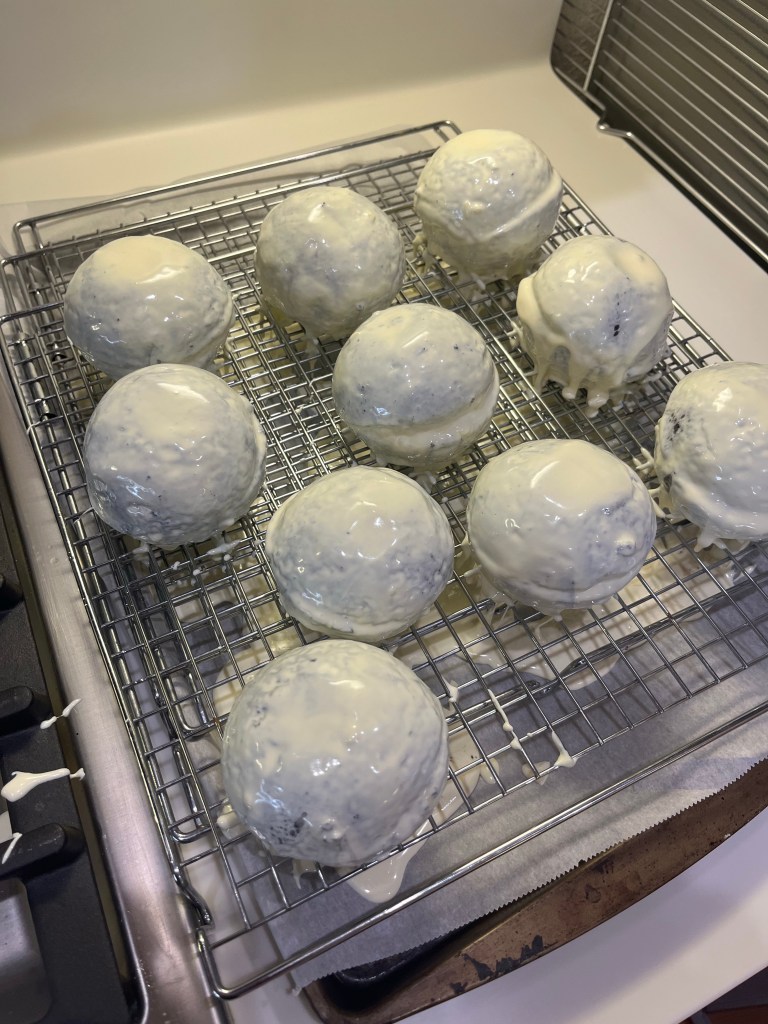
If you follow me you likely know I am a Vermonter and anyone from New England is known to be… um… frugal. I made some baseball cakes this week and when the cake rises in the hemispherical molds there is a portion that needs to be trimmed off. Well, I am not one to waste anything, especially chocolate cake.
I made what QC termed mini chocolate cakes from the remnants. Really all I did was to make some White Meringue Frosting and cover the tops of the cakes and add a few sprinkles. Easy, peasy.
RemnantsFirm Peak White Meringue FrostingVoila!
White Meringue Frosting
INGREDIENTS
¾ cup (170 g) confectioner’s sugar
3 large egg whites
2 Tbl cold water
1 tsp lemon juice
1 ½ tsp vanilla extract
METHOD
Place all ingredients in the stand mixer bowl and whisk until well combined.
Chose a saucepan large enough so the mixer bowl will rest on the rim but not touch 1-2” of water in the saucepan.
Once the water is almost boiling, place the mixer bowl on the saucepan and whisk the mixture. Turn the burner to low. The water should be not quite boiling. The mixture must not boil. Whisk until all the sugar is dissolved or you will end up with a grainy looking frosting. Check to see if it has reached 160-170⁰ F.
Place the bowl in the kitchen mixer with the whisk attachment on. Whisk the meringue frosting until stiff peaks forms and has a glossy look. This can take up to 12 -15 minutes or more. But don’t over-beat. You will beat air into the frosting. It needs to be easily spreadable
When the white meringue frosting is ready, if desired it can be colored with food gel colors. This frosting will crust over time, but the center of the frosting swirl will still be thick and fluffy.
Cakes and cupcakes with white meringue frosting can be stored in the refrigerator for two days.
Tip: Makes enough to frost 12 cupcakes. If using it on cupcakes, use a plastic piping bag and a large piping tip for great cupcake swirls
Yesterday was Fran’s (a.k.a. QC’s) birthday and for any who know her she feels Dani Rojas had it almost right: “Baseball is life” but Dani, American football is a close second.
To celebrate. I decided to make personalized, individual baseball birthday cakes. I had 2 1/2 inch silicone hemisphere molds but thought they would be too small a piece of cake so I bought two 3” ones. (In hindsight, the smaller ones were probably adequate, but would be more difficult to decorate.)
Due to the need to keep the cakes cold this is a pretty long procedure. It required about 6 hours total.
These photos were from a test batch before I decided to use pink raspberry buttercream for fill and bind the cakes.
Extreme Chocolate Cake Baseballs
Makes five 3” spherical cakes
INGREDIENTS • For Cake: 3 cups white sugar • 2⅔cups all-purpose flour • 1¼ cup unsweetened cocoa powder • 2¼ teaspoons baking soda • 2¼ teaspoons baking powder • 1½ teaspoon salt • 3 eggs • 1½ cup milk • ¾ cup vegetable oil • 3 teaspoons vanilla extract • 1½ cup boiling water • For Buttercream: 2 stick softened butter • 2cup icing sugar • 4-6 Tbl milk • For Raspberry Buttercream: 1 stick softened butter • 1 cup icing sugar • 2-3 Tbl milk • 6 oz fresh raspberries • For White Chocolate Ganache: 450g White Chocolate • 110g (½ cup) heavy cream • ~1 tsp white food coloring • For the Black Royal Icing: 1c (120g) confectioners’ sugar, sifted. • 1 Tbl meringue powder (not plain egg white powder) • 3 drops black food coloring • 1 Tbl Black Cocoa • 2-3+ Tbl room temperature water • For the Red Royal Icing: 1 c (120g) confectioners’ sugar, sifted. • 1 Tbl meringue powder (not plain egg white powder) • 3+ drops red food coloring • 2-3+ Tbl room temperature water
METHOD
Preheat oven to 350F (175C). Spray two 3” cell diameter silicone molds with Pam For Baking or equivalent. Line a 9×11” jelly roll pan with parchment paper.
Make the cake: In a stand mixer bowl, stir together the sugar, flour, cocoa, baking soda, baking powder and salt. Add the eggs, milk, oil and vanilla, mix for 3 minutes. Stir in the boiling water by hand.
Use a 1/3 measuring cup to fill each well two thirds full.
Pour remaining batter into jelly roll pan and spread to flatten.
Bake for ~25 minutes in the preheated oven, until a toothpick inserted comes out clean or 205 internal temp. Do NOT let the internal temp exceed 205 deg F or the cakes will be overdone.
Cool for 10 minutes before removing from silicon molds to cool completely.
Remove he cakes from the molds and refrigerate for 30 minutes to firm up the cakes.
Set small sheet cake aside to be used as a base for the baseballs when serving.
While the cakes are cooling make the raspberry buttercream: a. Make Raspberry Syrup: Heat 170g of raspberries in a small saucepan with two Tbl sugar and heat until boiling. b. When the raspberries are very tender mash them to break them into a sauce. c. Sieve the raspberries to remove the seeds and pulp and return to heat to reduce by half then cool. d. Make Raspberry Buttercream: Mix the butter and icing sugar and raspberry syrup. Add more milk as required to make the buttercream soft and easily spreadable. Beat at high speed until the buttercream is smooth and well mixed. (You may need to add the additional milk to achieve the desired viscosity as the cake will be very tender and fragile.)
Form and assemble the cake balls: With a sharp knife cut the top of each hemisphere to flatten and create a small hole in each cake (I used a melon scoop) a. Fill the hole in each hemisphere and cover half of the cakes with buttercream b. Mate each coated hemisphere with an uncoated one and return to fridge to set the buttercream.
Make vanilla and grass-green buttercream: Repeat making raspberry buttercream but substituting milk for raspberry syrup. Divide the buttercream 4::1. Color the larger amount with green food coloring to use to decorate the sheet cake later. a. Use the vanilla buttercream to fill any holes around the circumference of the cake ball and crumb coat each ball. (I dipped the ball in a thin buttercream and used gloved hands to smooth.) b. Return to the fridge to set the buttercream.
Make the white chocolate ganache: The ganache must be pourable but thick enough to cover each ball with a smooth coating. a. Fill a saucepan with water to about 2 inches deep. b. Place a metal or glass bowl over the warm water. Make sure the bowl does not touch the water. c. Place the chocolate and cream in the bowl and stir frequently. When the chocolate is almost completely melted, remove it from the heat and let the rest of the chocolate melt while it sits off the heat. Add white food coloring until the desired level of whiteness is achieved and mix well. If there is any un-melted chocolate let it rest until all the chocolate melts. As long as the mixture is warm, the chocolate will continue to melt.
To coat the balls: Place each cold ball on a stable surface that will keep them in place. a. Smooth the cold balls with gloved hands. b. Pour the white ganache over each ball, covering completely. Allow the chocolate to harden at room temperature, or in for fridge. c. If desired re-coat the balls by chilling them and repeat from step #12.
Make the Black Royal Icing: Combine confectioners’ sugar, meringue powder, black food coloring, black cocoa and 2 Tbl of water in a large bowl. a. Using a hand mixer or a stand mixer fitted with a whisk attachment, beat icing ingredients together on high speed for 1.5 – 2 minutes. b. When lifting the whisk up off the icing, the icing should drizzle down and smooth out within 5-10 seconds. If it’s too thick, beat in more water a few drops at a time. c. I usually need 3 Tbl but on particularly dry days, I use up to 4-5 Tbl. d. Keep in mind that the longer you beat the royal icing, the thicker it becomes. If your royal icing is too thin, just keep beating it to introduce more air OR you can add more confectioners’ sugar. e. Remember the icing has to flow through a very small piping tip so it cannot be to thick. If it’s too thin it will run (for reference, see my photos)
Make the Red Royal Icing: Sift confectioners’ sugar and meringue powder into a large bowl and add 2 Tablespoons of water. a. Add half the water after sifting the sugar. Add the remaining water or more, checking flow consistency of the icing is what you want for piping etc. b. Using a hand mixer or a stand mixer fitted with a whisk attachment, beat icing ingredients together on high speed for 1.5 – 2 minutes. c. When lifting the whisk up off the icing, the icing should drizzle down and smooth out within 5-10 seconds. If it’s too thick, beat in more water a few drops at a time. If your royal icing is too thin, just keep beating it to introduce more air OR you can add more confectioners’ sugar. d. When applied to cookies or confections in a thin layer, icing completely dries in about 2 hours at room temperature, quicker in the fridge.
Decorating the baseballs: Use black royal icing to draw the seams of the baseball. (I suggest doing one ball at a time, returning to the fridge between piping steps.) I wanted each person’s name written in script on each baseball using the black royal icing. a. After all the names and seams are piped and the black royal icing is setting in the fridge, clean the piping pen and fill with red royal icing. b. Remove the baseballs from the refrigerator, one at a time, and pipe the red stitches in the traditional baseball style. c. Return the baseballs to the fridge but bring them to room temperature an hour before serving.
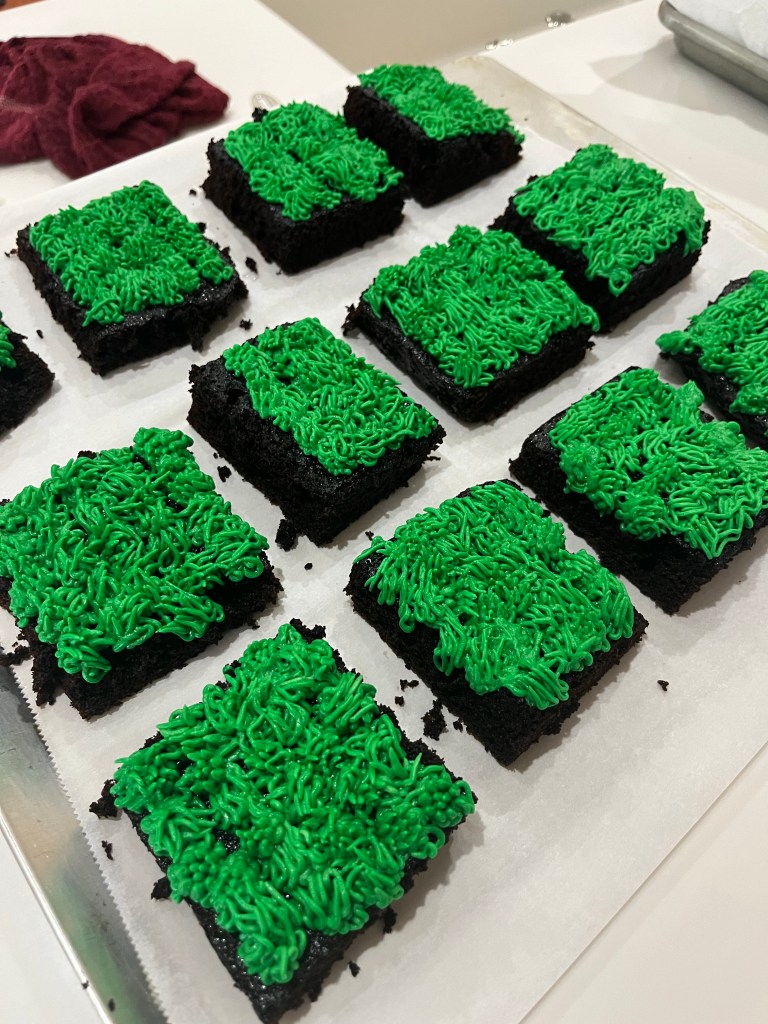
Make turf: Cut small sheet cakes into 3×3” squares and pipe green buttercream covering each square using a Wilton 233 piping tip or equivalent. Center each baseball cake on a piece of turf.
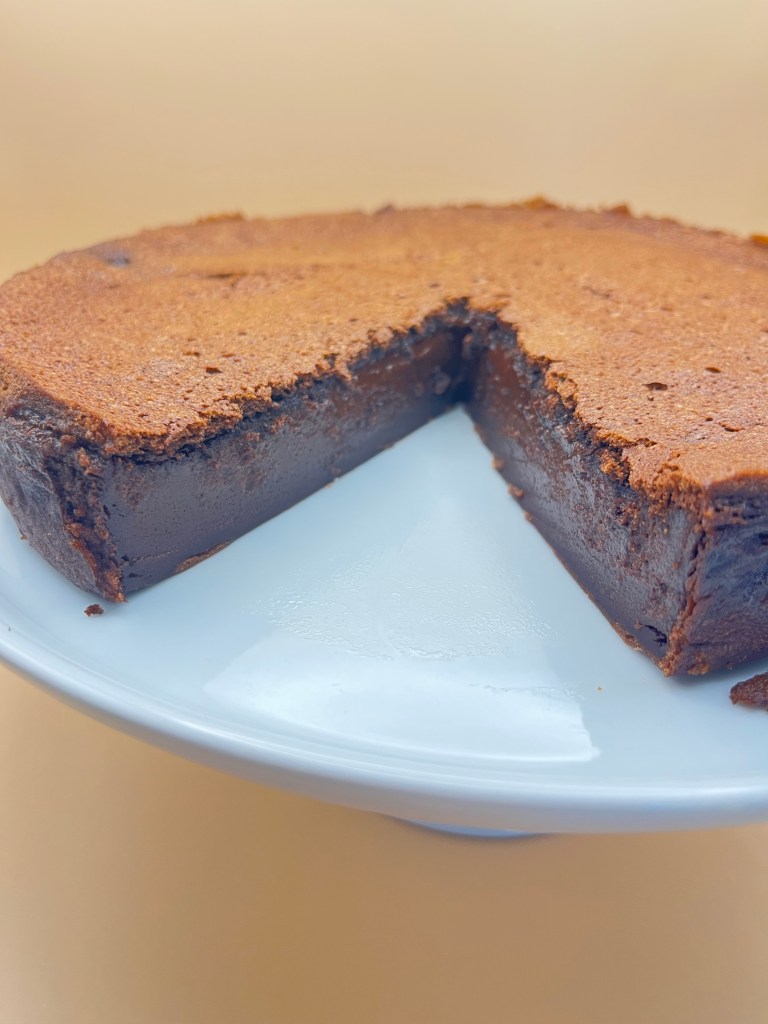
This recipe for a chocolate magic custard cake flew by my Facebook stream and I knew I was going to make it.
Baked in one pan the resultant cake has three distinct layers, hence, the magic. The bottom is a typical, albeit dense, cake. The center is a delicious chocolate custard, much like a smooth, rich pudding. The top has the consistence of a very thin brownie.
The originators of this recipe have a number of “magic” cakes, Zerrin and Yusuf Gunaydin. Try them, they are worthy.
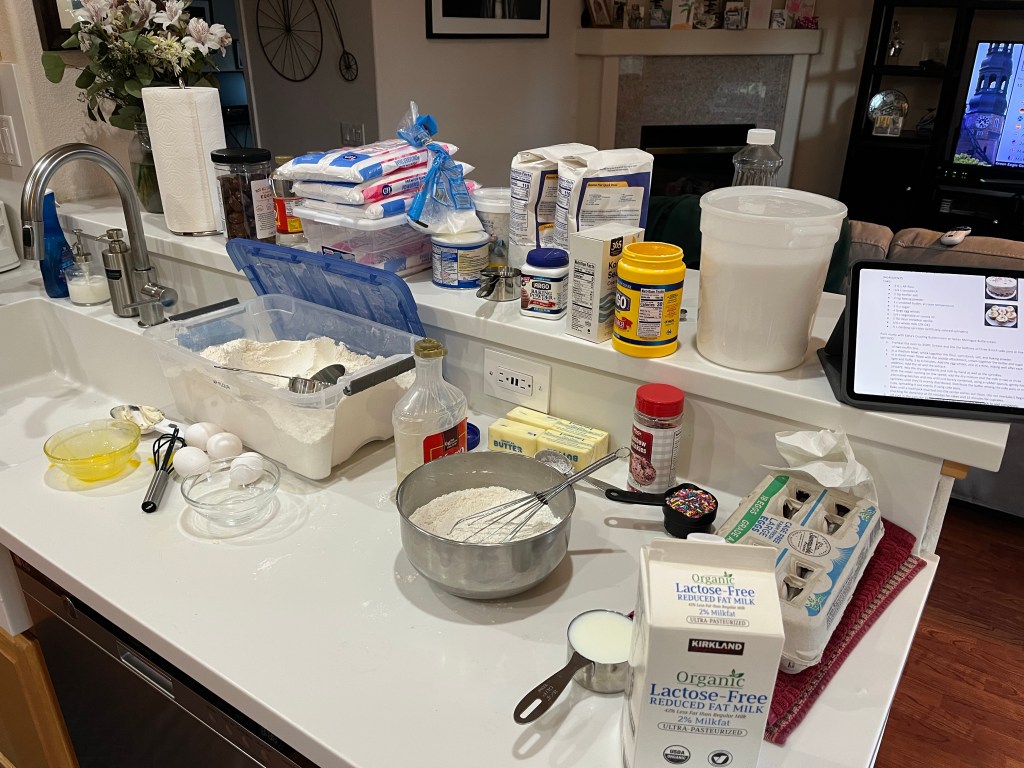
Ingredients, prepped in advanceCooled cakeYou can see the layers on the left side.
CHOCOLATE MAGIC CUSTARD CAKE
INGREDIENTS • 4 eggs, room temperature, separated • 1 teaspoon vanilla extract • 1 ¼ cup sugar • 110g butter (½ cup), melted and cooled • ½ cup AP flour • ⅓ cup and 2 tablespoons unsweetened cocoa powder • 2 cups lukewarm milk • 1 tablespoon powdered sugar for dusting
METHOD
Preheat oven to 320F (160C).
Grease an 8×8 inch square (or 9-inch round) baking pan line it with parchment paper.
Beat egg whites in a bowl until stiff and put aside.
Whisk egg yolks, vanilla extract and sugar until creamy.
Add melted butter and mix for half a minute.
Add the flour and unsweetened cocoa powder. Mix with a whisk (whisk attachment with hand mixer) until well incorporated.
Pour the milk gradually and continue whisking.
Add in the egg whites, one third at a time and gently stir with a whisk. (Full disclosure: I used a hand mixer with the whisk attachment at the slowest speed.) Stir until combined, do not over mix. There will be some small bits of egg white visible in the batter. Don’t worry about it.
Pour this runny batter into the baking pan and bake for 60 minutes. I started checking doneness at 45 minutes, then every 5 minutes thereafter. (I stopped at 55 minutes.)
The centre of the cake will still be jiggly when removed from oven.
Let it cool for about half an hour and then remove from the pan. When it reaches room temperature, chill it at least for an hour. (I couldn’t wait and cut a QC piece in 30 minutes, cooling at room temperature. It was fine.)
Slice it in the size you like and dust with powdered sugar right before serving and/or garnish it with fresh fruit
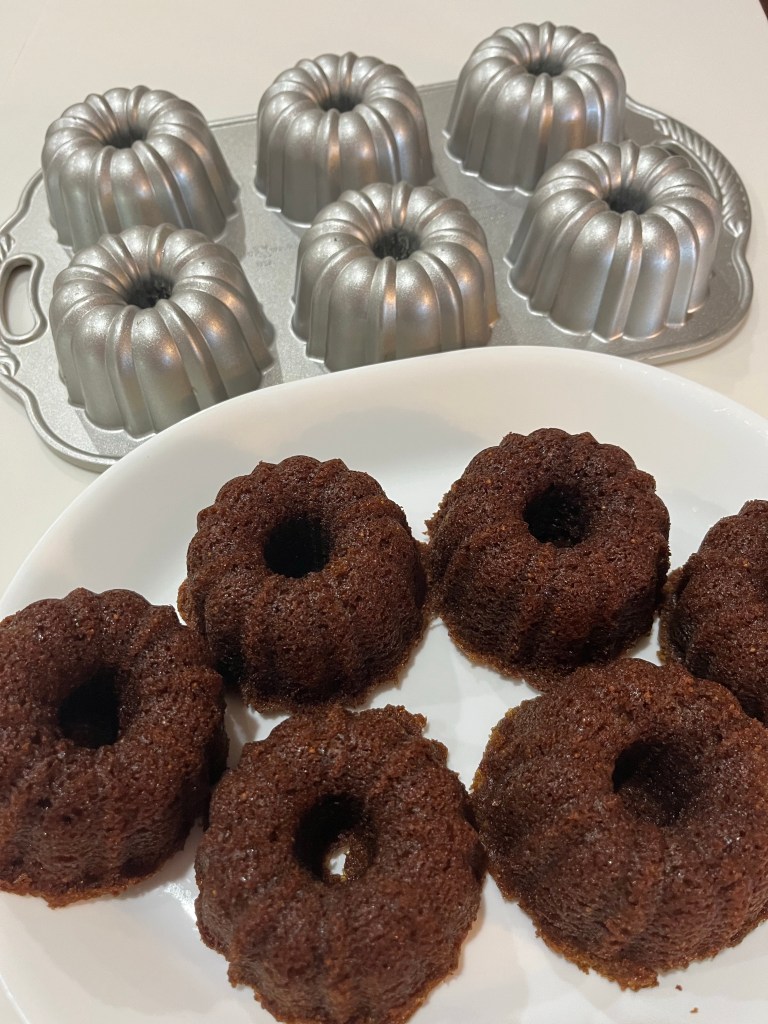
As I was updating “What’s Up in Dede’s Bakery” this recipe crossed my path. After all, I had fresh figs (but used a previous years fig jam for this bake) and the other scheduled bakes could wait, so it usurped my plans.
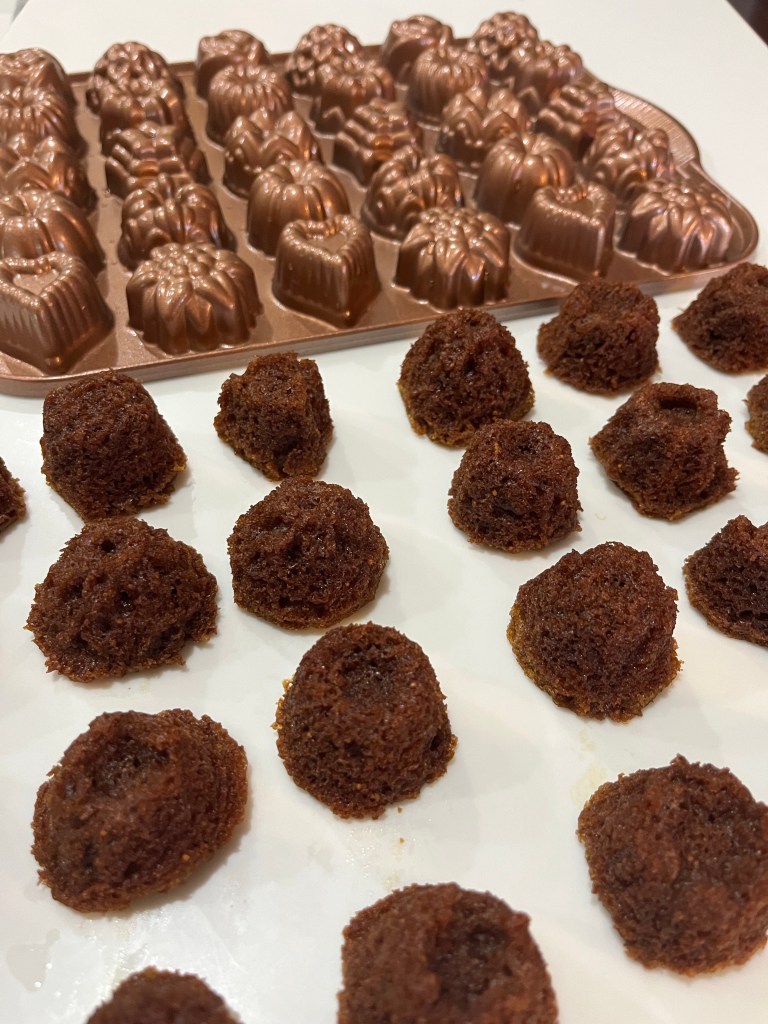
The original recipe called for a Bundt or tube cake pan but I opted for two decorative pans that I haven’t used in a while. The small well pan didn’t work great. The crumb was too big for any detail of the pan to be well defined, but it did make nice bite sized mini-cakes.
This is a basic, easy cake recipe with clear directions. The result is a moist, soft, flavorful cake. The glaze adds a bit of sweetness. Sprinkled with confectioners sugar would also work well.
Moist Fig Preserve Cake with Caramel Glaze
INGREDIENTS For the Fig Cake: • 2 cups all-purpose flour • 1 1/2 cups packed light brown sugar • 2 teaspoons baking soda • 1/2 teaspoon salt • 1 teaspoon ground cinnamon • 1 teaspoon ground nutmeg • 1/2 teaspoon ground allspice • 1/2 cup (4-ounces) unsalted melted butter • 1/2 cup vegetable oil • 3 large eggs • 1 cup buttermilk (or 1 Tbl lemon juice in a cup of milk) • 2 teaspoons pure vanilla extract • 1 cup fig preserves, or jam • 1 cup coarsely chopped macadamias or hazelnuts For the Caramel Glaze: • 4 tablespoons (2-ounces) unsalted butter • 1/4 cup packed light brown sugar • 1/4 cup granulated sugar • 1 dash salt • 1/2 cup whipping cream
METHOD Make the Fig Cake
Preheat the oven to 325F.
Generously grease and flour a 10-inch Bundt cake pan or 12 cup one-piece tube cake pan, making sure to cover all of the nooks and crannies. (Alternatively use cake spray, it released the cakes well. I used a 6 well Bundt cake pan and a 36 well pan for bite sized cakes.)
In a mixing bowl, combine the flour, light brown sugar, baking soda, salt, and spices. Stir to blend thoroughly. Add the melted butter and vegetable oil and beat until blended.
In another bowl, whisk the eggs. Add the eggs to the first mixture and beat until blended.
Add the buttermilk and vanilla and beat until smooth.
Add the fig preserves and chopped nuts; stir to blend.
Pour the batter into the prepared baking pan. (1/2 cup of batter in each well of the larger pan, 1 tsp in the smaller.)
Bake for 55 to 60 minutes, or until the center of the cake reaches 190F. (The smaller pan was baked for 20 minutes, the larger one for 30 minutes.)
Cool the cake in the pan on a rack for 10 minutes. Slide a knife around the sides of the cake to ensure it isn’t sticking, and then carefully invert it onto a cake plate and let it cool completely.
Make the Caramel Glaze
Combine the butter, brown sugar, granulated sugar, and a dash of salt in a small saucepan.
Place the pan over medium heat and cook for 1 minute, or until bubbling, stirring constantly.
Add the cream to the sugar mixture and bring the glaze to a boil. Continue to cook for 2 minutes, stirring constantly.
Let the glaze mixture cool slightly; drizzle the warm glaze over the cooled cake.
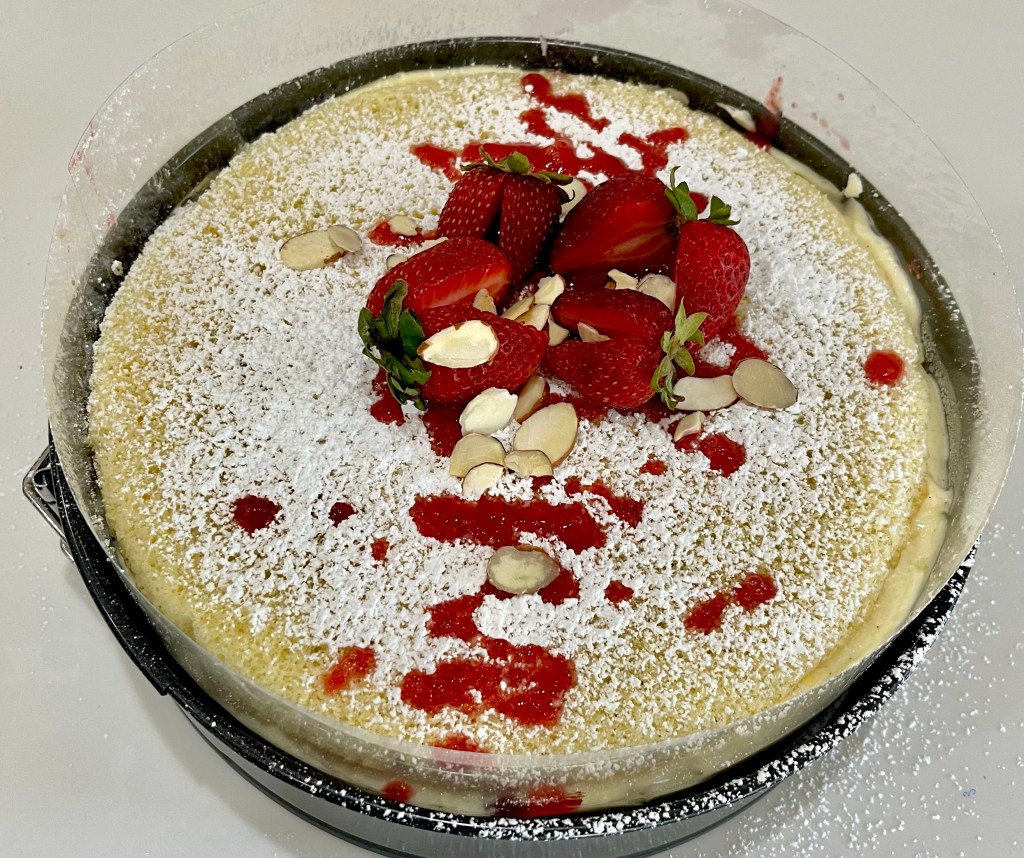
The GGBO is a very bad influence. I saw this cake (again) and thought it would be a great summer dessert. (It is.) Once again, Mary Berry does not disappoint. Maybe I should stop re-watching the show…
This is a pretty technical bake with lots of steps requiring careful timing. The genoise needs to be baked and cooled. The strawberry syrup needs to be heated twice. The agar has to be microwaved to boiling, then added to the pastry cream as it begins to boil but not before it thickens too much. The finished pastry cream must be room temperature before the whipped cream is added or it will melt the whipped cream.
Other than that, it’s pretty straightforward.
Still in the springform pan.It held together after removing the acetate!And it cut and held its layers well.
Fraisier Cake
INGREDIENTS Genoise Sponge • 4 Eggs • 60 g (1/4 c) Caster Sugar • 100 g (2/3 c) Plain Flour • 20 g (2 ½ Tbl) Cornstarch Strawberry Syrup • 120 g Fresh Strawberries • 118 g (1/2 c) Water • 90 g (6 Tbl) Caster Sugar Crème Diplomat • 500 ml (2 c) Full Cream Milk • 1 tsp Vanilla Paste – or 1 fresh Vanilla Bean • 1 tsp Orange extract – optional • 4 Egg Yolks • 30 g (2 Tbl) Caster Sugar • 35 g (1/4 c) Cornstarch • 1 tsp Agar-Agar Powder • 4 Tbl of water • 250 ml (1 c) Whipping Cream + 1 Tbl cornstarch Cake Filling • 500 g (about 1 pound) Fresh Strawberries – or more to taste • 20 g (1/4 c) Flaked Almonds – optional Cake Toppings • Icing Sugar – to taste • Fresh Strawberries – to taste • Flaked Almonds – to taste • Mint Leaves – to taste
METHOD
Genoise Sponge
Preheat your oven on 160’C/325’F. Line two 8” round springform pans with parchment paper and set aside.
In the bowl of a stand mixer, whisk the eggs and caster sugar on medium/high speed for 5 to 8 minutes, or until very pale, frothy and doubled in size.
Sift the flour and cornstarch over the sugar/eggs and gently fold in with a spatula until it’s all incorporated. Pour over the lined springform pans and gently spread with an offset spatula to level the batter. Weigh each pan/batter to assure they are the same weight and therefore size.
Bake for 10 to 12 minutes or until puffed and golden. Transfer over a cooling rack and leave to cool down completely before releasing the pan and removing the baking paper.
Strawberry Syrup
Blend the strawberries (thawed if using frozen) then place the strawberry puree, water and sugar into a small pot on low to medium heat. Cook for about 5 minutes, occasionally stirring, or until the sugar has dissolved and the liquid has started to slightly thicken.
Sieve the mixture through a fine sieve to remove everything except the liquid.
Set aside to cool.
(NOTE: After coating one side of both genoise sponges return the syrup to the heat and cook until it thickens. Then cool, covered with plastic wrap directly on the syrup.)
Crème Diplomat
Mix agar-agar and water in a small bowl. Microwave for 30 seconds and mix until it is a clear gelatinous liquid. Let cool to the touch, but still warm.
Whisk eggs and milk together and add to all other ingredients (except extracts and agar-agar gel) to a medium saucepan.
Bring to boil whisking constantly
Add the still warm agar-agar gel to the pastry cream
Cook until thickened (it will look lumpy, its ok)
Sieve lumpy mixture into a bowl, add extracts whisk until dissolved and combined. Transfer the pastry cream into a clean bowl or tray, cover with plastic wrap touching the surface and place in the fridge to cool down.
Once the pastry cream has reached room temperature, start whipping the cold cream until you reach stiff peaks.
Whisk the pastry cream to loosen it then gently fold in the whipped cream in 3 or 4 portions. Transfer into a piping bag with large round piping tip (Wilton #A1.)
Assembling the Cake
Pick strawberries that have about the same height to create the edges of the cake. Remove the stems and slice them in half to form a triangle. Cut the rest of the strawberries into small cubes and set aside.
Surround the interior of a 8×2 inch springform pan with an Acetate Strip.
Put the first layer of genoise at the bottom of the ring and brush it with strawberry syrup.
Place the strawberries sliced in half around the edges of the cake, sliced side facing out. Try to place them as tightly against each other as possible.
Pipe the crème diplomat between each strawberry, going as high as the pastry ring. Add about half the of the crème over the genoise and spread with an offset spatula if needed.
Cover the cream with the cubed strawberries and almond flakes (optional). Gently press on them to avoid any large air pockets.
Pipe the rest of the crème diplomat over the cubed strawberries and almonds, going all the way to the edges of the pastry ring (and over the strawberries on the edges).
Brush the second layer of genoise with the strawberry syrup (on one side only) and cover the cream with it, brushed side facing in. Gently press on it to even it out.
Place in the fridge to set for 2 to 3 hours, or overnight.
Cake Toppings
To finish the cake, sprinkle icing sugar over the genoise. Use the thickened and cooled strawberry syrup to drizzle a design on the genoise.
Add some slices of fresh strawberries in the centre of the cake with fresh mint leaves and flaked almonds.
Carefully remove the pastry ring and acetate strip before serving.
Carefully remove the pastry ring and acetate strip before serving.
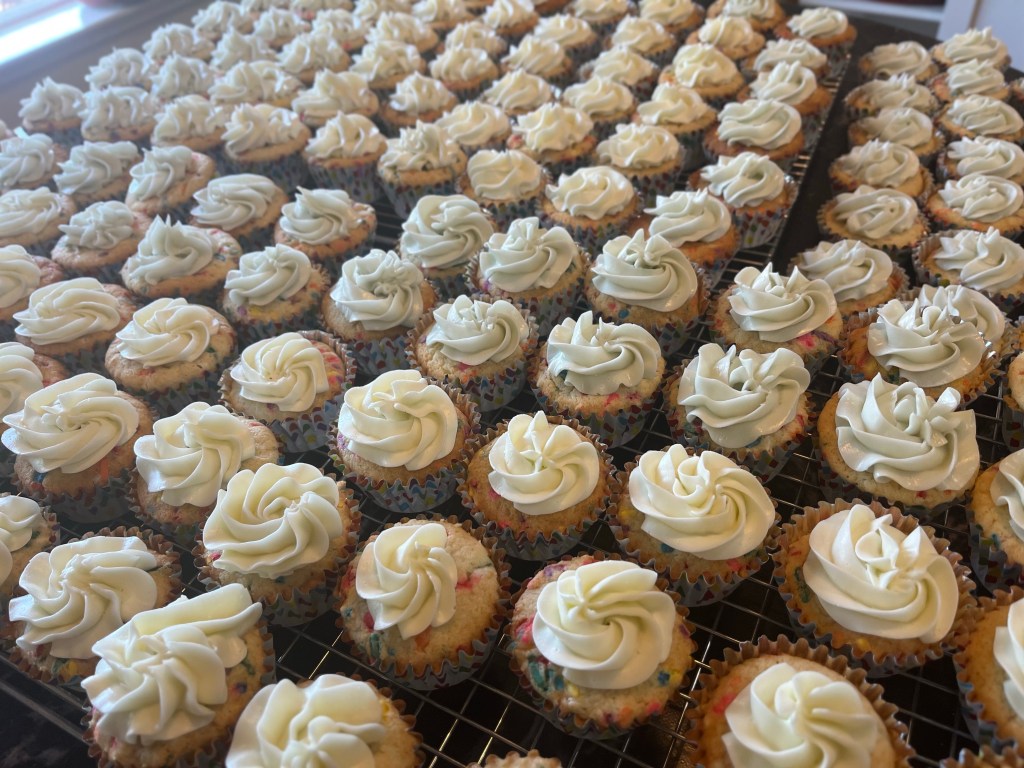
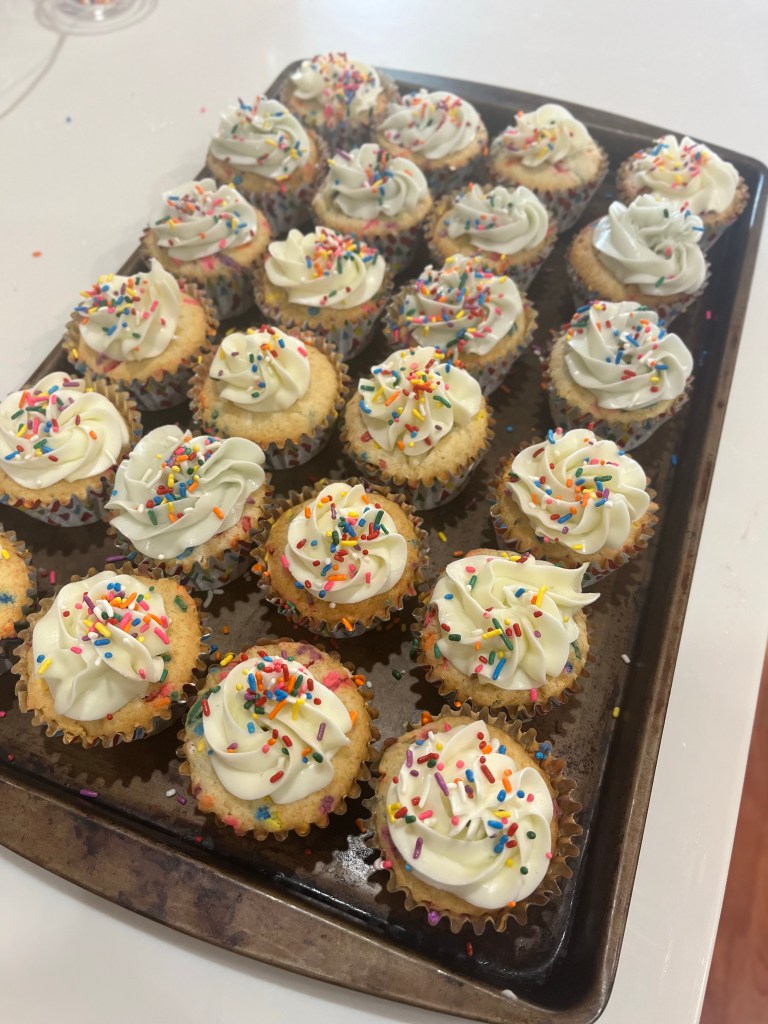
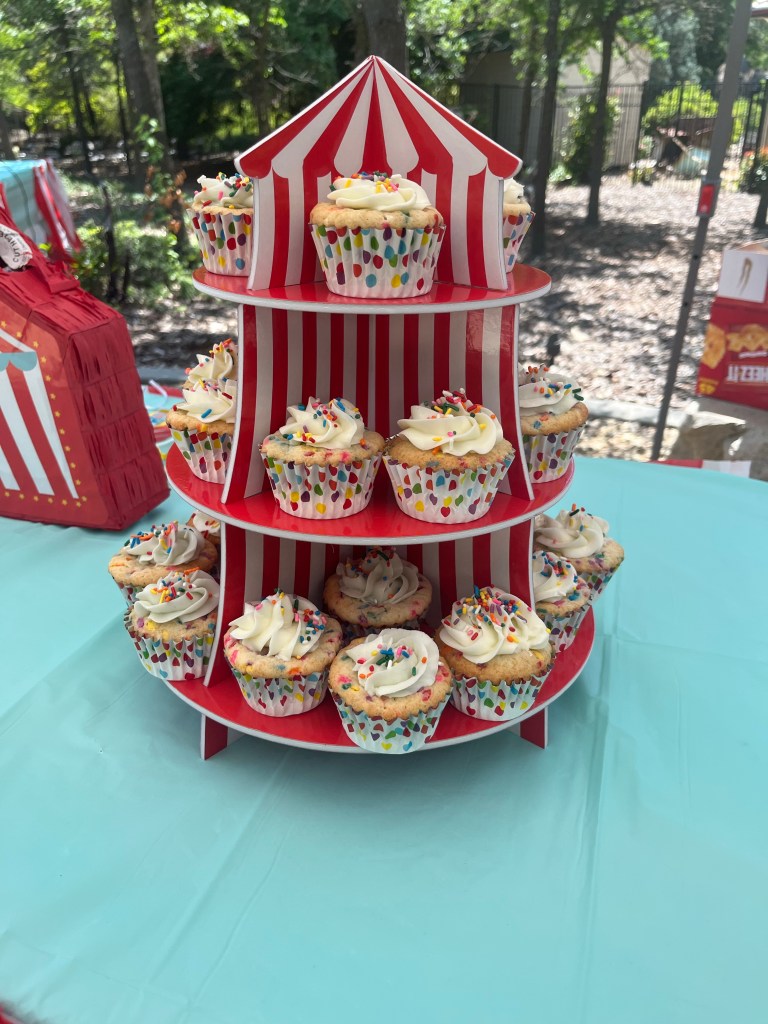
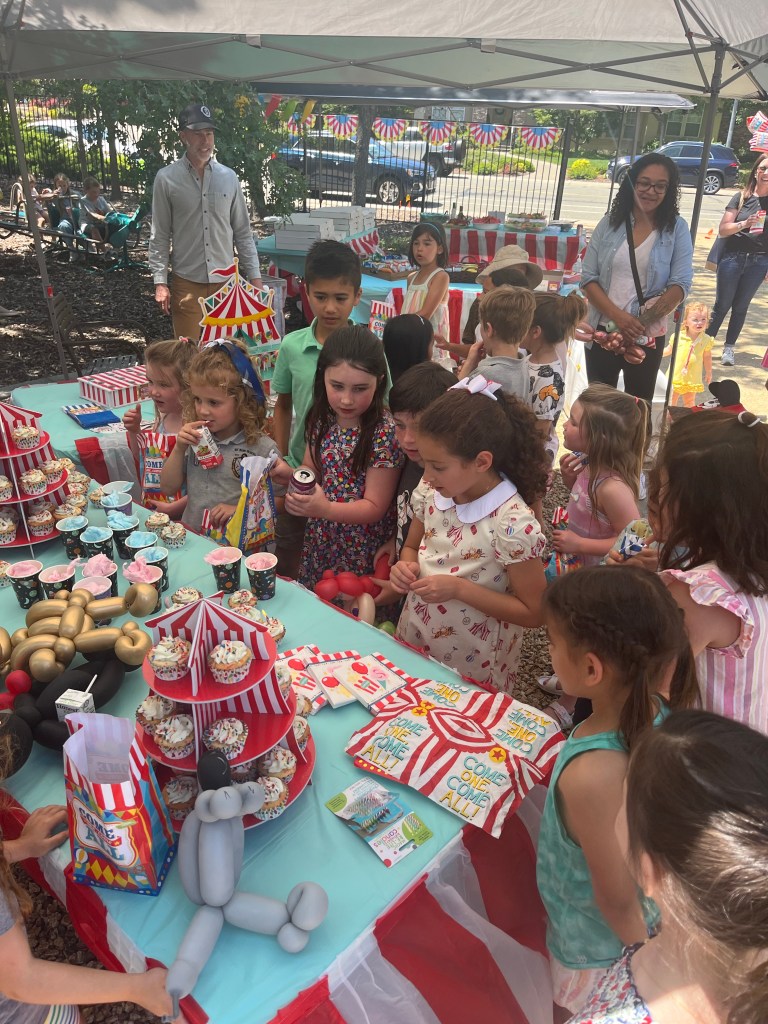
As they say, “Build it and they will come.” Dan and Frances built it and they came. It was our granddaughter Grace’s 7th birthday party and she requested FunFetti cupcakes as her party dessert. With an anticipated attendance of 100 kids and parents I figured 10 dozen cupcakes would be plenty. Well, I was wrong. They managed to eat only 40 cupcakes and we gave away an addition couple of dozen. Best laid plans of mice and men often go awry!
Kitchen at lift offField of dreamsFun!Ready for deliveryCupcake towerDessert tableReadySetGo!A little known fact. The candle was lit with a blowtorch!
FunFetti Cake
makes one 3-layer 8″ cake or 24 cupcakes
INGREDIENTS CAKE: • 2 ½ c AP flour • 1/4 c cornstarch • 1 tsp kosher salt • 2 tsp baking powder • 1 c unsalted butter, at room temperature • 1 ½ c sugar • 4 large egg whites • 1/4 c vegetable or canola oil • 1 Tbl clear imitation vanilla • 3/4 c whole milk (2% OK) • ½ c rainbow sprinkles (artificially colored cylinders)
Pairs nicely with Edna’s Crusting Buttercream or Italian Meringue Buttercream or Less Sweet Buttercream.
METHOD
Preheat the oven to 350ºf. Grease and line the bottoms of three 8-inch cake pans or line 24 cups of two muffin tins.
In a medium bowl, whisk together the flour, cornstarch, salt, and baking powder.
In a stand mixer fitted with the paddle attachment, cream together the butter and sugar until light and fluffy, 3 to 4 minutes. Add the egg whites, one at a time, mixing well after each addition. Add the oil and the extract.
By hand add the dry mixture and the milk in two or three alternating batches and mix until just barely combined, using a rubber spatula, gently fold in the sprinkles until they’re evenly distributed. Distribute the batter among the cake pans or muffin cups, spreading it out evenly if using cake pans.
Bake until a toothpick inserted into the center comes out clean. (~200 F. Do not overbake!) Begin checking for doneness at 20 minutes for cakes and 15 minutes for cupcakes.
Let cool in the pans for 10 minutes and then turn onto a wire rack to cool completely.
Buttercream Frosting – Less Sweet
For 3 cups of buttercream:
INGREDIENTS
• 1 1/2 cups (340g) unsalted butter, softened slightly • 2/3 cups (208g) light corn or glucose syrup • 1 1/4 cups (141g) powdered sugar (unsifted) • 1/8 teaspoon fine salt (to taste, start with a pinch) • 1 teaspoon vanilla extract • 3-6 tablespoons of heavy cream, room temperature • purple gel food coloring (optional)
METHOD
Add the softened butter to the bowl of your stand mixer. Using the whisk attachment, beat the butter on high speed until it’s paler in color and slightly more voluminous.
Add the corn syrup in 3 to 5 additions. Stop the mixer, add a little bit first, and mix it in at medium speed (still using the whisk attachment). Repeat until all the corn syrup has been added. Scrape down the bowl a couple of times to ensure everything is mixed well.
Once all the corn syrup has been added, mix at the highest speed for two minutes. This is an essential step, so make sure to time it. You need the butter to emulsify the sugar syrup, which won’t be visually apparent because the syrup is clear. If you under-whip at this step, your final frosting will have an overly buttery (fatty or greasy) feel. Proper emulsification will ensure that the syrup integrates evenly within the butter, giving it a much more pleasant texture.
Now give the frosting a taste. It should be smooth, creamy, and very buttery, with a slight sweetness. This is to gauge how much powdered sugar to add in this step. Notice how glucose (the sugar type in corn syrup) is not as sweet as the sucrose in powdered sugar.
Add the powdered sugar in a few additions, mixing on low speed to reduce the mess. Once all the sugar has been added, mix on high speed for 30 seconds. Give it another taste. Do you want it sweeter or need a firmer consistency of buttercream? Add more powdered sugar. You can add as much powdered sugar as you like. This buttercream can handle more, but remember that the more you add, the sandier the finished frosting will be.
Now let’s flavor and color the buttercream. Add the vanilla, a pinch of salt, and, optionally, a toothpick’s end of purple food coloring (to achieve a whiter shade). Mix on high speed for another minute.
Give it a taste. If it’s too buttery, add some heavy cream, one tablespoon at a time, until you like the consistency. Whip it in on high speed for at least one minute when you like the texture. (See my footnotes about this below.)
Switch over to a paddle attachment and run the frosting on low speed to get out any large air pockets. The finished buttercream will have minimal air bubbles and be ready to use.
I am making FunFetti cupcakes for my older granddaughters birthday party this week. I made two practice batches of cupcakes and one of American buttercream. The cakes are now great but the frosting was too sweet. (Think 60 seven-ish year old kids on sugar highs.)
Today I made a recipe of Italian buttercream frosting. It uses about one fourth the amount of sugar and will (hopefully) stand up to the expected outdoor temperature.
I had about a dozen chocolate cupcakes frozen that needed to by used soon, and I had a nice frosting, so, why not?
Mix 1½ cups (3/4c) of the sugar and the water in a heavy saucepan and bring to a boil over medium-high heat, stirring with a wooden spoon to dissolve the sugar. Continue to cook,without stirring, and bring to the softball stage (240°F).
As the simple syrup is heating, whip the whites at high speed in a stand mixer until soft peaks form, approximately 5 minutes. With the motor running, add the remaining ½ cup (1/4c) sugar gradually, continuing to whip until medium peaks form.
When the simple syrup reaches 240°F, and the motor running on slow, very slowly pour it into the egg whites in a thin stream, to avoid cooking the eggs. Raise the speed to high and continue to whip until the mixture has cooled to room temperature, 10 to 15 minutes.
Whip in the butter at medium speed, add the butter in 5 increments, stopping the motor between additions, scraping the bowl with a rubber spatula before adding each addition of butter.
With the motor running, add the vanilla, and whip just until it is blended.