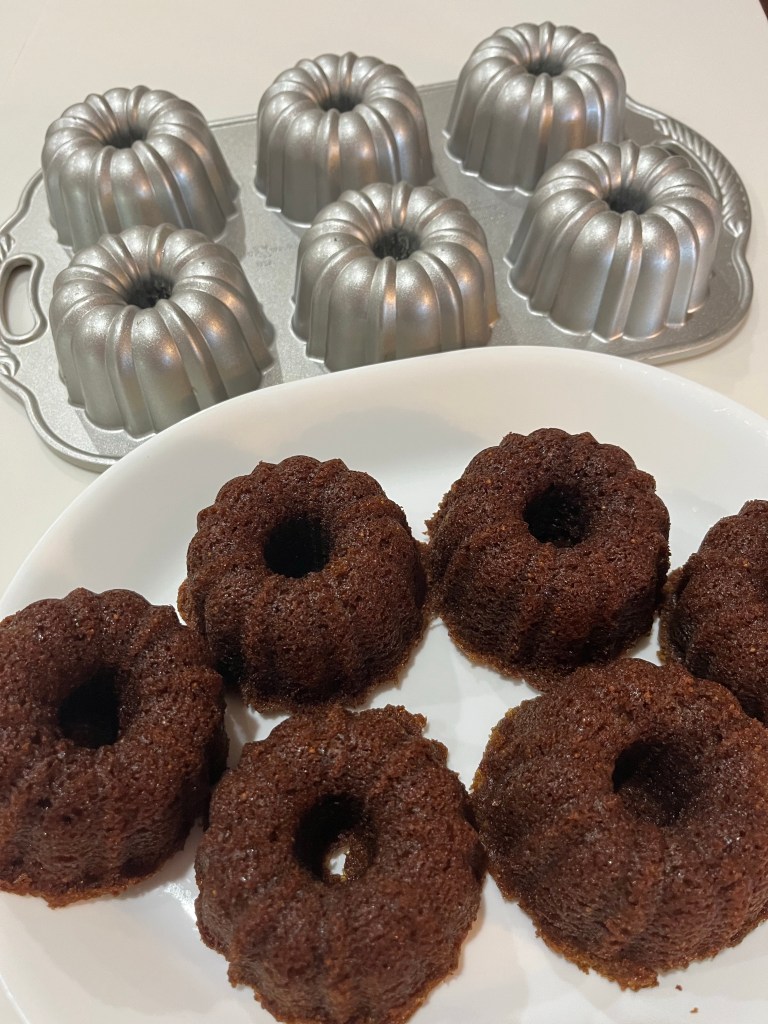
As I was updating “What’s Up in Dede’s Bakery” this recipe crossed my path. After all, I had fresh figs (but used a previous years fig jam for this bake) and the other scheduled bakes could wait, so it usurped my plans.
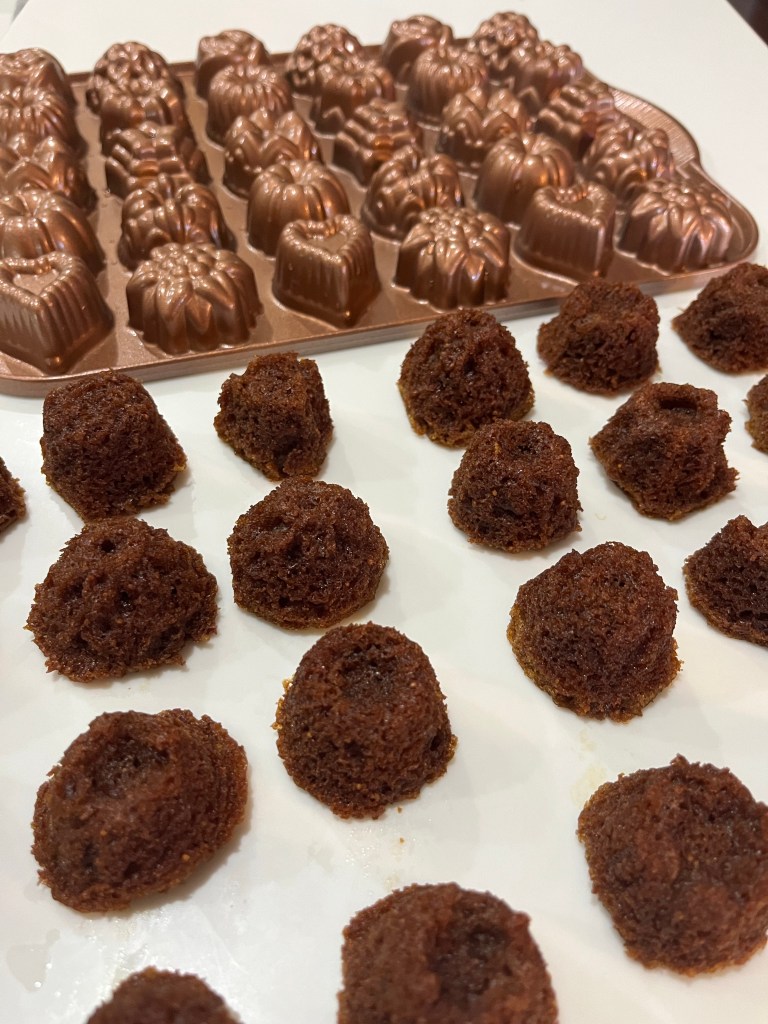
The original recipe called for a Bundt or tube cake pan but I opted for two decorative pans that I haven’t used in a while. The small well pan didn’t work great. The crumb was too big for any detail of the pan to be well defined, but it did make nice bite sized mini-cakes.
This is a basic, easy cake recipe with clear directions. The result is a moist, soft, flavorful cake. The glaze adds a bit of sweetness. Sprinkled with confectioners sugar would also work well.
Moist Fig Preserve Cake with Caramel Glaze
INGREDIENTS For the Fig Cake: • 2 cups all-purpose flour • 1 1/2 cups packed light brown sugar • 2 teaspoons baking soda • 1/2 teaspoon salt • 1 teaspoon ground cinnamon • 1 teaspoon ground nutmeg • 1/2 teaspoon ground allspice • 1/2 cup (4-ounces) unsalted melted butter • 1/2 cup vegetable oil • 3 large eggs • 1 cup buttermilk (or 1 Tbl lemon juice in a cup of milk) • 2 teaspoons pure vanilla extract • 1 cup fig preserves, or jam • 1 cup coarsely chopped macadamias or hazelnuts For the Caramel Glaze: • 4 tablespoons (2-ounces) unsalted butter • 1/4 cup packed light brown sugar • 1/4 cup granulated sugar • 1 dash salt • 1/2 cup whipping cream
METHOD Make the Fig Cake
Preheat the oven to 325F.
Generously grease and flour a 10-inch Bundt cake pan or 12 cup one-piece tube cake pan, making sure to cover all of the nooks and crannies. (Alternatively use cake spray, it released the cakes well. I used a 6 well Bundt cake pan and a 36 well pan for bite sized cakes.)
In a mixing bowl, combine the flour, light brown sugar, baking soda, salt, and spices. Stir to blend thoroughly. Add the melted butter and vegetable oil and beat until blended.
In another bowl, whisk the eggs. Add the eggs to the first mixture and beat until blended.
Add the buttermilk and vanilla and beat until smooth.
Add the fig preserves and chopped nuts; stir to blend.
Pour the batter into the prepared baking pan. (1/2 cup of batter in each well of the larger pan, 1 tsp in the smaller.)
Bake for 55 to 60 minutes, or until the center of the cake reaches 190F. (The smaller pan was baked for 20 minutes, the larger one for 30 minutes.)
Cool the cake in the pan on a rack for 10 minutes. Slide a knife around the sides of the cake to ensure it isn’t sticking, and then carefully invert it onto a cake plate and let it cool completely.
Make the Caramel Glaze
Combine the butter, brown sugar, granulated sugar, and a dash of salt in a small saucepan.
Place the pan over medium heat and cook for 1 minute, or until bubbling, stirring constantly.
Add the cream to the sugar mixture and bring the glaze to a boil. Continue to cook for 2 minutes, stirring constantly.
Let the glaze mixture cool slightly; drizzle the warm glaze over the cooled cake.
The GGBO is a very bad influence. I saw this cake (again) and thought it would be a great summer dessert. (It is.) Once again, Mary Berry does not disappoint. Maybe I should stop re-watching the show…
This is a pretty technical bake with lots of steps requiring careful timing. The genoise needs to be baked and cooled. The strawberry syrup needs to be heated twice. The agar has to be microwaved to boiling, then added to the pastry cream as it begins to boil but not before it thickens too much. The finished pastry cream must be room temperature before the whipped cream is added or it will melt the whipped cream.
Other than that, it’s pretty straightforward.
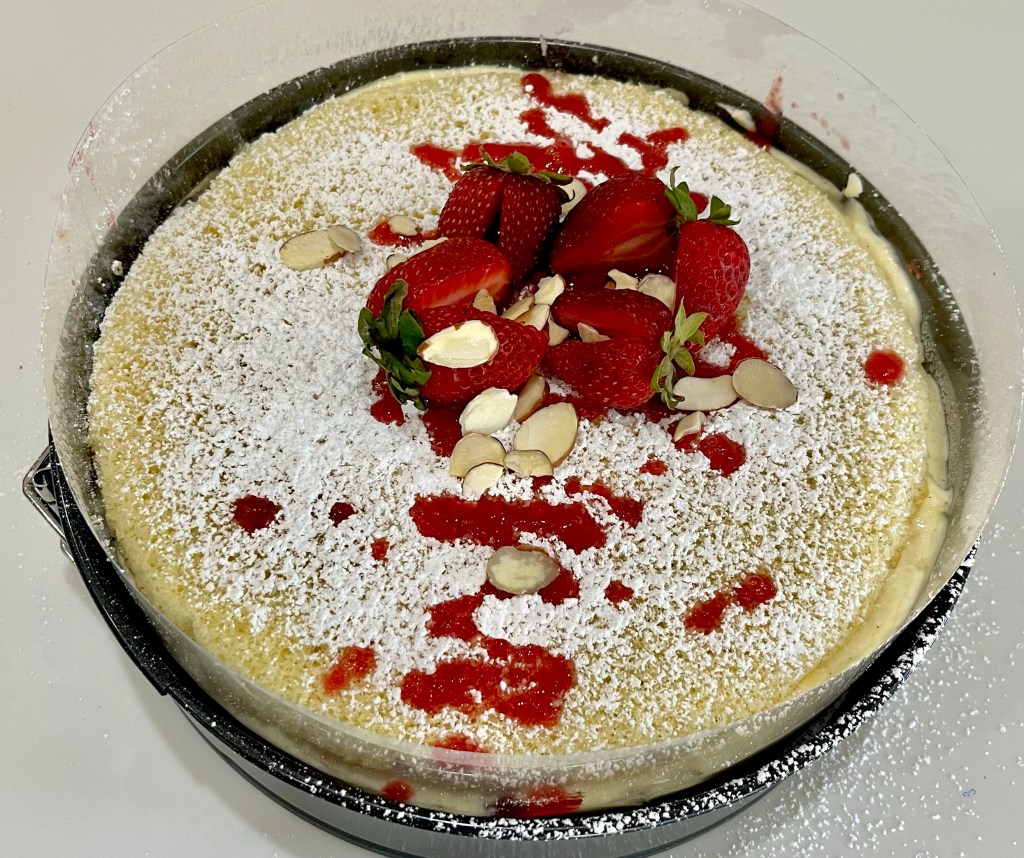
Still in the springform pan.It held together after removing the acetate!And it cut and held its layers well.
Fraisier Cake
INGREDIENTS Genoise Sponge • 4 Eggs • 60 g (1/4 c) Caster Sugar • 100 g (2/3 c) Plain Flour • 20 g (2 ½ Tbl) Cornstarch Strawberry Syrup • 120 g Fresh Strawberries • 118 g (1/2 c) Water • 90 g (6 Tbl) Caster Sugar Crème Diplomat • 500 ml (2 c) Full Cream Milk • 1 tsp Vanilla Paste – or 1 fresh Vanilla Bean • 1 tsp Orange extract – optional • 4 Egg Yolks • 30 g (2 Tbl) Caster Sugar • 35 g (1/4 c) Cornstarch • 1 tsp Agar-Agar Powder • 4 Tbl of water • 250 ml (1 c) Whipping Cream + 1 Tbl cornstarch Cake Filling • 500 g (about 1 pound) Fresh Strawberries – or more to taste • 20 g (1/4 c) Flaked Almonds – optional Cake Toppings • Icing Sugar – to taste • Fresh Strawberries – to taste • Flaked Almonds – to taste • Mint Leaves – to taste
METHOD
Genoise Sponge
Preheat your oven on 160’C/325’F. Line two 8” round springform pans with parchment paper and set aside.
In the bowl of a stand mixer, whisk the eggs and caster sugar on medium/high speed for 5 to 8 minutes, or until very pale, frothy and doubled in size.
Sift the flour and cornstarch over the sugar/eggs and gently fold in with a spatula until it’s all incorporated. Pour over the lined springform pans and gently spread with an offset spatula to level the batter. Weigh each pan/batter to assure they are the same weight and therefore size.
Bake for 10 to 12 minutes or until puffed and golden. Transfer over a cooling rack and leave to cool down completely before releasing the pan and removing the baking paper.
Strawberry Syrup
Blend the strawberries (thawed if using frozen) then place the strawberry puree, water and sugar into a small pot on low to medium heat. Cook for about 5 minutes, occasionally stirring, or until the sugar has dissolved and the liquid has started to slightly thicken.
Sieve the mixture through a fine sieve to remove everything except the liquid.
Set aside to cool.
(NOTE: After coating one side of both genoise sponges return the syrup to the heat and cook until it thickens. Then cool, covered with plastic wrap directly on the syrup.)
Crème Diplomat
Mix agar-agar and water in a small bowl. Microwave for 30 seconds and mix until it is a clear gelatinous liquid. Let cool to the touch, but still warm.
Whisk eggs and milk together and add to all other ingredients (except extracts and agar-agar gel) to a medium saucepan.
Bring to boil whisking constantly
Add the still warm agar-agar gel to the pastry cream
Cook until thickened (it will look lumpy, its ok)
Sieve lumpy mixture into a bowl, add extracts whisk until dissolved and combined. Transfer the pastry cream into a clean bowl or tray, cover with plastic wrap touching the surface and place in the fridge to cool down.
Once the pastry cream has reached room temperature, start whipping the cold cream until you reach stiff peaks.
Whisk the pastry cream to loosen it then gently fold in the whipped cream in 3 or 4 portions. Transfer into a piping bag with large round piping tip (Wilton #A1.)
Assembling the Cake
Pick strawberries that have about the same height to create the edges of the cake. Remove the stems and slice them in half to form a triangle. Cut the rest of the strawberries into small cubes and set aside.
Surround the interior of a 8×2 inch springform pan with an Acetate Strip.
Put the first layer of genoise at the bottom of the ring and brush it with strawberry syrup.
Place the strawberries sliced in half around the edges of the cake, sliced side facing out. Try to place them as tightly against each other as possible.
Pipe the crème diplomat between each strawberry, going as high as the pastry ring. Add about half the of the crème over the genoise and spread with an offset spatula if needed.
Cover the cream with the cubed strawberries and almond flakes (optional). Gently press on them to avoid any large air pockets.
Pipe the rest of the crème diplomat over the cubed strawberries and almonds, going all the way to the edges of the pastry ring (and over the strawberries on the edges).
Brush the second layer of genoise with the strawberry syrup (on one side only) and cover the cream with it, brushed side facing in. Gently press on it to even it out.
Place in the fridge to set for 2 to 3 hours, or overnight.
Cake Toppings
To finish the cake, sprinkle icing sugar over the genoise. Use the thickened and cooled strawberry syrup to drizzle a design on the genoise.
Add some slices of fresh strawberries in the centre of the cake with fresh mint leaves and flaked almonds.
Carefully remove the pastry ring and acetate strip before serving.
Carefully remove the pastry ring and acetate strip before serving.
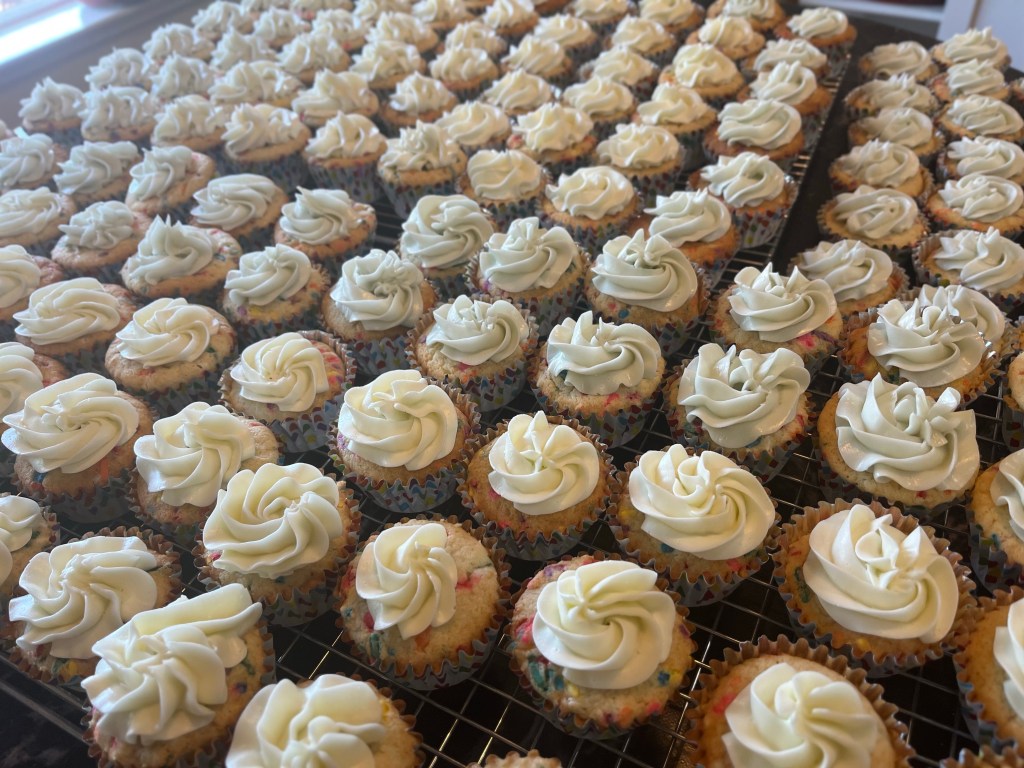
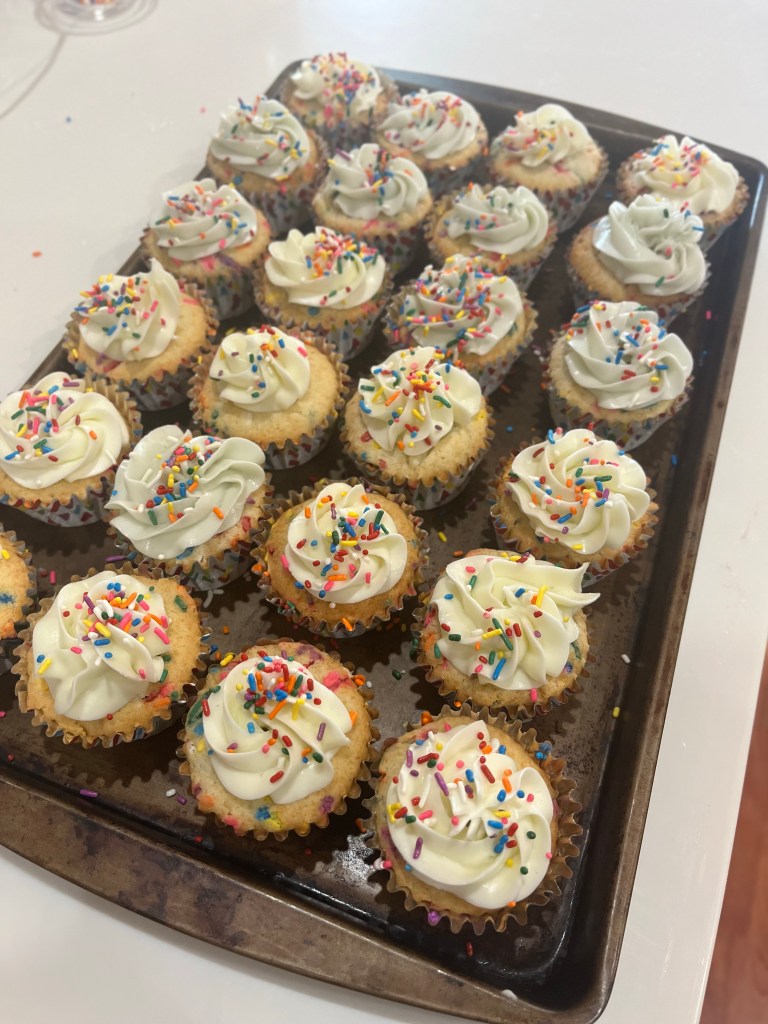
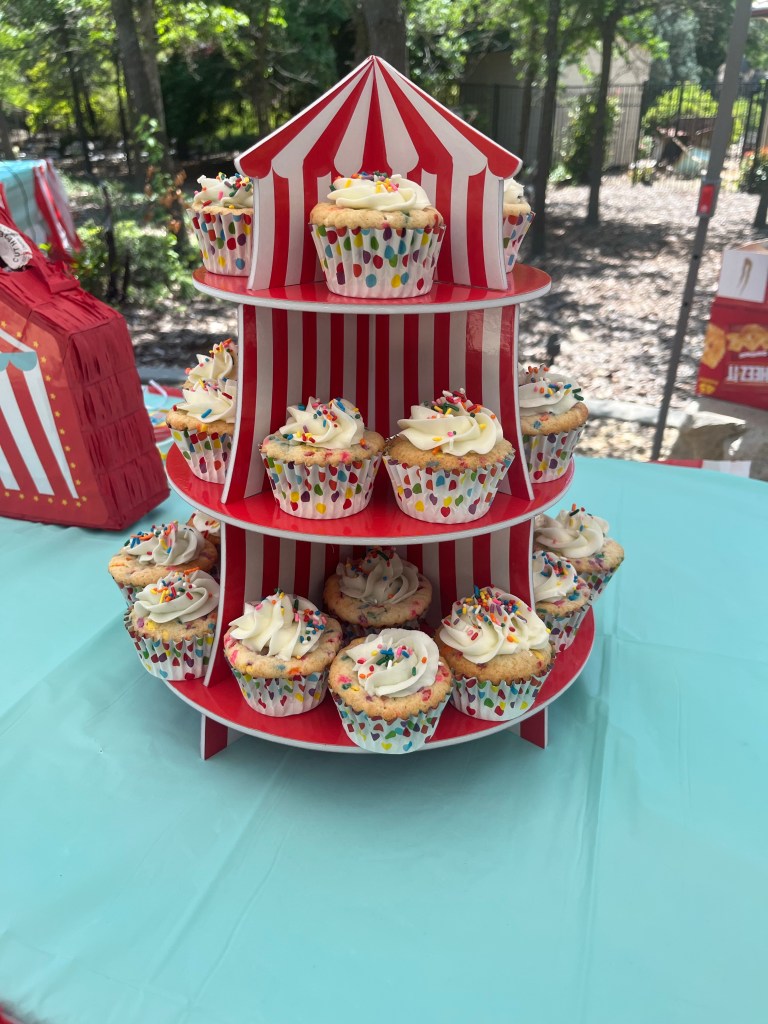
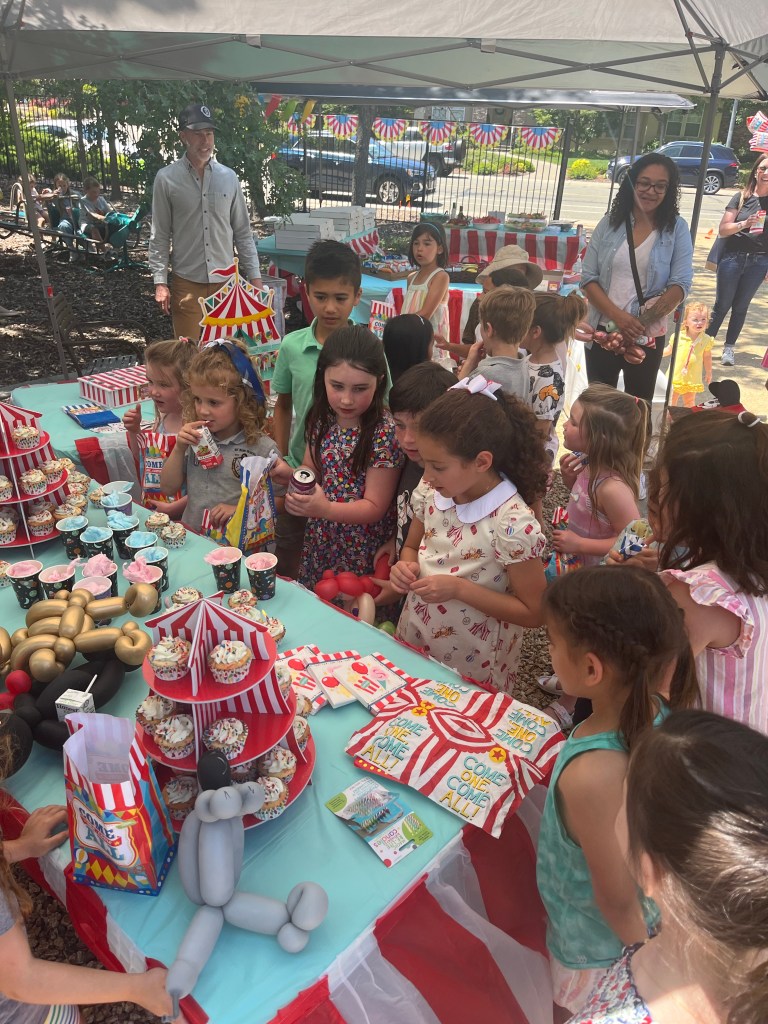
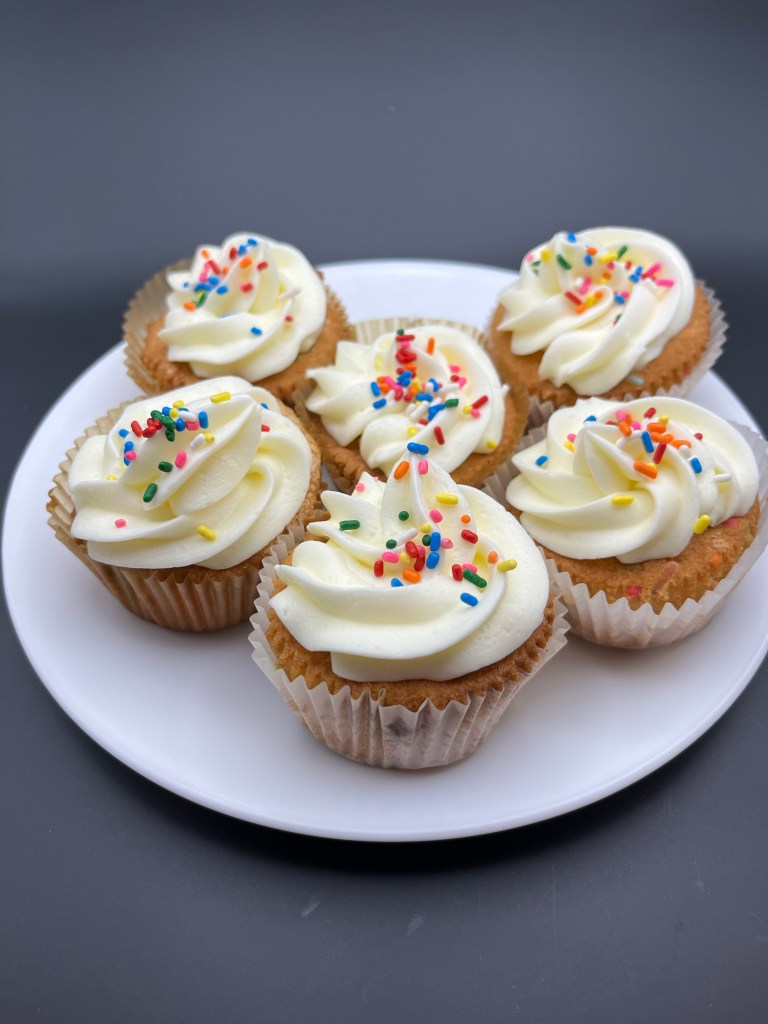
As they say, “Build it and they will come.” Dan and Frances built it and they came. It was our granddaughter Grace’s 7th birthday party and she requested FunFetti cupcakes as her party dessert. With an anticipated attendance of 100 kids and parents I figured 10 dozen cupcakes would be plenty. Well, I was wrong. They managed to eat only 40 cupcakes and we gave away an addition couple of dozen. Best laid plans of mice and men often go awry!
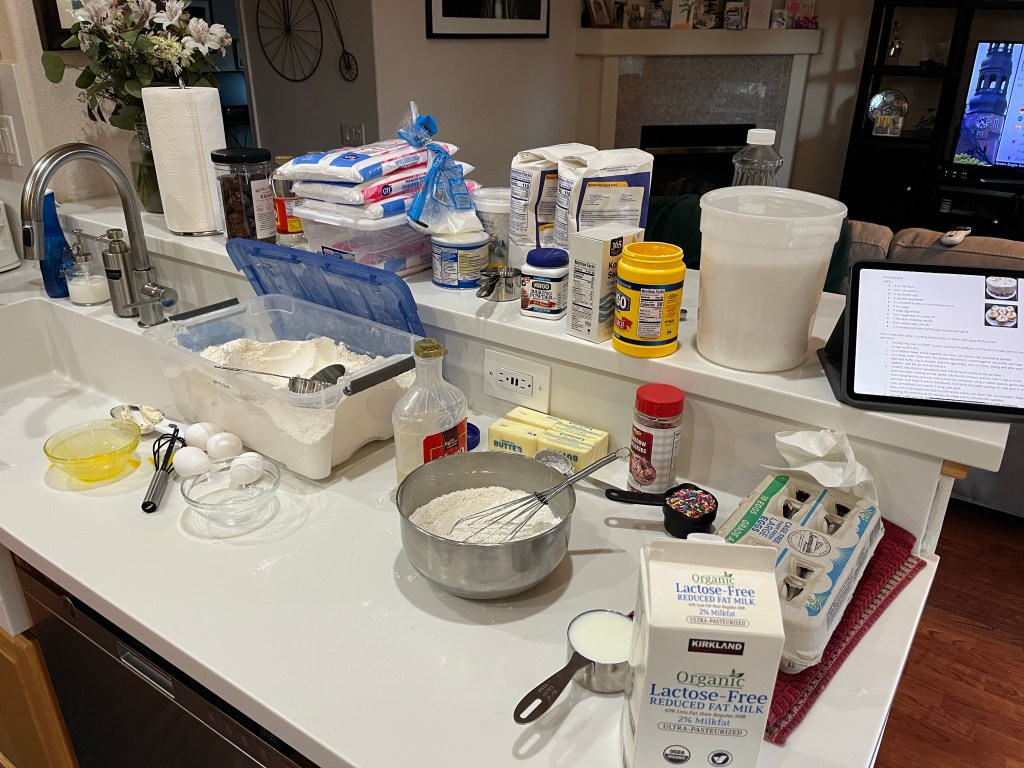
Kitchen at lift offField of dreamsFun!Ready for deliveryCupcake towerDessert tableReadySetGo!A little known fact. The candle was lit with a blowtorch!
FunFetti Cake
makes one 3-layer 8″ cake or 24 cupcakes
INGREDIENTS CAKE: • 2 ½ c AP flour • 1/4 c cornstarch • 1 tsp kosher salt • 2 tsp baking powder • 1 c unsalted butter, at room temperature • 1 ½ c sugar • 4 large egg whites • 1/4 c vegetable or canola oil • 1 Tbl clear imitation vanilla • 3/4 c whole milk (2% OK) • ½ c rainbow sprinkles (artificially colored cylinders)
Pairs nicely with Edna’s Crusting Buttercream or Italian Meringue Buttercream or Less Sweet Buttercream.
METHOD
Preheat the oven to 350ºf. Grease and line the bottoms of three 8-inch cake pans or line 24 cups of two muffin tins.
In a medium bowl, whisk together the flour, cornstarch, salt, and baking powder.
In a stand mixer fitted with the paddle attachment, cream together the butter and sugar until light and fluffy, 3 to 4 minutes. Add the egg whites, one at a time, mixing well after each addition. Add the oil and the extract.
By hand add the dry mixture and the milk in two or three alternating batches and mix until just barely combined, using a rubber spatula, gently fold in the sprinkles until they’re evenly distributed. Distribute the batter among the cake pans or muffin cups, spreading it out evenly if using cake pans.
Bake until a toothpick inserted into the center comes out clean. (~200 F. Do not overbake!) Begin checking for doneness at 20 minutes for cakes and 15 minutes for cupcakes.
Let cool in the pans for 10 minutes and then turn onto a wire rack to cool completely.
Buttercream Frosting – Less Sweet
For 3 cups of buttercream:
INGREDIENTS
• 1 1/2 cups (340g) unsalted butter, softened slightly • 2/3 cups (208g) light corn or glucose syrup • 1 1/4 cups (141g) powdered sugar (unsifted) • 1/8 teaspoon fine salt (to taste, start with a pinch) • 1 teaspoon vanilla extract • 3-6 tablespoons of heavy cream, room temperature • purple gel food coloring (optional)
METHOD
Add the softened butter to the bowl of your stand mixer. Using the whisk attachment, beat the butter on high speed until it’s paler in color and slightly more voluminous.
Add the corn syrup in 3 to 5 additions. Stop the mixer, add a little bit first, and mix it in at medium speed (still using the whisk attachment). Repeat until all the corn syrup has been added. Scrape down the bowl a couple of times to ensure everything is mixed well.
Once all the corn syrup has been added, mix at the highest speed for two minutes. This is an essential step, so make sure to time it. You need the butter to emulsify the sugar syrup, which won’t be visually apparent because the syrup is clear. If you under-whip at this step, your final frosting will have an overly buttery (fatty or greasy) feel. Proper emulsification will ensure that the syrup integrates evenly within the butter, giving it a much more pleasant texture.
Now give the frosting a taste. It should be smooth, creamy, and very buttery, with a slight sweetness. This is to gauge how much powdered sugar to add in this step. Notice how glucose (the sugar type in corn syrup) is not as sweet as the sucrose in powdered sugar.
Add the powdered sugar in a few additions, mixing on low speed to reduce the mess. Once all the sugar has been added, mix on high speed for 30 seconds. Give it another taste. Do you want it sweeter or need a firmer consistency of buttercream? Add more powdered sugar. You can add as much powdered sugar as you like. This buttercream can handle more, but remember that the more you add, the sandier the finished frosting will be.
Now let’s flavor and color the buttercream. Add the vanilla, a pinch of salt, and, optionally, a toothpick’s end of purple food coloring (to achieve a whiter shade). Mix on high speed for another minute.
Give it a taste. If it’s too buttery, add some heavy cream, one tablespoon at a time, until you like the consistency. Whip it in on high speed for at least one minute when you like the texture. (See my footnotes about this below.)
Switch over to a paddle attachment and run the frosting on low speed to get out any large air pockets. The finished buttercream will have minimal air bubbles and be ready to use.
I am making FunFetti cupcakes for my older granddaughters birthday party this week. I made two practice batches of cupcakes and one of American buttercream. The cakes are now great but the frosting was too sweet. (Think 60 seven-ish year old kids on sugar highs.)
Today I made a recipe of Italian buttercream frosting. It uses about one fourth the amount of sugar and will (hopefully) stand up to the expected outdoor temperature.
I had about a dozen chocolate cupcakes frozen that needed to by used soon, and I had a nice frosting, so, why not?
Mix 1½ cups (3/4c) of the sugar and the water in a heavy saucepan and bring to a boil over medium-high heat, stirring with a wooden spoon to dissolve the sugar. Continue to cook,without stirring, and bring to the softball stage (240°F).
As the simple syrup is heating, whip the whites at high speed in a stand mixer until soft peaks form, approximately 5 minutes. With the motor running, add the remaining ½ cup (1/4c) sugar gradually, continuing to whip until medium peaks form.
When the simple syrup reaches 240°F, and the motor running on slow, very slowly pour it into the egg whites in a thin stream, to avoid cooking the eggs. Raise the speed to high and continue to whip until the mixture has cooled to room temperature, 10 to 15 minutes.
Whip in the butter at medium speed, add the butter in 5 increments, stopping the motor between additions, scraping the bowl with a rubber spatula before adding each addition of butter.
With the motor running, add the vanilla, and whip just until it is blended.
Those of you who follow this blog know I almost always make a practice cake of any new bake. My almost 7 year old granddaughter wants a “FunFetti cake” for her birthday in a couple of weeks. I found this recipe and method and tried it this morning.
I think I over-baked the cake by about 3 or 4 minutes and know I over baked the cupcakes. I’ll try again making only cupcakes (as that is what we will serve at the party.) 80 cupcakes!
Funfetti Cake
INGREDIENTS CAKE: • 2 ½ c AP flour • 1/4 c cornstarch • 1 tsp kosher salt • 2 tsp baking powder • 1 c unsalted butter, at room temperature • 1 ½ c sugar • 4 large egg whites • 1/4 c vegetable or canola oil • 1 Tbl clear imitation vanilla • ½ tsp almond extract • 3/4 c whole milk (2% OK) • ½ c rainbow sprinkles (artificially colored cylinders) FROSTING: • 1 3/4 c unsalted butter, at room temperature • 3 ½ c powdered sugar • 1/8 tsp kosher salt • 1 ½ tsp clear imitation vanilla • 1/4 tsp almond extract (omit for nut free) • 2 Tbl whole milk
METHOD CAKE:
Preheat the oven to 350ºf. Grease and line the bottoms of three 8-inch cake pans or line 24 cups of two muffin tins.
In a medium bowl, whisk together the flour, cornstarch, salt, and baking powder.
In a stand mixer fitted with the paddle attachment, cream together the butter and sugar until light and fluffy, 3 to 4 minutes. Add the egg whites, one at a time, mixing well after each addition. Add the oil and the extracts.
With the mixer running on low speed, add the dry mixture and the milk in two or three alternating batches and mix until just barely combined. Do NOT over beat!.
Using a rubber spatula, gently fold in the sprinkles until they’re evenly distributed. Distribute the batter among the cake pans or muffin cups, spreading it out evenly if using cake pans.
Bake until a toothpick inserted into the center comes out clean. Begin checking for doneness at 20 minutes for cakes and 16 minutes for cupcakes. (Depends on your oven.)
Let cool in the pans for 10 minutes and then turn onto a wire rack to cool completely. FROSTING:
In a standing mixer fitted with a paddle attachment, beat the butter until smooth and gradually beat in the powdered sugar. Add the salt, extracts, and milk and beat to combine.
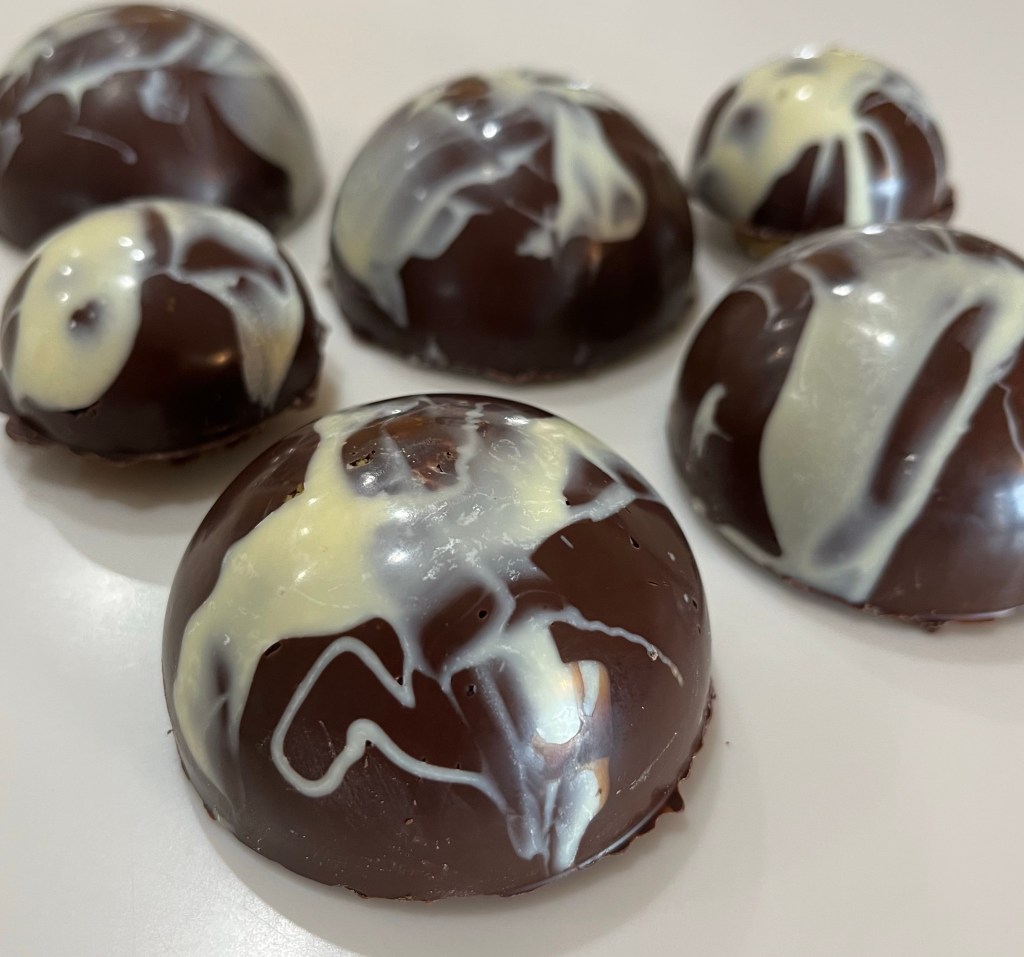
I had a few oranges left over from “poaching” my neighbors, John and Amy’s, trees. Luckily, I saw a Jaffa cake on GBBO which gave me the idea of created a Jaffa-ish dessert. Populate in Britain, Jaffa cakes include sponge, orange and chocolate.
I also had some pistachios left over from another project so I made the “cake” a pistachio flavored one. Actually, I didn’t make a cake, I made cookies, where they should have been biscuits. Whew! That’s a convoluted way to say I made pistachio flavored – mouse filled – cookie based tempered chocolate domes. Hmmm, that’s not much shorter, is it?
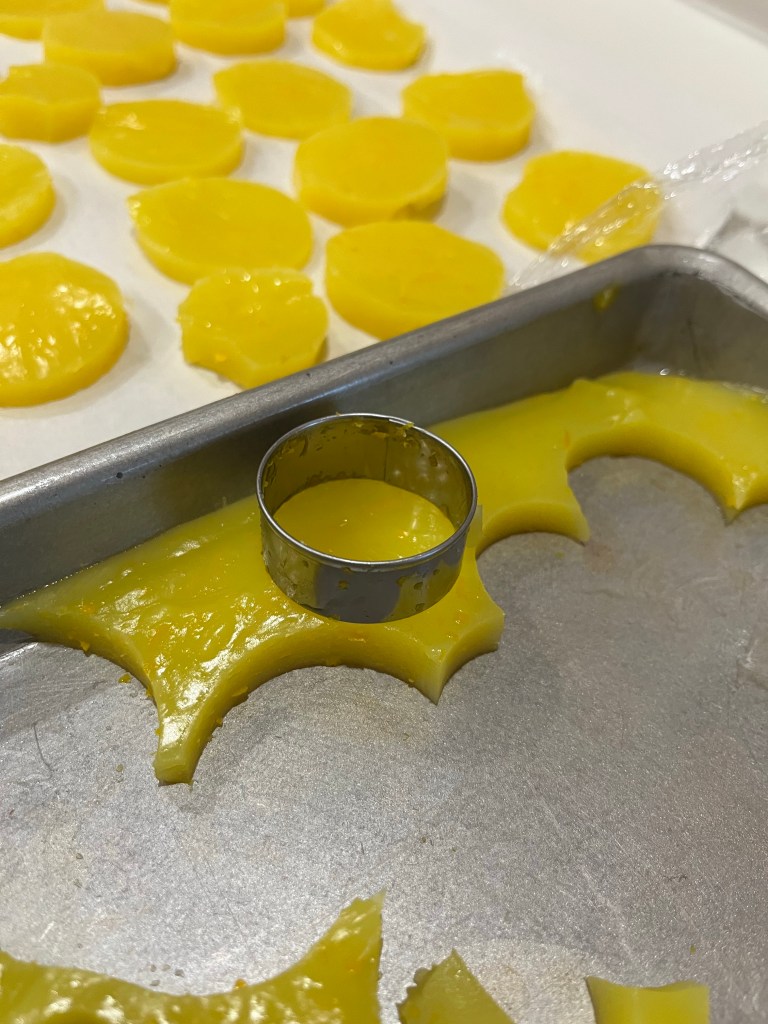
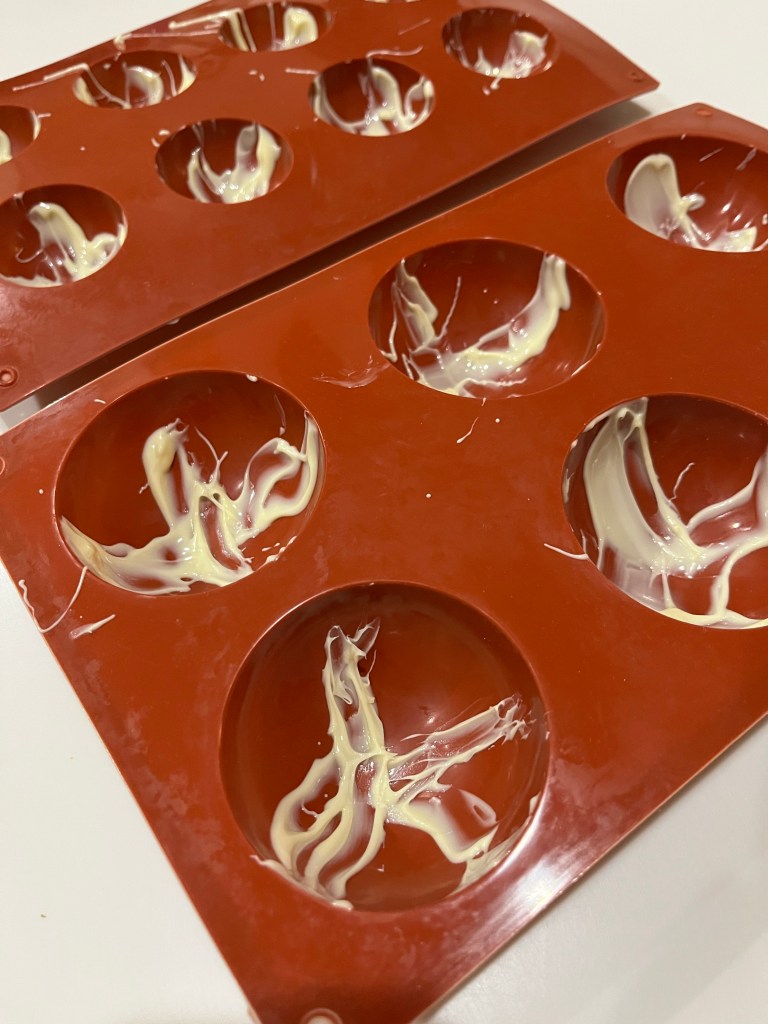
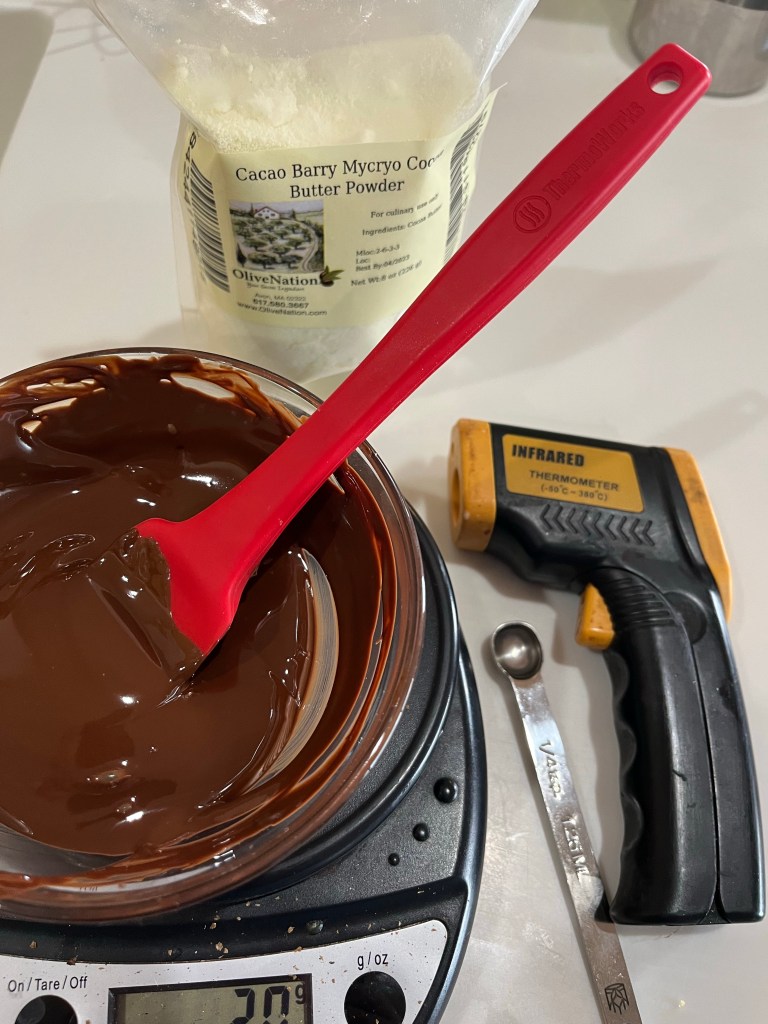
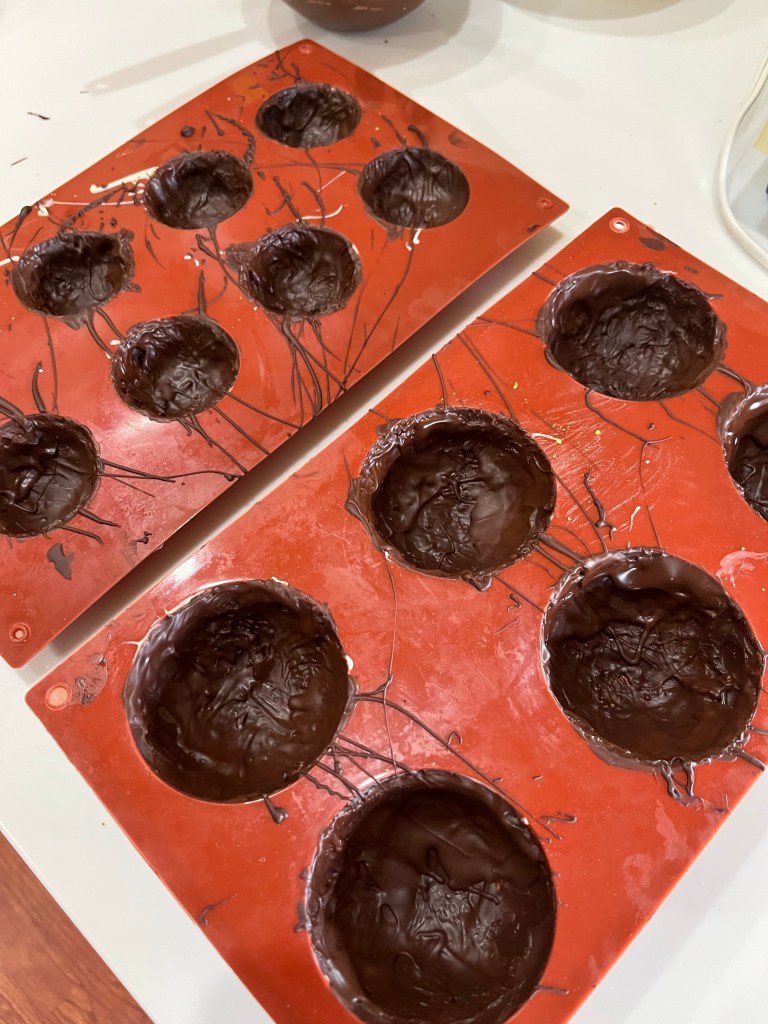
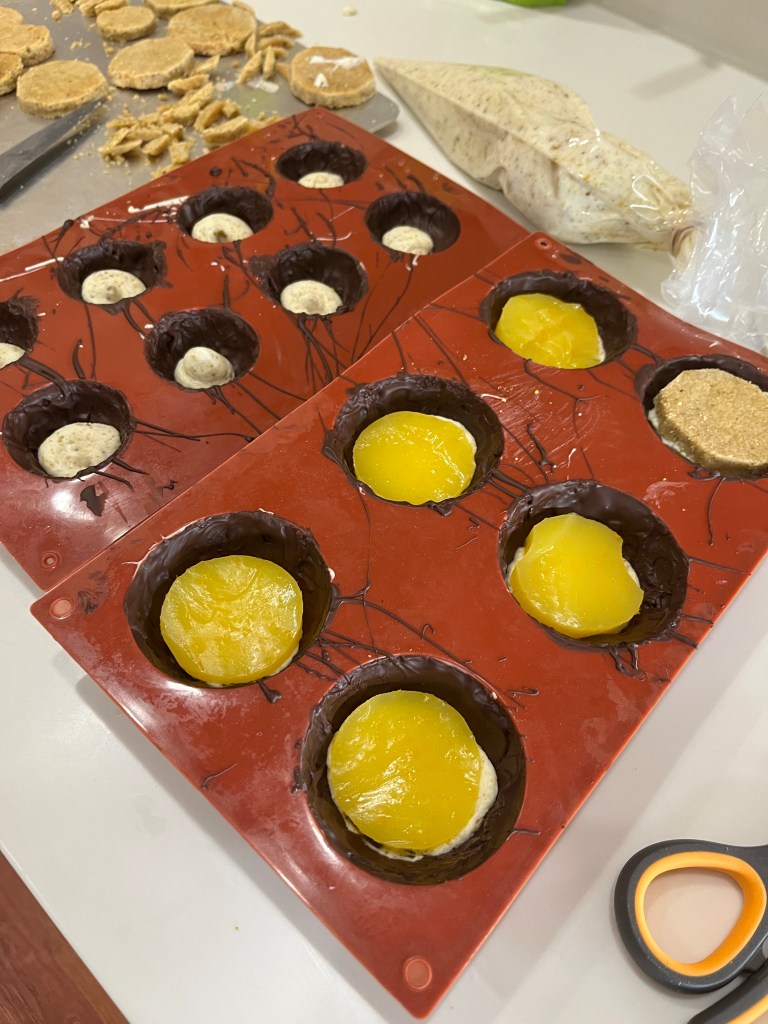
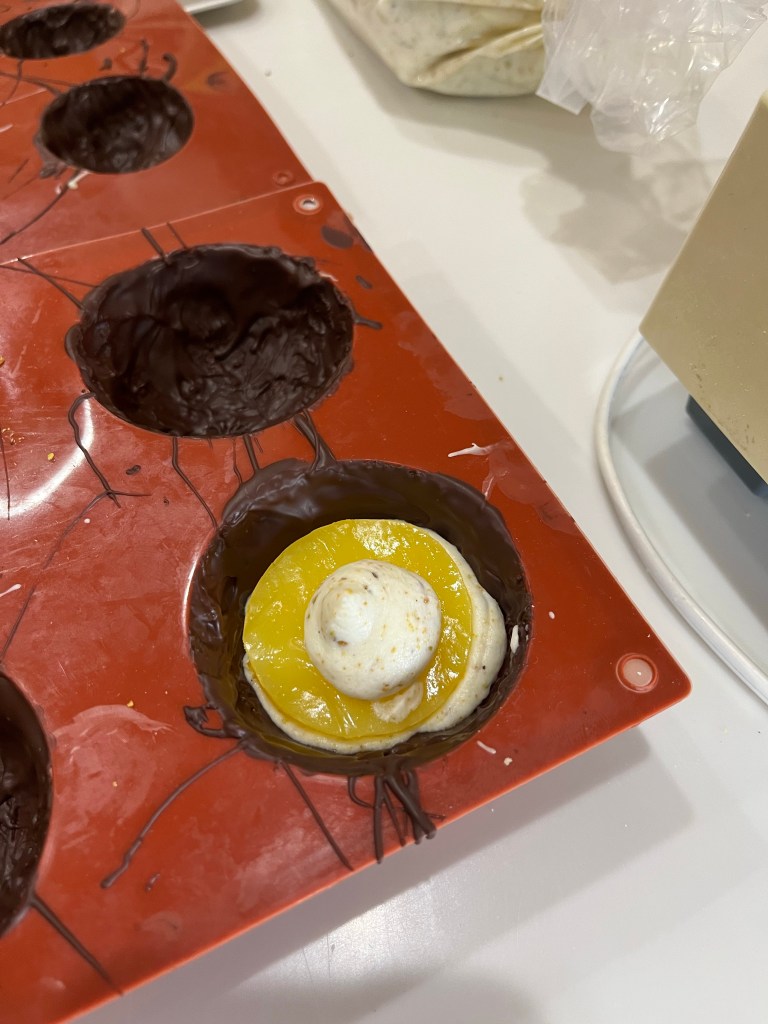
Cutting jelly disks2 sizes of jelly disksWhite chocolate streaked silicone moldTempering chocolateCoating silicone moldsSecond coat assures a well coated moldMousse filled moldsAdd biscuit to moldAdd mousse on top of biscuitSealed Jaffa domed “cake”Completed Jaffa domed dessert
The orange paired nicely with the chocolate but the combination of those flavors overpowered the pistachio. I made some plain pistachio cookies with leftover dough and they were excellent. To make the pistachio cookies leave the rolled dough about 1/4” thick.
JAFFA DOME “CAKE”
Procedure Outline:
Make orange jelly 1/8” thick – refrigerate
Make whipped cream – refrigerate
Streak silicone molds with melted white chocolate – allow to cool
Coat white chocolate streaked silicone molded with tempered dark chocolate – 2x – allow to cool between each coating
Make pistachio biscuit 1/8” thick – allow to rest a couple of minutes a. While warm, cut into appropriately sized disks to fit in silicone molds – b. allow to cool. They should snap like a biscuit.
Make vanilla mousse
Fill domes ~ ¼ full with mouse (piping is easiest)
Insert appropriately sized cut disk of orange jelly into each mold
Cover jelly with vanilla mousse
Fit pistachio biscuit over bottom of mold
Cover biscuit with vanilla mousse
Pipe tempered chocolate around the edge of the bottom.
Cover bottom with a layer of tempered dark chocolate – approx 1/8” thick.
(Note: my orange jelly and biscuit were too thick (1/4” each) so I reduced the amount of mousse in each cup and couldn’t cover the bottom of the dome with chocolate. The directions reflect appropriate changes. Next time!)
Orange Jelly
INGREDIENTS
600 ml (2½ c) Orange juice, about 5-6 oranges
Orange zest from 3 oranges
50 g ( ¼ c) Sugar
¼ teaspoon Salt
65 g( ½ c) Cornstrach METHOD
Grease 9-inch (24cm) square pan or similar size pan with oil and set aside.
Zest two oranges and place it in a sauce pan.
Squeeze the juice from the oranges and measure 2½ cups (600ml). pour the juice into the pan. Add the sugar, salt and cornstarch.
Place the saucepan over medium heat and cook, stirring constantly until thickened, about 6-8 minutes.
Pour the mixture into prepared pan, spread to 1/8” thick, allow to cool to room temperate, then refrigerate for at least 2 hours, or overnight.
Vanilla Mousse – Vegetarian
INGREDIENTS WHIPPED CREAM – YIELDS 1 ½ CUPS OF WHIPPED CREAM • 1 c whipping cream • 4 tbl confectioners sugar • 1 ½ tsp Cream of tartar • 1 tsp vanilla WHITE CHOCOLATE • 1 cup white chocolate chips • 3 tbl whipping cream AGAR AGAR • 2 tsp Agar Agar • 2 tbl warm water
METHOD
WHIPPED CREAM
Before beginning with the recipe, place the mixing bowl and whisk in the freezer for at least 10 minutes to chill.
Once the bowl has chilled, add heavy cream and vanilla and beat on low speed until the cream starts to thicken slightly.
Add the cream of tartar and powdered sugar and beat with increasingly higher speed until stiff peaks form. Once done, set it in the fridge to chill.
AGAR AGAR MIX
Mix 2 tsp Agar agar powder with 2 Tbl lukewarm water
Whisk to combine
Let set 4 – 5 minutes for the agar agar to bloom
VANILLA MOUSSE
Heat the white chocolate in a glass bowl in the microwave. Start with one minute, stir. If not melted try 15 seconds and stir again, then 10 seconds.
Add agar agar mix and stir for 5 minutes. It will be thick like jelly, that’s ok. The white chocolate and agar agar will turn smooth and shiny.
Add 2-5 Tbl warm milk and mix until the chocolate is thick but runny. Don’t add too much
If desired add a few drops of white food coloring to lighten the yellowish mixture and mix well
Gently fold the cool to touch white chocolate [and agar] mixture into the cool whipped cream until combined. Do not beat and deflate the mousse
Add remaining 1/3 cup of ground pistachios and gently fold into vanilla mousse.
Pistachio Shortbread Cookie
INGREDIENTS • 1 cup (230g) unsalted butter, softened to room temperature • 1/2 cup (100g) granulated sugar • 1/4 cup (50g) light brown sugar • 1 teaspoon pure vanilla extract • 1 teaspoon salt • 2 and 1/4 (281g) cups all-purpose flour • 1 cup (100g) finely chopped pistachios, divided
METHOD
Preheat oven to 325°F (163°C). Line a double layer cookie sheet with parchment paper.
Using a hand mixer or a stand mixer fitted with paddle attachment, beat the butter on high speed until completely smooth, about 1 minute. Add the granulated sugar and brown sugar and beat together until smooth and creamy, about 1 minute. Add the vanilla, salt, and flour and beat on low speed, gradually increasing to high speed as the mixture combines. Don’t over mix. Add 2/3 cup of the finely chopped pistachios, reserving the rest to add to the mousse.
Roll the dough out between sheets of parchment paper on the cookie sheet.
Bake the shortbread for 15-20 minutes or until lightly browned on top and around the edges.
Remove from the oven and allow to cool slightly.
Cut appropriate sized circles. Be sure the circles are ¼” less diameter than the molds, allowing 1/8” space around the cookie for chocolate.
I ended up cutting 1/8” bits off the circumference of the large cookies.
The problem with New Year Eve is… I can’t stay up past east coast midnight anymore. I made a cake for New Year’s 2022 that went over so well, I was asked to make one for this year. If you follow/know me, you know I said “Yes” before the question was complete.
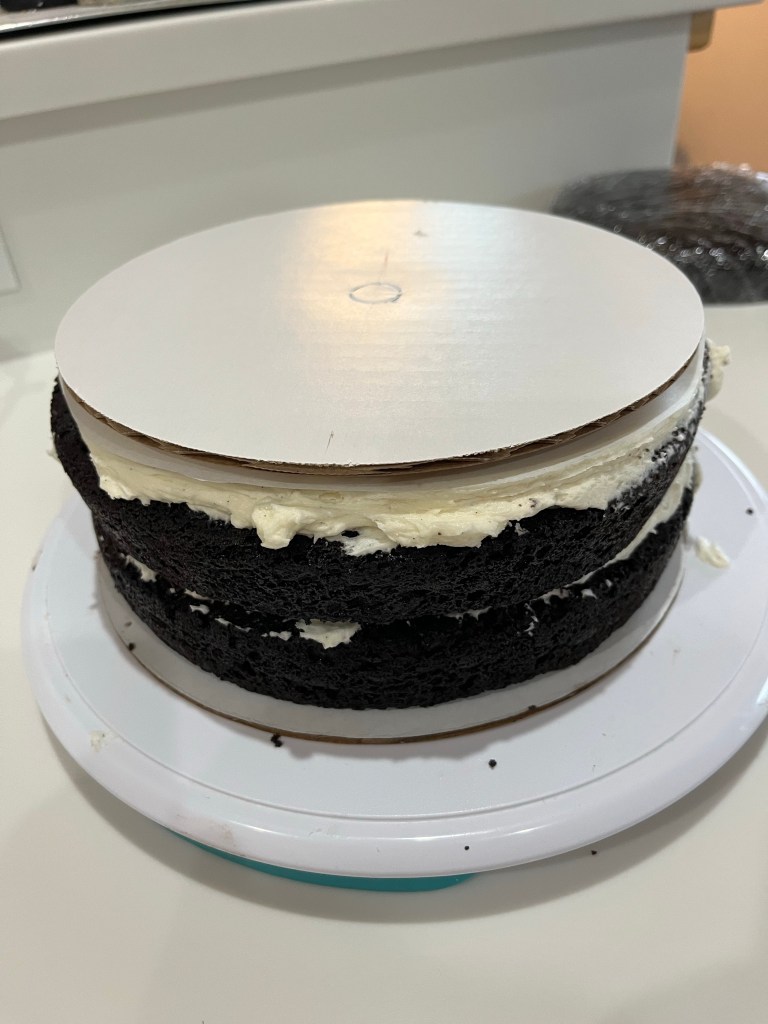
As usual I searched the internet for ideas until I found a design I liked. It had a nice dark midnight blue frosting so with another search found the ratio of food coloring to approach that color. It’s always good to try new techniques and develop new skills with big bakes like this, (four layer 9” cake to augment cheese cakes for about 60 people.)
I made the four 9” Extreme Chocolate Cakes, wrapped them in plastic wrap and placed them on flat surfaces in the freezer. I will take them out to thaw the day before New Year’s Eve. (New Year’s Eve eve?)
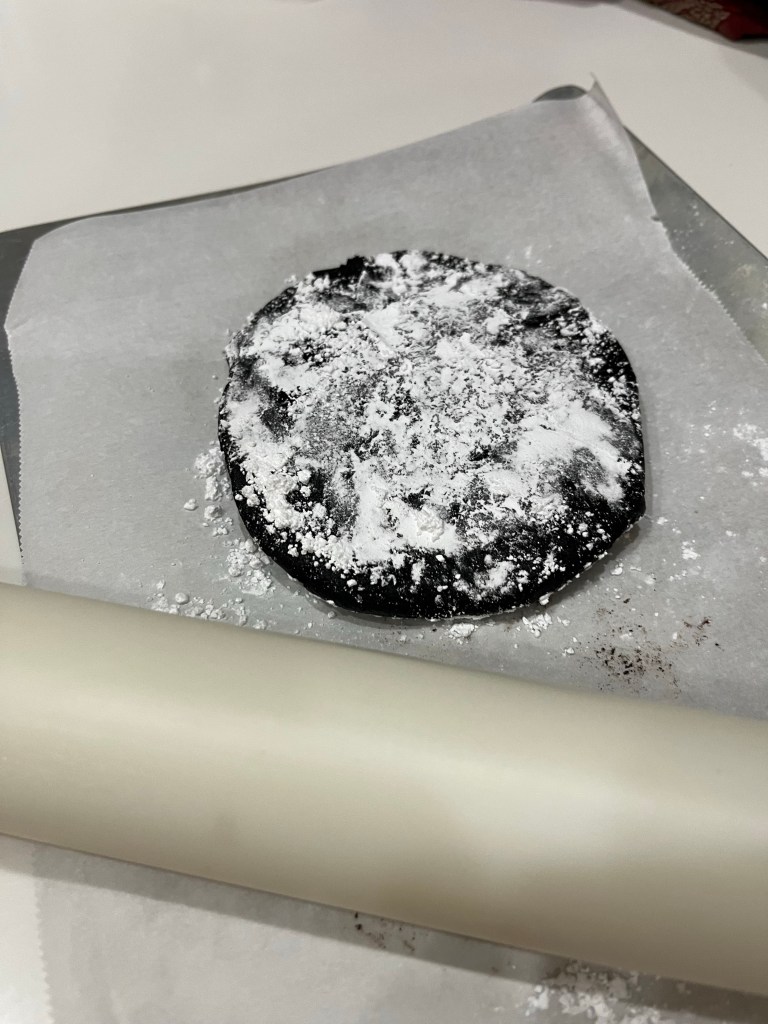
Making the black chocolate cookies is straightforward. I use Modern Mountain Black Cocoa rather than Hershey’s Special Dark (my go to.)
The dough should be pliable, not softRoll the dough out between parchment paper and dust with powdered sugar.
Making black royal icing isn’t as easy as making the cookies. I made a regular royal icing and added two tablespoons of the black cocoa and about 20 drops of black food coloring. Even that much food coloring in about a cup of royal icing only turns it dark gray, and detracts (big time) from the taste. The black cocoa (be sure to sift it before adding) turns the royal icing black.
Retained cookie shape after chillingThis is pure black royal icing.Oops! My damn dam wasn’t high enough
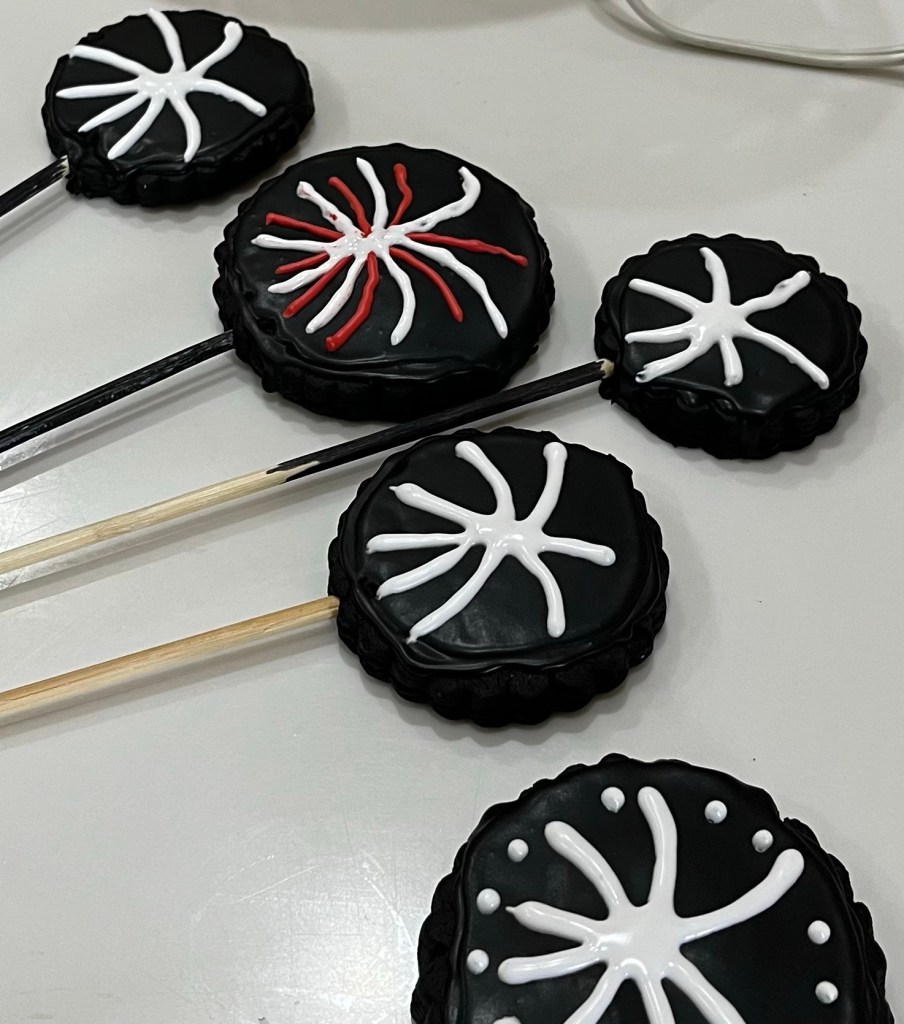
Chilling the cookie dough preserves the “star burst” shape after baking. As soon as the cookies come out of the oven insert skewers most of the way through them. Later you will paint them black. (On second thought, why not paint them with edible black paint before baking the cookies? Next time.) These cookies are VERY crispy and taste like chocolate cake.
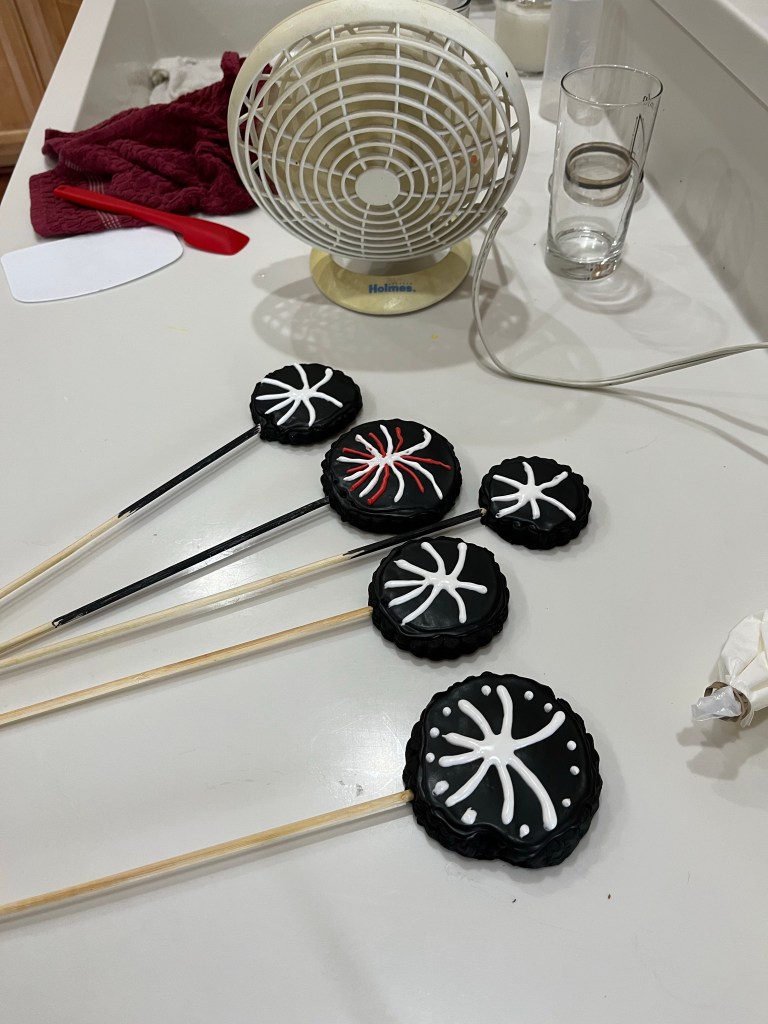
I tried an edible black marker to paint the skewers. Not worth the effort and ordered some edible black paint.Allow each color to dry before piping another colorPiped white royal icingFinished “Fireworks” cookies.
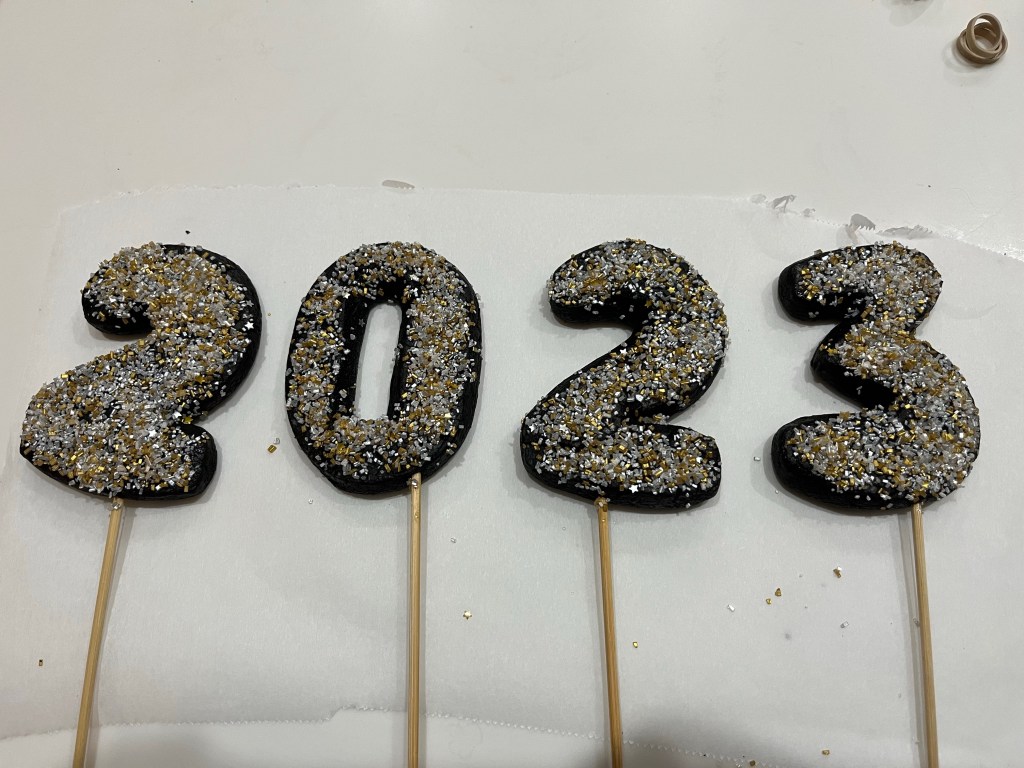
Finally, Amazon delivered my number cookie cutters. (To be fair, we only ordered them last night.) I made the second batch of chocolate cookie dough yesterday so when they arrived I started the over, cut the numbers (and a bunch of smaller cookies for QC and I to enjoy) and baked them. Once done I immediately inserted a small skewer into each number and let them cool and turn crispy. Once cool, I made a concentrated sugar water, painted the cookies then coated them with star shaped sprinkles.
It required 6 cups of white buttercream to crumb coat the whole cake. 4 more cups of midnight blue buttercream frosting finished the cake. I wish I could make my surfaces as smooth and clean as seen online. Oh well.
Crumb coated bottom two layersParchment paper circle and 8” cake plate on top of bottom 2 yayersMidnight Blue frosted cake.
Black Royal Icing
INGREDIENTS
• 4 cups (480g) confectioners’ sugar, sifted • 3 Tablespoons meringue powder (not plain egg white powder) • 5 drops black food coloring • 2 Tbl Black Cocoa (sifted) • 9–10 Tablespoons room temperature water
METHOD
Pour confectioners’ sugar, meringue powder, black food coloring, black cocoa and 9 Tablespoons of water into a large bowl.
Using a hand mixer or a stand mixer fitted with a whisk attachment, beat icing ingredients together on high speed for 1.5 – 2 minutes.
When lifting the whisk up off the icing, the icing should drizzle down and smooth out within 5-10 seconds. If it’s too thick, beat in more water 1 Tablespoon at a time. I usually need 10 Tablespoons but on particularly dry days, I use up to 12-14 Tablespoons. Keep in mind that the longer you beat the royal icing, the thicker it becomes. If your royal icing is too thin, just keep beating it to introduce more air OR you can add more confectioners’ sugar.
When applied to cookies or confections in a thin layer, icing completely dries in about 2 hours at room temperature. If icing consistency is too thin and runny, it will take longer to dry. If the icing is applied very thick on cookies, it will also take longer to dry. If you’re layering royal icing onto cookies for specific designs and need it to set quickly, place cookies in the refrigerator to help speed it up. You can also use a fan to help set the icing.
Black Chocolate Cookies
INGREDIENTS
• 1 1/2 cups (195g) AP flour • 3/4 cup (70g) unsweetened black cocoa powder • 1 teaspoon baking soda • 1/4 teaspoon kosher salt • 1/2 teaspoon espresso powder • 1 stick (110g) unsalted butter, room temperature • 3/4 cup (150g) sugar • 1 large egg • 1 1/2 teaspoons vanilla • 1 teaspoon molasses
METHOD
In a large bowl, vigorously whisk together the flour, cocoa, baking soda, salt, and espresso powder.
Cream the butter and sugar until light and fluffy, (2-3 min on medium.)
Beat in the egg, vanilla, and molasses.
Add the dry ingredients to the wet in 3 additions. When well mixed, remove the dough from the mixer, and form it into a ball. It should have the consistency of soft clay. If it’s stiff and unmanageable, massage some water into it, a tablespoon at a time until easily pliable.
Wrap it in plastic wrap, and chill it in the refrigerator for at least one hour.
When you are ready to roll-out the dough, preheat the oven to 350°F (175° C). Break off a chunk of dough from the ball of dough (about a quarter of it) and place it between two pieces of parchment paper. Use a rolling pin to roll the dough out to an even 1/2-inch thickness.
Use a cookie cutter or the rim of a small glass to cut out cookie shapes from the rolled out dough. Place on a parchment paper or silicone-lined baking sheet, allowing at least 1 inch between cookies on the cookie sheet.
Bake at 350°F (175° C) in the middle rack for 12 to 14 minutes, less or more, depending on the size and thickness of the cookies.
The cookies should bounce back when you press on their centers and be a little dark around the edges. When cool, they should be crispy.
Remove from oven and let cool for 5 minutes before removing the cookies from the tray to cool on a rack.
Extreme Chocolate Cake
Makes two 9” round cakes (double for this cake) INGREDIENTS (Makes one 10’ ROUND CAKE [and two 5”] – quantities are in parenthesis. Or one 11”x15”x2” sheet cake.) • 2 cups white sugar (3) • 1 3/4 cups all-purpose flour (2 2/3) • 3/4 cup unsweetened cocoa powder (1 ¼) • 1 1/2 teaspoons baking soda (2 ¼) • 1 1/2 teaspoons baking powder (2 ¼) • 1 teaspoon salt (1 ½) • 2 eggs (3) • 1 cup milk (1 ½) • 1/2 cup vegetable oil (¾) • 2 teaspoons vanilla extract (3) • 1 cup boiling water (1 ½)
METHOD
Preheat oven to 350 degrees F (175 degrees C). Grease and flour two 9 inch cake pans.
Use the first set of ingredients to make the cake. In a medium bowl, stir together the sugar, flour, cocoa,baking soda, baking powder and salt. Add the eggs, milk, oil and vanilla, mix for 3 minutes with an electric mixer. Stir in the boiling water by hand. Pour evenly into the two prepared pans. (For cupcakes,portion ¼ scant cups in each cupcake paper.
Bake for 30 to 35 minutes in the preheated oven, until a toothpick inserted comes out clean or 205F internal temp. Cool for 10 minutes before removing from pans to cool completely.
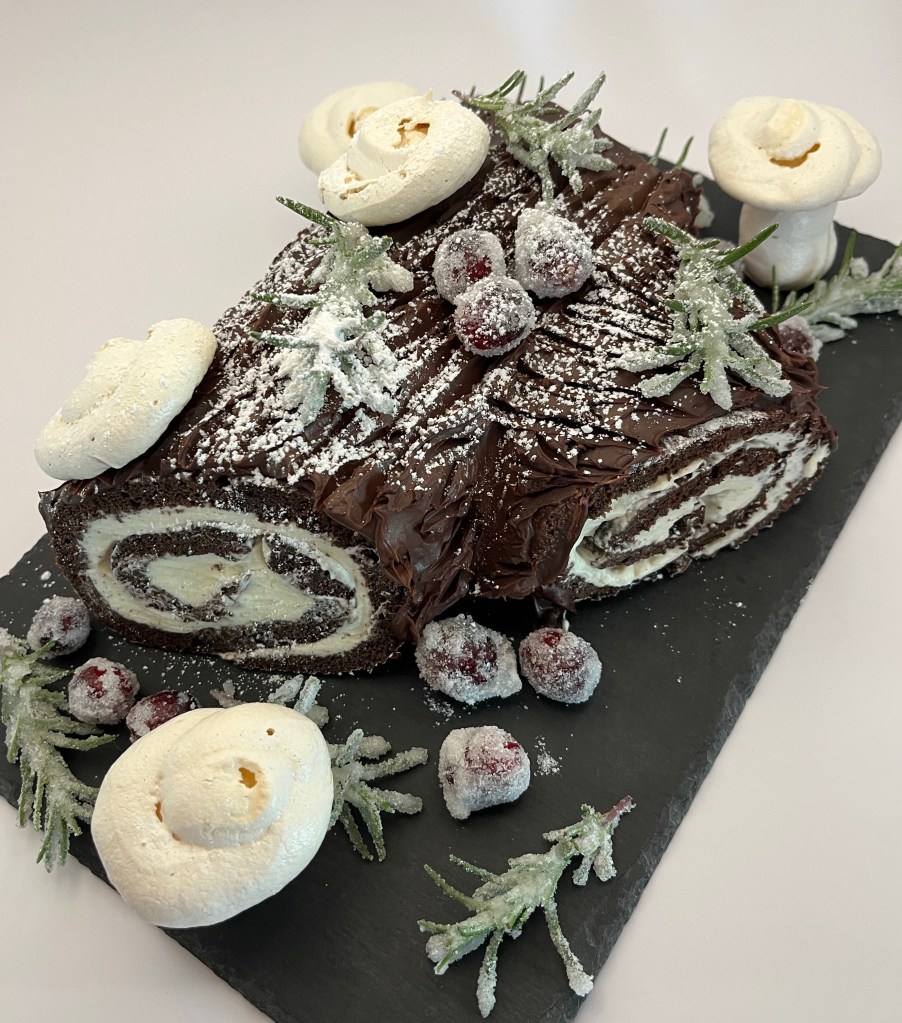
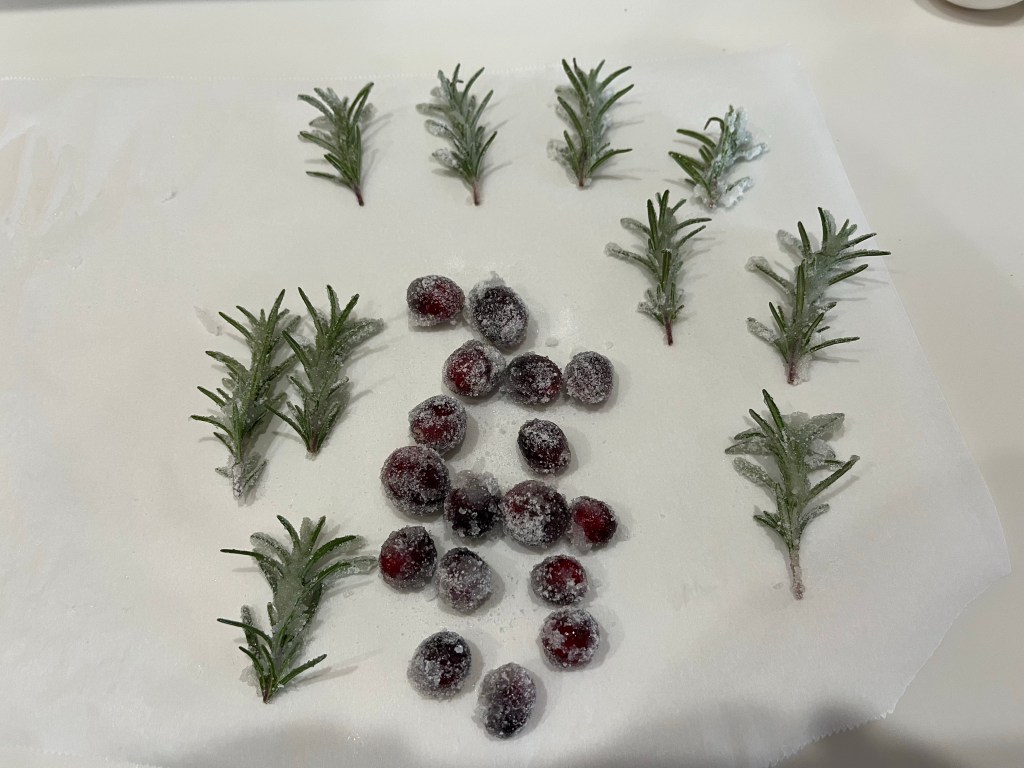
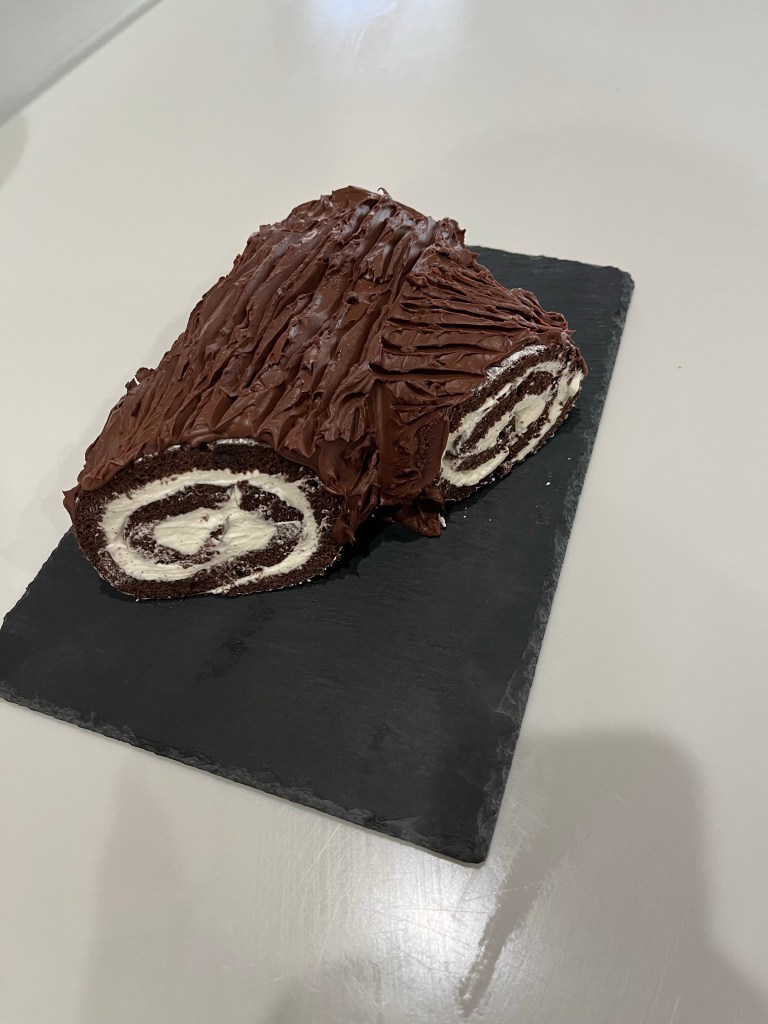
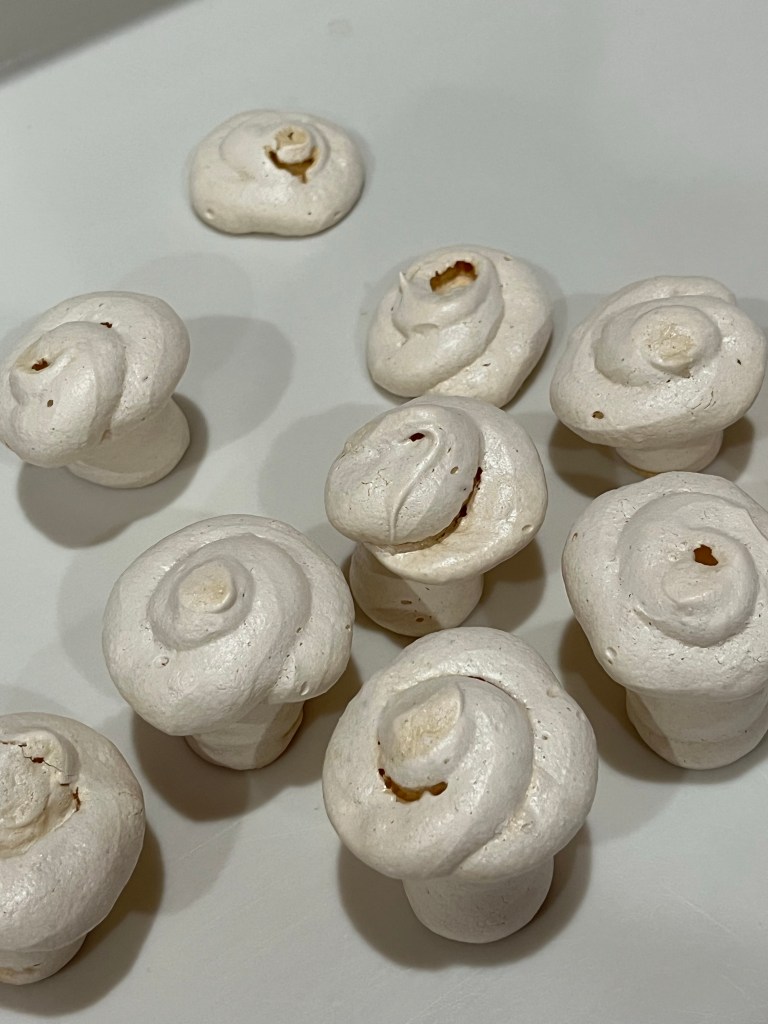
I made a Yule Log cake a couple of years ago and while it was good, but it wasn’t Cake Wall of Honor good (see below.) This years just might be. It has chocolate Swiss roll with whipped cream filling, glazed and sugared cranberries and rosemary, merengue mushrooms (not majic) and a dusting of confectioners sugar.
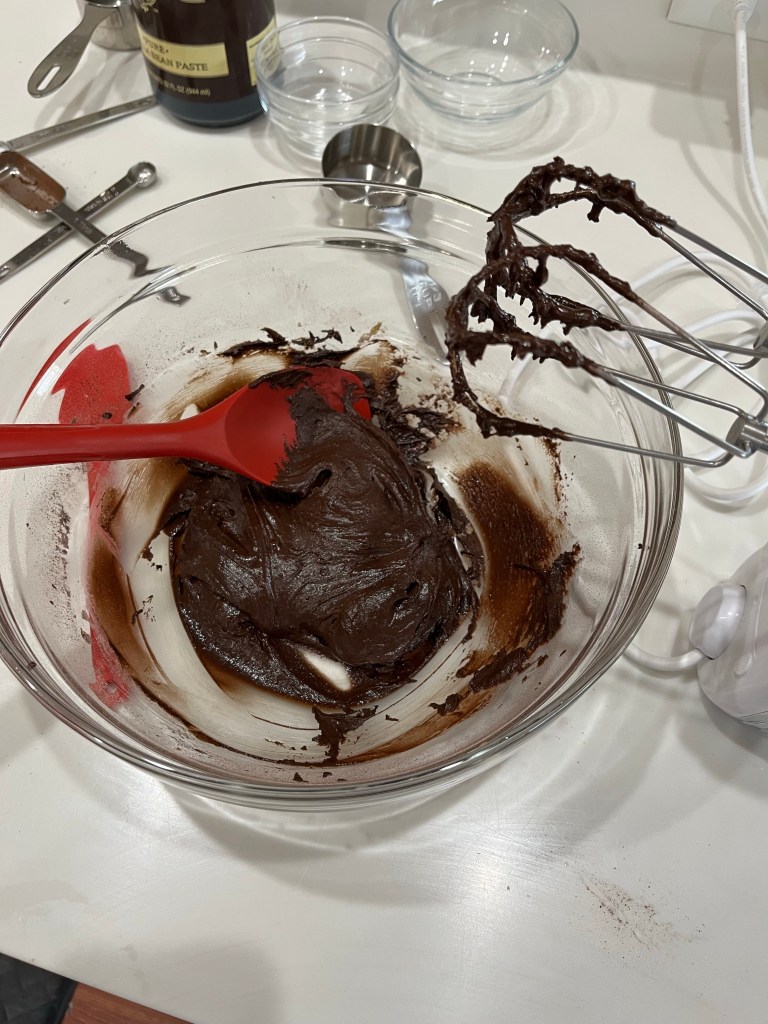
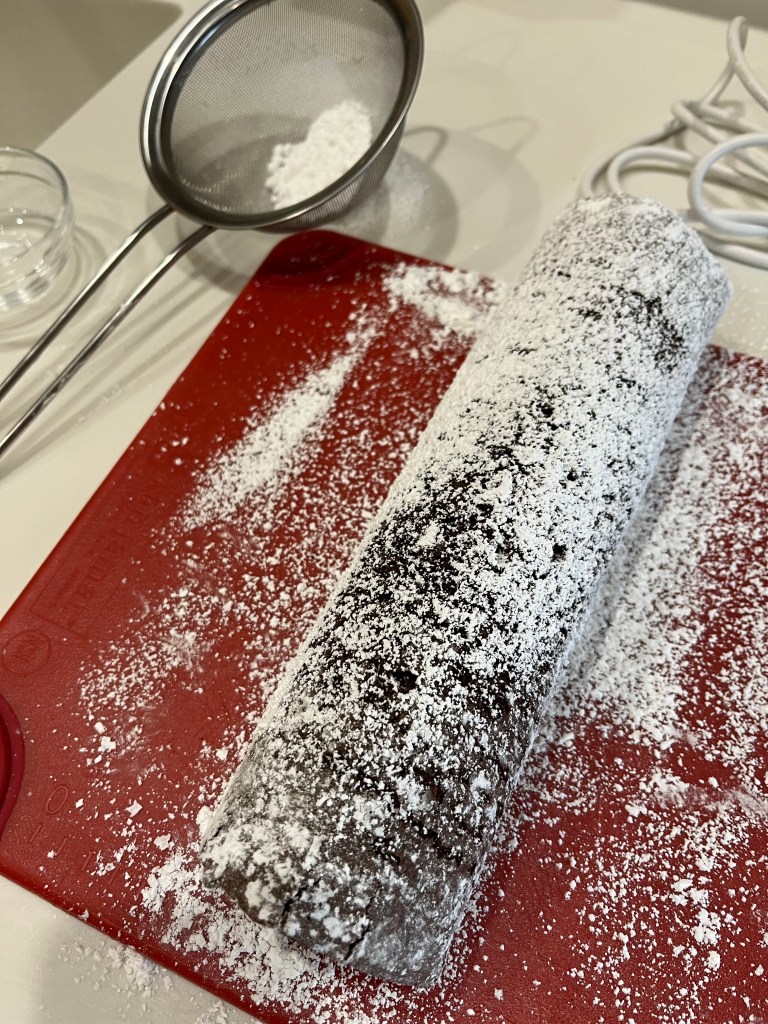
The chocolate was super thick until the whipped egg whites were added.Dollop the batter across the powdered parchment paper.Dolloping the batter makes it easier to spread evenly.Roll up in the parchment paper. Use confectioners sugar on every surface.After filling with whipped cream, re-roll, cut the end to make the side branch.
The recipe was cloned from a number of online suggestions. I took the parts I wanted and left the rest. Sorry I can’t reference them all, I didn’t keep notes.
Ingredients to sugar glaze cranberries and rosemaryGanache coated cakePiped mushroom caps and stalksPipe columns, trying to make them straight. They WILL fall over. Pipe flat disks for the tops.Striated “bark” ganache
Chocolate Swiss Roll Cake
INGREDIENTS Cake • 4 large eggs, separated • 1/3 cup (65g) granulated sugar • 1/3 cup (65g) packed light or dark brown sugar • 1 Tablespoon (15ml) strong brewed coffee • 1/4 cup (60g) unsalted butter, melted (see note) • 1 teaspoon pure vanilla extract • 1/2 cup (62g) all-purpose flour • 3 Tablespoons natural unsweetened cocoa powder • 1 teaspoon baking powder • 1/4 teaspoon salt Vanilla Whipped Cream • 1 cup (240ml) cold heavy cream or heavy whipping cream • 3 Tablespoons (38g) granulated sugar or confectioners’ sugar • 1 teaspoon pure vanilla extract
METHOD
Preheat oven to 350°F (177°C). Spray a 12×17 inch baking pan (Half sheet) with nonstick spray or grease with butter, so the parchment paper sticks. Then line it with parchment paper so the cake seamlessly releases. Spray or grease the parchment paper too. We want an extremely nonstick surface for this cake roll. Place the stand mixer bowl and whip into the freezer
Make the cake: Using a hand mixer or a stand mixer fitted with whisk attachment, beat the egg whites and granulated sugar together in a medium bowl on high speed for 5 minutes or until stiff peaks form. Set aside. In another bowl, beat the egg yolks, brown sugar, and vanilla extract together until pale and creamy, about 2 minutes.
Sift the flour, 3 Tablespoons cocoa powder, baking powder, and salt together into a large bowl bowl. Pour the melted butter, coffee, and egg yolk mixture over the dry ingredients. Beat everything together on medium speed until completely combined. Using a rubber spatula or wooden spoon, gently fold in the egg whites until completely combined. Avoid over-mixing and deflating those whites. Batter will be very light.
Spread batter evenly into prepared pan. It will be a very thin layer. Tap the pan fairly hard on the counter to smooth out the top. Bake for 10 minutes or until the top of the cake gently springs back when touched with your finger. Do NOT over-bake.
Roll the cake: As the cake bakes, place a piece of parchment paper flat on the counter. Sprinkle with a light coating of confectioners sugar. Once the cake comes out of the oven, immediately invert it onto the parchment paper. Peel off the parchment paper that was on the bottom of the cake as it baked, then dust the recently exposed cake with more confectioners sugar. Starting with the narrow end, slowly and gently roll the cake up with the parchment. The cake will be warm. Allow the cake to cool completely rolled up in the parchment. Place in the refrigerator for 2-3 hours.
Remove the cake roll from the refrigerator and allow to sit on the counter for a few minutes to warm up as you prepare the whipped cream.
Make the whipped cream:
Remove the mixer bowl and whisk from the freezer, whip the heavy cream, sugar, and vanilla extract on medium-high speed until medium to stiff peaks form, about 2-3 minutes.
Gently unroll the cake. Dollop the whipped cream on top, and carefully spread, leaving about a 1/2 inch border around the cake. Gently roll the cake back up, without the parchment/towel this time. Diagonally cut about 4” off the end of the log and position along one side.
Set aside in the refrigerator as you prepare the ganache.
Ganache Topping
Heat cream to near boiling
Pour over chocolate and let sit until chocolate softens
Beat with a spoon until blended and shiny. It won’t be pretty at first but will eventually come together into a uniform shiny chocolate.
Before the ganache firmest to frosting consistency use some to “glue” the branch on the log and fill in any cracks
When the ganache is a spreading consistency spread over the cake
Before completely set, use the tip of a knife to striate the ganache to resemble bark. Do not be to careful. It will look more natural if it imperfect. That’s my story, and I am sticking to it.
To make sugared cranberries and rosemary,
add 1/2 cup of sugar and 1/2 cup of water to a boil over medium-high heat.
Reduce heat and simmer for 5 minutes, until sugar has melted. Remove from heat and let cool for about 10 minutes.
Spread 1/2 cup of sugar evenly on a shallow dish.
Dip cranberries and rosemary springs to the sugar water, then roll in the sugar.
I saw this in Bon Appetite and thought it a strange pairing. As it turns out, it is a fantastic pairing. The sweet/sourness of the lime caramel paired with the sweet, moist, delicate yellow cake is fantastic! Thank you Bon Appetite.
Arranged Plum WedgesLime CaramelCake Right Outta the OvenReady for QC to Test
INGREDIENTS • ¾ cup (1½ sticks) unsalted butter, room temperature, plus more for pan • 1½ cups all-purpose flour (188 g), plus more for pan • 4–5 large red plums, cut into ½”-thick wedges (about 1 lb.) • 1 tsp. baking powder • 2 tsp. Diamond Crystal or 1 tsp. Morton kosher salt, divided • 2 Tbsp. finely grated lime zest • 2 cups (400 g) granulated sugar, divided • 2 large eggs, room temperature • 1 tsp. vanilla extract • ½ cup whole milk, room temperature • ¼ cup fresh lime juice • Vanilla ice cream (for serving; optional) METHOD
Place a rack in middle of oven; preheat to 350°. Lightly butter a 9″-diameter cake pan and dust with all-purpose flour; tap out excess. Line bottom of pan with a parchment paper round. Wrap wet bake even strip around the cake pan to reduce doming.
Arrange 4-5 large red plums, cut into ½”-thick wedges (about 8 oz.), in a circular pattern in pan,starting from center and working outward and overlapping if needed.
Whisk 1 tsp. baking powder, 1½ cups (188 g) all-purpose flour, and 1 tsp. Diamond Crystal or ½ tsp. Morton kosher salt in a large bowl.
Combine 2 Tbsp. finely grated lime zest and 1½ cups (300 g) granulated sugar in a large bowl and rub together with your fingers until evenly distributed, sugar starts to clump, and mixture is very fragrant. Add ¾ cup (1½ sticks) unsalted butter, room temperature, and beat with an electric mixer on medium-high until light and fluffy, about 3 minutes. Add 2 large eggs, room temperature, one at a time, beating to combine between each addition, then add 1 tsp. vanilla extract and beat 10 seconds. Reduce speed to low and gradually beat in dry ingredients, scraping down sides of bowl as needed. Add ½ cup whole milk, room temperature, and mix just until combined. Set batter aside.
Bring remaining ½ cup (100 g) granulated sugar, remaining 1 tsp. Diamond Crystal or ½ tsp. Morton kosher salt, and 3 Tbsp. water to a boil in a small saucepan over medium heat. Carefully add ¼ cup fresh lime juice, watching out for spatter, and cook undisturbed until liquid is thickened and beginning to turn a deep amber color, 5–7 minutes. Gently stir, remove from heat, and immediately pour lime caramel evenly over plums in pan. Scrape reserved batter over and smooth surface if needed.
Spoon cake batter in large portions over all the plum layer and spread with an offset spatula.
Bake cake until golden and a tester inserted into the center comes out clean, about 1 hour. Transfer pan to a wire rack and let cake cool in pan.
Run an offset spatula along edges of cooled cake to loosen. Set a platter upside down over pan and flip over to release cake. Carefully remove pan and peel away parchment paper; discard. Serve warm or room temperature, topped with scoops of vanilla ice cream if desired.
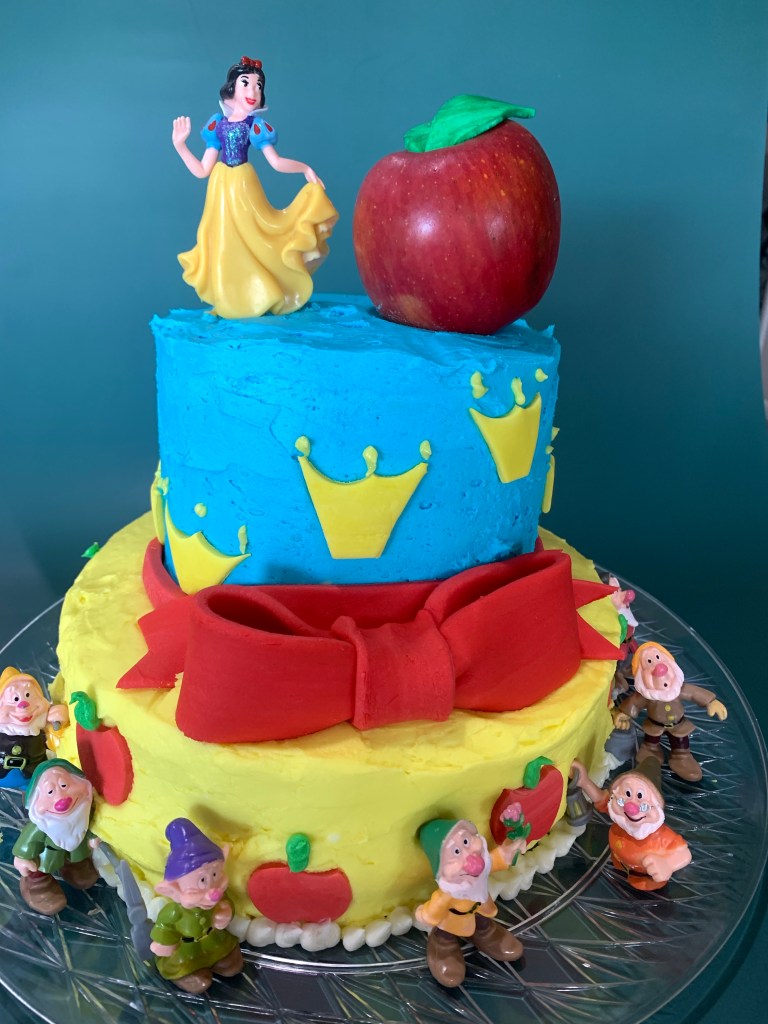
I realized I didn’t post at least a picture of my Snow White cake. I made this cake for my DIL Frances’ birthday last week. It’s an Extreme Chocolate Cake with buttercream frosting. (I am not the best at frosting smooth buttercream cakes.) The apple is real, but the leaves on the top are gum paste.
The ribbons, yellow crowns and red apples are also gum paste. The figurines are all purchased, but I thought my granddaughters would like to play with them.