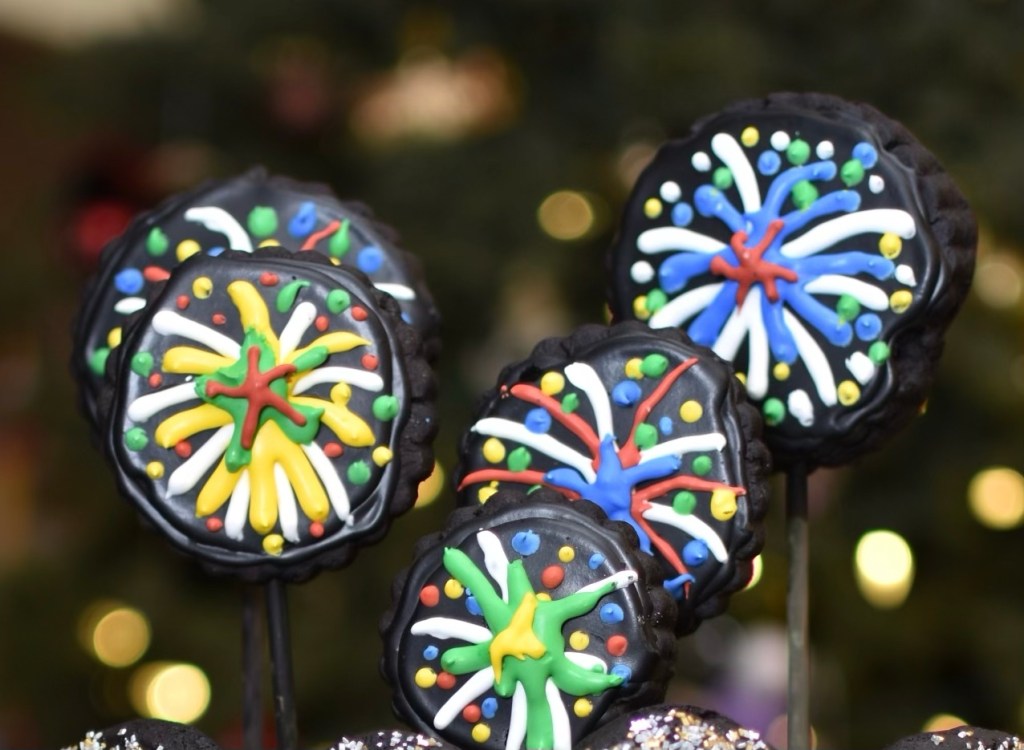
The second day of Mah Jongg at our house provided the opportunity to bake these black chocolate cookies again. (Follow the link for recipe and method.)
These are delicious cookies with the bitterness of the Dutch process cocoa offset by the sparkling sugar sprinkled on the top. Previously I flooded them with royal icing, (but this coarse sugar is easier.)
Thanks to my friend Beth here is a new chocolate chip cookie recipe. I can’t even tell you how long Beth and I have been friends. Our parents were life long friends before us and we simply continued the relationship.
This recipe has slightly different ingredient ratios than my “go-to” recipe. Plus it doesn’t use light brown sugar but substitutes turbinado sugar for the white granulated sugar, which adds a light caramel flavor. The author did not specify what kind of sugar to use, but the video showed a non-white sugar. The turbinado would add some of he flavor removed by not using the light brown sugar. (Full disclosure, I didn’t have any turbinado but did have some demarara which is similar to turbinado but a little darker and coarser.)
This author (Emojoie) only made 4 cookies (mine were 123g each) whereas next time I will make a dozen (~40g each) or so.
Chocolate Chip Cookies Best Ever from YouTube
INGREDIENTS • 100g butter, softened. • 80g Demerara or turbinado sugar • 1g salt • 50 g (1 large egg) • ½ tsp vanilla extract • 160g all-purpose flour • 3g baking soda • 100 g (3/4 c) chocolate chips • 50g hazelnuts (optional)
METHOD
Preheat oven to 375° F.
Beat by hand: butter, sugar and salt in large bowl until creamy. (Don’t over beat.)
Fork whip the egg and add in two additions mixing to incorporate after each addition
Add vanilla and mix well
Gradually add flour mixture mixing by hand. (Again, don’t over beat.) it should form one large ball between wet and dry dough.
Stir in morsels and optional hazelnuts and mix by hand.
Chill in the fridge for 30 minutes.
Divide the dough into 135 g portions
Form into balls with hands and add more chocolate to the top
Bake for 13 – 14 minutes or until golden brown. Do NOT overbake!
Cool on baking sheets for 2 minutes; remove to wire racks to cool completely.
I saw this cookie design online and as the timing was perfect, how could I resist? I used my Macadamia Nut Shortbread and a basic royal icing recipe. The cookies are delicious, timely and fun to make.
Oddly, I tried piping the blue circle inside the red one (center cookie) but they just didn’t look as good. I could only frost a couple cookies at a time or the flood/fill would dry before I could feather the colors.
I used these small squeeze bottles to pipe the required small amounts of icing. I find I have better control than if I use a piping bag.
4th of July Cookies 2023
Macadamia Nut Shortbread Cookies
INGREDIENTS • 1 cup butter, room temperature • 3/4 cup powdered sugar • 1 tsp vanilla extract • 2 cups flour • 1 cup macadamia nuts, finely chopped
METHOD
Beat the butter until smooth and add in the powdered sugar and vanilla. Gradually add flour then mix in the 1 cup of chopped macadamia nuts.
Transfer the batter to a sheet of parchment paper. Lay a second sheet over top and roll to 1/4-inch thickness. Place it onto a cookie sheet and refrigerate until firm.
Preheat oven to 300°F and remove dough from refrigerator.
Cut the cookies using a star cookie cutter. Re-roll the scraps and use as much as possible.
Place the stars onto a parchment lined cookie sheet, cover, and chill for 30 minutes.
Bake for 20 minutes until edges begin to brown.
Cool the cookies completely.
Royal Icing
INGREDIENTS • 4 cups (480g) confectioners’ sugar, sifted • 3 Tablespoons meringue powder (not plain egg white powder) • 9–10 Tablespoons room temperature water
METHOD
Pour confectioners’ sugar, meringue powder, and 9 Tablespoons of water into a large bowl.
Using a hand mixer or a stand mixer fitted with a whisk attachment, beat icing ingredients together on high speed for ~2 minutes.
When lifting the whisk up off the icing, the icing should drizzle down and smooth out within 5-10 seconds. If it’s too thick, beat in more water 1 Tablespoon at a time.
The longer you beat the royal icing, the thicker it becomes. If your royal icing is too thin, just keep beating it to introduce more air OR you can add more confectioners’ sugar.
Assembly
Pipe a thin bead of white royal icing around the edges of the cookies and let dry.
Flood/fill 2 or 3 cookies and while still wet pipe a drop of red and a drop of blue in the center of the cookie.
Pipe a ring of red royal icing around the blue and white drops, then pipe a blue ring outside the red circle.
Use a toothpick to draw a line through the icing from the center to the tip of each star then leave to dry.
I made Millionaires Bars once before and decided it was time to make another batch. They are just as good the second time around! Follow the link for the recipe etc.
A sheet of cookies, or one BIG one?Sensible portion control
Last night I made a clone of the macadamia nut cookies we had in Kauai. Basically, they are a shortbread cookie with fine ground macadamia nuts in the batter, and a dark chocolate coating.
Roll the dough into an approximation of a rectangle to minimize waste and chill for two hours. Cut the chilled dough into 1”x2” rectangles and place on a parchment lined cookie sheet. They do not spread so they can be placed fairly close together (like 1/4” – 1/2” apart.)
Once baked and completely cooled melt ~200g of dark chocolate and 1 Tbl corn syrup and dip one corner in the mix. Transfer the remainder to a piping bag. Sprinkle some coarse crushed macadamia nuts on the still wet chocolate and let the piping bag of chocolate cool and thicken slightly. Snip the end off the bag and pipe a chocolate swirl across the cookie. Leave to dry at room temperature or in the fridge.
QC said these may be the best cookies Dede’s Bakery and Confectionery ever made! High praise indeed.
Macadamia Nut Shortbread Cookies
INGREDIENTS • 1 cup butter, room temperature • 3/4 cup powdered sugar • 1 tsp vanilla extract • 2 cups flour • 1 cup macadamia nuts, coarsely chopped • 8 oz. dark chocolate • 1 Tbl corn syrup • 1/4 cup macadamia nuts, finely chopped
METHOD
Beat the butter until smooth and add in the powdered sugar and vanilla. Gradually add flour then mix in the 1 cup of chopped macadamia nuts.
Transfer the batter to a sheet of parchment paper. Lay a second sheet over top and roll to 1/4-inch thickness. Try to shape into a rectangle as much as possible. Place it onto a cookie sheet and refrigerate for 2 hours.
Preheat oven to 300°F and remove dough from refrigerator.
Slice the cookie batter into 1×2 inch rectangles. Transfer to a cookie sheet lined with parchment and bake for 20 – 25 minutes. The edges should be slightly browned.
Cool the cookies completely.
Melt and mix the chocolate and corn syrup then dip the corner of the cookies in the chocolate. Gently remove any excess chocolate, lay it out on a sheet of parchment and sprinkle with some finely chopped macadamia nuts.
Place into the fridge to set the chocolate and then serve.
While traveling last week I saw a recipe for 3 ingredient sugar cookies. QC loves sugar cookies so they moved to the top of DeDe’s Bakery and Confectionery ToDo list.
The original recipe called for just three ingredients, butter, powdered sugar and AP flour. After following the recipe I determined it was not nearly slack enough to pipe into swirls, so I added a fourth ingredient, milk.
I used the first attempted recipe to judge if, with modification, the batter could be modified to allow it to pipe. The second go round (below) I actually measured the amount of milk required to produce a very, very, firm peak, pipeable batter.
I used an Mi piping tip on the first attempt. The piped cookies were very nice, much like roses, but as expected they lost definition after baking. Typical of this type of cookie the butter melts out during baking.
For the second attempt, I used a B4 tip and expected the same result, but perhaps due to the less pronounced ridges it held its shape a bit better. Lucky guess in piping tips. Also, I froze the second attempt rather than just refrigerating.
Light, fluffy whipped cream-like butter and sugarB4 on the left, Mi on the rightM1 piped batterB4 piped batterB4 in the foreground, M1 behind
Swirled Butter Cookies
INGREDIENTS • 227g (1 c) Unsalted butter • 118g (1 c) Powdered Sugar • 256g (2 c) AP Flour • ¾ c + 2 Tbl milk to thin to piping consistency
METHOD
Preheat oven to 350°F (325°F Convection.) Line 2 large baking sheets with silicone baking mat or parchment paper.
In mixing bowl of a stand mixer, add butter and sugar. Cream at highest speed for about 5 minutes or until light and fluffy. The mixture should turn from yellow to white and look like whipped cream when you are done. Make sure to stop and scrape the sides of your bowl a few times with a spatula so that all the butter gets creamed.
Add in the flour ½ cup at a time. Mix in at low speed and then gradually increase speed once flour is incorporated. The mixture will be crumbly at first but then should form a thick, soft dough, almost like a thick paste.
Add milk sparingly until the dough achieves a firm piping consistency. (Think very firm peaks.)
Transfer the dough to a piping bag. Using a large open star tip (an M1 or B4 with a 1/2 inch opening), pipe swirls or whatever design you prefer. Space cookies 1 inch apart. Place piped cookies into freezer for 30 minutes so the dough is chilled. This will prevent them from spreading as much when they bake.
Place the cookie sheets into the middle of your oven. Bake for ~20 minutes or until edges and surface start to turn a light brown. (Rotate cookie sheet after 10 minutes). The fine detail of the piping will flow out as the butter melts, but the swirl should remain.
Let cookies cool on cookie sheet before removing. Store uneaten cookies in an airtight container.
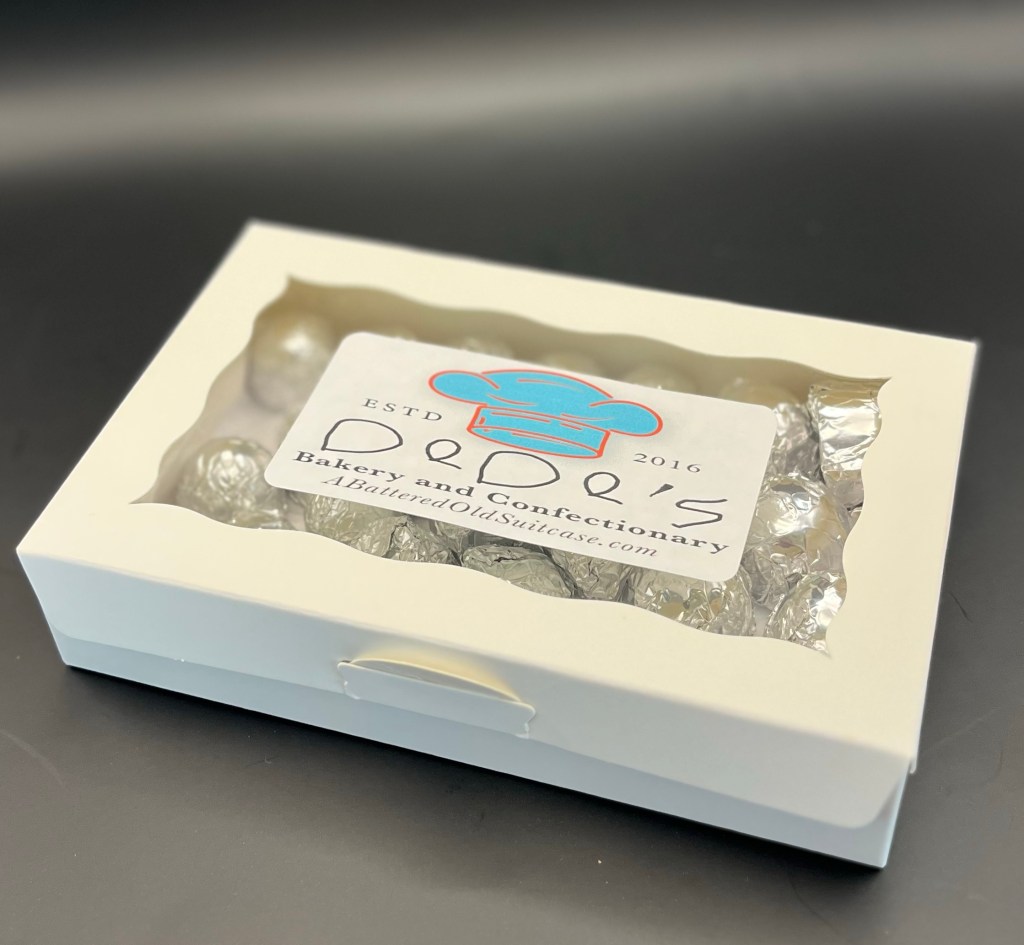
Our synagogue’s fundraiser is tonight and the administrator asked me to provide some of the deserts and something for the auction. To identify my goods I asked Dan to create a logo for me. For those who do not know, DeDe is my granddaughters name for me because they couldn’t pronounce Zayde (Yiddish for grandfather) when they were younger and it just stuck.
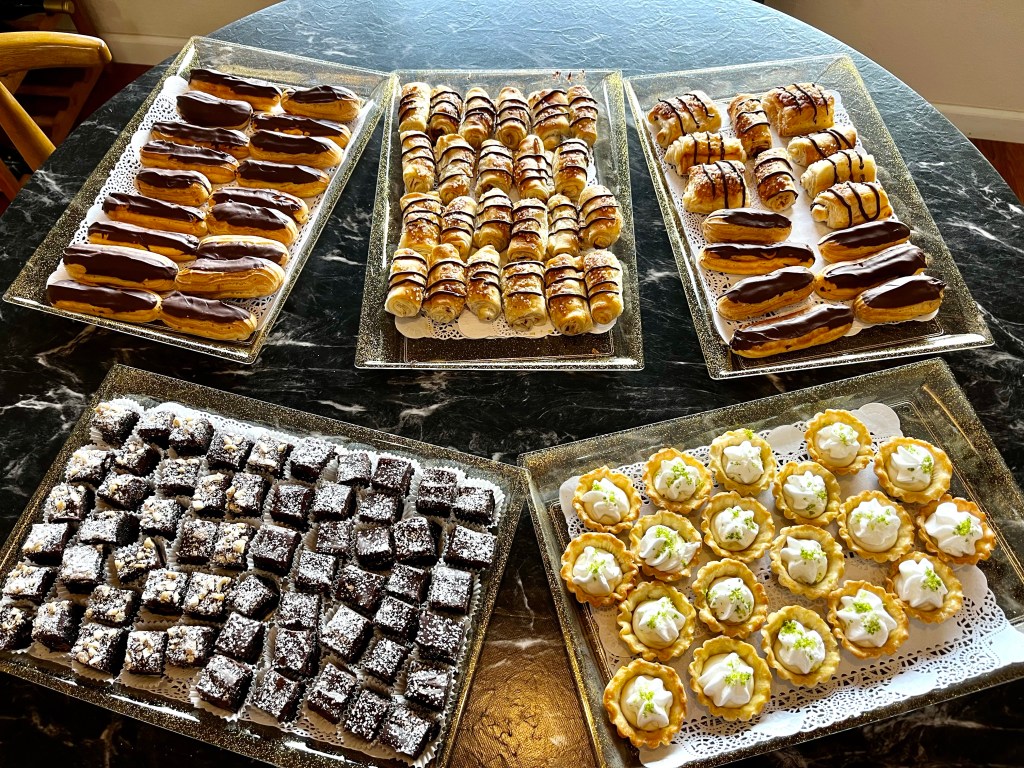
Over the last week or so I made and froze choux pastry for the eclairs and shells for the tarts. I made all the fillings yesterday and assembled everything this morning except the pain au chocolat which I made in its entirety this morning. (They don’t take very long.)
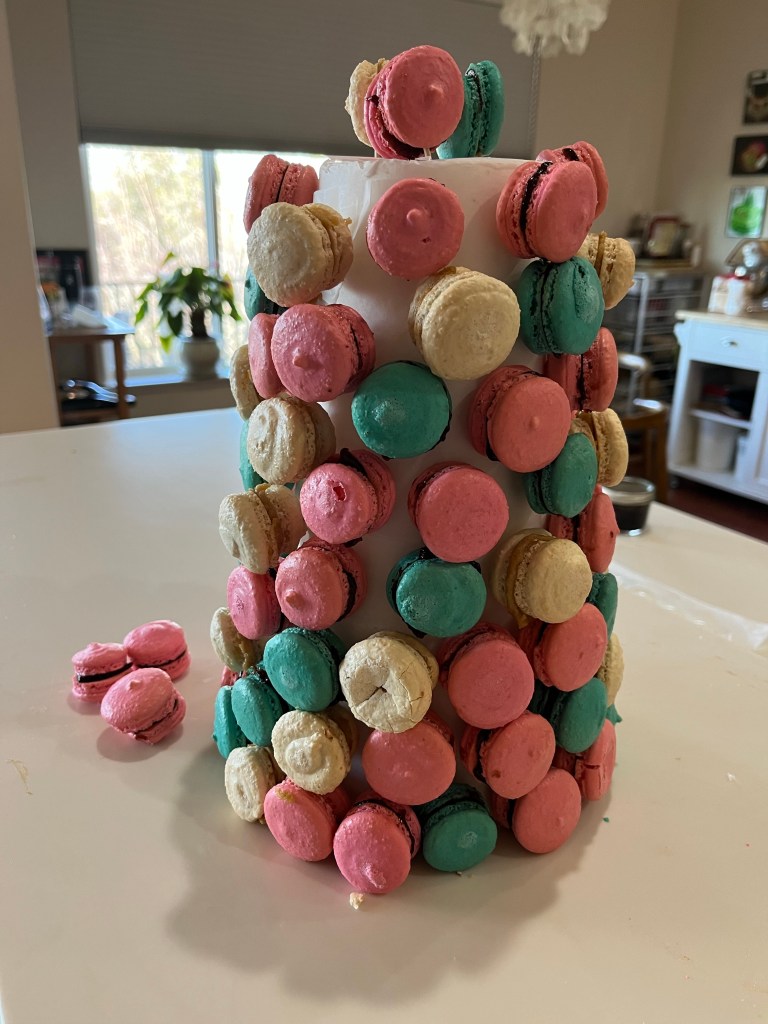
I had problems with the macaron tower. Being frugal, I used left over almond flour. Mistake! The flour was too coarse, even after running through a fine mesh sieve. The resultant batter was grainy and too thick to pipe properly. However, the taste was fine and they were crisp on the outside, had good legs, and were chewy on the inside.
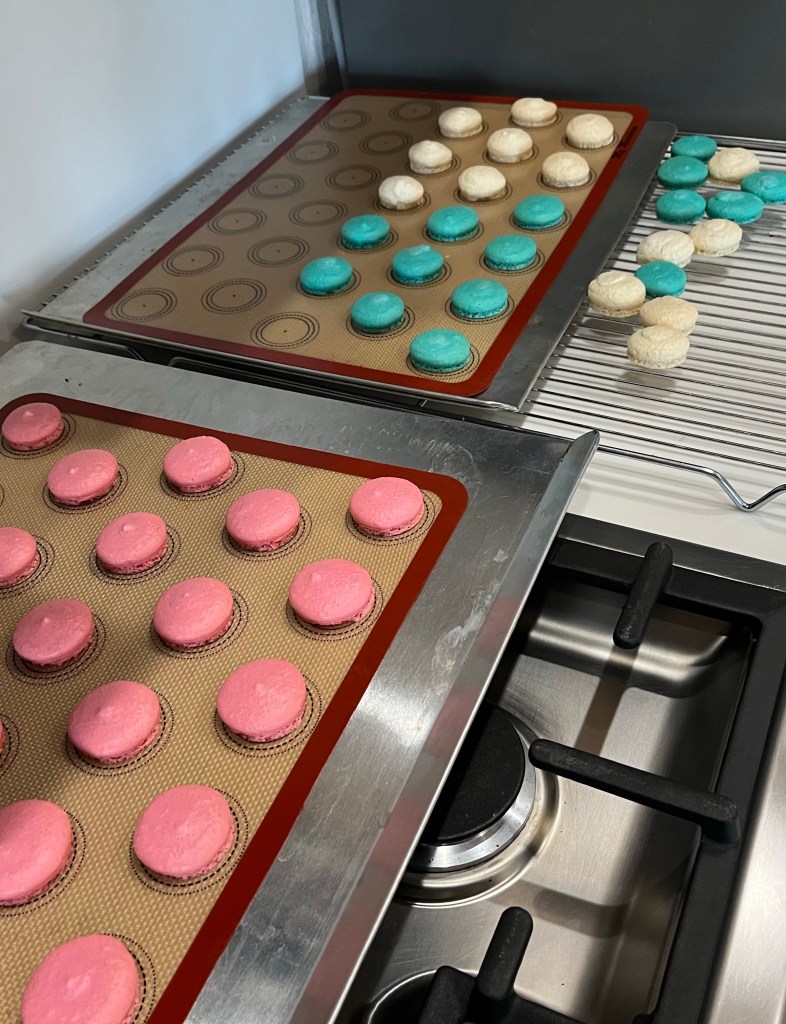
Cooling MacaronsFailed Tower“Improved” TowerFollow the links for recipies and methods.
I thought building the tower on my parchment-lined-styrofoam-cone would be easy if I started with a nice even base, then add macarons in a logical sequence row by row. Let’s just say it failed, not due to any ineptitude on my part but rather from geometrical issues with the cone. (It becomes smaller as you go up. Who knew?) I deconstructed the tower (breaking several macarons in the process) and re-built it by placing a single color in a spiral from bottom to top. (The nice teal one.) This method was better, but next time (and there will be a next time) I need to compensate the spiral with basic Euclidean geometric principles.
The teal macarons are filled with homemade plum jam, the pink with plum/raspberry jam and the white with hazelnut butter. They all taste good, but the hazelnut butter didn’t adhere well and the cookies tended to separate. QC suggests using a tart filling like lime or lemon curd to balance the sweetness of the macaron.
I made three trays of chocolates, each with a different shape. To make them a bit special I piped lines of tempered white chocolate in two of the molds and let it cool before filling with tempered 64% chocolate. For the third, I piped some white chocolate into the bottom of each well and used a toothpick to made a star pattern. It worked reasonably well but led to my major mistake with this treat.
White stripesSet up for temperingCompleted chocolate shellsCoconut cream (top), caramel (center), and orange jelly (bottom) filled chocolate shells
I attended a seminar on working with chocolate in Hawaii last year. The most important takeaway was the use of Mycryo to temper chocolate. I changed how to heat the chocolate and now use the microwave. 200g of dark chocolate requires 90 – 120 seconds with a 1000w microwave. After 60 seconds use small bursts and check the temperature between each one. If the temperature exceeds 104F it’s ok, just don’t go too high.
I failed to allow enough time between my golf round in the morning and our traditional happy hour dinner/drinks at our favorite pizza/bar. I tried to un-mold the chocolates too soon and broke many. In fact only six of the orange jelly confections survived. I should have allowed time to put the in the freezer for a few minutes to help them release. Oh well.
Notice the lack of shine on the macarons, and the points. Plus they were too thick, but had good feet. You can see a chip in the chocolate in the center candy, but also see how the white chocolate lines came out.
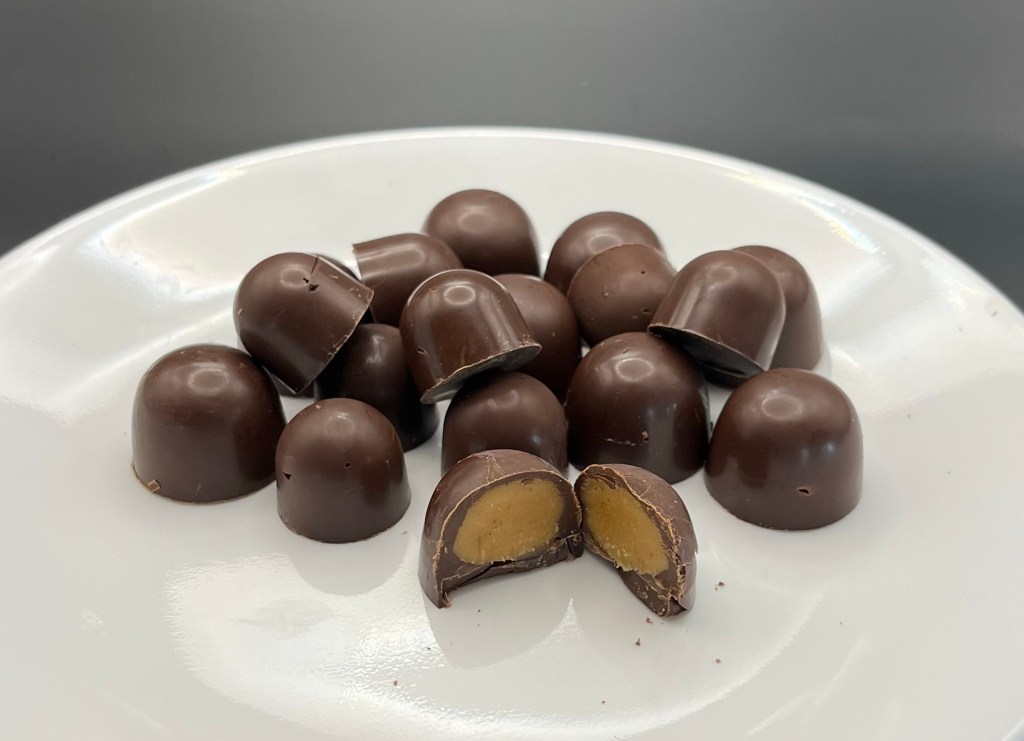
The confection with the faint stripes (left) are filled with fresh orange juice jelly, the hearts with soft caramel and the dome shaped ones (right) with coconut cream (think the inside of a Mounds bar. )
Overall, everything tasted good and that’s the most important!
Recently I invited our new neighbors, John and Amy, to join my small cadre of baked goods tasters. As it turns our they have several orange trees (not that that had any influence on my asking them to join the group) and they offered me as many oranges as I liked. That is the very good news.
Here is the other side of the coin. QC’s Mah Jongg group (who I made the key lime tarts in the previous post for) cancelled Tuesday’s game, so I gave away most of the tarts I made for them. Then, they changed their minds and decided to play (with 6 tartlets and some of one of the 6” pies left.)
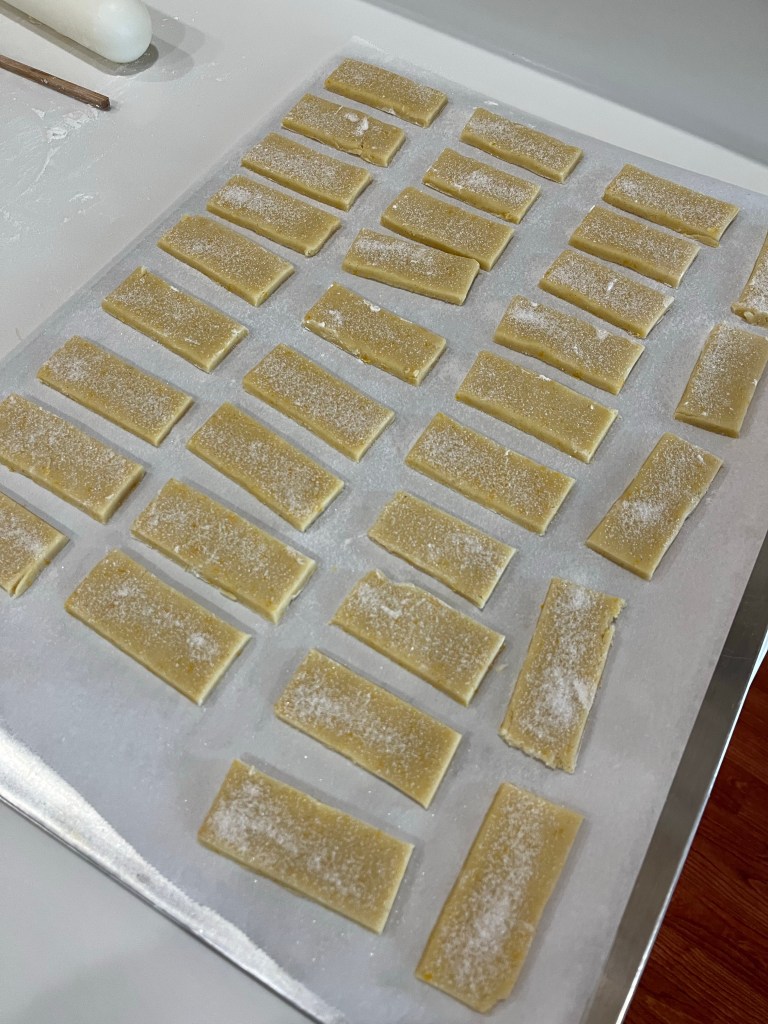
Then, they decided they would try to gather enough players for another game on Wednesday. As it turns out, for some reason, I had some extra oranges in my possession and no plans other than juicing, so… chocolate orange shortbread cookies for Wednesday’ game, and more samples for my tasting cadre.
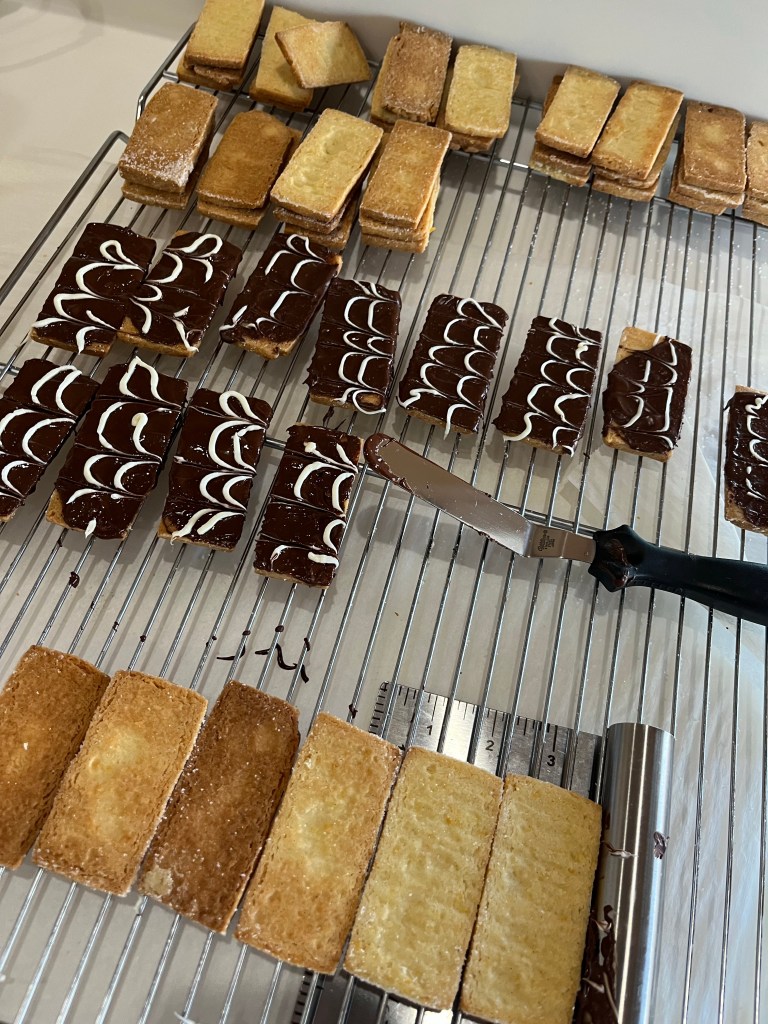
Cutting the rolled cookie doughDust with sugar before bakingSous Vide for keeping chocolate in temper at 90 FTempered dark chocolate with wiggly line white chocolate
I like to melt the chocolate in the microwave using short bursts (first is 1 minute, each other 30 seconds) while stirring between each burst. The white chocolate wasn’t tempered, nor was it quite fluid enough to pipe nicely. I made a second batch and it was much better.
I used my bench knife to act as an end block, lined up six cookies and spread dark chocolate over them all. While the dark chocolate was still liquid I piped the white in thin (occasionally straight) lines and ran a tooth pick across the top of the cookie to make the feathering.
The orange flavor comes through, but isn’t too strong. Next time, I may add some essence as the chocolate nearly overpowers the orange.
Orange Shortbread Cookies
INGREDIENTS • 1 cup sugar, plus extra for sprinkling • 3 sticks unsalted butter, at room temperature • Zest from 2 large oranges • 1 teaspoon pure vanilla extract • 3 ½ cups all-purpose flour • ¼ teaspoon salt • 6 ounces finely chopped, dark or semisweet chocolate, your choice
METHOD
Combine the sugar and zest, blending with a fork until thoroughly mixed and fragrant.
In the bowl of an electric mixer fitted with a paddle attachment, mix together the butter and 1 cup of sugar/zest mixture until they are just combined. Add the vanilla.
In a medium bowl, sift together the flour and salt, then add them to the butter and sugar/zest mixture. Mix on low speed until the dough starts to come together. Dump onto a surface dusted with flour and shape into a flat disk. Wrap in plastic and chill for 30 minutes.
Preheat the oven to 375 F.
Roll the dough ¼ inch thick and cut to 3 by 1-inch with a pizza cutter. Place the cookies on an parchment paper lined baking sheet and sprinkle with sugar. Bake for 20 to 25 minutes (rotate pans after 10 minutes), until the edges begin to brown. Allow to cool to room temperature.
When the cookies are cool, place them on a baking sheet lined with parchment paper.
TEMPERING DARK CHOCOLATE. Weigh 1% of the mycryo butter so it’s ready to add. To calculate: • 100g/3.5oz chocolate + 1/2 teaspoon (1g) mycryo cocoa butter • 200g/7oz chocolate + 1 teaspoon (2g) mycryo cocoa butter • 1kg/35.27oz chocolate + 5 tsp (10g) mycryo cocoa butter.
METHOD
Melt the chocolate on a bain-marie (or use a microwave, melting in 30 second bursts, stirring well between each burst and checking the temperature, reducing to 3 or 5 second bursts when almost ready).
Make sure the chocolate reaches a temperature of 122º F (a few degrees higher is OK). Take it off the bain-marie as soon as it gets near and give it a good stir then if necessary return 5 seconds or so at a time, stir and check the temperature.
Once off the heat (and off the bain-marie) let the chocolate cool to 94ºF. Sprinkle on the mycryo cocoa butter and wait a few seconds as it melts then stir in to combine. Use a rubber spatula to scrape the chocolate off the sides and fold into the middle. Stir well and continue to stir well fairly frequently. Keep the tempered chocolate in the sous vide, or Bain-marie at 90 F.
I made these cookies as the base for decorations for my NYE 2023 cake. They were so good I decided to post the recipe alone
The secret to these cookies is the black cocoa. I bought this for another project a year or so ago, but now use it regularly. If you want BLACK frosting, royal icing or other goodies, this should be your go to ingredient.
The recipe made about four dozen 2” cookies . No tricks or tips, just follow the recipe.
Black Chocolate Cookies
INGREDIENTS • 1 1/2 cups (195g) AP flour • 3/4 cup (70g) unsweetened black cocoa powder • 1 teaspoon baking soda • 1/4 teaspoon kosher salt • 1/2 teaspoon espresso powder • 1 stick (110g) unsalted butter, room temperature • 3/4 cup (150g) sugar • 1 large egg • 1 1/2 teaspoons vanilla • 1 teaspoon molasses
METHOD
In a large bowl, vigorously whisk together the flour, cocoa, baking soda, salt, and espresso powder.
Cream the butter and sugar until light and fluffy, (2-3 min on medium.)
Beat in the egg, vanilla, and molasses.
Add the dry ingredients to the wet in 3 additions. When well mixed, remove the dough from the mixer, and form it into a ball. It should have the consistency of soft clay. If it’s stiff and unmanageable, massage some water into it, a tablespoon at a time until easily pliable.
Wrap it in plastic wrap, and chill it in the refrigerator for at least one hour.
When you are ready to roll-out the dough, preheat the oven to 350°F (175° C). Break off a chunk of dough from the ball of dough (about a quarter of it) and place it between two pieces of parchment paper. Use a rolling pin to roll the dough out to an even 1/2-inch thickness.
Use a cookie cutter or the rim of a small glass to cut out cookie shapes from the rolled out dough. Place on a parchment paper or silicone-lined baking sheet, allowing at least 1 inch between cookies on the cookie sheet.
Bake at 350°F (175° C) in the middle rack for 12 to 14 minutes, less or more, depending on the size and thickness of the cookies.
The cookies should bounce back when you press on their centers and be a little dark around the edges. When cool, they should be crispy.
Remove from oven and let cool for 5 minutes before removing the cookies from the tray to cool on a rack.