2-Way Shortbread Cookies

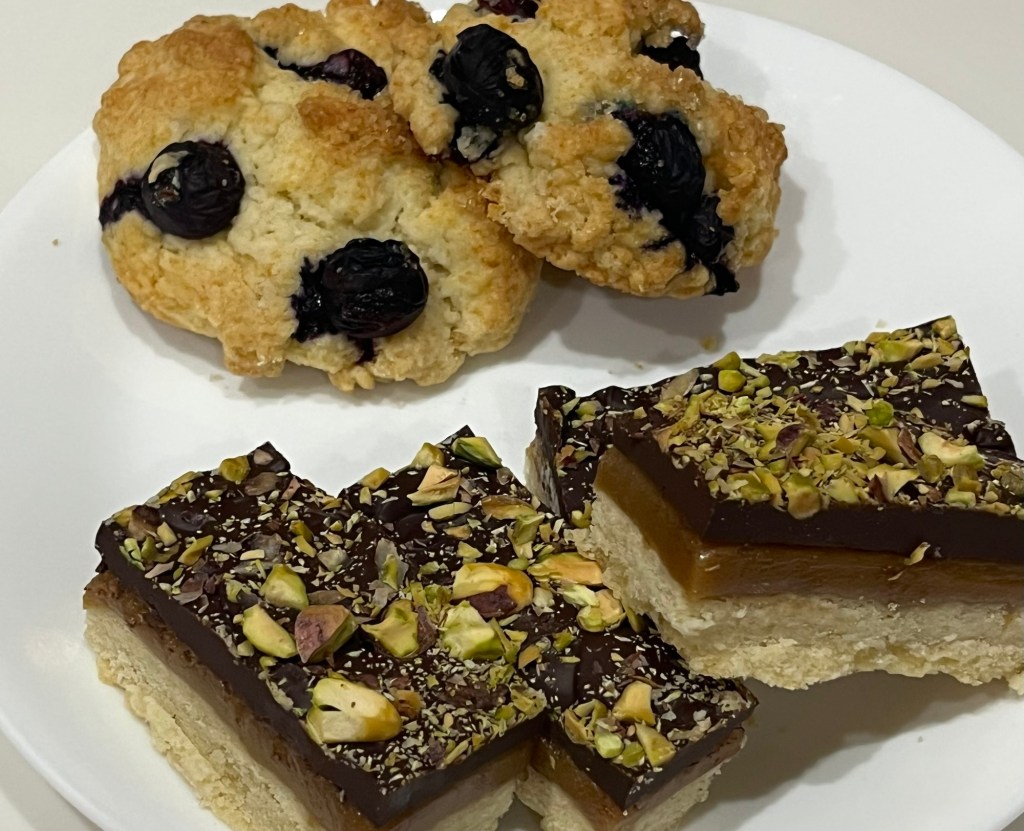
Our neighbor, and QC Cadre member, gave us mandarin oranges off her tree, so once again I “processed” and returned to her in a different form. I thought the chocolate dipped orange shortbread cookies were really good, until I sampled the cranberry pistachio shortbread cookies.

Both are easy to make and take little hands-on time, and both are well worth the effort.

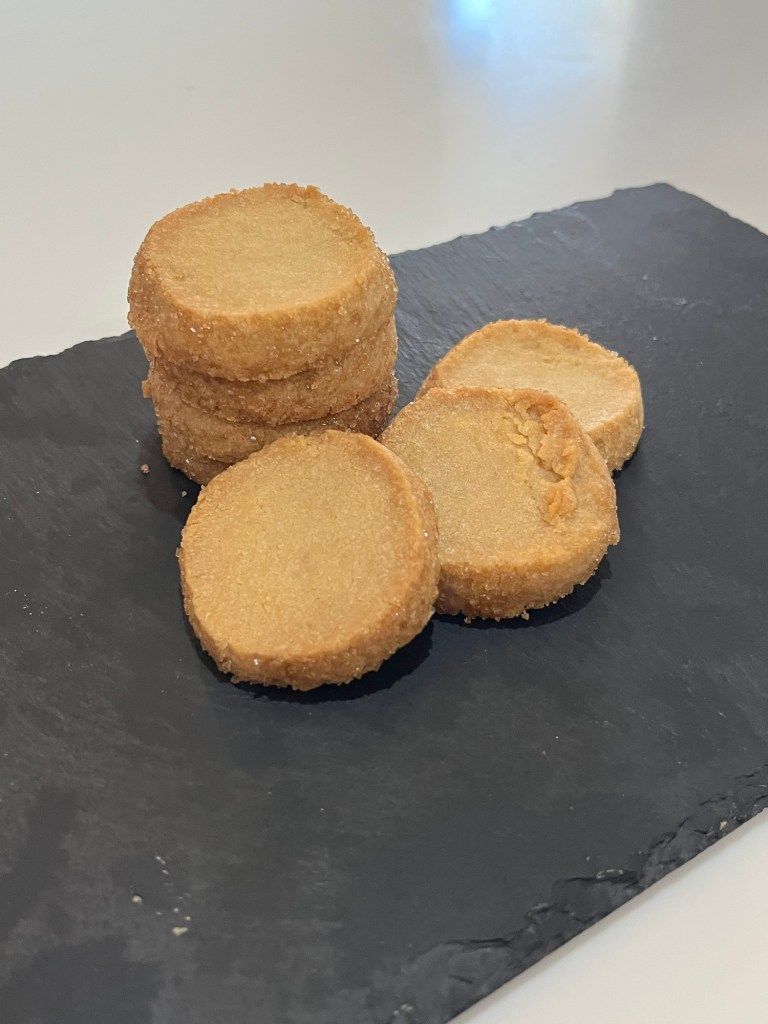
Chocolate Dipped Orange Shortbread Cookies

INGREDIENTS
• 1 c unsalted butter, softened
• ½ c powdered sugar
• 2 tsp orange zest (from 1 orange)
• 1 tsp vanilla extract
• 2 c all-purpose flour
• ¼ teaspoon salt
• ½ c dark or semi-sweet chocolate, melted
• finely chopped candy orange or zest for garnish

METHOD

  1. In a large mixing bowl, cream the softened butter and powdered sugar until light and fluffy.
  2. Mix in the orange zest and vanilla extract until evenly combined.
  3. In a separate bowl, whisk together the flour and salt. Gradually add this to the wet ingredients, mixing until the dough just comes together.
  4. Roll the dough into a log about 2 inches in diameter, wrap it tightly in plastic wrap, and refrigerate for at least 1 hour or until firm.
  5. Preheat your oven to 350°F (175°C) and line a baking sheet with parchment paper.
  6. Slice the chilled dough into 1/4-inch-thick rounds and place them on the prepared baking sheet, about 1 inch apart.
  7. Bake for 15-20 minutes, checking often after 12, until the edges are lightly golden. Allow the cookies to cool completely on a wire rack.
  8. Once cooled, dip half of each cookie into the melted chocolate and place them on parchment paper to set. Sprinkle with finely chopped candied orange or additional orange zest if desired.
  9. Let the chocolate set fully before serving or storing in an airtight container.

Cranberry Pistachio Shortbread Cookies Recipe

INGREDIENTS
• 1 cup (2 sticks) unsalted butter, softened
• 3/4 cup powdered sugar
• 1 tsp vanilla extract
• 2 cups all-purpose flour
• 1/2 tsp salt
• 1/2 cup dried cranberries, chopped
• 1/2 cup shelled pistachios, chopped

METHOD

  1. In a large bowl, beat the softened butter and powdered sugar until light and fluffy, about 2-3 minutes. Add the vanilla extract and mix until combined.
  2. Add the Flour and Salt:
  3. Gradually add the flour and salt to the butter mixture, mixing until just combined.
  4. Fold in the Cranberries and Pistachios:
  5. Gently fold in the chopped dried cranberries and pistachios until evenly distributed throughout the dough.
  6. Divide the dough in half and shape each portion into a log about 2 inches in diameter. Wrap each log tightly in plastic wrap and refrigerate for at least 1 hour, or until firm.
  7. Preheat the oven to 350°F (175°C). Line a baking sheet with parchment paper. Remove the dough logs from the refrigerator and slice them into 1/4-inch-thick rounds.
  8. Place the cookies on the prepared baking sheet, about 1 inch apart. Bake for 15-20 minutes, checking often after 12, until the edges are lightly golden.
  9. Let the cookies cool on the baking sheet for a few minutes, then transfer them to a wire rack to cool completely.

Just Another Day Off From Golf

It’s a dangerous thing taking a day off from golf. I wanted to make more berry drop scones for a couple of weeks, but never seemed to find the time, until today when there was no golf on my schedule..

We also had no snacks for after dinner so I decided to make Millionaires Shortbread Cookies this afternoon to be ready for dessert. It’s good to have a plan and to execute it properly.

Demerara Encrusted Brown Sugar Shortbread Cookies

SallysBakingAddiction strikes again! Once again I need refreshments for QCs Mah Jongg ladies tomorrow so, of course, I made these Demerara encrusted brown sugar cookies today to be sure they were worthy of this esteemed group.

I baked these in two batches. Both of them were baked 2-4 minutes too long. The cookies should still be a little soft and not firm in the last few minutes in the oven. REALLY good though. We will cut these in half to prevent any dental distress when eating them.

Brown Sugar Shortbread Cookies

INGREDIENTS
• 3/4 cup (12 Tbsp; 170g) unsalted butter, softened to room temperature
• 1 cup (200g) packed light or dark brown sugar
• 1 1/2 teaspoons pure vanilla extract
• 2 1/4 cups (281g) all-purpose flour (spooned & leveled)
• 1/4 teaspoon salt
For Rolling
• 1/2 cup (100g) Demerara sugar or Turbinado (Sugar in the Raw)

METHOD

  1. In a large bowl using a handheld mixer or a stand mixer fitted with a paddle attachment, beat the butter and brown sugar together on medium-high speed until completely smooth and creamy. Add the vanilla and beat until combined.
  2. Add the flour and salt and beat on low speed until incorporated. Turn the mixer up to medium-high speed and beat until the dough comes together. If the dough is too crumbly and won’t come together after a couple minutes of beating, stop the mixer, pour the dough crumbles on a work surface, and use your hands to bring it together. (I often have to do this, so don’t worry.) You can also try sprinkling the dough with a few drops of water and then beat again; or get your hands wet, then press the dough clumps together tightly until it forms one large clump of thick dough.
  3. With lightly floured hands, divide the dough in two. (If you want to be precise, the dough should weigh about 650g, so each half will be about 325g.) Roll and shape each piece of dough into an 8-inch log.
  4. For Rolling: Pour coarse sugar onto a large plate. One at a time, roll the logs in the sugar until the exterior is fully coated.
  5. Tightly wrap the logs in plastic wrap and chill in the refrigerator for at least 4 hours and up to 5 days. Chilling is mandatory for this cookie dough. I always chill mine overnight.
  6. Preheat oven to 350°F (177°C). Line two large baking sheets with parchment paper or silicone baking mats. (Always recommended for cookies.) Set aside.
  7. Remove logs from the refrigerator. Slice each log into 16 equally thick cookies and place cookies on baking sheets about 2 inches apart. Bake the cookies for 14–16 minutes, or until set and lightly browned around the edges. Do not over-bake. Allow to cool for 5 minutes on the baking sheet, then transfer to cooling rack to cool completely.
  8. Cover and store leftover cookies at room temperature for up to 1 week. After day 1, the cookies will taste crunchier.

Notes

  1. Make Ahead Instructions: Baked cookies freeze well up to 3 months. Thaw overnight in the refrigerator and bring to room temperature, if desired, before serving. You can make/assemble the cookie dough logs and chill in the refrigerator for up to 5 days (see step 5). Cookie dough logs freeze well too, up to 3 months. Allow the logs to thaw overnight in the refrigerator, then continue with step 6. See How to Freeze Cookie Dough if you’d like to see a video tutorial for freezing various types of doughs.
  2. Special Tools (affiliate links): Electric Mixer (Handheld or Stand) | Coarse Sparkling Sugar | Baking Sheets | Silicone Baking Mats or Parchment Paper | Cooling Rack
  3. Old Version: The old recipe called for: 2 and 1/4 cups (281g) all-purpose flour; 1/4 teaspoon salt; 1 cup (2 sticks; 226g) unsalted butter, softened to room temperature; 1 cup (200g) packed light brown sugar; 1/3 cup (67g) packed dark brown sugar; 1 and 1/2 teaspoons pure vanilla extract; optional: 2/3 cup (135g) coarse sugar, for rolling. Same baking instructions. The cookies usually over-spread, so I updated the amounts of ingredients.
  4. Be sure to check out my top 5 cookie baking tips AND these are my 10 must-have cookie baking tools.
  5. Find it online: https://sallysbakingaddiction.com/brown-sugar-shortbread/

S’mores Brownies

Our home association wine club had a beach themed wine tasting event and I provided the s’mores brownies for 164 guests and staff. With all humility, they were exceptional. I used my basic raspberry chocolate brownie recipe, but with the excellent suggestion by QC, added a layer of crushed graham cracker on the ganache and below the Italian meringue. I also blowtorched the meringue to give it the toasted s’more look.

I received many compliments and several inquiries as to where to buy them. (They cannot.)

Blueberry Crumble Dream Cookies

I had high hopes for this cookies, but there are barely a step above “meh.”

They are basically a chocolate chip cookies substituting blueberries for chocolate chip and really, who would want to do that?

They taste fine and have a good texture. Next time, I am making chocolate chip cookies.

Oh yeah. As long as the oven was going to be on I made a loaf of sandwich bread too. It’s a much tighter crumb than my favorite bread (High Hydration No-knead Honey Bread) but this loaf is great for PB&J sandwiches.

Blueberry Crumble Dream Cookies


Prep Time: 15 minutes | Cooking Time: 15 minutes | Total Time: 30 minutes

INGREDIENTS
• 1 cup unsalted butter, softened
• 1 cup granulated sugar
• 1/2 cup brown sugar
• 2 large eggs
• 1 teaspoon vanilla extract
• 2 1/2 cups all-purpose flour
• 1 teaspoon baking soda
• 1/2 teaspoon salt
• 1 1/2 cups fresh blueberries
• 1/2 cup coarse sugar for sprinkling

METHOD

  1. Preheat oven to 350°F (175°C). Line a baking sheet with parchment paper.
  2. In a large bowl, cream together the butter, granulated sugar, and brown sugar until light and fluffy.
  3. Beat in the eggs one at a time, then stir in the vanilla extract.
  4. In a separate bowl, whisk together the flour, baking soda, and salt.
  5. Gradually add the dry ingredients to the wet ingredients, mixing until just combined.
  6. Gently fold in the blueberries.
  7. Drop rounded tablespoons of dough onto the prepared baking sheet.
  8. Sprinkle each cookie with coarse sugar.
  9. Bake for 12-15 minutes, or until the edges are golden brown.
  10. Allow cookies to cool on the baking sheet for 5 minutes before transferring to a wire rack to cool completely.

Berry Jam Bars – t.y. KAB

While on our anniversary/baseball stadium journey we stopped by King Arthur Baking in Norwich Vermont. This is my second time at this wonderful store and THIS time, I controlled myself and left after spending less than $100. Whew!

KAB sends me weekly recipes and I received this one while back east. I knew I had blackberries on the vine back home and couldn’t wait to give them a try. The wait was worth it!

KAB calls these “easy” jam bars and they are not incorrect. (Deliberate use of the double negative.)

https://www.kingarthurbaking.com/recipes/berry-easy-jam-bars-recipe

Berry Easy Jam Bars

INGREDIENTS
Dough
• 2 1/4 cups (270g) King Arthur Unbleached All-Purpose Flour
• 1 cup (89g) old-fashioned rolled oats*
• 1/2 cup (106g) light brown sugar, packed
• 1/4 cup (50g) granulated sugar
• 1 1/4 teaspoons baking powder
• heaping 1/2 teaspoon table salt
• 15 tablespoons (212g) unsalted butter, melted
• *Or substitute 1 cup (113g) King Arthur Rolled Oats.

Filling

  1. 1 pound (454g) blueberries, raspberries, and/or blackberries (try 2 cups blueberries, 1/2 cup blackberries, 1/2 cup raspberries)
  2. 1/2 cup (106g) light brown sugar, packed
  3. 3 tablespoons (23g) King Arthur Unbleached All-Purpose Flour
  4. zest and juice from 1 lemon*
  5. 1/2 teaspoon cinnamon
  6. pinch of table salt
    *Aim to use about 2 tablespoons (28g) of fresh juice from the lemon.

Topping

  1. 1 1/2 teaspoons granulated sugar
  2. 1/4 teaspoon cinnamon

METHOD

  1. Preheat the oven to 375°F with a rack in the center. Line an 8″ pan with parchment on all sides, then lightly grease.
  2. In a large bowl, whisk together all of the dough ingredients except the butter. Use your fingers or a spoon to break up any brown sugar lumps. Add the melted butter and stir until fully combined and smooth.
  3. Transfer about 2/3 of the dough (roughly 2 2/3 cups or 485g) to the prepared pan and press into an even layer.
  4. In another large bowl, gently mix together all of the filling ingredients until the berries are evenly coated. Transfer the fruit to the pan and distribute it into an even layer.
  5. Crumble the remaining dough (about 1 1/3 cups or 240g) over the berries; squeeze the dough together to make bigger clumps or tease it apart for finer crumbles. (Even coverage is not important at this step.)
  6. In a small bowl, combine the topping ingredients. Then sprinkle the cinnamon sugar evenly over the top of the bars.
  7. Bake the jam bars for 50 to 55 minutes, covering the pan with foil if the top is browning too quickly, until the berries are bubbling and the topping is baked through.
  8. Let the bars cool completely in the pan (or for at least 1 1/2 hours; if you’re really in a rush, you can stick them briefly in the refrigerator or freezer to expedite the process). As they cool, use a small offset spatula or knife to dislodge any jam from the sides to make removing them from the pan easier.
  9. Remove the bars from the pan using the parchment as a sling, then slice and serve.
  10. Store the sliced jam bars in an airtight container in the refrigerator for up to 4 days. They’re delightful cold.

Memorial Day Bake

Dede’s bakery opened early this morning. QC (Fran) loves the smell of fresh bread when she wakes. It had been a while since I made the hi-hydration honey bread, so… I also made some shortbread cookies which will be part of the decorations for a cake this weekend

I need to flood the cookies to finish them, but I have lots of time. I also need to practices some Italian buttercream as I had major issues the last time I made some.

Both bakes were excellent and a good treat for elevensies.

Under My Thumb… Hallongrottor

Facebook is marvelous for keeping in touch with friends and family. With my browsing history it also displays some marvelous bakes. I

Facebook is incredibly bad at providing accurate, truthful news. Lucky, for me, the years I declined to read any of that, and when given the option selected “Show Less” of those posts. Hence, overall, my Facebook experience is marvelous.

Hallongrottor, Swedish for “raspberry cave,”came to me on Facebook yesterday. Basically, it is a shortbread cookie with fresh raspberry jam baked in a well lined the center. What’s not to love? In America they are called “thumbprint cookies.” My name for them is “delicious.”

Hallongrottor Recipe

INGREDIENTS
• 9 Tbl butter, softened
• ⅓ c sugar
• ¼ tsp salt
• 1 tsp vanilla paste
• 1 c flour
• 3 Tbl potato starch
• ½ tsp baking powder
• ¼ – ½ c raspberry jam
• Powdered sugar for garnish.

METHOD

  1. With a rubber spatula, mix the butter and sugar in a mixing bowl until combined. Mix in the salt and vanilla paste. In a smaller bowl, whisk the flour, potato starch, and baking powder together. Add the flour mixture into the butter mixture and gently combine them until you have a soft dough.
  2. Line a 12-cup cupcake tin with seven paper liners. Using a spoon or ice cream disher, divide the batter among seven cups. Only fill the cups about three-quarters full.
  3. Using the handle of a wooden spoon or a wine cork, press a deep divot into each cookie. Fill the caves with raspberry jam. Pop the hallongrottor into the fridge for about 10 minutes while you preheat the oven to 350°F.
  4. Bake for 15-20 minutes or until just a hint of color appears on the edges. Cool the hallongrottor completely on a wire cooling rack. Dust the tops with powdered sugar before serving.

Summertime S’mores Brownies

For some unknown reason, or a moment of weakness, QC and I volunteered to help our community’s wine club with their July wine tasting event. Even worse, I offered to make brownies to pair with the dessert wine for each of the 168 attendees.

For practice (I always practice) I made an 11”x15” pan of brownies and cut them into one inch squares. (Do the math.)

To make them s’moresy I piped some Italian meringue on top, browned some with a blowtorch and topped some with a raspberry. The raspberry isn’t very s’moresy, but I like raspberries.

CHOCOLATE AND RASPBERRY BROWNIE BARS

INGREDIENTS

BROWNIES
• 4 large eggs
• 1 ¼ cups dark cocoa
• 1 teaspoon salt
• 1 teaspoon baking powder
• 2 teaspoons vanilla extract
• 2 ¼ cups sugar 1 cup
• 1 cup unsalted butter, melted
• 1 ½ cups All-Purpose Flour
• 1 cup chocolate chips
• 1 cup Raspberry Jammy Bits
• 3 Tbl seedless raspberry jam
• 1 tablespoon water ½ Tbl water
CHOCOLATE GANACHE GLAZE
• ½ cup heavy cream
• ½tablespoons light corn syrup (20g)
• 1 1/3 cups (200 g)) semisweet or bittersweet chocolate, chopped
• ½ tablespoon vanilla extract

METHOD

  1. Preheat the oven to 350°F. Lightly grease a 11″ x 15″ pan. To make very even bars, line the pan with aluminum foil before baking, leaving foil sticking up above the edges of the pan.
  2. Crack the eggs into a bowl, and beat them with the cocoa, salt, baking powder, and vanilla until smooth.
  3. Add the sugar and melted butter, stirring until smooth.
  4. Add the flour, chips, and Jammy Bits, again stirring well. The batter will be very thick.
  5. Spoon the batter into the prepared pan and smooth.
  6. Bake the brownies for about 30 minutes, until a cake tester inserted into the center comes out clean (205 degrees,) or with just a few moist crumbs clinging to it. The brownies should feel set on the edges, and the center should look moist, but not uncooked. Do not over bake! Remove them from the oven.
  7. Heat the seedless raspberry jam with the water and stir until smooth. (I use 2 tsp of apply jelly, mixed with 1 tsp water and heated to melt the jelly.) Brush over the warm brownies. Set aside to cool for an hour or longer before topping with the ganache.
  8. To make the ganache, heat the cream and corn syrup until they begin to steam. Pour over the chopped chocolate in a bowl. Let sit for 5 minutes, add any flavorings, and whisk until smooth. Let cool for 15 minutes or so.
  9. Pour ganache over the brownies while it’s still warm but has begun to thicken — reheat if it thickens too much as you work. Allow several hours for the ganache to set up fully. You may refrigerate the brownies to hasten the setting of the ganache.
  10. Remove the brownies from the pan using the aluminum foil sling. Heat a knife in hot water, wipe dry and use to cut the brownies. Repeat with each cut.
  11. Just before serving, garnish brownies with fresh raspberries and confectioners’ sugar, if desired.

ITALIAN MERINGUE

INGREDIENTS
• 3 egg whites room temperature
• 2/3 cup caster sugar
• 1/4 cup water
• 1/4 teaspoon cream of tartar

METHOD

  1. Wipe down all tools with white vinegar.
  2. Place sugar and water mixture over medium heat for 5 minutes. Do not stir it at all during this time. The mixture will look cloudy.
  3. Gently stir the mixture for 1 minute. There should be little to no granules of sugar left at this point.
  4. Once the mixture begins to bubble from the bottom, 3 to 5 minutes, place the digital thermometer in the pot and increase to medium-high heat. Do not stir it at all after this.
  5. In the bowl of an electric mixer, whip the eggs whites on low speed until foamy. Add the cream of tartar, increase the speed to medium, and beat until soft peaks form.
  6. Allow the sugar mixture to come to a boil and watch carefully. Once it reaches 230 °F turn stand mixer on highest speed to whip egg whites to peaks.
  7. Once the sugar syrup reaches 240 °F, remove from heat and remove the probe. This takes about 4- 6 minutes. Allow the boiling to come to a slow bubble before moving on.
  8. Slowly pour sugar syrup (steady stream) into whisked egg whites. Avoid the whisk attachment or it will fling your mixture all over the bowl.
  9. Allow mixture to whisk for another 3-5 minutes until the mixer bowl is cool/room temperature to the touch..

Storing and Make Ahead Information:

  1. Italian Meringue can be made ahead of time and stored in a piping bag or covered bowl, in the refrigerator covered for up to five days or at room temperature covered for up to three days.

Salted Margarita Bars

I saw these somewhere and had to make them. Good tart and tasty after golf bake. Maybe use a graham cracker base next time.

Salted Margarita Bars


INGREDIENTS
CRUST
• ½ cup/113 grams unsalted butter (1 stick), melted, plus more for greasing the pan
• About 40 saltine crackers (from one 4-ounce/113-gram sleeve)
• 1 tablespoon granulated sugar
• 1 teaspoon kosher salt
FILLING
• 2 teaspoons lime zest plus ½ cup juice (from about 4 limes)
• ¼ cup tequila (preferably blanco)
• 2 tablespoons orange liqueur, such as Grand Marnier
• Pinch of kosher salt
• 5 large egg yolks
• 1 (14-ounce) can sweetened condensed milk
• Flaky salt, for finishing

METHOD

  1. Heat the oven to 350 degrees. Lightly grease a 9-inch square baking pan with butter. Line the buttered pan with parchment, leaving an overhang on two sides to help pull the bars out of the pan.
  2. CRUST: In a food processor, pulse the saltines until ground like coarse sand. It’s OK if there are a few larger pieces. Add the melted butter, sugar and salt, and pulse a few more times until all the crumbs are evenly saturated. Pour the mixture into the lined pan, press into an even layer and freeze for about 15 minutes.
  3. After the crust has chilled, bake it until fragrant and golden brown, about 15 to 18 minutes.
  4. FILLING: As the crust is chilling, in a liquid measuring cup or small bowl, combine the lime zest, lime juice, tequila, orange liqueur and salt.
  5. In a medium bowl whisk together the yolks and sweetened condensed milk. Add the tequila-lime mixture to the yolk mixture, whisk to combine, then pour into the prepared crust. (It’s OK if the crust is not yet completely cool.) You may be tempted to prepare the curd earlier, but don’t do so more than 10 minutes before baking, as the lime juice will start to thicken it, which could affect the bake.
  6. Bake 15 to 17 minutes until the curd is set around the edges and slightly jiggly in the center.
  7. Transfer to a rack to cool slightly, then freeze for at least 2 hours.
  8. After freezing, remove the bars from the pan using the parchment paper overhang and transfer to a cutting board. Sprinkle with flaky salt, cut into 16 bars and serve right away. Store leftovers in the freezer. Cheers!