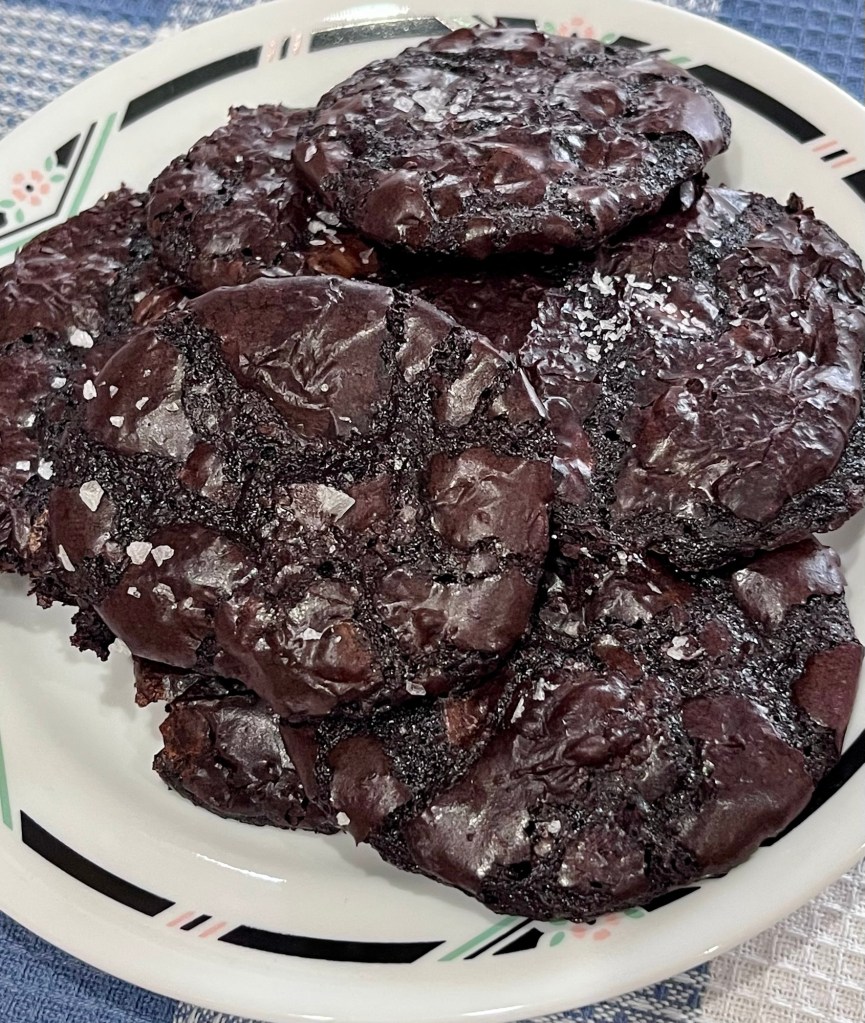
I saw this recipe by Sally and immediately added it to my list. Chocolaty doesn’t begin to describe these cookies. When I worked in Monroe, NY, we would go to lunch at a restaurant that served a chocolate cake for dessert that I described as having the density of iridium. If that was true, these cookies have the chocolate intensity of osmium.
Don’t get me wrong! They are delicious with a nice snap on the edges with a soft and chewy center. Well work making. Note the slight change made in the chocolate ingredient, and I had no nuts to add. Next time.
Tiny, Salty, Chocolaty Cookies
INGREDIENTS • 85g (6 Tbl: ¾ stick) unsalted butter • 282g (2½ c confectioners’ sugar • 60g (¾ c) unsweetened cocoa powder • 1 teaspoon kosher salt • 2 large egg whites • 1 large egg • 226g ounces bittersweet chocolate (at least 67 percent cacao), chopped (176g 54% and 50g 100%, because that is what I had) • ½ cup finely chopped hazelnuts, almonds, pistachios, pecans or walnuts (optional) • Flaky sea salt, such as Maldon or Jacobsen
METHOD
Heat the oven to 350⁰F. Line two baking sheets with parchment paper.
Melt the butter in a small pot over medium heat, swirling, until it’s starting to foam and brown, 3 to 4 minutes. (Whisk the butter from time to time so that the solids don’t stick to the bottom of the pot.) Let cool.
Sift then whisk the confectioners’ sugar, cocoa powder and salt in a medium bowl, ridding it of as many lumps as possible. (If you really want to, feel free to sift everything.)
Using a spatula, mix in the egg whites, whole egg and browned butter, stirring until you’ve got a good, smoothish mixture (any small lumps will take care of themselves), followed by the chocolate and any nuts you may want to add.
Using a spoon, drop quarter-size blobs of dough (the texture is really somewhere between a dough and a batter) onto the baking sheet, spacing them about 2 inches apart (they spread a lot). Keep them small. Sprinkle with flaky salt and bake until the cookies have flattened considerably and look baked through and a little wrinkled, 8 to 10 minutes, checking after 6 min.
Let cool before eating so they can firm up.
TIP Cookies can be baked up to 2 days ahead, wrapped tightly, and stored at room temperature.
It’s a challenge to find a granola bar that doesn’t melt when golfing in the summer where the temperature can be over 100 degrees
I made these peanut butter granola bars with rolled oats, honey, peanut butter and eggs. While it hasn’t been over 98 this month these bars held up.
Predominantly peanut butter flavor I added raisins and the bars held up to the heat.
Peanut Butter Granola Bars
INGREDIENTS • 3 cups old-fashioned rolled oats • 3/4 cup peanut butter • 1/3 cup honey or maple syrup • 1/2 cup mini chocolate chips (optional) • 2 whole eggs • Optional add-ins: pinch of salt (omit if peanut butter is salted), walnuts, pecans, almonds, chia, sunflower, or pumpkin seeds, or dried fruit
METHOD
Preheat oven to 350℉.
In a large bowl, combine all ingredients and mix well. *If your peanut butter is solid at room temperature, heat it for 10-15 seconds to make it a more drizzly consistency before adding to the mix.
Line a 9×9 inch baking dish or pan with parchment paper. This makes it much easier to remove the bars from your dish once baked.
Transfer the mixture to the prepared dish or pan. Very firmly press the mixture into the pan in an even layer — the firmer you press, the better the bars will stick together. If you’re using chocolate chips, sprinkle them on top, then press them down into the bars.
Bake for 15-17 minutes or until the center is baked through and the edges are just starting to brown. Start checking at 14 minutes, as all ovens are different.
Remove from the oven and place pan on a cooling rack.
Let the bars cool completely (this is important) before cutting into 16 squares with a sharp knife
Wanting to try something different than my standard chocolate chip cookie, I made these. I never used tahini before and found they had a pleasant, nutty flavor. Kinda like a very mild peanut butter.
The cookies were crispy, (maybe overbaked a couple of minutes?) front weighted with chocolate, as if that were a problem, delicious and worthy to be made again (and again.)
Salted Tahini Chocolate Chip Cookies
INGREDIENTS Yield: 18 to 24 cookies • 113g (8 Tbl) RT unsalted butter • 120g (½ c) tahini, well stirred • 200g (1 c) granulated sugar • 1 large RT egg • 1 egg RT yolk • 1 tsp vanilla extract • 150g (1 c + 2 Tbl) all-purpose flour • ½ tsp baking soda • ½ tsp baking powder • 1 tsp kosher salt • 230g (1¾ c) chocolate chips or chunks, bittersweet or semisweet • Flaky salt, like Maldon
METHOD
In the bowl of an electric mixer fitted with the paddle attachment, cream butter, tahini and sugar at medium speed until light and fluffy, about 5 minutes. Add egg, egg yolk and vanilla and continue mixing at medium speed for another 5 minutes.
Sift flour, baking soda, baking powder and kosher salt into a large bowl and mix with a fork. Add flour mixture to butter mixture at low speed until just combined. Use a rubber spatula to fold in chocolate chips. Dough will be soft, not stiff. Refrigerate at least 12 hours (or freeze for 2 hours); this ensures tender cookies.
When ready to bake, heat oven to 325⁰F and line a baking sheet with parchment paper or nonstick baking mat. Use a medium. ice cream scoop or spoon to form dough into 18 to 24 balls.
Place the cookies on the baking sheet at least 3 inches apart to allow them to spread. Bake 13 to 16 minutes until just golden brown around the edges but still pale in the middle to make thick, soft cookies. As cookies come out of the oven, sprinkle sparsely with salt. Let cool at least 20 minutes on a rack.
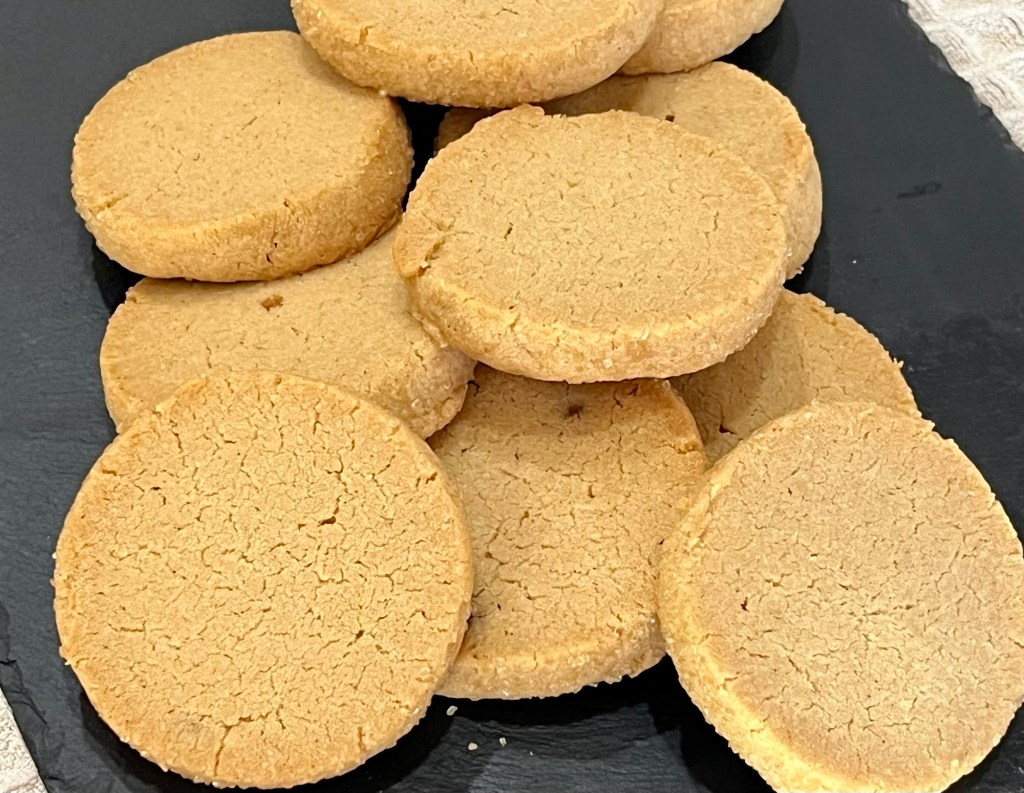
Sally rides again, (as opposed to astronaut Sally Ride.) I make a great shortbread cookie (although currently with some chocolate drizzle issues,) but Sally published a Brown Sugar Shortbread cookie, and of course, I couldn’t resist.
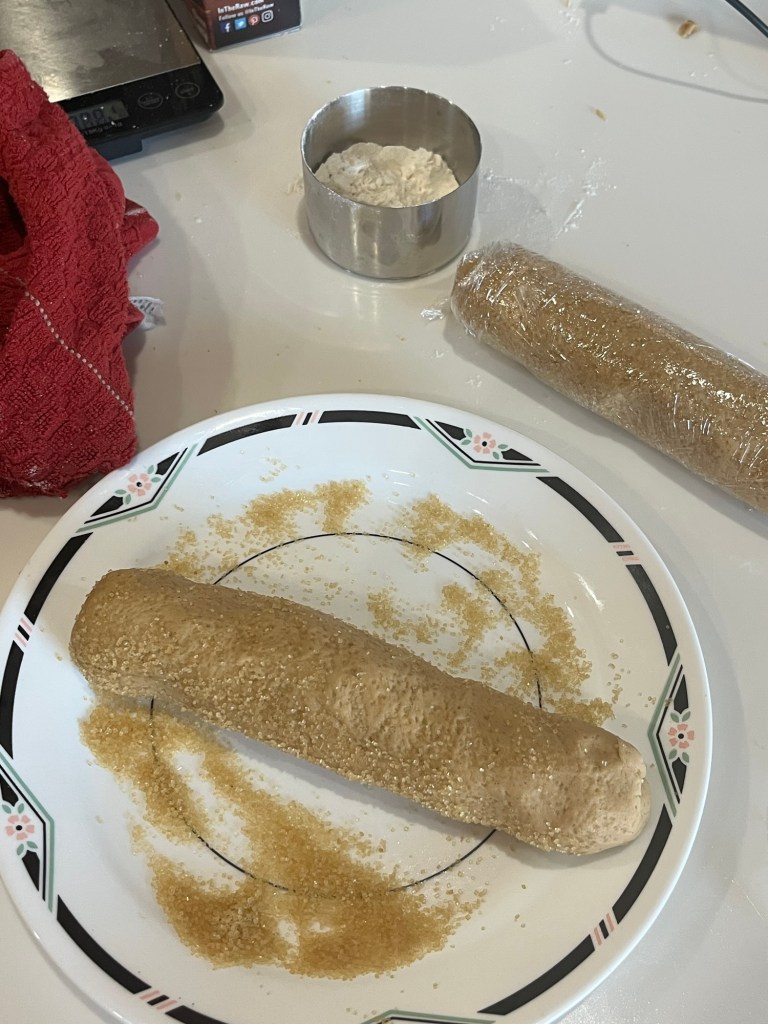
These cookies have a slightly higher (brown) sugar and flour content and as slice and baked coolies are rolled into logs rather than flat disks before chilling, but otherwise the methods are similar.
QC commented how good they smelled while baking, and when sampling, said they taste just like they smell. They’re sweeter than my usual shortbread cookie, no surprise and definitely will be added to the cookie wheel of fortune. (I really should invent one of those someday.)
Brown Sugar Shortbread Cookies
Yield: 24 cookies INGREDIENTS • 170g (¾ cup ;12 Tbl) unsalted butter, softened to room temperature • 200g (1 c) packed light or dark brown sugar • 1 ½ tsp vanilla extract • 281g (2¼ c) all-purpose flour (spooned & leveled) • ¼ teaspoon salt For Rolling • 100g ( ½ c) coarse sugar (such as Sparkling or Sugar in the Raw) METHOD
In a large bowl using a handheld mixer or a stand mixer fitted with a paddle attachment, beat the butter and brown sugar together on medium-high speed until completely smooth and creamy. Add the vanilla and beat until combined.
Add the flour and salt and beat on low speed until incorporated. Turn the mixer up to medium-high speed and beat until the dough comes together. If the dough is too crumbly and won’t come together after a couple minutes of beating, stop the mixer, pour the dough crumbles on a work surface, and use your hands to bring it together. You can also try sprinkling the dough with a few drops of water and then beat again; or get your hands wet, then press the dough clumps together tightly until it forms one large clump of thick dough.
With lightly floured hands, divide the dough in two. (If you want to be precise, the dough should weigh about 650g, so each half will be about 325g.) Roll and shape each piece of dough into an 8-inch log.
For Rolling: Pour coarse sugar onto a large plate. One at a time, roll the logs in the sugar until the exterior is fully coated.
Tightly wrap the logs in plastic wrap and chill in the refrigerator for at least 4 hours and up to 5 days. Chilling is mandatory for this cookie dough. I always chill mine overnight.
Preheat oven to 350°F. Line two large baking sheets with parchment paper or silicone baking mats. Set aside.
Remove logs from the refrigerator. Slice each log into 12 equally thick cookies and place cookies on baking sheets about 2 inches apart. Bake the cookies for 14–16 minutes, or until set and lightly browned around the edges. Do not over-bake. Allow to cool for 5 minutes on the baking sheet, then transfer to cooling rack to cool completely.
Cover and store leftover cookies at room temperature for up to 1 week. After day 1, the cookies will taste crunchier.
Notes Make Ahead Instructions: Baked cookies freeze well up to 3 months. Thaw overnight in the refrigerator and bring to room temperature, if desired, before serving. You can make/assemble the cookie dough logs and chill in the refrigerator for up to 5 days (see step 5). Cookie dough logs freeze well too, up to 3 months. Allow the logs to thaw overnight in the refrigerator, then continue with step 6. See if you’d like to see a video tutorial for freezing various types of doughs.
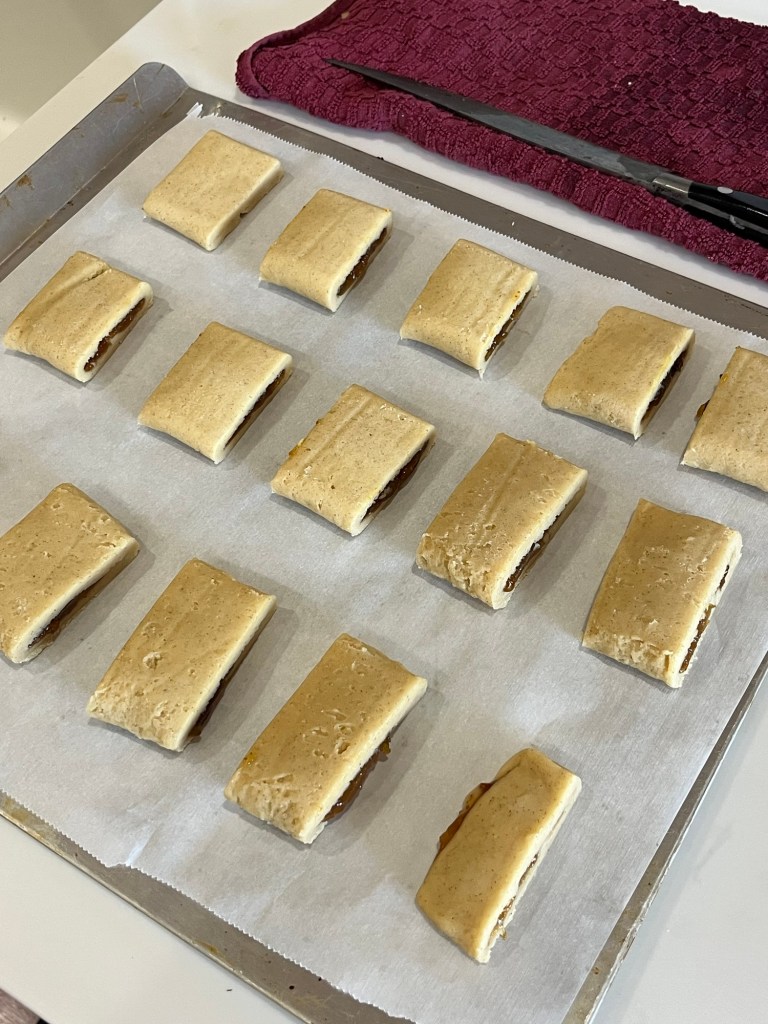
I make these cookies occasionally and love them (almost as much as those 2-serving-packages available commercially.) My issue with mine was it never looked right to seal the dough on the side of the cookie. I saw another method to wrap and seal the fig so today, was a method development bake..
Instead of sealing the dough by pinching the edges together and pressing with the tines of a fork, I wrapped the dough around the fig filling and pressed the edges together on the bottom of the cookie. It took a little thought and work to figure out the mechanics.
The method to make the dough and filling is the same as previously published. One change I will make is to cut the cookies apart after the log is baked. If done when the log is hot, they cut nicely and result in a nice sharp edge, unlike these (right photo) that flowed slightly.
Homemade Fig Cookies – Bookend Fold Seal
INGREDIENTS • 1 pint fresh or preserved figs or 12 ounces dried figs • 1 ½ cups AP flour • ¼ teaspoon baking powder • ¼ teaspoon salt • ¼ tsp ground cinnamon • 1 stick butter • ⅓ cup sugar • 1 egg • 1 teaspoon vanilla extract • 2 tablespoons orange juice
If you are using: • Fresh figs: Remove stems and boil figs with 2 cups of sugar in 1 cup of water for 45 minutes. Drain and cool. (This seemed to be too much sugar and water.) Try cutting in half. If too thin, cook down until temp reaches about 210⁰F. • Dried figs: In a bowl, pour boiling water over figs (stems removed) and let rest 10 minutes. Drain all but 2 tablespoons water and stir in 2 tablespoons corn syrup + ¼ teaspoon cinnamon. • Preserved figs: Drain syrup. METHOD
Puree figs in food processor into a thick paste (if too thick or thin to spread evenly, add a little water or flour until spreadable consistency is reached).
Combine flour, baking powder, cinnamon, and salt together and set aside.
Cream butter and sugar in a mixing bowl.
Add egg and vanilla, mix until smooth
Add orange juice and combined dry ingredients to bowl and mix until dough forms.
Divide dough in half and roll into two rectangles ~4”x ~10 x ~½” and chill for 30 min to set butter and make it easier to roll and fold. It’s helpful to make make the rectangles as even as possible to make the next step easier.
Roll dough out between parchment paper into an 5”x14” rectangle ~ ¼” thick.
Return to the refrigerator for another 30 minutes, repeat for the second disk.
Flip rectangle over to release the dough from the parchment paper.
One rectangle at a time, spread fig paste onto the center 1½ ” of each rectangle, lengthwise.
Using the parchment paper to help, fold uncovered dough over fig paste.
Butt the two edges of the dough together and push together to seal then flip the cookie right side up.
Move to a clean piece of parchment paper and place on a baking sheet.
Bake 25 minutes at 350⁰F until crust begins to brown.
While still warm cut each log into 2” pieces
Note:
Try to either spray or lightly flour the parchment paper to help when removing the dough rectangle from the paper.
If necessary wet the edges of the fold over portions of the dough to help seal.
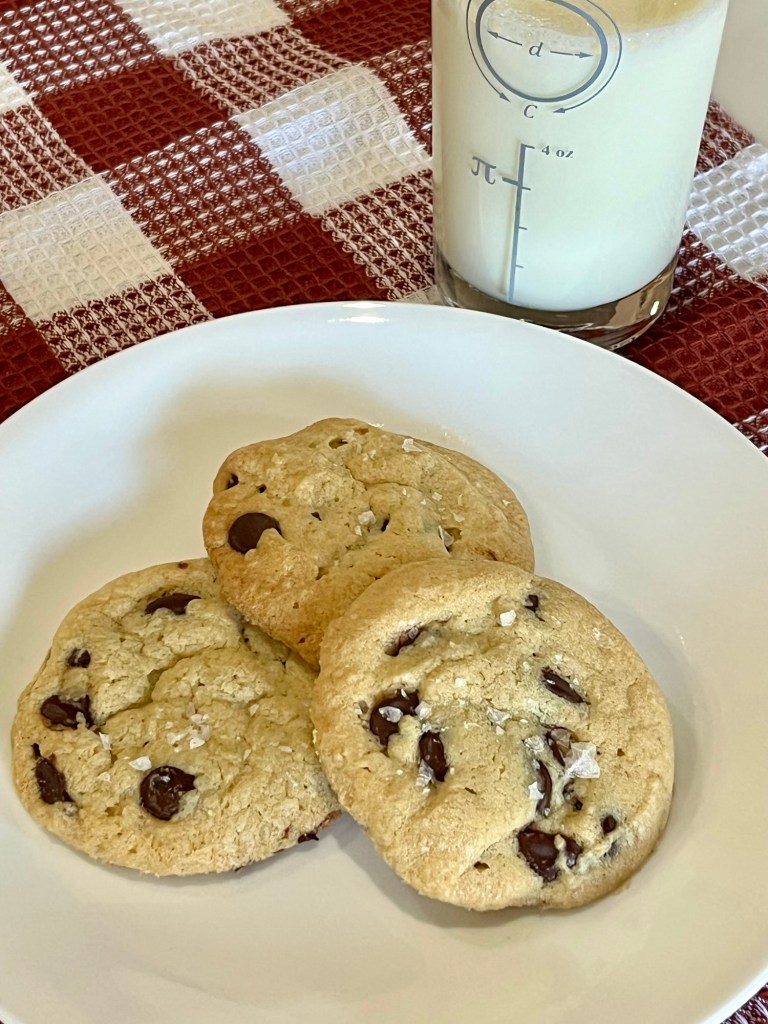
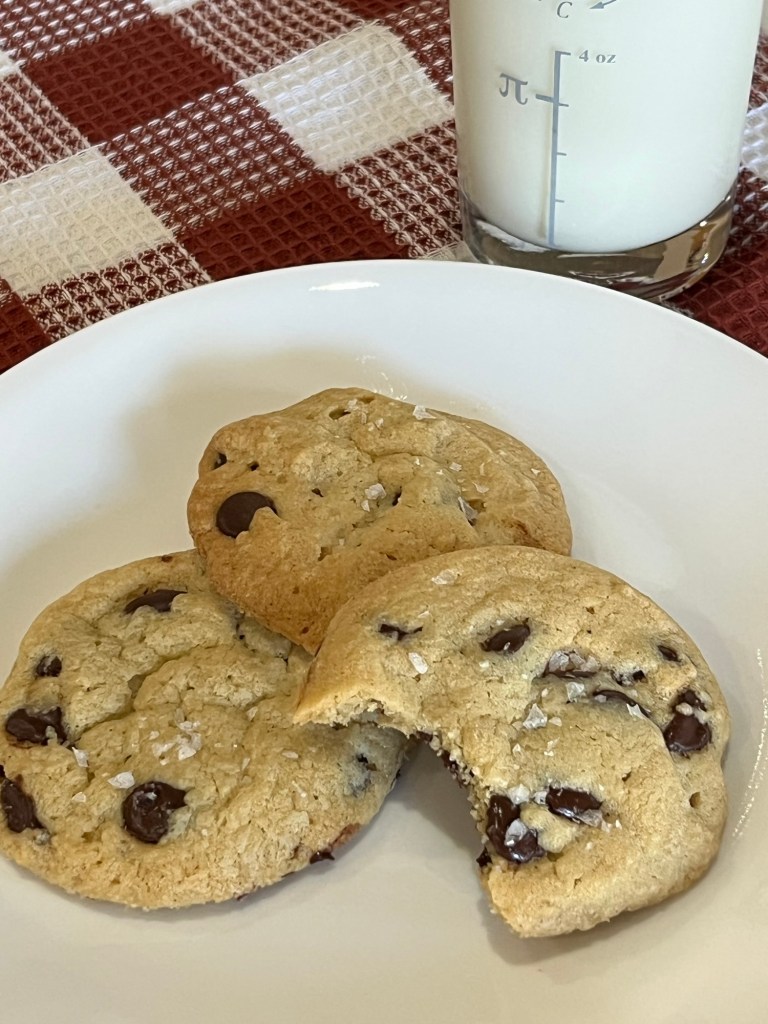
Sometimes you think something couldn’t be improved, but in this case you would be so wrong. I was about to make a new (to me) recipe of Tahini chocolate chip cookies when Sally sent out her recipe. Stand aside Tahini there is a new cookie in town
These cookies are thicker and are more cohesive than my standard Nestles recipe. It shows to go, even childhood favorites (until today,) can be replaced.
Chewy Chocolate Chip Cookies – Sally
INGREDIENTS • 281g (2 ¼ c) all-purpose flour • 1 teaspoon baking soda • 1 ½ teaspoons cornstarch • 1/2 teaspoon salt • 170g (12 Tbl) unsalted butter, melted & cooled for 5 minutes • 150g (3/4 c) packed light or dark brown sugar • 100g ( ½ c) granulated sugar • 1 large egg + 1 egg yolk, at room temperature • 2 teaspoons pure vanilla extract • 225g (1 ¼ c) semi-sweet chocolate chips or chocolate chunks
METHOD
In a large bowl, whisk the flour, baking soda, cornstarch, and salt together. Set aside.
In a medium bowl, whisk the melted butter, brown sugar, and granulated sugar together until no lumps remain. Whisk in the egg and egg yolk until combined, then whisk in the vanilla extract. The mixture will be thin. Pour into dry ingredients and mix together with a large spoon or spatula. The dough will be very soft, thick, and shiny. Fold in the chocolate chips. The chocolate chips may not stick to the dough because of the melted butter, but do your best to combine them.
Cover the dough tightly and refrigerate for at least 2 hours or up to 3 days. I highly recommend chilling the cookie dough overnight to prevent overspreading.
Preheat oven to 325°F. Line large baking sheets with parchment paper or silicone baking mats. If the dough has chilled for longer than 2 hours, let it sit at room temperature for about 15 minutes.
Using a cookie scoop or Tablespoon measuring spoon, scoop the chilled cookie dough, about 3 scant Tablespoons (about 2 ounces, or 60g) of dough for XL cookies or 2 heaping Tablespoons (about 1.75 ounces, or 50g) of dough for medium-large cookies. Roll into a ball, then use your fingers to shape the cookie dough so that it’s taller rather than wide—almost like a cylinder. This helps the cookies bake up thicker. Repeat with remaining dough. Arrange the cookies 3 inches apart on the prepared baking sheets.
Bake the cookies for 13–14 minutes or until the edges are very lightly browned. The centers will look very soft, but the cookies will continue to set as they cool. Cool on the baking sheet for 10 minutes before transferring to a cooling rack to cool completely. While the cookies are still warm, I like to press a few more chocolate chips into the tops—this is optional and only for looks!
Store tightly covered at room temperature for up to 1 week.
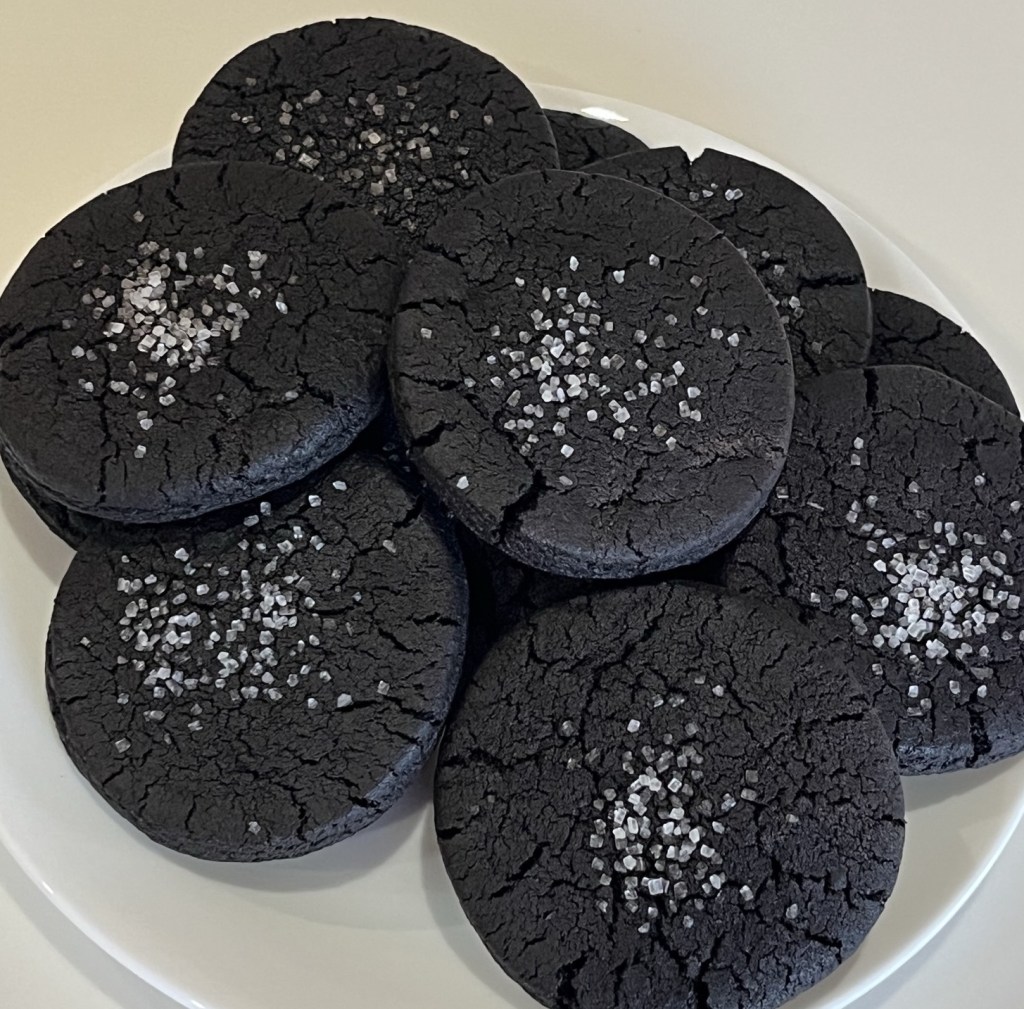
I find it hard to believe I never posted theses Black Chocolate Cookies. They are among our favorite 5… um… 6…um… 10, yeah thats the ticket. They are among our 10 favorite cookies.
KAB says “black cocoa powder is ultra-Dutch processed, meaning it is treated with an alkaline solution to reduce its acidity. This gives it a smooth texture, dark color, and unsweetened-chocolate highlights.”
Whatever the reason, we really, really, really like these cookies.
Black Chocolate Cookies
INGREDIENTS • 1 ½ cups (195g) AP flour • ¾ cup (70g) unsweetened black cocoa powder • 1 teaspoon baking soda • ¼ teaspoon kosher salt • ½ teaspoon espresso powder • 1 stick (110g) unsalted butter, room temperature • ¾ cup (150g) sugar • 1 large egg • 1 ½ teaspoons vanilla • 1 teaspoon molasses
METHOD
In a large bowl, vigorously whisk together the flour, cocoa, baking soda, salt, and espresso powder.
Cream the butter and sugar until light and fluffy, (2-3 min on medium.)
Beat in the egg, vanilla, and molasses.
Add the dry ingredients to the wet in 3 additions. When well mixed, remove the dough from the mixer, and form it into a ball. It should have the consistency of soft clay. If it’s stiff and unmanageable, massage some water into it, a tablespoon at a time until easily pliable.
Wrap it in plastic wrap, and chill it in the refrigerator for at least one hour.
When you are ready to roll-out the dough, preheat the oven to 350°F (175° C). Break off a chunk of dough from the ball of dough (about a quarter of it) and place it between two pieces of parchment paper. Use a rolling pin to roll the dough out to an even 1/2-inch thickness.
Use a cookie cutter or the rim of a small glass to cut out cookie shapes from the rolled out dough. Place on a parchment paper or silicone-lined baking sheet, allowing at least 1 inch between cookies on the cookie sheet.
Bake at 350°F (175° C) in the middle rack for 12 to 14 minutes, less or more, depending on the size and thickness of the cookies.
The cookies should bounce back when you press on their centers and be a little dark around the edges. When cool, they should be crispy.
Remove from oven and let cool for 5 minutes before removing the cookies from the tray to cool on a rack.
It was a great vacation, returning to my native Vermont. I love my family and friends, but am happy back in Dede’s Bakery.
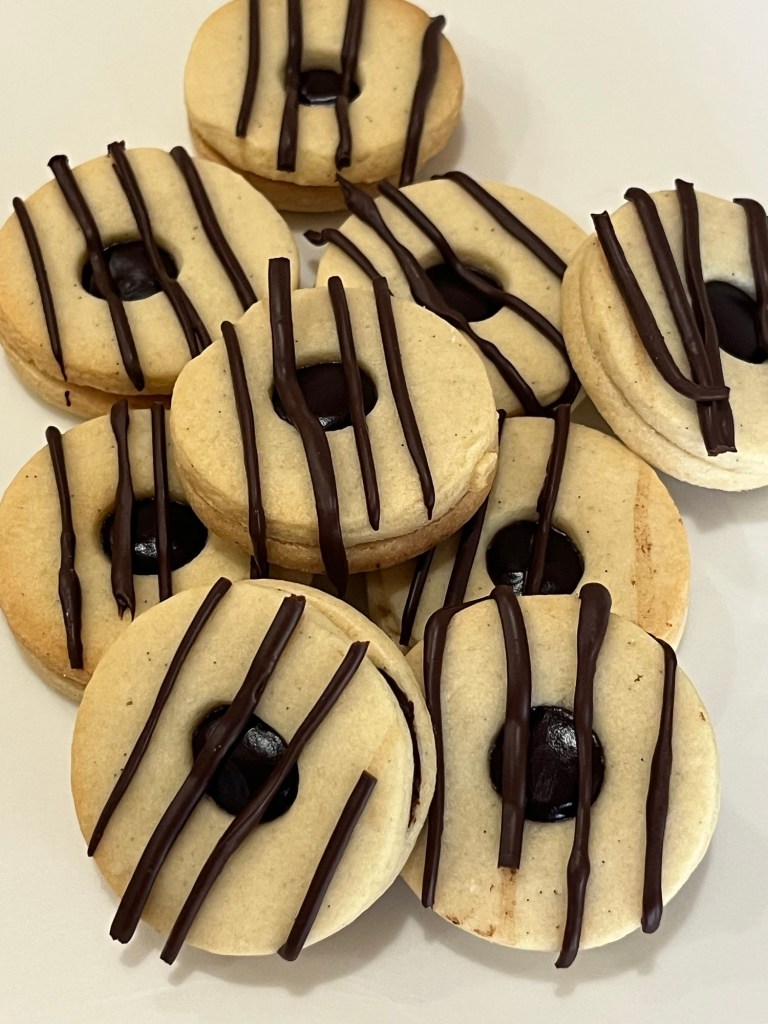
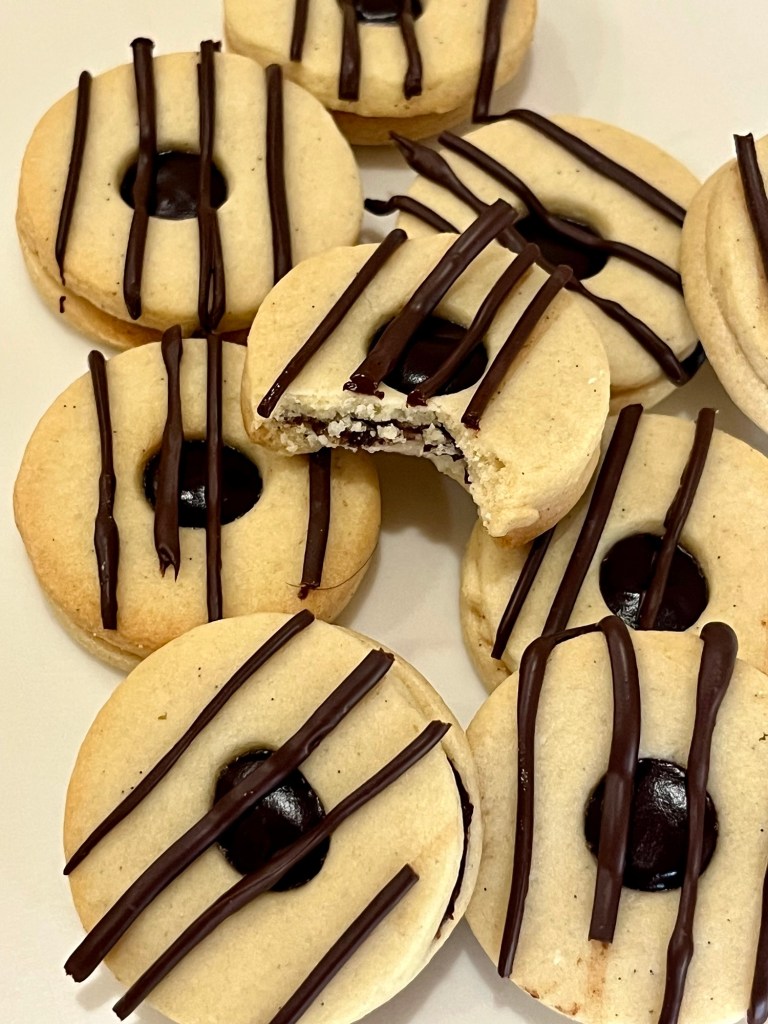
I needed a loaf of bread so made our favorite Artisan No-Knead Bread, and while it was rising and baking I made a batch of Sally’s Striped Fudge Cookie Sandwiches. I saw this recipe on the flight home and it instantly jumped to the top of my “to-do” list. What’s great about this recipe is the cookie is a perfect carrier for whatever filling you want. This one is chocolate, but a berry/fruit or fig jam.
INGREDIENTS • 281 (2 ¼ c) all-purpose flour (spooned & leveled), plus more as needed for rolling and work surface • ½ tsp baking powder • ¼ tsp salt • 170g (¾ c = 12 Tbl) unsalted butter, softened to room temperature • 150g (¾ c) granulated sugar • 1 large egg, at room temperature • 2 tsp pure vanilla extract Chocolate Ganache + Topping • 170g (6 oz) semi-sweet chocolate, coarsely chopped and divided • 45g (3 Tbl) heavy cream • Optional: if needed to thin out topping: splash vegetable oil or melted coconut oil
METHOD To make the cookies:
Whisk the flour, baking powder, and salt together in a medium bowl. Set aside.
In a large bowl using a handheld or a stand mixer fitted with a paddle attachment, beat the butter and sugar together on high speed until completely smooth and creamy, about 2 minutes. Add the egg and vanilla and beat on high speed until combined, about 1 minute. Scrape down the sides and up the bottom of the bowl and beat again as needed to combine.
Add the dry ingredients to the wet ingredients and mix on low until combined. Dough will be a bit soft. If the dough seems too soft and sticky for rolling, add 1 more Tablespoon of flour.
Divide the dough into 2 equal parts. Place each portion onto a piece of lightly floured parchment paper or a lightly floured silicone baking mat. With a lightly floured rolling pin, roll the dough out to about 1/4-inch thickness. Use more flour if the dough seems too sticky. The rolled-out dough can be any shape, as long as it is evenly 1/4-inch thick.
Lightly dust one of the rolled-out doughs with flour. Place a piece of parchment on top. (This prevents sticking.) Place the 2nd rolled-out dough on top. Cover with plastic wrap or aluminum foil, then refrigerate for at least 1-2 hours and up to 2 days.
Once chilled, preheat oven to 350°F (180°C). Line 2-3 large baking sheets with parchment paper or silicone baking mats.
Remove one of the slabs of dough from the refrigerator and, using a 2-inch round cookie cutter, cut into circles. Re-roll the remaining slab and continue cutting until all is used. Repeat with second slab of dough. You should have about 64 circles. Using a 1-inch round cookie cutter, cut a hole into the center of 32 of them. Let’s call these 32 cookies the “donut cookies” because of that center hole. Place the whole circles and the donut cookies on separate baking sheets (because the donut cookies take 1 less minute to bake), placing all cookies 2 inches apart from one another.
Bake the whole circles for about 10 minutes, or until lightly browned around the edges, and the donut cookies for about 9 minutes. Rotate the baking sheets halfway through bake time. Remove from the oven. Allow cookies to cool on the baking sheets for 5 minutes, then transfer to a wire rack to cool completely before assembling.
To make the ganache:
Place 85g (3 oz) of chopped chocolate for the ganache into a small heatproof bowl. Heat the cream in a small saucepan over medium heat, stirring occasionally. Once cream begins to boil, immediately remove from heat and pour over the chocolate. Stir gently and slowly until the ganache is smooth. Allow it to cool for 10 minutes before adding to cookies. During this time, it will slowly thicken.
Once the ganache is ready, spread about ½ teaspoon on each whole circle. Carefully top each with a donut cookie and press down gently to create a cookie sandwich.
To make the topping:
Melt the remaining chopped chocolate in the microwave in 15-second increments, stopping and stirring after each until completely smooth. Add a splash of vegetable oil or melted coconut oil if chocolate isn’t thin enough to drizzle. Drizzle over each sandwich. Allow chocolate to set completely, about 30 minutes.
Cookies will stay fresh in an airtight container at room temperature for 2 days or in the refrigerator for up to 1 week.
QC and I rarely have desserts out, but last week it was included in our meal, so what’s a person to do? We had “pizookies” at BJ’s and I instantly thought: “You know, this could be even better if….”
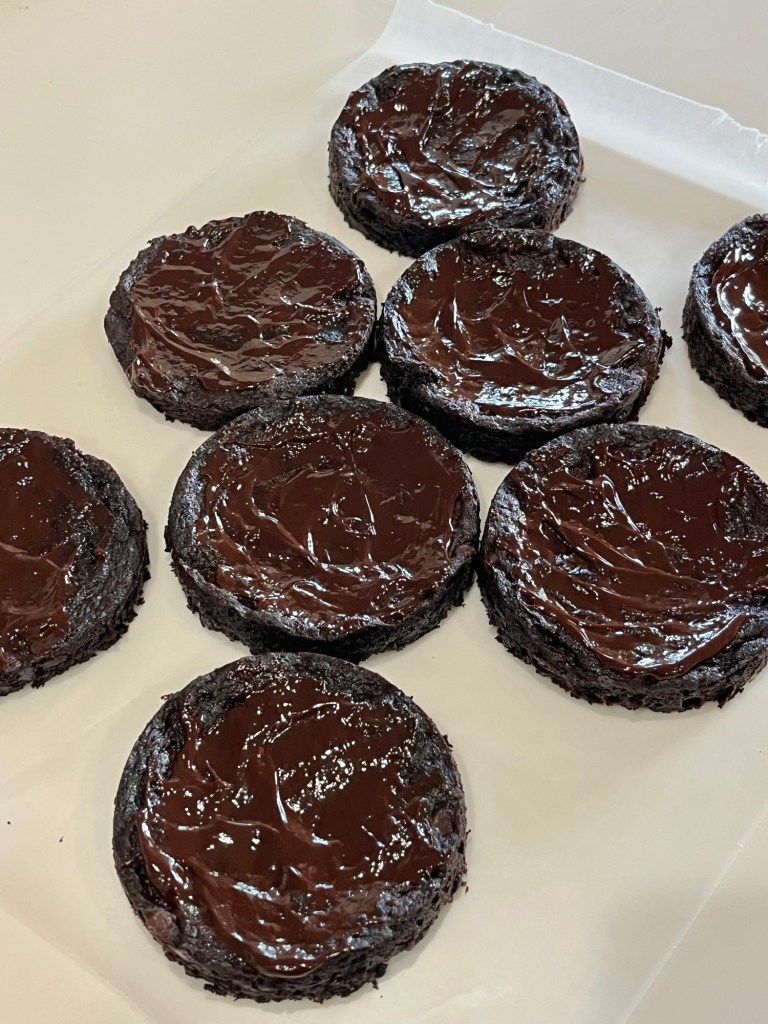
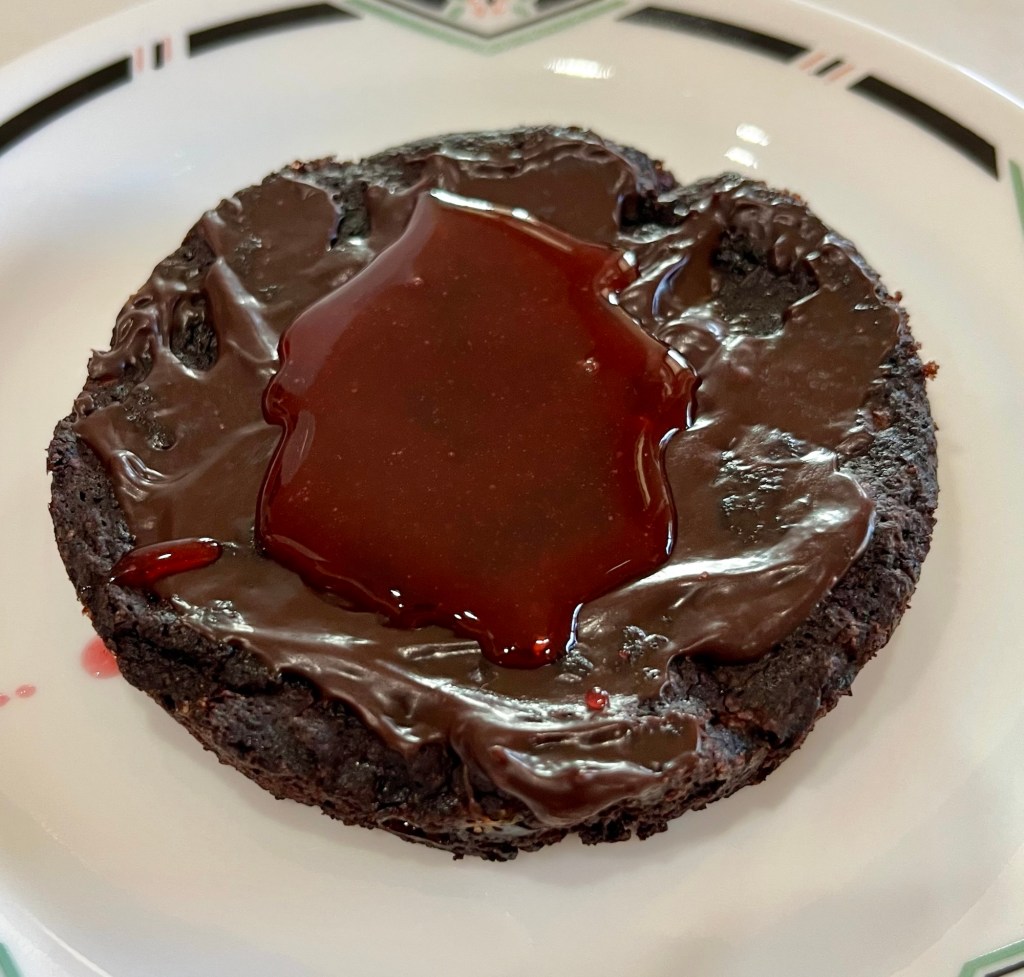
I made my chocolate and raspberry brownie tart free standing, not in a tin. I also add raspberry Jammie bits to the batter, raspberry coulis and whole raspberries because, as you might guess, I like raspberries.
The amount of raspberry stood up to the otherwise overwhelming dominant chocolate. I also made the hot fudge, caramel sauce and coulis.
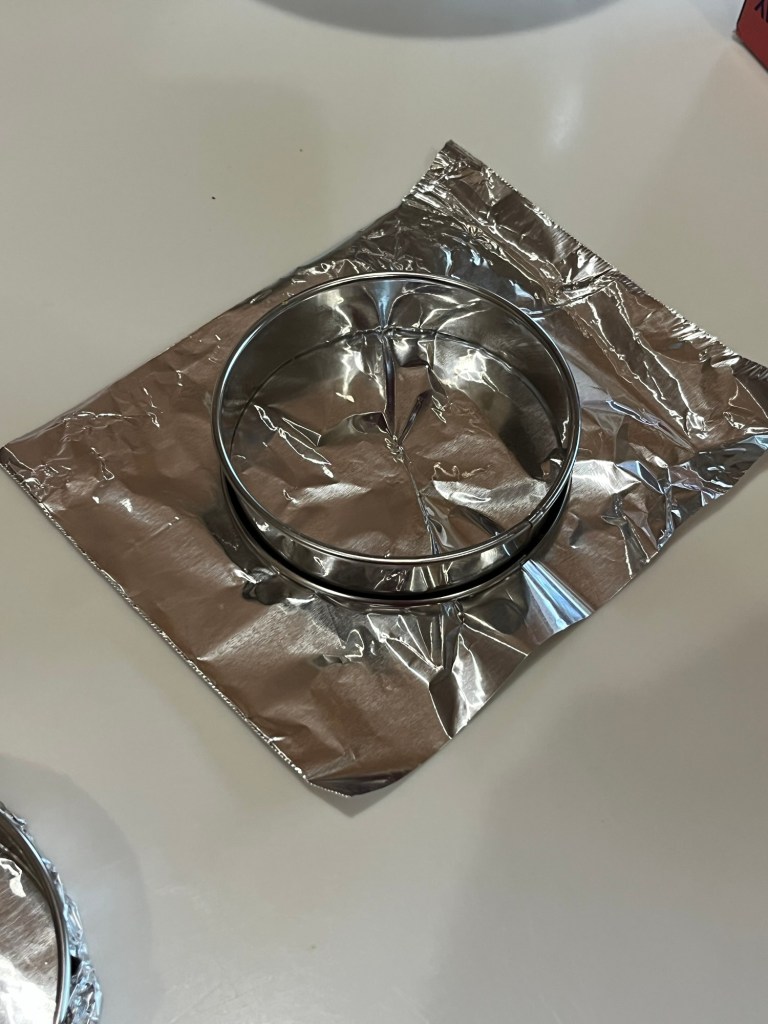
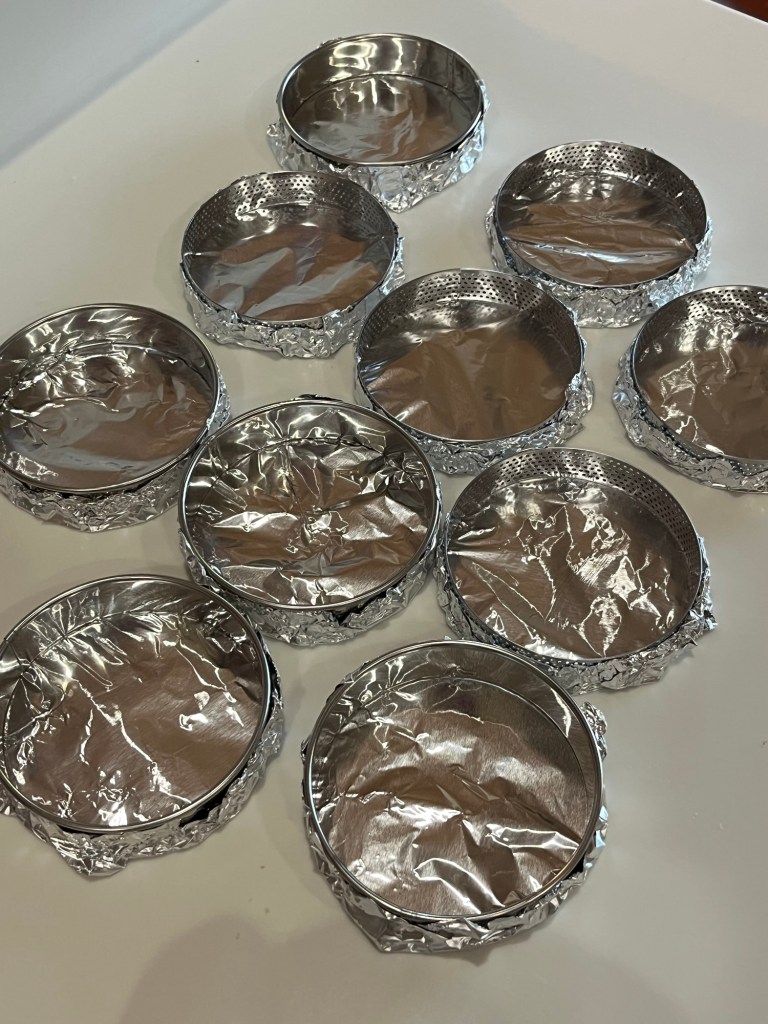
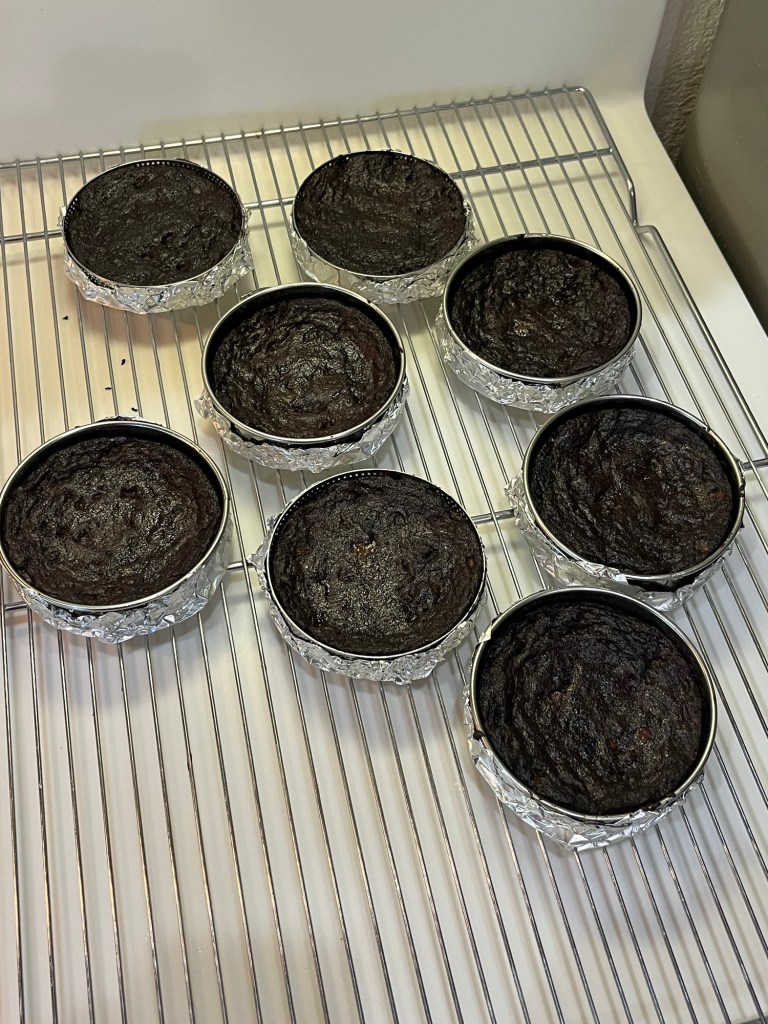
Tart Ring and FoilFoil Wrapped RingBaked Brownie BaseGanache Covered BrownieRaspberry Coulis on Ganache Coated BrownieChocolate and Raspberry Brownie Tart with Raspberry Coulis, Hot Fudge and Caramel Sauce Drizzles.
Chocolate And Raspberry Brownie Tart
INGREDIENTS BROWNIES • 2 large eggs • ½ cup + 2 Tbl dark cocoa • ½ tsp salt • ½ tsp baking powder • 1 tsp vanilla extract • 1 cup + 2 Tbl sugar • ½ cup unsalted butter, melted • ½ cup + 2 Tbl AP flour • ½ cup chocolate chips • ½ cup jammy bits • 1 ½ Tbl honey or seedless raspberry jam • ½ Tbl water CHOCOLATE GANACHE GLAZE • ½ cup heavy cream • 20 g (½ Tbl) light corn syrup • 200 g (1⅓ c) semisweet or bittersweet chocolate, chopped • ½ tablespoon vanilla extract
METHOD
Preheat the oven to 350°F. Lightly grease eight 4” tart rings and cover the bottom and outside with aluminum foil. (Spray the sides of the tart ring and foil on the bottom cooking spray.)
Crack the 2 eggs into a bowl, and beat them with the cocoa, salt, baking powder, and vanilla until smooth.
Add the sugar and melted butter, stirring until smooth.
Add the flour, chips, and Jammy Bits, again stirring well. The batter will be very thick.
Spoon 90 g of batter to half fill each tart ring and smooth with a small offset spatula
Bake the brownies for 12-16 minutes, checking the temperature after 8 minutes. The brownies are done when a cake tester inserted into the center comes out clean (200 degrees,) or with just a few moist crumbs clinging to it. The brownies should feel set on the edges, and the center should look moist, but not uncooked. Do not over bake! Remove them from the oven.
Heat the honey or seedless raspberry jam with 1 Tbl of water and stir until smooth. Brush over the warm brownies. Set aside to cool for an hour or longer before topping with the ganache.
Loosen the brownies from the rings by running a knife around the brownie. Carefully peel the aluminum foil from the brownie and release the brownie from the ring.
To make the ganache, heat the cream and corn syrup until they begin to steam (60 sec in 1000W microwave.) Pour over the chopped chocolate in a bowl. Let sit for 5 minutes, add any flavorings, and whisk until smooth. Let cool for 15 minutes or so.
Spread ganache over the brownies while it’s still warm but has begun to thicken — reheat if it thickens too much as you work. Allow several hours for the ganache to set up fully. You may refrigerate the brownies to hasten the setting of the ganache.
Spread a tablespoon of raspberry sauce on the ganache, top with a scoop of ice cream and drizzle sauce(s) of your choice, i.e. hot fudge, raspberry, caramel or marshmallow. Garnish with fresh raspberries.
Hot Fudge
INGREDIENTS
⅔ c heavy cream
144 g (½ c) light corn syrup
70 g (⅓ c) light brown sugar – not packed
¼ c unsweetened natural cocoa powder
¼ tsp salt
170 g dark or bittersweet chocolate, finely chopped
2 Tbl unsalted butter
2 tsp vanilla extract METHOD
Bring cream, corn syrup, brown sugar, cocoa powder, optional salt, and half the chopped chocolate to a boil in a 1½-quart heavy saucepan over moderate heat, stirring, until chocolate is melted. Reduce heat and cook at a low boil for 5 minutes, stirring frequently.
Turn off the heat and add butter, vanilla, remaining chocolate, and stir until smooth.
Cool slightly before serving.
Cooled sauce can be stored in a jar with a lid or in airtight container in the refrigerator for many weeks. Reheat sauce before using by placing the desired portion in a microwave-safe bowl and heating for about 10 to 15 seconds, or reheat on the stovetop
Caramel Sauce INGREDIENTS • 112 g (½ c) RT butter • 106 g (½ c) light brown sugar • dash salt • 144g (½ c) light corn syrup • 7 oz (½ can) sweetened condensed milk • 1 tsp vanilla METHOD
Melt the butter in 1½ quart or larger saucepan.
Add the brown sugar and salt and combine. Stir in the corn syrup, mix well.
Gradually add the sweetened condensed milk, stirring constantly. It can take 10-15 minutes to add the milk. Go very slowly!
Cook and stir over medium heat to 220°F for sauce viscosity.
Remove from heat, stir in vanilla.
Store in sealable container when cool
Seedless Raspberry Coulis
INGREDIENTS • 480 g fresh washed and dried raspberries • 200 g (1 c) caster sugar • 60 g (1/4 c) cold water • 2 Tbl lemon juice
METHOD
Add all ingredients to a 1 ½ quart saucepan
Cook while stirring and mashing over medium heat until it thickens (~220 F)
Strain the coulis through a fine mesh sieve.
Pour into an airtight container and cool before sealing
I forget where I first saw this recipe but there are plenty on YouTube .
It’s best if you can make your own seedless raspberry jam, but alas, I couldn’t this time. These are very flavorful cookies with a hint ‘o almond flavor Well worth your time to make them
Buttery Raspberry Crumble Cookies
INGREDIENTS • 1 cup unsalted butter, softened • 1/4 cup granulated sugar • 1/3 cup powdered sugar • 1 teaspoon vanilla extract • 1 teaspoon almond extract • 2 1/4 cups all-purpose flour • 1/4 teaspoon kosher salt • 1/2 cup seedless raspberry jam For the Crumble Topping: • 1/2 cup all-purpose flour • 1/4 cup granulated sugar • 1/4 cup unsalted butter, cold and cut into small cubes • 1/4 tsp cinnamon (optional)
METHOD
Combine the softened unsalted butter with granulated sugar and powdered sugar. Use a stand mixer on medium speed until the mixture is light and fluffy, about 2-3 minutes. The butter should be a pale color, and the sugars fully incorporated, leaving no grainy texture.
Mix in the vanilla extract and almond extract.
Gradually add the all-purpose flour and kosher salt into the butter mixture. Mix on low speed until just combined. The dough should be smooth and a bit crumbly, yet it should hold together when pressed between your fingers.
Wrap the dough in plastic wrap and refrigerate for at least 30 minutes.
Make the crumble topping: In a small bowl, combine flour, sugar, and cinnamon (if using). Cut in the cold butter with a pastry cutter or fork until the mixture forms coarse crumbs.
Preheat your oven to 350°F (175°C) and line two baking sheets with parchment paper.
Once chilled, roll the dough into small balls (about 1 inch). Place them onto the prepared baking sheets, spacing them about 2 inches apart to allow for spreading.
Using your thumb or the back of a small spoon, press gently into the center of each dough ball to create a well. You’ll want a depth sufficient to hold the raspberry jam without breaking through the bottom.
Spoon a small amount of seedless raspberry jam into each indentation. Ensure the jam does not overflow, just to the brim, then sprinkle the crumble topping over the cookies. Do not be afraid to pile a lot of crumble topping on.
Place the baking sheets in the oven and bake for 15–18 minutes or until the edges are lightly golden.
Remove the cookies from the oven and let them cool on the baking sheets for a few minutes before transferring to wire racks to cool completely. The cookies should have a slightly crisp edge and a soft, crumbly center.