Dave Oney was born mid last century in Middlebury, Vermont. He received his BS in Chemistry and worked as a polymer chemist in Massachusetts and New Jersey. He became a microscopist (someone who studies little bitty things using a microscope) and photomicrographer (someone who photographs little bitty things) before settling into a 35-year career in technical sales of scientific imaging equipment (the science of digitally recording itty bitty things, sending the image to a computer for analysis.) He designed and created a number of products contributing to this field. He is (was) proficient in several computer languages and is currently working on mastering English.
After making a few more paradigm shift career changes Dave and his wife, Fran, retired and moved closer to their children and granddaughters and now live in the foothills of the Sierra Nevadas.
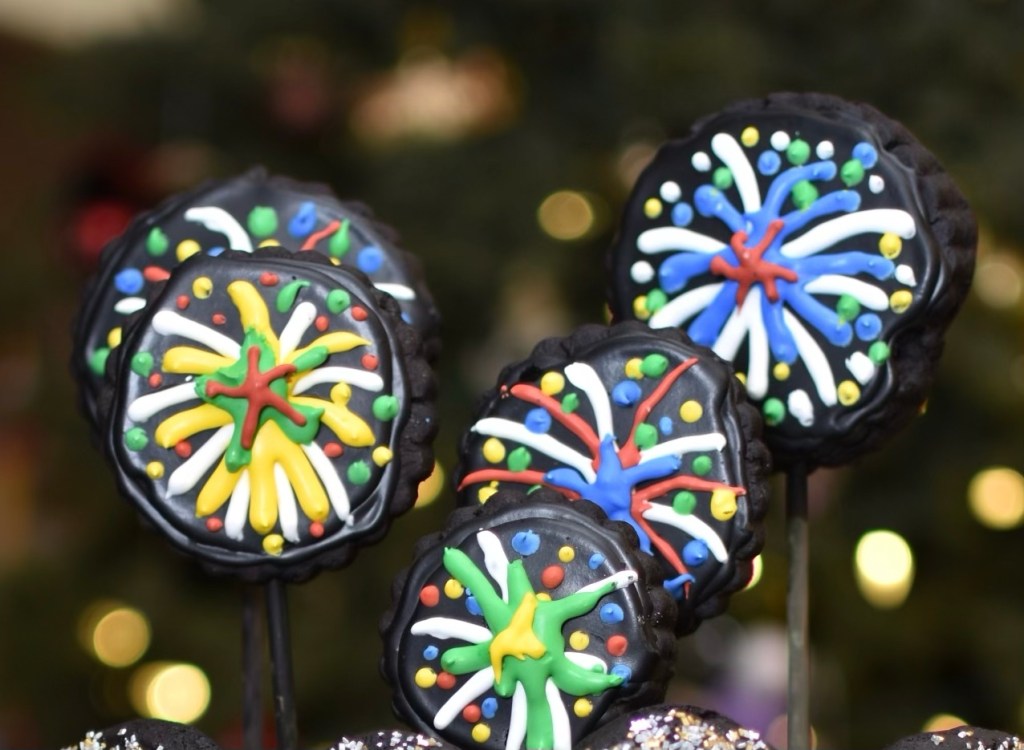
I made these cookies as the base for decorations for my NYE 2023 cake. They were so good I decided to post the recipe alone
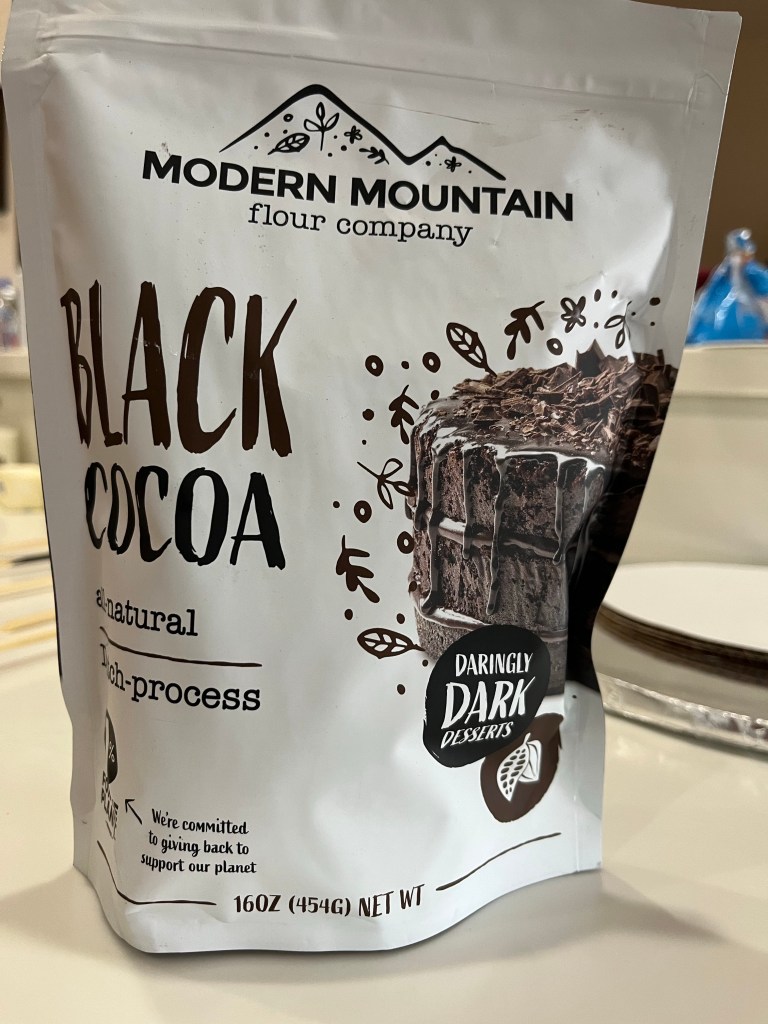
The secret to these cookies is the black cocoa. I bought this for another project a year or so ago, but now use it regularly. If you want BLACK frosting, royal icing or other goodies, this should be your go to ingredient.
The recipe made about four dozen 2” cookies . No tricks or tips, just follow the recipe.
Black Chocolate Cookies
INGREDIENTS • 1 1/2 cups (195g) AP flour • 3/4 cup (70g) unsweetened black cocoa powder • 1 teaspoon baking soda • 1/4 teaspoon kosher salt • 1/2 teaspoon espresso powder • 1 stick (110g) unsalted butter, room temperature • 3/4 cup (150g) sugar • 1 large egg • 1 1/2 teaspoons vanilla • 1 teaspoon molasses
METHOD
In a large bowl, vigorously whisk together the flour, cocoa, baking soda, salt, and espresso powder.
Cream the butter and sugar until light and fluffy, (2-3 min on medium.)
Beat in the egg, vanilla, and molasses.
Add the dry ingredients to the wet in 3 additions. When well mixed, remove the dough from the mixer, and form it into a ball. It should have the consistency of soft clay. If it’s stiff and unmanageable, massage some water into it, a tablespoon at a time until easily pliable.
Wrap it in plastic wrap, and chill it in the refrigerator for at least one hour.
When you are ready to roll-out the dough, preheat the oven to 350°F (175° C). Break off a chunk of dough from the ball of dough (about a quarter of it) and place it between two pieces of parchment paper. Use a rolling pin to roll the dough out to an even 1/2-inch thickness.
Use a cookie cutter or the rim of a small glass to cut out cookie shapes from the rolled out dough. Place on a parchment paper or silicone-lined baking sheet, allowing at least 1 inch between cookies on the cookie sheet.
Bake at 350°F (175° C) in the middle rack for 12 to 14 minutes, less or more, depending on the size and thickness of the cookies.
The cookies should bounce back when you press on their centers and be a little dark around the edges. When cool, they should be crispy.
Remove from oven and let cool for 5 minutes before removing the cookies from the tray to cool on a rack.
The problem with New Year Eve is… I can’t stay up past east coast midnight anymore. I made a cake for New Year’s 2022 that went over so well, I was asked to make one for this year. If you follow/know me, you know I said “Yes” before the question was complete.
As usual I searched the internet for ideas until I found a design I liked. It had a nice dark midnight blue frosting so with another search found the ratio of food coloring to approach that color. It’s always good to try new techniques and develop new skills with big bakes like this, (four layer 9” cake to augment cheese cakes for about 60 people.)
I made the four 9” Extreme Chocolate Cakes, wrapped them in plastic wrap and placed them on flat surfaces in the freezer. I will take them out to thaw the day before New Year’s Eve. (New Year’s Eve eve?)
Making the black chocolate cookies is straightforward. I use Modern Mountain Black Cocoa rather than Hershey’s Special Dark (my go to.)
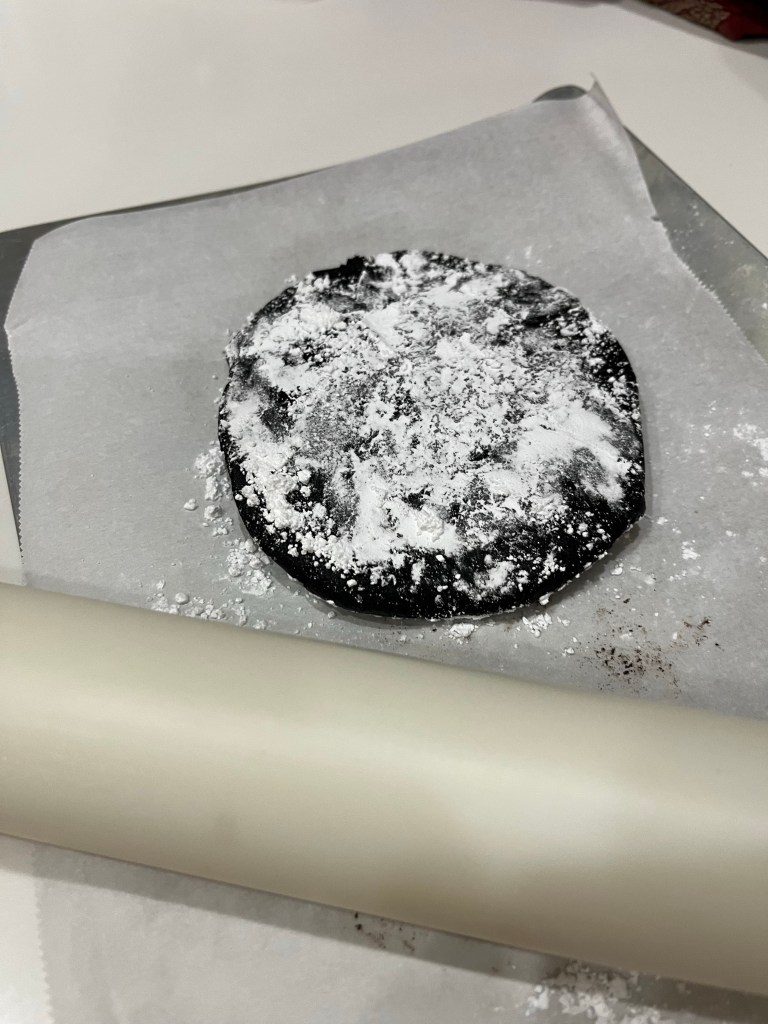
The dough should be pliable, not softRoll the dough out between parchment paper and dust with powdered sugar.
Making black royal icing isn’t as easy as making the cookies. I made a regular royal icing and added two tablespoons of the black cocoa and about 20 drops of black food coloring. Even that much food coloring in about a cup of royal icing only turns it dark gray, and detracts (big time) from the taste. The black cocoa (be sure to sift it before adding) turns the royal icing black.
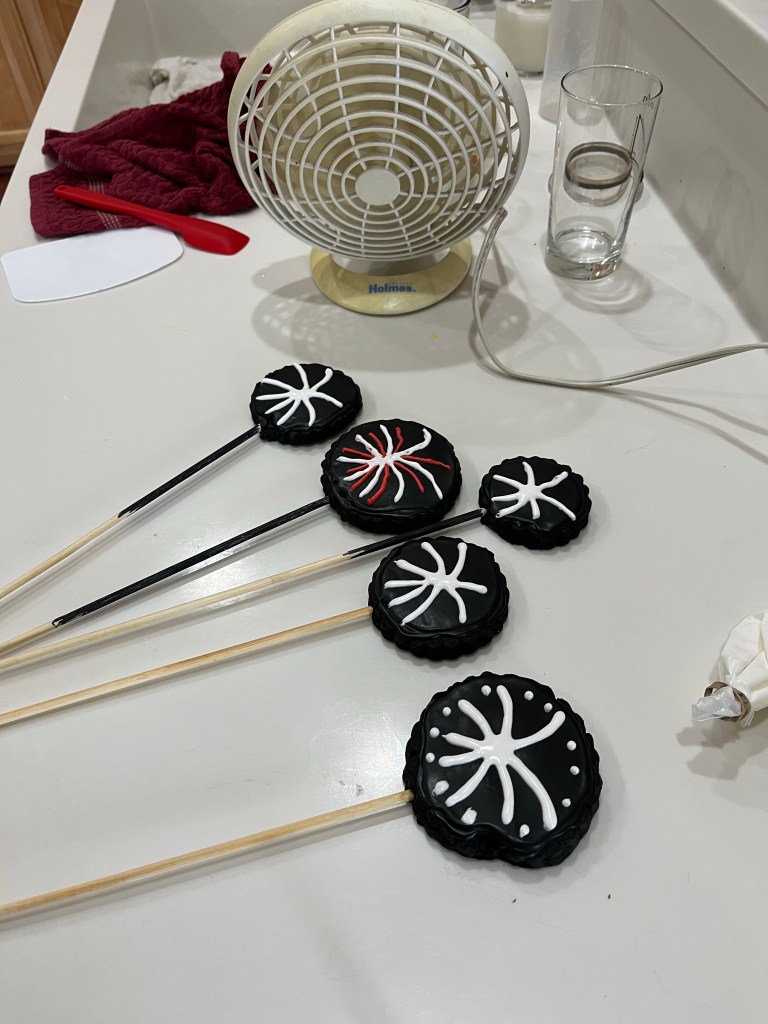
Retained cookie shape after chillingThis is pure black royal icing.Oops! My damn dam wasn’t high enough
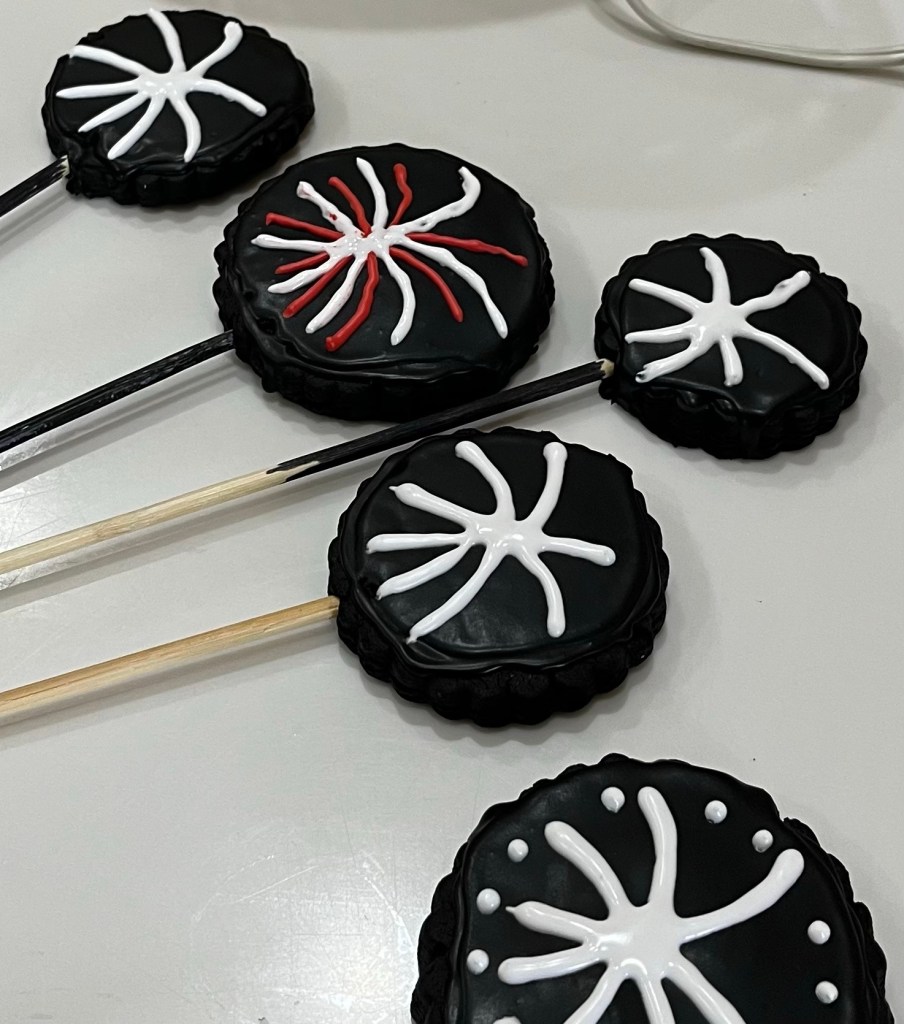
Chilling the cookie dough preserves the “star burst” shape after baking. As soon as the cookies come out of the oven insert skewers most of the way through them. Later you will paint them black. (On second thought, why not paint them with edible black paint before baking the cookies? Next time.) These cookies are VERY crispy and taste like chocolate cake.
I tried an edible black marker to paint the skewers. Not worth the effort and ordered some edible black paint.Allow each color to dry before piping another colorPiped white royal icingFinished “Fireworks” cookies.
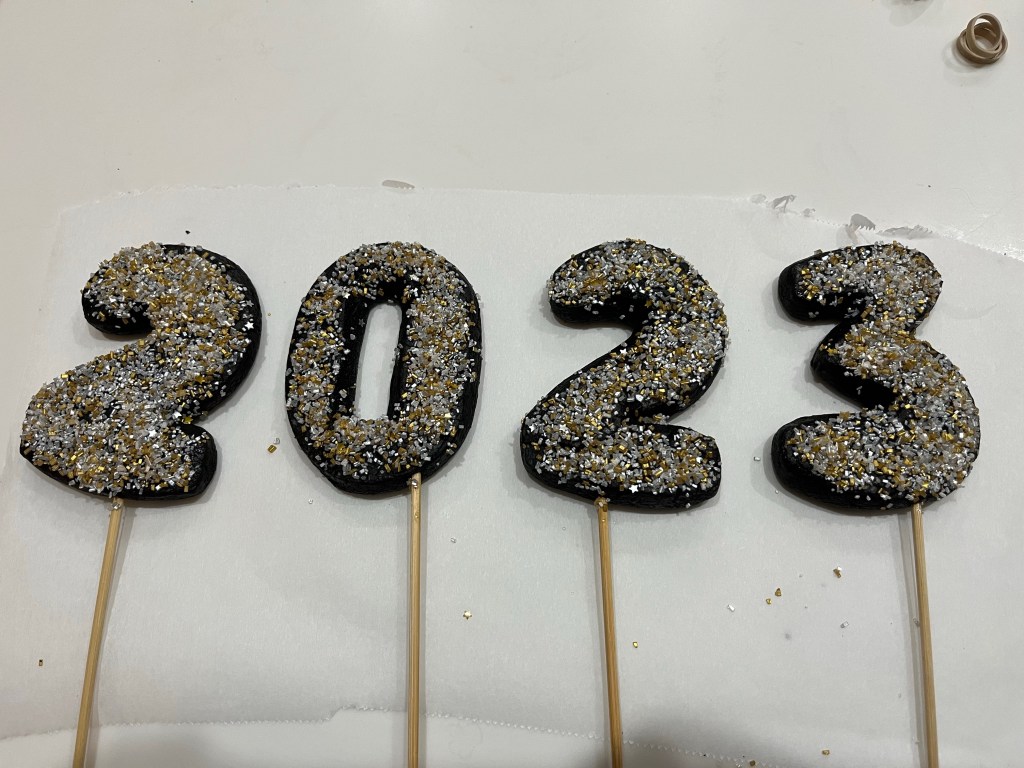
Finally, Amazon delivered my number cookie cutters. (To be fair, we only ordered them last night.) I made the second batch of chocolate cookie dough yesterday so when they arrived I started the over, cut the numbers (and a bunch of smaller cookies for QC and I to enjoy) and baked them. Once done I immediately inserted a small skewer into each number and let them cool and turn crispy. Once cool, I made a concentrated sugar water, painted the cookies then coated them with star shaped sprinkles.
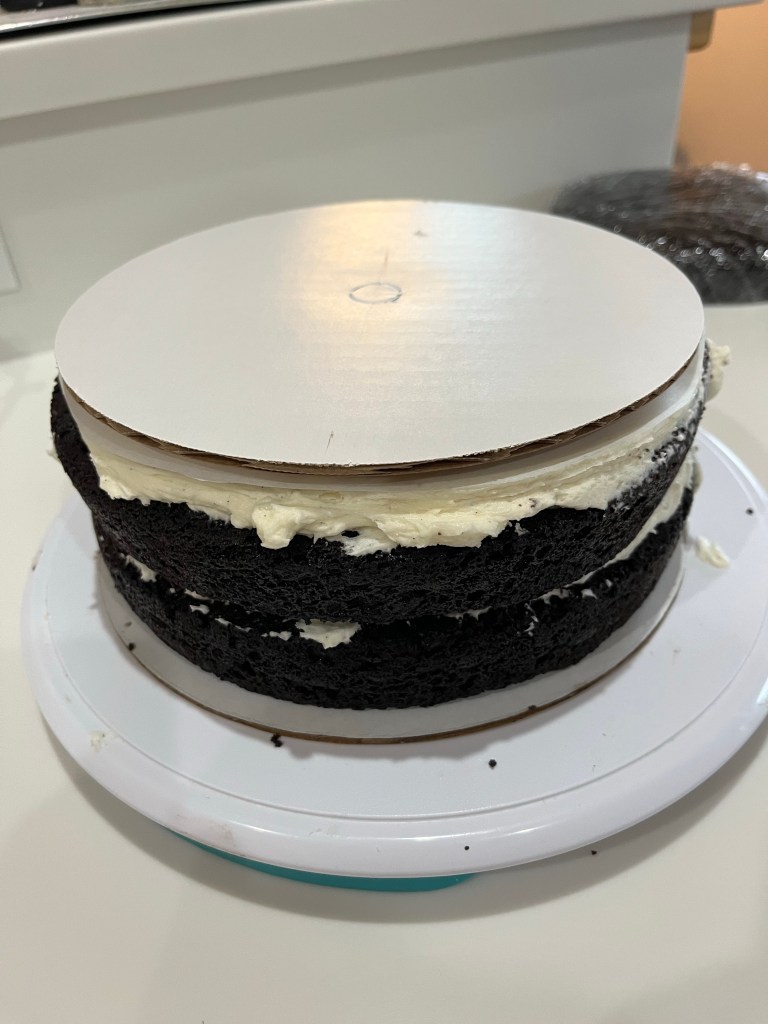
It required 6 cups of white buttercream to crumb coat the whole cake. 4 more cups of midnight blue buttercream frosting finished the cake. I wish I could make my surfaces as smooth and clean as seen online. Oh well.
Crumb coated bottom two layersParchment paper circle and 8” cake plate on top of bottom 2 yayersMidnight Blue frosted cake.
Black Royal Icing
INGREDIENTS
• 4 cups (480g) confectioners’ sugar, sifted • 3 Tablespoons meringue powder (not plain egg white powder) • 5 drops black food coloring • 2 Tbl Black Cocoa (sifted) • 9–10 Tablespoons room temperature water
METHOD
Pour confectioners’ sugar, meringue powder, black food coloring, black cocoa and 9 Tablespoons of water into a large bowl.
Using a hand mixer or a stand mixer fitted with a whisk attachment, beat icing ingredients together on high speed for 1.5 – 2 minutes.
When lifting the whisk up off the icing, the icing should drizzle down and smooth out within 5-10 seconds. If it’s too thick, beat in more water 1 Tablespoon at a time. I usually need 10 Tablespoons but on particularly dry days, I use up to 12-14 Tablespoons. Keep in mind that the longer you beat the royal icing, the thicker it becomes. If your royal icing is too thin, just keep beating it to introduce more air OR you can add more confectioners’ sugar.
When applied to cookies or confections in a thin layer, icing completely dries in about 2 hours at room temperature. If icing consistency is too thin and runny, it will take longer to dry. If the icing is applied very thick on cookies, it will also take longer to dry. If you’re layering royal icing onto cookies for specific designs and need it to set quickly, place cookies in the refrigerator to help speed it up. You can also use a fan to help set the icing.
Black Chocolate Cookies
INGREDIENTS
• 1 1/2 cups (195g) AP flour • 3/4 cup (70g) unsweetened black cocoa powder • 1 teaspoon baking soda • 1/4 teaspoon kosher salt • 1/2 teaspoon espresso powder • 1 stick (110g) unsalted butter, room temperature • 3/4 cup (150g) sugar • 1 large egg • 1 1/2 teaspoons vanilla • 1 teaspoon molasses
METHOD
In a large bowl, vigorously whisk together the flour, cocoa, baking soda, salt, and espresso powder.
Cream the butter and sugar until light and fluffy, (2-3 min on medium.)
Beat in the egg, vanilla, and molasses.
Add the dry ingredients to the wet in 3 additions. When well mixed, remove the dough from the mixer, and form it into a ball. It should have the consistency of soft clay. If it’s stiff and unmanageable, massage some water into it, a tablespoon at a time until easily pliable.
Wrap it in plastic wrap, and chill it in the refrigerator for at least one hour.
When you are ready to roll-out the dough, preheat the oven to 350°F (175° C). Break off a chunk of dough from the ball of dough (about a quarter of it) and place it between two pieces of parchment paper. Use a rolling pin to roll the dough out to an even 1/2-inch thickness.
Use a cookie cutter or the rim of a small glass to cut out cookie shapes from the rolled out dough. Place on a parchment paper or silicone-lined baking sheet, allowing at least 1 inch between cookies on the cookie sheet.
Bake at 350°F (175° C) in the middle rack for 12 to 14 minutes, less or more, depending on the size and thickness of the cookies.
The cookies should bounce back when you press on their centers and be a little dark around the edges. When cool, they should be crispy.
Remove from oven and let cool for 5 minutes before removing the cookies from the tray to cool on a rack.
Extreme Chocolate Cake
Makes two 9” round cakes (double for this cake) INGREDIENTS (Makes one 10’ ROUND CAKE [and two 5”] – quantities are in parenthesis. Or one 11”x15”x2” sheet cake.) • 2 cups white sugar (3) • 1 3/4 cups all-purpose flour (2 2/3) • 3/4 cup unsweetened cocoa powder (1 ¼) • 1 1/2 teaspoons baking soda (2 ¼) • 1 1/2 teaspoons baking powder (2 ¼) • 1 teaspoon salt (1 ½) • 2 eggs (3) • 1 cup milk (1 ½) • 1/2 cup vegetable oil (¾) • 2 teaspoons vanilla extract (3) • 1 cup boiling water (1 ½)
METHOD
Preheat oven to 350 degrees F (175 degrees C). Grease and flour two 9 inch cake pans.
Use the first set of ingredients to make the cake. In a medium bowl, stir together the sugar, flour, cocoa,baking soda, baking powder and salt. Add the eggs, milk, oil and vanilla, mix for 3 minutes with an electric mixer. Stir in the boiling water by hand. Pour evenly into the two prepared pans. (For cupcakes,portion ¼ scant cups in each cupcake paper.
Bake for 30 to 35 minutes in the preheated oven, until a toothpick inserted comes out clean or 205F internal temp. Cool for 10 minutes before removing from pans to cool completely.
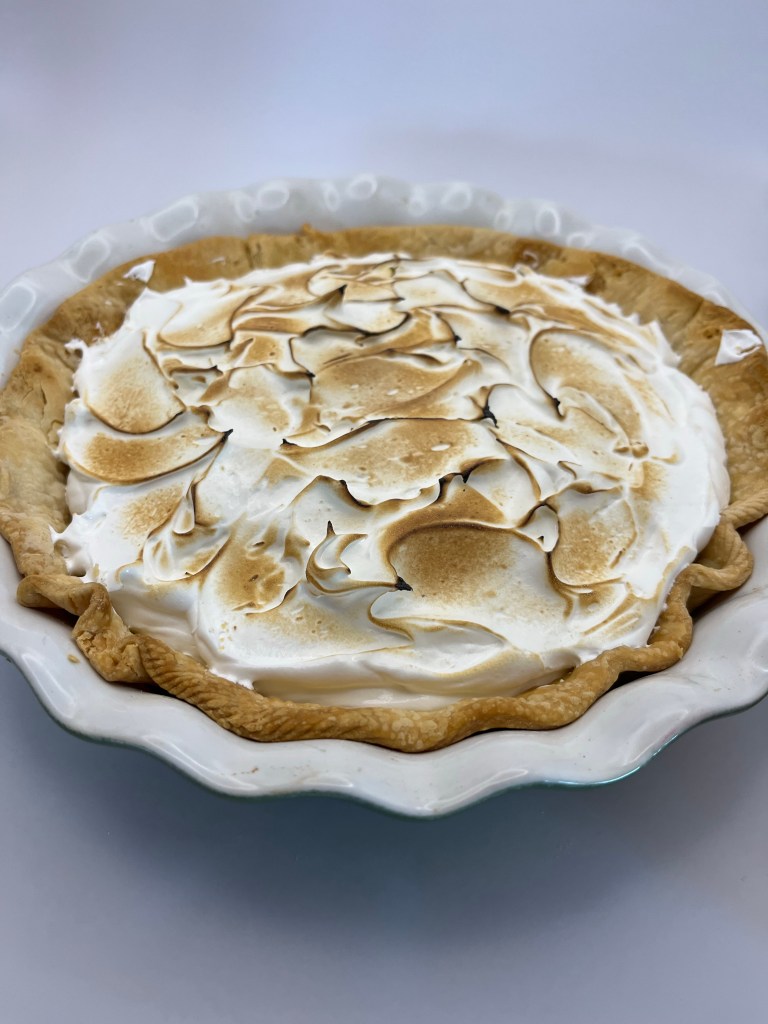
I needed a few cranberries for decoration on the Yule Cake, so with left over 11.75 oz of the 12 oz bag, I saw and made this recipe for a cranberry merengue pie. (You can take the boy out of Vermont…) Never having made one and needing a dessert to augment the smallish Yule Cake, I thought, Let’s give it a try, waste not, etc.
Macerating the cranberriesCooking berries, eggs and cornstarch until smoothPar-baked pie crustCranberry mixture poured into par-baked pie shellItalian Meringue, torch and cranberry pie.Meringue covered pie prior to torching.Torched Cranberry Meringue Pie
Cranberry Meringue Pie
INGREDIENTS For the filling: • 1 12-ounce bag whole cranberries, fresh or frozen • 3/4 cup water • 1 cup granulated sugar • 3 large egg yolks • 3 tablespoons cornstarch • 4 tablespoons cold salted butter, cubed • 1 8- or 9-inch pie crust, any kind, par-baked if necessary For the meringue: • 150g (or ¾ cup) granulated sugar • 60ml (or ¼ cup) water • 60g (or ¼ cup) egg whites (about 2 large egg whites)
METHOD To make the filling,
Combine the cranberries, water, and sugar in a medium saucepan with a lid. Cover the pot and bring to a boil over medium-high heat. Continue boiling for 3-5 minutes, or until the cranberries have totally disintegrated and the mixture is thick and gloopy. Use a potato masher to speed things up.
While the cranberries cook, whisk the egg yolks and cornstarch in a large mixing bowl.
When the cranberries are done, scrape the contents of the saucepan through a fine mesh sieve into the bowl with the eggs and cornstarch. Stir and press on the solids in the sieve until you’ve extracted all the liquid you possibly can, then scrape whatever’s on the bottom of the sieve into the bowl.
Whisk the cranberry-egg-cornstarch mixture together thoroughly, pour it back into the saucepan, and bring to a boil over medium heat, whisking constantly.
Cook at a full boil for 3 full minutes while whisking. Finally, whisk in the butter piece by piece until it’s completely incorporated and pour the filling into a prepared pie crust.
Cool on a rack at room temperature until there’s no heat coming off the bottom of the pan, then refrigerate overnight (or about three hours if you’re on deadline and like living dangerously).
ITALIAN MERINGUE
In a medium-sized saucepan, combine the sugar and water. Heat over low heat, stirring until the sugar has dissolved. Once the sugar has dissolved, turn the heat to medium-high and allow the syrup to come to a boil.
In the meantime, add the egg whites to a medium-sized, heatproof bowl and mix (with a mixer fitted with the whisk attachment) until foamy and the whites are almost able to hold soft peaks.
Once the syrup is boiling, clip on a candy (or sugar) thermometer.
Cook until the syrup reaches 116°C/240°F, then take the pan off the heat and slowly drizzle the hot syrup into the bowl with the foamy egg whites, mixing continuously to prevent the eggs from scrambling. Don’t pour the syrup onto the whisk, or the syrup may splatter against the sides of the bowl (or into your face!). Instead, aim for a spot close to the whisk.
Once all the syrup has been added, keep mixing until the bottom of the bowl feels cool to the touch and the meringue has cooled down to body temperature.
Use immediately or keep in the fridge (covered) until ready to use. It’s a very stable meringue, so it won’t start weeping, leaking or collapsing.
NOTES Italian meringue can be made two days in advance and stored in the fridge until needed (covered with plastic wrap,) or transferred to a piping bag, sealed, then placed in the fridge.
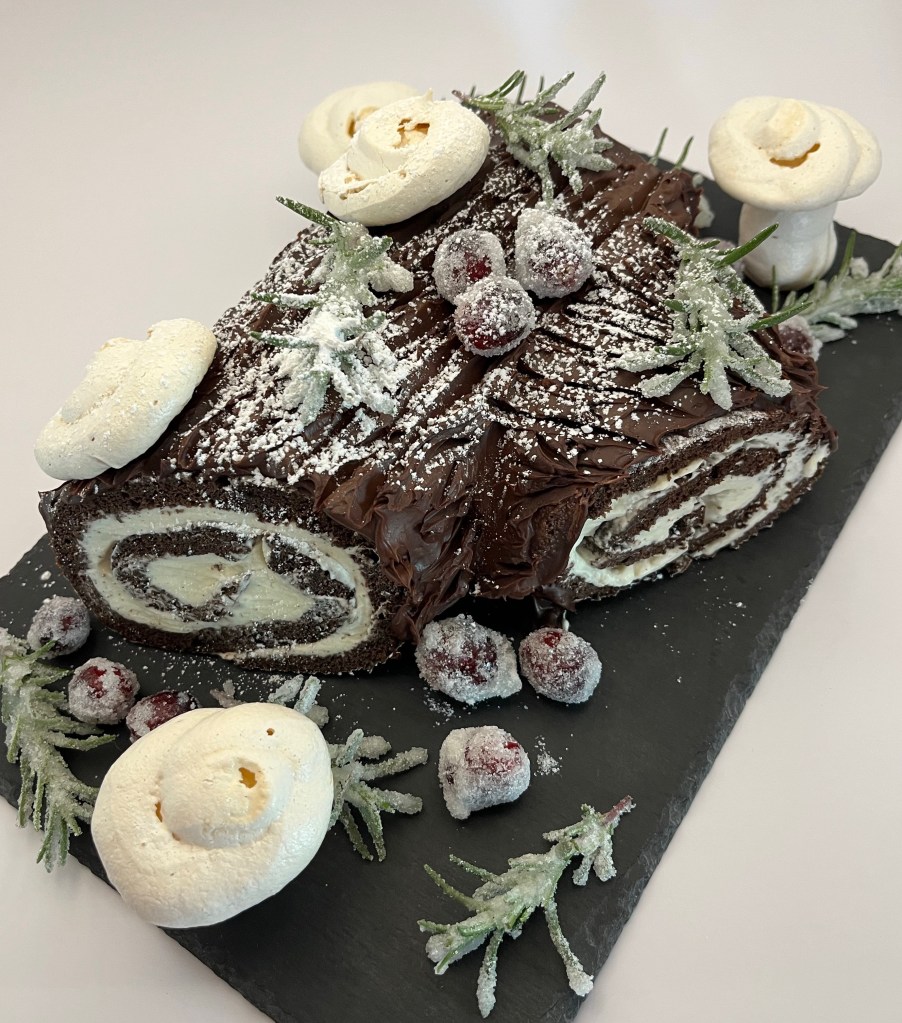
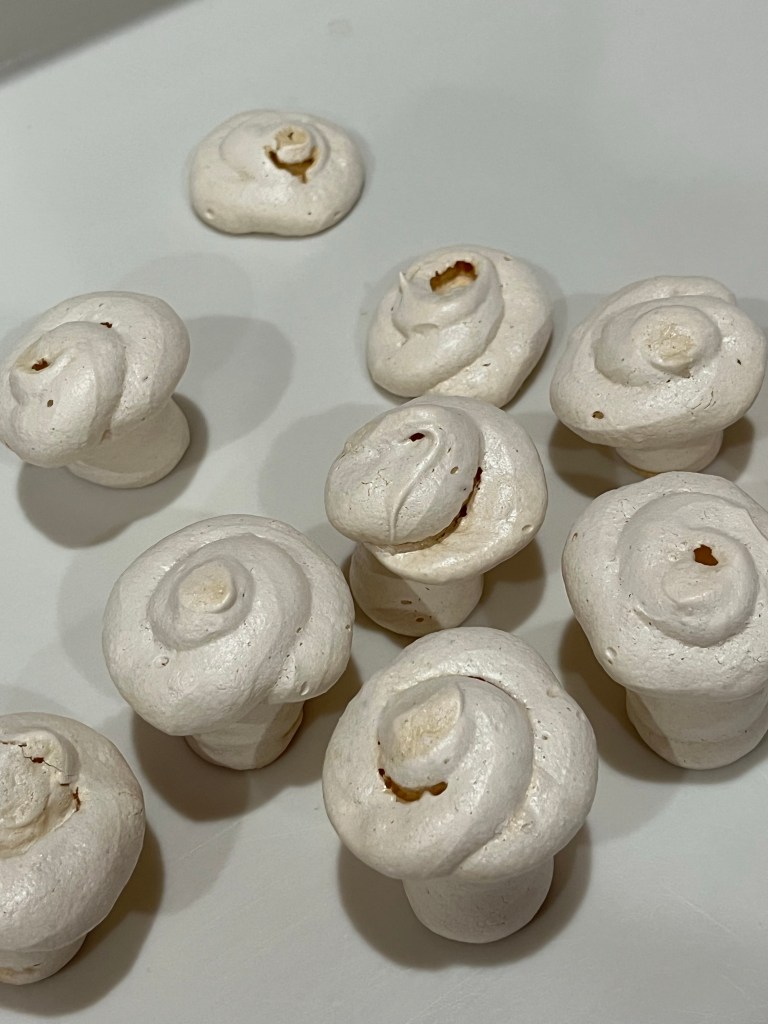
I made a Yule Log cake a couple of years ago and while it was good, but it wasn’t Cake Wall of Honor good (see below.) This years just might be. It has chocolate Swiss roll with whipped cream filling, glazed and sugared cranberries and rosemary, merengue mushrooms (not majic) and a dusting of confectioners sugar.
The chocolate was super thick until the whipped egg whites were added.Dollop the batter across the powdered parchment paper.Dolloping the batter makes it easier to spread evenly.Roll up in the parchment paper. Use confectioners sugar on every surface.After filling with whipped cream, re-roll, cut the end to make the side branch.
The recipe was cloned from a number of online suggestions. I took the parts I wanted and left the rest. Sorry I can’t reference them all, I didn’t keep notes.
Ingredients to sugar glaze cranberries and rosemaryGanache coated cakePiped mushroom caps and stalksPipe columns, trying to make them straight. They WILL fall over. Pipe flat disks for the tops.Striated “bark” ganache
Chocolate Swiss Roll Cake
INGREDIENTS Cake • 4 large eggs, separated • 1/3 cup (65g) granulated sugar • 1/3 cup (65g) packed light or dark brown sugar • 1 Tablespoon (15ml) strong brewed coffee • 1/4 cup (60g) unsalted butter, melted (see note) • 1 teaspoon pure vanilla extract • 1/2 cup (62g) all-purpose flour • 3 Tablespoons natural unsweetened cocoa powder • 1 teaspoon baking powder • 1/4 teaspoon salt Vanilla Whipped Cream • 1 cup (240ml) cold heavy cream or heavy whipping cream • 3 Tablespoons (38g) granulated sugar or confectioners’ sugar • 1 teaspoon pure vanilla extract
METHOD
Preheat oven to 350°F (177°C). Spray a 12×17 inch baking pan (Half sheet) with nonstick spray or grease with butter, so the parchment paper sticks. Then line it with parchment paper so the cake seamlessly releases. Spray or grease the parchment paper too. We want an extremely nonstick surface for this cake roll. Place the stand mixer bowl and whip into the freezer
Make the cake: Using a hand mixer or a stand mixer fitted with whisk attachment, beat the egg whites and granulated sugar together in a medium bowl on high speed for 5 minutes or until stiff peaks form. Set aside. In another bowl, beat the egg yolks, brown sugar, and vanilla extract together until pale and creamy, about 2 minutes.
Sift the flour, 3 Tablespoons cocoa powder, baking powder, and salt together into a large bowl bowl. Pour the melted butter, coffee, and egg yolk mixture over the dry ingredients. Beat everything together on medium speed until completely combined. Using a rubber spatula or wooden spoon, gently fold in the egg whites until completely combined. Avoid over-mixing and deflating those whites. Batter will be very light.
Spread batter evenly into prepared pan. It will be a very thin layer. Tap the pan fairly hard on the counter to smooth out the top. Bake for 10 minutes or until the top of the cake gently springs back when touched with your finger. Do NOT over-bake.
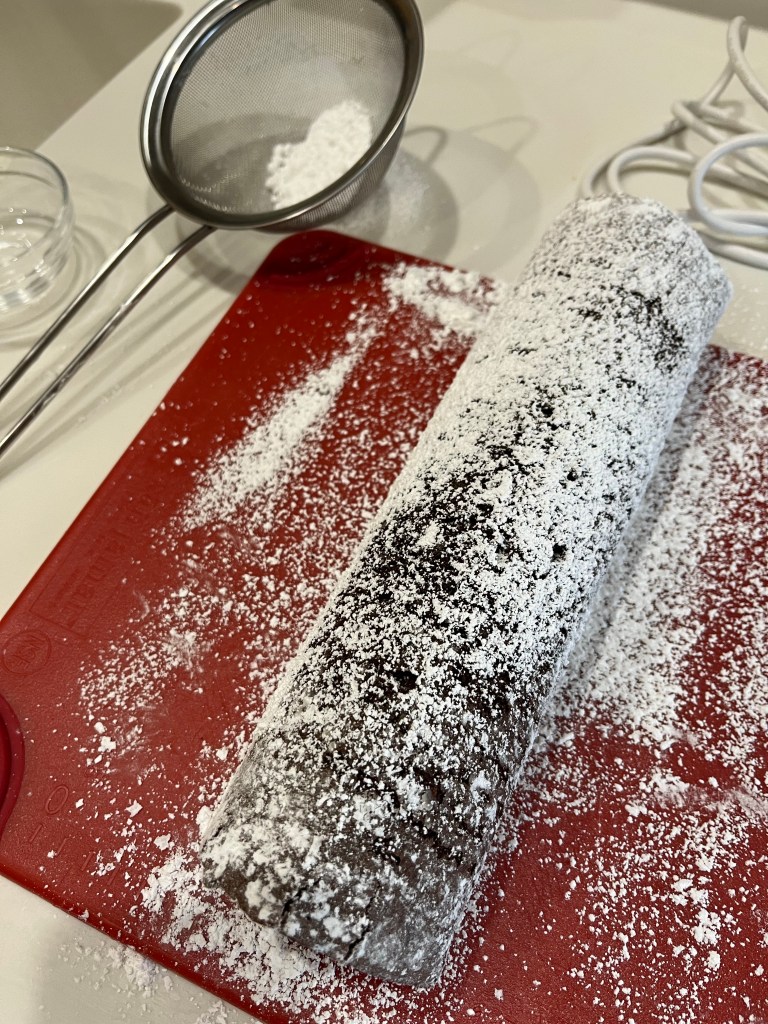
Roll the cake: As the cake bakes, place a piece of parchment paper flat on the counter. Sprinkle with a light coating of confectioners sugar. Once the cake comes out of the oven, immediately invert it onto the parchment paper. Peel off the parchment paper that was on the bottom of the cake as it baked, then dust the recently exposed cake with more confectioners sugar. Starting with the narrow end, slowly and gently roll the cake up with the parchment. The cake will be warm. Allow the cake to cool completely rolled up in the parchment. Place in the refrigerator for 2-3 hours.
Remove the cake roll from the refrigerator and allow to sit on the counter for a few minutes to warm up as you prepare the whipped cream.
Make the whipped cream:
Remove the mixer bowl and whisk from the freezer, whip the heavy cream, sugar, and vanilla extract on medium-high speed until medium to stiff peaks form, about 2-3 minutes.
Gently unroll the cake. Dollop the whipped cream on top, and carefully spread, leaving about a 1/2 inch border around the cake. Gently roll the cake back up, without the parchment/towel this time. Diagonally cut about 4” off the end of the log and position along one side.
Set aside in the refrigerator as you prepare the ganache.
Ganache Topping
Heat cream to near boiling
Pour over chocolate and let sit until chocolate softens
Beat with a spoon until blended and shiny. It won’t be pretty at first but will eventually come together into a uniform shiny chocolate.
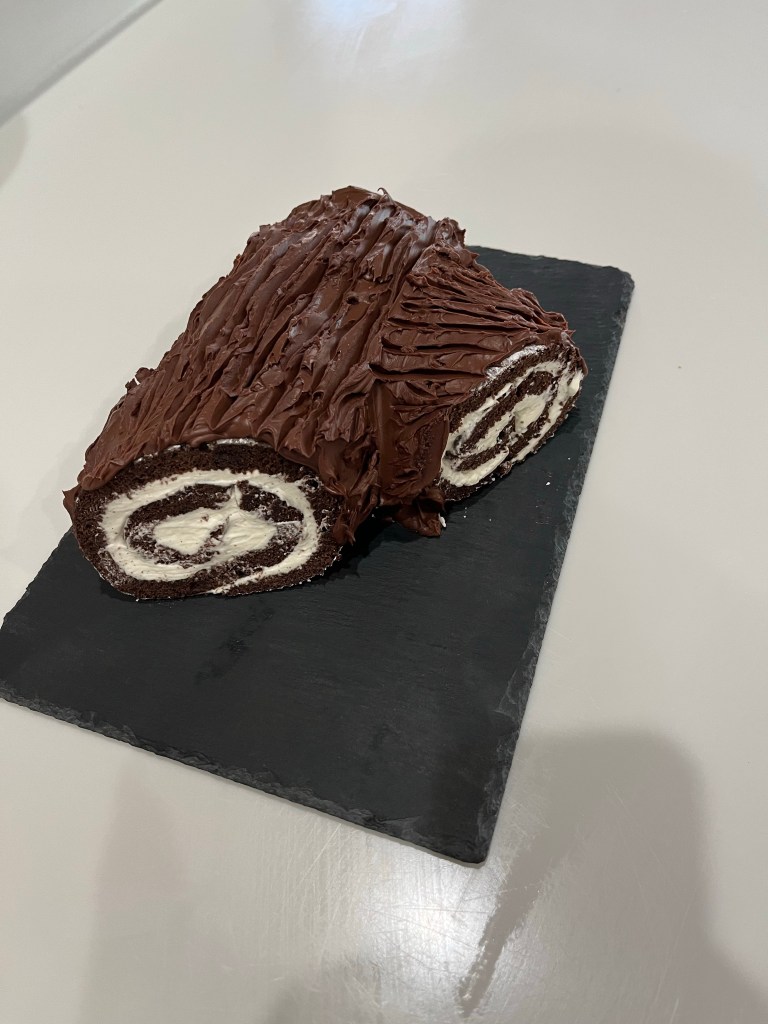
Before the ganache firmest to frosting consistency use some to “glue” the branch on the log and fill in any cracks
When the ganache is a spreading consistency spread over the cake
Before completely set, use the tip of a knife to striate the ganache to resemble bark. Do not be to careful. It will look more natural if it imperfect. That’s my story, and I am sticking to it.
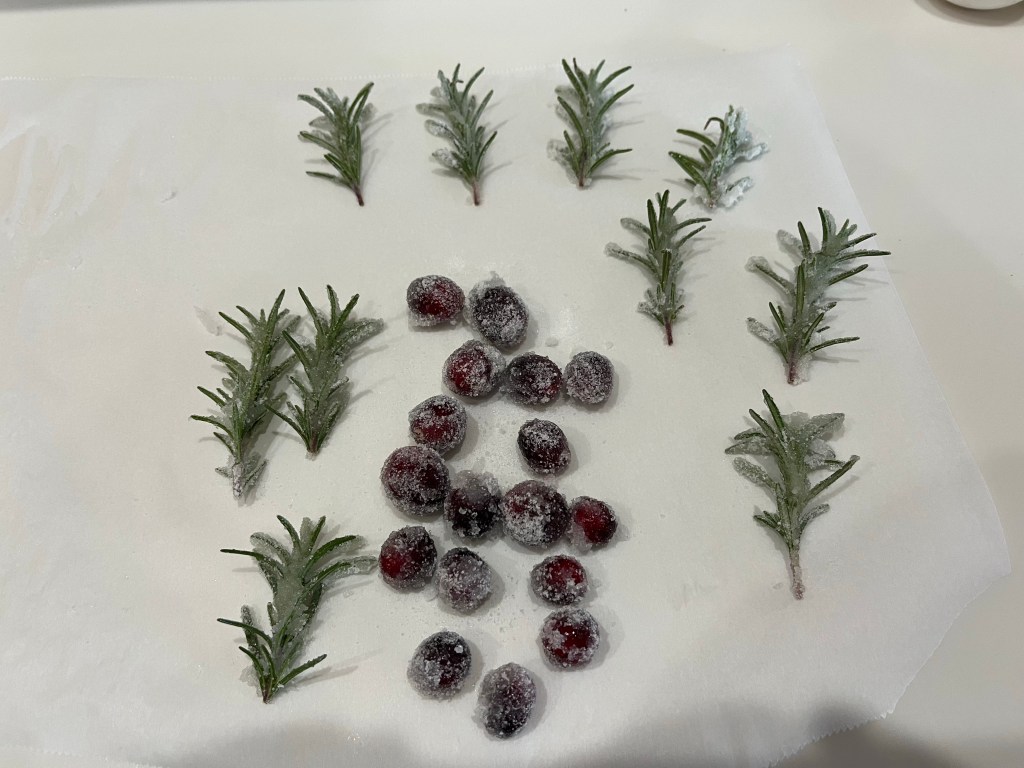
To make sugared cranberries and rosemary,
add 1/2 cup of sugar and 1/2 cup of water to a boil over medium-high heat.
Reduce heat and simmer for 5 minutes, until sugar has melted. Remove from heat and let cool for about 10 minutes.
Spread 1/2 cup of sugar evenly on a shallow dish.
Dip cranberries and rosemary springs to the sugar water, then roll in the sugar.
Hanukkah starts Sunday at sundown. Jelly donuts are always a part of our Hanukkah celebration. Of course, it’s part of many of our celebrations… like Thursdays, or the First of The Month Days and many others.
Making these donuts is strait forward with only a couple of possible pitfalls. One is to overwork the dough. Knead it for 2 minutes only! Another is to be sure it fully proofed. When poked, the dough should bounce back slowly, but bounce back. Lastly, regulate the frying temperature. Too hot and they will bake on the outside but not on the inside. Too cold and the donuts will be greasy.
You don’t need an occasion or excuse to make donuts. Try them anytime. It’s a fun bake and the results are delicious.
JELLY DOUGHNUTS
INGREDIENTS • 1 tablespoon dry yeast • ¾ cup about 100° F milk • ¼ cup melted butter • ¼ teaspoon kosher salt • ½ cup sugar • 1 large egg and 1 egg yolk, lightly beaten • 2 ½ to 3 cups all-purpose flour, divided • ¼ teaspoon ground nutmeg • Vegetable oil for frying • ¾ cup jam or jelly, any flavor For the Coating: • 1 cup sugar • ½ teaspoon ground cinnamon METHOD
Generously flour a clean work surface and lightly oil a medium-size bowl.
In the bowl of a standing mixer, add the warm milk, then sprinkle the yeast over the milk. Using the dough hook in the stand mixer, stir to dissolve and allow it to sit until it gets foamy, about 10 minutes. Add the butter, salt and sugar, and stir to combine. Blend in the egg and egg yolk, then beat in 2 cups of the flour. Beat until the dough starts to pull away from the sides of the bowl, then beat in another ½ cup flour plus the nutmeg.
When the batter has formed into a cohesive ball, turn it onto the floured work surface and knead the dough for two minutes. (No more!) Add more flour as needed if the dough feels too sticky. Form the dough into a ball, and place in the oiled bowl. Cover with a dishtowel or plastic wrap and let sit in a warm, draft-free place until the dough has doubled in volume, about 1 hour. Check with the poke test.
Re-flour your work surface. Turn the dough onto the floured surface and roll it out with a floured rolling pin to a ½-inch thickness.
Depending on how big you want your final donuts (2 1/2 – 3 inch) cookie cutter, cut as many rounds as you can,. Gather the scraps, let them sit for another 15 minutes, then roll the dough out again, and cut as many more circles as possible. Place the circles on a very lightly floured baking sheet with a couple of inches between each doughnut, cover with a clean dishtowel or loose plastic wrap, and let sit for about 1 hour, until they are quite puffy, about 1 inch thick.
About 15 minutes before you are going to fry the doughnuts, place paper towels on a clean surface. Make the sugar coating: In a shallow bowl, mix together the 1 cup sugar with the cinnamon. And pour at least 2 inches of oil into a deep skillet or pan. Heat to 375° F over medium heat.
Use a spatula to transfer two or three doughnuts into the pan. They will rise and bob on the surface; fry for about 1 minute, until golden brown on the underside, then flip them and cook until the second side is golden brown, another 1 to 2 minutes. You can occasionally gently press the doughnuts down into the oil to cook the sides evenly. Remove the doughnuts, allowing excess oil to drain back into the pan, and let them rest for a minute on the paper towels.
Then place them in the bowl with the sugar coating and turn to coat completely.
Use a chopstick or wooden dowel to poke a hole into the side of each doughnut, and as you slide it in, give it a wiggle to create a small pocket in the center of the doughnut. Fill a pastry bag or sturdy plastic bag with the jelly. Insert the pastry bag into the hole on the side of the doughnut. Gently squeeze a couple of teaspoons of jelly into the middle of the doughnut. Remove the bag carefully from the doughnut, and repeat until all the doughnuts are filled.
I was born and raised just a few miles from Charlotte, VT and never knew that had a pastry named for them. “Oh! What was that QC?” Sorry, I was just told Charlottes were not named for that town, rather the name originated from a pastry made in British, unless you prefer the “alternate facts” that point to Russian origins.
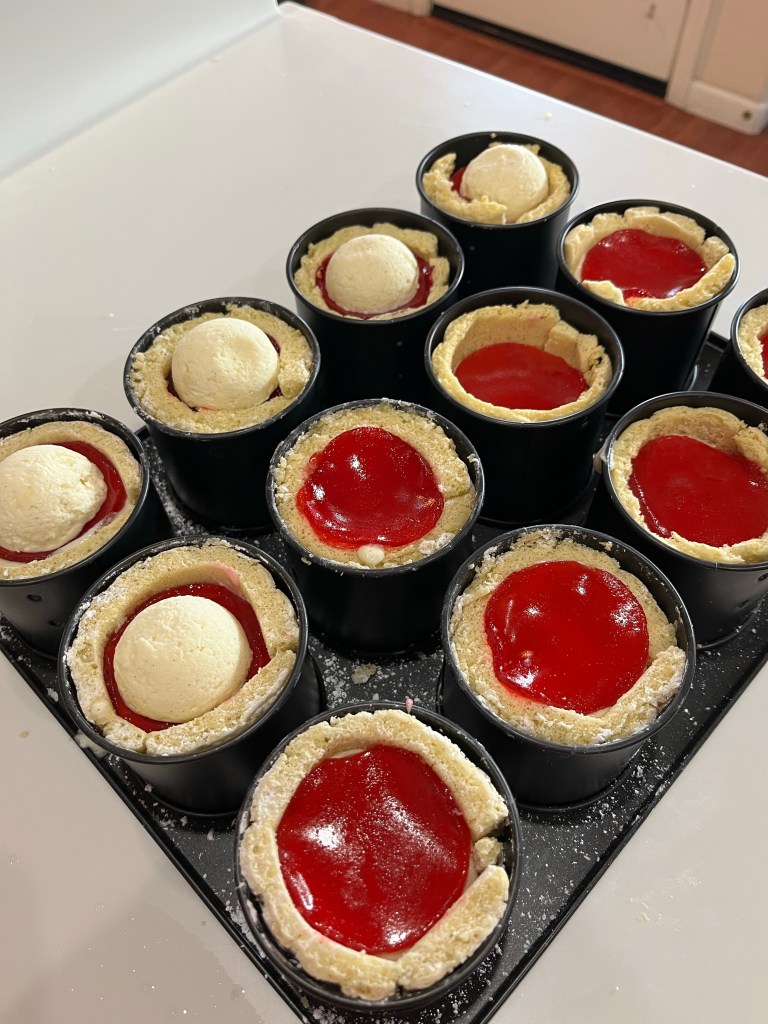
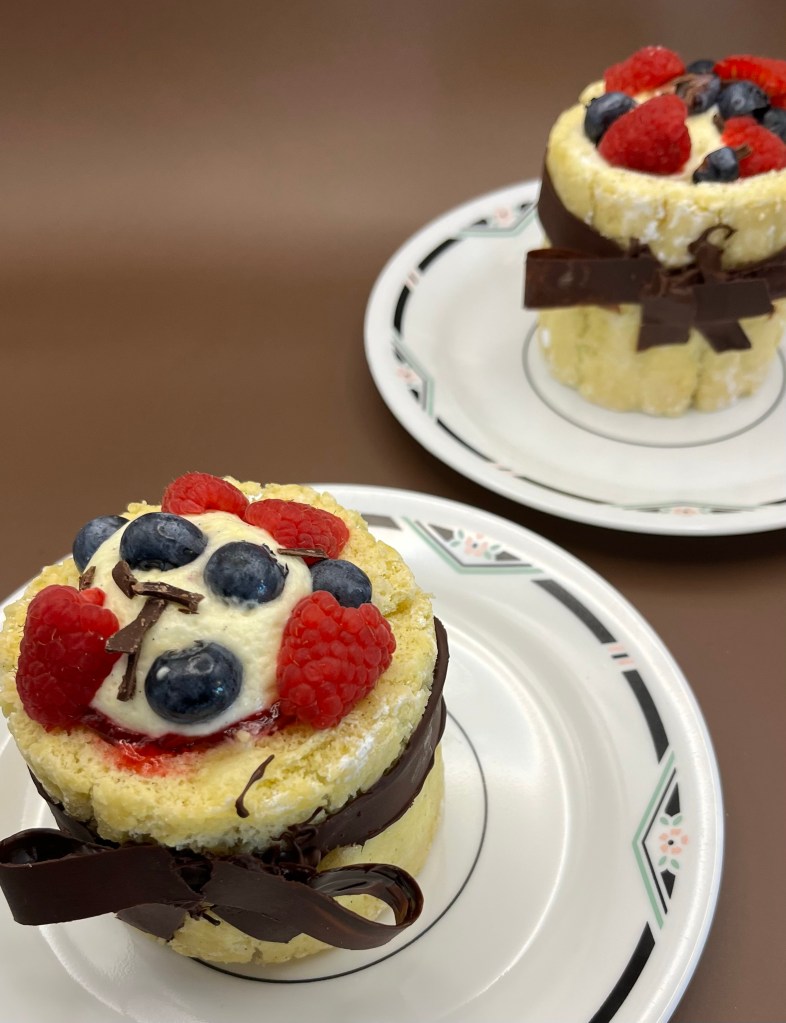
There are many variations of Charlotte cakes. After sampling so many amazing pastries in Paris, I decided to try some mini charlottes. They retain the charlotte basics of lady fingers, creams and berries. In this version the lady fingers are smaller than usual to fit into my entremet cups. The creme chiboust may not be “authentic” but maintains the essential of being a blend of creme patisserie and Italian meringue.
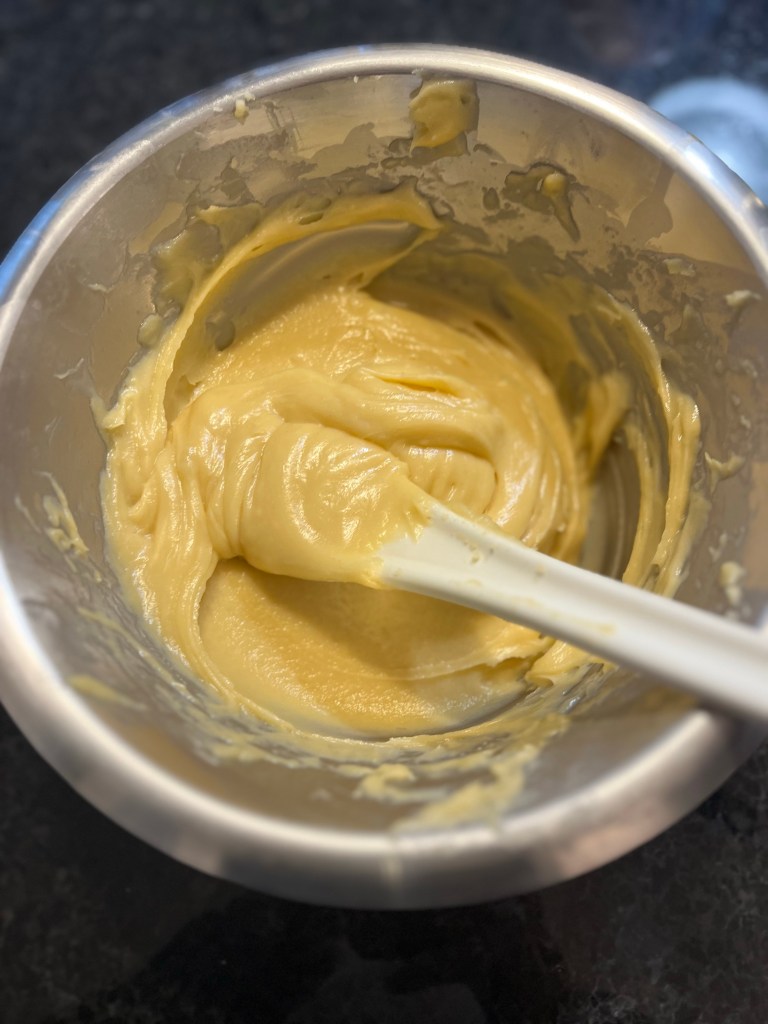
Creme chiboust ingredientsHeating ingredients (not the bananas)Sieving cooked creampat
For the the creme patisserie in eclairs I made last week I used the “old fashioned method” of tempering the eggs and adding back into the hot mixture. I prefer Martha Stewarts method of adding everything to the sauce pan, except the vanilla, heating until it thickens, sieving, then adding the vanilla and stir. Depending on how thick you want the final creampat you can heat the mixture as long or short as you wish.
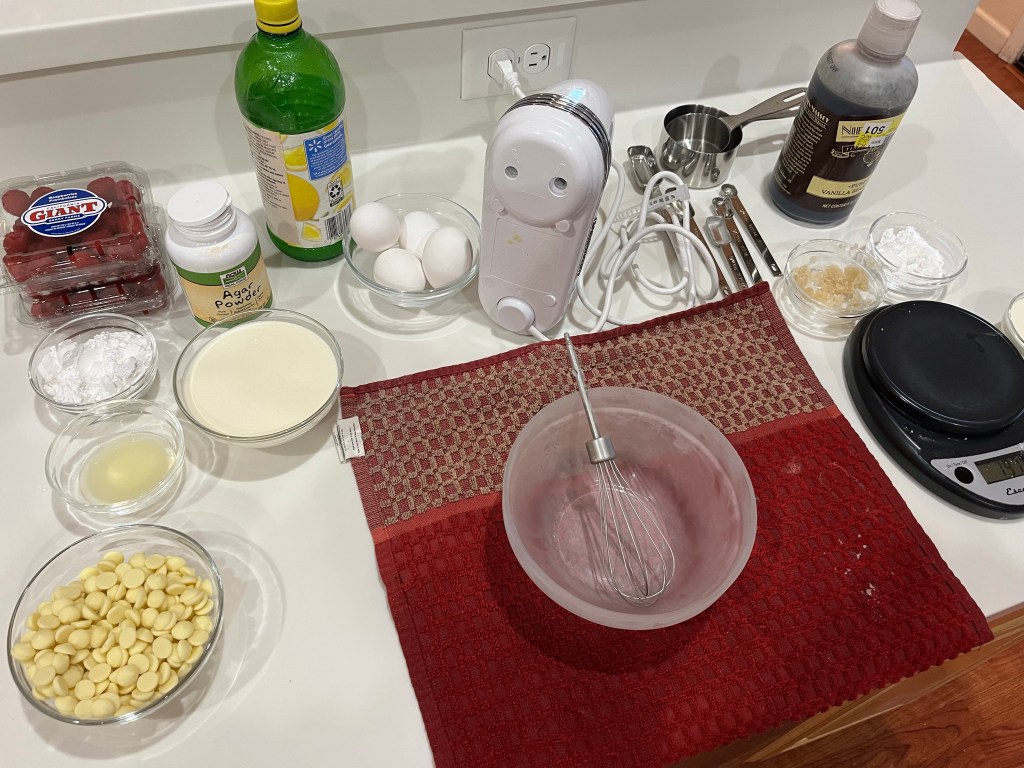
Heating sugar water to make Italian meringue Pouring hot sugar water into whipped egg whitesFinished Italian meringue. Delicious!
Once the creampat is cooled, whip the egg whites and cream of tartar to soft peaks. Meanwhile heat the sugar/water mixture to 240F. Drizzle the hot sugar water into the whipped egg whites and beat on high to firm peaks.
Creme Chiboust piped into moldsScrape excess from hemisphere mold
Fold the Italian meringue into the creampat without deflating the meringue. Pipe the resultant creme chiboust into hemispherical molds, cover with plastic directly on the creme chiboust and freeze. The diameter of the molds should be at least 1 cm less than the molds you will use to make the charlottes.
Pie plate lined with plastic wrapRaspberry jelly poured into pan
I was pleased (surprised?) how well the raspberry jelly set up and then released from the plastic wrap. I used agar agar to set the jelly (and everywhere else throughout this bake) to keep everything vegetarian.
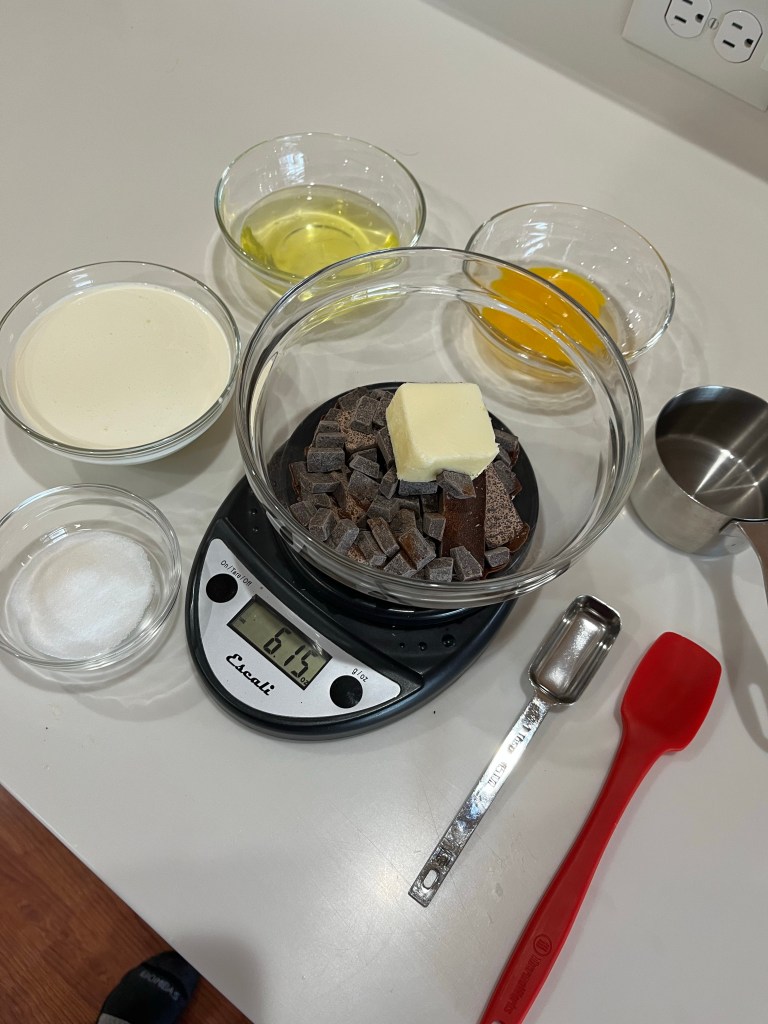
I set all the ingredients required for the chocolate mousse and took a picture. Unfortunately, that is the only picture I took during the process. Imagine, if you will, chocolate and butter on a Bain Marie. Imagine the stand mixer making whipped cream, then being cleaned and making a meringue, both with soft peaks. Imagine folding the two whipped ingredients into the cooled chocolate. Now, you are up to date.
Making the raspberry/white chocolate mousse is very similar to making the dark chocolate mousse. In fact, pretend the red raspberry puree is chocolate and you won’t even miss photos in the above section.
Imagine, if you will, I actually took pictures while making the raspberry mousse. Dang! I took a picture of all the ingredients (left) and of the completed raspberry confit (right,) but missed all the intermediate steps.
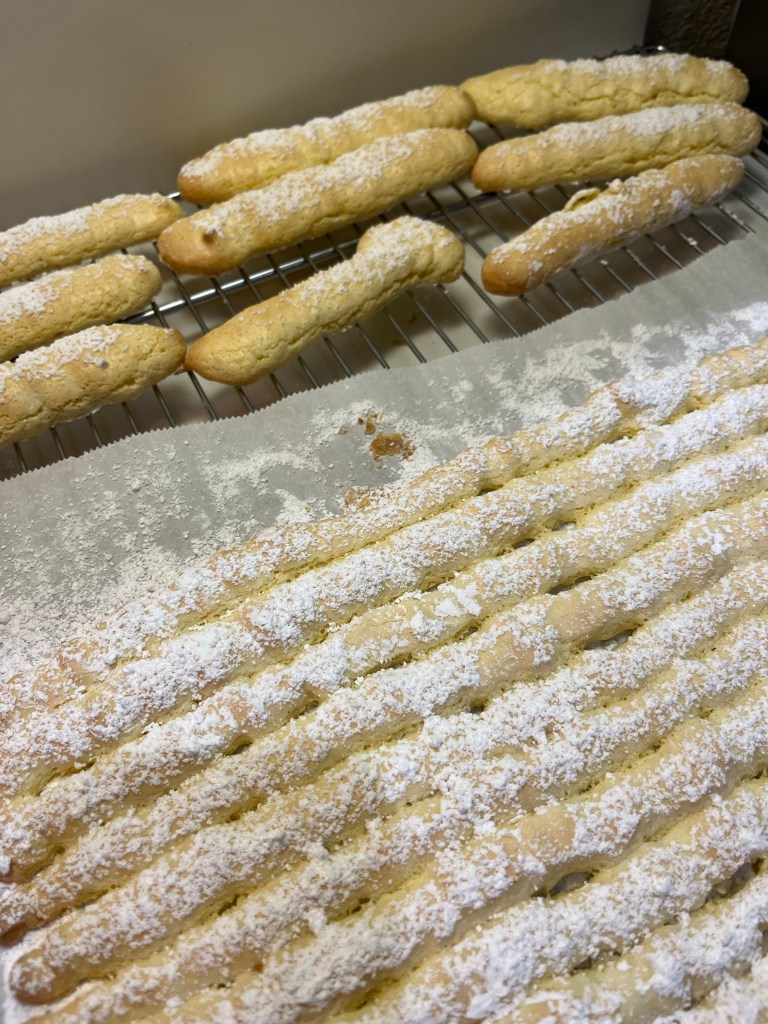
Consistency of lady finger batterPiped long lady fingers. These were too thin and too far apart.Left over lady fingers in back
The first batch of lady fingers were piped with too much space between them. Plus they were over baked and cracked when trying to bend them into the entremet molds. The lines of lady fingers should touch when baked to create a “sheet” that is smooth on one side and have the rounded “lady finger” look on the other. The second batch were just right, but only filled 8 of the 12 molds. The third batch were slightly underdone so I let them dry in the turned-off oven for a few more minutes. While they were then slightly over done, I was able to salvage enough to finish all twelve molds.
Filling molds with lady fingersFilling lined molds with mousse and raspberry jellyRemoving frozen creme chiboust domes from silicon moldsAdding creme chiboust domesCompleted charlottes, ready for freezer and finishing
Charlottes are traditionally wrapped with a ribbon. The set mousse should hold the cake together but the ribbon looks pretty and suggests it is (erroneously) required to hold the cake together.
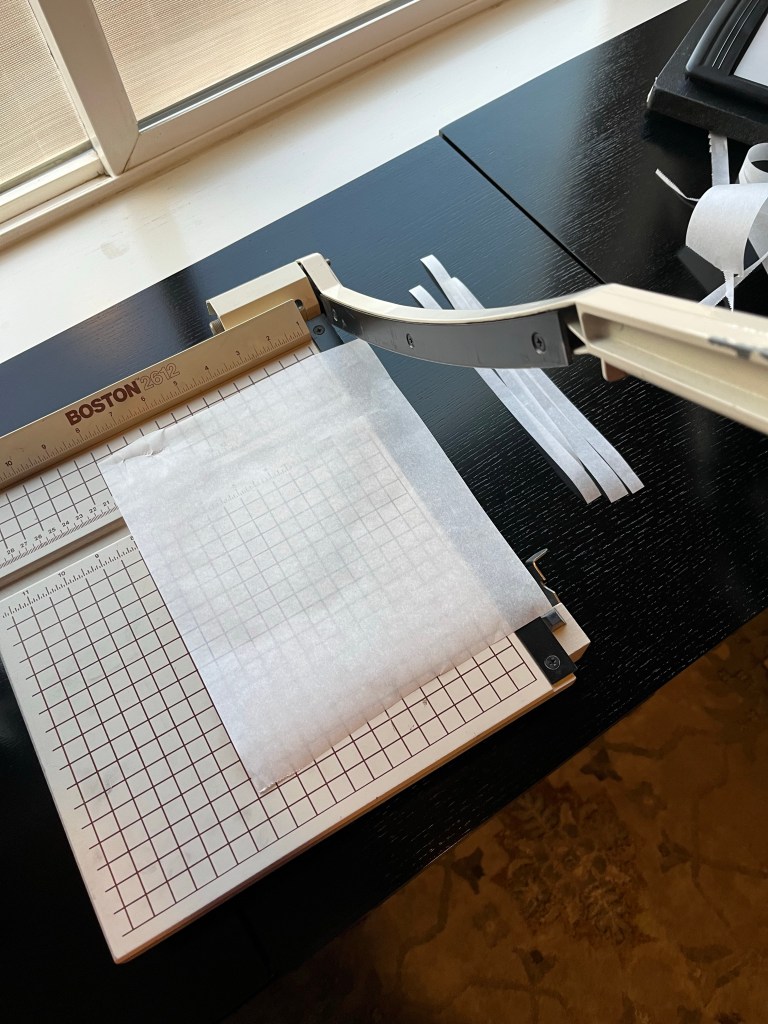
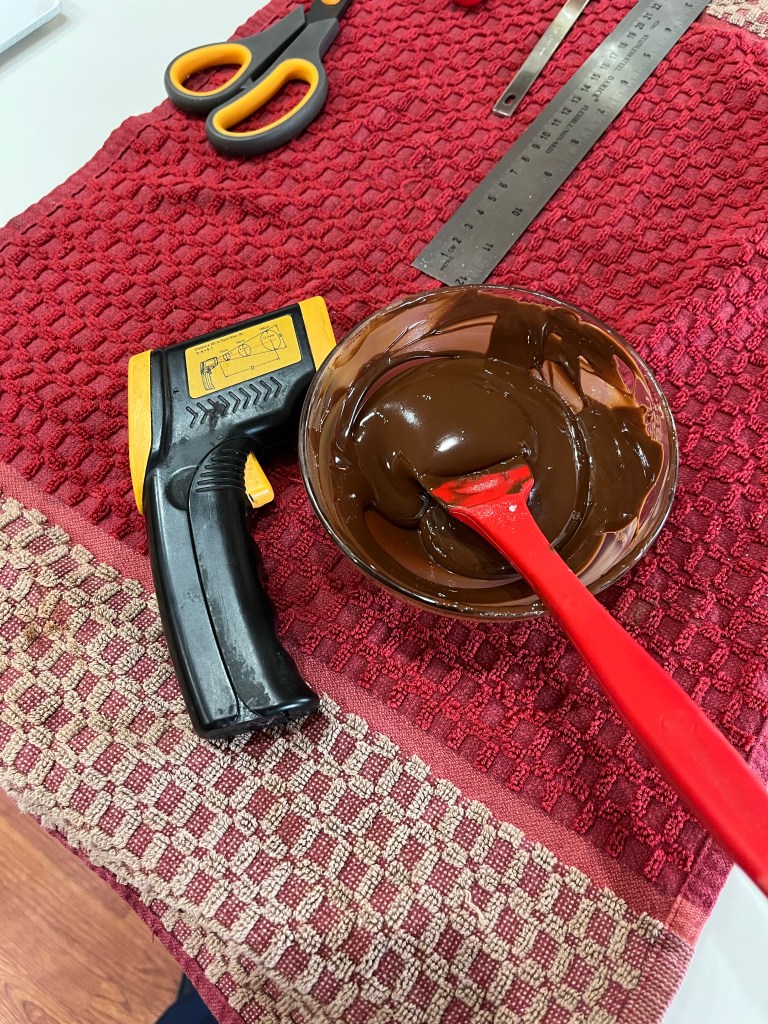
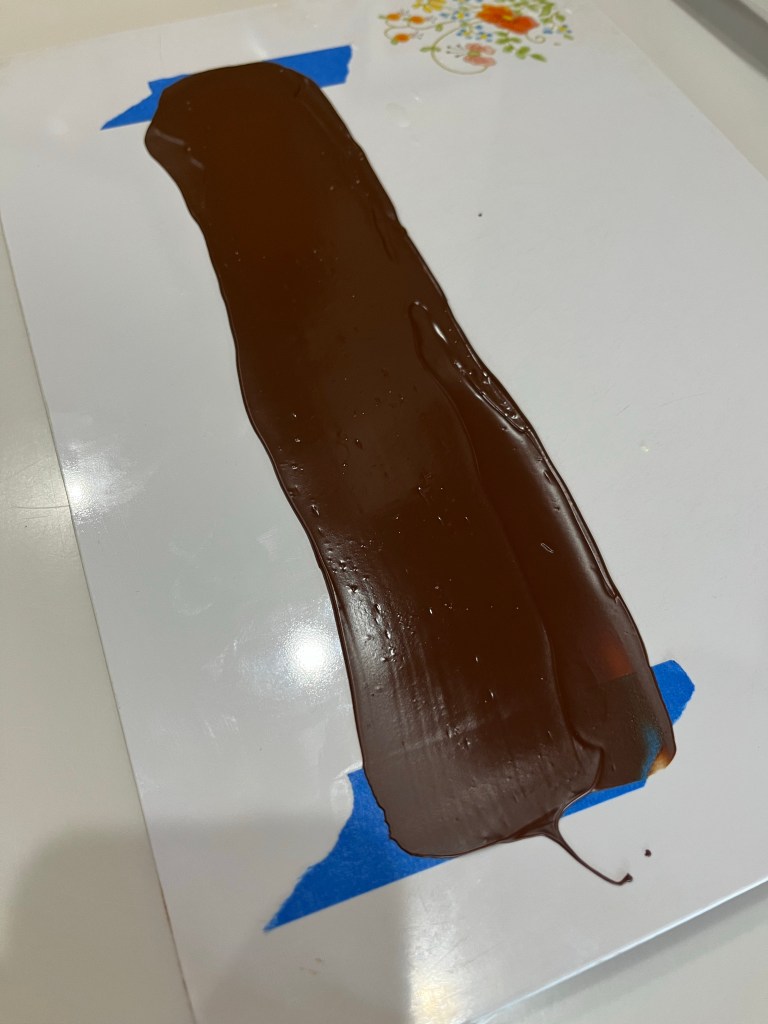
Cutting 1/2” wide parchment paperTools for tempering chocolateStrips taped downStrips coated with tempered chocolateDried but still flexible parchment paper lined chocolate strips
I found the chocolate releases from parchment paper easier than from acetate. Most of my photos show the first attempt using acetate.
4” x 1/2” strips of parchment paper, coated with chocolate and allowed to dry some were folded over and the ends put together to form the loops of the bow. Other short straight pieces were used for the ends of the ribbons. A little chocolate was used to glue the parts onto the side of a charlotte to resemble a ribbon bow.
Sliced raspberries and blueberries plus some chocolate shavings sprinkled on top finished the charlottes. They need to be refrigerated or frozen until serving. QC and I decided the flavor and texture were excellent, but other pastries I previously made were as good and much, much easier.
Mini Red Berry / Chocolate Charlotte
Crème Chiboust
INGREDIENTS Crème Patisserie • ½ c sugar • ¼ c corn starch • Pinch salt • 2 c whole milk • 4 egg yolks • 2 Tbl butter • 2 tsp vanilla Italian Meringue • 1 cup sugar (200g) • 1/2 cup water • 4 large room temperature egg whites • 1/2 teaspoon cream of tartar
METHOD Crème Patisserie
Whisk eggs and milk together and add to all other ingredients (except vanilla) to a medium saucepan.
Bring to boil whisking constantly
Cook until thickened (it will look lumpy, its ok)
Sieve lumpy mixture into a bowl and add vanilla, mix thoroughly
When incorporated, cover with plastic directly on the cream and cool about an hour.
Italian Meringue
In a small saucepan, combine sugar and water. Heat over high heat, stirring only until it comes to a boil. Once it reaches a boil, stop stirring. Cook until sugar syrup registers 240°F (115°C) on an instant-read or candy thermometer. Brush down sides of pot as necessary with a pastry brush dipped in water.
Meanwhile, combine egg whites and cream of tartar or lemon juice in the bowl of a stand mixer fitted with a whisk attachment (see note). Set mixer to medium speed and mix until soft peaks form (when lifted, the head of the mixer should form gentle peaks in the egg whites that very slowly collapse back into themselves), about 2 minutes.
With the mixer running, carefully and slowly drizzle in hot sugar syrup. (Hot sugar is just as dangerous as fryer oil, so use caution!) Increase speed to high and whip to stiff peaks.
Crème Chiboust
Stir the cooled crème patisserie to loosen slightly then mix in about one-third of the meringue. Then add the crème patisserie mixture to the remaining meringue and mix in.
The crème chiboust is ready to use.
Lady Fingers
INGREDIENTS • 4 large separated eggs • 3/4 cup granulated sugar, divided • 3/4 teaspoon vanilla extract • 1/4 teaspoon cream of tartar • 1 cup all-purpose flour • 4 teaspoons cornstarch • 1/2 teaspoon kosher salt • Powdered sugar, for dusting
METHOD
Separate 4 large egg yolks, placing the yolks into the bowl of a stand mixer (or large bowl if using an electric mixer) and the whites into a small bowl. Let sit out until room temperature. Meanwhile, arrange 2 racks to divide the oven into thirds and heat the oven to 350°F. Line 2 baking sheets with parchment paper or silicone baking mats. Fit a pastry bag with a 1/2-inch round tip.
Add 1/2 cup of the granulated sugar and 3/4 teaspoon vanilla extract to the egg yolks. Beat with the whisk attachment on medium speed until the egg yolks are lightened in color, about 2 minutes. Increase the speed to medium-high and beat until doubled in volume, very pale yellow, falls off the whisk in thick ribbons, and the whisk leaves visible lines through the egg yolk mixture when the mixer is running, about 2 minutes more.
Transfer the mixture to a bowl. Clean and dry the stand mixer and whisk attachment.
Add the reserved egg whites and 1/4 teaspoon cream of tartar to the stand mixer. Attach the whisk attachment and turn on to on medium-low speed. Slowly add the remaining 1/4 cup granulated sugar and beat until the mixture is foamy and beginning to grow in volume, about 2 minutes.
Increase the speed to medium and beat until soft peaks form, about 2 minutes. Increase the speed to medium-high and beat until glossy and stiff peaks form, about 2 minutes more.
Add half of the egg yolk mixture and fold until just combined. Add the remaining egg yolk mixture and fold until almost fully incorporated, some streaks are okay. Do not over-mix.
Sift 1 cup all-purpose flour, 4 teaspoons cornstarch, and 1/2 teaspoon kosher salt into the egg mixture. Fold together until just incorporated with no dry bits remaining, it’s okay if the mixture is not smooth. Do not over-mix.
Transfer the mixture to the pastry bag. Pipe 4-inch long ladyfingers onto the baking sheets, spacing them 3/4 to 1-inch apart, 20 per sheet. Dust an even layer of powdered sugar over the ladyfingers.
Bake until puffed and just turning golden around the bottom, 11 – 14 minutes, until they feel firm, but not brown.
Let the ladyfingers cool completely on the baking sheets.
RECIPE NOTES: Ladyfingers can be stored in an airtight container for up to 10 days
Agar Agar Raspberry Jelly
INGREDIENTS • 2 Cups Raspberries • 1/2 Cup Sugar • 2 tsp Agar Agar powder • 1/4 Cup Water METHOD
Pour the 1/4 cup water and 2 cups raspberries into a small saucepan. Heat over medium heat, stirring occasionally until raspberries have softened.
Use a stick blender to puree the mixture.
Strain to remove the raspberry seeds.
Pour the 1/4 cup water in saucepan and add 2 tsp agar agar powder. Mix well. cook on medium heat.
Stir in agar until completely dissolved. Add raspberry juice and mix well.
Add sugar, heat the mixture to a rolling boil and continue to cook the mixture for 2 minutes.
Pour into a baking dish or into silicone molds.
Refrigerate for 30 minutes or until firm.
Remove and cut into desired shapes.
Dark Chocolate Mousse
INGREDIENTS • 2 Cups • 4 1/2 ounces bittersweet chocolate, finely chopped • 2 tablespoons salted butter, diced • 2 tablespoons expresso or hot water • 1 cup cold heavy cream • 3 large eggs separated • 1 tablespoon sugar
METHOD
Combine the chocolate, butter, and espresso in the top of a double boiler over hot, but not simmering, water, stirring frequently until smooth.
Remove from the heat and let cool until the chocolate is just slightly warmer than body temperature.
Meanwhile, whip the cream to soft peaks, then refrigerate. Once the melted chocolate is sufficiently cool, whip the egg whites in a medium bowl until they are foamy and beginning to hold a shape. Sprinkle in the sugar and beat to soft peaks.
When the chocolate is cool, stir in the yolks. Gently stir in about one-third of the whipped cream. Fold in half the whites just until incorporated, then fold in the remaining whites, and finally the remaining whipped cream.
Add the mousse to a piping bag and twist close. Store in the refrigerator until required.
Raspberry/White Chocolate Mousse – with Agar Agar
INGREDIENTS WHIPPED CREAM – YIELDS ¾ CUPS OF WHIPPED CREAM • ½ cup Heavy whipping cream • 2 tablespoons Confectioners sugar • ¾ teaspoons Cream of tartar • ½ tsp vanilla bean paste WHITE CHOCOLATE • ½ cup White chocolate chips • 1 ½ tablespoons Heavy whipping cream STRAWBERRY PURÉE • 225 grams (8 oz) fresh raspberries • 1 Tbsp lemon juice • 58 grams (2 oz) powdered sugar • 200 grams (7oz) white chocolate • 1-3 Tbsp warm milk • 250 ml (1 cup + ½ tablespoon) cold heavy cream • Red food coloring to suit (1-2 drops) AGAR AGAR • 1 Tsp Agar Agar • 1 Tbl cup water
METHOD PREPARE WHIPPED CREAM
Before beginning with the recipe, place the mixing bowl and whisk in the freezer for at least 10 minutes to chill.
Once the bowl has chilled, add heavy cream and vanilla and beat on low speed until the cream starts to thicken slightly. There will be fewer and larger bubbles.
Add the cream of tartar and powdered sugar and beat with increasingly higher speed until stiff peaks form. Once done, set it in the fridge to chill.
AGAR AGAR MIX
Add 1 teaspoons Agar agar powder to 1 tablespoons lukewarm water
Stir until agar agar is completely dissolved
PREPARING THE RASPBERRY PURÉE
Combine raspberries, lemon juice and confectioners sugar in a saucepan and bring to a boil. Lower the heat and simmer for 10 minutes until the syrup thickens and raspberries are very soft.
Keep stirring occasionally. When the raspberries are very soft and the syrup has thickened, take it off the flame and allow it to cool.
When completely cooled, puree it with an immersion blender. Sieve to remove seeds, add raspberry flavoring and set aside. Measure the syrup – you will require ¾ cup+ 2 Tbl (200 ml) of thick syrup.
Cool to near room temperature.
PREPARING WHITE CHOCOLATE
Heat a pan 1/2 filled with water over low heat. Lower the heat and place the white chocolate bowl over the water when it simmers. Keep stirring the chocolate as it softens and melts.
Add dissolved agar agar and 4-5 Tbl warm milk and mix until the chocolate is thick but runny.
FOR RASPBERRY MOUSSE:
Add half the cooled whipped cream to the cool white chocolate mixture
Add the raspberry purée that was prepared earlier to the whipped cream/white chocolate mixture
Mix gently to not deflate.
Add the rest of the whipped cream to the raspberry -white chocolate.
I was in Versailles, Fr last month and had what was undoubtedly the best baguette of my life. The crust had the exact right crunch and the interior was soft and light. Then and there I decided I needed to perfect my baguette baking to at least approach this level of perfection.
My go-to recipe is from King Arthur and it served me well. Upon returning home I searched for differences in recipe ingredients and methods keying on authors who tauted the bread qualities that I wanted.
From what I understand the hydration level, (this recipe is 72%) at least in part, determines the size of the holes in the bread. By using the stretch and fold technique with a long rest (45 min) between each helps develop the gluten. These two properties contribute to the characteristics I desire.
This is the first attempt of “perfecting” my baguette. Do you remember my five attempts at baking an acceptable rye bread? Well, here we go again,
Classic French Baguettes
INGREDIENTS
• 500 g all purpose flour • 360 g water • 10 g salt • 3 g instant yeast about 1 tsp • 25 g honey about 1 Tbsp
METHOD
Mix all ingredients in a bowl, cover with a plastic wrap and let rest for 15 minutes.
Stretch and fold every 45 minutes and repeat at 3 times, flipping the dough upside down after each set. The rest time between stretch and folds is important.
Cover the bowl with a plastic wrap and place in refrigerator overnight for about 12-14 hours.
Turn the dough on a lightly floured work surface. Divide into 3 equal parts and gently shape into rectangles without knocking the air out of the dough. Cover and let rest for 45-60 minutes.
Preheat the oven to 500F, with a baking stone positioned in the upper half the oven. I like to use a small cast iron skillet with water to provide steam. Add the water below when the loaves are put into the oven.
Stretch each dough rectangle slightly and fold into a cylinder, sealing the seams as you roll. Using your hands, roll the cylinders gently stretching them from the center towards the ends to desired length, about 14-15 inches.
Place each loaf on a lightly floured couche, seam side up. Cover and proof at a room temperature for about 30-60 minutes, or until the dough has sufficiently proofed. Press dough with a finger. If it springs back slowly it is properly proofed. If it never springs back it is over proofed and if it springs back quickly it is under proofed.
Transfer the baguettes to a piece of parchment paper, seam side down and dust off excess flour. I like to use a serrated break knife to make 5 scores on each baguette. Don’t cut straight across the loaf, but with a shallow long cut down the length. Each cut should be 4-5” longWhen scoring, use a swift and firm motion to ensure nice and clean cuts.
Carefully open the oven, and slide the rack with the baking stone out. Slide the baguettes off the parchment paper and onto the baking stone. Add a cup of water to the cast iron skillet, close the oven and reduce temperature to 475F. Bake for 15 minutes.
Remove the water pan, rotate the baguettes, drop the temperature to 450F and continue baking for another 10- 15 minutes, Check how brown the baguettes are after 10 minutes and every couple of minutes thereafter. They should be a nice dark brown, but not too dark. Over baking will make the crust and interior too hard. Experience will tell you when it is Goldilocks just right.
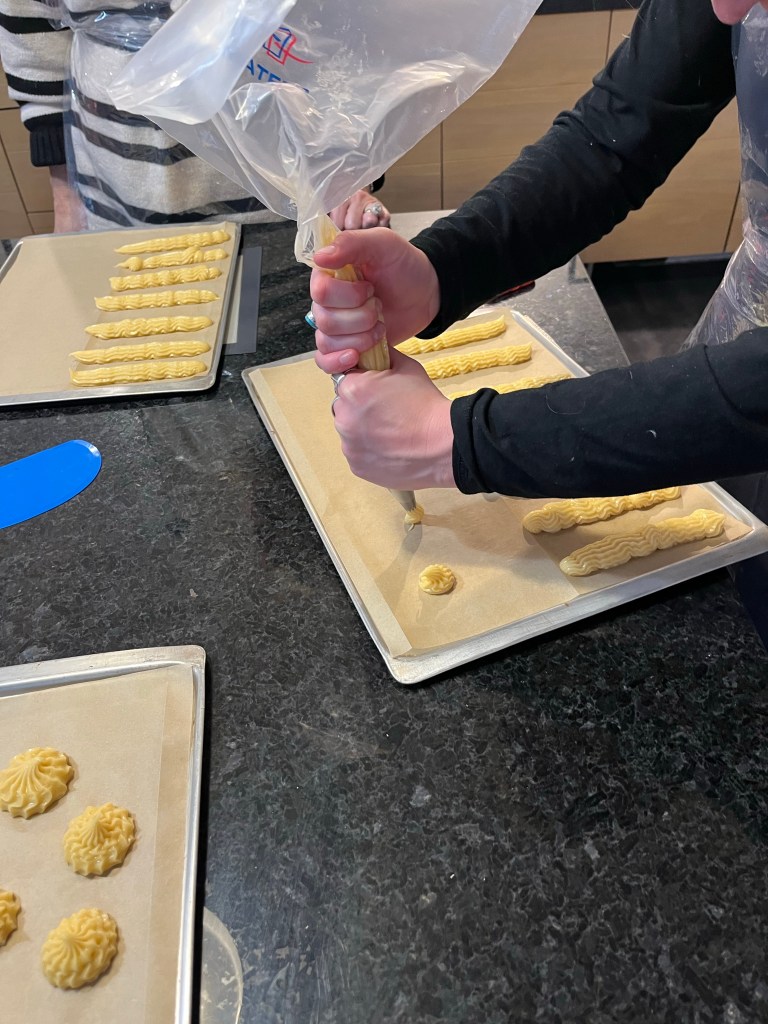
I make choux pastry for eclairs and/or profiteroles several times a year. When we were planning our European vacation with a stop in France I had the opportunity to include an afternoon, small group class on making choux pastry (and it was taught in English!)
There were six of us in the class, myself, three young(ish) people from Utah and a mother/daughter from London. It was a good mix of friendly, fun people. I was the only student with experience making choux or cream patisserie, but that wasn’t an issue for any of us.
Our instructor was James who was a head pastry chef in England and France for 20 years before retiring and taking this position as a teacher. While not a trained teacher he did develop apprentices for his kitchens throughout his entire career.
The process of making choux is quite easy, but there are always tips and tricks that experience can teach you.
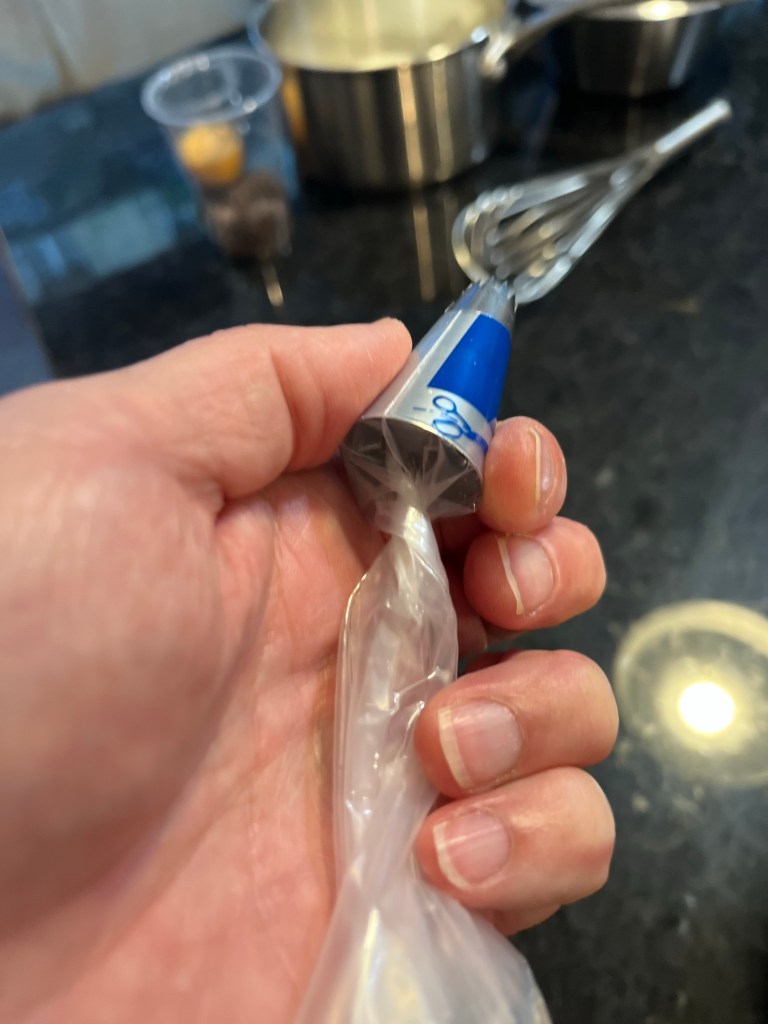
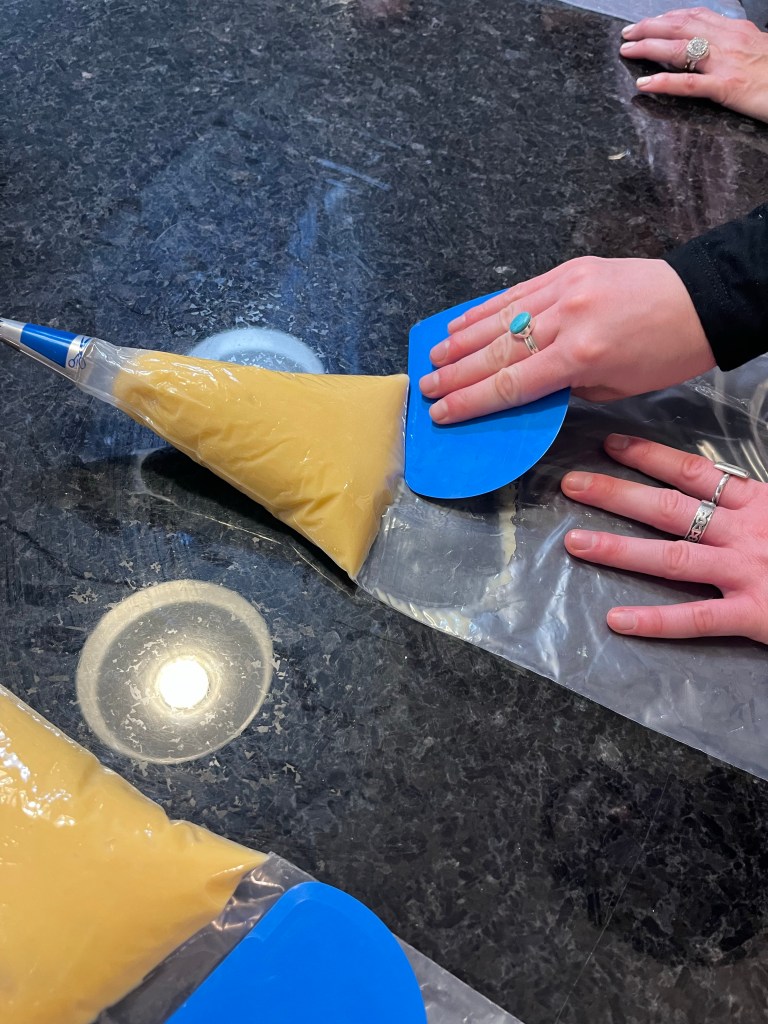
James previously weighed the water, butter and salt. He also portioned the eggs and flour for us.Once the butter melts, add the flour all at once and stir continuously.When a heavy film forms on the bottom of the pan it is ready for the next step.Transfer the hot batter to a bowl and stir to cool. Once cool, add the egg a little at a time. The choux is ready when it slowly drips off a spoon and forms a “V”.First tip/trick is to twist the piping bag near the tip and tuck it into piping tip to keep dough from running out.Second tip is to use a flat side of a bowl scraper to push all the dough down to just inside the tip.
James set up three stations and we worked in teams of two. I worked with Mary, sister of Russ, both of Utah. You will occasionally see Mary’s hands and arms. You can tell us apart as I only wear one ring. We were both too busy to take pictures while we were filling the piping bags, also our hands were covered in raw choux.
Once the piping bag is filled grip it like this with your dominant hand,Gently twist the bag to seal the choux inside.Tip the bag upright, and twist the choux filled end, not the empty bag to force the choux until it just enters the tipPick up the filled, sealed bag with your dominant hand and place the tip on the paper, holding the bag at a 45 deg angle. (James is behind me)
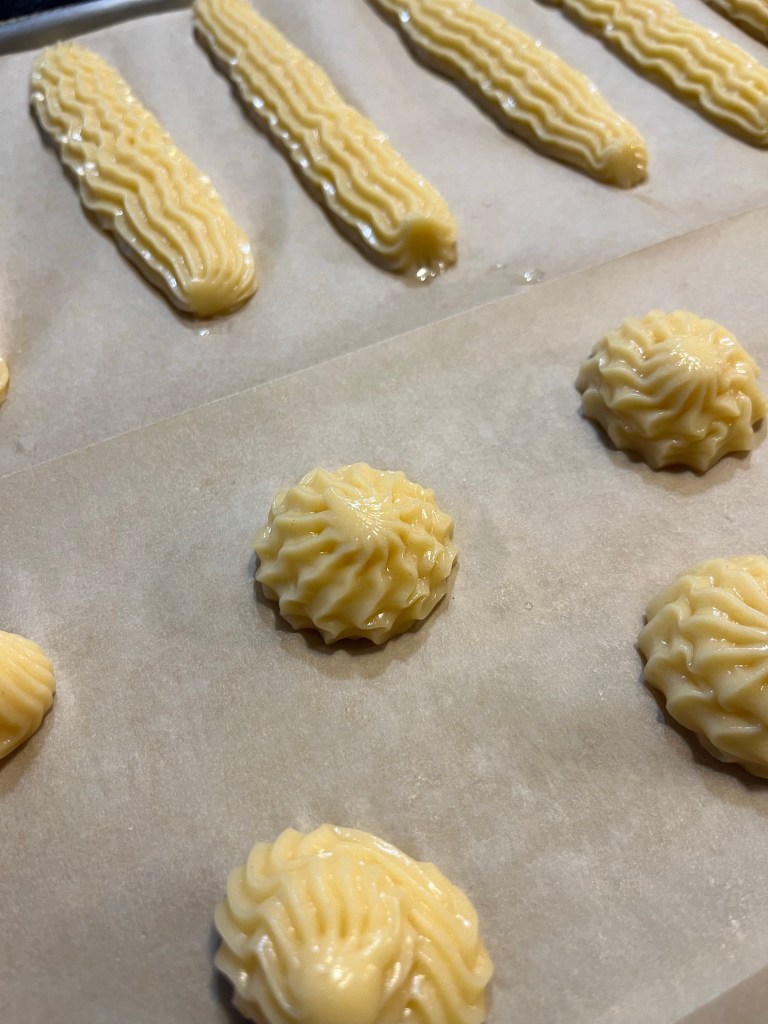
Pipe eclairs in straight(ish) lines just less than half the width of the paper and about 3/4” wide.
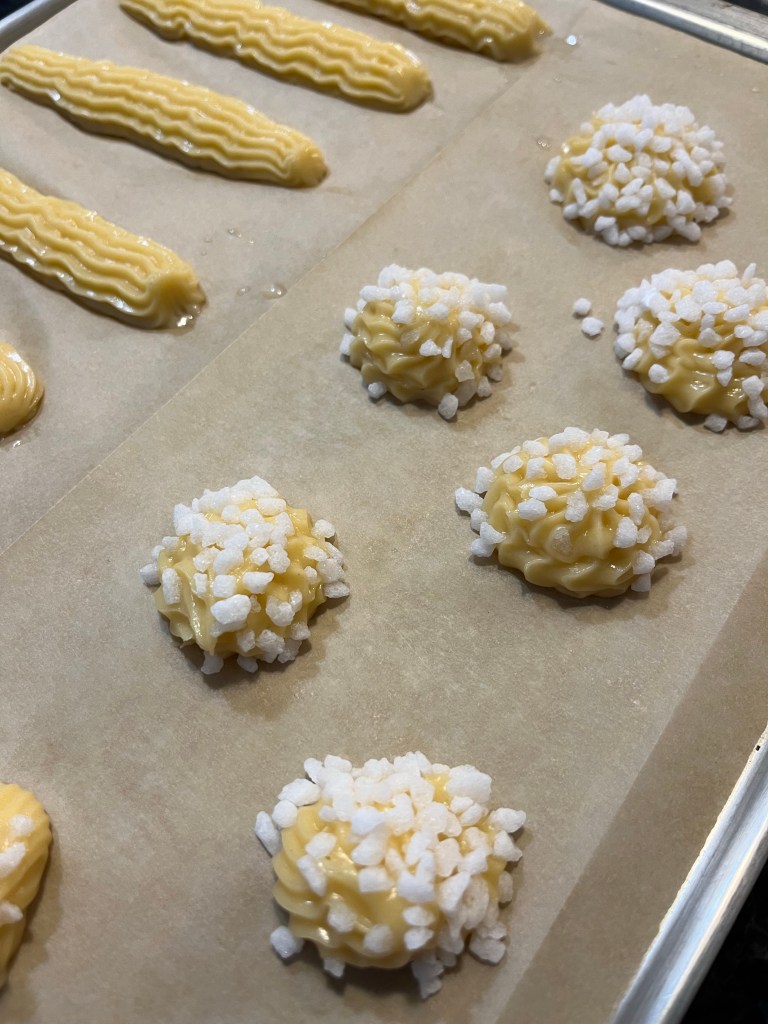
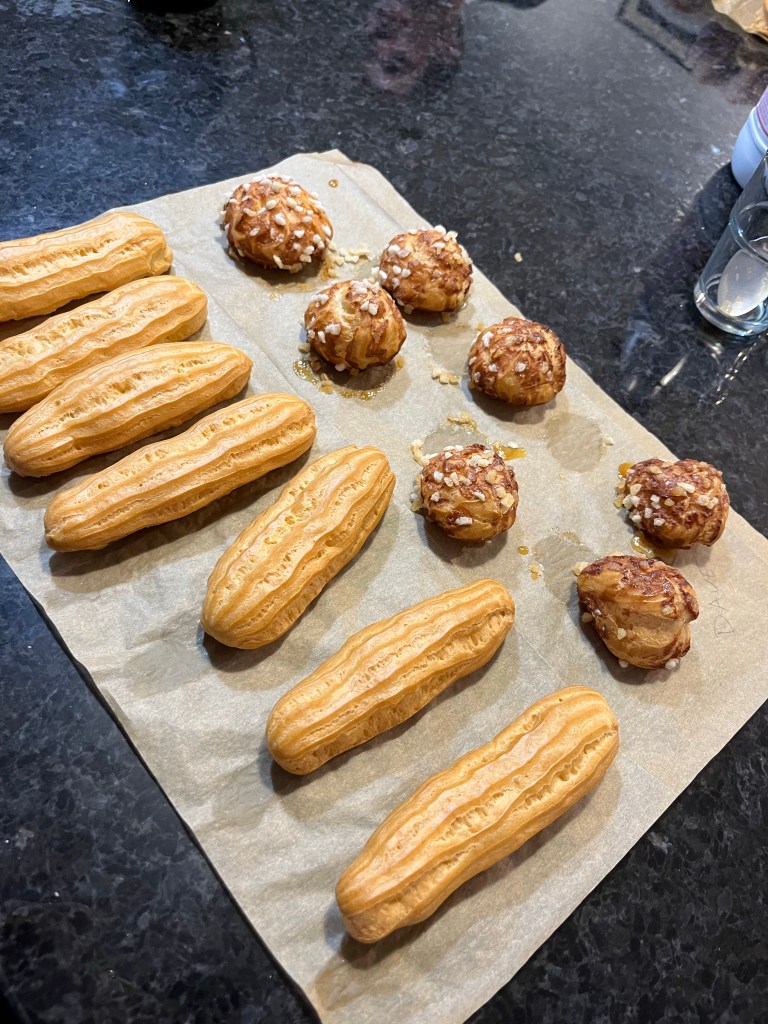
When all the eclairs are piped use any leftover choux for chouquettes. Marys hands,Relatively straight eclairs. My piping.Poke the tips of the Chouquettes or ends of the eclairs with a wet finger.For chouquettes sprinkle with coarse sparking sugar before baking. For profiteroles leave plain but add desired filling after they cool.
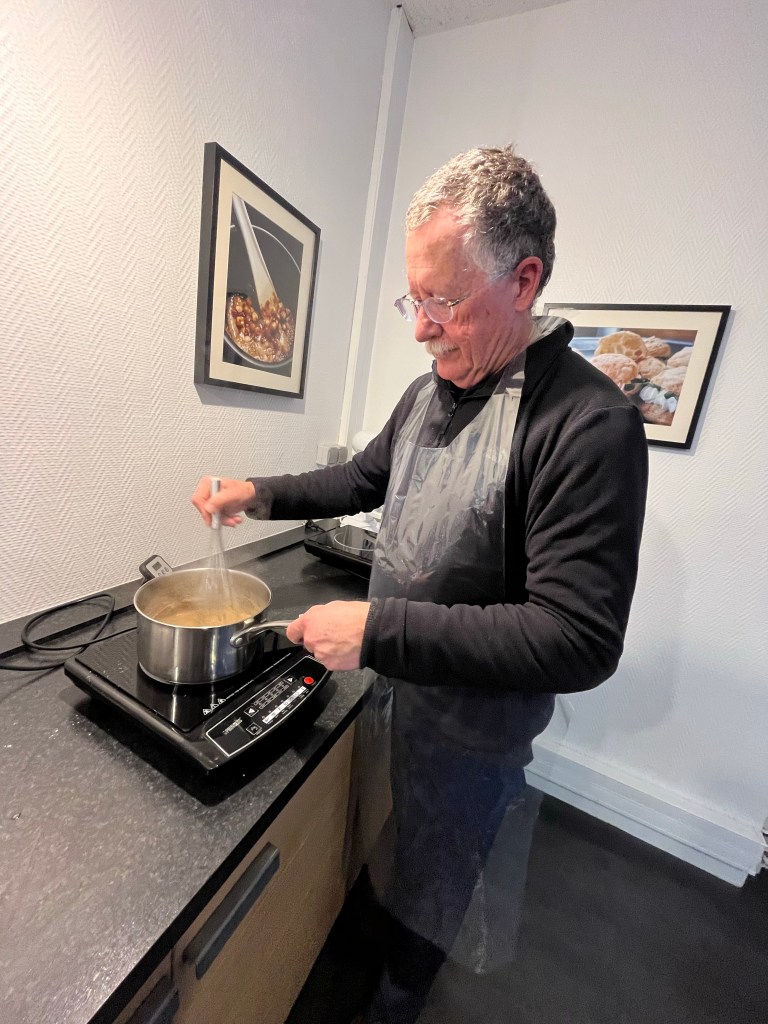
Each team made a different variety of filling. Mary and I made coffee, the others made chocolate and vanilla. Cream patisserie is fairly easy to make. I use Martha Stewarts’ method of mixing everything together before heating, then sieving the thickened mixture. We did the traditional egg tempering method in class.
James previously measured the ingredientsMary mixed the water, corn starch, and coffee and thoroughly mixed in the egg.The water is brought to a minimum boil and a little is added to the egg mixture. This is tempering the eggs.The egg mixture is added back into the hot water and mixed until smoothThe hot mixture is poured onto a plastic lined pan, covered with more plastic and cooled in the fridge.
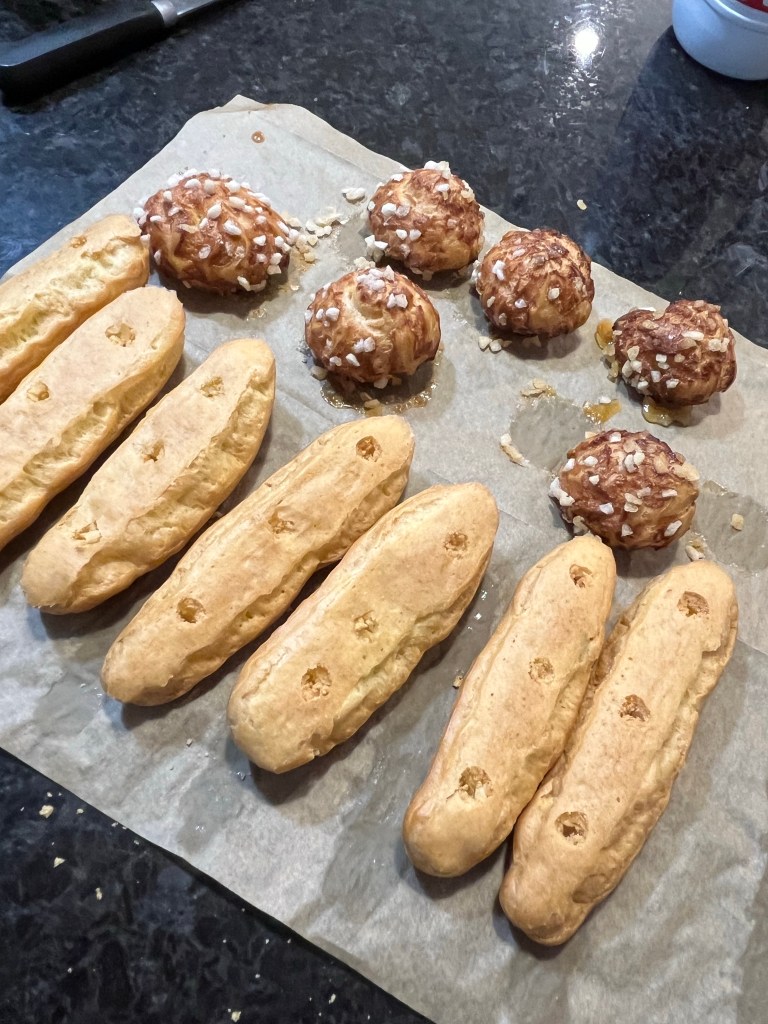
Two great tips for filling the eclairs, neither of which I knew. Use the tip of a knife to bore three holes in the bottom of each eclair. Let gravity be the force, do not push the knife down or you will break the eclair. Also, fill each end hole first. When you fill the center last the creampat will push up through the two end holes assuring the entire eclair is full. Believe me, this works great.
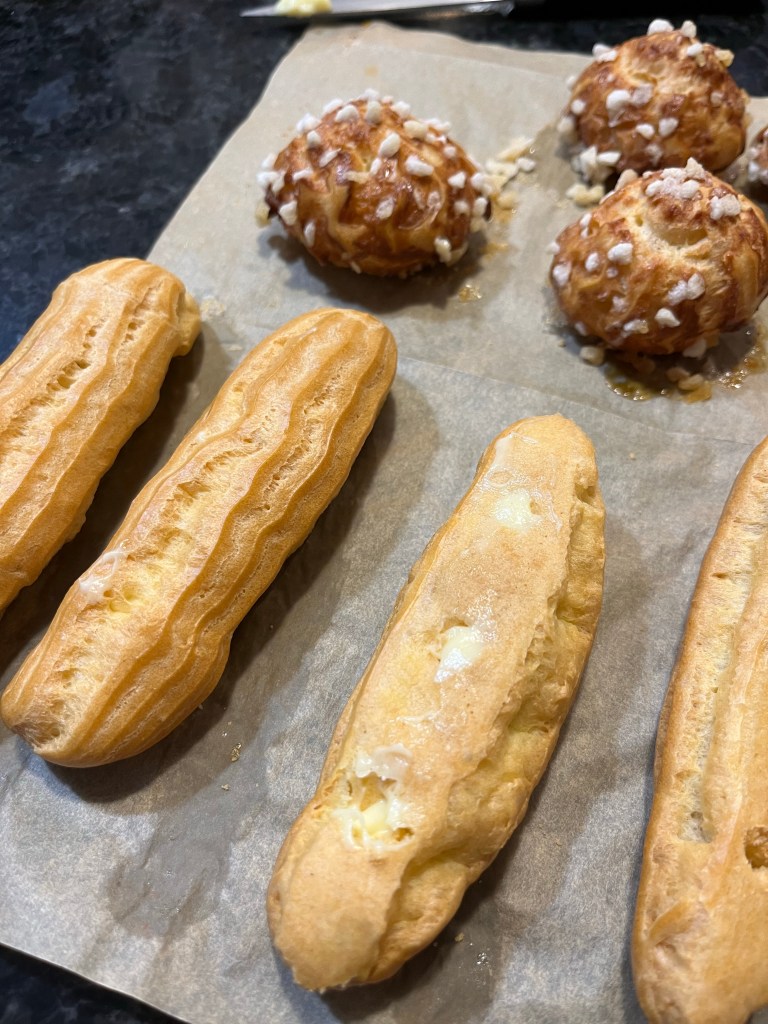
The pastries are baked according to the instructions,Baked eclairs and chouquettes,Light airy inside of a chouquettes,3 holes are bored into each eclair with the tip of a knife. Don’t force the knife. Let gravity ease it into the choux.Filled eclairs with creampat in each hole.
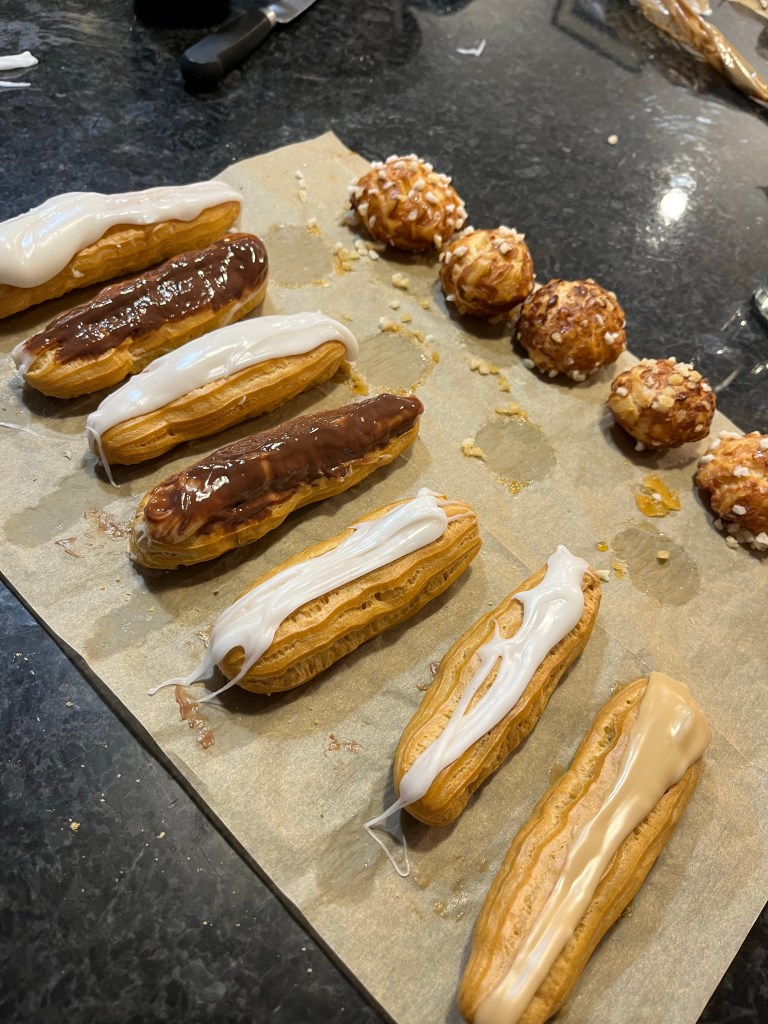
James made the topping in advance. I usually just use a simple chocolate ganache, but learning this technique was fascinating. It was so messy neither Mary or I were able to photograph the procedure.
Don’t tell QC, but I could imagine a week of baking courses in Paris, learning so many new techniques. It was a blast.
I was not a fan of my previous pretzel experiment using KAB Measure For Measure gluten free flour. While the taste was acceptable, the texture was wrong and the resulting pretzels (both dough and baked) were very fragile. That batch ended up being binned.
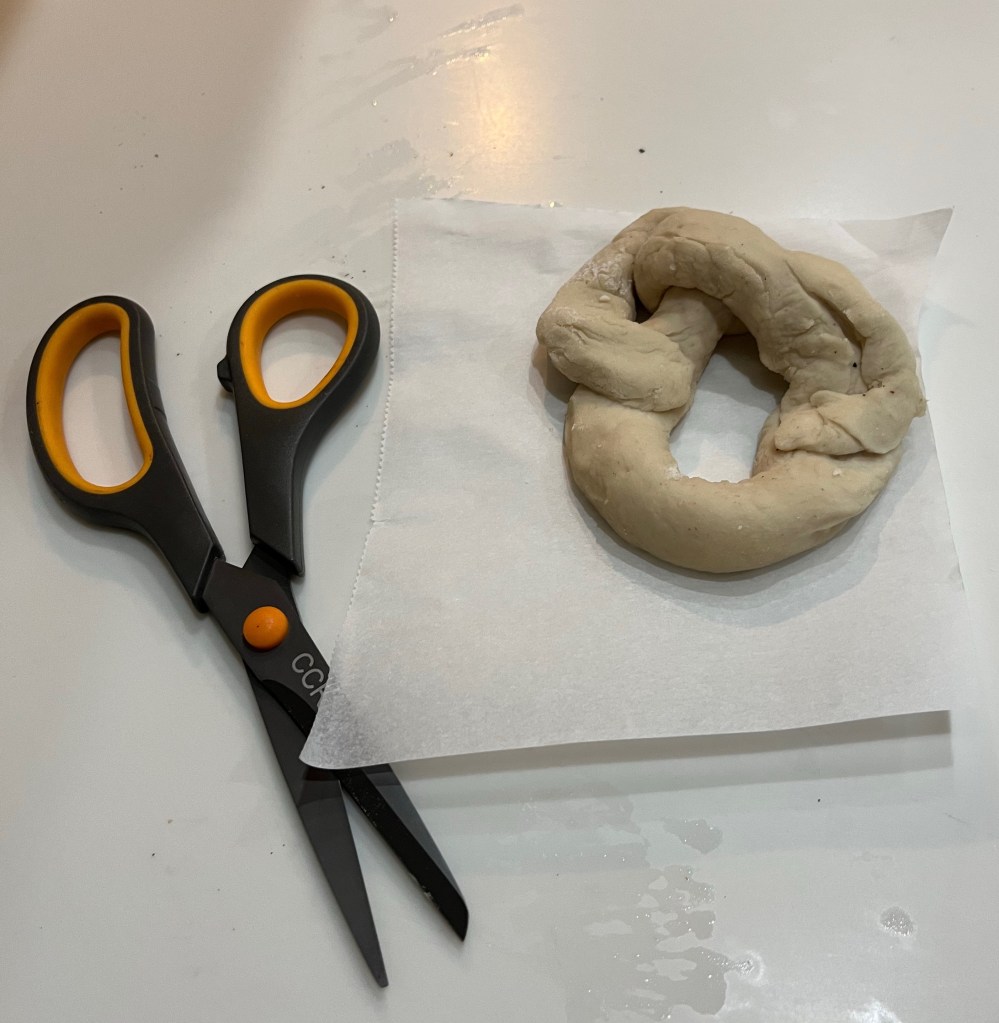
This batch used Kim’s Flour Blend, the flour used to make the Artisan nGDS bread a few days ago. This flour provided the correct texture and dough strength for the pretzels to hold their shape, although the taste was not as close to a traditional pretzel as the Measure For Measure flour. As an extra precaution I cut the parchment paper under each un-baked pretzel and used a large spatula to carefully slide the pretzel and paper into the alkaline bath. The paper slid off the boiled pretzel and was discarded.
This recipe required a longer bake time. Depending on your oven, bake 9 to 10 minutes, rotate the baking tray, then bake another 9 to 10 minutes.
nGDS Soft Chewy Pretzels with Kim’s Flour
Ingredients: • 3 cups (420g) Kim’s blend GF flour – weighed or poured & leveled • 1 ½ tsp xanthan gum • 1 ½ tsp psyllium husk powdered • 1 tbl active dry yeast • 1 tsp salt • 1 cup water • 3/4 cup almond milk • 2 tbl olive oil • 1 tbl honey • 3 ½ tbl red palm and coconut oils shortening (Nutivia) melted – cooled slightly
Directions:
Heat the water in the microwave for 20-30 sec to achieve a temperature of about 120-130 deg then combine with the cold milk in a small bowl for a resulting solution temperature of 110 to 115 degrees F. Add the sugar and salt to the warmed water and milk and stir to combine. Sprinkle in the yeast and mix with a fork. Allow the mixture to sit for about 5 minutes or until it becomes foamy.
Pour the foamy mixture into the bowl of a stand mixer fitted with a dough hook and add the melted, cooled, unsalted butter and flour. (I add the flour a cup at a time to be sure it mixes well.) Mix on low speed for until combined and no dry flour remains in the bowl. Scrape the bowl as needed. Continue to mix for about another 7 minutes or until the dough pulls away from the sides of the bowl and is smooth. Scrape the dough from the hook if it comes up to far. Note: The dough may begin to pull away from the bowl after only 2 minutes, but may look a bit pulled or shaggy and still be sticky. It is not done kneading until it is smooth to the touch and no longer sticky.
Remove the dough from the bowl and form into a ball. Wipe out the bowl, if necessary and grease it with 1-2 tablespoons of oil. Place the dough ball back into the bowl and turn over a couple of times to coat thoroughly with the oil. Cover the bowl with a dish towel or plastic wrap and place in a warm area , free from drafts or cool air (a microwave, turned off is a good location), for about 1 hour, until the dough has risen and doubled in size.
Refrigerate covered for at least 6 hours, preferably overnight, but up to 10 days.
On baking day, remove the dough from refrigerator and dump it out onto well-floured surface. Loosely cover with plastic wrap (the piece that covered the bowl in the fridge) and let the dough warm to room temperature.
When the dough is ready, preheat the oven to 450 F and position the oven rack in the upper third of the oven. Line a large (15″ x 20″) baking sheet with parchment paper and spray with Bakers Joy. Set aside. Note: You may need 2 baking sheets to avoid crowding the pretzels. If only one small, puny sheet is available, make one batch of pretzels and keep the remaining dough covered, so it does not become dry. Between batches, allow the baking sheet to cool, before filling with remaining pretzels.
Place in proofing oven (or other draft free, warm location such as an oven, turned off, with the light on) for 1 hour
In a large, wide pot (6-8 quarts) add 8 cups of water, baked baking soda and malt powder. Stir to combine and bring to a full boil. Place a plate lined with paper towels nearby, as well as the kitchen spider or slotted spoon.
In the meantime, dampen a kitchen towel with water and set aside. Heavily dust your work surface with Kim’s Blended Flour, remove the dough from the bowl, place it on the work surface and divide into 8 equal pieces. Cover the pieces that you’re not rolling with plastic wrap or a damp kitchen towel, so they don’t become dry. Using the palms of your hands, roll each piece of dough to a 24-30 inch long rope and then shape into a “U”. Don’t be afraid to use plenty of flour. The dough is sticky! Grab the ends of the rope and cross them over each other once or twice and then bring the ends down to the bottom of the ‘U” and press them down to seal, forming the shape of a pretzel. Place the pretzels onto the greased parchment-lined baking sheet and cover with a damp kitchen towel to prevent the dough from drying out, while you continue to roll the remaining dough. You can also cut some of them into 1 ½” logs to make nuggets.
Place the formed pretzels in a warm, draft free location (such as a proofing oven, or regular oven (Off) with the oven light on to proof for an hour.
The lack of gluten results in a more fragile structure than a traditional gluten pretzel dough. To help maintain the pretzel shape I cut the parchment paper around each pretzel and gently lowered them into the mixture as described in the next paragraph. The paper floats off when the pretzel is flipped. The boiling gave the dough more structure and helped they stay in shape.
One at a time, lower each pretzel into the boiling water mixture for about 30 seconds. I push them down underwater a few times to assure the top is treated as well. The pretzels will puff up while boiling. Using a kitchen spider or slotted spoon, carefully remove the pretzel from the water, blot slightly on paper towels and then place back onto the parchment lined greased or sprayed baking sheet a few inches apart.
Using a pastry brush, brush the top and sides of each pretzel with the almond milk wash and then sprinkle with coarse salt.
Place the pretzel filled baking sheet on the upper oven rack and bake for about 7 minutes. Open the oven and quickly rotate the baking sheet so that the pretzels that were facing the front are now facing the rear of the oven. It may seem like a pain, but it’s quick and easy and will ensure even baking. Continue to bake for another 7 minutes or until pretzels are dark golden brown.
Remove sheet from oven and place pretzels on a wire rack to cool slightly before serving. Outrageously good if served warm. Mildly spectacular if served later.
Kim’s Gluten Free Bread Flour Blend 700g (5 c) 1.4kg (10 c) 2.1kg (15 c) 2.8kg (20 c) Bob’s Red Mill potato starch 285 g 570 g 855 g 1140 g superfine white rice flour (DON’T use 250 g 500 g 750 g 1000 g regular rice flour, ie Bob’s Red Mill) Tapioca flour 75 g 150 g 225 g 300 g Egg white protein 75 g 150 g 225 g 300 g Xanthan gum 15 g 30 g 45 g 60 g
We needed a thank you gift for a friend, who happens to love my soft, chewy pretzels and as my golf was cancelled due to rain…
I had trouble rolling the dough into long enough ropes to make good pretzel “knots.” I believe the dough wasn’t wet enough to allow the 24”-30” rope. Today’s was only about 18”.
That aside the flavor and texture was wonderful. QC gave it a big thumbs up.