Dave Oney was born mid last century in Middlebury, Vermont. He received his BS in Chemistry and worked as a polymer chemist in Massachusetts and New Jersey. He became a microscopist (someone who studies little bitty things using a microscope) and photomicrographer (someone who photographs little bitty things) before settling into a 35-year career in technical sales of scientific imaging equipment (the science of digitally recording itty bitty things, sending the image to a computer for analysis.) He designed and created a number of products contributing to this field. He is (was) proficient in several computer languages and is currently working on mastering English.
After making a few more paradigm shift career changes Dave and his wife, Fran, retired and moved closer to their children and granddaughters and now live in the foothills of the Sierra Nevadas.
Pavlovas are a meringue type confection with a crisp exterior and marshmallow like interior. They were named for ballerina Anna Pavlova and are quick and easy to make. They will keep at room temperature for 3-5 days if sealed in an airtight container in low humidity.
I made them for Independence Day and topped them with red (fresh raspberry or strawberry sauce) and blue (fresh blueberries) for the red, white and blue theme, and chocolate because, well….it’s chocolate!
The tartness of the sauces compliments and tempers the sweetness of the pavlova. These are a delicious, light, refreshing dessert.
Mini Pavlova
INGREDIENTS
• 6 (180 g) large egg whites, room temperature • 1 ½ cups granulated sugar • 2 tsp corn starch • ½ tsp cream of tartar • ½ Tbsp lemon juice • ½ Tbsp vanilla extract
METHOD
Preheat the Oven to (I used 215˚ F as my oven runs hot. Many recipes call for 250˚ F. But my pavlovas were over baked and light brown at this temperature. Because this contains eggs, it should be heated to more than 160˚ F. at a minimum.)
Line a large baking sheet with parchment (or Silpat) paper. Using your stand mixer, beat 6 egg whites on high speed until soft peaks form. With the mixer on high, gradually add 1 ½ cups sugar and cream of tartar and beat 10 min on high speed, or until soft peaks form. It will be smooth and glossy.
Add the cornstarch, lemon juice and vanilla extract. The mini pavlovas can be formed by piping, or for a more irregular look I used a spoon.
Bake for 30-45 min. If the temperature is too high, or you leave them in the oven to long they will begin to brown. After 30 minutes add 15 additional minutes if necessary for the surface to no longer tacky.
Slide the pavlova with the parchment paper onto the counter or a cooling rack and allow it to come to room temperature.
Once cool, you can top them with your choice of topping or store in an airtight container for 3-5 days at room temperature (in a low humidity place).
Berry Sauce
INGREDIENTS
• ½ cup water • 1 tsp corn starch • 1 cup blueberries, raspberries or strawberries • ½ cup granulated sugar • 1 Tbl lemon juice • ½ tsp vanilla extract
METHOD
Combine water and cornstarch in a small saucepan and bring to a boil, stirring until the cornstarch dissolves
Add the berries, sugar and lemon juice. Crush the berries with a potato masher.
Place over medium-high heat. Bring to a boil, then reduce heat to a simmer. Simmer for 15 minutes, stirring occasionally.
Remove from heat and using an immersion blender blend the sauce for 30 to 60 seconds
Strain the sauce through a fine-mesh sieve, pushing the berries to extract as much juice as possible. Stir in vanilla extract.
Cover with plastic wrap directly on the sauce to prevent skimming
Have you ever see contestants on GBBO struggle making a Swiss roll? For those unfortunate few readers unfamiliar with this cake, it is a thin sheet cake rolled tight, usually with some filling inside.
Follow this method and you too could be a contender!.
Swiss Roll
INGREDIENTS • 4 large eggs, separated and at room temperature • ¼ (32g) cup confectioners sugar, sifted, plus extra for dusting • 1 tsp vanilla extract • Dash of salt • 2 (25g) Tbl granulated sugar • ¾ (96g) cup cake flour • ½ c raspberry jam
METHOD
Preheat the oven to 350 F. Line the bottom of a 15-x-10-inch jelly roll pan with parchment paper. Leave the sides unlined and undressed.
Place the egg yolks and confectioners sugar in a large bowl and whip until the yolks have doubled in volume and hold a ribbon. This takes about 4 minutes. Whip in the vanilla.
In the bowl of a stand mixer, whip the egg whites with the salt first on low speed until foamy, then increase the speed to high and pour in the granulated sugar, whipping until the whites hold a medium peak.
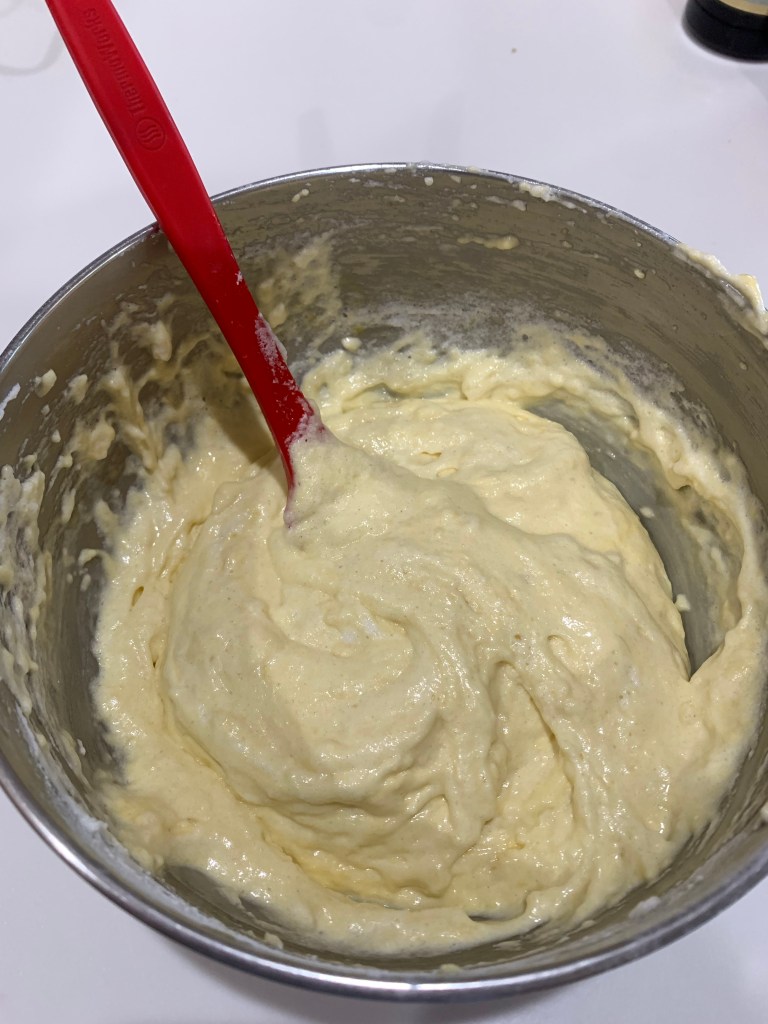
Sift half of the flour into the yolk mixture and fold in without deflating the eggs, then fold in half of the whipped egg whites. Repeat with the remaining flour, and fold in the balance of the whites until evenly incorporated. Spread the batter into the prepared pan, taking the time to ensure the batter is level.
Bake the cake for about 12 minutes, until the cake springs back when gently pressed in the center. It will only lightly brown. Do NOT over-bake. Cool the cake for about 2 minutes on a cooling rack, then loosen the sides with a spatula. I found using the spatula and pushing straight down on the edges worked very well.
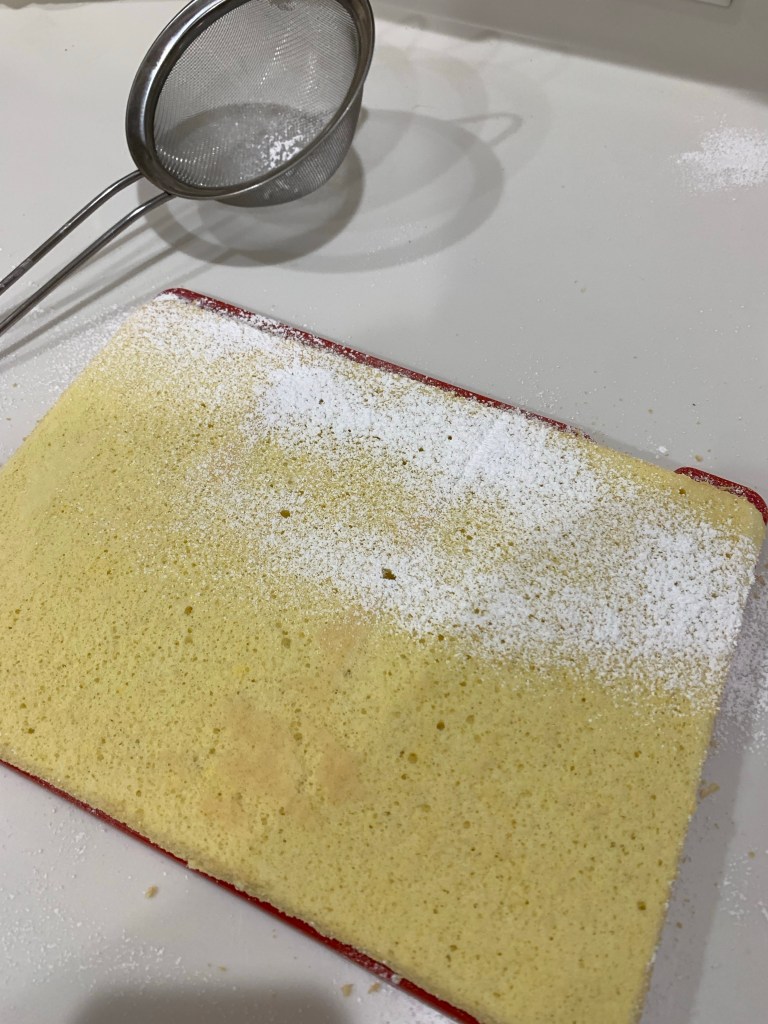
Sift a layer of confectioners sugar over the surface of the cake and cover with a clean towel. Place a second pan of about the same size as the jelly roll pan over the towel and flip the cake, removing the pan it was baked in. Peel off the parchment paper and dust this surface with icing sugar. Roll the cake up from the 10-inch side with the towel and let it cool completely (cooling it rolled sets its “memory” so the cake won’t crack once filled and re-rolled.)
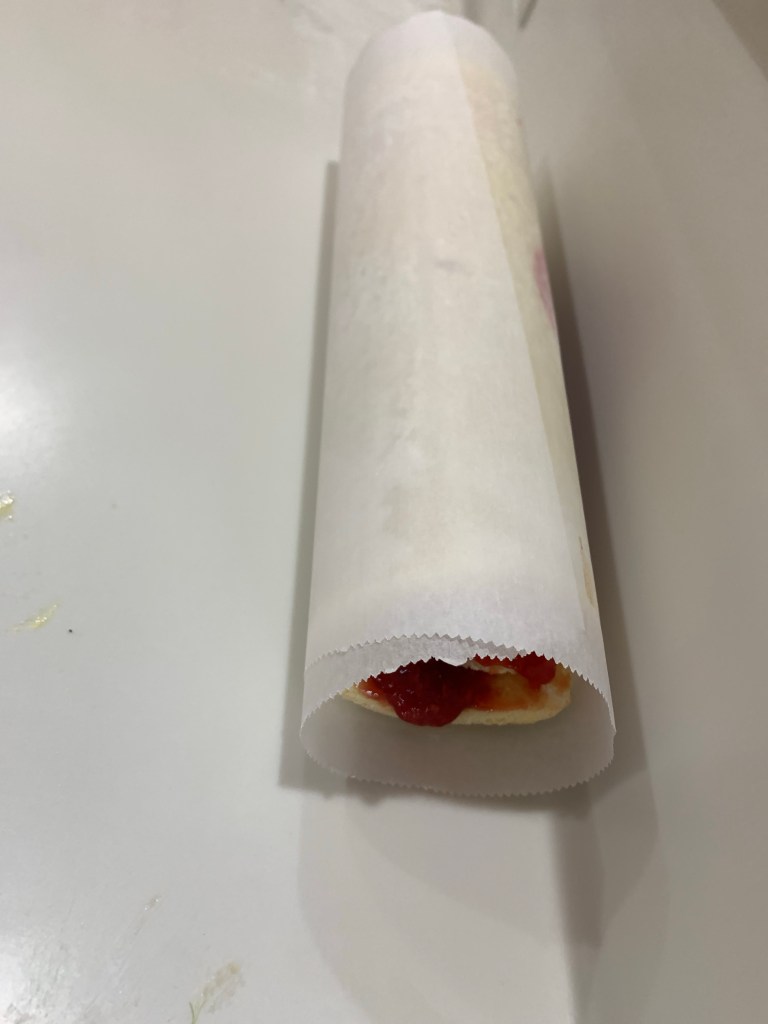
Stir the raspberry jam to soften. Unroll the cake and spread an even layer of jam over the cake. Don’t use too much jam. The ½ cup should be plenty. Leave and inch on the last part of the cake uncoated with jam. The jam will squeeze along as you roll and will eventually coat the last edge. Roll the cake back up again, if desired, dust the top with confectioners sugar. Cover and store at room temperature until ready to serve.
The cake can be prepared up to a day in advance and stored, wrapped and unrefrigerated.
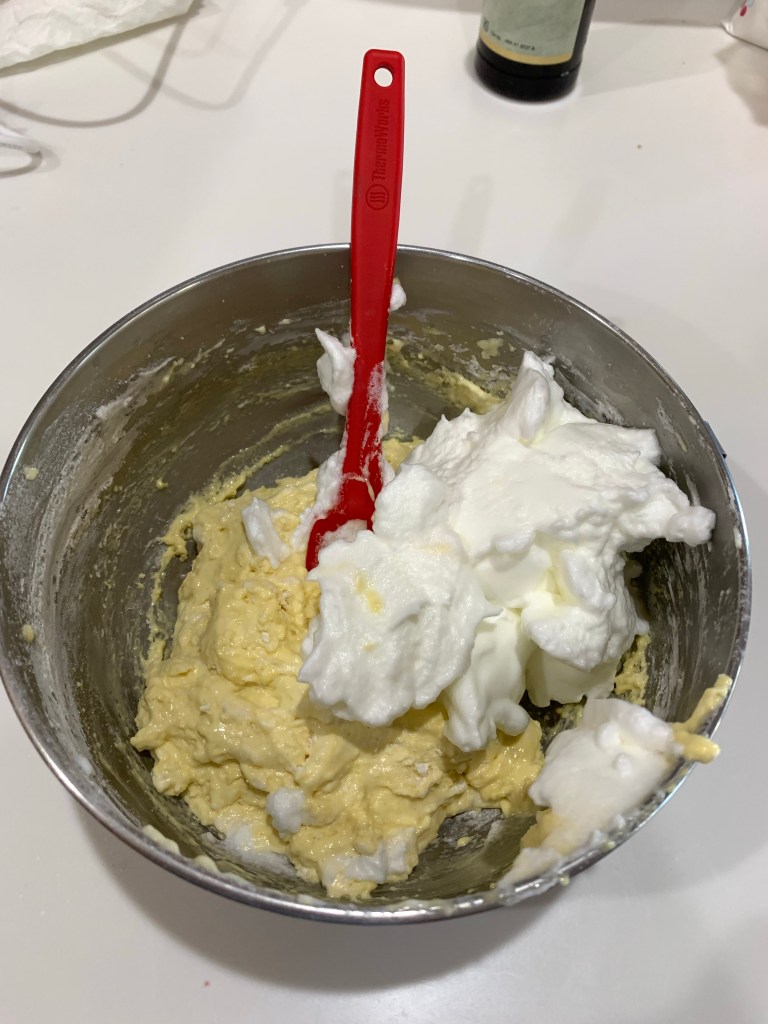
Mix by hand to incorporate confectioners sugarSwitch to hand mixer with whisk attachmentAdd whipped cream in several additionsFold everything together without deflating the mixture.Cooled cakeDusting cake with confectioners sugarCooled cake, unrolled to spread jamCake with jam being rolled back upFinished Swiss Roll, wrapped for room temperature storage
I need an Independence Day themed dessert for a party this weekend. I started out with a red, white and blue mousse cake. The blue was to be blueberry mousse. As you may know, blueberries are not chucked full of flavor, so having made the blueberry mousse, (it tasted mostly like whipped cream) I looked elsewhere for inspiration.
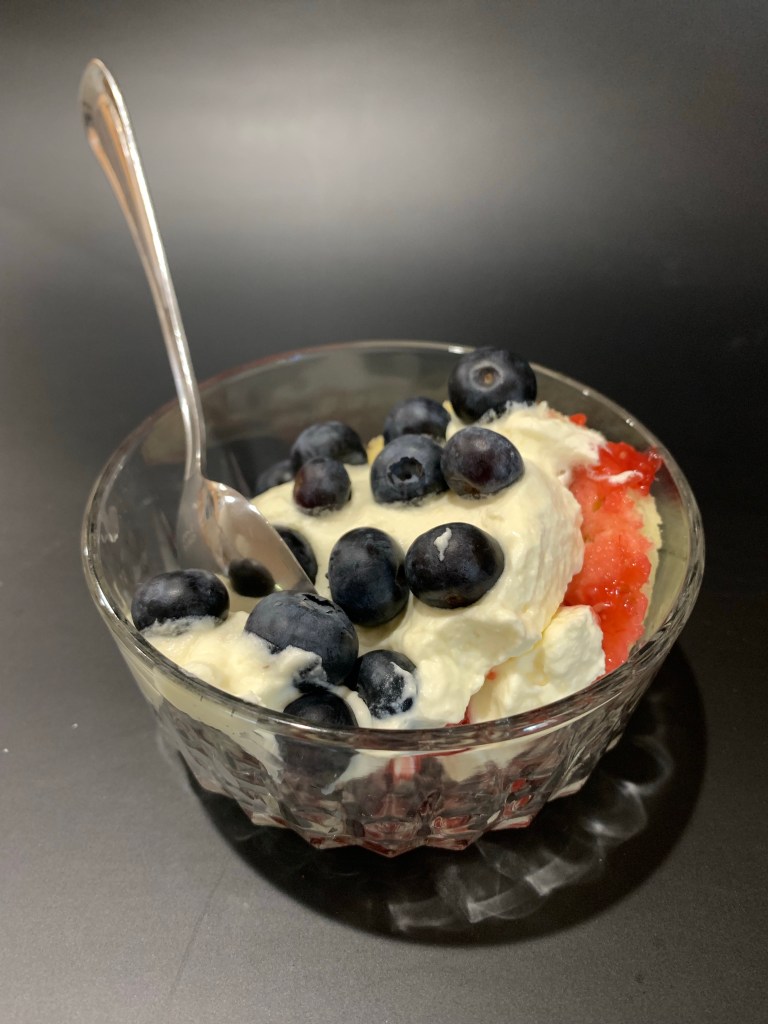
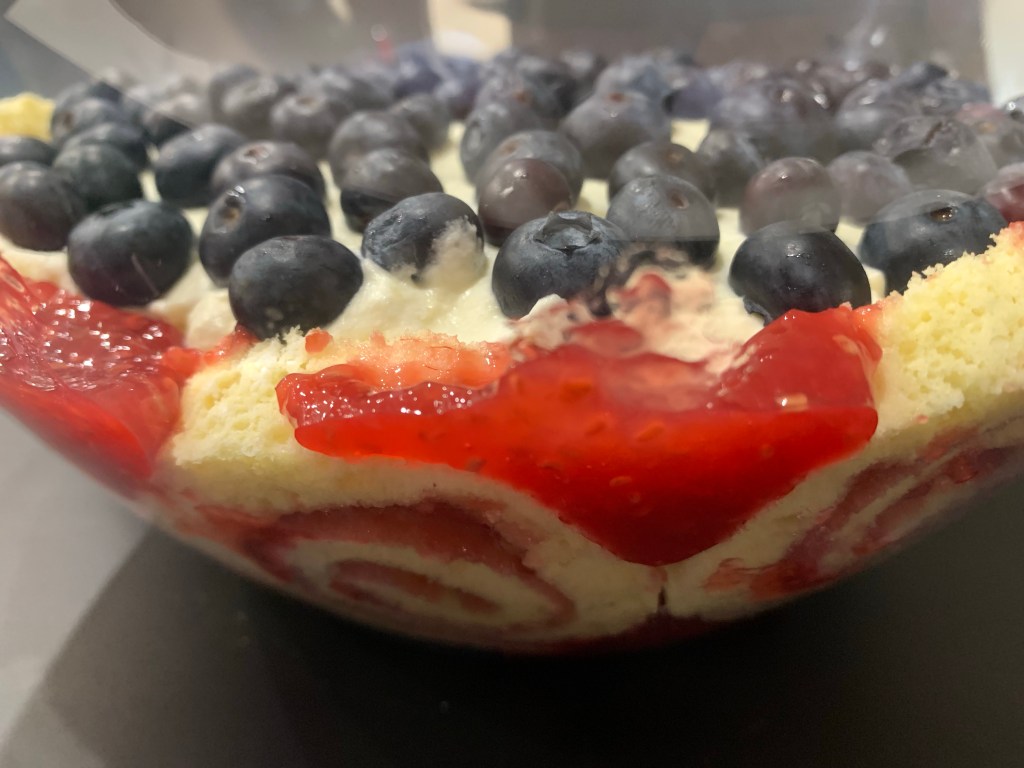
I don’t know how it came to mind, but a berry trifle with red berries, whipped cream and blueberries sounded perfect for a cool, light summer dessert. As one of the kids at the party is allergic to strawberries I used raspberries as the red. (The fact raspberries are my fav, didn’t enter into the decision.) I wanted something more substantial than simple whipped cream so I decided on Creme Diplomat. This creme is basically cream patisserie and whipped cream. I fortified each with cornstarch to help it retain is structure longer.
Rather than lady fingers or simple cubes of white or vanilla cake I settled on a sliced Swiss roll with raspberry filling. (Prettier). I never made a Swiss roll before, but had lots of advice and examples from watching years of GBBO.
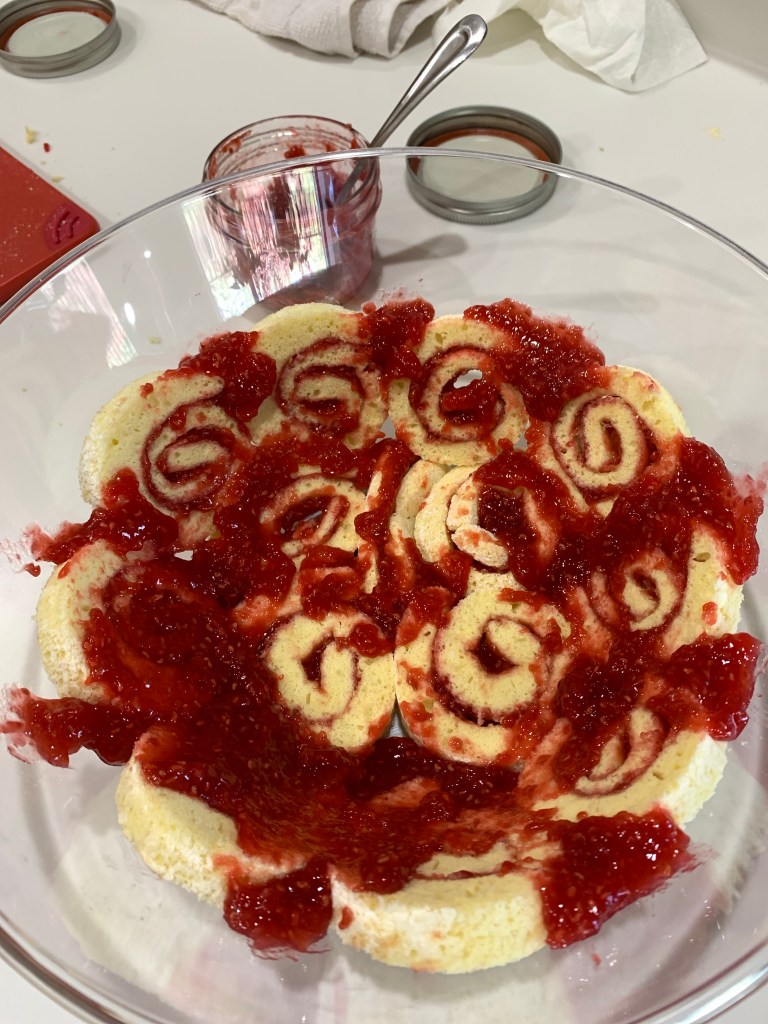
By coincidence, I made raspberry jam last week and had plenty to use for this project. I sliced the cool, filled Swiss roll into 14 pieces. (Note the nice tight swirl pattern. GBBO contestants always struggle with this.) The bottom and sides of the bowl were lined with the slices, then extra jam was forced into any openings between, or on top of the slices.
Creme Diplomat is essentially 1:1 cream patisserie and whipped cream. It resulted in a light, cool and perfect for a summer dessert. QC loved it, said it wasn’t overly sweet but delicious. 😄
I am experimenting with a new backdrop for many of my pictures. I am using the dark background in this post. Let me know what you think.
Crème Diplomat
INGREDIENTS
• ½ c sugar • ¼ c corn starch • Pinch salt • 2 c whole milk • 4 egg yolks • 2 Tbl butter • 2 cups heavy cream, cold • 2 Tbl granulated sugar
METHOD
Whisk eggs and milk together and add to all other ingredients (except vanilla) to a medium saucepan.
Bring to boil whisking constantly
Cook until thickened (it’s ok if it looks lumpy)
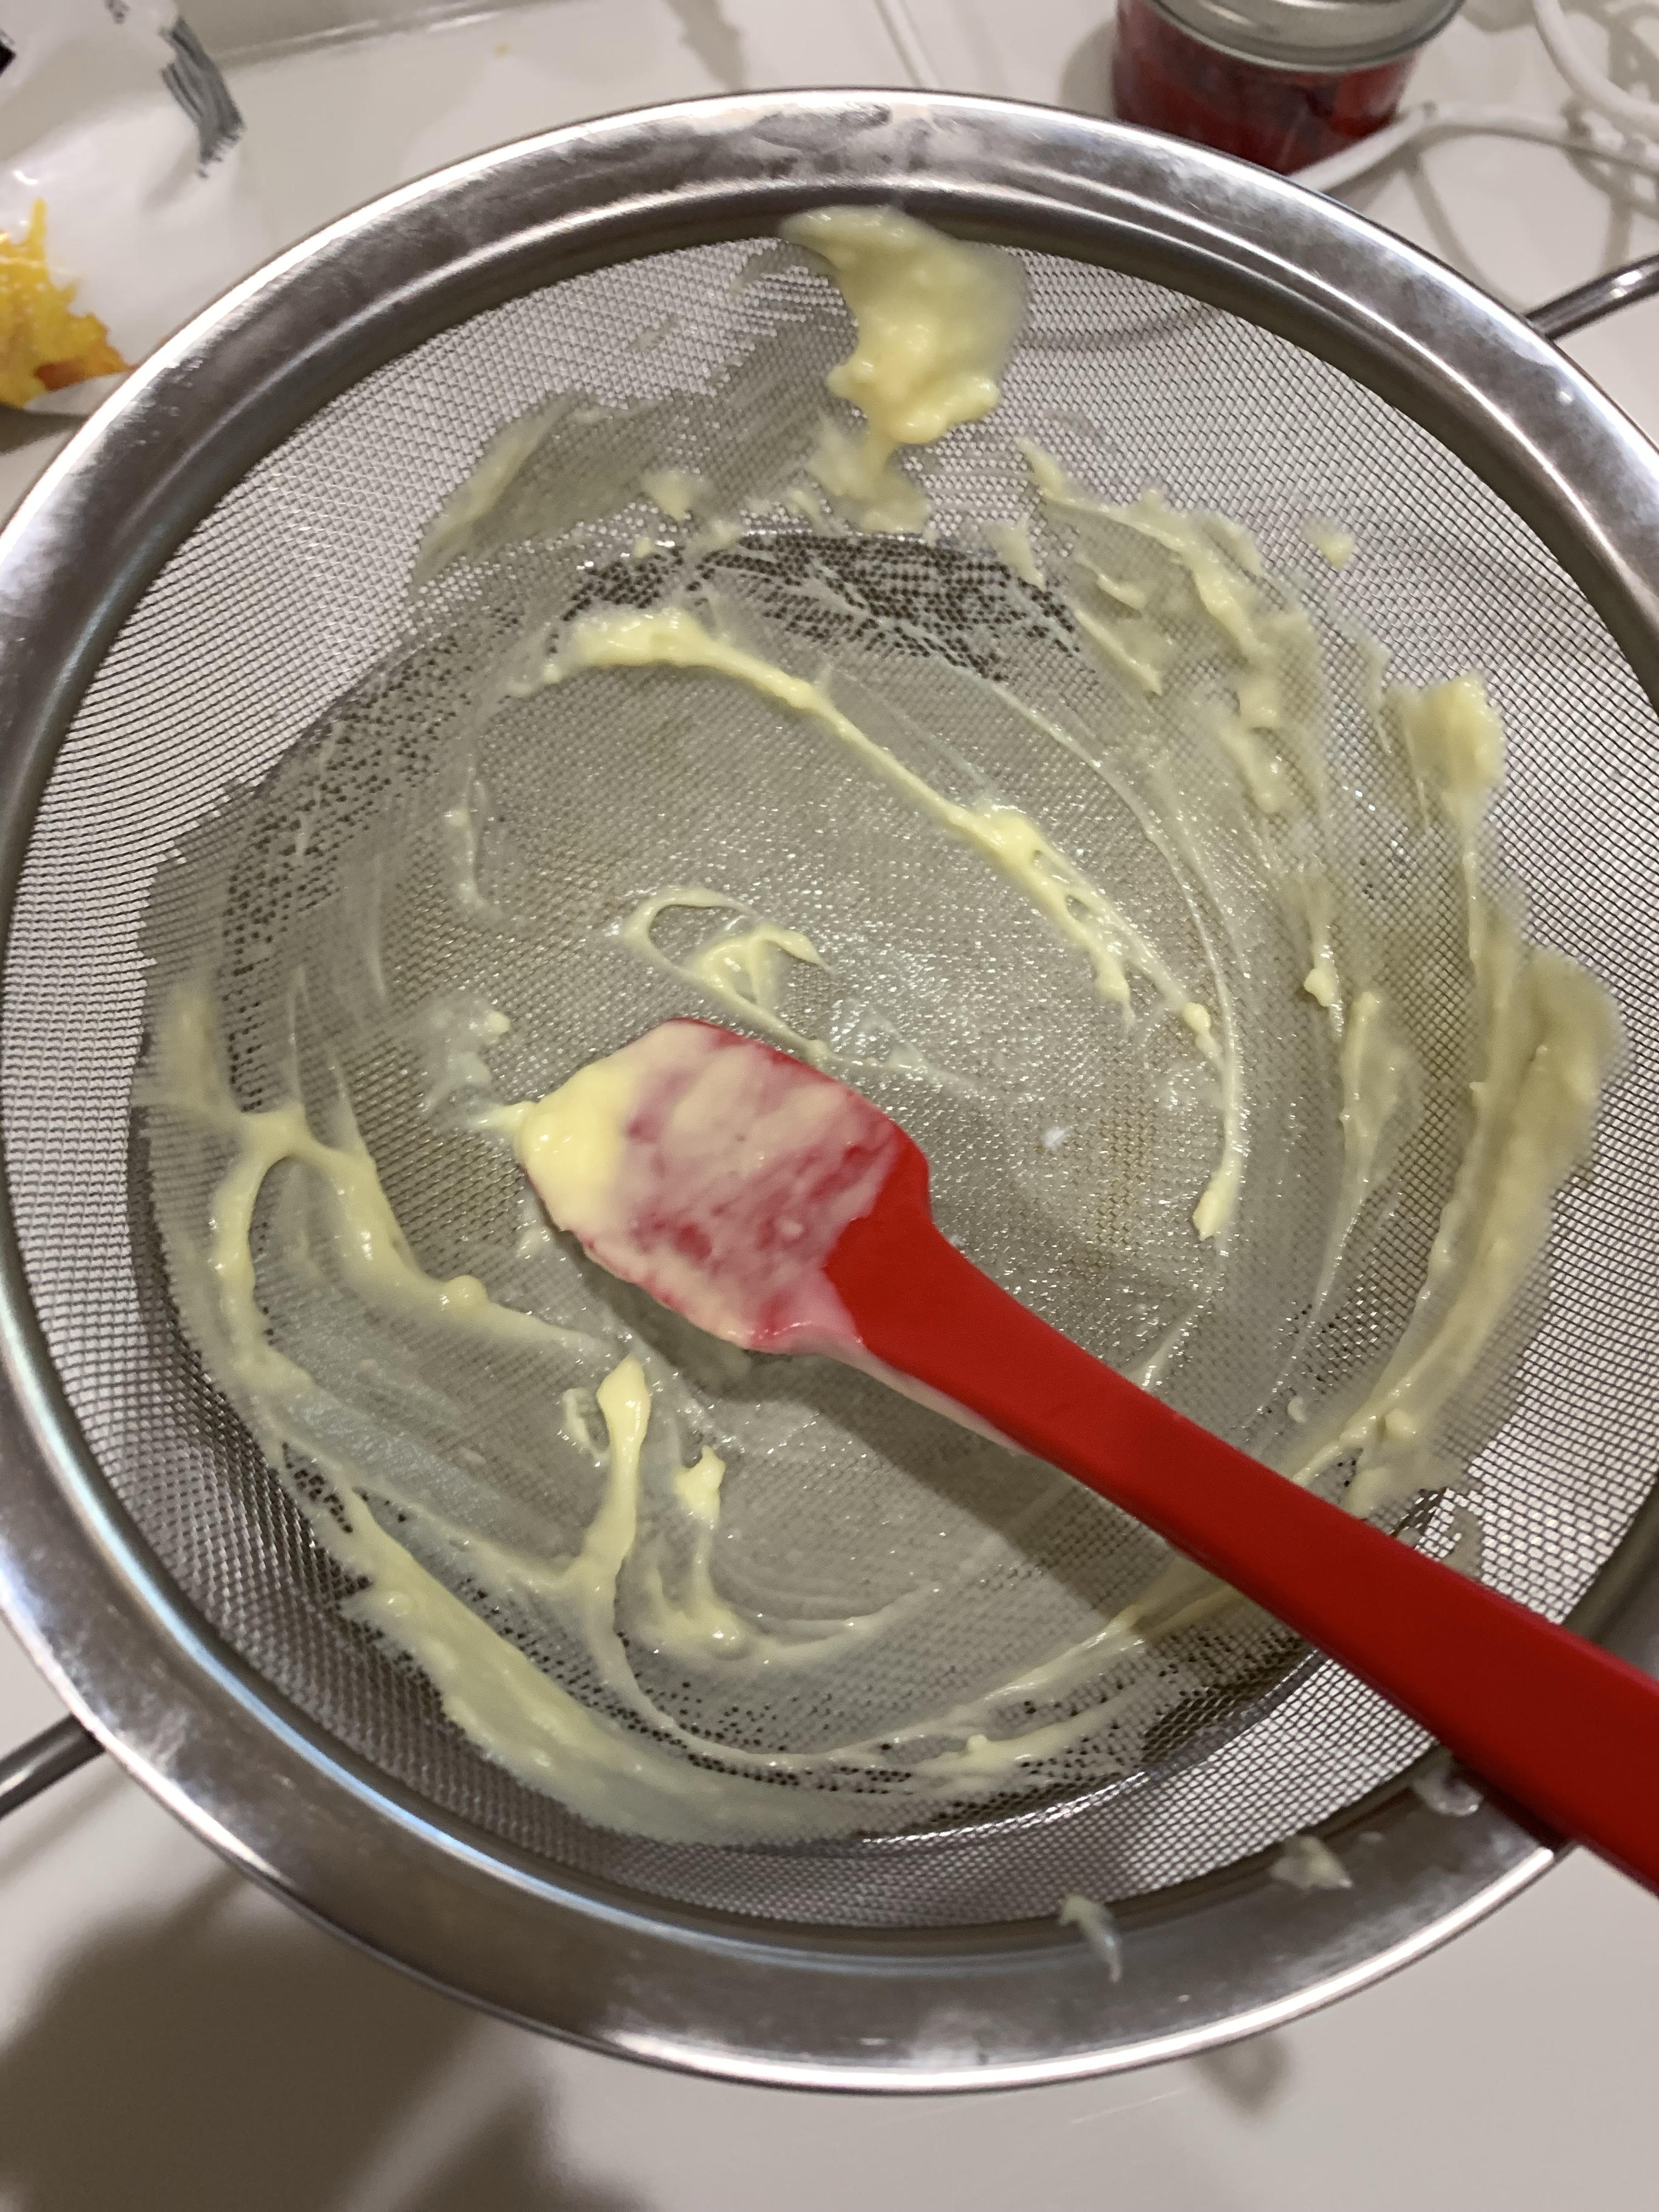
Sieve lumpy mixture into a bowl and add 1 tsp vanilla, mix thoroughly
When incorporated, cover with plastic directly on the cream and cool about an hour.
Whip the cold heavy cream and granulated sugar to medium peaks.
Fold a few spoonfuls of the custard into the cream. Gradually fold the rest of the custard in 2 or 3 additions, being careful to not knock the air out.
Whisk ConstantlyNote Temperature. It will boil lower than expectedSieve mixtureDon’t be afraid to force every bit through the strainer.Cover with plastic wrap directly on the cream.
Don’t ask me why I was obsessed with making a Neapolitan Mousse Cake, but I was, and it’s now complete. Today was the third and fourth (and final) adjustments to the recipe(s).
To make the three layers approximately the same thickness I increased the amount of white and strawberry mousse. I also adjusted the amount of agar agar to create the consistency I wanted.
Neapolitan Mousse
INGREDIENTS
WHIPPED CREAM (for Chocolate Mousse)– YIELDS 1 ½ CUPS OF WHIPPED CREAM • 1 cup Heavy whipping cream • 4 tablespoons Powdered Sugar or Confectioners sugar • 1 ½ teaspoons Cream of tartar • 1 tsp vanilla bean paste WHIPPED CREAM (for Vanilla and Strawberry Mousse)– YIELDS 2 CUPS OF WHIPPED CREAM • 1 ½ cup Heavy whipping cream • 6 tablespoons Powdered Sugar • 2 teaspoons Cream of tartar • 1 ½ tsp vanilla bean paste WHITE CHOCOLATE • 2 cup White chocolate chips • ½ cup heavy whipping cream DARK CHOCOLATE • 1 cup dark chocolate chips • ½ cup Heavy whipping cream STRAWBERRY PURÉE • 1 ½ cup fresh strawberries • 1/3 + 2 Tbl cup granulated sugar • 1 ½ tsp strawberry extract • Red food coloring to suit (1-2 drops) AGAR AGAR • 2 Tsp Agar Agar • 2 Tbl warm water CHOCOLATE GANACHE • 1 cup chocolate • ¾ cup heavy cream GRAHAM CRAKER CRUST • 2 cups finely crushed regular graham crackers • 1/3 cup butter, melted • ½ beaten egg white • 3 tablespoons sugar
METHOD
GRAHAM CRACKER CRUST
Heat oven to 350°F. In a food processor pulse the crushed graham crackers several times, then add the rest of the ingredients until well mixed. Press remaining mixture firmly and evenly against bottom of an 8” removable bottom cake pan.
Bake at 350 F for 10 min. Set aside to cool.
When cool, line the inside edges of the cake pan with acetate
WHIPPED CREAM – (3 batches required)
Before beginning with the recipe, place the mixing bowl and whisk in the freezer for at least 10 minutes to chill.
Once the bowl has chilled, add heavy cream and vanilla and beat on low speed until the cream starts to thicken slightly. There will be fewer and larger bubbles.
Add the cream of tartar and powdered sugar and beat with increasingly higher speed until stiff peaks form. Once done, set it in the fridge to chill.
PREPARING THE CHOCOLATE MOUSSE
Heat heavy cream to steam, not boil. I use the microwave in 30 second bursts
Place 1 cup chopped chocolate in a heat proof bowl.
Pour heated cream over chocolate, cover and let sit 30 seconds
Beat until the cream is completely incorporated and the chocolate is smooth and creamy
Let come to room temperature
Gently fold the room temperature chocolate into the cold whipped cream
Spread the chocolate mousse evenly on top of the graham cracker crust
Refrigerate
PREPARING THE STRAWBERRY PURÉE
Combine strawberries and sugar in a saucepan and bring to a boil. Lower the heat and simmer for 10 minutes until the syrup thickens.
Keep stirring occasionally. When the strawberries are soft and the syrup has thickened, remove from heat and allow to cool.
When completely cooled, coarsely puree it with an immersion blender. Add strawberry extract and set it aside. Measure the syrup – you will require ½ cup of thick syrup
AGAR AGAR MIX
Mix 3 teaspoons Agar agar powder with 4 Tbl lukewarm water
Whisk to combine
Let rest 4 – 5 minutes for the agar agar to bloom
PREPARING STRAWBERRY AND VANILLA MOUSSE
Heat a pan 1/2 filled with water over low heat and place the white chocolate bowl over the water when it simmers. Keep stirring the chocolate as it softens and melts.
Add agar agar mix and stir constantly for 5 minutes
Add ½ cup warm milk and mix until the chocolate is thick but runny.
FOR VANILLA MOUSSE
If desired add a few drops of white food coloring to lighten the yellowish mixture and mix well
Gently fold the cool to touch white chocolate [and agar] mixture into the cool whipped cream until combined. Do not beat and deflate the mousse.
FOR STRAWBERRY MOUSSE
Add half the cooled whipped cream to the cool white chocolate mixture
Add the strawberry syrup that was prepared earlier to the whipped cream/white chocolate mixture
Mix gently to not deflate.
Add the rest of the whipped cream to the strawberry-white chocolate.
[OPTIONAL – add two drops of red food coloring. Without the coloring the strawberry mousse is not strongly differentiated from the vanilla mousse.]
TO MAKE CHOCOLATE GANACHE
Warm cream in the microwave just until a simmer and not boiling hot.
Pour it over the chocolate and let it rest, undisturbed, for 30 seconds.
Now start stirring gently until it forms a smooth chocolate ganache.
Let the ganache cool slightly, but it should still be pourable.
DECORATING THE MOUSSE CAKE WITH GANACHE
Pour the chocolate around the edge of the mousse cake letting some run down the side, but not so much as to drip all the way to the bottom.
Cover the rest of the cake with chocolate and top with sliced strawberries.
DECORATING THE MOUSSE CAKE WITH A CHOCOLATE COLLAR
Cut a piece of parchment paper the circumference and height (or a little more) of the mousse cake.
Place it on a larger piece of parchment paper to help later clean-up.
Temper a cup of chocolate, fill a piping bag and let cool slightly. This was an experiment for me. It needs to be cool enough to not run when piped, but warm enough to pipe easily
Cut a small hole in the end of the piping bag and with an erratic swirling pattern make a lace pattern over the smaller piece of parchment paper, being sure to cover all the way to the edges.
Let the chocolate collar dry such that it won’t drip when picked up.
Carefully wrap the mousse cake with the still slightly soft collar and press gently.
Let the collar cool for a few minutes then carefully peal the parchment paper base from the collar, leaving the chocolate collar adhered to the mousse cake.
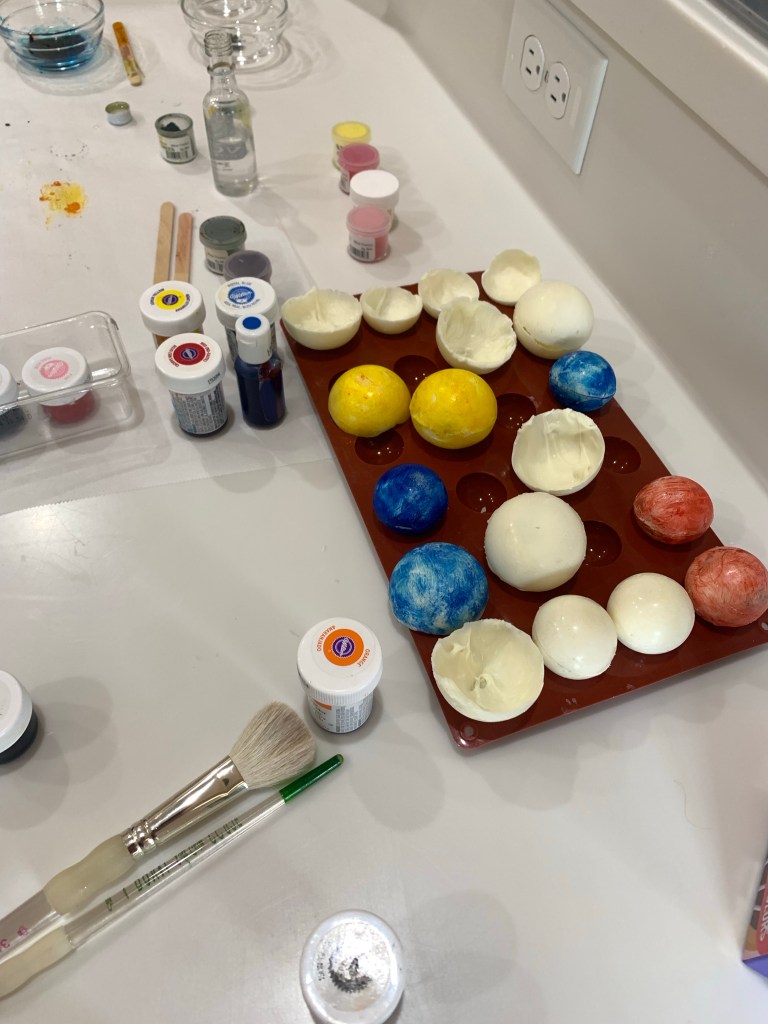
Grace’s sixth birthday is a space themed extravaganza so I made a galaxy cake. It’s more of a solar system cake, but not our solar system.
The cake is a six layer stacked extreme chocolate cake. A cardboard cake board separates each two layers to make cutting and serving easier. Each layer is a 9” round cake, and the “internal” cake board is 8” to allow a smooth buttercream transition between layers. The small white stars are tempered white chocolate made with a silicon mold. The larger stars, around the base, are various colors of white chocolate, again formed using a silicon mold.
The planets are white chocolate made with a variety of hemispherical silicon molds and painted with decorating colors mixed with vodka. Some of them were fused together to make spheres, the ones on the side of the cake were left as hemispheres. Slightly melting the edges of the hemisphere or the bottom of the spheres helped them adhere to the blue buttercream.
Before adding the planets I splattered the cake with white food coloring. The “space woman” was purchased and a printable decal image of Grace was pasted on the silver faceplate of the space suit.
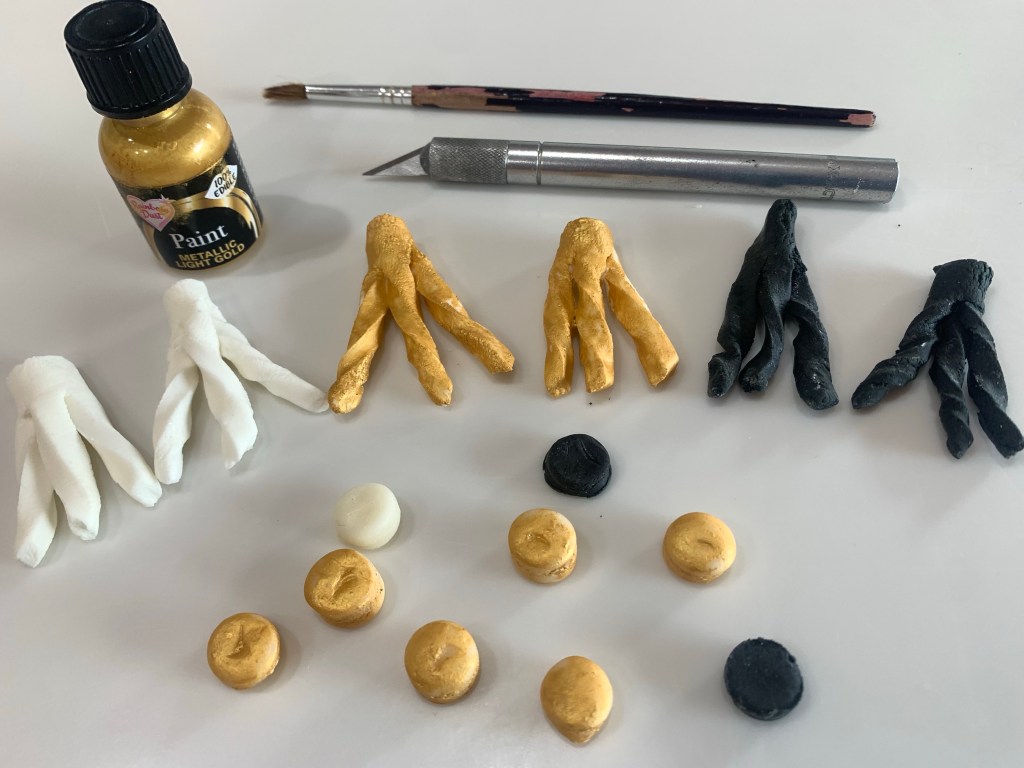
My younger granddaughter graduated pre-school today and I made a cake for her celebration party. The cake was relatively simple, extreme chocolate cake for the cap and marble cake for the base. The mortarboard was a 1/4” thick piece of tempered dark chocolate.
The time consuming part of this cake was making all the little decorations. The tassels were made by cutting a 1/8” rectangle of fondant 2.5” wide and slicing it into 1 1/2” x 1/4” strips, leaving the top 1” intact. Cut each three strip piece apart leaving the 1” header. Paint one side of the header with water and roll up. Twist each of the strips to form the tassel. Let dry. Paint the gold tassels and leave some white. Make another set using the black fondant.
Roll another sheet (or a portion of the above) and cut with a circulate cutter. (I used a large piping tip,) Again, paint the gold ones, leave some white ones and cut out the black.
The mortarboard was made by pouring tempered dark chocolate onto a parchment lined cutting board. Before it was completely set and hard use a straight edge to cut it into a 8”x8” square.
Extreme Chocolate Cake
Makes two 9” round cakes INGREDIENTS (Makes one 10’ ROUND CAKE [and two 5”] – quantities are in parenthesis. Or one 11”x15”x2” sheet cake.) • 2 cups white sugar (3) • 1 3/4 cups all-purpose flour (2 2/3) • 3/4 cup unsweetened cocoa powder (1 ¼) • 1 1/2 teaspoons baking soda (2 ¼) • 1 1/2 teaspoons baking powder (2 ¼) • 1 teaspoon salt (1 ½) • 2 eggs (3) • 1 cup milk (1 ½) • 1/2 cup vegetable oil (¾) • 2 teaspoons vanilla extract (3) • 1 cup boiling water (1 ½)
METHOD
Preheat oven to 350 degrees F (175 degrees C). Grease and flour two 9 inch cake pans. (SEE QTY FOR 10” CAKES)
Use the first set of ingredients to make the cake. In a medium bowl, stir together the sugar, flour, cocoa,baking soda, baking powder and salt. Add the eggs, milk, oil and vanilla, mix for 3 minutes with an electric mixer. Stir in the boiling water by hand. Pour evenly into the two prepared pans. (For cupcakes,portion ¼ scant cups in each cupcake paper.
Bake for 30 to 35 minutes in the preheated oven, until a toothpick inserted comes out clean or 205F internal temp. Cool for 10 minutes before removing from pans to cool completely.
Marble Cake
INGREDIENTS • 454 g cake flour • 454 g granulated sugar • 1 tsp salt • 1 Tablespoon baking powder • 1 teaspoon baking soda • 4 large eggs room temperature • 142 g vegetable oil • 397 g buttermilk room temperature or slightly warm • 227 g butter unsalted and softened • 2 teaspoon vanilla • 1/2 teaspoon almond extract • 29 g cocoa powder dutch or natural • 85 g hot water • 1 Tablespoon cocoa powder for dusting
METHOD Cake Batter
Prepare three 8″x2″ cake pans with cake goop or another preferred pan spray. Preheat your oven to 335ºF
Bring your butter, milk, and eggs to room temperature. It’s really important when making a cake for the ingredients to all be slightly warm so they create an emulsion.
Heat the water until it’s simmering and then combine it with your cocoa powder.
Stir it until the cocoa powder is moistened. It will look lumpy, but that is normal.
Set it aside and let it cool while you prepare the cake batter.
In a separate container, combine 3/4 cup of the milk and the oil together and set it aside.
In a separate container, combine the remaining milk, eggs, vanilla, and almond extract together. Whisk it to break up the eggs, and then set it aside.
In the bowl of your stand mixer, combine the flour, sugar, baking powder, baking soda, and salt with the paddle attachment. Mix for 10 seconds to combine everything.
Add your softened butter to the flour mixture and mix on low until the mixture resembles coarse sand (this takes about 30 seconds). This style of mixing is called the reverse creaming method, and it will result in a very velvety, moist cake. A lot of my other cake recipes like brown butter cake and white velvet buttermilk cake use this method.
Add in your milk/oil mixture and mix it on low until the dry ingredients are moistened.
Increase the speed to medium (setting 2 on my Bosch Mixer, setting 4 on a KitchenAid) and let it mix for 2 minutes to develop the cake’s structure. If you don’t let your cake mix on this step, your cake could collapse.
Scrape your bowl and then reduce the speed to low.
Add in your egg mixture in three batches, letting the batter mix for 15 seconds between additions.
Scrape down the sides again to make sure everything has incorporated.
Marbling the Cake Batter
Take out 1/3 of your batter and combine it with the cooled chocolate mixture and fold it gently until it’s combined.
Layer your batter into your pans, starting with vanilla, then chocolate, and ending with vanilla.
Use a butter knife to swirl them together gently. Do not over-mix or your cake will not have a marbled interior.
Bake the cakes for 35-40 minutes at 335ºF (168ºC) or until a toothpick inserted into the center comes out cleanly (but the cake has not begun to shrink yet from the sides of the pan). IMMEDIATELY TAP THE PAN FIRMLY on the countertop once to release the steam from the cake. This stops the cake from shrinking.
Let the cakes cool for 10 minutes inside of the pan before flipping them out. The cake will shrink a bit and that is normal.
Flip the cake onto a cooling rack and let it cool completely. I chill my cakes before handling them, or you can wrap them in plastic wrap and freeze them to trap moisture in the cake.
Thaw the cake on the countertop while it’s still wrapped before frosting.
Marshmallow Fondant
INGREDIENTS • 1 package (16 ounces) white mini marshmallows • 2-5 tablespoons water • 2 pounds sifted confectioners’ sugar • 1/4 cup solid vegetable shortening METHOD
Grease your mixing bowl and a glass bowl that can be used to melt marshmallows in the microwave.
Place the marshmallows, water and flavoring of your choice in greased glass bowl and microwave on high at 30 second intervals.
Stir every 30 seconds until marshmallows are completely melted, about 2 minutes.
Sift one half of the 2 pound bag of confectioner’s sugar in a greased mixing bowl. Make a well in the center of the confectioner’s sugar and pour in the melted marshmallows.
I use the paddle attachment for my KitchenAid mixer for this first part of the mixture.
Mix until all the melted marshmallows are incorporated in the confectioner’s sugar.
Add any food coloring at this point.
Mixture will be thick but still runny.
Sift the remaining half bag of confectioner’s sugar into the melted marshmallows.
Mix on low until it comes together.
Change to your dough hook attachment as this will get extremely thick.
Fondant will be very thick and have a dough like consistency
Wrap fondant in saran and make sure no air gets to it.
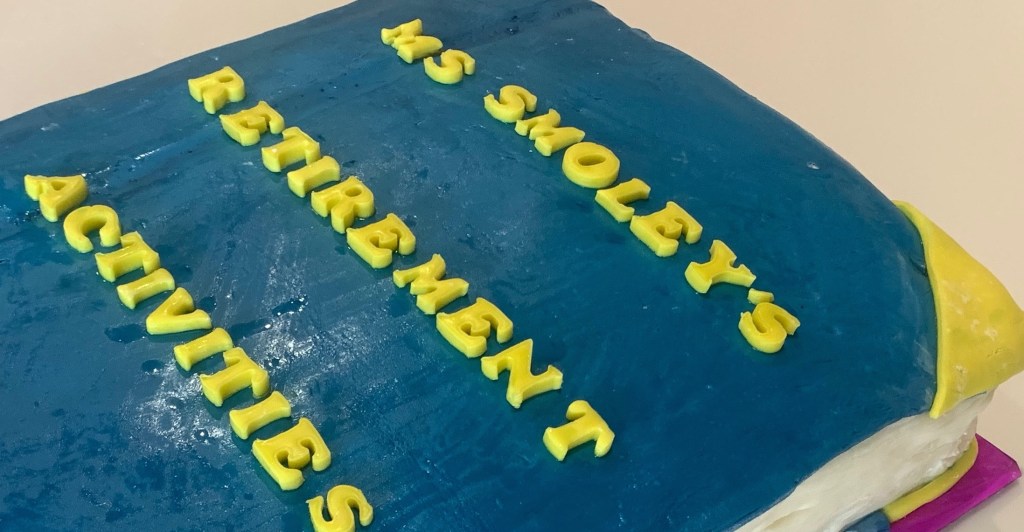
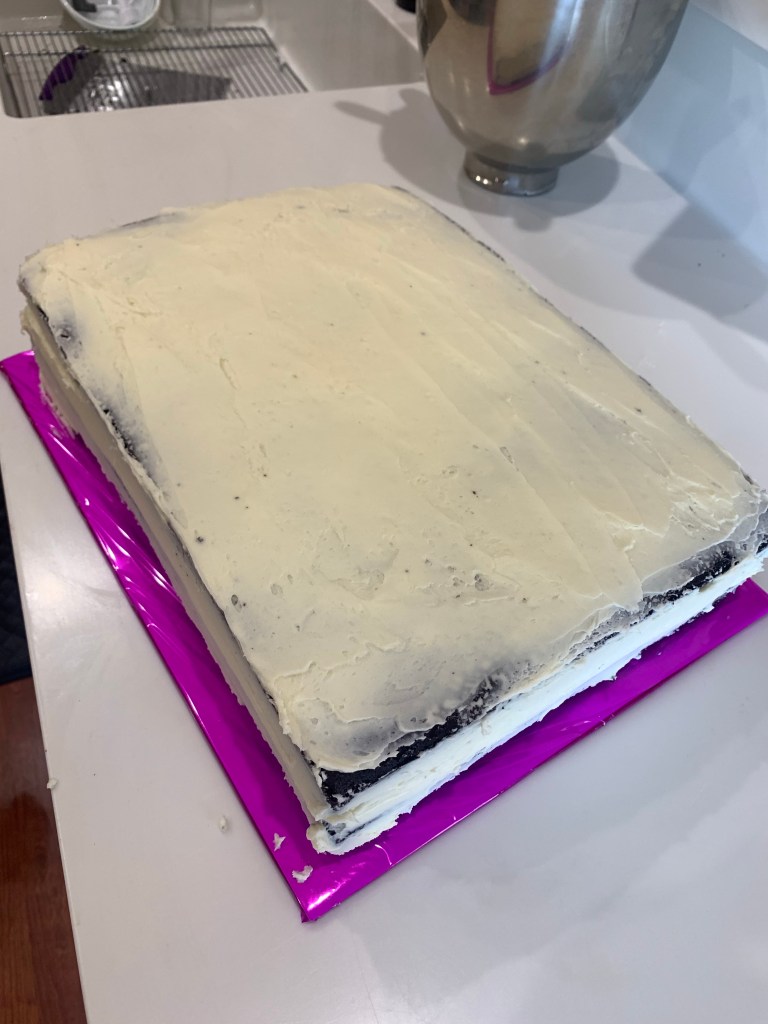
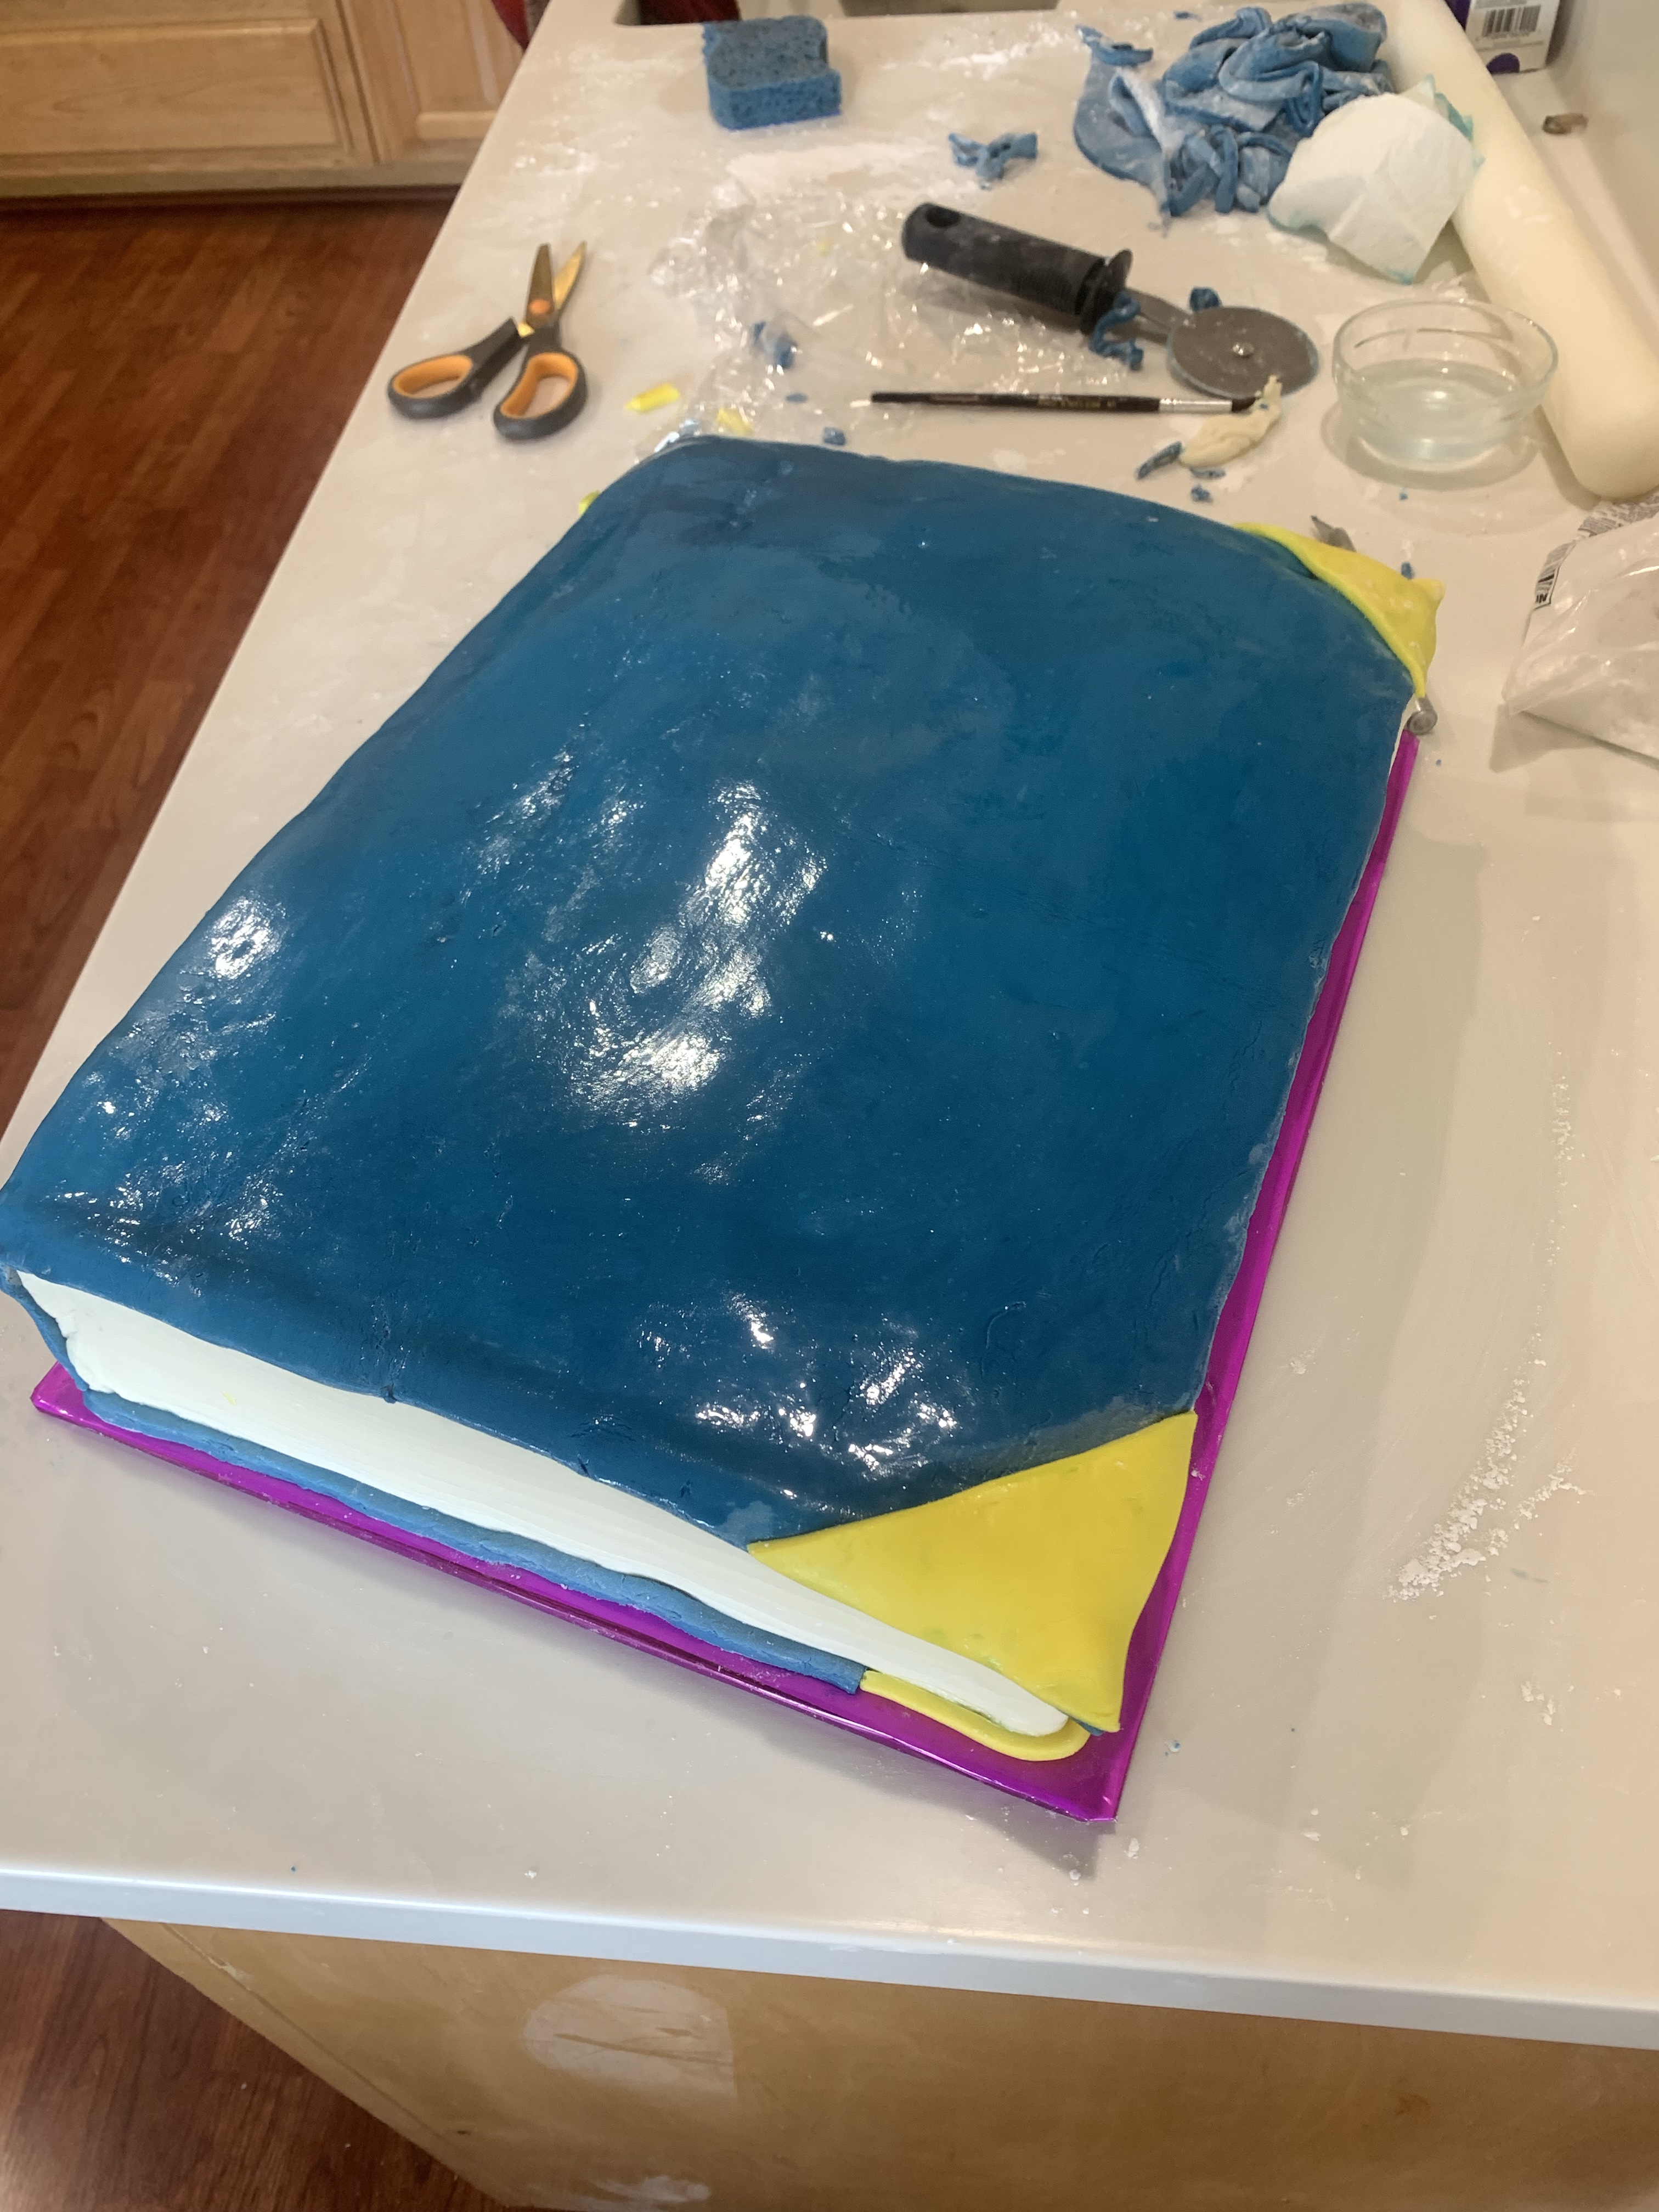
I thought a “Book Cake” would be an appropriate choice for a school principal’s retirement party. I was told she likes to read and likes chocolate cake, so….
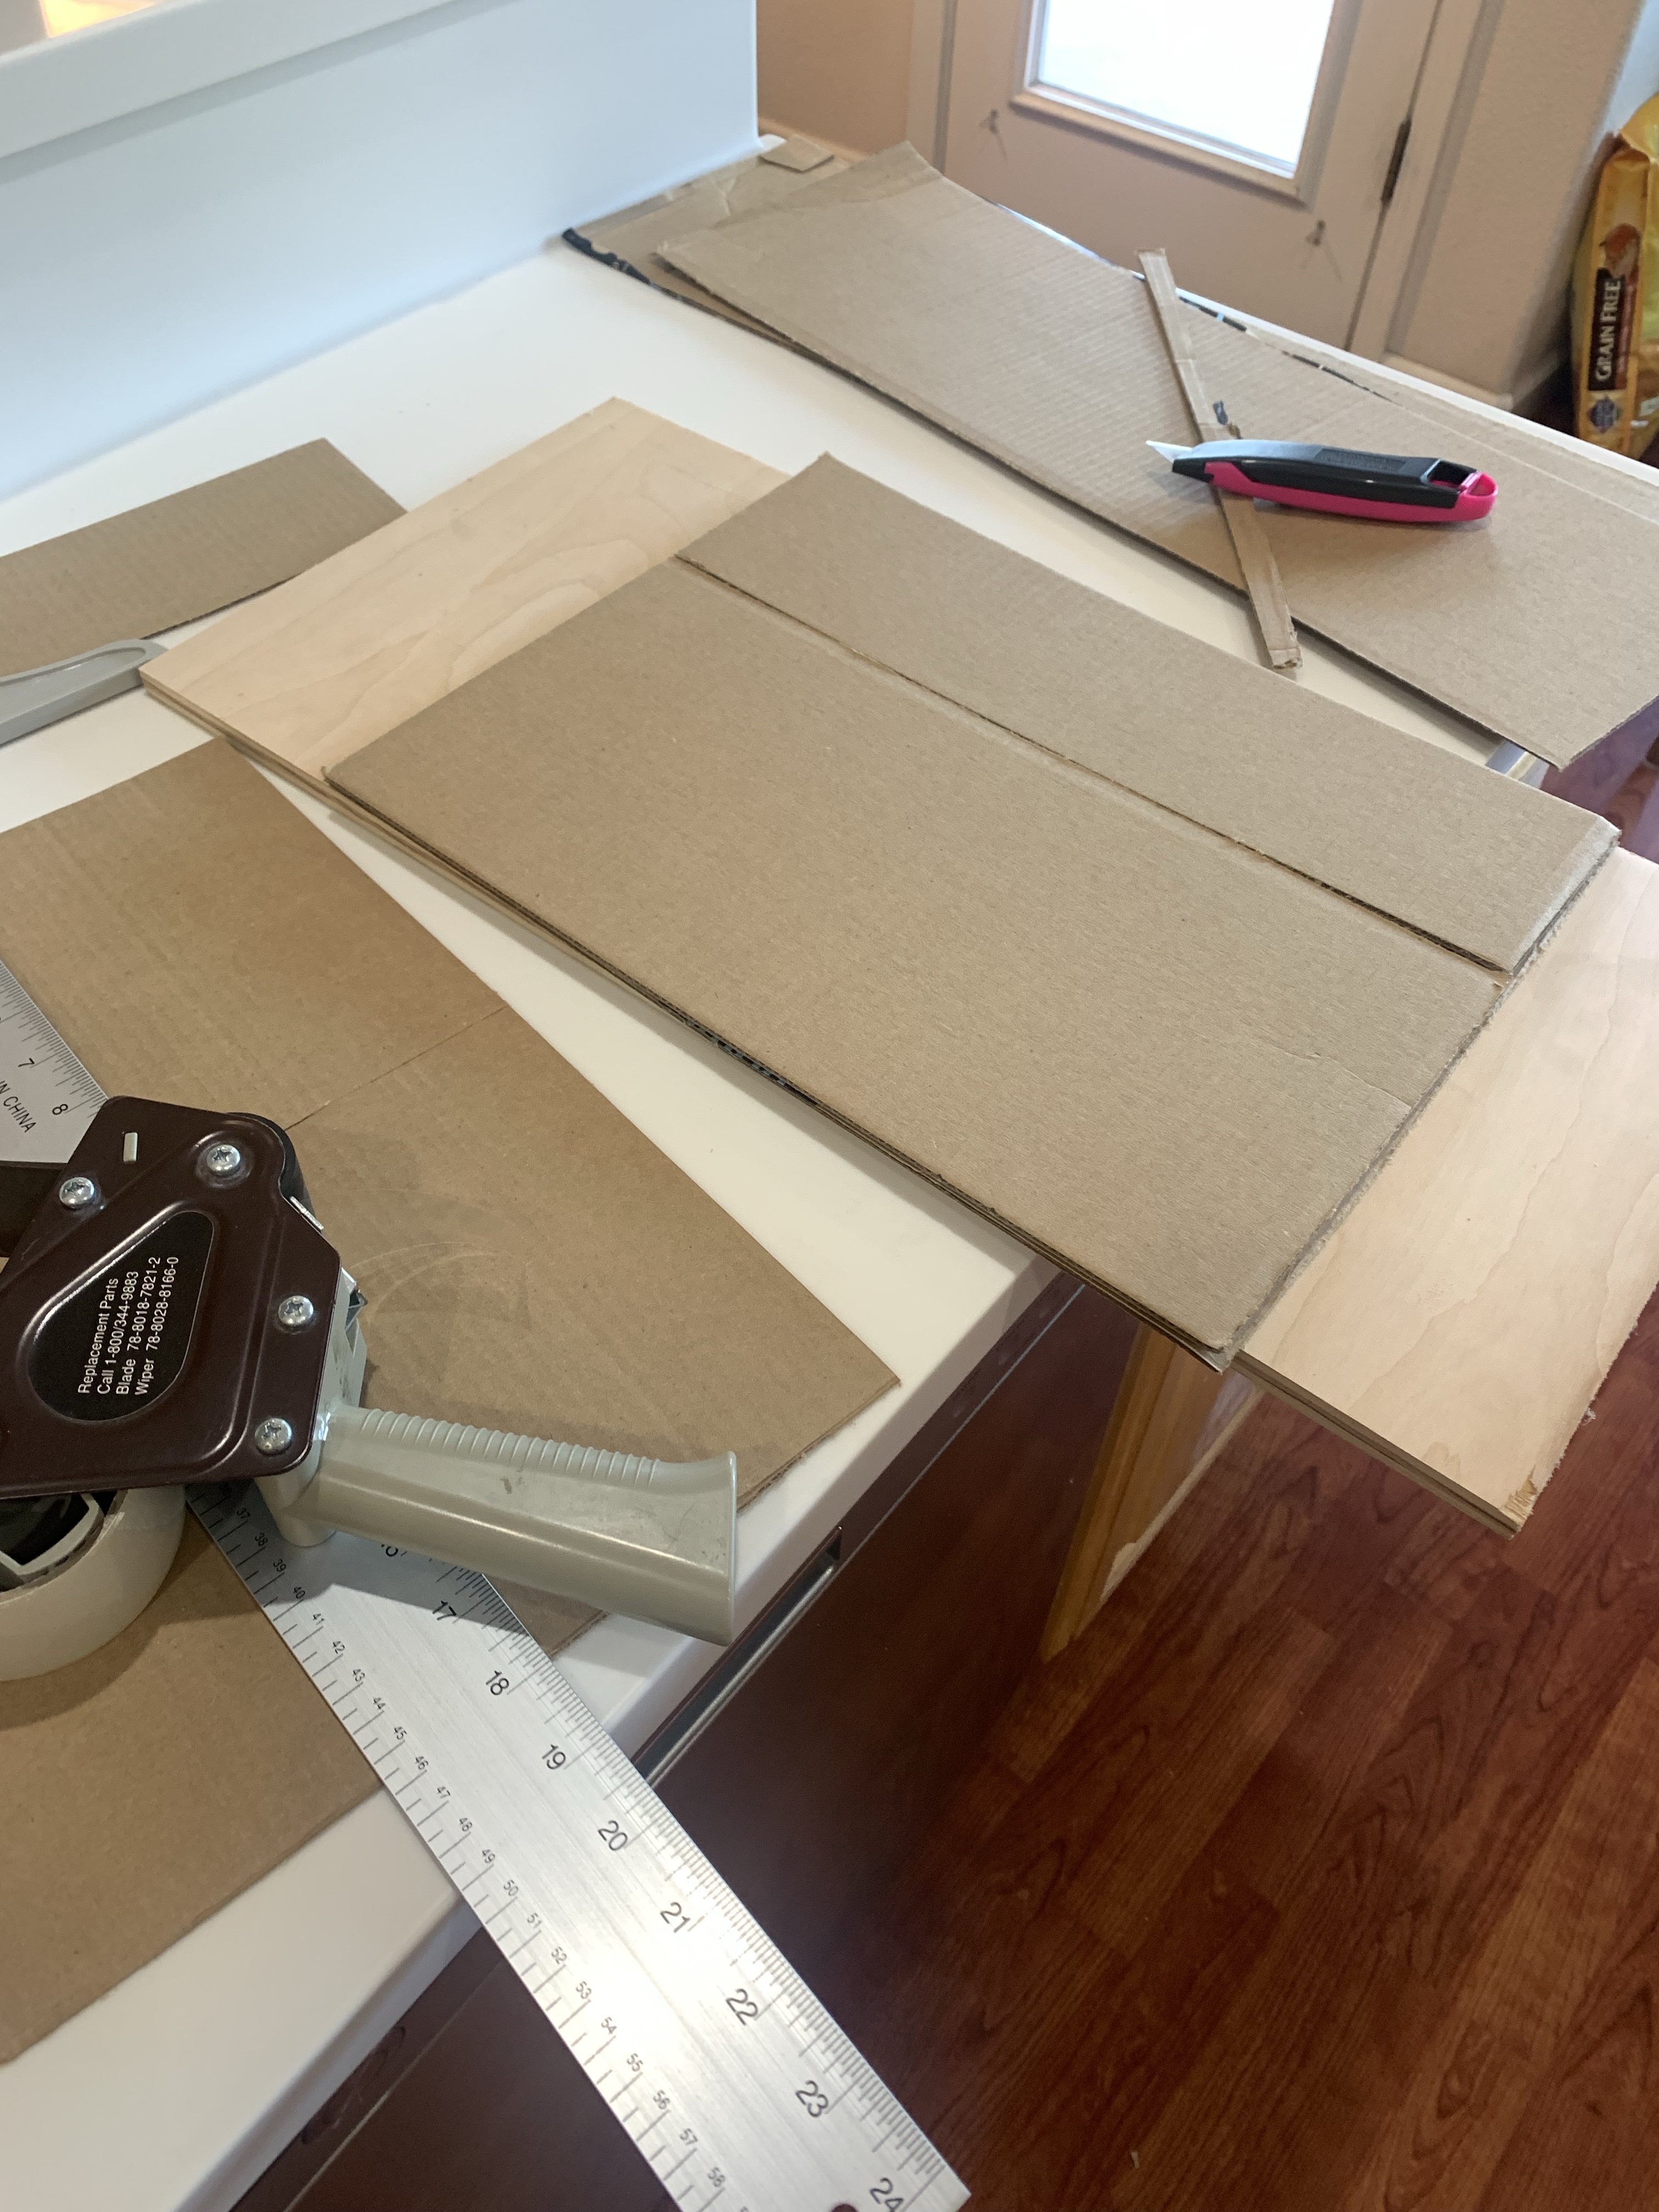
I didn’t have a rectangular cake board of the appropriate size (13”x17”,) nor did the local stores, so I made one from cardboard and food quality cellophane.
I made two 11×15” Extreme Chocolate Cakes and refrigerated them for a couple of days. When crumb coating, I like to cool (and firm) the cakes. Also, I make my buttercream frosting a little thinner when using it for crumb coating..
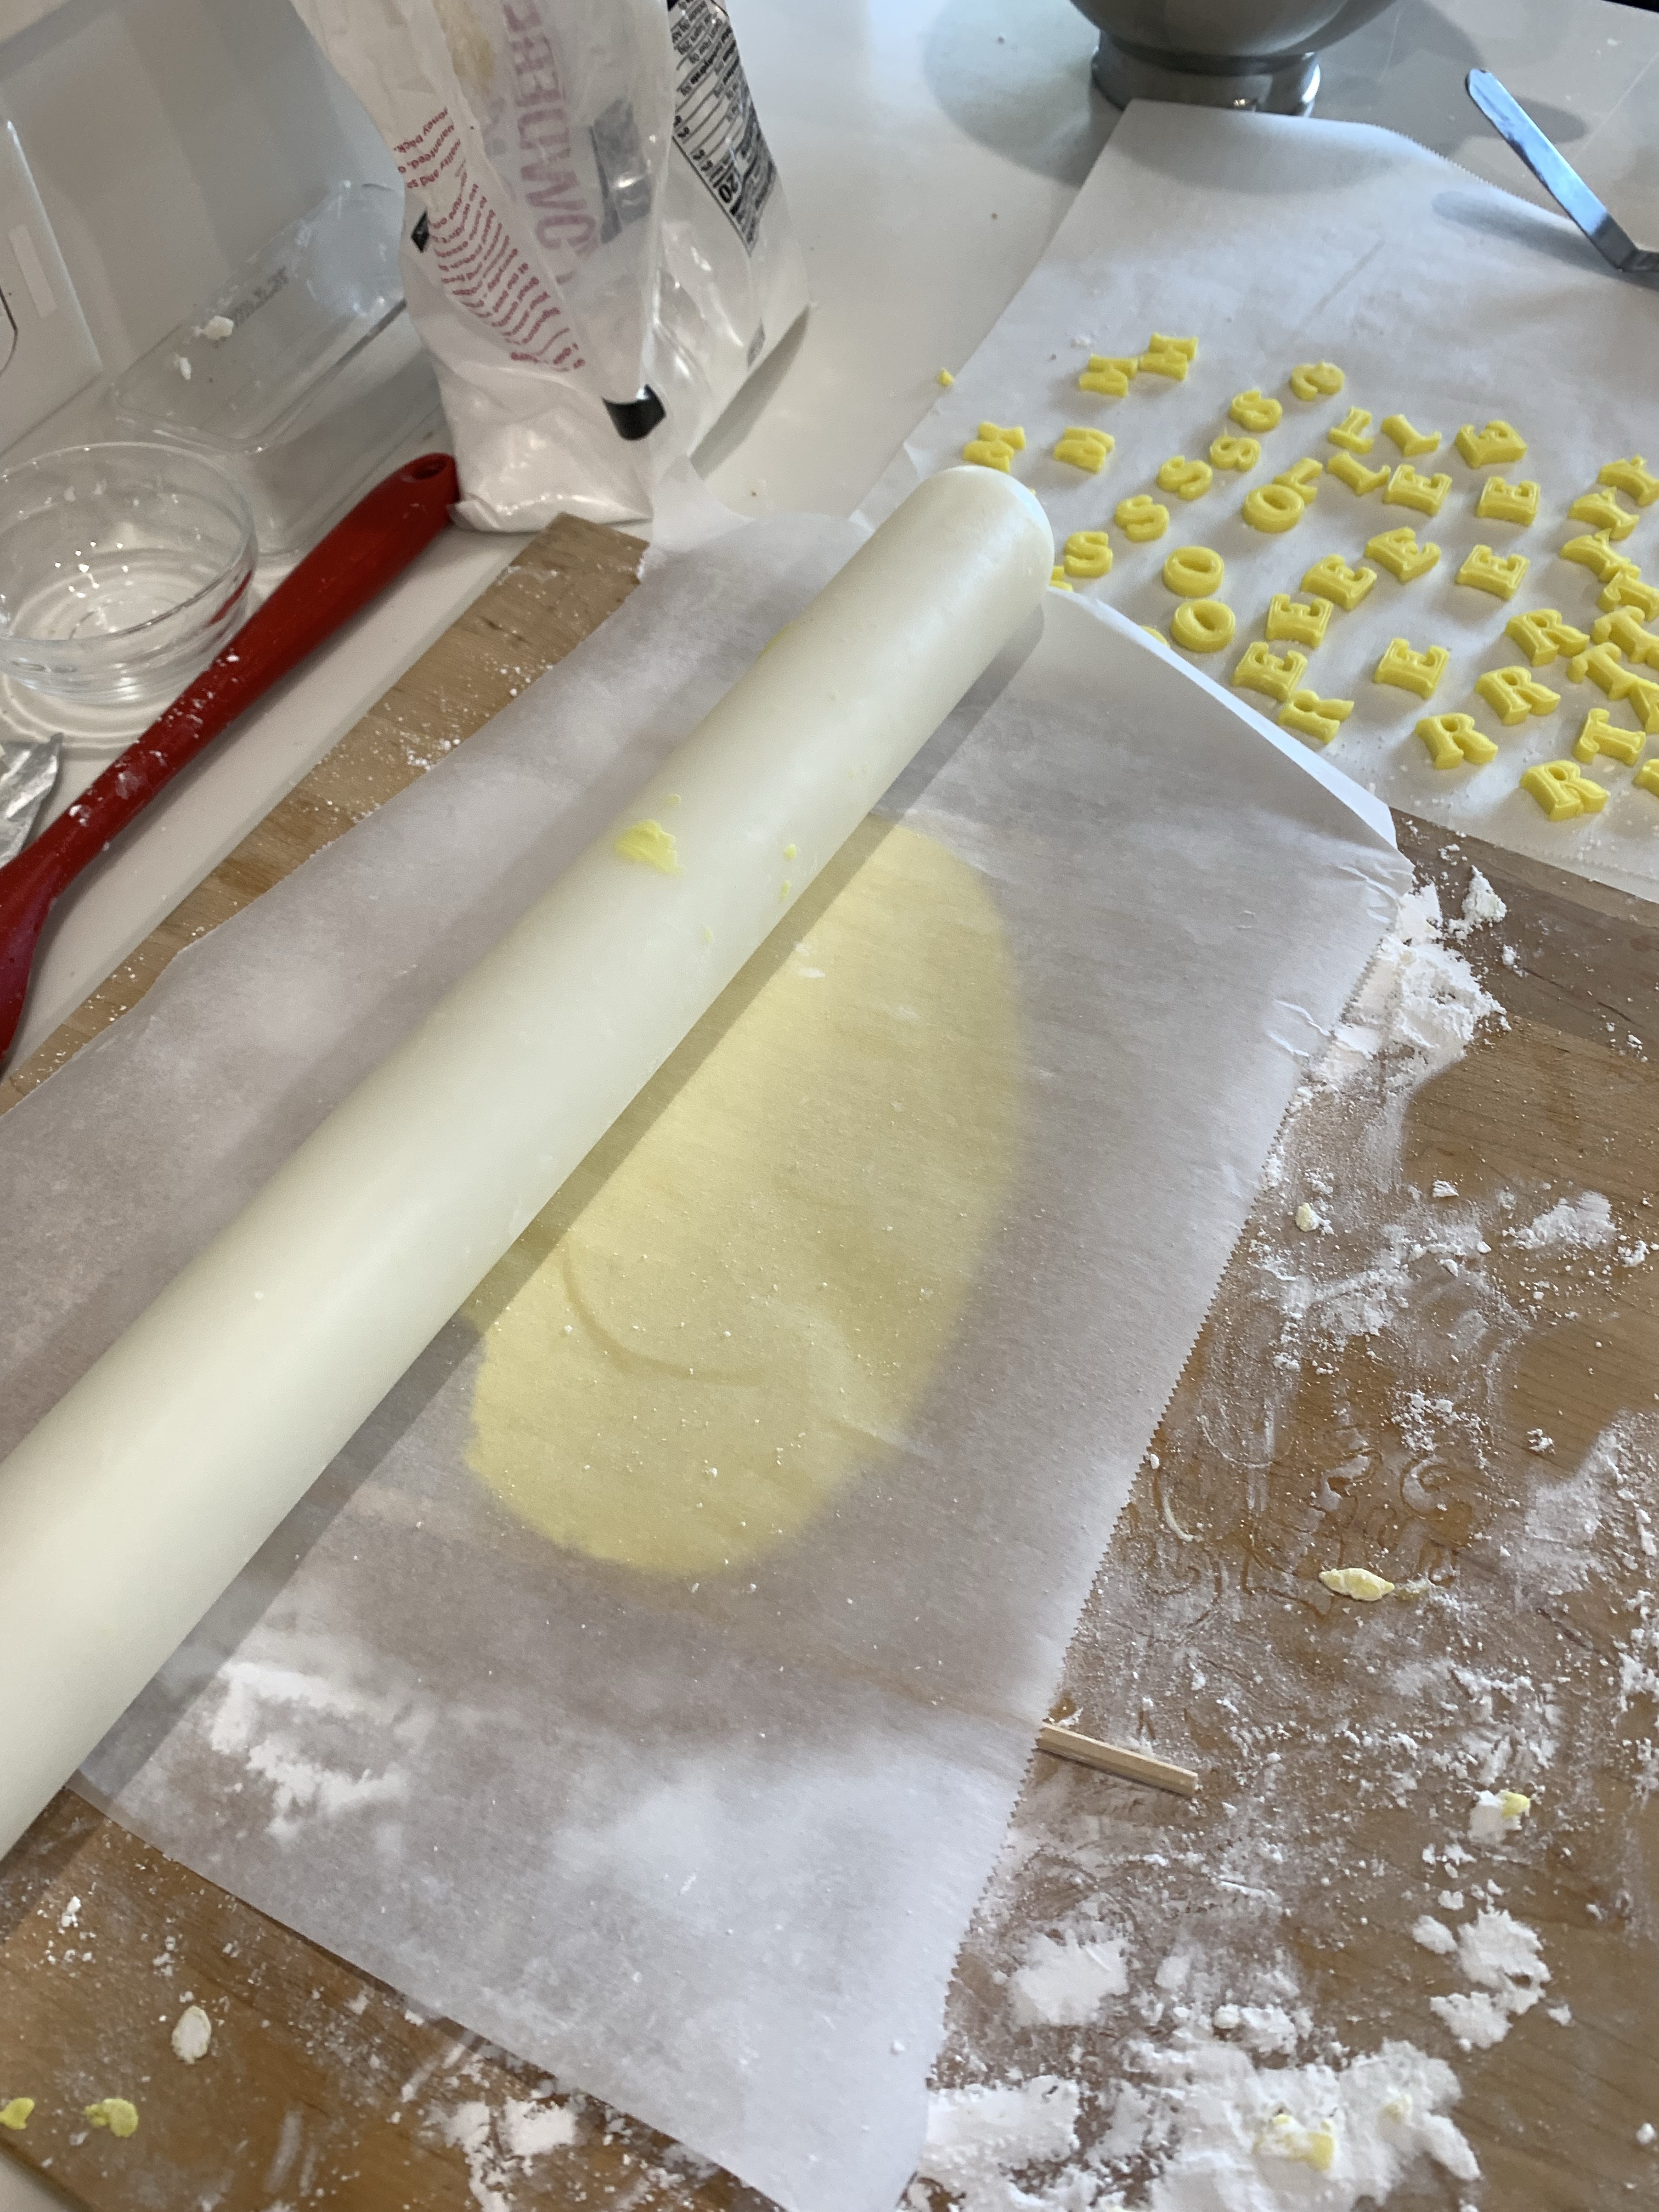
One batch of marshmallow fondant was divided 4:1. The large portion formed the edges and were striated to resemble pages of a book. The small portion was colored with the school color “yellow.” The white fondant was wrapped in plastic and left to rest for a couple of hours. The yellow portion was rolled out between parchment paper sheets. I use chopsticks of various sizes to roll the fondant into the desired thickness. The yellow fondant sheet was left to dry slightly, uncovered on a thin bed of powered sugar. After an hour or so, brush some additional sugar on the top of the sheet and flip it over, letting it rest until dry to the touch. I used the yellow to make the letters for the title and spline. (See the top of the pictures below. If they are dry, they are easier to punch out.
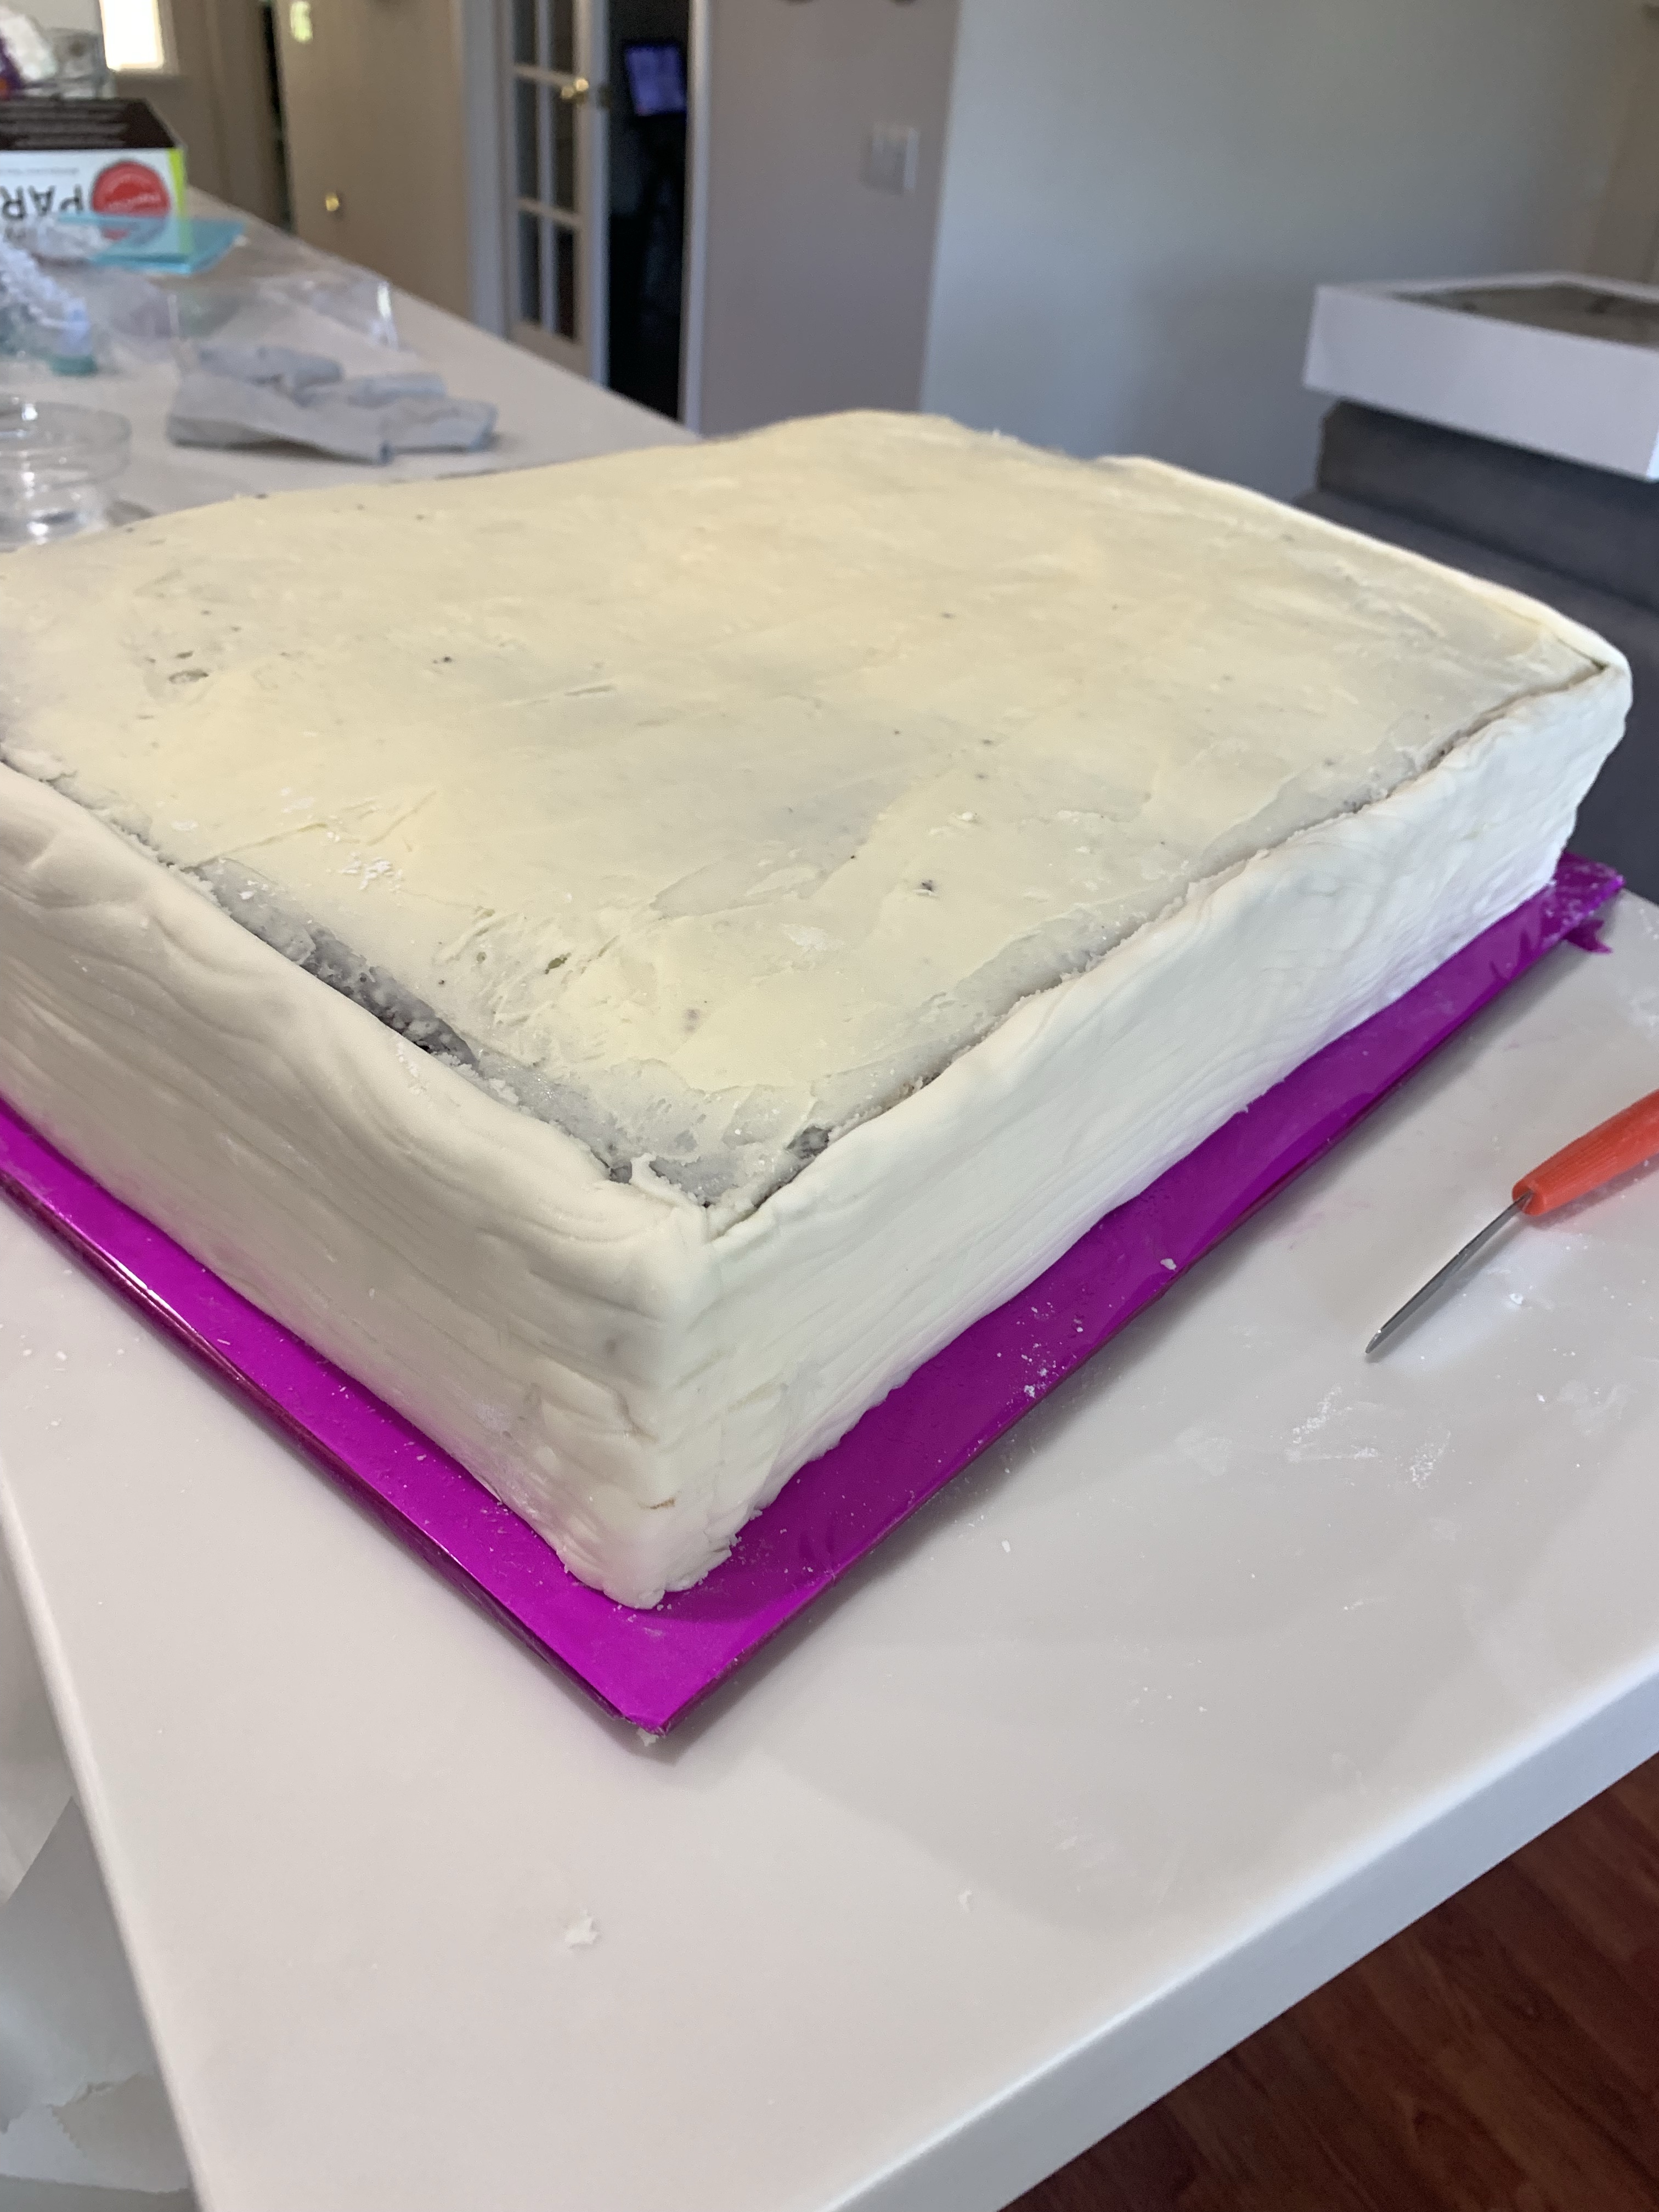
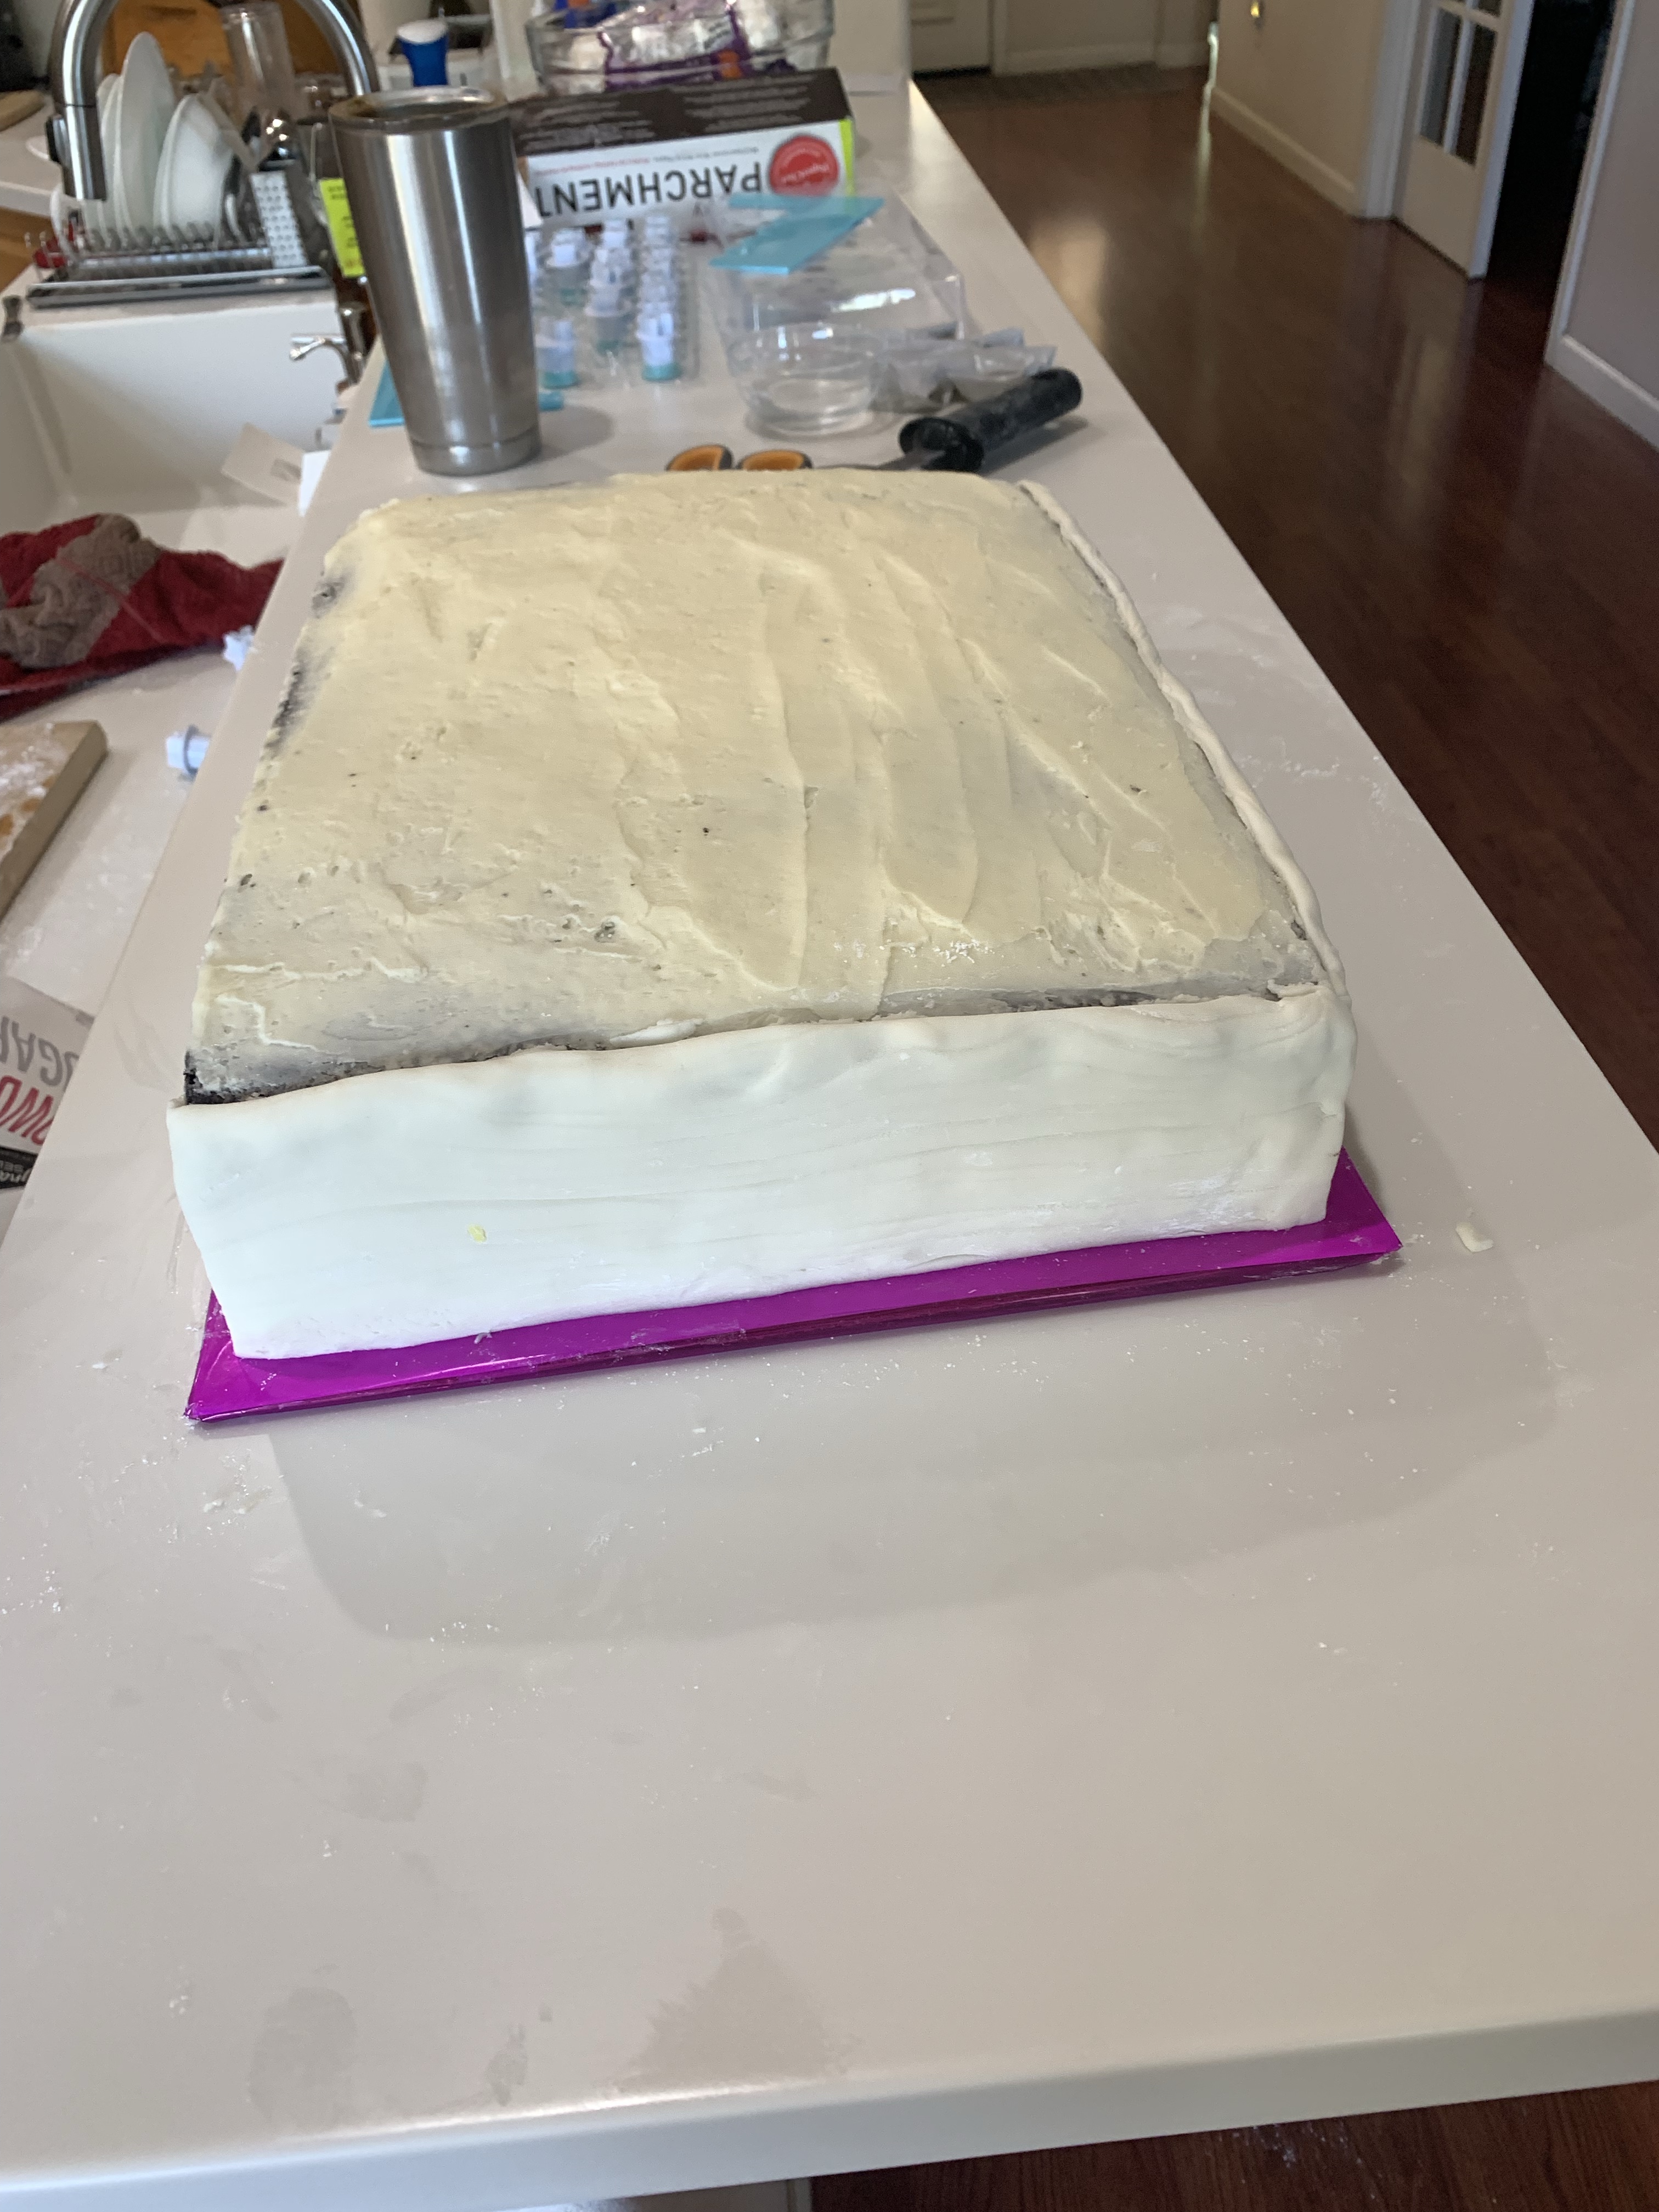
When the white fondant is firmer, roll three pieces long and wide enough to cover the edges of the cake. Use a sharp tool to score the fondant lengthwise to represent the pages of the book.
Before covering the cake with fondant smooth the surface of the crumb coat by wetting gloved hands and rubbing them over the surface. This also helps wet the crumb coat so the fondant will stick.
Cut the sheets of white fondant to be an inch longer and wider than the sides of the cake. Press them on, smoothing the joins on the corners and trim the top to be just wider than the book. Cut the bottom off even with the bottom of the book.
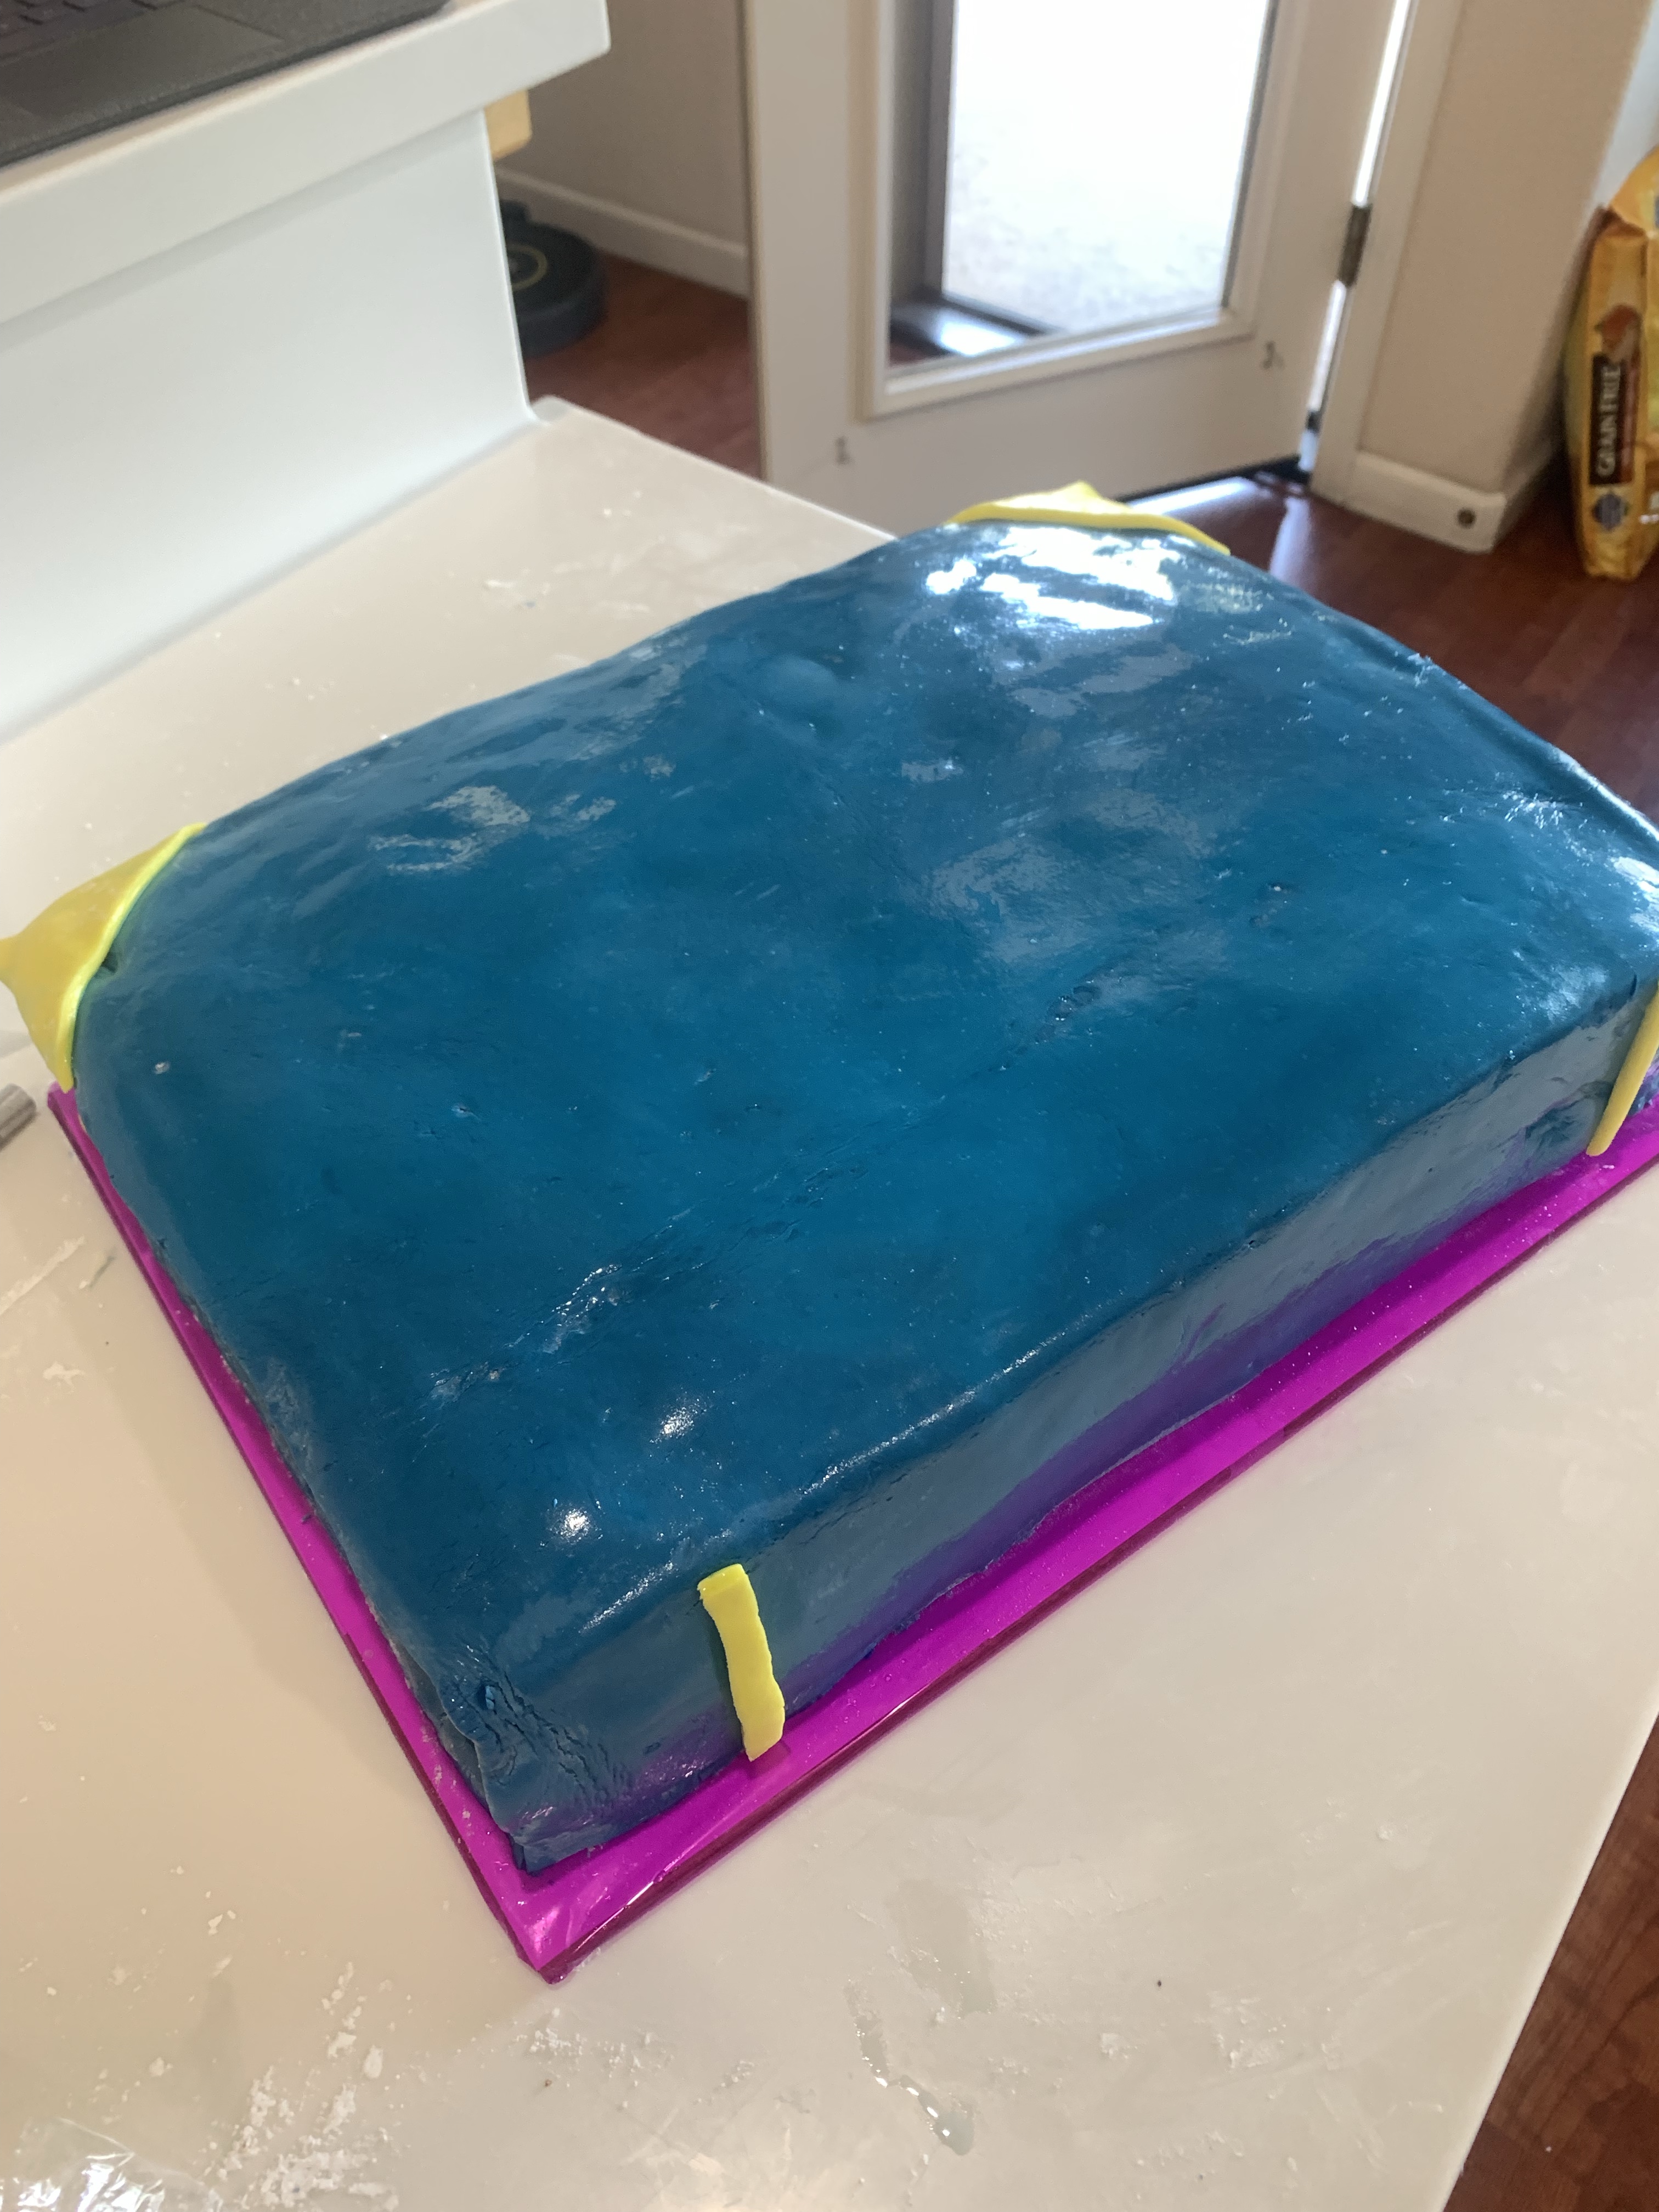
Make another batch of fondant. (Note to self: be sure to use fresh, mini-marshmallows. Life will be much easier.) This batch will be the book cover and can be colored “school blue” in the mixer. Once the consistency and color is correct, transfer the fondant to a vegetable-shortening-coated-surface and knead the fondant with gloved and grease covered hands to be sure the fondant is a uniform consistency and color. Let it set for an an hour, wrapped in plastic.
Roll the fondant out on a well sugar dusted table to be two inches wider and longer than the book. In my case it was 16”x16” and I used a 1/4” chopstick to roll it an even thickness. Fold it in half and carefully transfer to the cake. Trim to size and cut thin long pieces to be the bottom cover of the book. Paint water along the bottom edge and apply the thin pieces.
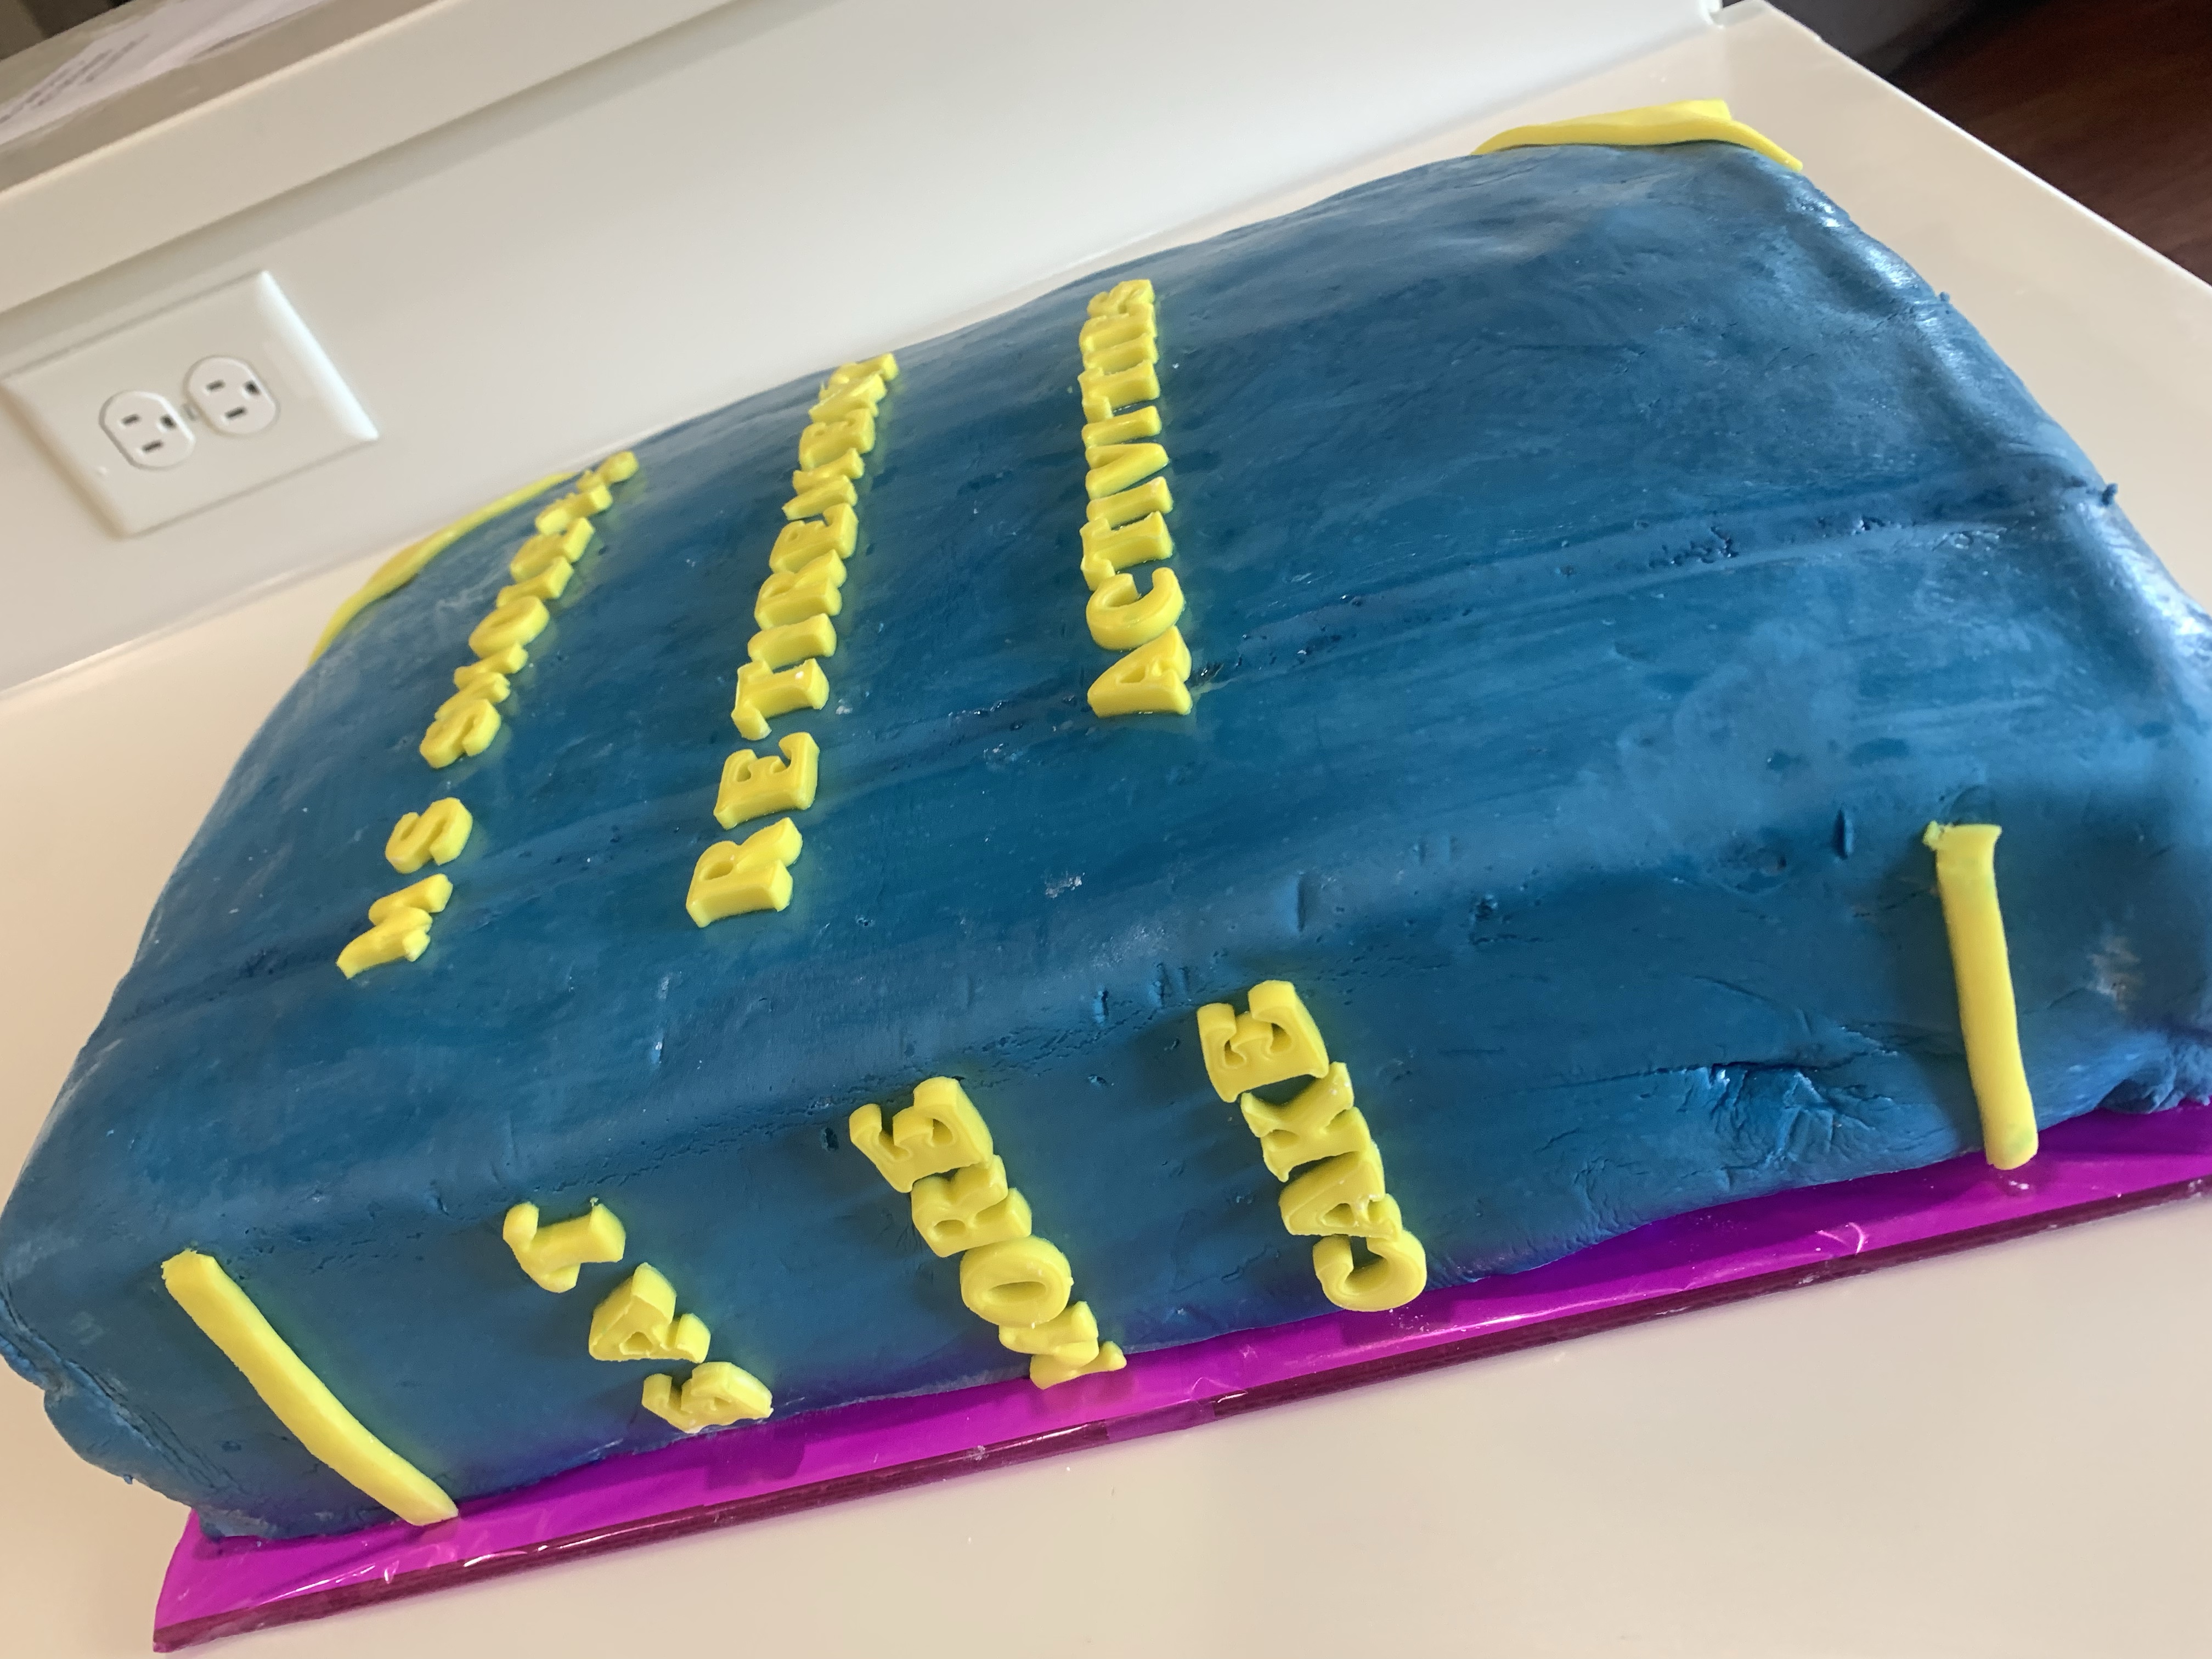
Use the yellow fondant and apply as reinforcements to the corners of the top of the book and thin pieces on the bottom corners. Two more short thin pieces were added to the spline. Wipe the book cover with a damp paper towel. This removes any residual sugar and makes the fondant sticky so the letters will adhere. If the fondant is still too soft, push a toothpick into the top corners to hold it in place. Just remember to remove the toothpick before delivering the cake.
If you have the talent you can brush or pipe the lettering on after the fondant dries. My handwriting is all but illegible so I opt to punch them out and place by hand.
Extreme Chocolate Cake
Makes two 9” round cakes INGREDIENTS (Makes one 10’ ROUND CAKE [and two 5”] – quantities are in parenthesis. Or one 11”x15”x2” sheet cake.) • 2 cups white sugar (3) • 1 3/4 cups all-purpose flour (2 2/3) • 3/4 cup unsweetened cocoa powder (1 ¼) • 1 1/2 teaspoons baking soda (2 ¼) • 1 1/2 teaspoons baking powder (2 ¼) • 1 teaspoon salt (1 ½) • 2 eggs (3) • 1 cup milk (1 ½) • 1/2 cup vegetable oil (¾) • 2 teaspoons vanilla extract (3) • 1 cup boiling water (1 ½)
METHOD
Preheat oven to 350 degrees F (175 degrees C). Grease and flour two 9 inch cake pans. (SEE QTY FOR 10” CAKES)
Use the first set of ingredients to make the cake. In a medium bowl, stir together the sugar, flour, cocoa, baking soda, baking powder and salt. Add the eggs, milk, oil and vanilla, mix for 3 minutes with an electric mixer. Stir in the boiling water by hand. Pour evenly into the two prepared pans. (For cupcakes, portion ¼ scant cups in each cupcake paper.
Bake for 30 to 35 minutes in the preheated oven, until a toothpick inserted comes out clean or 205F internal temp. Cool for 10 minutes before removing from pans to cool completely.
Marshmallow Fondant
INGREDIENTS • 1 package (16 ounces) white mini marshmallows • 2-5 tablespoons water • 2 pounds (about 8 cups) sifted confectioners’ sugar • 1/4 cup solid vegetable shortening METHOD
Grease your mixing bowl and a glass bowl that can be used to melt marshmallows in the microwave.
Place the marshmallows, water and flavoring of your choice in greased glass bowl and microwave on high at 30 second intervals.
Stir every 30 seconds until marshmallows are completely melted, about 2 minutes.
Sift one half of the 2 pound bag of confectioner’s sugar in a greased mixing bowl. Make a well in the center of the confectioner’s sugar and pour in the melted marshmallows.
I use the paddle attachment for my KitchenAid mixer for this first part of the mixture.
Mix until all the melted marshmallows are incorporated in the confectioner’s sugar.
Mixture will be thick but still runny.
Sift the remaining half bag of confectioner’s sugar into the melted marshmallows.
Mix on low until it comes together.
Change to your dough hook attachment as this will get extremely thick.
Fondant will be very thick and have a dough like consistency
Wrap fondant in saran and make sure no air gets to it.
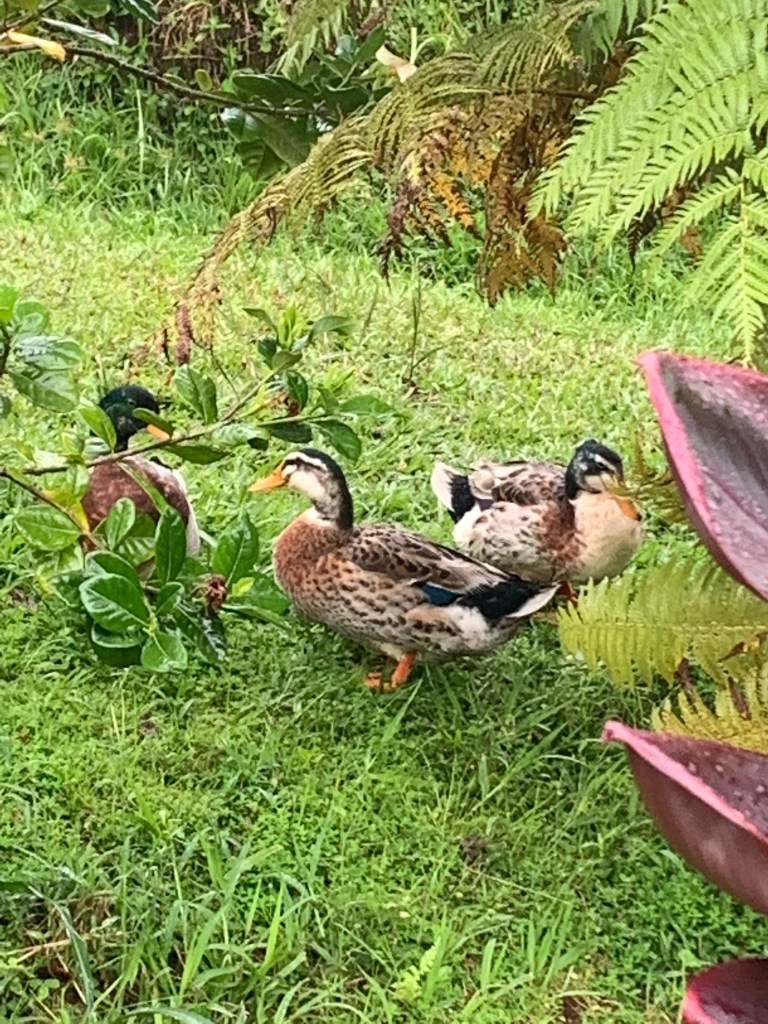
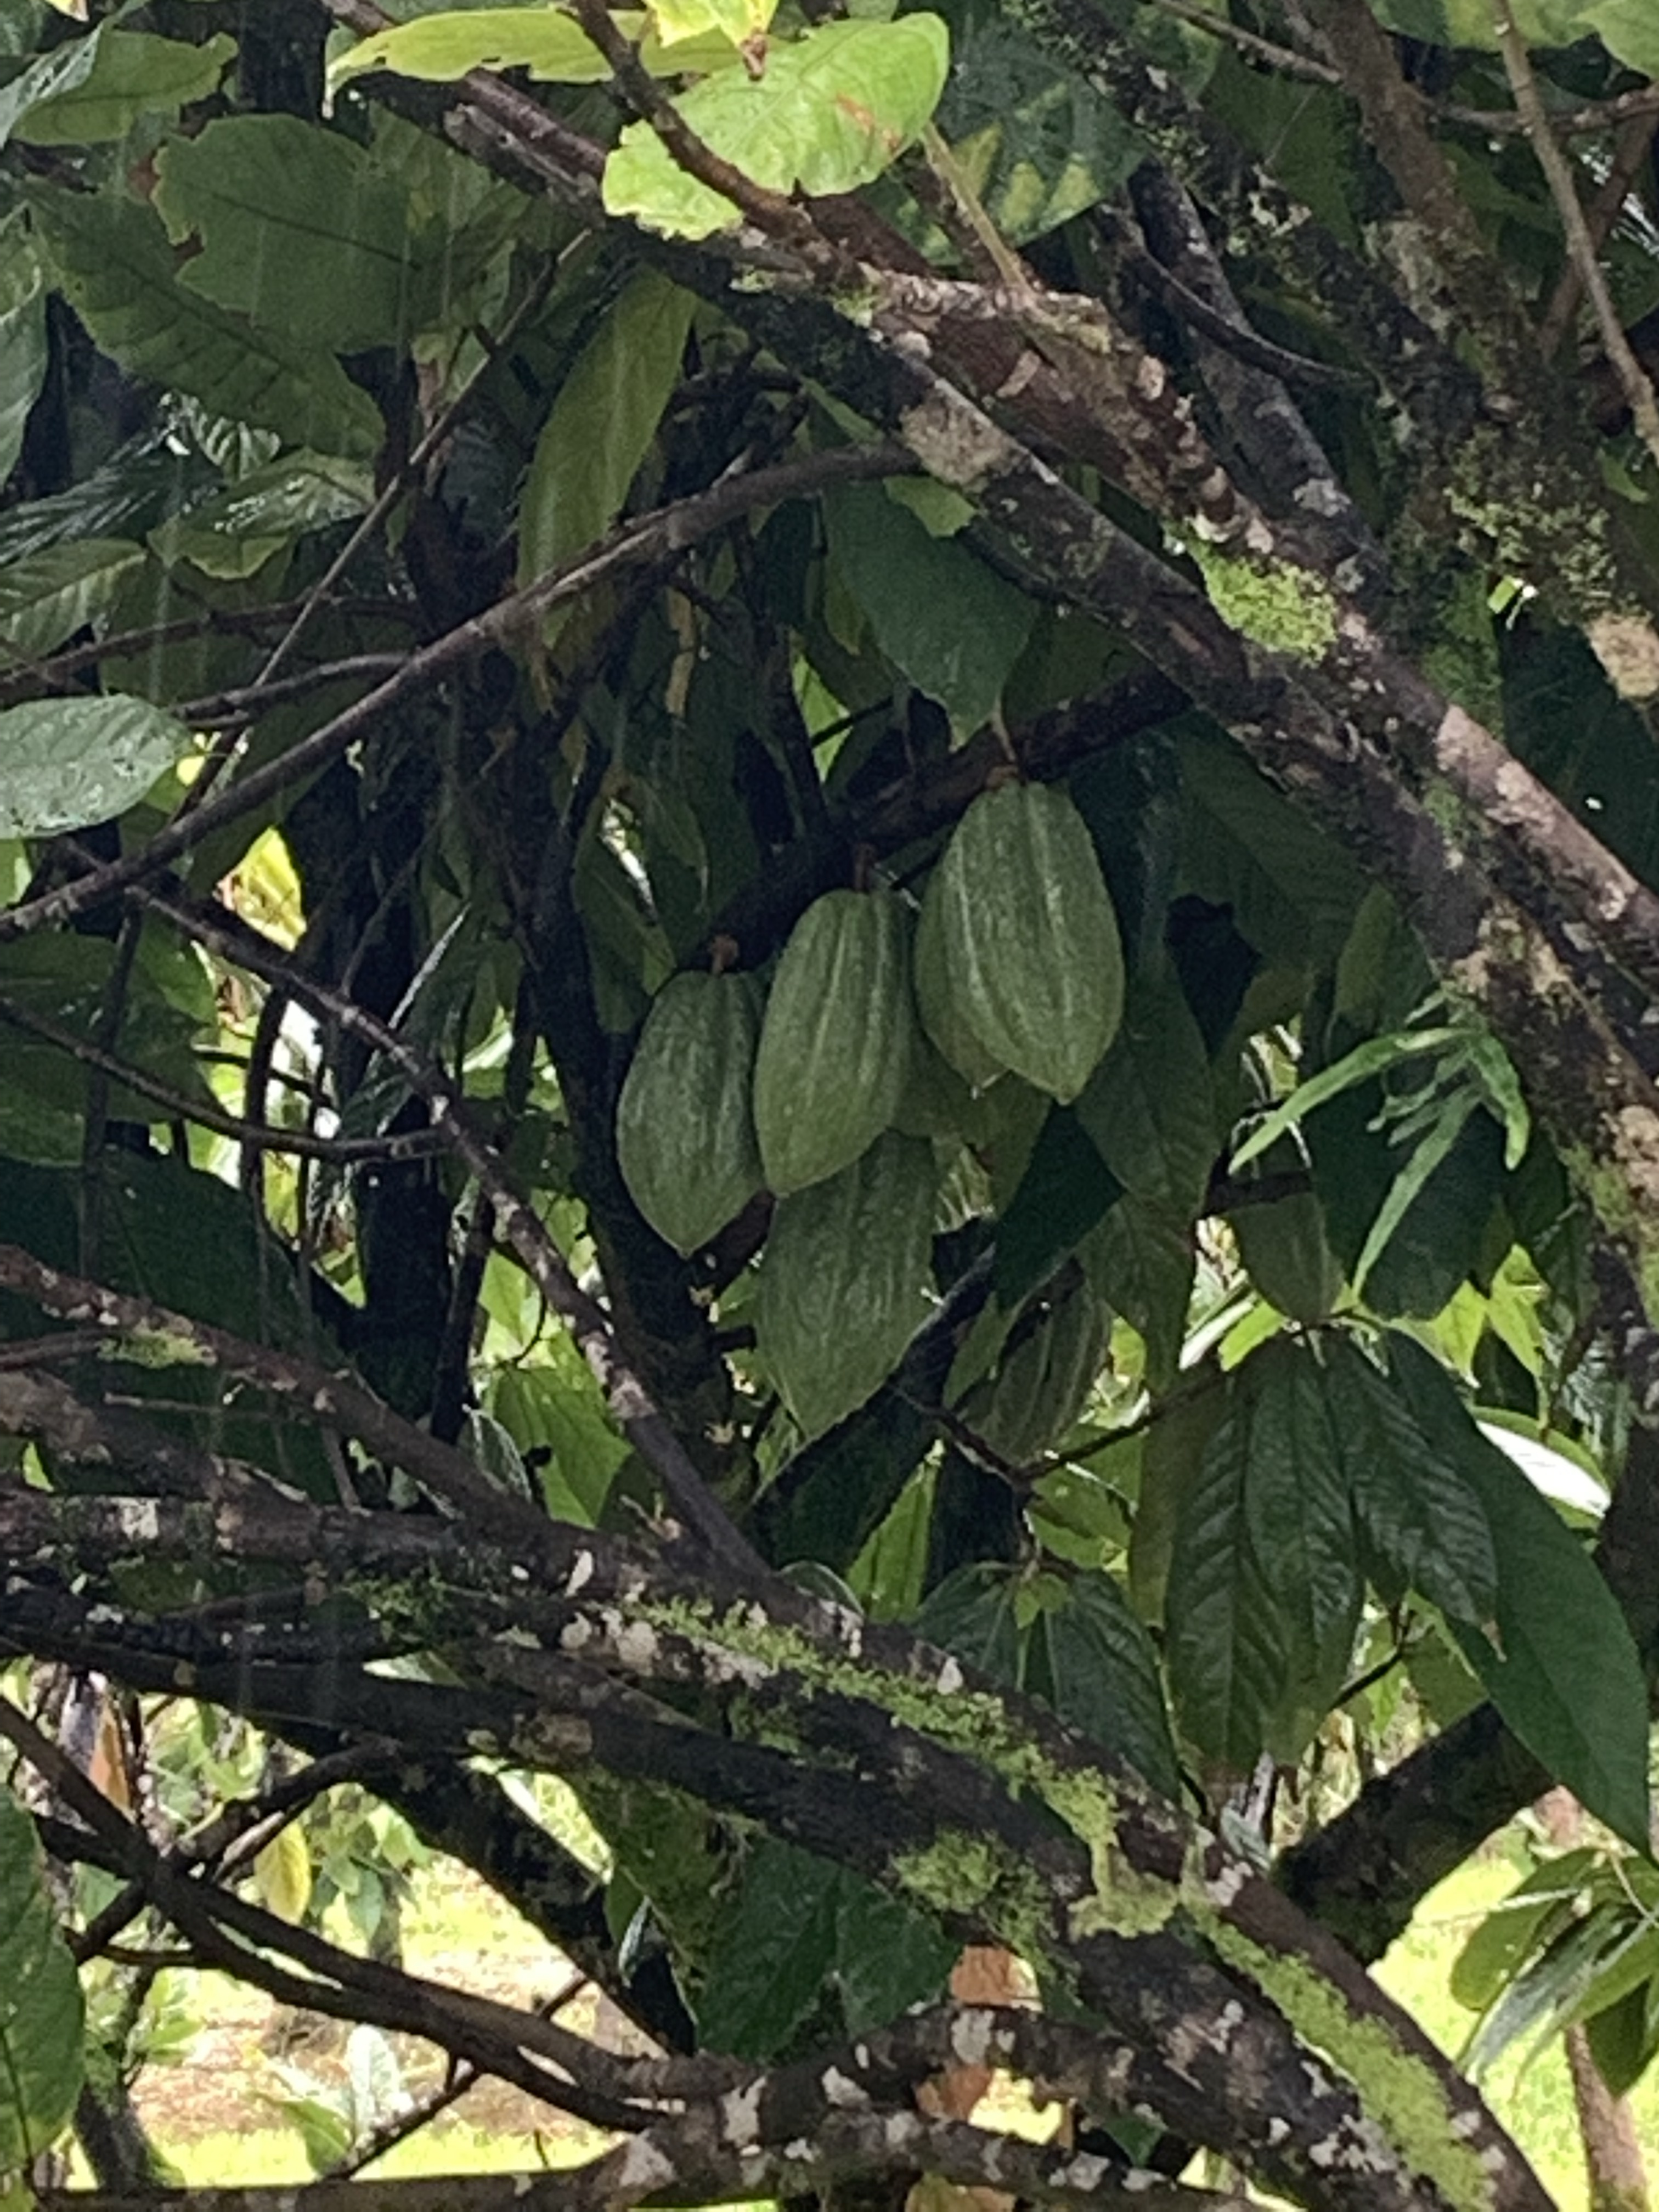
Chocolate bars do NOT grow on trees. Growing chocolate is labor intensive as most of the harvesting and processing of cocoa and production of chocolate is done by hand. We toured the Lavahola Cocoa farm yesterday (Monday, May 17,) in the rain.
The Lavahola Chocolate Farm maintains a small garden near the visitor center. It contains a variety of native plants, and houses a few ducks.
There are three types of cacao, Criollo, Forastero and Trinitario, all of which are grown at Lavahola.
Forastero is the hardiest, higher yield and most reliable strain. It is therefore the least expensive and most profitable. Unfortunately, it is bland and bitter and requires more additives to make it into a salable product.
Criolo is the connoisseurs go-to chocolate. It is quite rare and accounts for about 3% of the worlds supply, and therefore quite expensive.
The Trinitario bean was the happy result of a disaster in Trinidad. The Criollo plantations were destroyed by a hurricane (or disease) so the farmers replanted with the high yield Forastero to rebuild their industry. The new trees were planted on/near the roots of the Criollo trees and the resultant hybrid, Trinitario, is hardier than Criollo and tastier than Forastero.
Cacao grows on small trees and start producing after about 4 years. It is climate sensitive and this latitude is as far north as cacao will grow. In fact the higher elevation (200’) on one end of the farm is too cool to grow cacao.
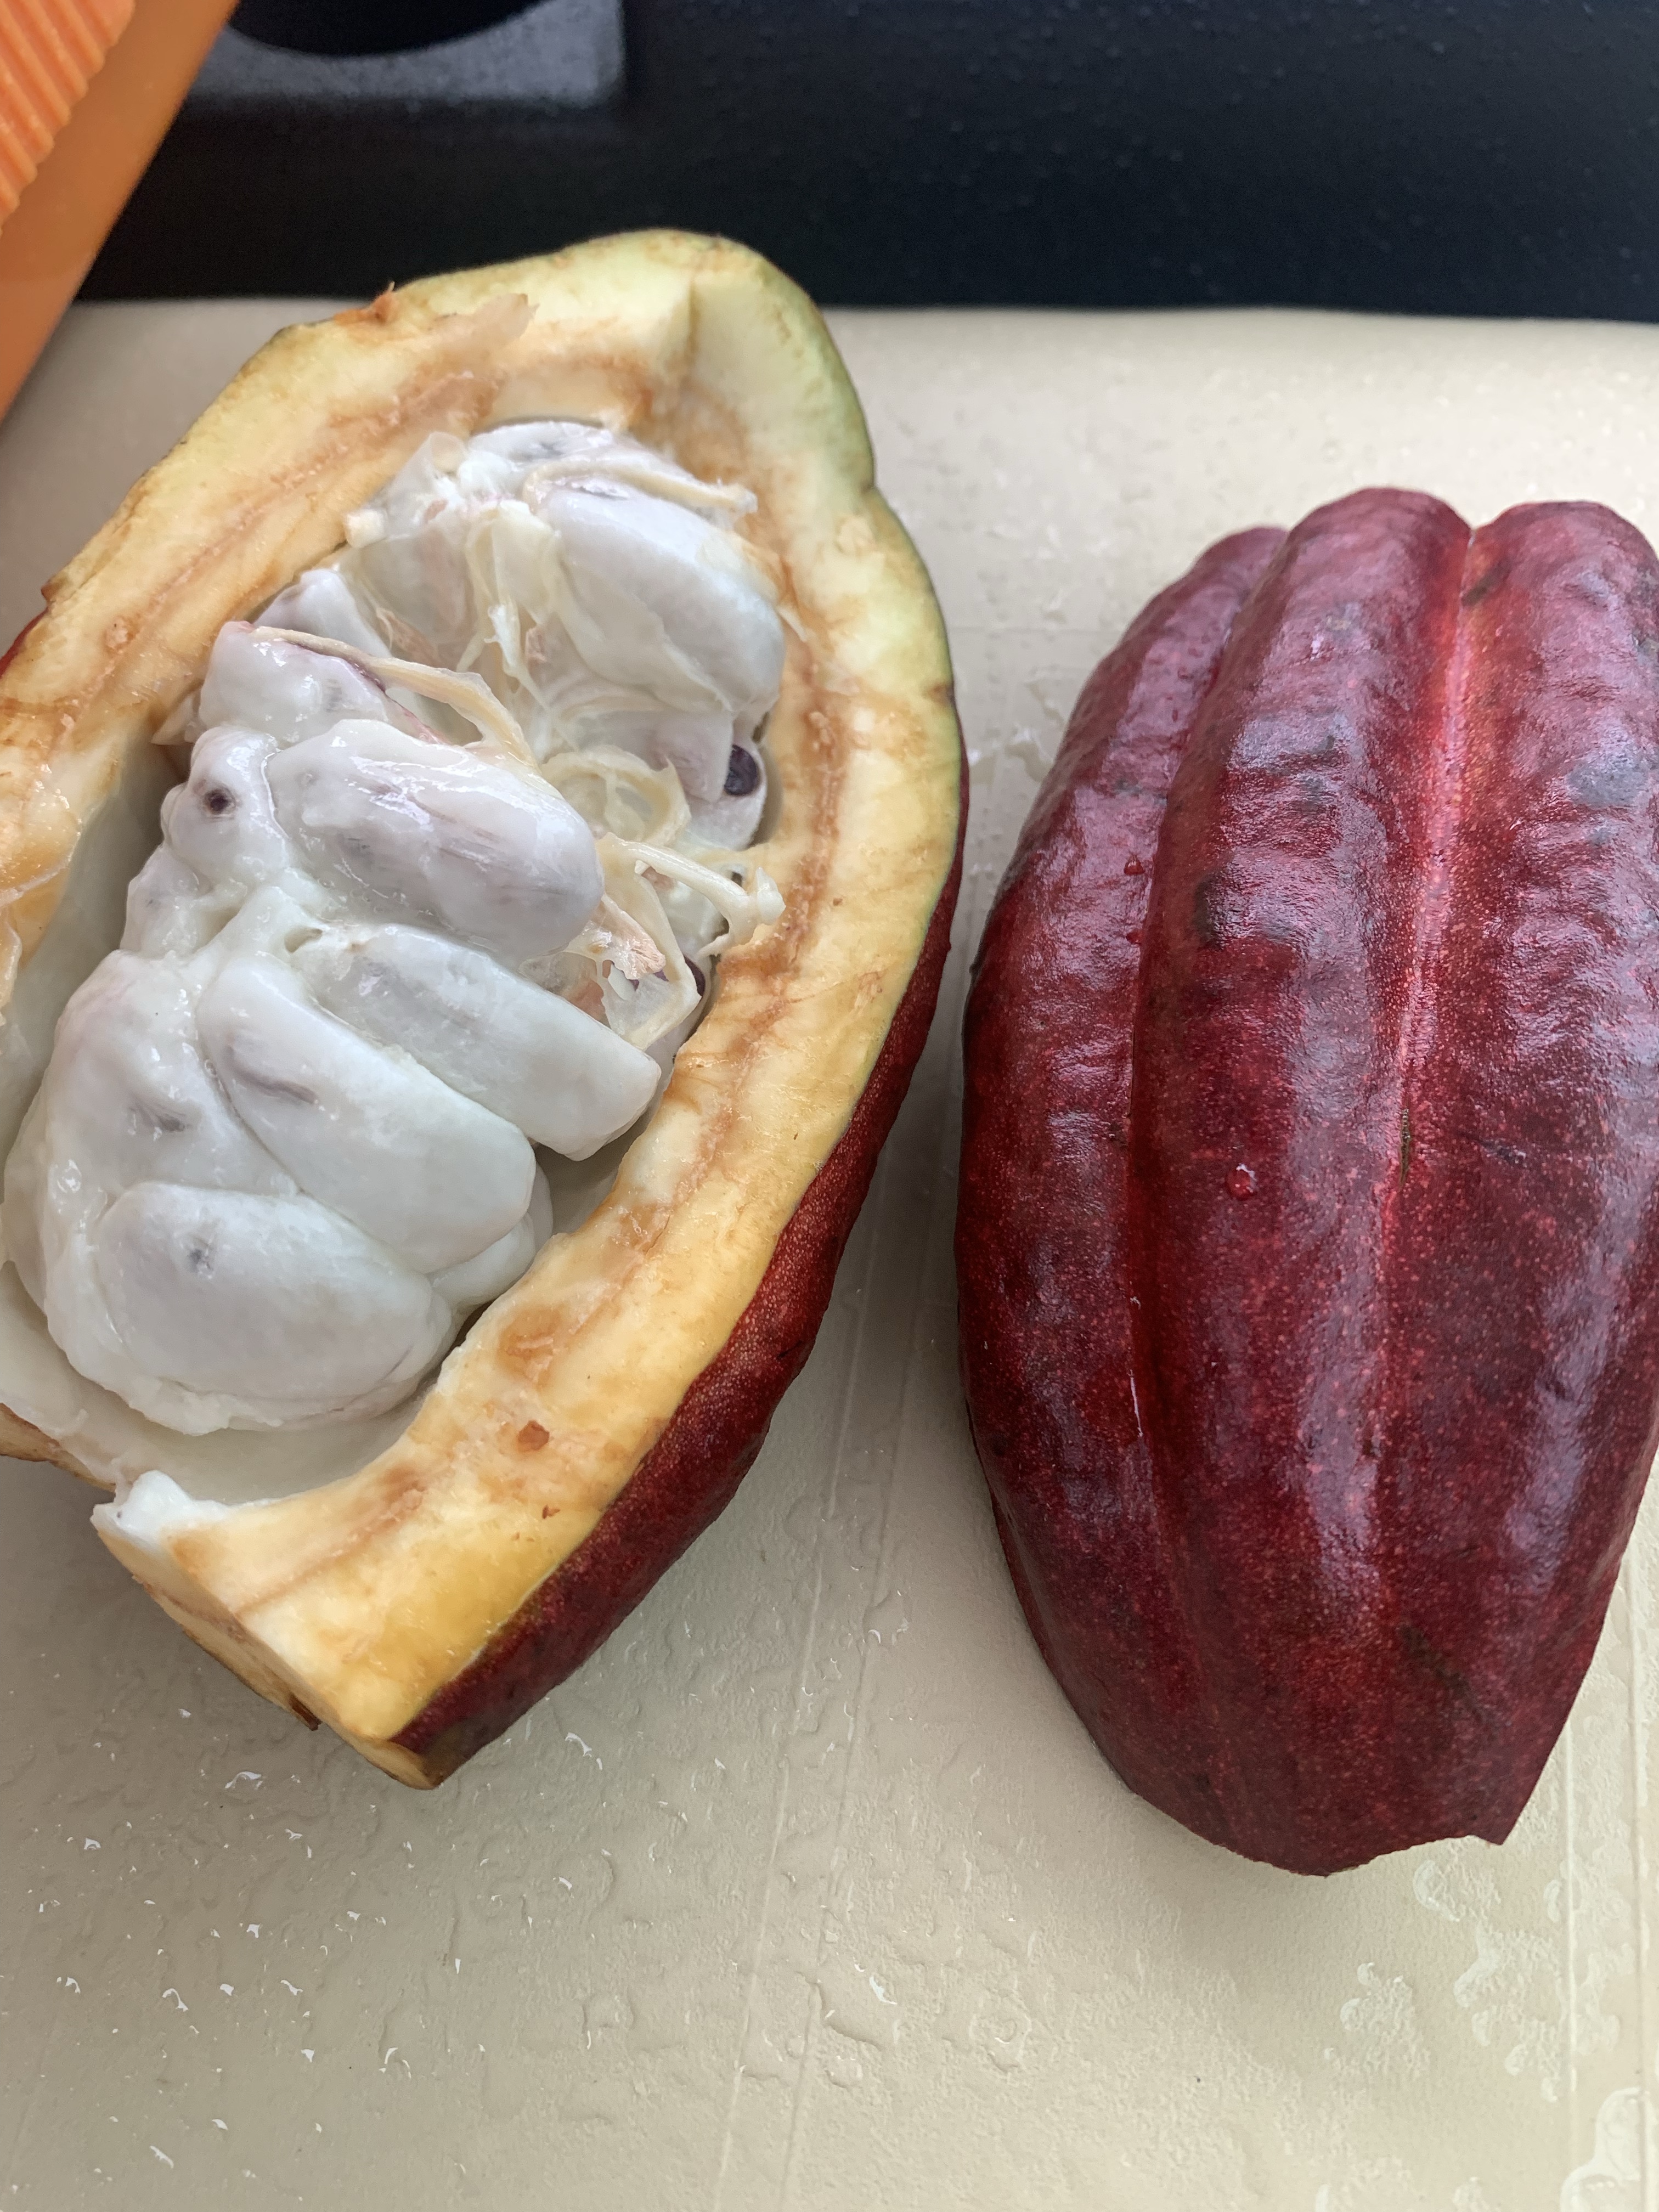
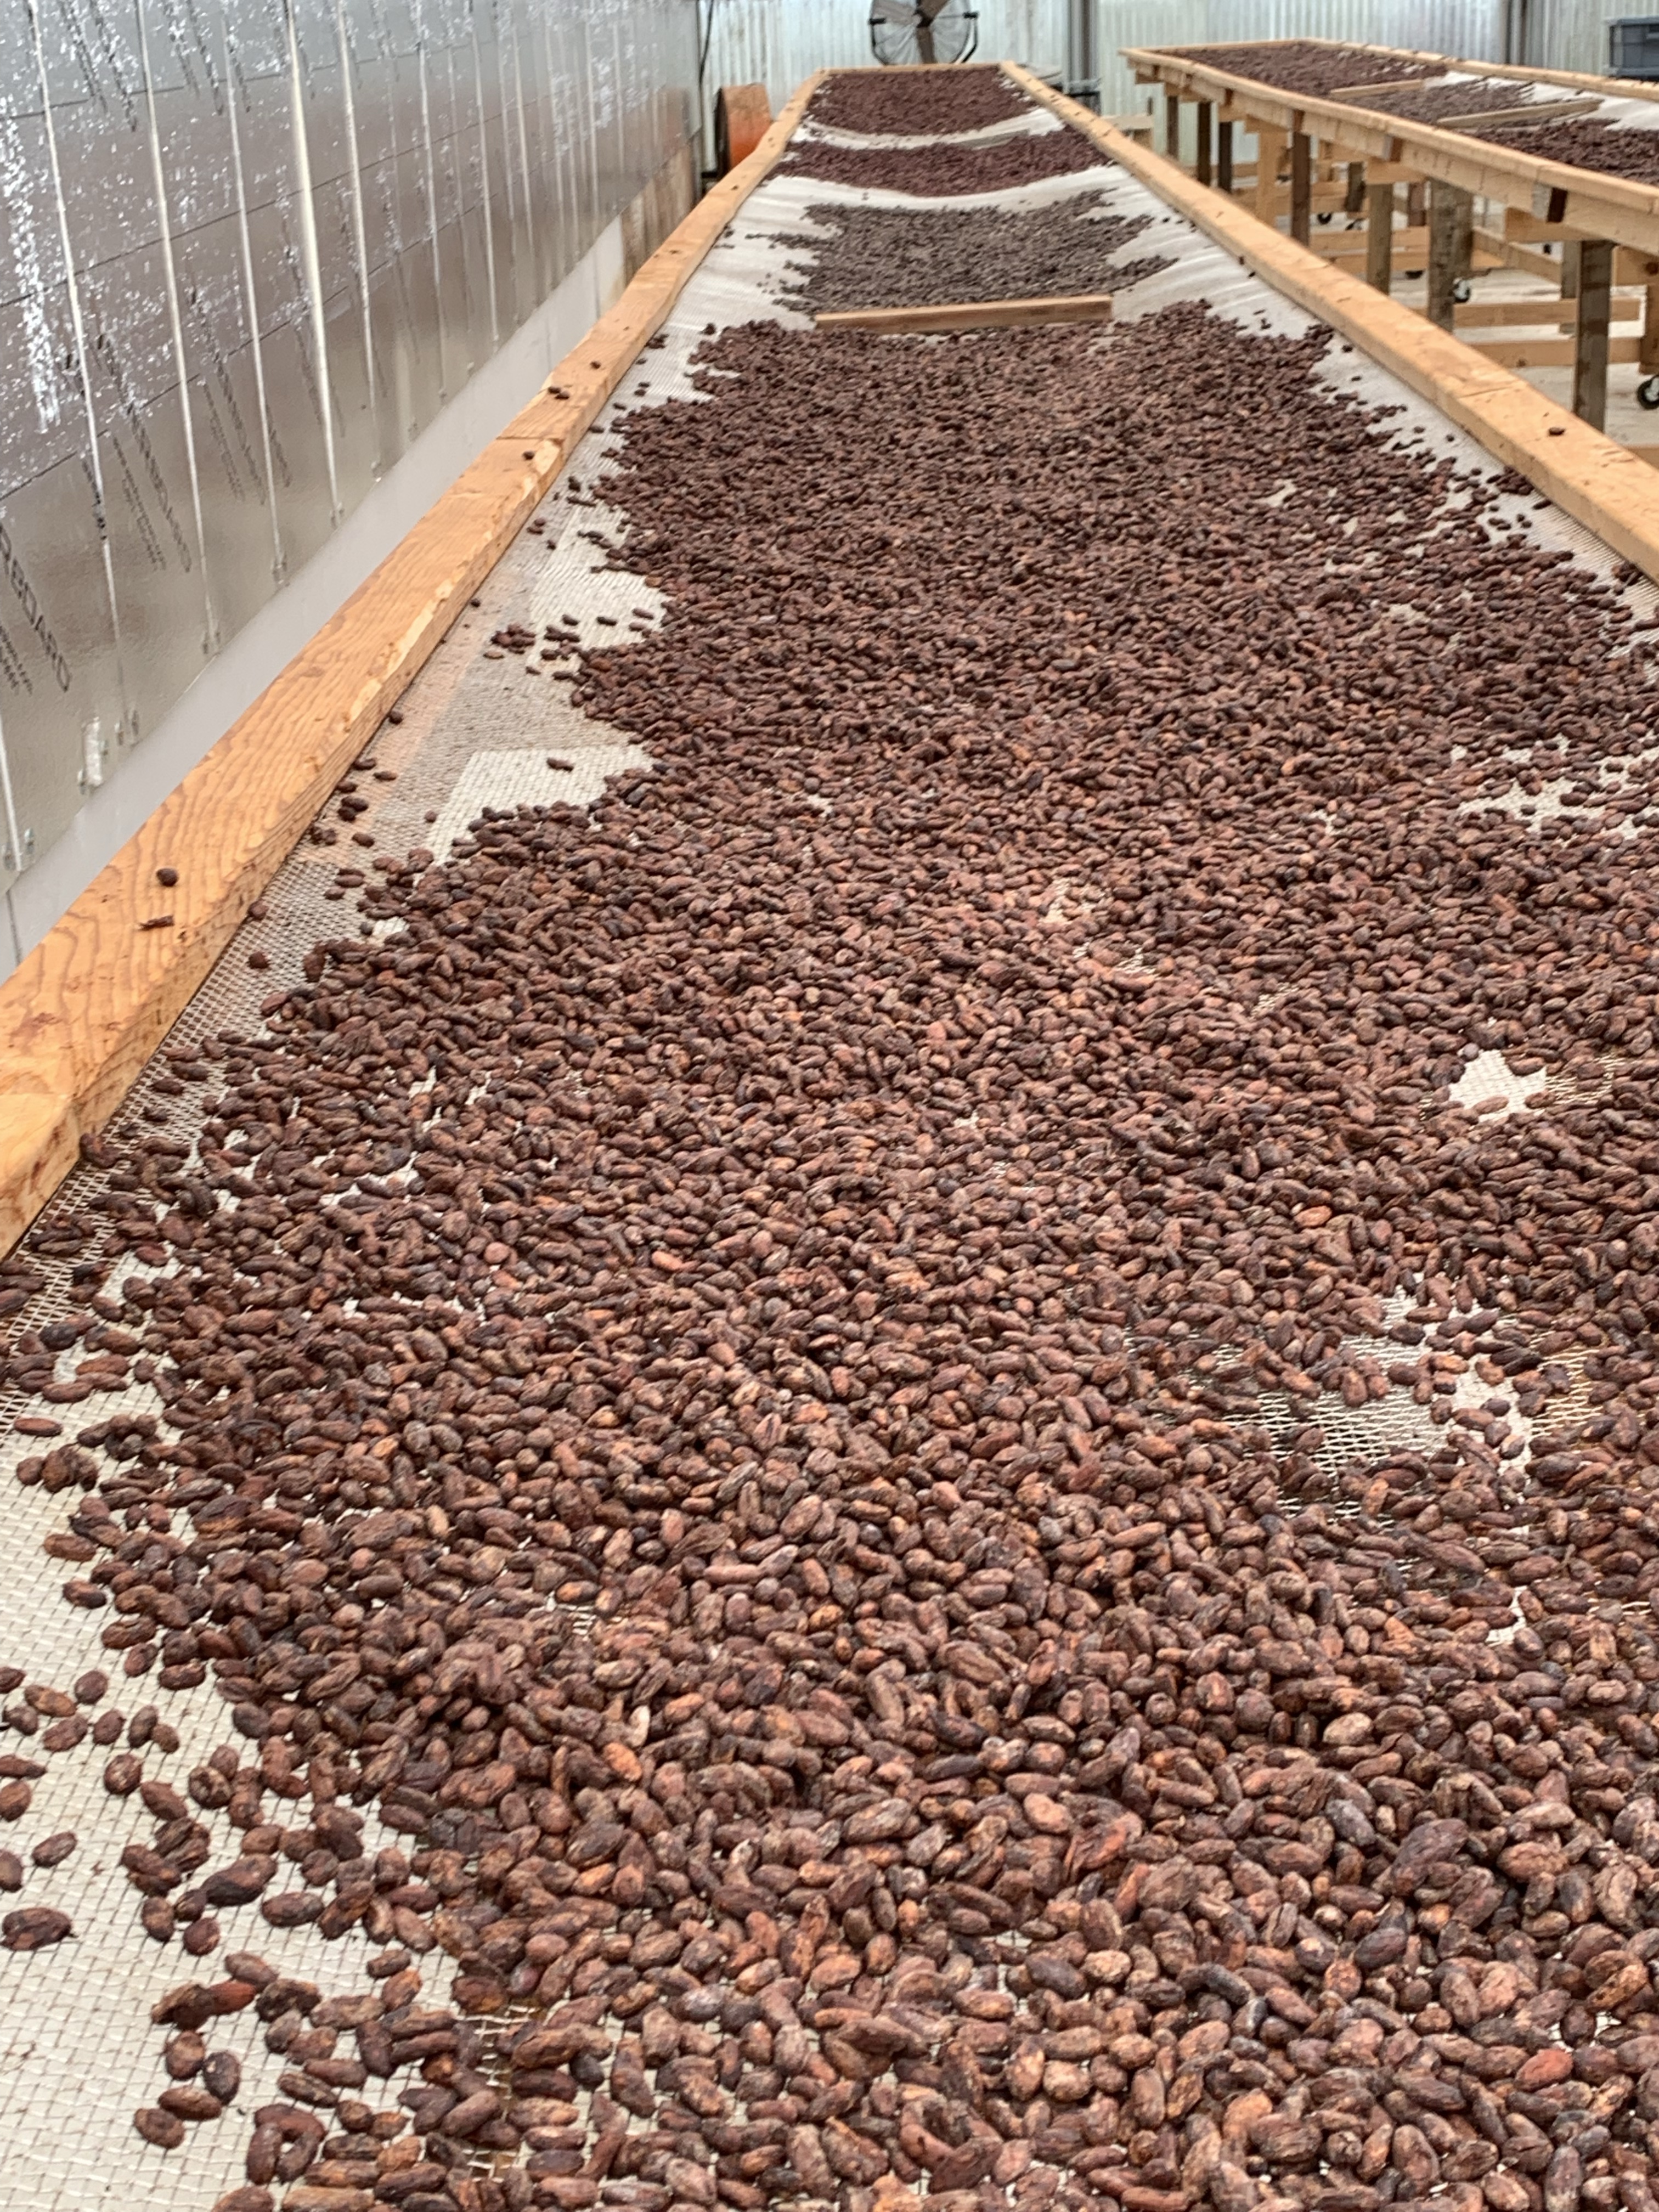
The pods are harvested after they turn red and when scraping the outside exposes a yellow interior. They are cut open and the beans are dried for several months before being examined and selected by the chocolatier. The highest quality beans are roasted and puréed in what looks like a peanut butter mill.
The thick shell protects the beans when grown in a cooler climate.
If you happen to be in Hilo on the Big Island take a trip up the mountain and visit Lavahola Chocolate Farm. It’s well worth investing the hour. The staff was knowledgeable, friendly and fun.
Let me say up front, I am NOT a millennial. You might even say I am multi-millennial, somewhat akin to being multi-generational. That is my excuse for taking photographs of my meals before eating… and I am sticking it.
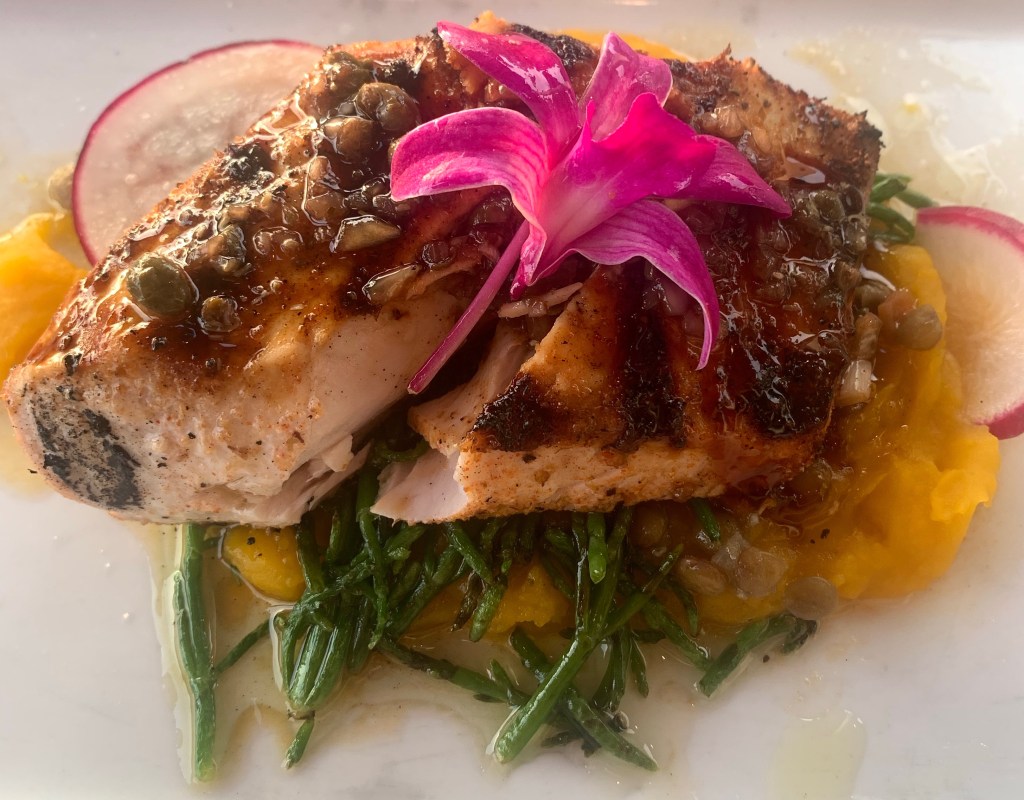
Last night we ate at Island Lava Java in Kona, HI. We asked for, and were seated, at a table with a view of the ocean. (Center picture.) We wanted to watch the sun set over the Pacific. (Right hand picture.)
We sat at the bar (surprise, surprise) waiting the few minutes for the very pleasant hostess to shoo out the previous party. They had been there for three hours. Time to leave folks. The bar had two brews that sounded acceptable, a nice porter and a Kona red ale. I settled on the porter while waiting at the bar.
I had pan-seared mahi-mahi with macadamia nut and coconut crust, herbed scallop potato, fresh wilted spinach, mango buerre blanc, and topped with an orchid. (Left hand picture.) This dinner was the second best mahi-mahi I have ever eaten. (Also, I had the red ale during dinner.)
When visiting the western side of the Big Island I strongly recommend Island Lava Java. It’s 15 minutes south of the airport and while waiting for your room to be available, swing by.
From the minute we stepped up to the hostess podium I felt we were home. The hostess, bartender and waitress were outstanding at their craft and warm and friends. Definitely a go to restaurant.
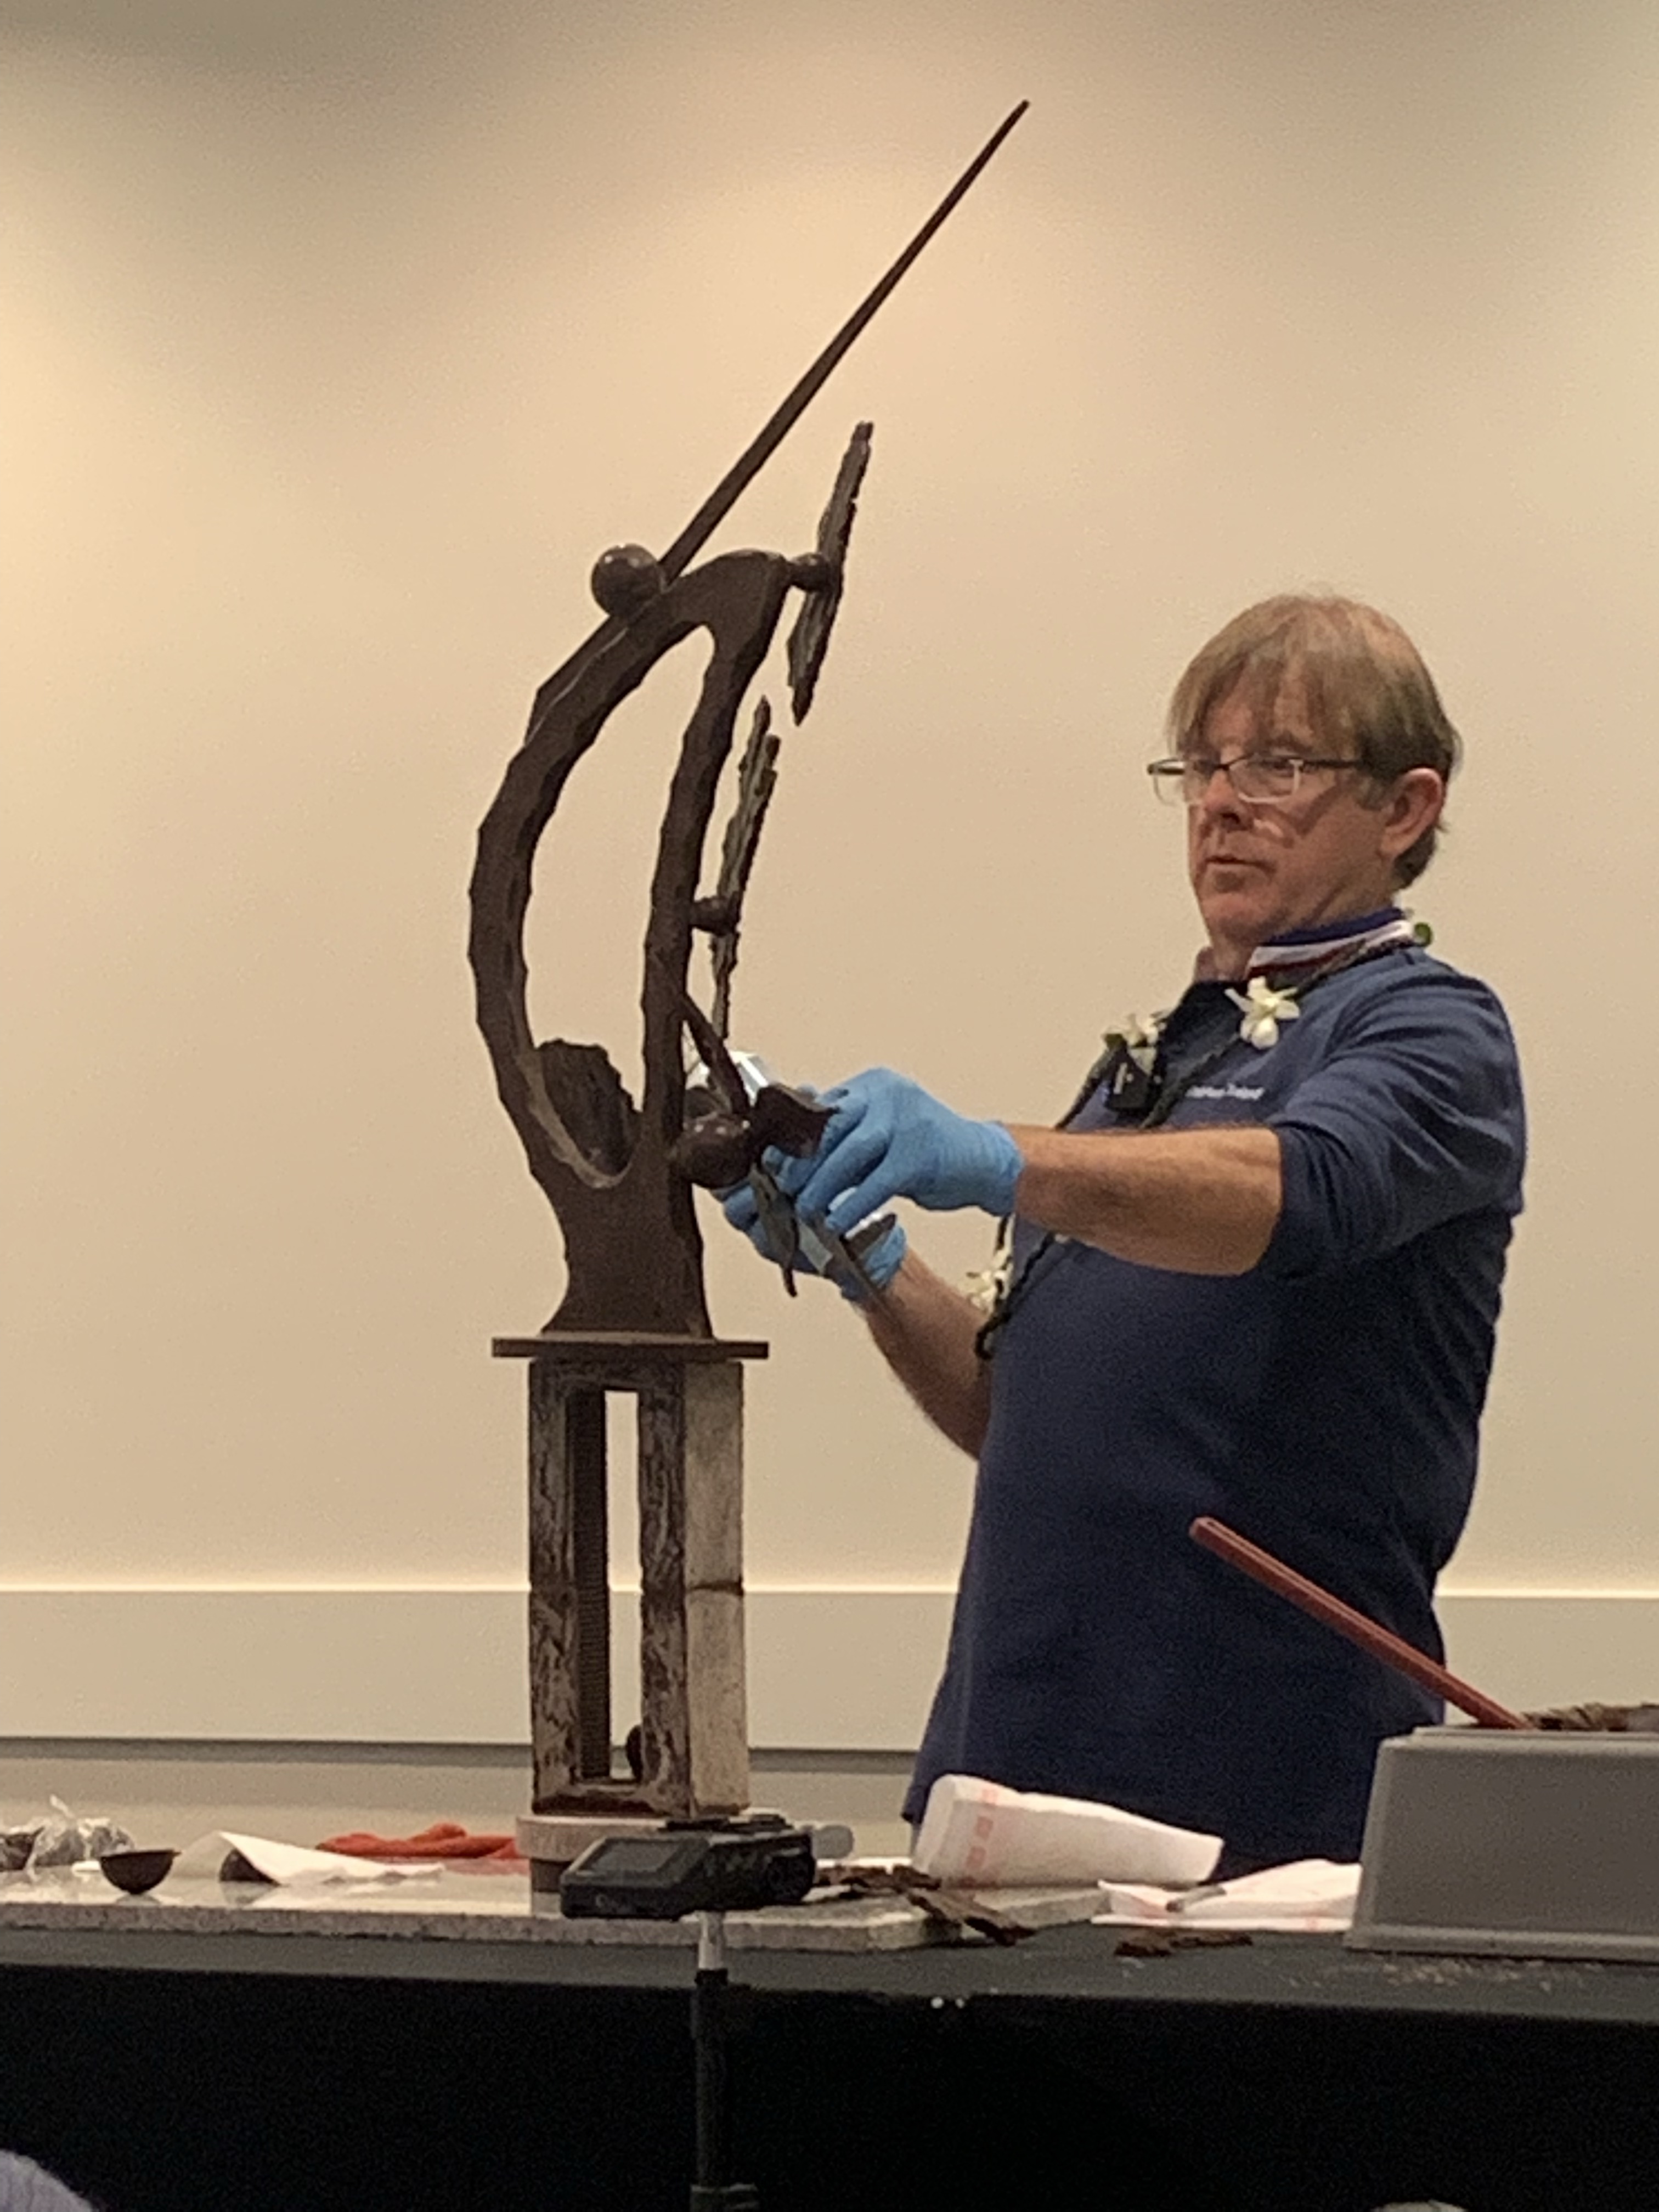
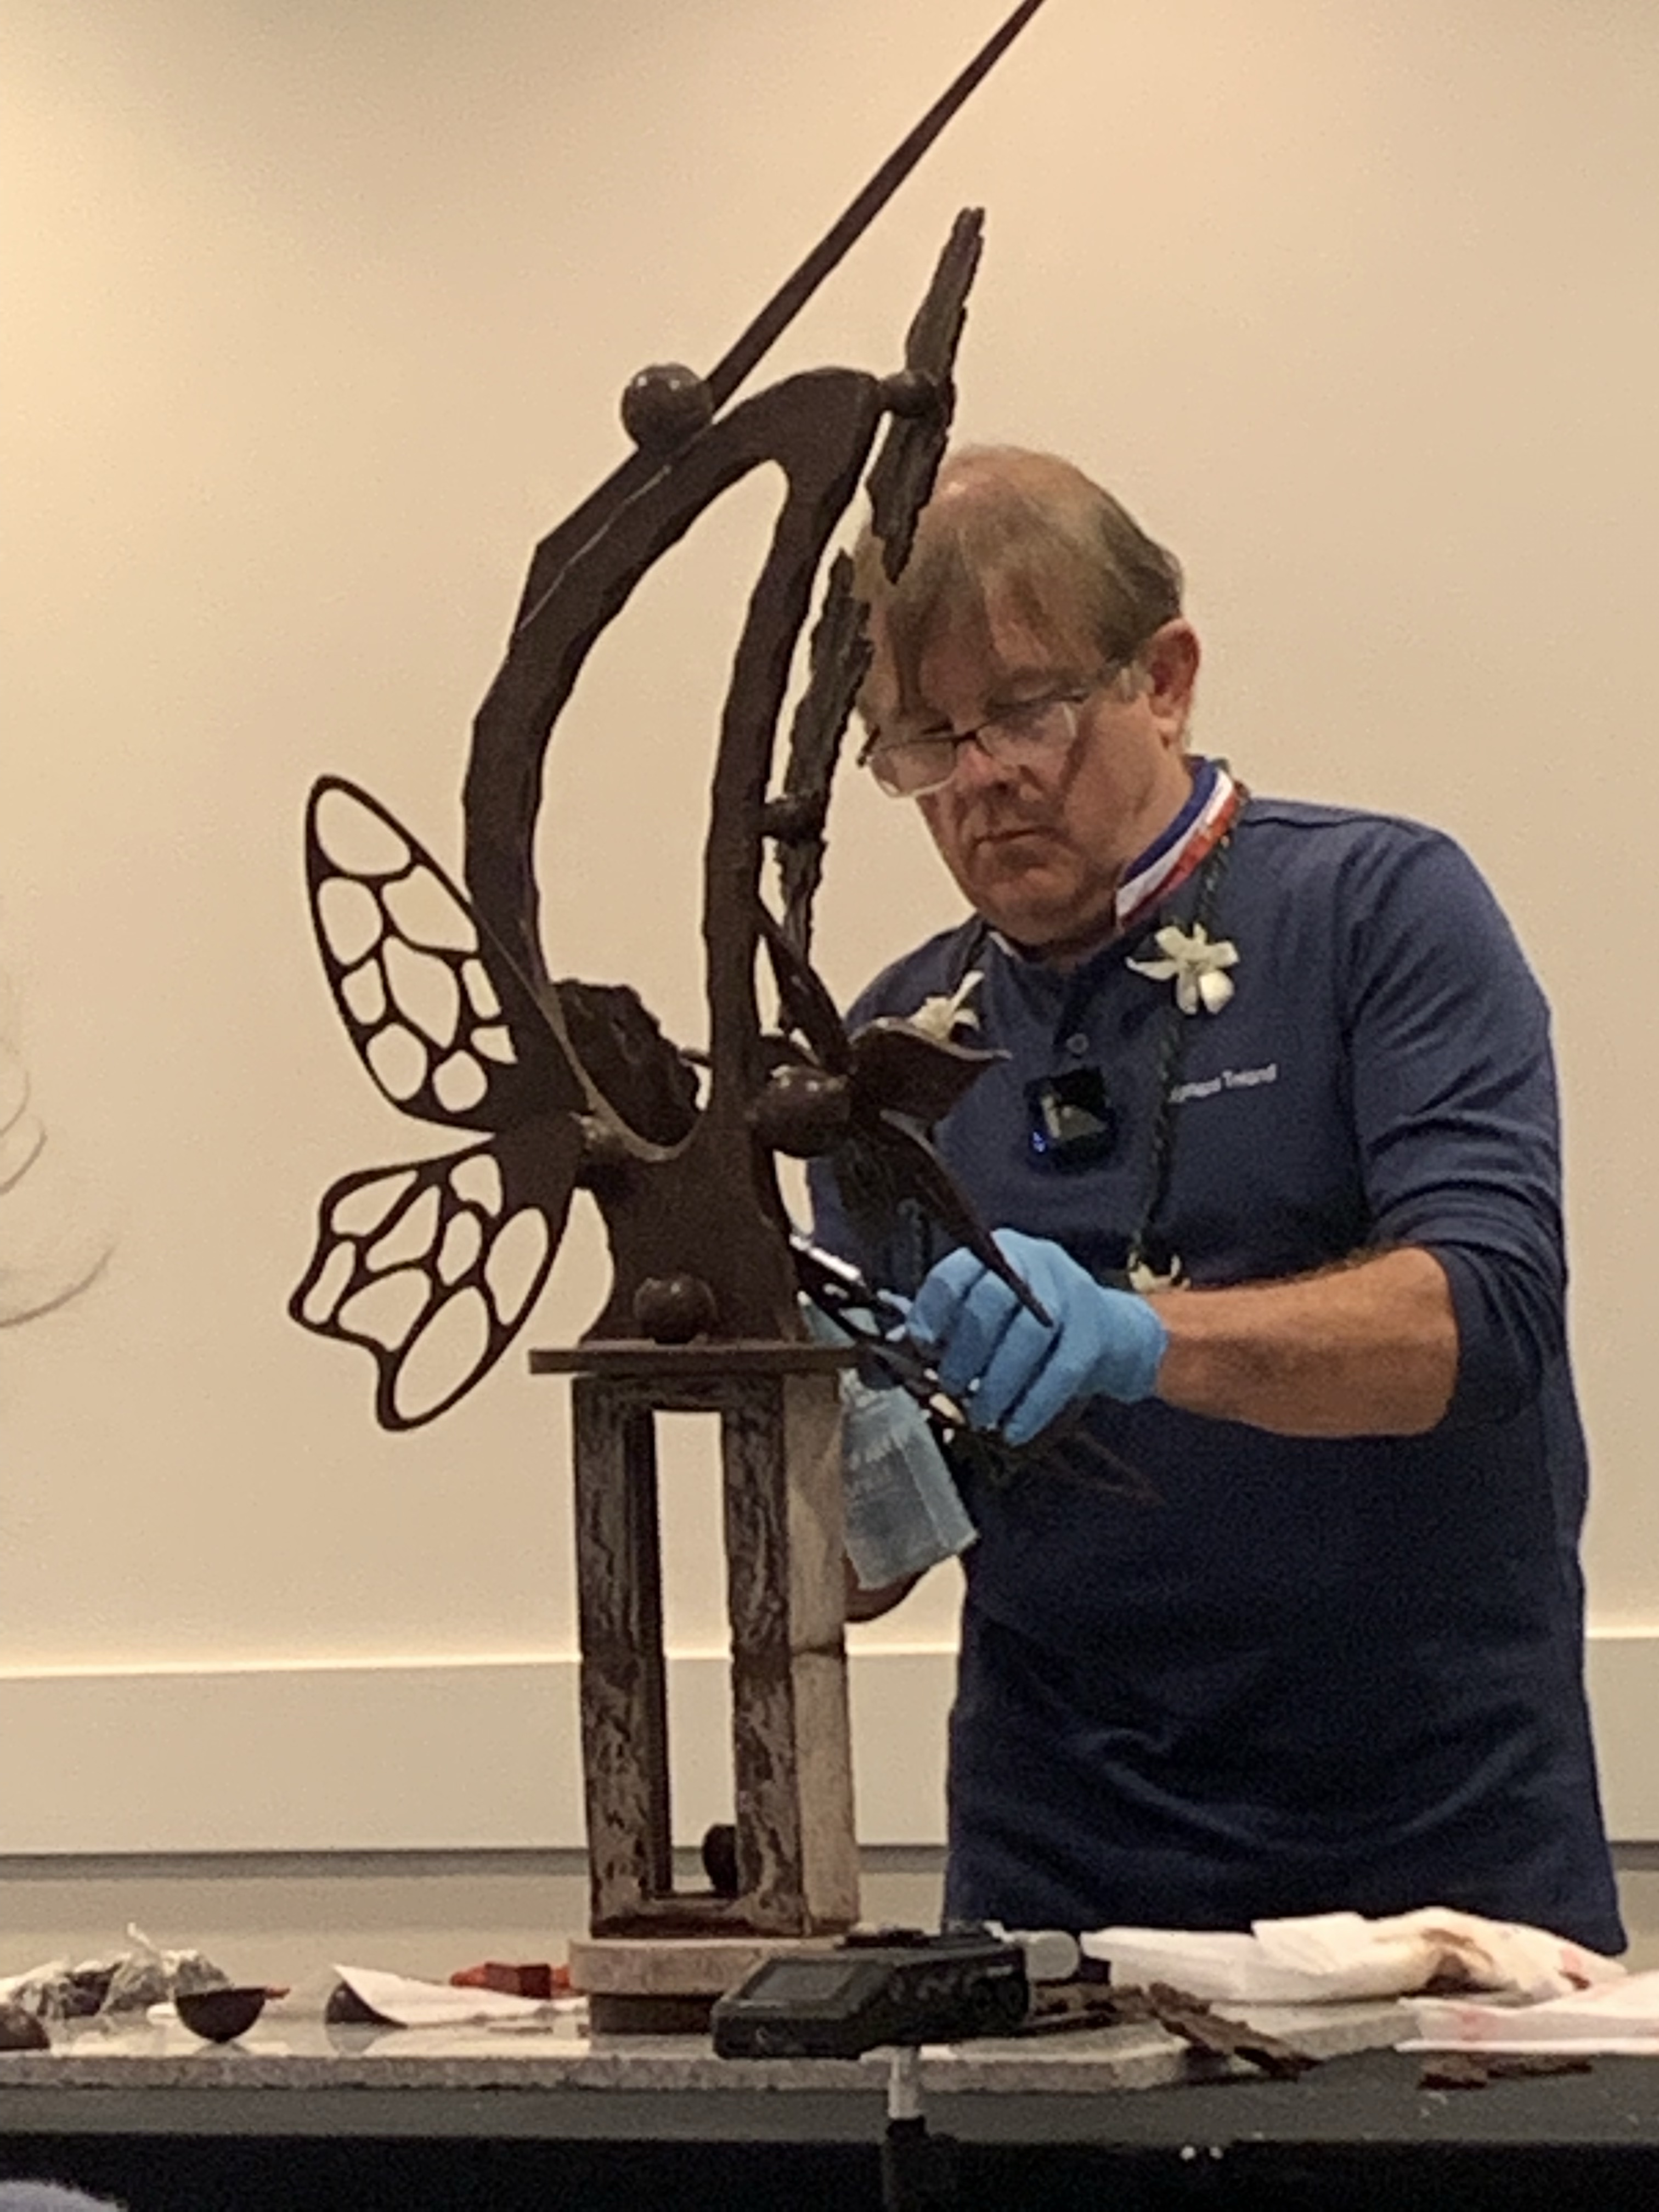
I attended a fascinating seminar by MOF Chef Stephan Tréand. Chef Tréand earned the prestigious Meilleur Ouvrier de France, or “best craftsman in France,” award in 2004. The seminar was described as “Tempering Chocolate.” Chef Tréand dispensed with that discussion in the first two minutes, then spend the next ninety minutes demonstrating how to make a pure chocolate showpiece.
UNBELIEVABLE !
Rather than try to explain the process here are a few photos from start to finish. He brought some of the pieces with him, but made most of them during the seminar.
I will say I did learn new concepts and methods about tempering and using tempered chocolate.