Unknown's avatar

About Dave Oney

Dave Oney was born mid last century in Middlebury, Vermont. He received his BS in Chemistry and worked as a polymer chemist in Massachusetts and New Jersey. He became a microscopist (someone who studies little bitty things using a microscope) and photomicrographer (someone who photographs little bitty things) before settling into a 35-year career in technical sales of scientific imaging equipment (the science of digitally recording itty bitty things, sending the image to a computer for analysis.) He designed and created a number of products contributing to this field. He is (was) proficient in several computer languages and is currently working on mastering English. After making a few more paradigm shift career changes Dave and his wife, Fran, retired and moved closer to their children and granddaughters and now live in the foothills of the Sierra Nevadas.

Guess Who Came to Dinners?

We just had a weekend guest, and sadly, put her on a plane to return to her home last night. This woman prefers to eat healthy, in moderation and occasionally diet. Boy did she come to the wrong place!

We started with some rugelach. I made apple/cinnamon, chocolate and hand pies
chocolate/blackberry. They are very similar except the for filling.  I added an apple tart, (I got to use my new spiralizer so am happy.) Fran and I had some fruit dumplings from Apple Hill (much like my hand pies but bigger, so I added blueberry, apply and blackberry hand pie/filled rough puff pastry dumplings. For dinner we had my homemade pizza margherita: sweet/salty sauce, home made dough (ala pizza 2 Independent Pizza in Seattle), basil and fresh mozzarella, baked 6 minutes at 600 degrees in my gas grill. I added some garlic bread knots to accompany.  It was so good, I made second one for Sunday night.  Unfortunately, we at all the garlic bread knots, so I made some chocolate mousse with pink whipped cream topping. Oh, we also had a salad.

mousse

RUGELACH

INGREDIENTS

CRUST

  • 16 tablespoons (1 cup) unsalted butter, at room temperature
  • 3/4 cup cream cheese, at room temperature (2 T cream cheese = 28g. 3/4 Cup = 12 T, ¾ C = 4oz.)
  • 1/3 cup sour cream
  • 1/2 teaspoon salt
  • 2 cups King Arthur Unbleached All-Purpose Flourrugelach1

FILLING CINNAMON RAISIN

  • 1/2 cup brown sugarrugelach2
  • 1 cup walnuts, chopped
  • 1/2 cup dried cranberries, raisins, or currants
  • 1 tablespoon cinnamon
  • water for brushing dough

DARK CHOCOLATE:

  • 1 T brown sugar
  • 1 Tsp unsweetened cocoa power
  • ¼ Tsp cinnamon (optional)

TOPPING

  • granulated sugar or coarse white sparkling sugar
  • milk or cream

METHOD

  1. To make the dough using a mixer: Beat together the butter, cream cheese, sour cream, and salt until smooth. Add the flour, mixing to make a stiff dough.
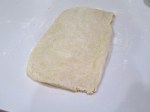
  2. Divide the dough into three equal portions. Press each gently into a disk. Make the disks as round as possible, smoothing their edges; this will allow you to roll the disks into a perfectly round circle, making the resulting rugelach more attractive.  (Note how :perfect this dough circle is.) Wrap the disks in plastic, and chill the dough for about 1 hour, until it’s firm but not rock hard. Or chill longer (up to overnight), then warm for about 45 to 60 minutes at room temperature, until the dough softens enough to roll out without cracking.
  3. To make the CINNAMON RAISIN FILLING: process the sugar, walnuts, dried fruit, and cinnamon in a food processor or blender until finely chopped and well combined (but not pasty). Don’t have a food processor? Simply stir together the filling ingredients; your filling will be chunky rather than smooth.
  4. To make the CHOCOLATE FILLING: Whisk together 1 tablespoon brown sugar and 1 teaspoon unsweetened cocoa powder; add 1/4 teaspoon cinnamon, if desired. Sprinkle atop rolled-out dough. Sprinkle with 1/4 cup (1 1/2 ounces) mini chocolate chips or chopped semisweet chocolate.
  5. Working with one piece of dough at a time, place it on a generously floured surface. Roll it into a 10″ circle and brush it lightly with water. For a flavorful touch, brush the rolled-out rugelach dough with a thin layer of boiled cider, warmed apple or 

    currant jelly, or puréed fruit preserves, instead of water.

  6. Use your fingers to spread about 1/3 of the filling onto the round, going all the way to the edges and gently patting the filling to help anchor it to the dough.
  7. Using a pizza cutter, baker’s bench knife, or sharp knife, divide the dough into 12 equal wedges. Roll each wedge up, beginning with the wide end and ending with the narrow end. Place the rolls point-side down on a baking sheet; lining the baking sheet with parchment will help with cleanup. Repeat with the remaining two pieces of dough.
  8. Brush the rugelach with milk or cream; and sprinkle with granulated or coarse white sparkling sugar, if desired.
  9. Preheat the oven to 350°F. Refrigerate the rugelach while the oven is preheating.
  10. Bake the rugelach for 25 to 30 minutes, or until golden brown. Remove from the oven, and cool right on the pan. Serve warm or at room temperature.
  11. Store leftover rugelach in an airtight container at room temperature for several days. Freeze for longer storage.

APPLE TART

TART SHELLS


INGREDIENTS

  • 100 g cold butter cut into small cubes
  • 200 g all-purpose flour
  • 60 g icing sugar (Splenda?)
  • ½ tsp vanilla
  • ¼ tsp salt
  • 1 egg (50g)

APPLE FILLING

  • 3 apples (sliced thin or spiralized with skins on)
  • 1/2 cup sugar
  • 1 Tsp cinnamon

METHOD

  1. Mix butter with sugar
  2. Add salt then vanilla
  3. Add egg
  4. Stir in flour.
    1. Mix by hand until incorporated
    2. Add 3-5 Tbl water to make dough sticky
  5. Cover with plastic and refrigerate for 30 min
  6. Butter tartlet pans
    1. Roll dough to about ⅛” thick
    2. Lay over tart mold and press into all crevices
    3. Roll top to cut off excess
  7. Prick holes in bottom and sides of formed dough
  8. Add pastry weights to each pan
  9. Bake in preheated oven 350o F (175o C) for 17 min
    1. Remove pastry weights with 5 min left in the bake
    2. Remove pastry shells from pans and let cool on wire rack
  10. Fill cooled tart shell with sliced apples. I put them in a spiral shape but any way will do
  11. Sprinkle sugar and cinnamon over the apples.
  12. Cover exposed edges of tart with aluminum foil to prevent over browning.
  13. Back at 375 F for 20-30 min. When apples have reduced and mixture is bubbling.
  14. Remove from over and cool on a wire rack.

Sweet and Salty Pizza Sauce

INGREDIENTS

  • 1 tablespoon olive oil
  • 2 cloves garlic, minced
  • 3 medium tomatoes, diced
  • 1 can tomato paste
  • 1 Tbsp sugar
  • ½ teaspoon salt
  • 1/8 teaspoon pepper, freshly ground
  • 2 tablespoons (4 large leaves) fresh basil, coarsely chopped

METHOD

  1. Heat oil in medium saucepan over a medium heat until hot.
  2. Add garlic; cook 30 seconds or until fragrant.
  3. Stir in tomatoes, tomato paste, salt and pepper and cook for 8-10 minutes or until slightly thickened, stirring and mashing tomatoes with potato masher until crushed.
  4. Stir in basil.
  5. Place in small bowl; cool to room temperature This sauce may be made up to 3 days ahead and refrigerated or up to 2 months ahead and frozen.

Japanese Cream Pans

If you have previously read my blog you know I tend to create a title that is a little sarcastic, punny (not puny as in “small”, but punny and in “with puns”) and snarky. This time, I admit my ignorance. For fear of insulting a people and culture I of which I have little knowledge, I simply titled this one as Japanese Cream Pans.Final Cream Pans

Another more snarky point: I tried one of these pastries courtesy of my son’s mother in law’s cousin, or my cousin-in-law once removed. (I made that up. I find it annoying to have to describe a full family tree to delineate the connection of two people related via someone’s marriage.)

Anyway, these pastries are light, soft and delicious. I found a recipe online and followed it with two exceptions and one caution Rolled formed doughlearned after making them. See below.

You can make the tangzhong and cream filling as much as 3 days in advance. Both will stay in the refrigerator that long if covered. Tangzhong is a water roux used to lighten the texture and provides the more tender crumb these pastries require.

Flattened dough

INGREDIENTS

Cream Pan Dough:

  • 2 1/2 c. bread flour
  • 2 tsp. active dry yeast
  • 4 T. sugar
  • 3 T. unsalted butter
  • 1/2 tsp. salt
  • 1/2 c. tangzhong
  • 1 egg
  • 1/2 c. milk

Tangzhong:

Cream Filled unfolded dough

  • 1/3 c. bread flour
  • 1 c. water

Japanese custard cream:

  • 1 3/4 c. milk
  • 4 T. unsalted butter
  • 4 egg yolks
  • 1/2 c. sugar
  • 5 T. flour
  • 2 T. cornstarch
  • 1/2 tsp. salt
  • 2 tsp. vanilla bean paste (or vanilla extract, or seeds scraped out of 1 vanilla bean pod)

Egg Wash:

  • 1 egg yolk beaten with 2-3 T. waterCream Filled Folded dough

METHOD

  1. Make the tangzhong. In a small saucepan, gently heat the bread flour + water, while slowly whisking.  When the mixture thickens, and swirl lines appear – remove from heat and cool.  You will only end up using half of this mixture – store the other half in the refrigerator (covered) for up to 3 days.
  2. Make the cream pan dough.  Add the tangzhong, butter, sugar, salt, and egg beaten with the milk to a mixer bowl.  On top of those ingredients, add the bread flour.  Make a depression in the center of the bread flour, and add the yeast.  Turn the mixer fitted with adough hook to low until a basic dough is formed. The increase speed to medium to knead for 8 minutes, then allow the dough to rise (covered) for 1 hour in a warm place.  Punch down, and allow to rise another 30 minutes.) While the dough is rising, make the custard cream.
  3. HERE IS ONE OF THE CHANGES: I use the Martha Stewart method of making cream patisserie. Put all the ingredients into a large sauce pan and heat with constant stirring until the mixture begins to set (looks like loose scrambled eggs), strain the mixture and add the vanilla. Much easier that tempering the eggs etc.
  4. The original recipe follows here:
    1. Scald the milk and butter in a large pyrex measuring cup by microwaving for 2-3 minutes.
    2. Beat the egg yolk with a whisk, and add the flour, cornstarch, salt, and sugar. Whisk together to form a thick paste.
    3. Add about 1/3 of the warm milk mixture to the paste, and whisk constantly. (This step tempers the egg, and loosens up the paste so that you can add the remaining warm milk.)  Add the second 1/3 of the warm milk, and whisk until combined.  Then add the last 1/3 of the warm milk, and whisk until combined.
    4. Strain the egg mixture into a saucepan. (This will catch any lumps, and any bits of egg that may have “scrambled”.)
    5. Add the vanilla bean paste (or vanilla extract, or scraped vanilla bean guts), then slowly heat the saucepan over medium low heat (whisking constantly). When the mixture thickens so that swirl lines appear, remove from heat and continue whisking another 30 seconds.
  5. Refrigerate the custard cream until cold and thick in a covered container for several hours.
  6. Dust a work surface liberally with flour. Divide the dough into 16 pieces.  Using a cookie scoop, portion out 16 balls of chilled custard cream.  (I usually set the custard portions on top a sheet of Reynold’s non-stick foil.)
  7. I WAS NOT HAPPY WITH BAKING THE CREAM. Skip this and inject the cream after the pastry has cooled. Be gentle with the dough, don’t over deflate. This will keep it lighter and less bread-like.
  8. The original instructions follow here.
    1. Flatten each piece of dough with the palm of your hand and place in a small custard cup. Use a small spoon to put a portion of chilled custard into the depression.
    2. Pinch the edges upwards to seal and place seam side down on a silicone lined cookie sheet.
  9. Cover with plastic wrap and allow to rise for another 30-60 minutes. Brush the tops of the buns with the egg wash, and bake at 335 degrees for 15 minutes. Use a dilute egg wash. I increased the water from 1 Tablespoon to 3.
  10. Remove from oven and cool thoroughly.
  11. Inject cooled creampat. You should feel the pastry become heavy. That is enough filling.
  12. Refrigerate to store.

Holy Wheat! Bat Man!

Last week I noticed I still had a bag of whole wheat flour in the fridge that I have to use. As bread baking day was approaching I thought, “Why not adding some of the whole wheat flour to my regular recipe?” So I substituted one cup whole wheat for the 6-7 cups bread flour that was called for. I also increased the hydration a little. A little confession here. I don’t actually measure the amount of water I add to the recipe. I start with the recommended amount, then just add until it seems about the right hydration. i.e. the “feel of the dough is right. Usually this means it is soft, pliable and a little sticky.


IMG_0005

I also thought it might be interesting to use some molasses instead of sugar. This would make the bread healthier (more fiber with whole wheat) and “sugar free” (sort of. Close enough for me.)

I made a standard 1 lb sandwich loaf plus a 2 lb boule with a variety of seeds on top. I had some issues with the seeds sticking to the loaf Dutch Oven with Loaf(actually, not sticking.) Next time, I will add the seeds to the dough prior to the second rise. This should help the adhesion.


INGREDIENTS

  • 5 to 6 cups bread flour
  • 1 cup whole wheat flour
  • 4 tablespoons molasses
  • 1 tablespoon salt
  • 2 tablespoons shortening
  • 4 1/2 teaspoons fast acting yeast
  • 2 ¼ cups very warm water (120° to 130°F)

METHOD

  1. In large bowl, stir 3 1/2 cups of the bread flour, one cup whole wheat flour, the sugar, salt, shortening and yeast until well mixed. Add warm water. Beat with electric mixer on low speed 5 minutes, scraping bowl frequently. The whole wheat flour does not absorb the water as fast as the bread flour so the extra long mixing gives it a chance. Beat on medium speed 1 minute, scraping bowl frequently. Stir in enough remaining flour, 1 cup at a time, to make dough easy to handle.
  2. Knead with the dough hook for 8 minutes as fast as your mixer will go. My KitchenAide will let me go to 5 (our of 7). Place dough on lightly floured surface. Knead by hand until dough is smooth and springy. Grease large bowl with shortening. Place dough in bowl, turning dough to grease all sides. Cover bowl loosely with plastic wrap and let rise in warm place 40 to 60 minutes or until dough has doubled in size. Dough is ready if indentation remains when touched.
  3. Grease bottoms and sides of a 9×5-inch loaf pan with shortening or spray with cooking spray. Place dutch oven in the oven and start heating 30 minutes before the second rise is complete.
  4. Gently push fist into dough to deflate. Divide dough in one third and 2 thirds. This will be about 1 lb and 2 lb.  Flatten the smaller portion with hands or rolling pin into 16×6-inch rectangle on lightly floured surface. Roll dough up tightly, beginning at 6-inch side. Press with thumbs to seal after each turn. Pinch edge of dough into roll to seal. Pinch each end of roll to seal. Fold ends under loaf. Place seam side down in pan.
  5. Line a bowl of approximately the same dimensions as your dutch oven with parchment paper. Form the 2 lb portion of dough into a ball. I like to work it a bit on the counter, rolling back and forth between my hands to form a nice smooth ball.  (Next time, I will add the seeds to the smooth side of this ball, then turn over into the lined bowl to rise the second time.)  Cover loosely with plastic wrap and let rise in warm place 35 to 50 minutes or until dough has doubled in size.
  6. Move oven rack to low position so that tops of pans will be in center of oven. Place a small metal pan in the oven to create steam for the sandwich loaf. The dutch over shouldn’t need extra steam.
  7. When the boule has doubled carefully tip the dough from the bowl into the now very hot dutch oven. The seeds that were on the bottom of the bowl will now (hopefully) be well attached to the dough which will now be on the top.
  8. Heat oven to 425°F. Place both loaves into the over and pour a cup of water into the metal pan.
  9. Bake 25 to 30 minutes or until loaves are deep golden brown and sound hollow when tapped. Remove from pans to wire rack to cool.

Fig and Oatmeal and Chocolate, Oh My!

I am expecting to harvest over 100 pounds of fig from our single tree in the back yard. We are leaving the very high figs for the birds and squirrels. They don’t seem to understand that and keep raiding my allotment on the lower branches. To date I ate figs, froze figs, made fig preserves, fig spread, fig newtons, fig cake and now fig/oatmeal/chocolate chip cookies. Daniel is making some figgy pudding, I am planning some fig hand pies and we gave away 20 lbs to friends, family and neighbors. What’s next, Fig fudge? Fig ice cream? Fig bread? You know, sometimes there may be too much of a delicious thing.

cookie and milk small

I searched a number of recipes to find one I liked for fig cookies. The one I chose also had oatmeal and chocolate. Think oatmeal/chocolate/raisin cookies except the fig imparts a softer and more subtle flavor and texture the raisin would. I upped the fig content being sure to not use any fully or over ripe figs. They would kick up the moisture content making the cookies too soggy. I also omitted the coconut (not a favorite of Fran.) Chilling the batter is essential. I chilled for 2 hours and it may not have been enough. The first batch were a little flat, the second were better.

Fig and Chocolate Oatmeal Cookies

Based on post from fiveandspice at Food52.com

Makes about 2-dozen cookies

INGREDIENTS

  • ½ cup plus 3 tablespoons salted butter, at room temp.
  • 2/3 cup sugar
  • 2/3 cup dark brown sugar
  • 2 large eggs
  • 1 teaspoon vanilla extract
  • 1 ¾ cups all-purpose flour
  • 1 ½ cups rolled oats
  • 1 teaspoon baking soda
  • ½ teaspoon salt
  • 9 ounces chopped dark chocolate (I like 70% cacao)
  • 1½ cup chopped fresh figs (not over ripe)

METHOD

  1. Cream the butter and sugars together until light and fluffy (3-5 minutes) in a standing mixer fitted with the paddle attachment. Add the eggs and vanilla and beat until fully incorporated, scraping down the sides of the mixer as needed.
  2. In a separate bowl, stir together all the remaining ingredients. Stir these into the butter mixture on low speed until fully combined with no dry floury patches left.
  3. Refrigerate the dough 30-60 minutes before proceeding. Heat your oven to 350F. Scoop the dough in 2-3 Tbs. scoops onto baking sheets. Bake each sheet one at a time (keep the full sheets that aren’t being baked in the fridge until it’s their turn) until the cookies are golden around the edges but still look a tad doughy in the middles, about 15-18 minutes, rotating each baking sheet halfway through the bake time.
  4. Let the cookies cool on the sheet for 5 minutes before transferring to a cooling rack to finish cooling.

Shield of David

Our best friend gave me two gifts for my recent birthday. Now, I am not saying there were ulterior motives here, but she is visiting us this fall. Coincidence? Perhaps not.

The Shield of David (Mogen David, or Jewish Star) is a six pointed star symbolizing the internal and external connections of Torah, God and Israel. A Shield of David bundt pan makes an awesome cake, too.

You may have read elsewhere in this blog, we had a bumper crop of figs in our backyard tree this year. My challenge was how to use all these fresh figs. I froze a few pounds but our freezer is pretty small and already has chocolate chip cookie dough ready for baking, extra tartlet shells for an emergency snack or drop in guests and several quarts of Vermont maple syrup from near my home town in Vermont, so I have frozen enough already.

slice 2

Today I made a fig-spice cake in my new pan. Think apple-spice but with figs instead. The Bundt pan worked really well. Spraying with some Baker’s Joy helped the cake slide out of the pan perfectly. The cake is moist with good texture and is sweet.  (It was even  sweeter after dusting with confectioners sugar.) The figs were well dispersed throughout the cake and the edges had a nice caramelized crunch.


Based on hungryforlouisiana.com/figging-out-fresh-fig-cake/

INGREDIENTS

  • 3 eggs
  • 2 cups sugar
  • 1 cup canola oil
  • 1 cup buttermilk (or 1 Tbl white vinegar mixed into 1 Cup milk)
  • 1 teaspoon baking soda
  • 2 cups all-purpose flour
  • 1 cup chopped fresh figs (between 15-20 small to medium figs)
  • 1 teaspoon cinnamon
  • ¼ teaspoon ginger
  • ½ teaspoon salt
  • 1 pinch nutmeg
  • Confectioner’s sugar and fig leaves for garnish

METHOD

  1. Heat oven to 350 degrees. Using a standing mixer or bowl, whisk eggs briefly. Add sugar and beat until light and fluffy, about one minute. Add oil, and beat until just combined.
  2. In a separate medium bowl, add buttermilk and stir in baking soda.
  3. Beginning with flour, add flour and buttermilk mixture alternately and mix until combined.
  4. Add chopped figs, cinnamon, ginger, salt and nutmeg, and mix until thoroughly incorporated.
  5. Pour batter into a greased and floured Bundt pan, and bake until done (50-60 minutes).
  6. Cool in baking rack for 5-10 minutes, then remove from pan. Allow to cool another 5-10 minutes. Arrange on plate, and garnish with confectioner’s sugar and fresh figs.

What The Fig!!

Well, it finally happened. The figs in our backyard tree are ripe and ready for harvest. To date, we have harvested about 55 pounds (about 25 Kilos) of figs. Let me be clear. That is the first harvest. We probably have 2 or 3 more to go.  Prolific tree, I just wish the apricot and plum trees would take a lesson. I made several pints of fig preserve and several fig newton filling (alone with some homemade fig newtons), fig and brie tarts and froze a few pounds for future consideration.

Picking the figs proved somewhat challenging. It turns out many people are allergic to the sap and/or leaves of the fig tree. As luck would have it, all of us were, some more than others. Soap (Dawn dishwashing detergent) and water and time worked well to remove the itch and rash. It was gone the next day. Next time, long sleeves and gloves.

After the figs were washed, dried and sorted the best were sliced (about ½” thick) and frozen. Some were laid out on parchment lined baking sheets and put in the freezer. Others were sliced and put into zip lock bags and a simple syrup with Fruit Fresh added were frozen. We shall see which method we like better.

Picking Figs

Picking 2

Picking

Frances and I picked the first half of the harvest. Daniel, The Young and Tall, joined us after his work the next day to  help with the high fruit. Rosie, the Supervisor as ever vigilant.Supervisor


Washing, Sorting and Processing

The fruit was washed, dried (wet fruit spoils faster) and spread as a single layer on paper towels in the refrigerator for processing the next day (after rash). Note to self: Use gloves on day two also.

The cut figs were boiled to 220oF and either mashed with a potato masher (Frances’ method) or food processed with a couple quick pulses (my method) and canned. I added a couple more pulses for the newton filling, which seemed about right in the final product.

Here are a couple of tips about making the fig newtons. The recipe makes just the right amount of cookie batter vs. filling, try it. After cutting the rolled dough to an 8”x14” sheet, roll it as rectangular and with as straight edges as possible. It will make the cookies look better.  Also, before trying to fold the dough over and pinching shut cut the sheet in half, or ever thirds, crosswise. This makes the soft dough easier to fold smoothly. More also, be bold when folding. Like flipping eggs in a frying pan. Just go for it. If you don’t fold far enough for the un-filled edges to meet, it’s a bear to try to stretch the top layer to meet the bottom to seal.

For the tartlets, be sure to use enough Brie (or other cheese) to fill half the shell. Too little and the cheese does not add enough flavor. You can always add a piece of cheese to the top to compensate. I also sprinkled the tartlets with a little flaked sea salt to offset the fig sweetness.

Homemade Fig Newtons – HGTV

INGREDIENTS

  • 1 pint fresh or preserved figs or 12 ounces dried figs
  • 1 1/2 cups flour
  • 1/4 teaspoon baking powder
  • 1/4 teaspoon salt
  • 1 stick butter
  • 1/3 cup sugar
  • 1 egg
  • 1 teaspoon vanilla extract
  • 2 tablespoons orange juice

If you are using:

  • Fresh figs: Remove stems and boil figs with a cinnamon stick and 2 cups of sugar in 1 cup of water for 45 minutes. Drain and cool.
  • Dried figs: In a bowl, pour boiling water over figs (stems removed) and let rest 10 minutes. Drain all but 2 tablespoons water and stir in 2 tablespoons corn syrup + ¼ teaspoon cinnamon.
  • Preserved figs: Drain syrup.

METHOD

  1. Puree figs in food processor until a thick paste forms (if too thick or thin to spread evenly, add a little water or flour until spreadable consistency is reached).
  2. Combine flour, baking powder and salt together and set aside.
  3. Cream butter and sugar in a mixing bowl.
  4. Add egg and vanilla, mix until smooth
  5. Add orange juice and combined dry ingredients to bowl and mix until dough forms.
  6. Optional: for dough into a flat thick disk and chill to set butter and make it easier to roll and fold.
  7. Roll dough out on a floured surface into a 8”x14” rectangle about ¼” thick.
  8. Cut rectangle in half lengthwise.
  9. Spread fig paste onto half of each rectangle, lengthwise.
  10. Cut the rectangle in half crosswise, or even thirds to facilitate folding.
  11. Fold dough in half lengthwise to cover fig paste and pinch edges to seal.
  12. Slide each newton log onto a parchment lined baking sheet.
  13. Bake 25 minutes at 350 degrees until crust begins to brown.
  14. Slice into cookie-sized segments and cool. Slice while warm to reducing flaking.

Yes We’re Going to a Party Party

Dutch Oven with Loaf

Along with the other wonderful birthday gifts I received yesterday, (and the day before) Fran gave me my very  own Emile Henry Bread and Potato pot! Emile Henry, France, is a family owned business manufacturing ceramic cooking product since 1850. This bread pot adds a nice glaze to the surface of the loaf and by retaining the moisture which turns to steam, it also imparts a fantastic crust to the bread.

Preheating the oven with Loafthe dutch oven inside to 450o F, adding the risen dough and quickly covering with the top locks the steam into the dutch oven, making it perform like a steam injection oven used by commercial bakeries.

Use any bread recipe you like, to date I have made no knead bread and NY rye. Next up is my standard sandwich bread loaf.

Sliced Loaf

I found if the dough is a little dry, sprinkle a little water on the top of the dough after you place it in the Bread Pot. This will assure adequate water to create the steam necessary to generate the steam.

No Knead Bread – KAF

INGREDIENTS

Grams

  • 680g lukewarm water
  • 907g King Arthur Unbleached All-Purpose Flour* or Organic All-Purpose Flour
  • 1 tablespoon salt
  • 14g instant or active dry yeast

Volume

  • 3 cups lukewarm water
  • 6 1/2 to 7 1/2 cups All-Purpose Flour
  • 1 tablespoon salt
  • 1 1/2 tablespoons instant or active dry yeast

METHOD

  1. Combine all of the ingredients in a large mixing bowl, or a large (6-quart), food-safe plastic bucket. For first-timers, “lukewarm” means about 105°F, but don’t stress over getting the temperatures exact here. Comfortably warm is fine; “OUCH, that’s hot!” is not. Yeast is a living thing; treat it nicely.
  2. Mix and stir everything together to make a very sticky, rough dough. If you have a stand mixer, beat at medium speed with the beater blade for 30 to 60 seconds. If you don’t have a mixer, just stir-stir-stir with a big spoon or dough whisk until everything is combined.
  3. Next, you’re going to let the dough rise. If you’ve made the dough in a plastic bucket, you’re all set — just let it stay there, covering the bucket with a lid or plastic wrap; a shower cap actually works well here. If you’ve made the dough in a bowl that’s not at least 6-quart capacity, transfer it to a large bowl; it’s going to rise a lot. There’s no need to grease the bowl, though you can if you like; it makes it a bit easier to get the dough out when it’s time to bake bread.
  4. Cover the bowl or bucket, and let the dough rise at room temperature for 2 hours. Then refrigerate it for at least 2 hours, or for up to about 7 days. (If you’re pressed for time, skip the room-temperature rise, and stick it right into the fridge). The longer you keep it in the fridge, the tangier it’ll get; if you chill it for 7 days, it will taste like sourdough. Over the course of the first day or so, it’ll rise, then fall. That’s OK; that’s what it’s supposed to do.
  5. When you’re ready to make bread, sprinkle the top of the dough with flour; this will make it easier to grab a hunk. Grease your hands, and pull off about 1/4 to 1/3 of the dough — a 14-ounce to 19-ounce piece, if you have a scale. It’ll be about the size of a softball, or a large grapefruit.
  6. Plop the sticky dough onto a floured work surface, and round it into a ball, or a longer log. Don’t fuss around trying to make it perfect; just do the best you can.
  7. Place the loaf on a piece of parchment (if you’re going to use a baking stone); or onto a lightly greased or parchment-lined baking sheet. Sift a light coating of flour over the top; this will help keep the bread moist as it rests before baking.
  8. Let the loaf warm to room temperature and rise; this should take about 60 minutes (or longer, up to a couple of hours, if your house is cool). It won’t appear to rise upwards that much; rather, it’ll seem to settle and expand. Preheat your oven to 450°F while the loaf rests. If you’re using a baking stone, position it on a middle rack while the oven preheats. Place a shallow metal or cast-iron pan (not glass, Pyrex, or ceramic) on the lowest oven rack, and have 1 cup of hot water ready to go.
  9. When you’re ready to bake, take a sharp knife and slash the bread 2 or 3 times, making a cut about 1/2″ deep. The bread may deflate a bit; that’s OK, it’ll pick right up in the hot oven.
  10. Place the bread in the oven — onto the baking stone, if you’re using one, or simply onto a middle rack, if it’s on a pan — and carefully pour the 1 cup hot water into the shallow pan on the rack beneath. It’ll bubble and steam; close the oven door quickly.
  11. Bake the bread for 25 to 35 minutes, until it’s a deep, golden brown.
  12. Remove the bread from the oven, and cool it on a rack. Store leftover bread in a plastic bag at room temperature.

METHOD 2 – DUTCH OVEN

  1. When you’re ready to bake, measure out a two-pound ball of dough. If you don’t have a scale, it should look like it will fill the base of the Bread Pot most of the way.
  2. Shape the dough and let it rest on a floured kitchen towel or piece of parchment paper with the seam side up, covered, while it rises. (You can also use a brotform if you want to make some fancy rings on the surface of your loaf.)
  3. To ensure you get a burst of steam when the dough is put inside the pot, it should be preheated empty for about 30 minutes. Start preheating your pot roughly 30 minutes before your rising dough is ready to bake.
  4. Keep in mind the temperature of your kitchen will make a difference in how quickly the dough rises. The No-Knead Crusty White Bread dough can take anywhere from one to three hours to rise; I usually let it rise for at least one hour before preheating the pot for 30 minutes, giving the dough a total of a 1½ hours to rise.
  5. When your dough looks like it will be ready in 30 minutes, put the Bread Pot (both the bottom and the lid) into the cold oven, and set it to 450°F (or the temperature your recipe calls for).
  6. Half an hour later, the dough should be risen and the pot should be thoroughly preheated. Carefully remove the hot pot from the oven, taking care to place it on a neutral surface like a cooling rack, wooden board, or kitchen towel. (Avoid contact with anything cold, such as cold water or a cold surface; this may cause the pot to crack.)
  7. Apply a gentle coating of vegetable oil-based non-stick spray and sprinkle in some semolina flour or cornmeal. (Be careful during this step — the pot may smoke slightly when prepared.)
  8. Slide your hand under the towel or piece of parchment paper and turn the dough over into the pot, seam side down. You can gently shake the pot from side to side to help the dough settle evenly in the bottom.
  9. Don’t worry if your dough doesn’t look picture-perfect here; it will turn into a beautiful, golden loaf as it bakes.
  10. Make a few slashes in the top of your loaf (a lame works well for this), and then put the lid on. Bake for 40 minutes; remove the lid and bake for another 10 to 20 minutes, until the loaf browns fully.
  11. Remove the loaf from the oven and let it cool completely on a rack before slicing.

More Hookers! NYT Fake News! Sad!

A couple of weeks ago, while reading the NYT online I saw this recipe for a Chocolate/Salted Caramel tart. I thought, how could you go wrong with this combination? I mean, salted caramel, chocolate and hookers (tarts), plus wanting to support the poor failing NYT! I planned on making this the first weekend my crack QC/Taster panel was back home. Tada!!

nyt-revenue-report.jpg

Unsurprisingly, the recipe posted in the successful, reliable and accurate NYT made anBroken Baked Tart Shell excellent tart. I made two error with this pastry. First I removed it from the tart pan too soon. The shell was still very fragile and I put a thumb through the side.

Repaired Filled Tart Close Up


I used a little foil to dam the flow of caramel and chocolate, plus I tipped it away from the breach so there is a thinner layer on that side of the tart. SAD!


I also poured the chocolate ganache when it was a little too thick. That may have helped plug the leak in the damn dam, but did not have the nice smooth, shiny top I was looking for. Finished Tart I also added some white chocolate ganache in a spiral and cut it through with a clean knife to make the star like pattern.


Hover your mouse over these three pictures to see the caption.

Anyway, here is the recipe. I followed it pretty closely and really wouldn’t change anything, except adding the white chocolate starburst. Oh, I did use sour cream instead of creme fraiche. Any notes are in red below.

INGREDIENTS

  • FOR THE CHOCOLATE DOUGH:
    • ½ cup (1 stick) salted butter, at room temperature
    • ½ cup plus 1 tablespoon confectioners’ sugar
    • ¼ cup unsweetened cocoa
    • 1 large egg yolk
    • ¾ teaspoon vanilla extract
    • 1 ¼ cups all-purpose flour
    • Optional: water, a tablespoon at a time until the dough is pliable.
  • FOR THE CARAMEL FILLING:
    • 2 cups sugar
    • ½ cup water
    • ¼ cup corn syrup
    • ½ cup (1 stick) unsalted butter
    • ½ cup heavy cream
    • 2 tablespoons creme fraiche or sour cream
    • Pinch of salt
  • FOR THE CHOCOLATE GLAZE:
    • 3 ½ ounces extra-bittersweet chocolate (70 to 85%), chopped
    • ½ cup heavy cream
    • Sea salt

PREPARATION

  1. Prepare chocolate dough: In bowl of an electric mixer, combine the butter, confectioners’ sugar and cocoa. Beat until smooth. Add egg yolk and vanilla, and beat until blended.
  2. Sift flour into dough mixture. Beat on low speed until combined. (Note: next time I will add a little water here to make the dough a little more pliable. I will also rest in in the fridge for 20-30 minutes.) Press the dough into the bottom and up the sides of a 10-inch tart pan. (You can use a 9-inch pan, but the crust will be thicker and the caramel may take longer to set in step 4.)
  3. Preheat oven to 350 degrees. Line tart with foil, and fill with dried beans, rice or pie weights. Bake for 15 minutes. Remove foil and weights, and bake until pastry is dry and set, another 10 to 15 minutes. Transfer to a wire rack to cool. The shell is fragile. Be sure to wait until it is cool before handling.
  4. Prepare caramel filling: In a large saucepan, bring sugar, water and corn syrup to a boil. Stir or swirl the pan occasionally, until mixture is a medium amber color, about 12 minutes. Remove from the heat. Caramel will continue to cook and darken off of the heat. Carefully but quickly whisk in the butter, cream, creme fraiche and salt until smooth (mixture will bubble up). Pour hot caramel into tart, and allow to cool and set, at least 1 hour.
  5. Prepare chocolate glaze: Place chocolate in a bowl. In a small saucepan, bring cream to a boil. Pour hot cream over chocolate and whisk until chocolate has melted and mixture is smooth. Pour glaze over tart, tilting tart for even coverage. (At this point, I piped a spiral of white chocolate ganache on the tart and used a butter knife to cut through the ganache to make the starburst design.) Refrigerate until tart is set, at least one hour, then sprinkle with a few granules of sea salt. Keep refrigerated until serving.

Clouseau, Clafoutis Hasenfeffer Incorporated

Honey Whole Wheat Clafoutis With Raspberries

One of my favorite bits from the old Peter Sellers Inspector Clouseau Pink Panther movies (imagine Clouseau’s fake French accent)

Clouseau: Does your dog bite?
Hotel Clerk: Non.
Clouseau: [bowing down to pet the dog] Nice doggie.
[Dog barks and bites Clouseau in the hand]
Clouseau: I thought you said your dog did not bite!
Hotel Clerk: That eez not my dog.

I saw this recipe online and followed it back to the source (Ellie Krieger, Special to The Washington Post) and as I had a pint of raspberries left over in the fridge I thought this would make a good, perhaps even, elegant breakfast, rather than a dessert.  Actually, clafoutis [klah-foo-TEE] is a basic pancake which is baked rather than cooked on a griddle, but it sure sounds fancy.

The recipe calls for pastry flour (low gluten) to make a more tender, “pancake” type structure. Not having any whole wheat pastry flour, I substituted regular whole wheat flour and added a little cornstarch. I didn’t have a lemon so substituted ½ teaspoon of key lime juice for a little tartness. I made a half recipe, used a 6” pie plate and topped it with some fresh Vermont maple syrup, cutting the ingredients below in half. Perhaps next time I would add a little baking powder to help the rise some.


Using low-fat milk, whole wheat flour and honey rather than sugar increases the healthfulness of this recipe. I did dust the oiled pie plate with a little caster sugar. In hindsight, I probably wouldn’t do that again. It didn’t add anything to the clafoutis.

INGREDIENTS

  • 2 large eggs, beaten
  • 1/2 cup low-fat (1 percent) milk
  • 1/4 cup honey
  • 2 tablespoons unsalted butter, melted and cooled
  • 1 1/2 teaspoons finely grated lemon zest (from 1 lemon)
  • 1/8 teaspoon salt
  • 1/2 cup whole-wheat pastry flour
  • 9 ounces (2 cups) fresh raspberries
  • 1 tablespoon confectioners’ sugar, for serving

METHOD

  1. Preheat the oven to 325 degrees. Grease a 9-inch pie plate or ceramic dish with cooking oil spray.
  2. Whisk together the eggs, milk, honey, butter, lemon zest and salt in a mixing bowl until well incorporated, then gradually whisk in the flour, to form a smooth batter.
  3. Pour into the pie plate, then add the raspberries; top sides down will help them to stay upright as you work. Bake (middle rack) for 40 to 50 minutes, until the clafoutis is golden brown and center is set.
  4. Dust the top with confectioners’ sugar and serve right away.

San Juan Hill Pastry Hand Pies   

Making puff pastry at home is a tedious process requiring several hours to incorporate the butter into the flour. For years I have relied on the kindness of Trader Joe’s and Pillsbury as my source of puff pastry. Both are delicious and easy to use. TJ’s has less rise and is good for a variety of pastries while Pill’s has skyscraper (get it?, “high rise?”) puff. This spring I found out that TJ’s puff pastry is seasonal. Who knew? Also, trying to insert a very little humor and perhaps some click bait with “San Juan Hill” – Teddy Roosevelt and the “Rough” Riders? Oh well, maybe not.

Anyway, I decided it was time to try, at least rough puff pastry. I tried two different recipes, one from King Arthur Flour and the other from Gordon Ramsey via BBC. The primary difference between the two is KAF adds sour cream while Gordon uses cool water as the liquid and KAF adds some baking powder to assist the rise.

To create the characteristic layers in the puff pastry it needs to be book folded and rolled. Both recipes called for repeating this twice, but many of the comments said to repeat up to four times, which I will do next time. The final pastry was very good, but lacked the layers and puff of either TJ’s or Pill’s.

I have trouble making the pastry and remembering to take photos as the work progresses. What I need is a camera that will take pics every 15 seconds, the just use the appropriate ones. I missed the filling of the pies. I used a heaping teaspoon for the blueberry mix and made a few using 3 fresh raspberries. Another suggestion: cut the tops of the pies about and inch bigger than the bottoms. Once the dough tries to stretch over the filled bottom the edges do not line up. I used about 2.5″ for the bottom and 3:5 inches for the tops. Also, round hand pies are much better looking but wastes a lot of dough. Square pies are rather plain, but more efficient.  What I need are two hexagonal cookie cutters, one 2.5″ and the other 3.5″. Then I could have the “roundish” look but a closest pack design, minimizing waste.

Gordon’s pastry was a bit easier to work with than KAF’s. The original recipe called for too much water which made a very, very wet dough. Luckily, I started with about 50 ml (one third of what the recipe said you may need and half of what it said to add initially.) They both tasted excellent and the texture was good, not great, but that may improve with additional rolling, folding and chilling. Once I made Gordon’s pastry I used the bottom of KAF’s to fill and finish the hand pies.

Rough Puff Pastry – Gordon Ramsey

INGREDIENTS

  • 250g strong plain flour
  • 1 tsp fine sea salt
  • 250g butter, at room temperature, but not soft
  • about 150ml cold water

METHOD

  1. Sift the flour and salt into a large bowl. Roughly break the butter in small chunks, add them to the bowl and rub them in loosely. You need to see bits of butter.
  2. Make a well in the bowl and pour in about one-third of the cold water, mixing until you have a firm rough dough adding extra water if needed. Wrap dough with cling film and leave to rest for 20 mins in the fridge.
  3. Turn out onto a lightly floured board, knead gently and form into a smooth rectangle. Roll the dough in one direction only, until 3 times the width, about 20 x 50cm (~ 8”x20”). Keep edges straight and even. Don’t overwork the butter streaks; you should have a marbled effect.
  4. Fold the top third down to the center, then the bottom third up and over that. Give the dough a quarter turn (to the left or right) and roll out again to three times the length. Fold as before, cover with cling film and chill for at least 20 mins before rolling to use.

Blueberry Hand Pies with Rough Puff Pastry – KAF

INGREDIENTS

Pastry

  • 2 cups King Arthur Unbleached All-Purpose Flour
  • ¾ teaspoon salt
  • ½ teaspoon baking powder
  • 1 cup (16 tablespoons) cold unsalted butter
  • ½ cup cold sour cream

Filling

  • 2 cups blueberries, fresh or frozen
  • 2 tablespoons cornstarch
  • ⅓ cup sugar
  • ⅛ teaspoon salt (a large pinch)
  • 1 tablespoon lemon juice
  • *For frozen berries, use 2½ tablespoons cornstarch.

Topping

  • 1 large egg, beaten
  • 2 tablespoons white sparkling sugar, for garnish

METHOD

  1. To make the pastry: Whisk together the flour, salt, and baking powder. Add the butter, working it in to make a coarse/crumbly mixture. Leave most of the butter in large, pea-sized pieces.
  2. Add the sour cream, and stir until the mixture starts to come together in chunks. Turn it out onto a floured work surface, and bring it together with a few quick kneads.
  3. Pat the dough into a rough log, and roll it into an 8″ x 10″ rectangle. Dust both sides of the dough with flour, and starting with a shorter end, fold it in three like a business letter.
  4. Flip the dough over, give it a 90° turn on your work surface, and roll it again into an 8″ x 10″ rectangle. Fold it in three again.
  5. Wrap the dough, and chill for at least 30 minutes before using.
  6. To make the filling: If you’re using fresh berries, rinse and drain well. Place fresh or frozen berries in a saucepan. Whisk the cornstarch with the sugar, and pour over the berries. Add the salt and lemon juice, stirring to combine.
  7. Place the saucepan on a burner set to medium-high heat and cook, stirring, until the small amount of liquid in the bottom of the pan comes to a simmer. Reduce the heat to medium and continue to cook, stirring frequently, until the mixture starts to thicken, about 5 minutes. Transfer the cooked berries to a bowl and let cool to room temperature. It’s fine to make the filling ahead of time, and refrigerate until you’re ready to use it.
  8. Preheat the oven to 425°F; place a rack on the middle shelf. Line a baking sheet with parchment paper.
  9. To assemble the pies: Roll the dough into a 14″ x 14″ square. With a straight edge and pastry wheel, or a 3½” square cutter, cut out sixteen 3½” squares.
  10. Divide the filling among eight of the squares, using about a heaping tablespoon for each; a slightly heaped tablespoon cookie scoop works well here. Brush some of the beaten egg along the edges of each filled square.
  11. Use a knife to cut a vent into each of the remaining eight squares; or use a decorative cutter of your choice.
  12. Top each filled square with a vented square, and press along the edges with the tines of a fork to seal.
  13. Brush the top of each pie with the remaining beaten egg, and sprinkle with sparkling sugar. Transfer the pies to the prepared baking sheet. Note: If at any time during this process the pies become sticky and hard to work with, simply refrigerate them for about 20 minutes, until firm.
  14. Bake the pies for 18 to 20 minutes, until they’re a light golden brown. Remove them from the oven, and let cool for 20 minutes before serving.
  15. Store pies, lightly wrapped, at room temperature for a couple of days; freeze for longer storage.