I had a couple of cups of blueberries in the fridge that were complaining about being ignored, so I made them into drop scones for breakfast yesterday. Actually, I froze half of them so they will continue to be enjoyed for a while. They thaw on the counter and are as fresh as new.
Berry Drop Scones
INGREDIENTS
2 ½ cups (312g) all-purpose flour
1 tablespoon baking powder
3/4 teaspoon kosher salt
1/3 cup (67g) sugar
Zest of 1 small lemon (or orange or lime)
½ cup (115g) unsalted butter, chilled and cut into cubes
150-175g berries. Use any berries that you like.
1 cup heavy cream + extra if required
Coarse or turbinado sugar for topping
METHOD
Preheat oven to 400. Line a baking sheet with parchment paper.
In the bowl of a food processor, add the flour, baking powder, salt, sugar and zest. Pulse a few times to incorporate.
Add the cubed butter and pulse to incorporate. The mixture should resemble very coarse sand.
Empty the flour mixture into a mixing bowl. Add the cream and stir until just barely incorporated. Add additional cream by the tablespoon to help the dough come together
Gently fold in the berries. (It’s fine if the raspberries or blackberries break up a little – it adds a nice pink stain to the dough.) The dough should just be moist, not wet, but also not crumbly or powdery looking. If it looks too dry, add a tablespoon of cold water.
Spoon the dough into 12 equally sized pieces on the parchment lined baking sheet. Sprinkle some coarse or turbinado sugar over the top, if desired.
Bake for 16-19 minutes, rotating the pan halfway through. The scones should be lightly golden and cooked through. I rotate the pan after 10 minutes
Cool in the pan for 5-10 minutes then carefully remove to a cooling rack
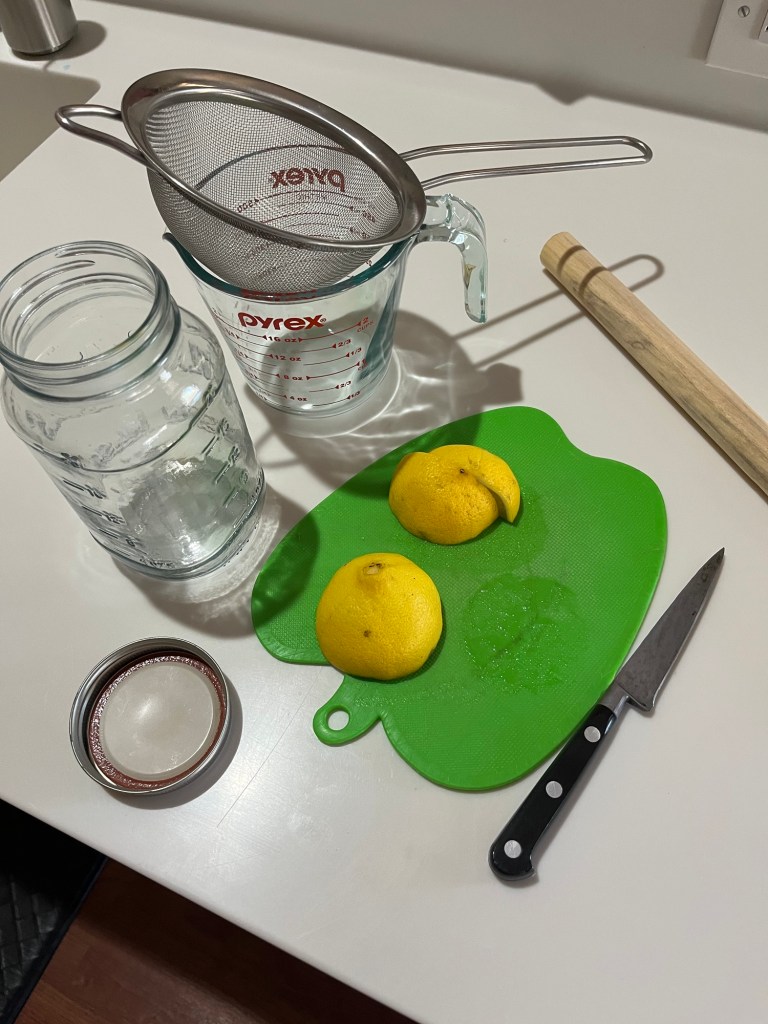
Here is my method for beating the heat and thirst on these hot, occasionally blistering summer days. First, turn on the AC and set the thermostat to a temperature comfortable for you. That fixes the heat, but not the thirst. My go-to quencher this summer is fresh carnival lemonade, then, after drinking about half of it, I re-fill the bottle with iced tea to make (IMHO) the best Arnold Palmer ever.
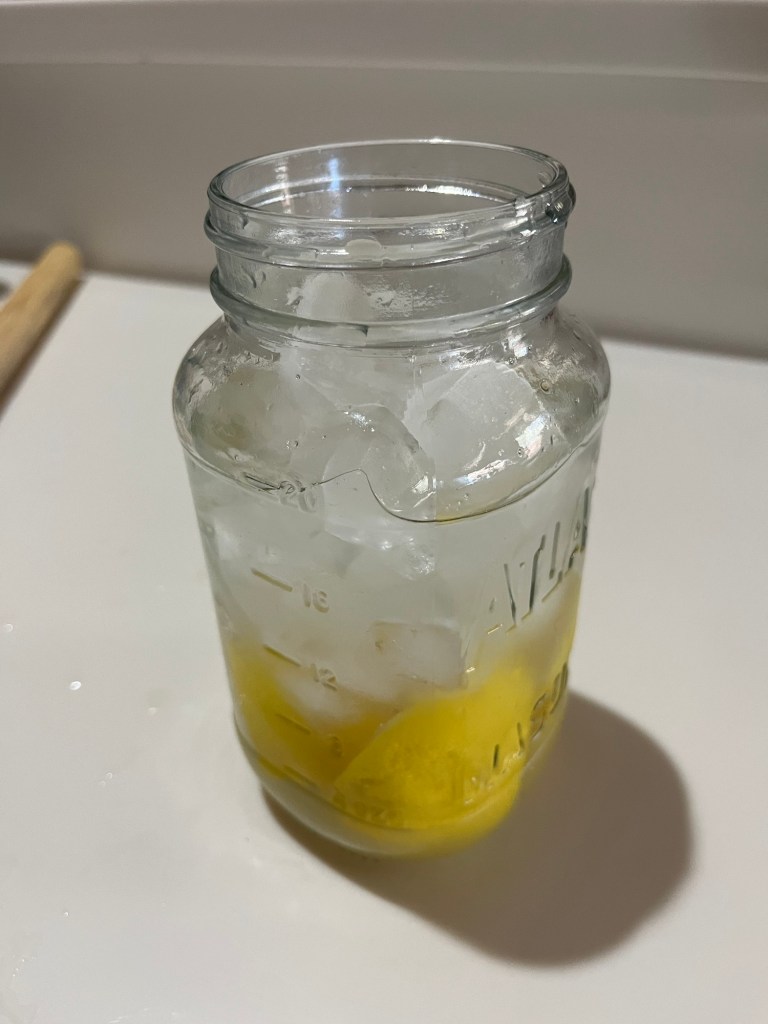
Get ReadyGet SetAlmost Go!!
I know that everyone reading this post has their own method for making lemonade, iced tea and Arnold Palmers, but this is mine. Make sun-tea by adding two cold brew tea bags to a container and let it sit in the sun. Depending on where you live that could be anywhere from 10 minutes (here in July) to overnight (here right now.) Make country fair lemonade by putting a whole, quartered, lemon into a 20 oz mason jar, add 3 teaspoons (or to taste) sugar, and pound it with a muddler. Don’t have a muddler you say? You could use the end of a wooden spoon, but I found that unacceptable. I happen to have a one foot length of 1” diameter dowel. I cleaned it and sealed the ends with some butcher block wax. It works great.
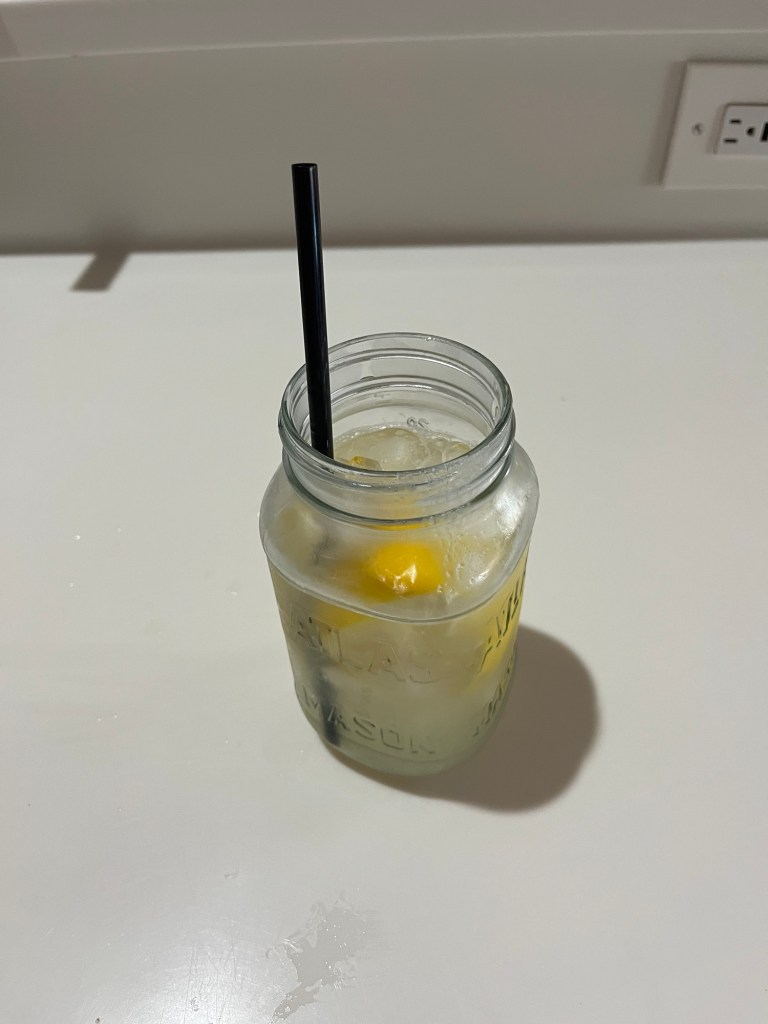
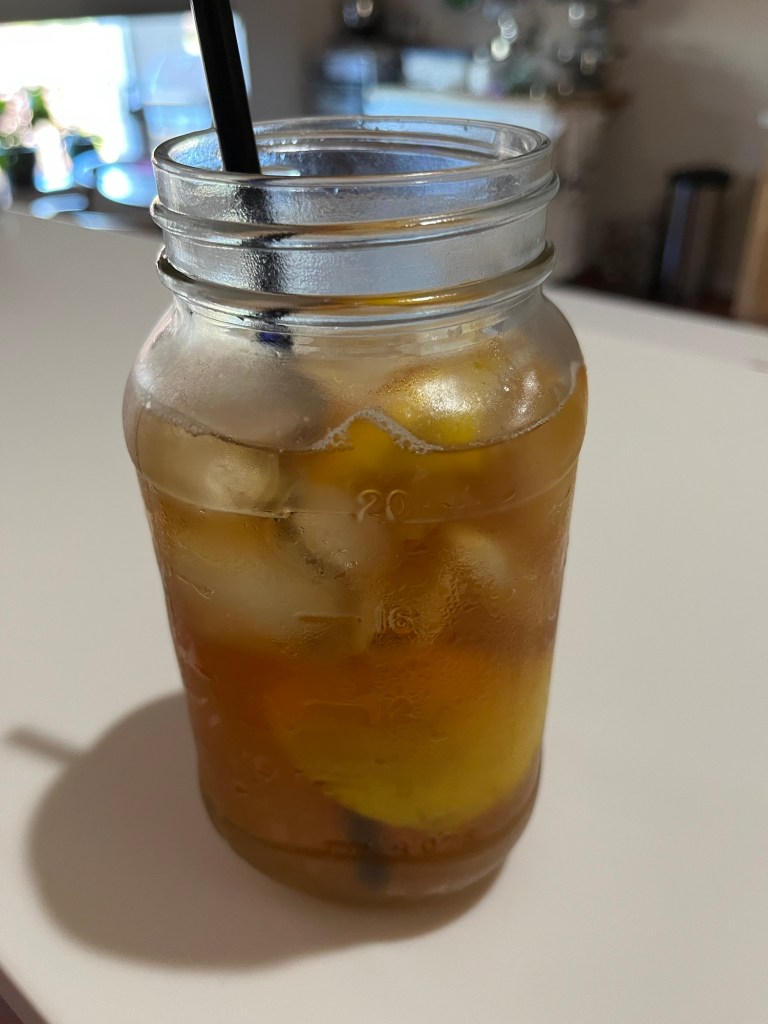
Add some iceAdd some waterAdd a strawAnd make an Arnold Palmer.
Once muddler-ed, I like to strain the muddle to remove the lemon seeds. I also squeeze out more lemon juice before tossing everything (less seeds) back into the mason jar. Add ice to nearly fill the jar, then water to within an inch of the top. Put the top on and shake like crazy for one full minute. I like to wrap the jar in a kitchen towel as it becomes very, very cold. Remove the top, add a straw and you will have fantastic lemonade.
But there is only 20 oz (including the ice and lemons) so after drinking between 1/2 and 2/3rds of the lemonade, add iced tea to fill the jar back up. You may want to experiment with ratios to yield and Arnold Palmer with the tartness you like.
Yes, it is still hot and yes, I am sitting in the AC right now, but I am enjoying a great drink as I write this.
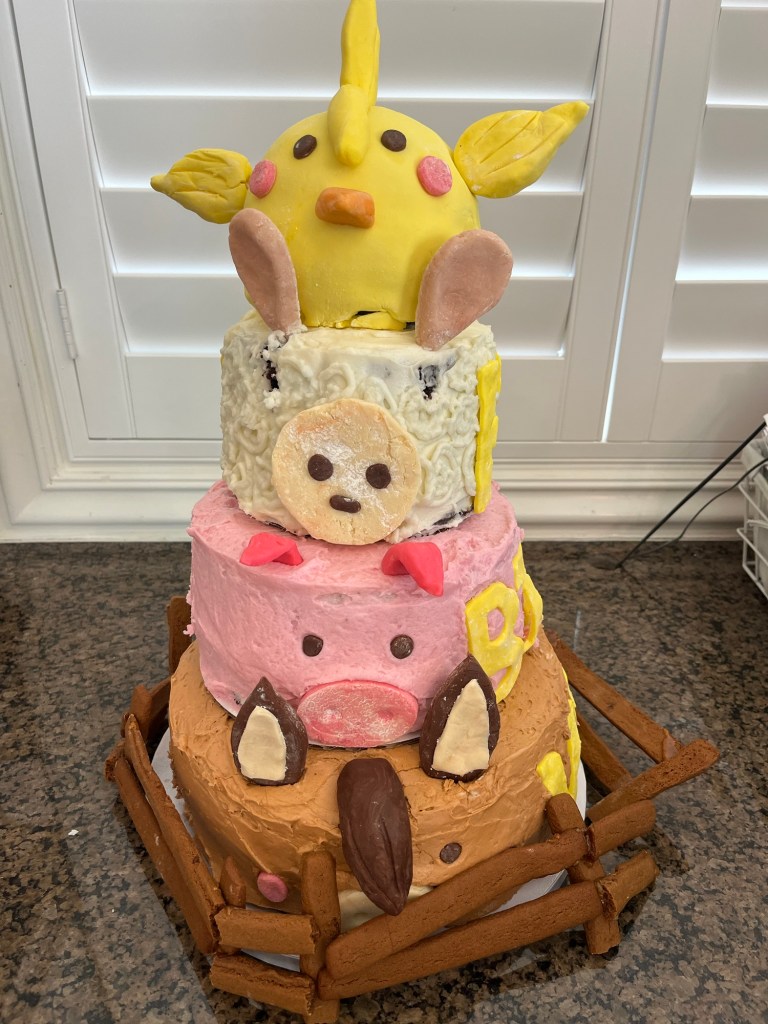
It’s not every day you are able to make a “Farm Animal” birthday cake for your granddaughter’s 6th birthday! I made a horse, a pig, a sheep and a chick and surrounded them with a barnyard fence.
I was directed to make all the cakes chocolate, but that was the only order… er.. guidance I was give. All but the chick were frosted with a basic buttercream and the chick was coated with marshmallow fondant and adorned with fondant wings, comb, beak and eyes. The other animals features are semisweet and white modeling chocolate and held on with embedded toothpicks (which were all removed before slicing.
The barnyard fence is gingerbread with hot caramel gluing the parts together. (The blisters on my fingers and hands attest to the temperature of the caramel.)
(Note to self: stabilize cakes above 4 layers with a dowel driven down the center of the cakes. This should reduce the sadness when the cake collapses in the heat. Oh well, stuff happens.)
THE BEST BUTTERCREAM FROSTING
INGREDIENTS • 452 g (4 cups) of powdered sugar (or 1 box) • 1 Cup (2 sticks) of softened butter • 2-3 teaspoons of vanilla • 1-2 tablespoons of whipping cream (for crumb coat frosting add cream as needed) Optional • 2 Tbl Meringue Powder to make crusting frosting. • Violet food coloring (a very small amount will make the frosting white)
METHOD
Add powdered sugar to mixing bowl.
Add softened sticks of butter
Add vanilla. If you want white frosting add a very small amount of violet food coloring
Add 1 tbsp of cream.
Beat on low until powdered sugar is incorporated. Then move mixer up to medium-high speed. Scrape sides and bottom of bowl often. When completely mixed the frosting may appear dry. (See option below.)
Add more cream, a little bit at a time, beating at slowest speed, until frosting is the proper consistency. For optional raspberry flavor
Add raspberries and 2 Tbl sugar to a food processor and pulse to macerate the berries
Sieve to remove pulp and seeds. You should have about ½ cup puree.
Add puree to soft peak mixture and red food coloring if desired.
Modeling Chocolate With Real Chocolate
INGREDIENTS Dark modeling chocolate • 1 ⅓ cups (227g) chopped semisweet chocolate (not chips)* • ⅓ cup (103g) light corn syrup White modeling chocolate • 1 ⅓ cups (227g) chopped white chocolate (not chips)* • ⅓ cup (103g) light corn syrup
METHOD
In a heatproof bowl set over simmering water (or in a double boiler), melt the chocolate. Stir constantly until melted; don’t let its temperature rise above 110°F. Remove from the heat.
Warm the corn syrup to 110°F, (10 seconds in a 1000W microwave for a full recipe) add to the melted chocolate, and stir until the mixture is uniform. It will look grainy at first but smooth out as you keep stirring.
Allow the mixture to cool, then cover and let rest at room temperature for 2 hours. It will set up and become quite stiff.
When you’re ready to use it, take a chunk and work it in your hands until it softens. From this point you can tint it with gel colors, roll it out and cut it with decorative cutters, or shape it any way you choose, like modeling clay; the chocolate will set once more as it cools. See our blog post, Modeling chocolate 101, for step-by-step instructions on how to make chocolate roses, letters, and other kinds of decorations.
Carmel Glue
INGREDIENTS • 200g caster sugar • 60ml cold water
METHOD
Put the sugar and water in a large, low-sided frying pan over a medium-high heat. Without stirring, bring to 320°F on a sugar thermometer. If you don’t have one, the syrup is ready when the sugar has dissolved, and it turns a light golden color.
Swirl the syrup gently in the pan to even out the color. Take the pan off the heat and leave to cool for a few moments to thicken slightly to the consistency of honey.
If the syrup begins to harden in the pan, put it back over a gentle heat until it has returned to the required consistency.
Gingerbread Cookies
INGREDIENTS • 3 ½ cups (440g) all-purpose flour • 1 teaspoon baking soda • 1/2 teaspoon salt • 1 Tablespoon ground ginger • 1 Tablespoon ground cinnamon • ½ teaspoon ground allspice • ½ teaspoon ground cloves • 10 Tablespoons (2/3 cup; 145g) unsalted butter, softened to room temperature • 3/4 cup (150g) packed light or dark brown sugar • 2/3 cup (160ml; about 200g) unsulphured or dark molasses • 1 large egg, at room temperature • 1 teaspoon pure vanilla extract
METHOD
In a large bowl, whisk together the flour, baking soda, salt, ginger, cinnamon, allspice, and cloves. Set aside.
In a large bowl using a handheld mixer or stand mixer fitted with a paddle attachment, beat the butter for 1 minute on medium speed until completely smooth and creamy. Add the brown sugar and molasses and beat on medium high speed until combined and creamy. Scrape down the sides and bottom of the bowl as needed. Next, beat in egg and vanilla on high speed for 2 full minutes. Scrape down the sides and bottom of the bowl as needed. The butter may separate; that’s ok.
Add the flour mixture to the wet ingredients and beat on low speed until combined. The cookie dough will be quite thick and slightly sticky. Divide dough in half and place each onto a large piece of plastic wrap. Wrap each up tightly and pat down to create a disc shape. Chill discs for at least 3 hours and up to 3 days. Chilling is mandatory for this cookie dough. I always chill mine overnight.
Preheat oven to 350°F (177°C). Line 2-3 large baking sheets with parchment paper or silicone baking mats. Set aside.
Remove 1 disc of chilled cookie dough from the refrigerator. Generously flour a work surface, as well as your hands and the rolling pin. Roll out disc until 1/4-inch thick. Tips for rolling—the dough may crack and be crumbly as you roll. What’s helpful is picking it up and rotating it as you go. Additionally, you can use your fingers to help meld the cracking edges back together. The first few rolls are always the hardest since the dough is so stiff, but re-rolling the scraps is much easier. Cut into shapes. Place shapes 1 inch apart on prepared baking sheets. Re-roll dough scraps until all the dough is shaped. Repeat with remaining disc of dough.
Bake cookies for about 9-10 minutes. If your cookie cutters are smaller than 4 inches, bake for about 8 minutes. If your cookie cutters are larger than 4 inches, bake for about 11 minutes. My oven has hot spots and yours may too—so be sure to rotate the pan once during bake time. Keep in mind that the longer the cookies bake, the harder and crunchier they’ll be. For soft gingerbread cookies, follow my suggested bake times.
Allow cookies to cool for 5 minutes on the cookie sheet. Transfer to cooling rack to cool completely. Once completely cool, decorate as desired.
Cookies stay fresh covered at room temperature for up to 1 week.
Extreme Chocolate Cake
Makes two 9” round cakes (double for this cake) INGREDIENTS (Makes one 10’ ROUND CAKE [and two 5”] – quantities are in parenthesis. Or one 11”x15”x2” sheet cake.) • 2 cups white sugar (3) • 1 3/4 cups all-purpose flour (2 2/3) • 3/4 cup unsweetened cocoa powder (1 ¼) • 1 1/2 teaspoons baking soda (2 ¼) • 1 1/2 teaspoons baking powder (2 ¼) • 1 teaspoon salt (1 ½) • 2 eggs (3) • 1 cup milk (1 ½) • 1/2 cup vegetable oil (¾) • 2 teaspoons vanilla extract (3) • 1 cup boiling water (1 ½)
METHOD
Preheat oven to 350 degrees F (175 degrees C). Grease and flour two 9 inch cake pans.
Use the first set of ingredients to make the cake. In a medium bowl, stir together the sugar, flour, cocoa,baking soda, baking powder and salt. Add the eggs, milk, oil and vanilla, mix for 3 minutes with an electric mixer. Stir in the boiling water by hand. Pour evenly into the two prepared pans. (For cupcakes,portion ¼ scant cups in each cupcake paper.
Bake for 30 to 35 minutes in the preheated oven, until a toothpick inserted comes out clean or 205F internal temp. Cool for 10 minutes before removing from pans to cool completely.
King Arthur Baking occasionally sends me catalogs containing lots of cool stuff. I am not a fan of the mixes, but understand why they’re treading towards them. I have LOTS of their equipment and some supplies, but my favorite part are the recipes.
I know I could go online and search for ideas, but the catalog provides inspiration for new bakes.
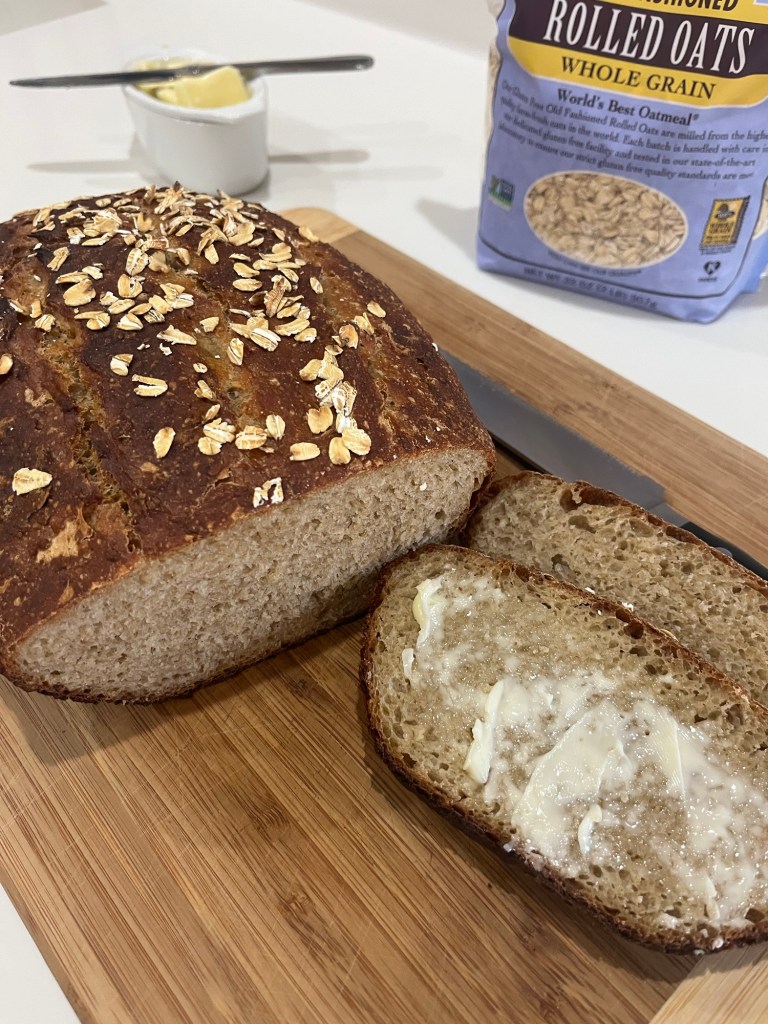
This no-knead oat bread is delicious. It has a nice soft, chewy crumb, (which is not a given with 25% of the dough being whole wheat flour,) plus the crust was crunchy.
The dough is ready in 15-20 minutes which is perfect for a quick after dinner “chore”. It ferments and doubles in size overnight at room temperature, proofs in the morning, and is ready for breakfast, (depending on when you rise and eat.) It also made a killer roast beast, lettuce and tomato sandwich. Definitely a keeper
INGREDIENTS • 1/3 c (71g) light brown sugar or dark brown sugar, packed • 4 c (480g) unbleached bread flour • 4 Tbl (57g) butter, softened • 1 c (113g) whole wheat flour • 1 1/2 c (134g) old-fashioned rolled oats • 2 tsp (12g) table salt • 1/2 tsp instant yeast • 2 1/4 c (510g) water, cool
METHOD
Put all of the ingredients into a large bowl. Stir, then use a stand mixer to mix up a sticky dough. Continue to beat for several minutes in a stand mixer to incorporate all the flour.
Cover the bowl with plastic wrap, and let it rest at room temperature overnight, or for at least 8 hours; it will become bubbly and rise quite a bit, so be sure your bowl is large enough.
Turn the dough out onto a lightly floured surface. To make a single loaf, choose a 14″ to 15″ long lidded stoneware baker.
Shape the dough to fit and place it in the lightly greased pan of your choice, smooth side up. Cover and let rise at room temperature for about 1 hour, until dough has become puffy and fills the pan about 3/4 full. (I used an oblong Dutch oven.)
Garnish by sprinkling a handful of oats on top. (If baking a round loaf, slash a hash mark pattern (#) on top.)
Place the pan into a cold oven. To keep the bread’s bottom crust from burning, set the rack in the middle, not at or near the bottom. Set the oven temperature to 450°F. Bake the bread for 45 to 50 minutes, then remove the lid and continue to bake for another 5 to 15 minutes, until the bread is deep brown, and an instant-read thermometer inserted into the center registers about 205°F.
Remove the bread from the oven, turn out onto a rack, and cool before slicing.
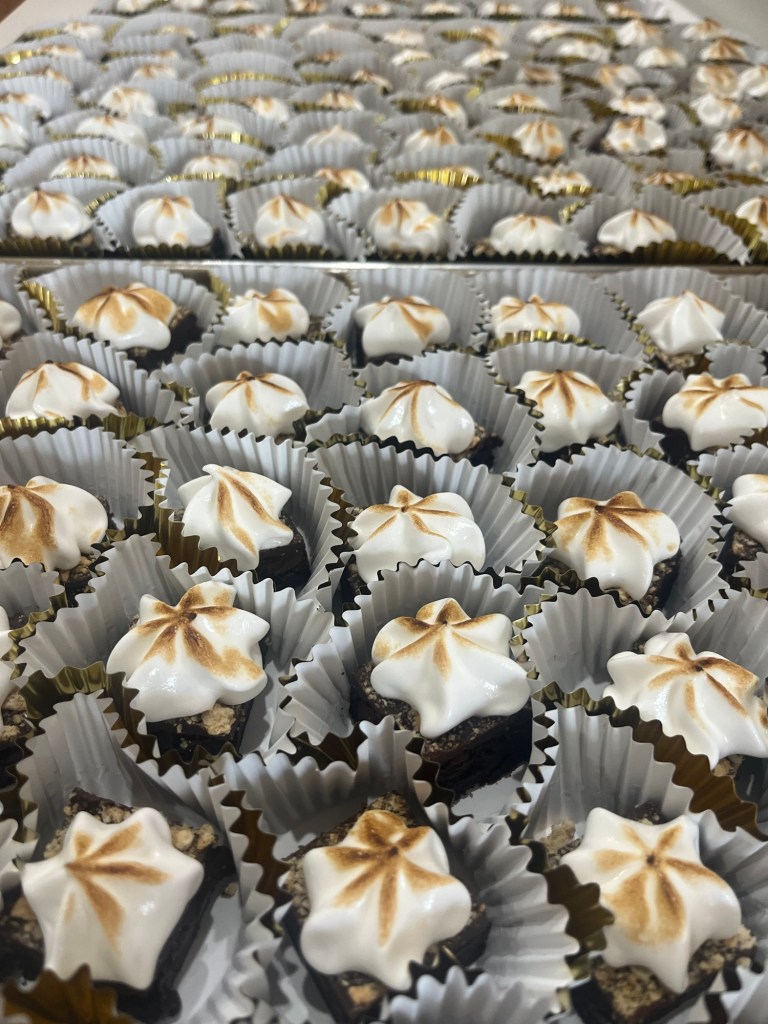
Our home association wine club had a beach themed wine tasting event and I provided the s’mores brownies for 164 guests and staff. With all humility, they were exceptional. I used my basic raspberry chocolate brownie recipe, but with the excellent suggestion by QC, added a layer of crushed graham cracker on the ganache and below the Italian meringue. I also blowtorched the meringue to give it the toasted s’more look.
Cutting the brownies with a pizza cutterActually 175 individual browniesS’mores raspberry brownies
I received many compliments and several inquiries as to where to buy them. (They cannot.)
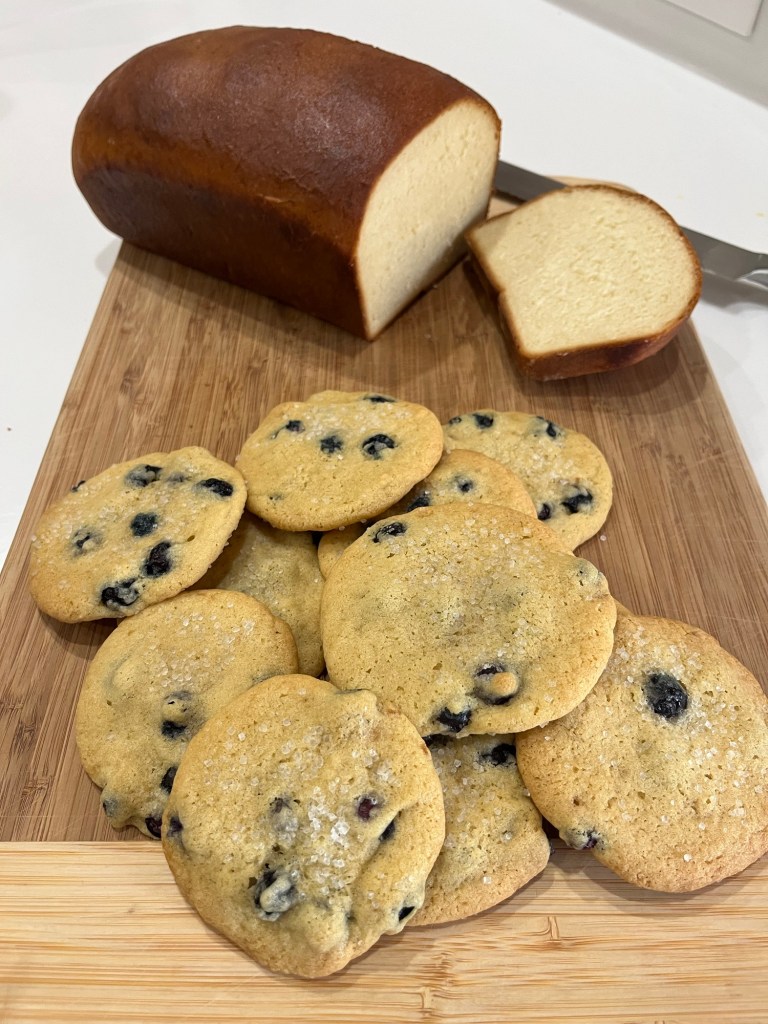
I had high hopes for this cookies, but there are barely a step above “meh.”
They are basically a chocolate chip cookies substituting blueberries for chocolate chip and really, who would want to do that?
They taste fine and have a good texture. Next time, I am making chocolate chip cookies.
Oh yeah. As long as the oven was going to be on I made a loaf of sandwich bread too. It’s a much tighter crumb than my favorite bread (High Hydration No-knead Honey Bread) but this loaf is great for PB&J sandwiches.
I saw this recipe on Facebook and decided to make it for QC’s Mah Jongg group. I made a number of changes from the published recipe and they are incorporated below.
Next time I’ll punch the flavors up as mango is not a strong flavor and can be overpowered by the strawberry. The tequila didn’t add much either, so maybe a little lime in the cupcake batter would add some punch. (No coconut, so it cannot be “Put the lime in the coconut.”
The were pretty and were well received by the group. I always make a gluten free selection so added some crème patisserie/chocolate ganache topped with chopped pistachio nuts, and had some eclair shells in the freezer that I needed to use up and had the crème patisserie and chocolate ganache anyway and finally, plums from our tree as the season is now over.
Strawberry Mango Margarita Cupcakes
Makes 48 mini-cupcakes
INGREDIENTS : Cupcakes: • 3 1/2 cups all-purpose flour • 1 1/4 cups caster sugar • 3 tsp baking powder • 1/2 tsp fine salt • 1/2 cup unsalted butter, softened • 2 large eggs • 1 1/2 cups full cream milk • 1/2 cup vegetable oil • 2 tbsp Greek yogurt or sour cream • 1 tsp vanilla extract • Pink and red food gel (for strawberry color) • 2-3 tsp strawberry freeze-dried powder • Yellow food gel (for mango color) • 2-3 tsp mango freeze-dried powder • 8-10 tsp tequila (optional) Frosting: • 1 batch American or Swiss Meringue Buttercream • Food gels: Pink and red for strawberry; yellow for mango • Flavorings: Strawberry and mango freeze-dried powder Decorations: • 1 cup granulated sugar • 10 limes, cut into 40 wedges • 10 strawberries, halved
METHOD:
Preheat oven to 275°F (140°C) for fan-forced or 320°F (160°C) for conventional.
Line two mini cupcake tins with liners and spray with bakers spray.
In a large bowl, mix flour, sugar, baking powder, and salt.
Add butter and mix until crumbly.
In another bowl, combine eggs, milk, oil, yogurt, tequila, and vanilla; mix well.
Fold dry ingredients into egg mixture until well combined.
Divide the batter into two portions.
Separately, by hand, mix each freeze-dried powder with 3-4 teaspoons of tequila
Add pink and red food gels and strawberry flavoring to one portion. Mix by hand.
Add yellow food gel and mango flavoring to the other portion. Mix by hand.
Pipe alternating layers of strawberry and mango batter into the liners.
Bake for 10–15 minutes or until a toothpick inserted into the center comes out clean. Cool completely.
Prepare the buttercream frosting, dividing it into two portions.
Add pink and red food gels and strawberry flavoring to one portion.
Add yellow food gel and mango flavoring to the other portion.
Dip the rims of the cooled cupcakes in water, then roll in granulated sugar to mimic a margarita glass.
Pipe frosting in swirls on each cupcake, alternating between strawberry and mango flavors.
Decorate each cupcake with a lime wedge and a strawberry half.
While on our anniversary/baseball stadium journey we stopped by King Arthur Baking in Norwich Vermont. This is my second time at this wonderful store and THIS time, I controlled myself and left after spending less than $100. Whew!
KAB sends me weekly recipes and I received this one while back east. I knew I had blackberries on the vine back home and couldn’t wait to give them a try. The wait was worth it!
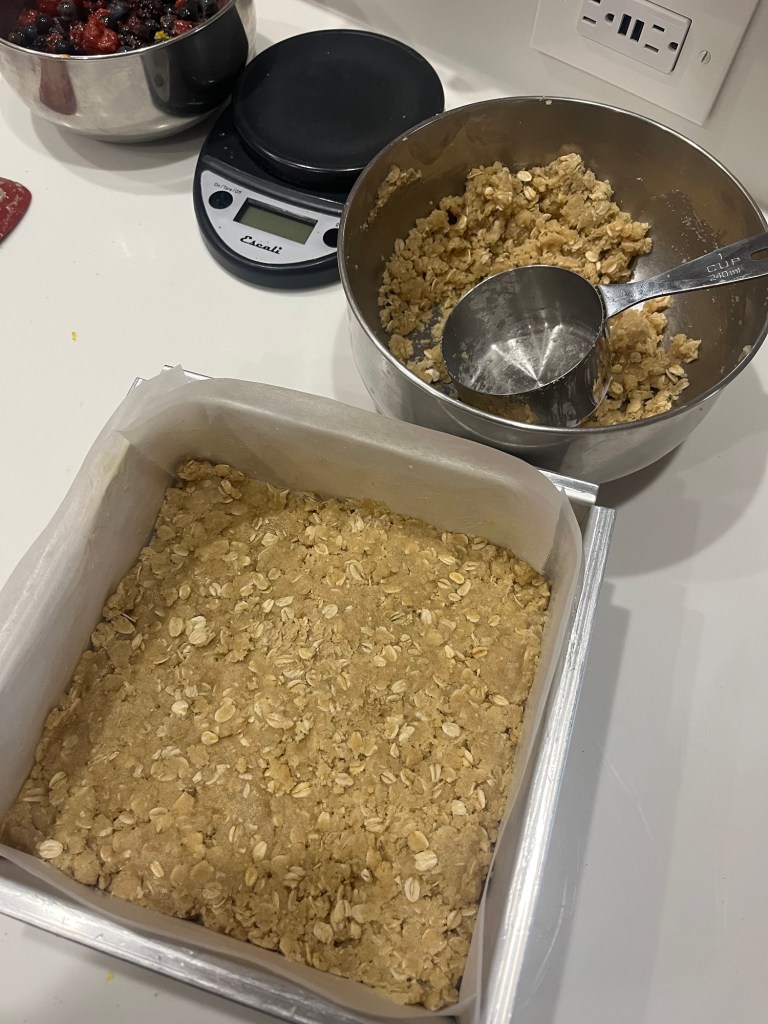
Dough and filling ingredientsCrust pressed into baking panBerry mixture added to pan.
KAB calls these “easy” jam bars and they are not incorrect. (Deliberate use of the double negative.)
INGREDIENTS Dough • 2 1/4 cups (270g) King Arthur Unbleached All-Purpose Flour • 1 cup (89g) old-fashioned rolled oats* • 1/2 cup (106g) light brown sugar, packed • 1/4 cup (50g) granulated sugar • 1 1/4 teaspoons baking powder • heaping 1/2 teaspoon table salt • 15 tablespoons (212g) unsalted butter, melted • *Or substitute 1 cup (113g) King Arthur Rolled Oats.
Filling
1 pound (454g) blueberries, raspberries, and/or blackberries (try 2 cups blueberries, 1/2 cup blackberries, 1/2 cup raspberries)
1/2 cup (106g) light brown sugar, packed
3 tablespoons (23g) King Arthur Unbleached All-Purpose Flour
zest and juice from 1 lemon*
1/2 teaspoon cinnamon
pinch of table salt *Aim to use about 2 tablespoons (28g) of fresh juice from the lemon.
Topping
1 1/2 teaspoons granulated sugar
1/4 teaspoon cinnamon
METHOD
Preheat the oven to 375°F with a rack in the center. Line an 8″ pan with parchment on all sides, then lightly grease.
In a large bowl, whisk together all of the dough ingredients except the butter. Use your fingers or a spoon to break up any brown sugar lumps. Add the melted butter and stir until fully combined and smooth.
Transfer about 2/3 of the dough (roughly 2 2/3 cups or 485g) to the prepared pan and press into an even layer.
In another large bowl, gently mix together all of the filling ingredients until the berries are evenly coated. Transfer the fruit to the pan and distribute it into an even layer.
Crumble the remaining dough (about 1 1/3 cups or 240g) over the berries; squeeze the dough together to make bigger clumps or tease it apart for finer crumbles. (Even coverage is not important at this step.)
In a small bowl, combine the topping ingredients. Then sprinkle the cinnamon sugar evenly over the top of the bars.
Bake the jam bars for 50 to 55 minutes, covering the pan with foil if the top is browning too quickly, until the berries are bubbling and the topping is baked through.
Let the bars cool completely in the pan (or for at least 1 1/2 hours; if you’re really in a rush, you can stick them briefly in the refrigerator or freezer to expedite the process). As they cool, use a small offset spatula or knife to dislodge any jam from the sides to make removing them from the pan easier.
Remove the bars from the pan using the parchment as a sling, then slice and serve.
Store the sliced jam bars in an airtight container in the refrigerator for up to 4 days. They’re delightful cold.
Probably not the G.O.A.T,, but a very, very good amuse-bouche. I am harvesting from our plum tree and wanted something beyond plum jam, pie or cake. These goat cheese-honey-basil-stuffed plums really hit the spot as the temperatures climb beyond 100F. Served chilled the are an amazing blend of sweet and mildly bitter.
I pick plums at dawn when the temperatures are still below 80F.
Our plum treeAfter the 1st harvestAfter making today’s treat!
I used about 10 plums for this recipe. (Several were sacrificed learning the best way to pit the plums.) While we were away on our anniversary/baseball stadium tour I asked neighbors and friends to help themselves to the garden and luckily, there are still loads of plums, blackberries and figs remaining.
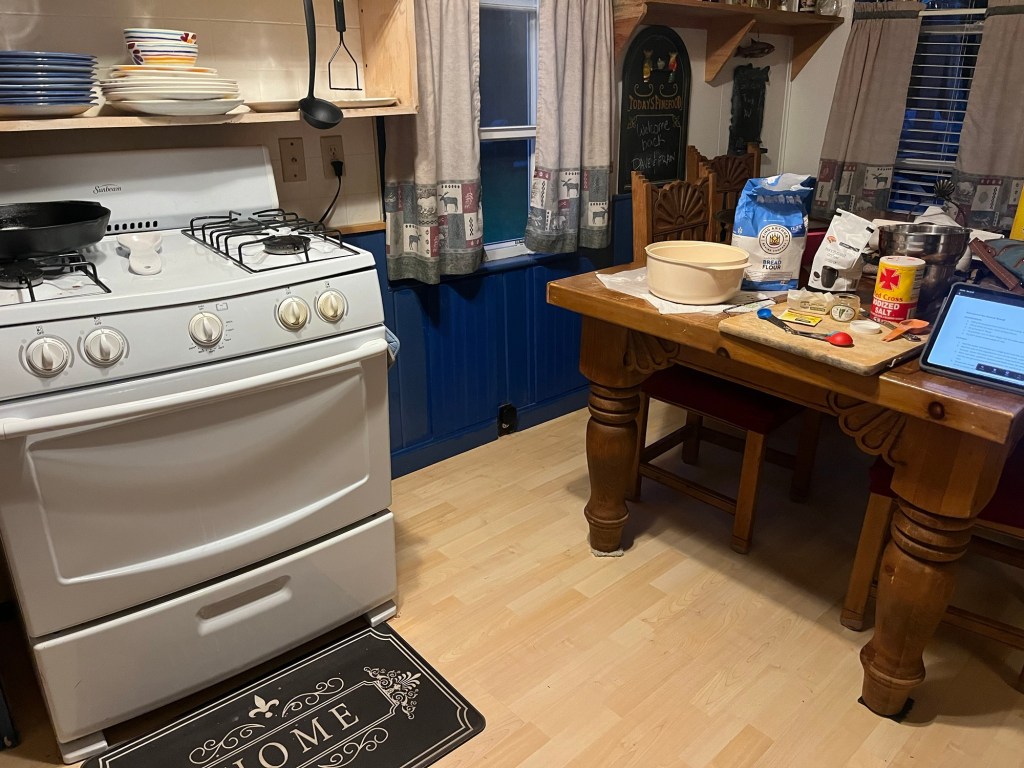
I didn’t realize there would be a test on this vacation. We started our 50th anniversary/baseball stadium tour last week and are now resting in Vermont for a few days before trekking down to Boston for our 3rd stadium then going to New York City for our 4th.
Being away from baking in my kitchen for a whole week I started to get anxious. On our way to Lake Dunmore I stopped and bought some flour and yeast. Our first day here I made two loaves of bread using a cast iron skillet with a second frypan for a lid to substitute for my Dutch Oven. It worked pretty good, except the bottom of the bread burnt slightly due to the dark cast iron. I adjusted temperature and baking time and each one improved, right up to the 4th loaf when I removed the loaf from the pan and placed it on a cookie sheet for the last 30 minutes of baking time. Perfection!! It took 4 tries, but successfully passed the test.
Improve Baking Station“Test” KirchenImprove Dutch OvenShaggy Dough Before Stretch and FoldSmooth Dough after Stretch and FoldFinished Loaf