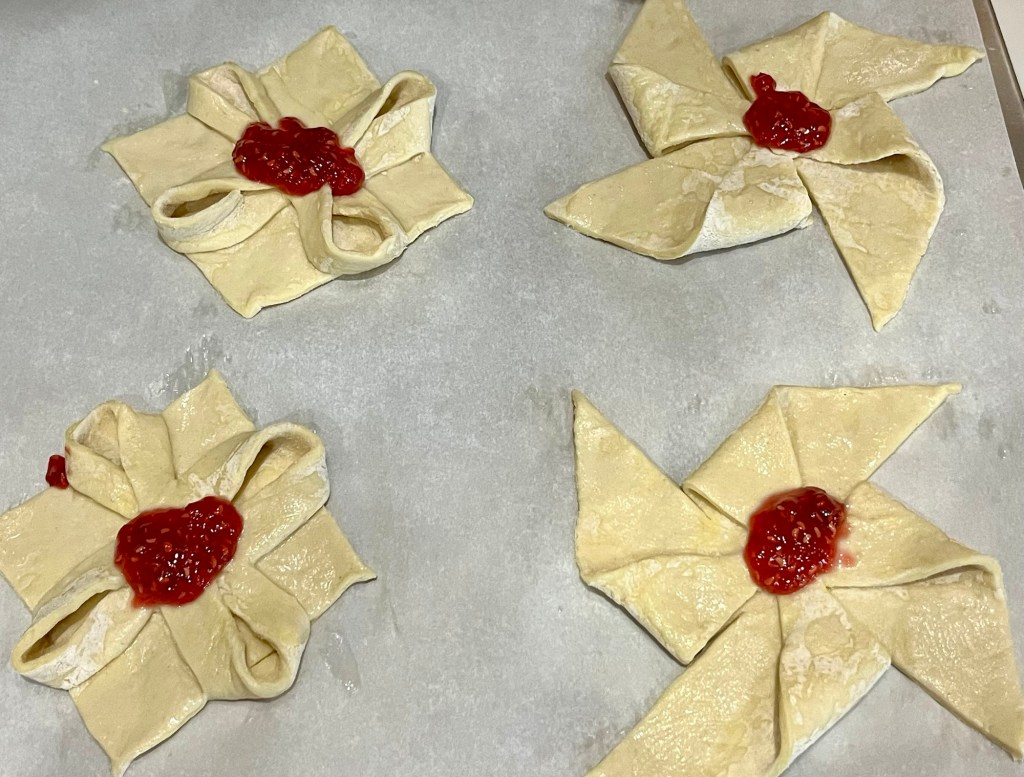
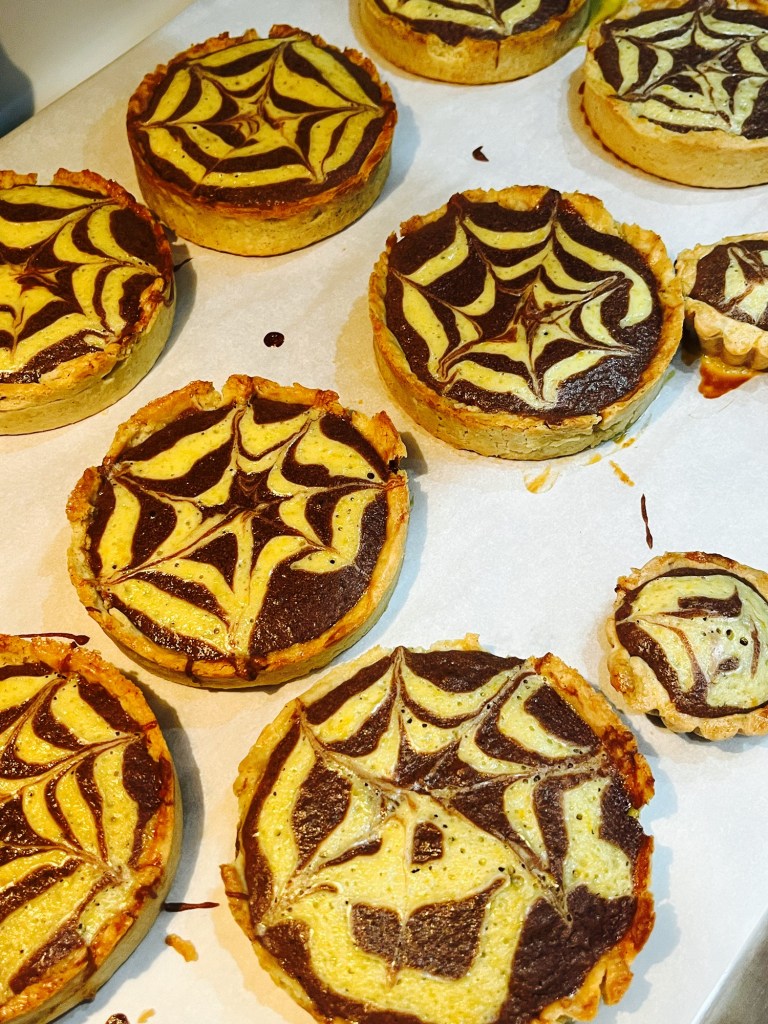
I made some chocolate-orange-custard tarts last week. Honestly, they tasted pretty good, but if I saw them in a patisserie I would give them a pass.
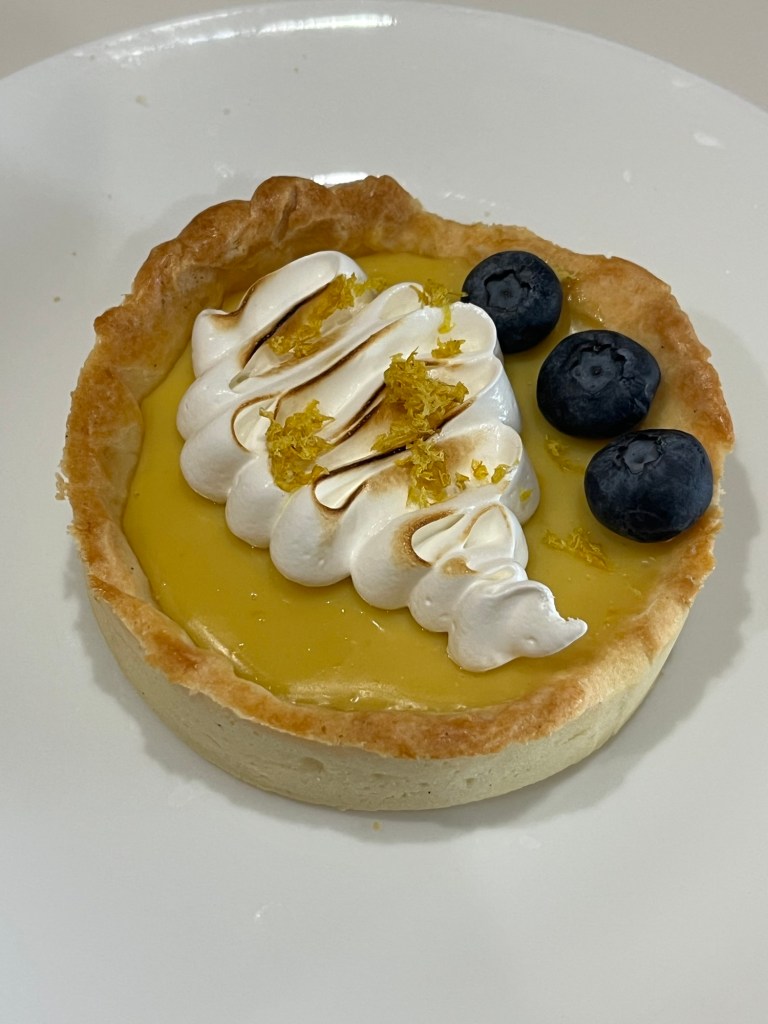
I remade them today but without the baked custard, chocolate and orange bases. (Truthfully, maybe a little over baked in my case.) Version 2.0 used a new method to make the tart case, and creme patisserie, chocolate ganache and a new orange drizzle.
The tart base was made using a food processor to mix the butter, sugar, salt and 1/4th of the flour. It’s basically the same method I use to make berry drop scones. Using the food processor is easier and quicker than cutting the butter into the sugar with your hands.
I use the “Martha Stewart” creme patisserie method and a standard eclair ganache recipe and method. The orange drizzle is simple the zest of one orange, 70 grams of confectioners sugar and enough fresh orange juice to make a pipeable paste.
There are a lot of steps in this recipe (none of them very difficult,) but believe me, it is well worth the effort.

CremePat – Chocolate – Orange Tart
Yield: Five 4” tarts.
INGREDIENTS
Tart Shell
• 100 g cold butter cut into small cubes
• 60 g icing sugar
• ½ tsp vanilla
• ¼ tsp salt
• 2 egg – 1 for the dough and the other 1 reserved for an egg wash
• 200 g all-purpose flour
Chocolate Ganache
• 150 g dark chocolate finely chopped
• 150 g heavy cream
• 2 Tbl corn syrup
• 1 tsp vanilla
Orange Crème
• 1 orange, juiced and zested
• 35g confectioners sugar
Crème Patisserie
• 1 c (175 ml) whole/full fat milk (¾ c 2% plus ¼ c heavy cream)
• 2 (40g) large egg yolks
• ¼ c (13 grams) granulated/caster sugar
• ⅛ c corn starch
• 1 Tbl butter
• ½ tsp vanilla extract
METHOD
Tart Shell
- In a food processor pulse sugar, salt and 50g AP flour
- Pulse in cubed butter and vanilla
- Transfer to a mixing bowl and add egg and mix until incorporated
- Stir in flour. Mix by hand like you are kneading bread until incorporated
- Cover with plastic and refrigerate for 30 min
- Pre-heat oven to 350 degrees
- Butter or spray tartlet pans, or use non-stick pans
- Roll dough to about ⅛” thick
- Lay over tart mold and press into all crevices
- Prick holes in bottom and sides of formed dough
- Fill tarts with pastry weights. (For mini tartlet pans I put beans in a cupcake paper. For large pans use crumpled parchment paper filled with pie weights.)
- Paint edges of the tartlet with the egg wash.
- Bake in preheated oven 350° F (175 C) for 12 min
- Remove from oven, remove weights, then roll top to cut off excess
- Return to oven and bake 8 more minutes to dry the bottoms
- Immediately remove from pans and cool on a wire
Chocolate Ganache - Heat the cream to just below boiling.
- Place the chopped chocolate in a heat proof bowl
- Pour the hot cream over the chocolate and let it sit for a couple of minutes
- Add the corn syrup and vanilla and mix until smooth
- Pour the chocolate into a sealed piping bag. (No piping tip required.)
- Let the mixture cool to the desired viscosity.
Orange Crème - Place the confectioners’ sugar and zest in a small bowl. Add the orange juice one drop at a time while stirring, until the desired viscosity is attained.
- Pour into a piping bag with a small circular piping tip inserted. (Do not cut the end off yet.)
Crème Patisserie - Whisk eggs and milk together then add to all other ingredients (except vanilla) to a medium saucepan.
- Bring to boil, whisking constantly
- Cook until it begins to thicken (it will look lumpy, its ok)
- Sieve lumpy mixture into a bowl and add vanilla, mix thoroughly
- Transfer to a sealed piping bag to cool. (No piping tip required.)
ASSEMBLY - Pipe a ¼” layer of CremePat into each tart shell and smooth
- Pipe a ⅛” layer of chocolate crème on the CremePat layer and smooth
- Pipe concentric ⅛“wide circles of orange cream and feather the orange cream with a toothpick
- Add a sprig of candied orange peel for garnish.