There are volumes documenting all that I don’t know, and a postcard describing what I do know. I discover, or am taught, new ideas daily.
Here are two things I didn’t know, but probably everyone else did.
A pie shield that doesn’t fall off during baking
A parchment paper liner for par baking that fits the pastry
Pie Shield to Protect the Edges of the Pie
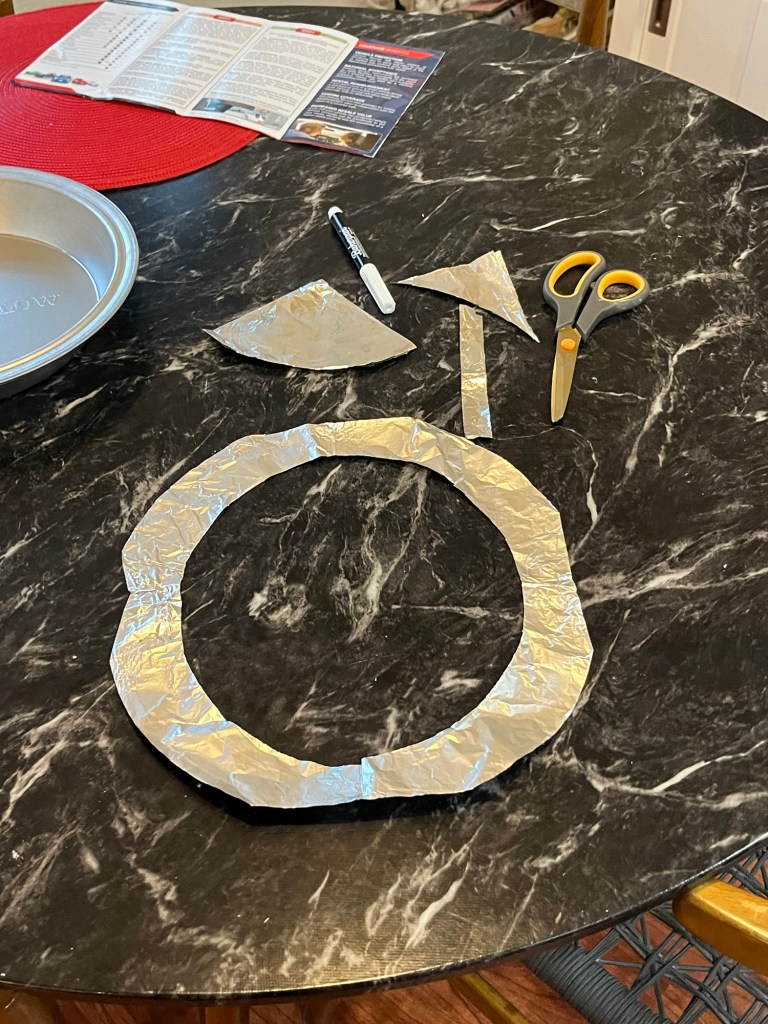
I reviewed all the pie shields on Amazon and reviews of all of them complained about them falling off. This one creates a shield from a single sheet of aluminum foil that does not come off while baking.
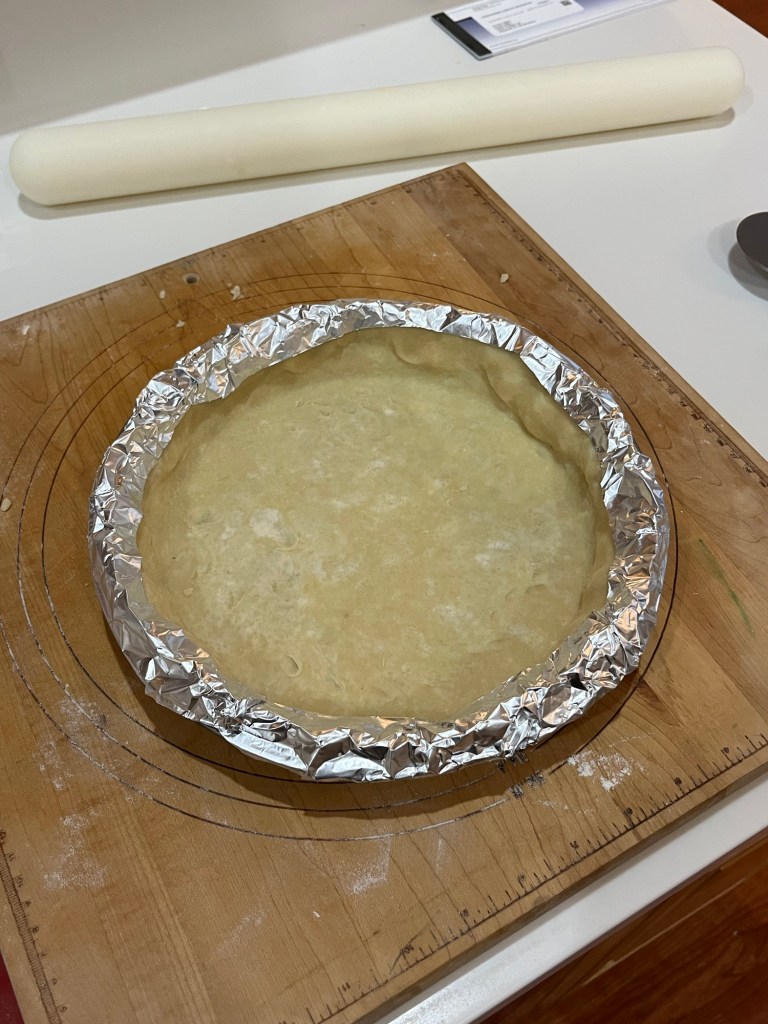
Trace a circle ~1”larger than your pie plate (Use a skewer or chop stick)Trace a smaller concentric circle ~1” smaller than your pie plateFold the square in half, then in half againCut out the circlesEnd up with a ring ~2 inches wide.Wrap the foil around the edge of the crust
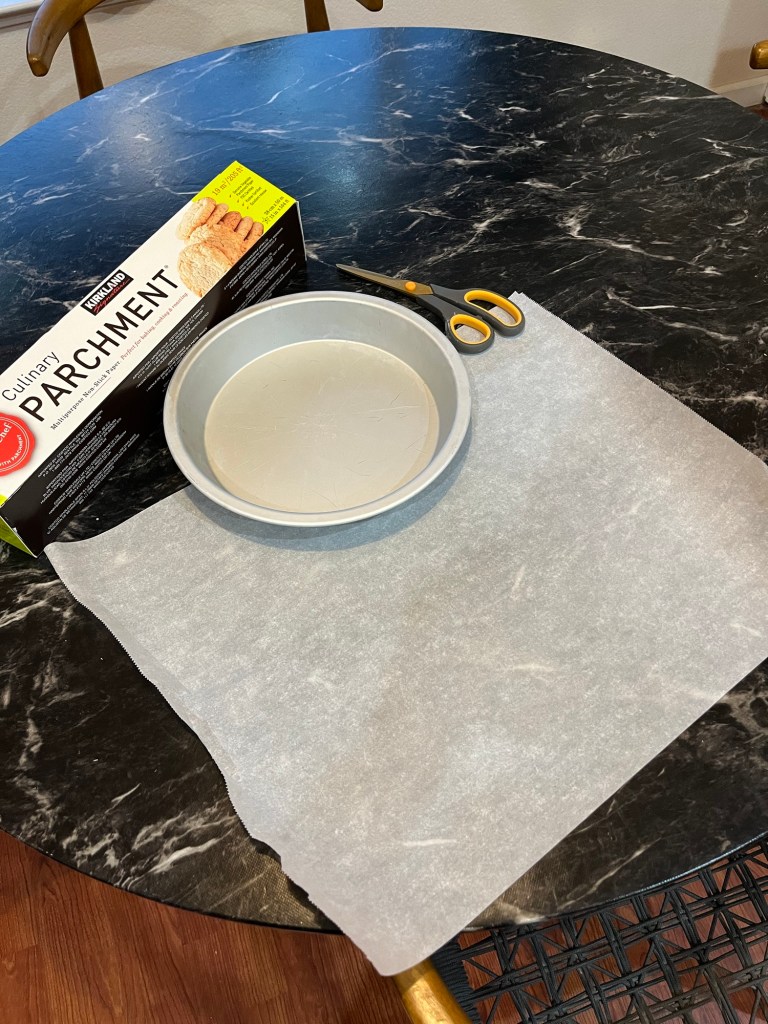
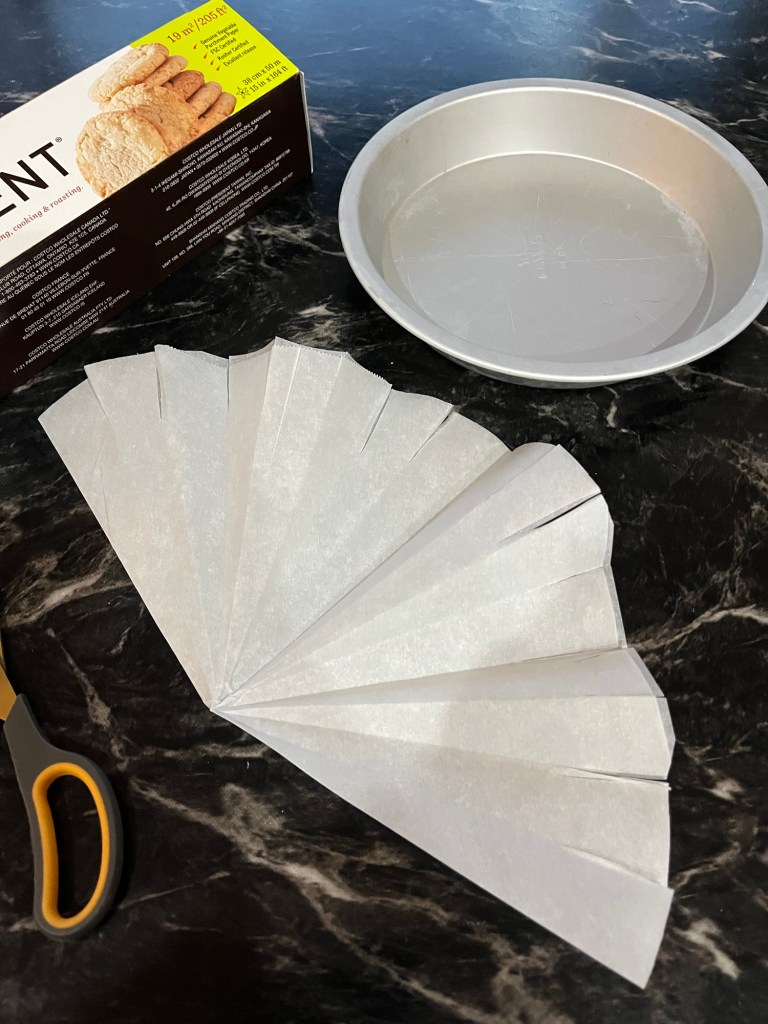
Contour forming parchment paper liner
Ever try to fit a piece of parchment paper to a pastry shell without deforming the pastry? The simple solution is to crumple the parchment paper then smooth out (at least two times.) For smaller pastries cut slits into the edges of the paper to allow it to fit into the smaller shells.
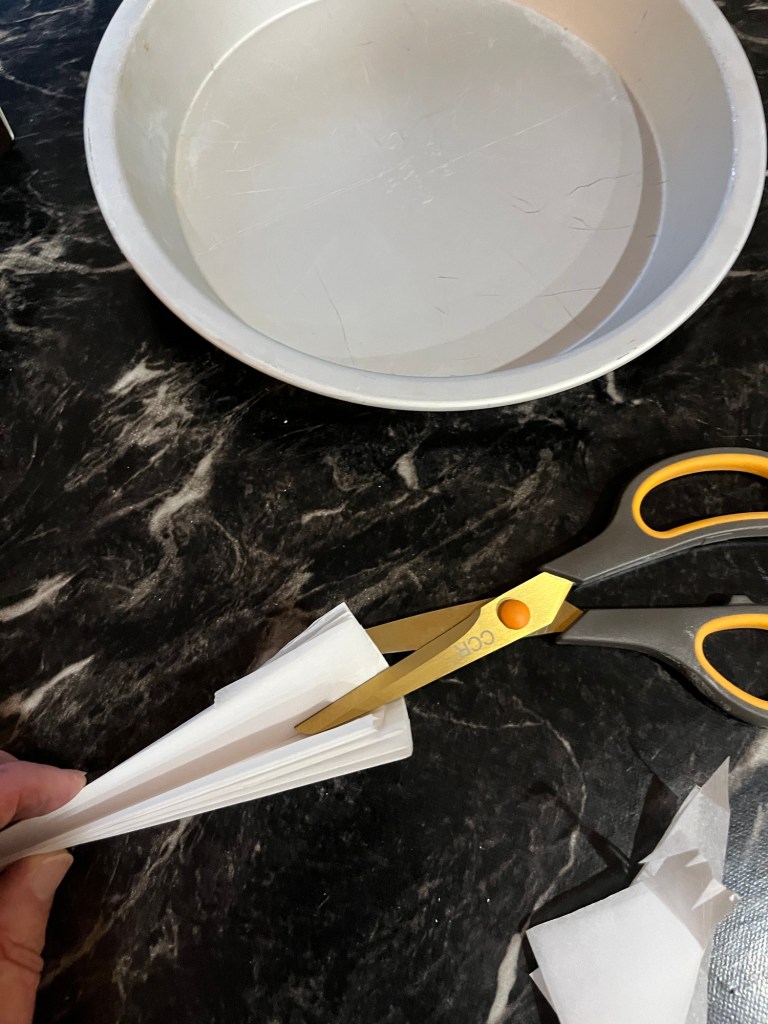
Parchment paper, curling up on the edgesCut into a square then folded in half, diagonally.Fold in half again, Fold as many times as you can. Trim to ~2” longer than the radius of the pan.Cut the folds on the endUnfold and lengthen any cuts as requiredCrumple and smooth, crumple and smooth againFit to the pie plateAdd pie weights.
Fold the parchment paper diagonally in half. Place a finger in the middle of the long side of the triangle and fold across your finger. Keep your finger in the same place and fold diagonally again. Fold one short side down the the long side and repeat. Cut the large end to make a triangle ~2 inches longer than the radius of your pie plate.
Actually, I was ‘experimenting” with vegetarian mirror glaze today. Previously, I made a mirror glaze that was too rubbery so I thought I would give it another try. Anyway, I wanted to try making some chocolate mousse domes. The recipe I found for the domes was good. It uses Agar Agar rather than gelatin sheets so it remained vegetarian.
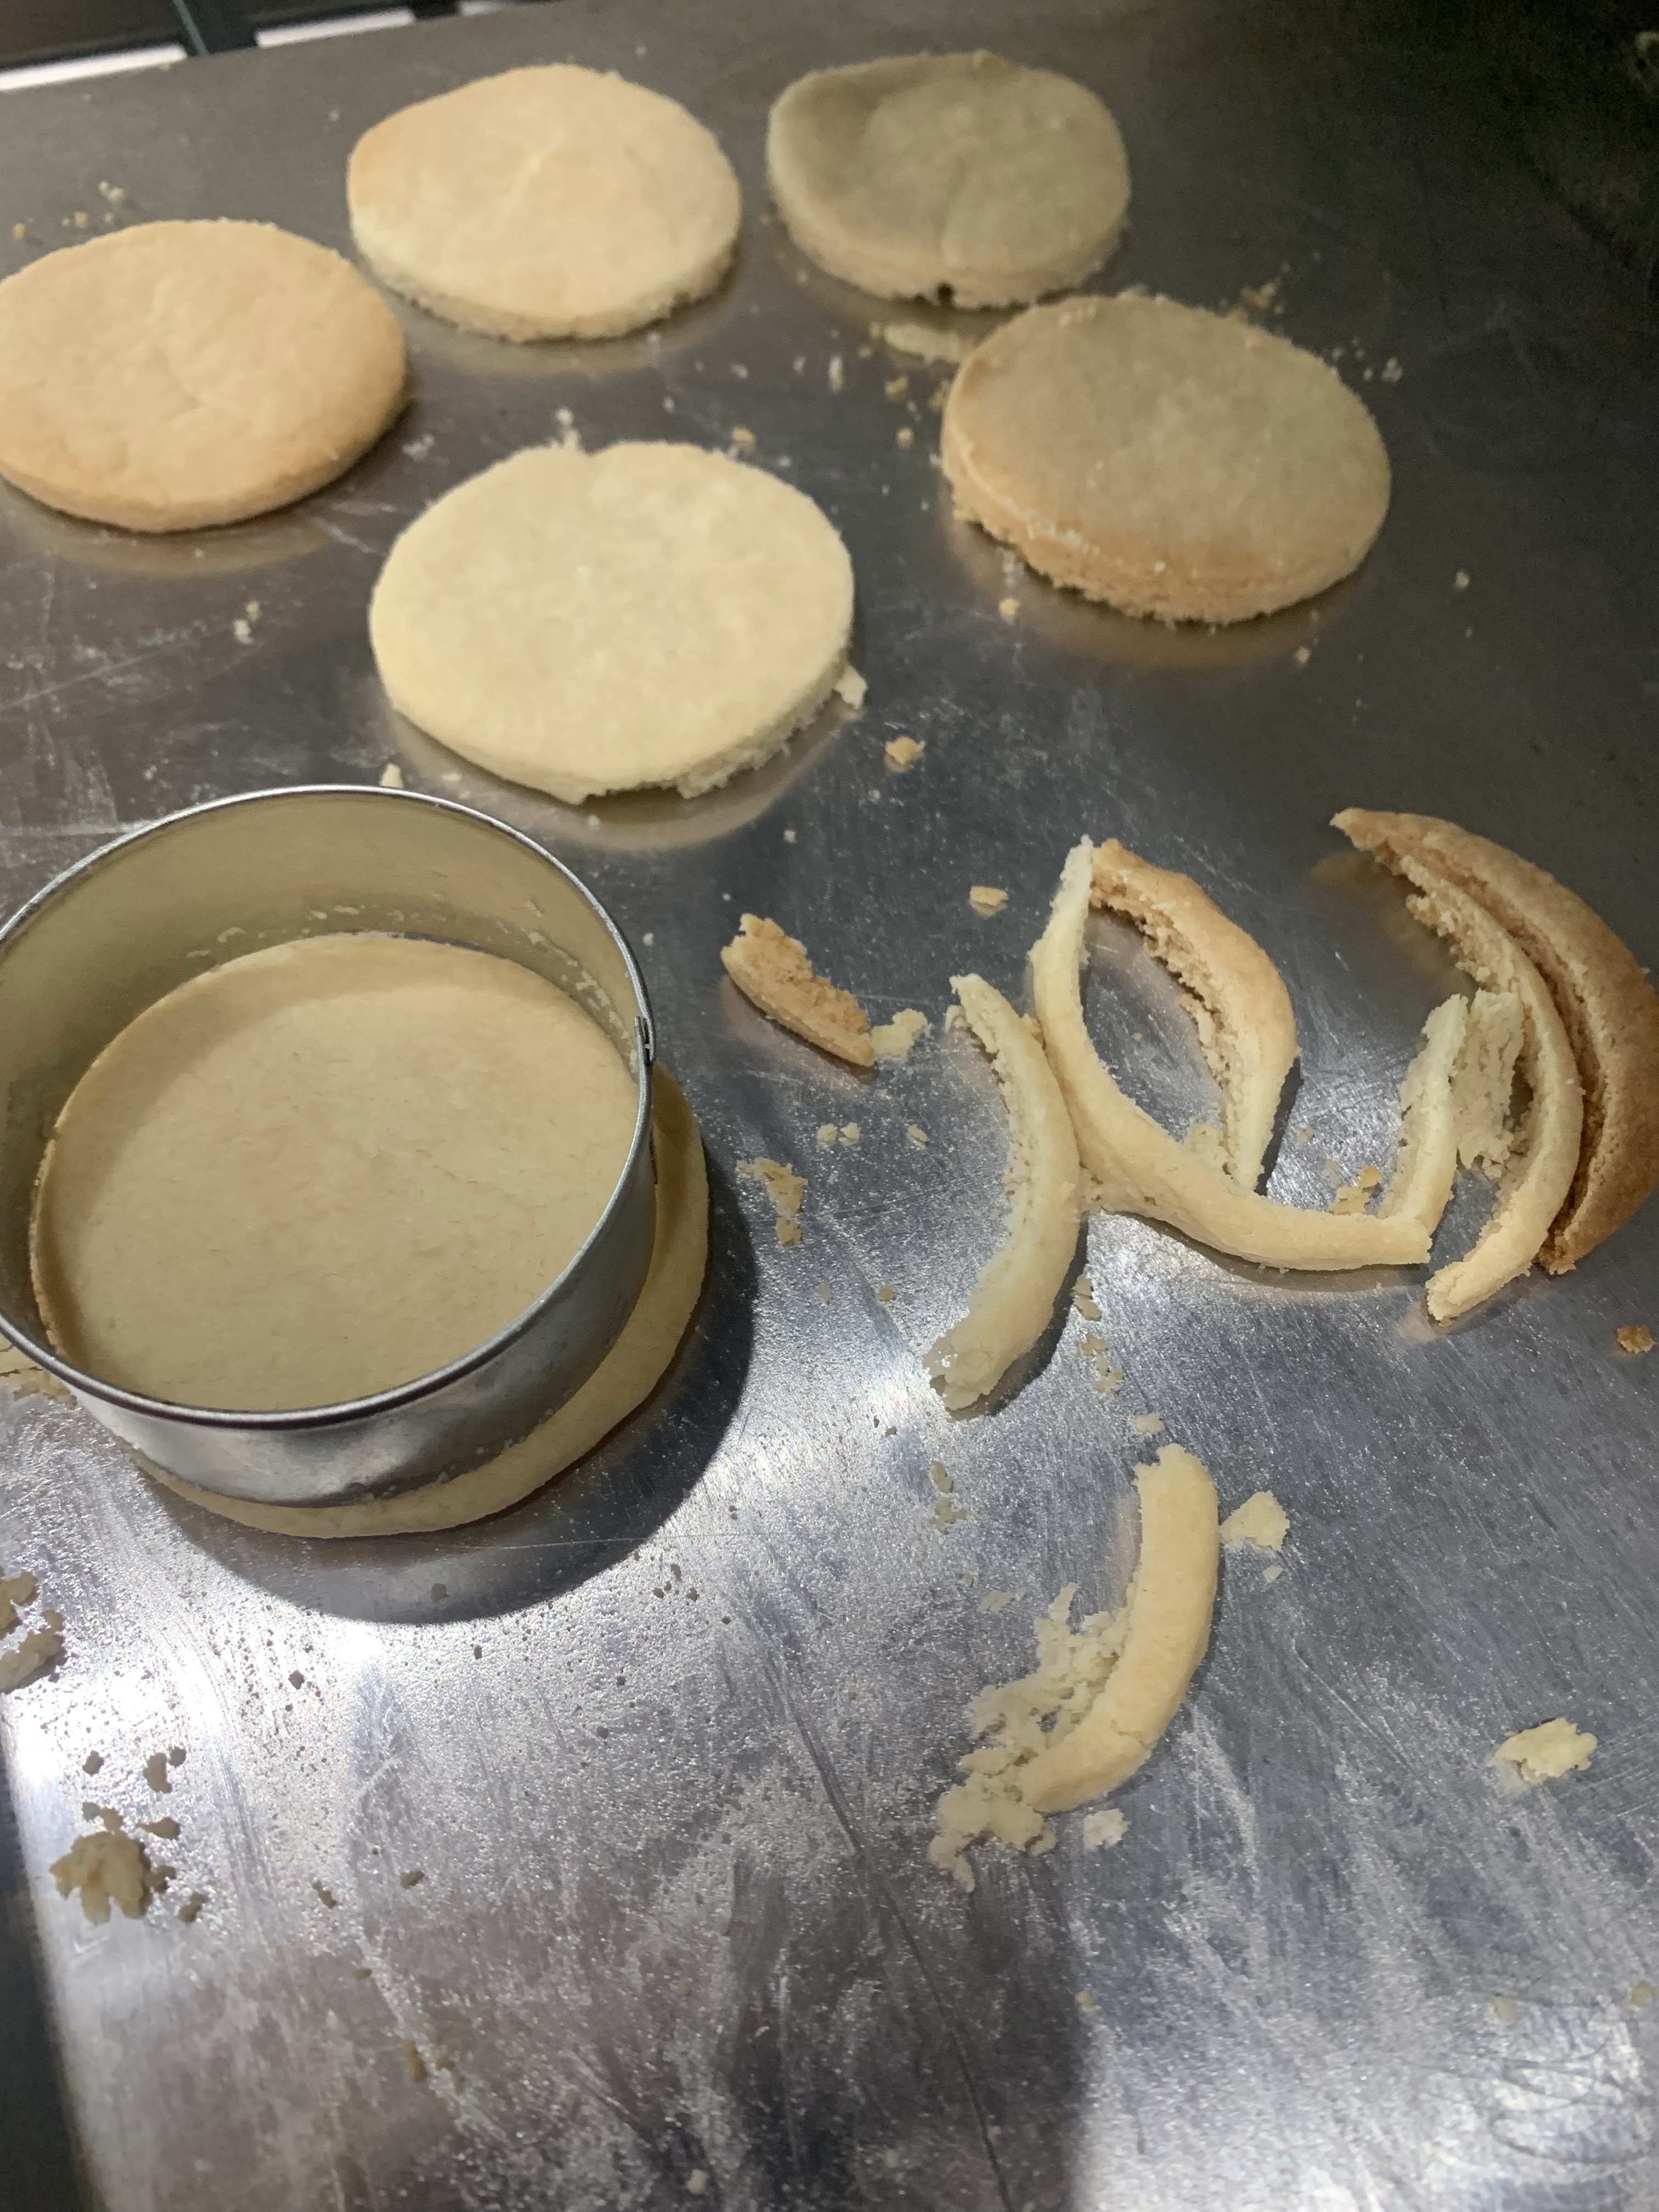
As I only needed six shortbread cookies for the bases of the domes, I decided to make a few (24) shortbread cookies with the balance of the recipe. And, as long as I was also using chocolate for the domes I figured I might as well dip one side of the cookie to make a nice chocolate crescent accent
L: Baked 2.5” Diameter Cookies – C: Cookies and Dipping Chocolate – R: Final
To make the domes, I filled my 2.5” diameter silicone mold with mousse to within 1/4” of the top. This provided room to fit a 2.5” trimmed cookie in the base. As the cookies spread a little while baking, the thinnest were trimmed with a cutter and placed on the still soft mousse, then put in the freezer until solid.
Top: L: Mousse and Cookie in Mold – C: Trimming Cookie – R and Bottom: Finished Domes.
Even the thinnest shortbread cookies were too thick (about 1/4”.) The problem is the unbaked cookies are too fragile to move if they are any thinner. Next time I will roll the dough out thinner on the cookie sheet then remove the excess from between the round cookies. Wish me luck.
The results were promising. The glaze was too thick to pour. Spreading the glaze ruins the effect of a smooth. Coating. I found another recipe for the glaze, but using gelatin sheets. I will substitute Agar powder using one third the amount of Agar to gelatin. The ratio of cocoa powder to liquids seems right to allow it to pour. Time will tell.
Chocolate Mouse Domes with Agar Agar
Mousse
INGREDIENTS: • 60 g Dark Chocolate (melted) • 50 ml (1/4 cup) Heavy Cream • 175 ml (3/4 cup) Whipping Cream ( whipped into soft Peaks) • 1 tbl Agar Agar • 6 short bread biscuits
METHOD:
Add Agar Agar to heavy cream and bring to a boil. Remove from heat and add chocolate
Let rest for five minutes, then mix chocolate and heavy cream into a smooth mixture.
Fold in Whipped Cream to the above mixture
Assembling
Pour the mousse mixture into semi dome silicone molds or any medium sized round bowls.
Place one biscuit over each dome
Freeze the mousse until solid.
White Chocolate Glaze
INGREDIENTS • 50 g White Chocolate • 50 ml Heavy Cream • 2 tsp Agar Agar • 1 tbl Butter
METHOD
Mix in the above mixture and bring it to boil once.
INGREDIENTS • 206g, or 1 cup sugar • 142g, or 1⁄2 cup, plus 11⁄2 tbsp heavy cream • 1 ½ tsp Agar Powder (originally 12g, or 4 tsp gelatin, powdered) • 60g, or 1⁄4 cup water, cold • 148g, or 2/3 cups water, room temperature • 71g, or 1⁄2 cup, plus 5 tsp cocoa powder
METHOD
In a medium pot, bring sugar and heavy cream to a boil over medium heat, stirring until the sugar dissolves.
Add the Agar powder and heat while stirring until mixture starts to thicken (1-2 min, medium low heat.)
In a bowl, combine the 148g (2/3 cups) room temperature water with the cocoa powder, stirring with a spatula until it becomes a uniform paste.
Stir cream-sugar-Agar mixture into cocoa powder paste until combined.
Remove the pot from the heat, and strain the glaze mixture through a mesh strainer over a heatproof bowl to remove any clumps of undissolved cocoa powder.
Emulsify the mixture with a hand blender (immersion blender) to remove any lumps, until smooth.
Cover and chill in the fridge overnight to set, until ready to use. Should be 90 deg to pour.
Store in the fridge in an airtight container for up to 1 week.
OPTION PUBLISHED WITH THIS RECIPE INGREDIENTS: • 50 ml Water • 50 ml Heavy Cream • 50 ml Sugar • 80 gm Cocoa Powder • 2 tsp Agar Agar
METHOD:
Bring all the ingredients to boil in a medium saucepan.
Whisk to cool to room temperature
Sieve once to remove lumps
ASSEMBLING AND DECORATION:
After 8 hours remove mousse from freezer and remove from the moulds
Place mousse domes on cooling rack.
Pour Dark Chocolate or White Chocolate Glaze over the dome and place the dome in freezer for 5 mins.
I sprinkled some freeze dried raspberry powder on the domes to add a little bitterness to the sweetness of the mouse and glaze.
Anyone who read the post on my go-to brownie recipe knows a vital ingredient is jammy bits. These are small pieces of sugar coated chewy raspberry jam. They add texture, moisture and flavor to the brownies, but they are time consuming to make. (You can buy them at King Arthur Baking.)
The California wildfires “smoked us in” this morning with the AQI over 300 (!) I decided to stay inside (except to walk Rosie while wearing a KN-95 mask.) This provided the time necessary to make jammies. (Full disclosure: I also baked some chocolate chip cookies and blueberry drop scones from frozen doughs I made previously. I had to do something as the jam was reducing!)
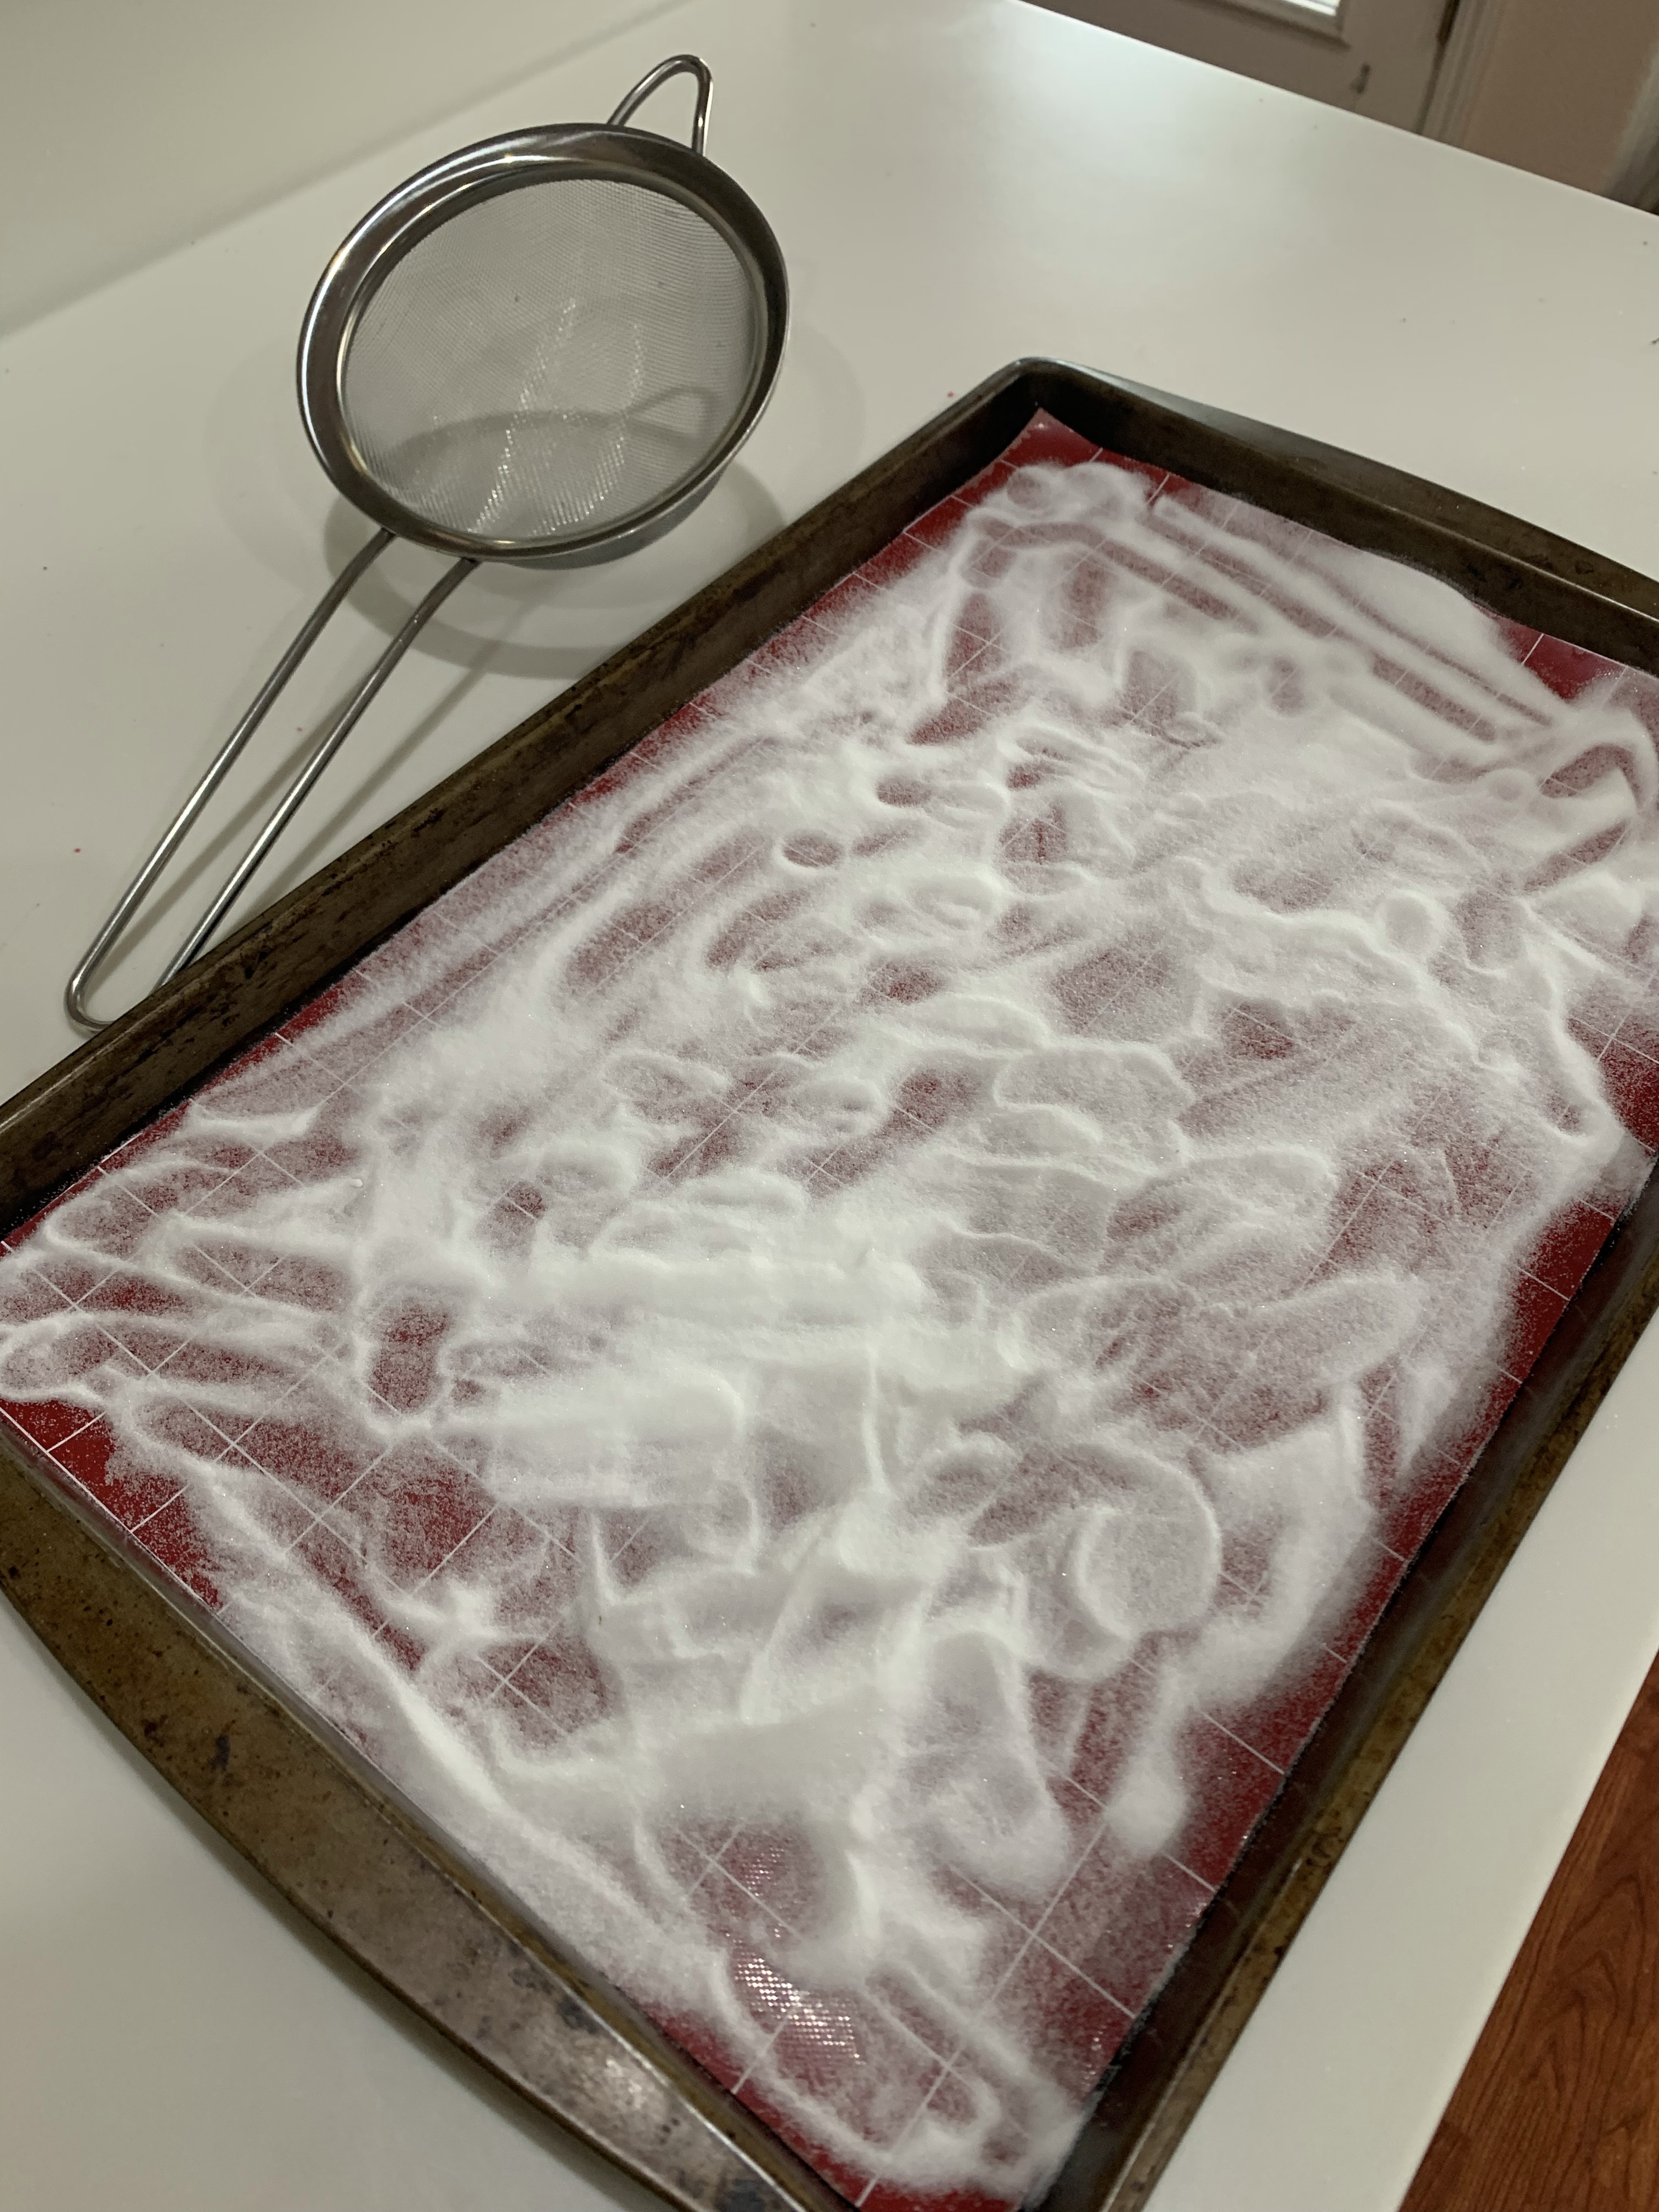
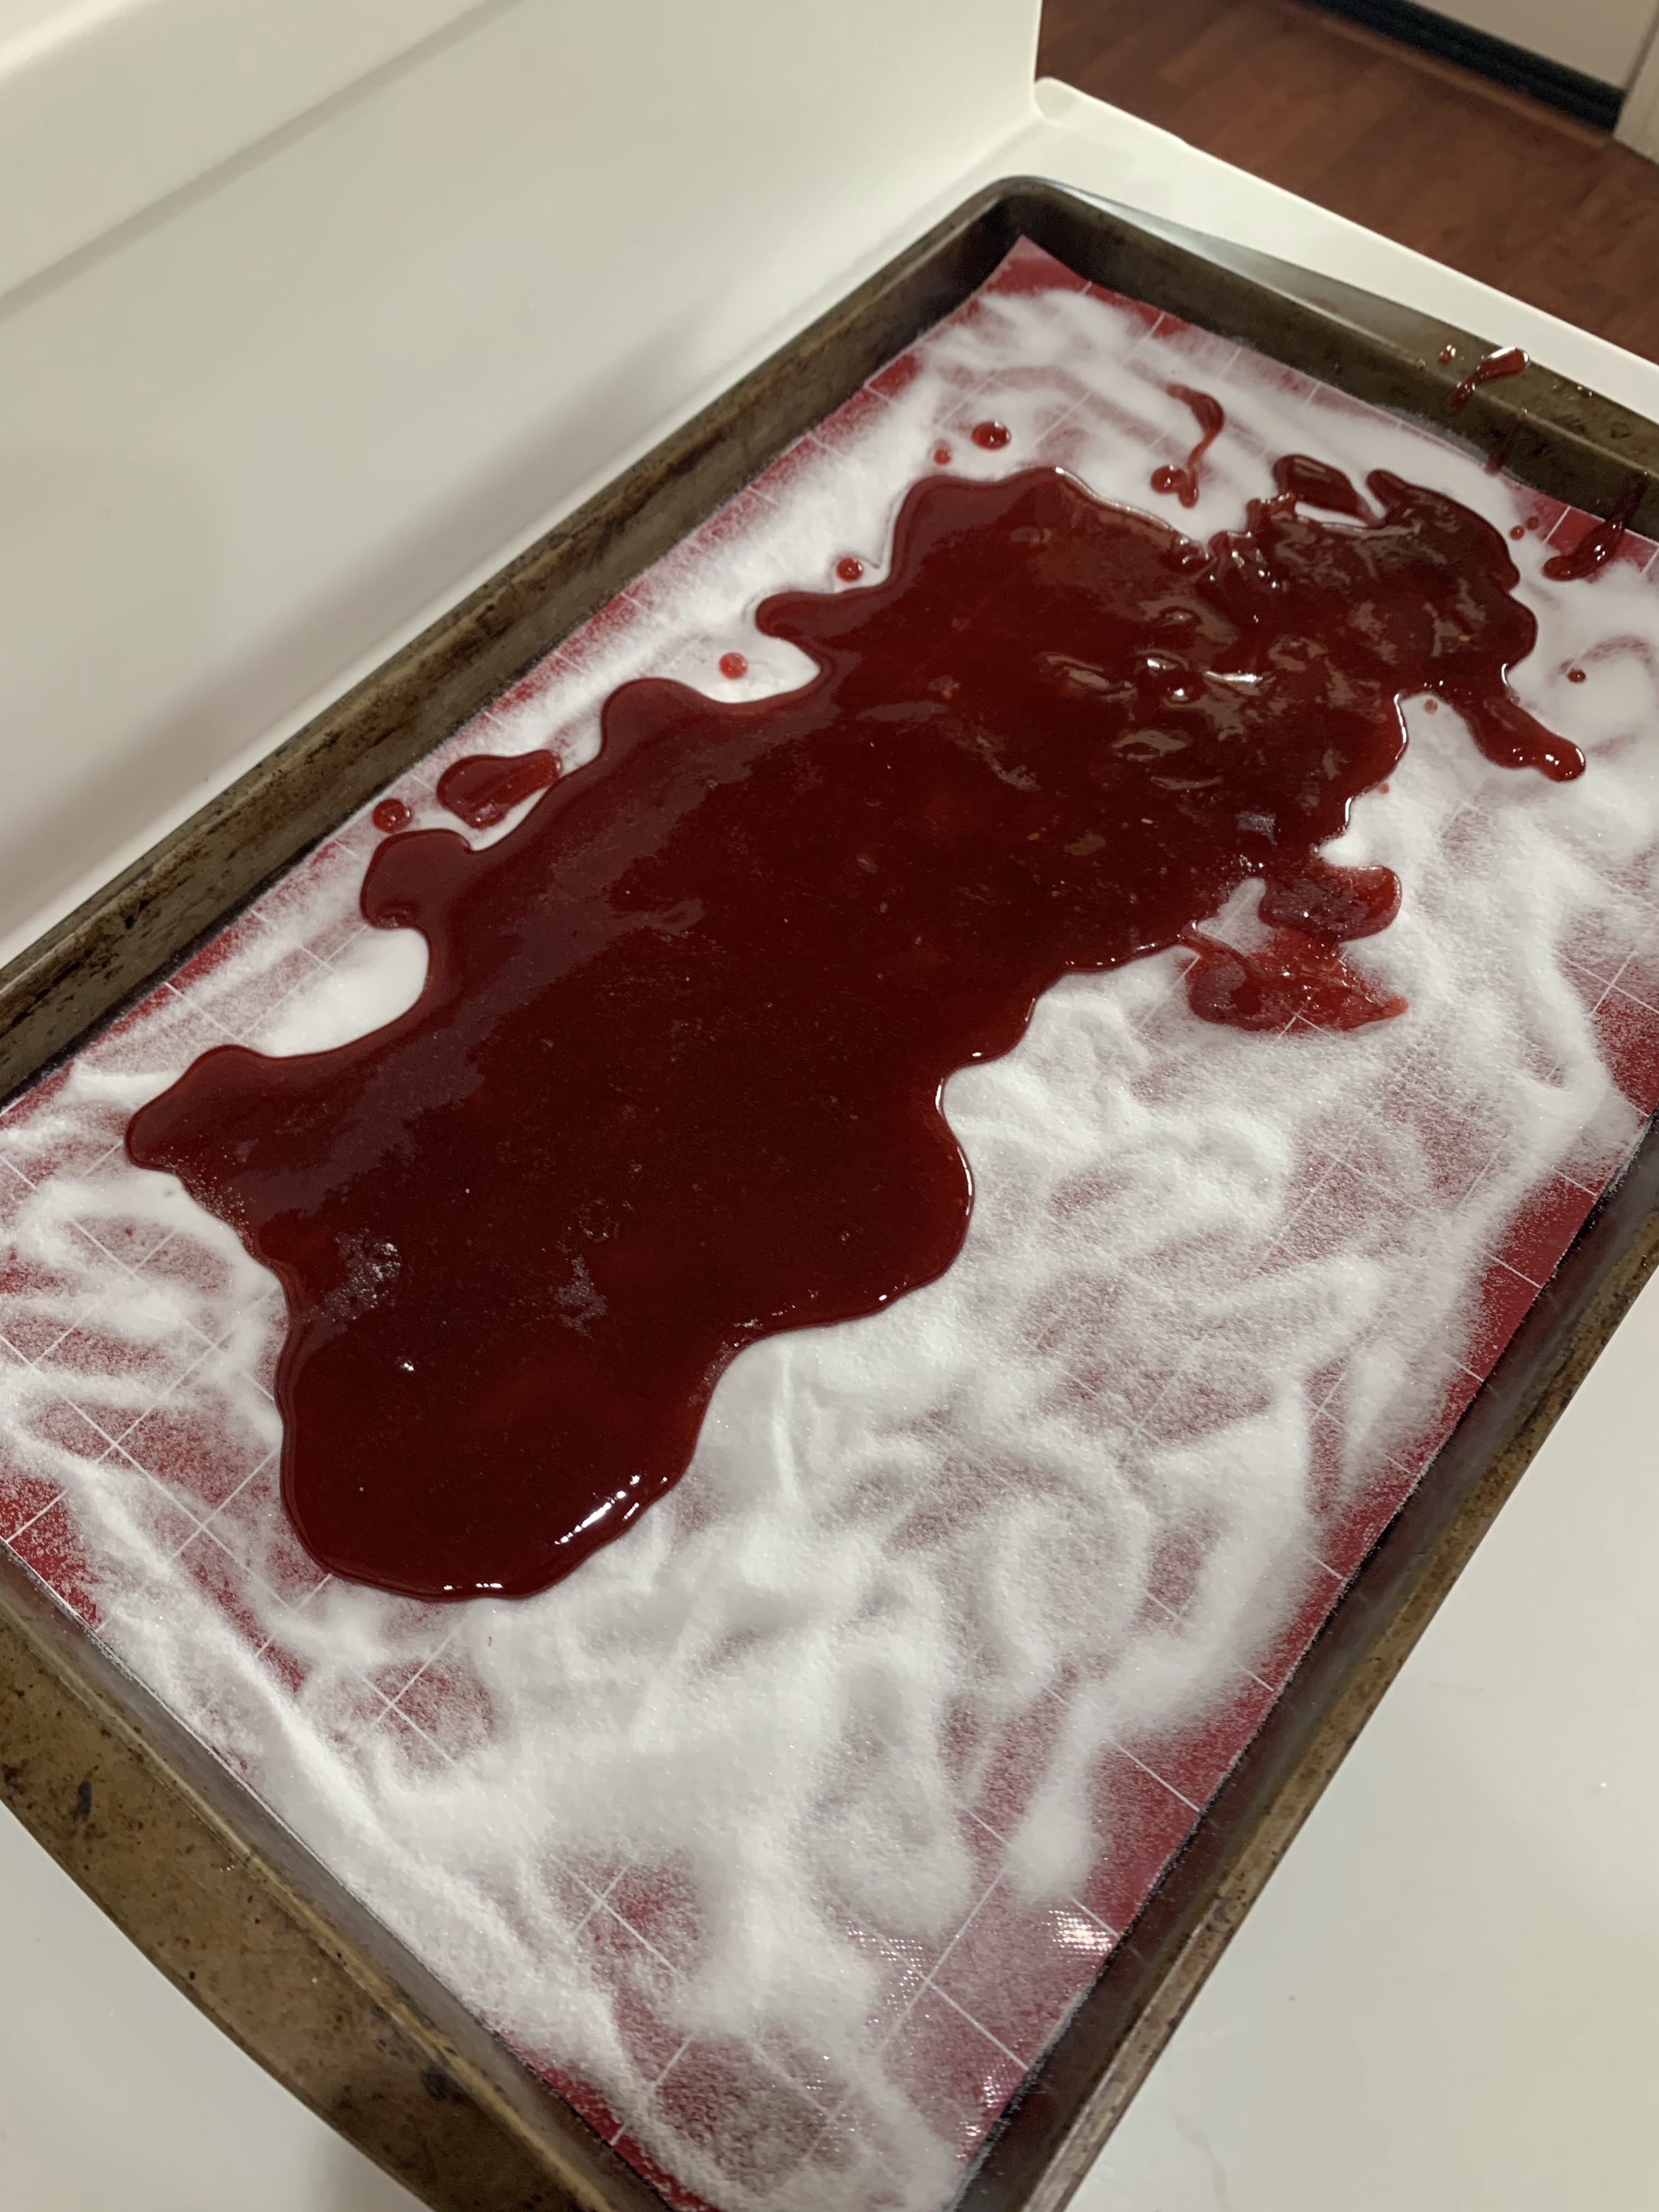
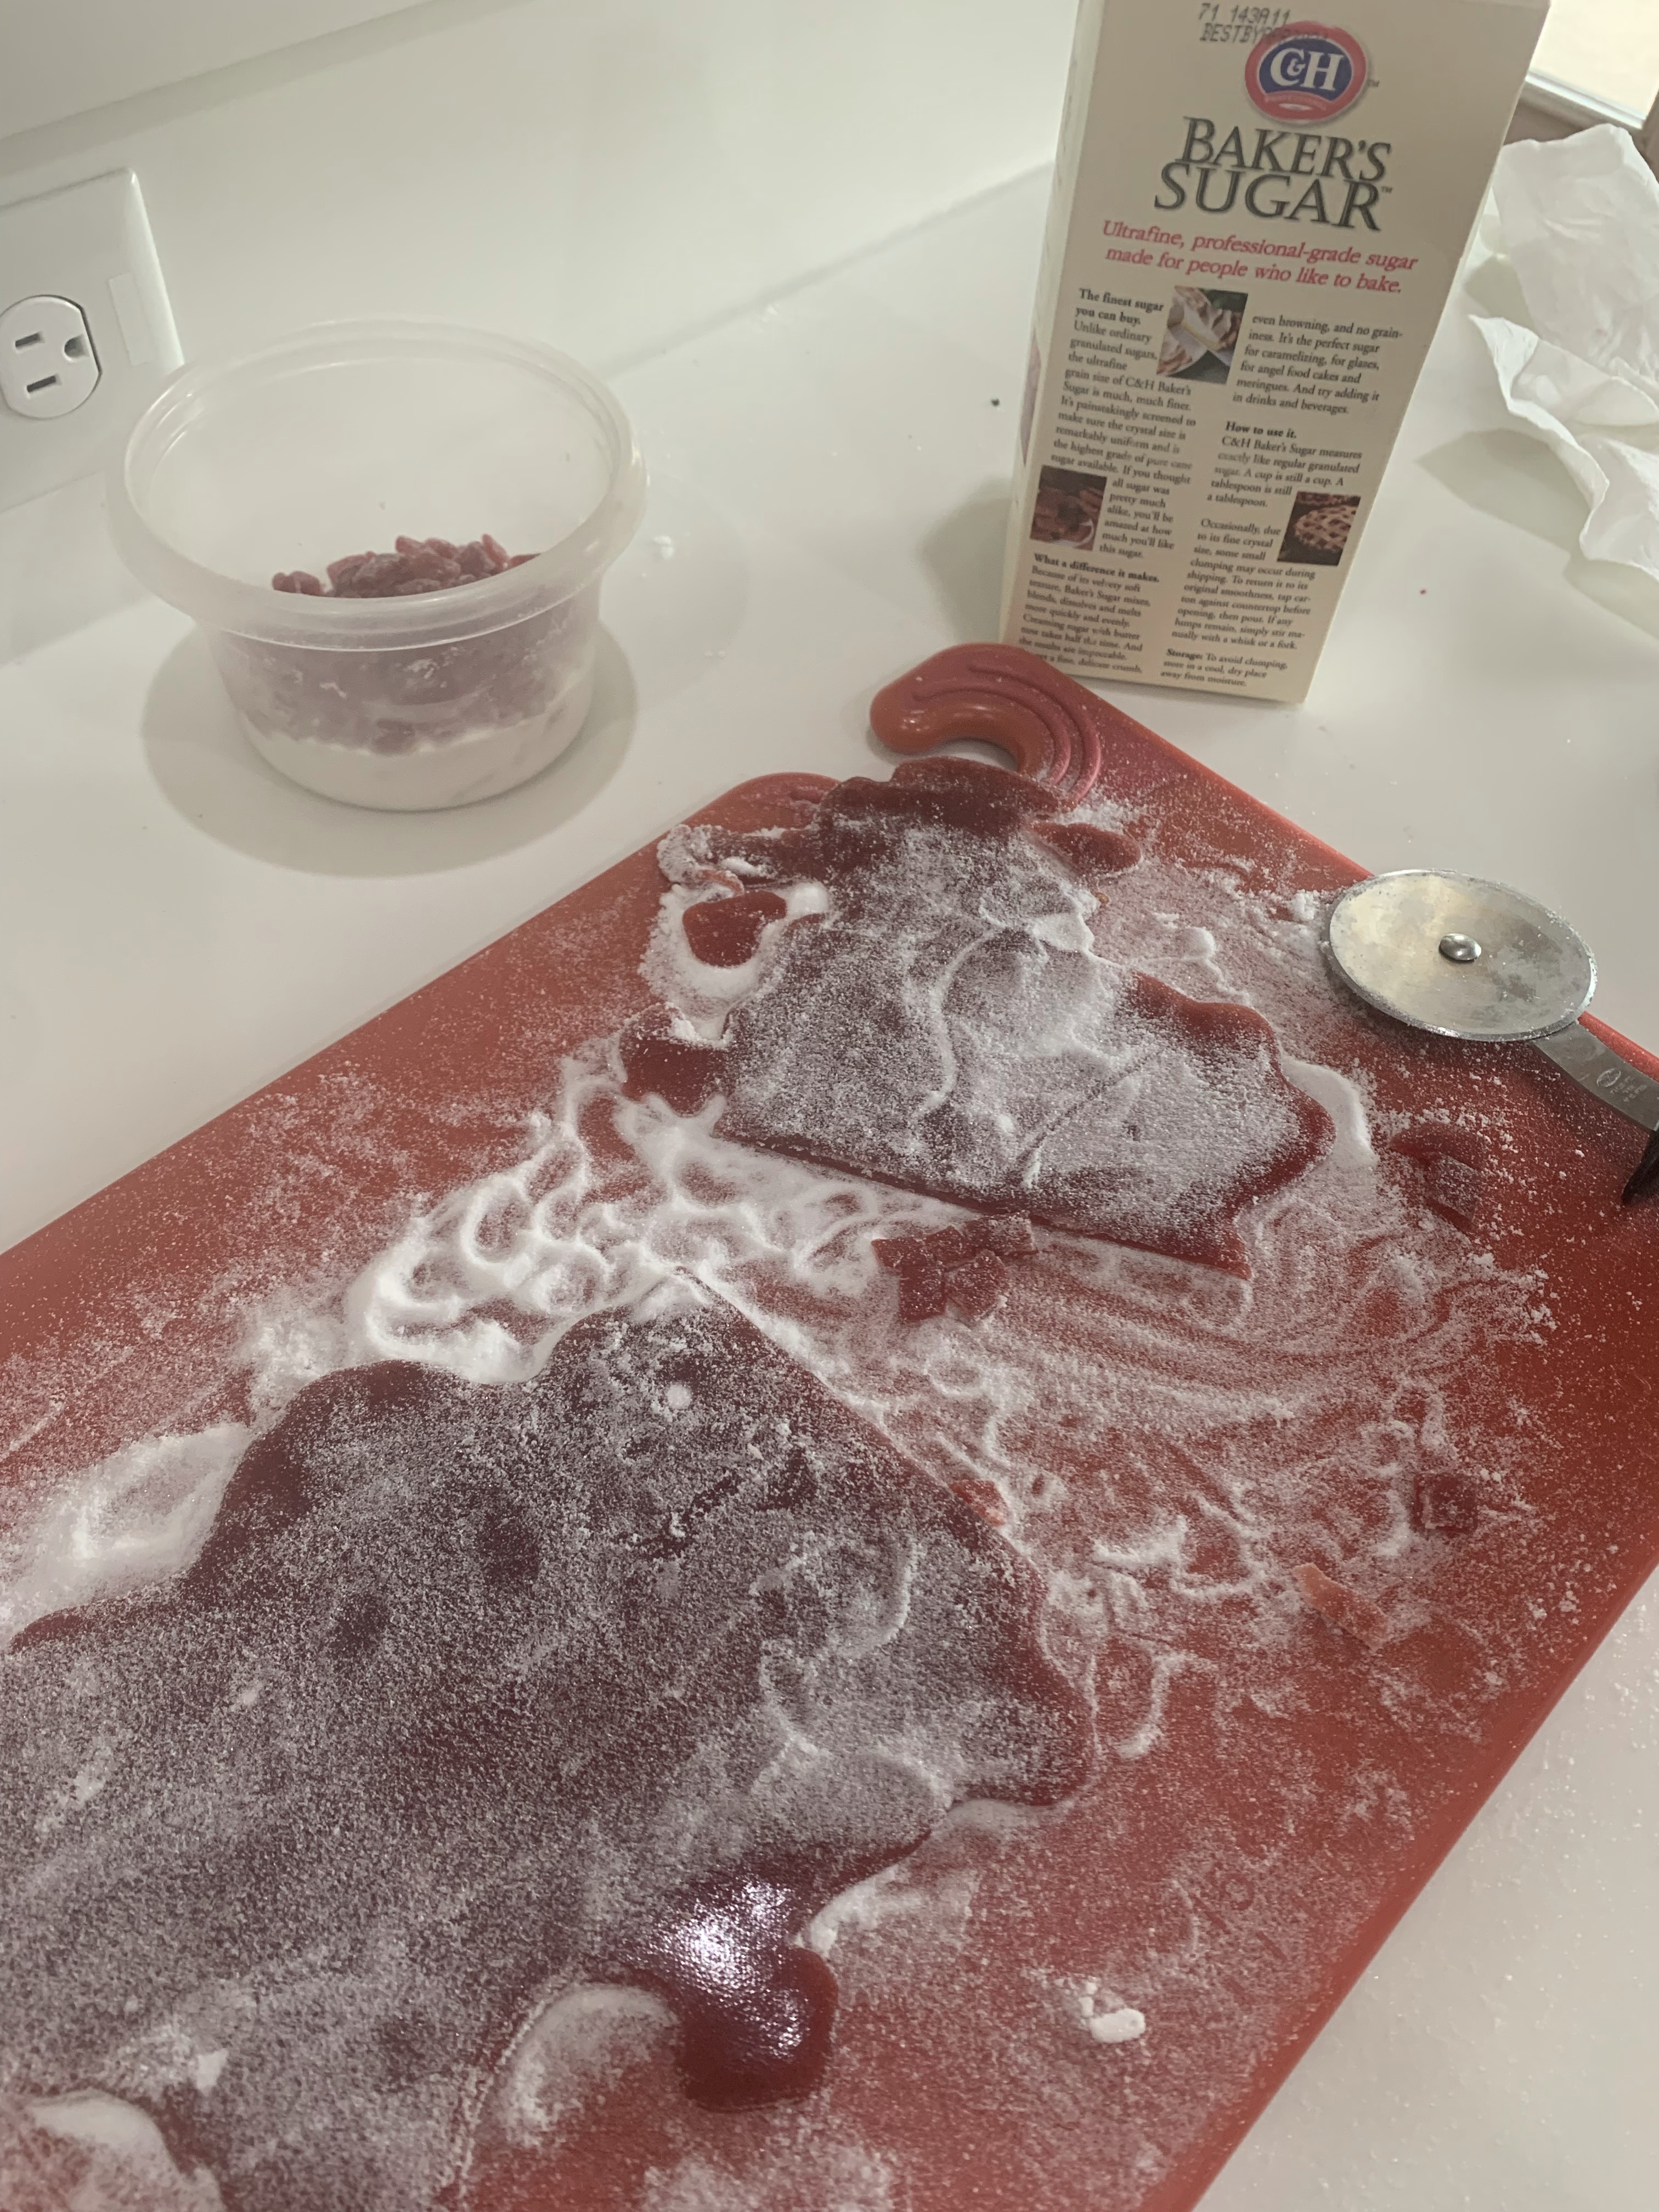
L: Making jam pretty much as normal – R: Caster sugar coated silicone lined baking sheet
L: Sieving hot jam onto sugar – C: Sheet of jam ~2-3mm thick – R: Frozen jam sheet, sugar coated on both sides and cut in half.
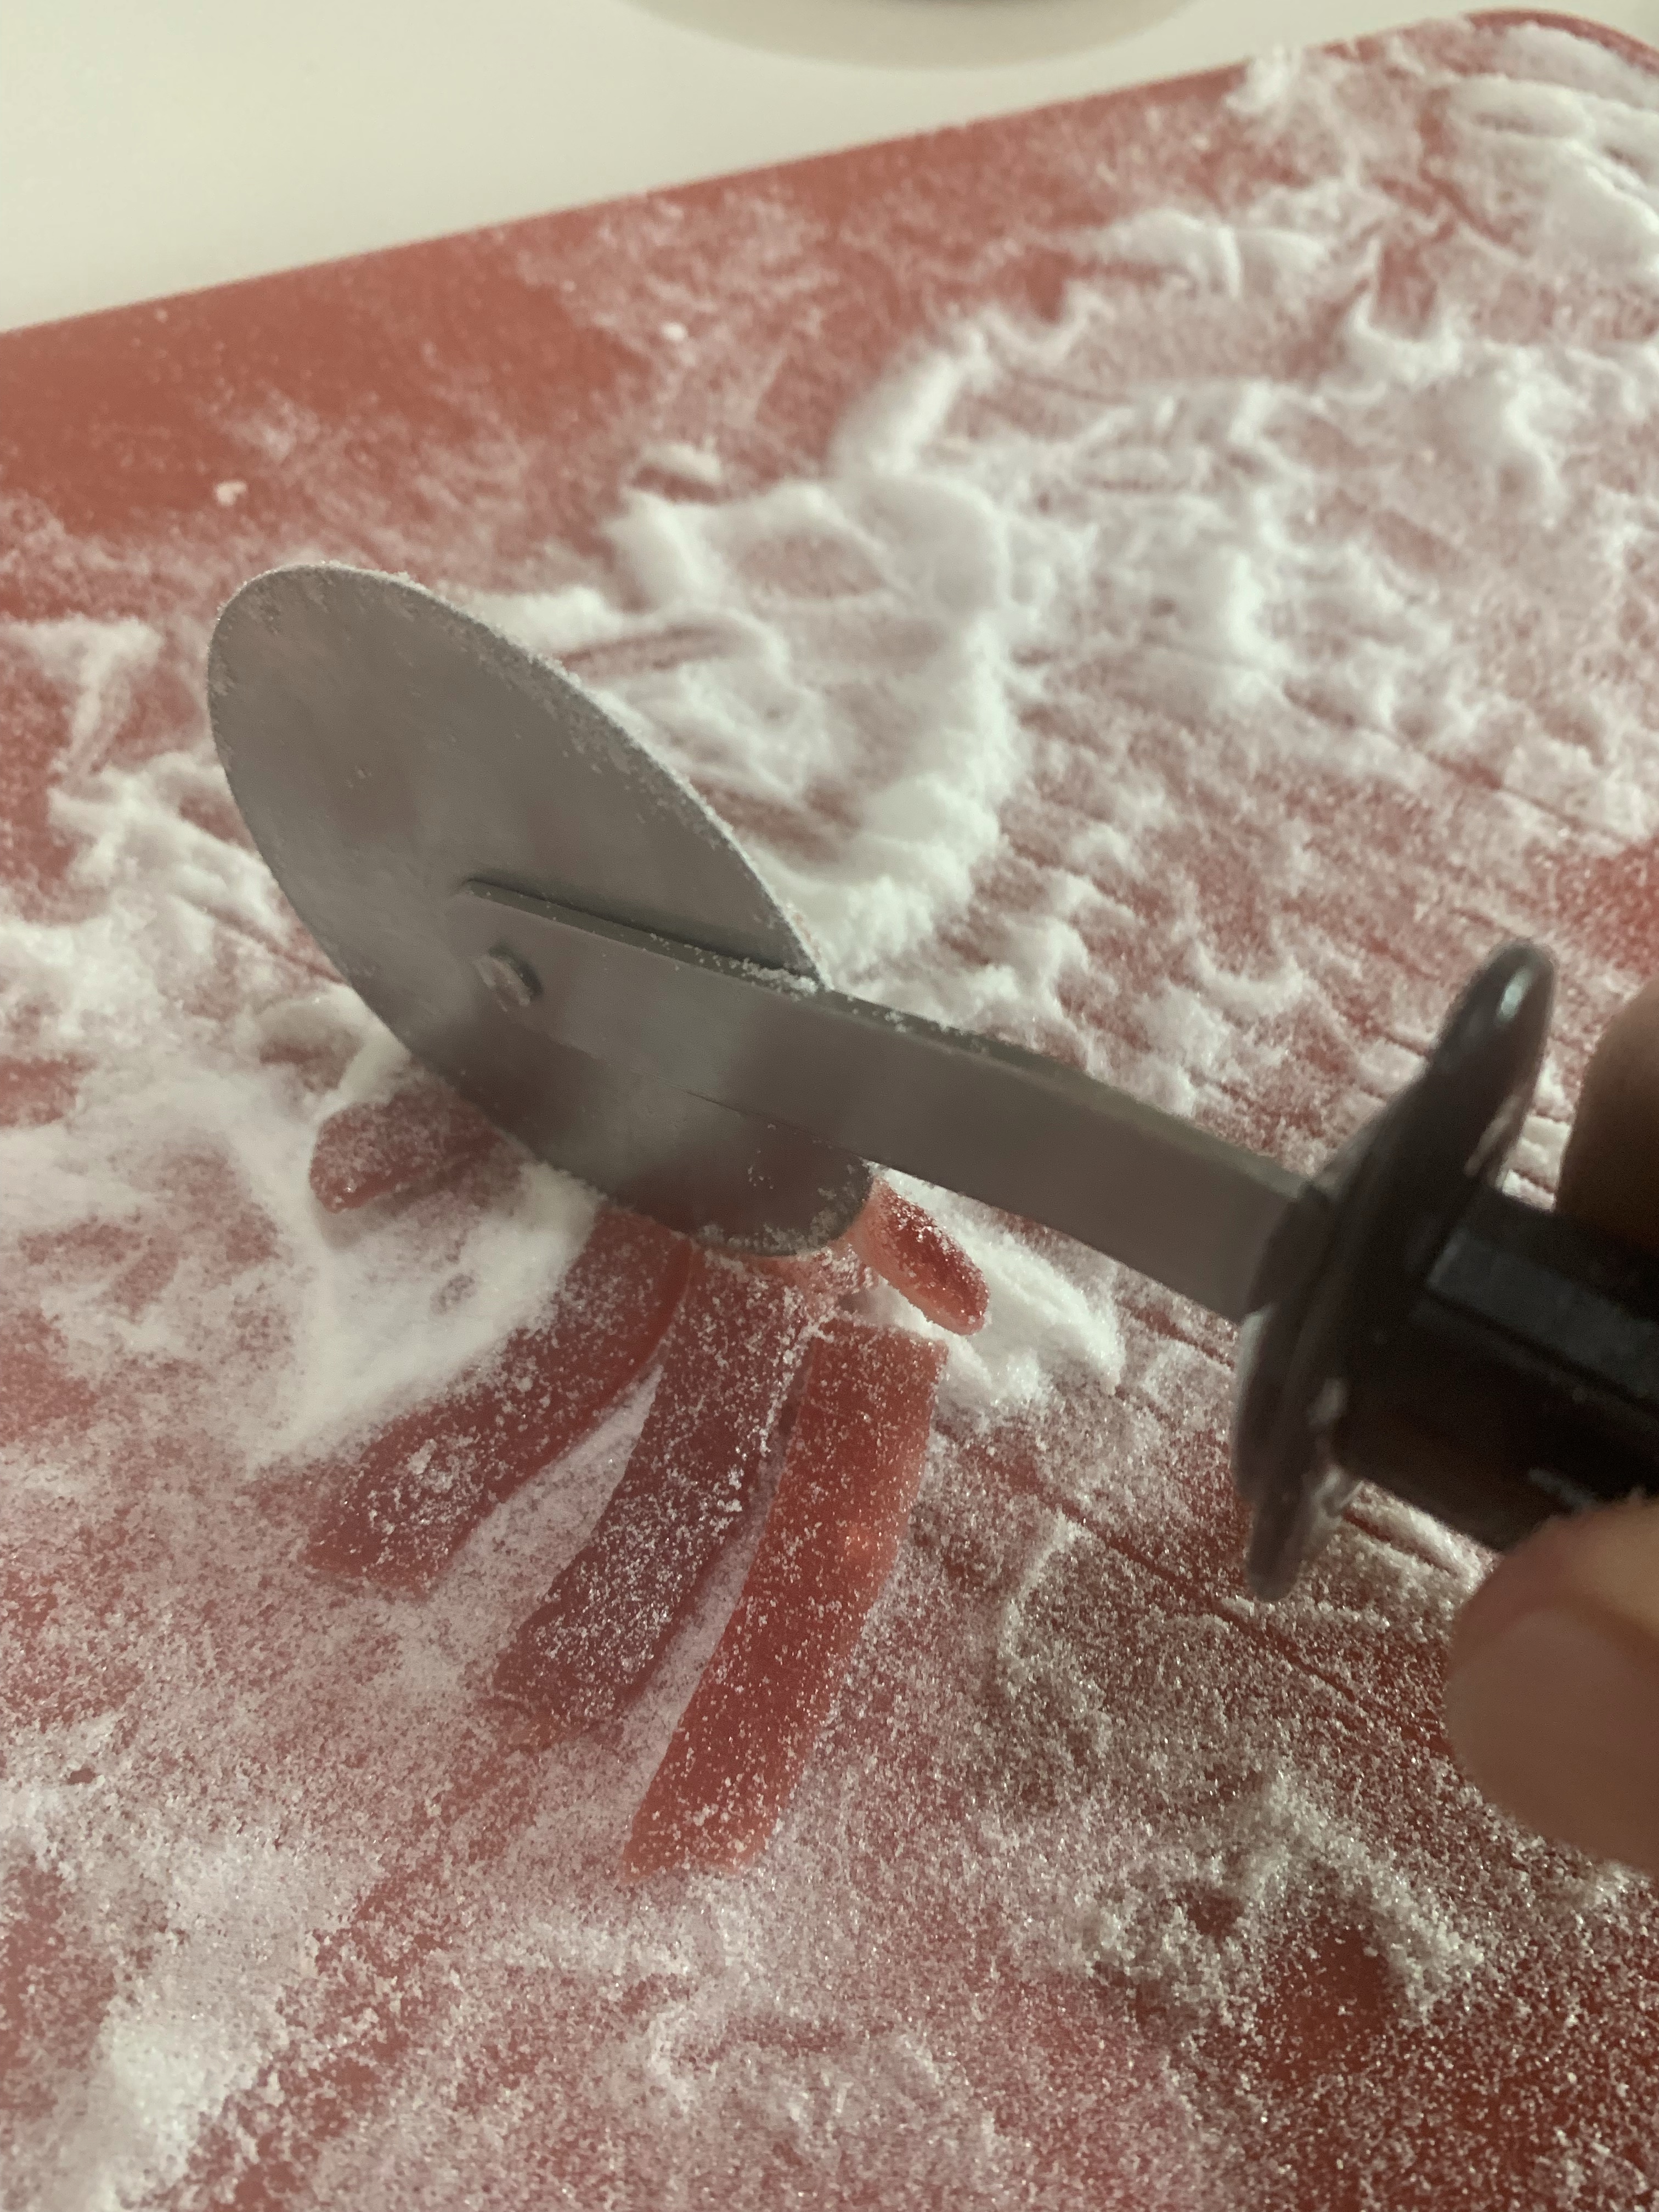
L: Frozen jam sheets cut into 1/4” wide strips – R: Jam strips cut into squares.
Once the jammy bits are cut put them in an airtight container, add several tablespoons of caster sugar and toss to coat the bits. If some stick together break them apart and re-coat. If some to stick together when you go to use them, just cut them apart.
Fruit Jammy Bits
INGREDIENTS
• 2 cups Berries • 2 Tbl Fruit Pectin • 2 cups sugar • Caster sugar (Extra Fine) for coating
METHOD
Puree berries
Heat puree to barely boiling and add pectin
Once pectin is incorporated, add the sugar
Continue boiling until mixing marks stay 7-10 seconds or about 235-240F
Pour mixture into a fine sieve to remove seeds. Press firmly to squeeze as much seedless puree as possible through the sieve. I let the drippings fall on the caster sugar coated silicone mat trying to keep the thickness to 1-2mm.
If necessary, spread mixture on caster sugar coated silicone mat and freeze
Remove the sheet of fruit from the freezer and coat top with caster sugar
Flip coated over onto a cutting board and coat the now top surface with more sugar
When the fruit sheet is pliable cut into small squares (1/4” across) with a knife
Toss the jammy bits into a bowl of sugar then store in an air-tight container in the freezer
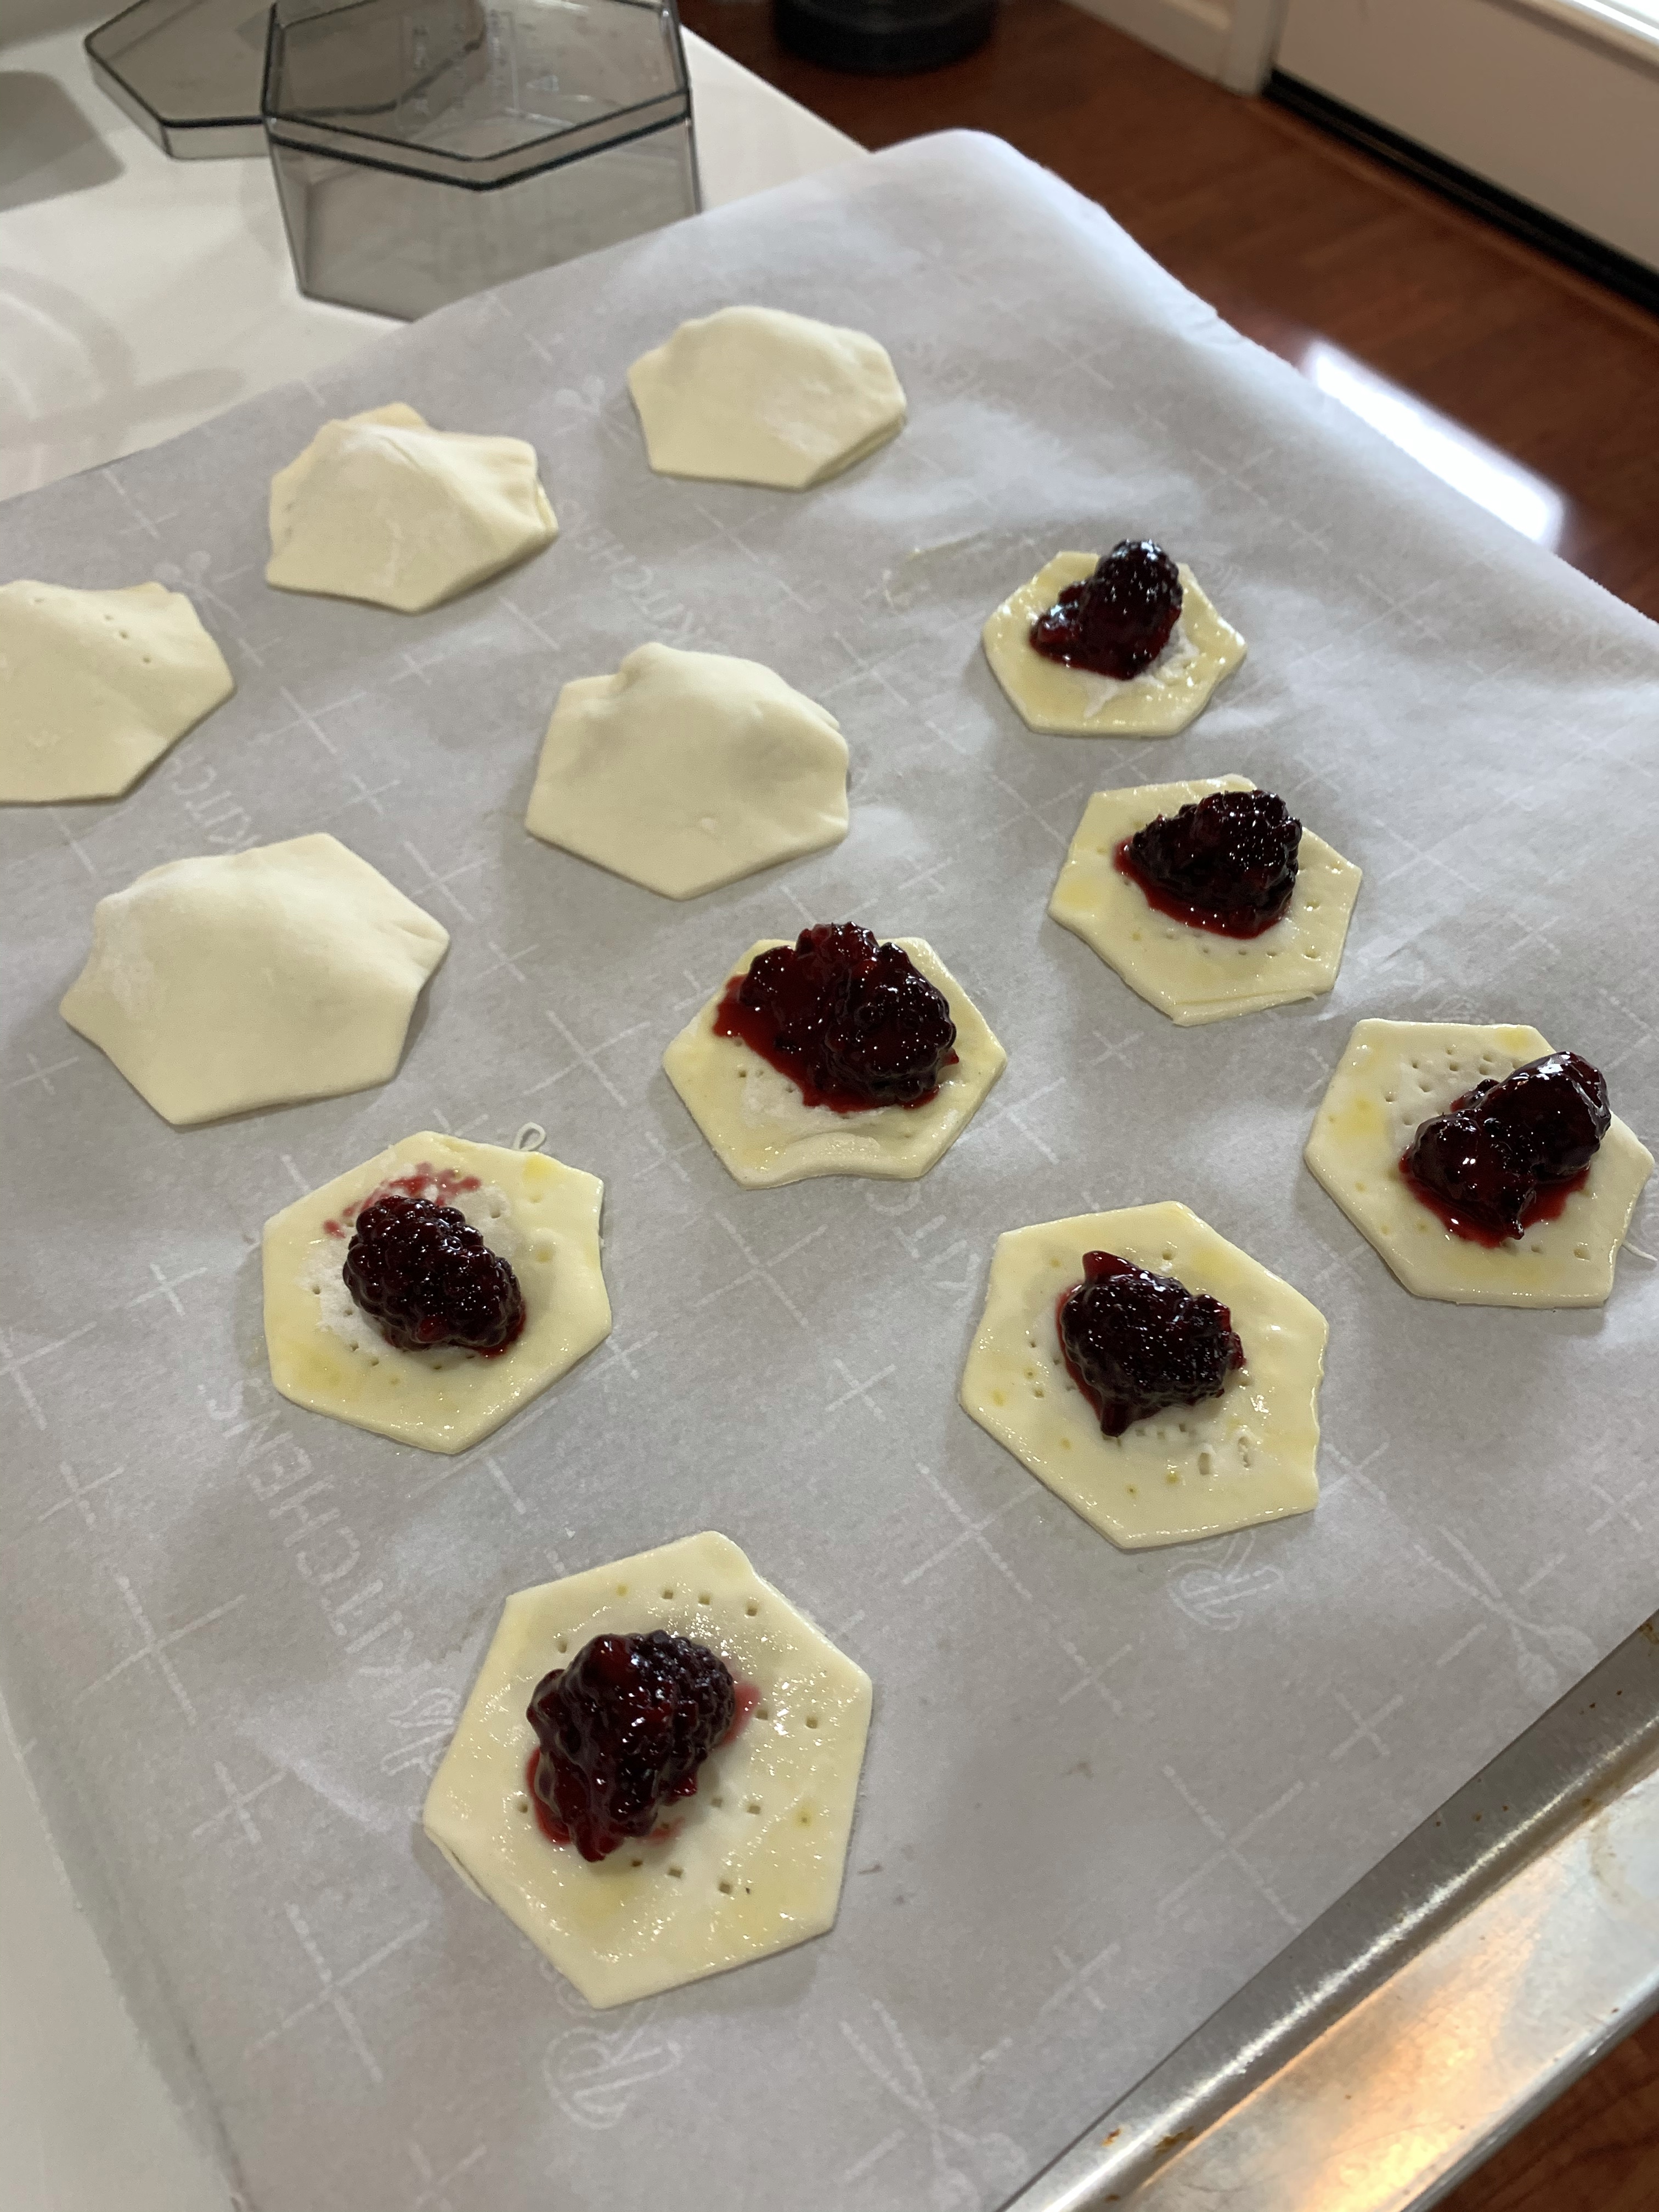
The more important thing is I was able to try out my new hexagonal cookie cutter. I never liked the square, or triangular (folded squares) hand pies. Circular were good, but the space between the circles wasted a lot of puff pastry. The hexagonal cutter was nearly as efficient as cutting squares, but look more like round pies.
My new hexagonal cookie cutters
I used a larger cutter for the top to assure good coverage of the smaller bottom. I docked the bottom piece with a fork to manage the puff of the pastry.
The edges of the covered pies were pinched with the fork, and egg wash painted on, a steam vent cut on the top and sparkling sugar sprinkled on each pie before baking.
I don’t know how I got by without one of these dough whisks. For everyone who does a significant amount of making dough for bread, pretzels, bagels, donuts etc, this is a must have took. It makes the initial mixing, prior to kneading or stretch and pull so much faster and easier. Do yourself a favor and buy one.