I often make a no knead bread which uses the stretch and fold technique and is delicious, has a good crumb, crust and air holes.
I saw this recipe in my Facebook feed and I was skeptical it could compete with my usual recipe/method.. After a trial bake it was every bit as good as my go-to recipe with NO stretch and fold or kneading. Prep time was about 10 minutes. Total “hands-on” time was about 15 minutes.
I mixed the three ingredients (plus water) with my danish dough whisk assuring all the dry ingredients were well hydrated before covering and placing in the fridge overnight.
In the morning I let the dough warm to room temperature and rise for about 3 hours. I placed it on a well floured parchment paper, folded it into a round boule, flipped it over so the folded side is down. Before placing in the Dutch oven I cut a deep X in the top.
No Knead Bread – 3 Ingredient
INGREDIENTS
3 1/2 cups bread flour
2 teaspoons sea salt
1 teaspoons instant yeast
1 2/3 cups water (100 degrees F
METHOD
Mix dry ingredients in a large bowl. Using a wooden spoon or Dutch dough whisk blend warm water into the dry ingredients. This dough will be wet and shaggy, also very forgiving. Mix until no dry flour is seen. Cover with plastic wrap and put a towel on top to proof for 8-10 hours at room temperature or for several days in the fridge.
If refrigerated, take the dough out and place on parchment before heating the oven so it gets to room temperature, then preheat the oven to 450 F with the covered Dutch oven inside.
Dust a large square of parchment paper with flour and turn out the dough carefully. (It will be sticky but try to preserve the proof.) Dust the top with flour and using a dough scraper gently fold the dough over and create a round boule. Use the sharp edge of the scraper to score lines in the dough. Cover with the plastic wrap and let rest until pot and oven are up to temperature.
Remove the pot from the oven. Place the parchment paper and dough into the Dutch oven and replace lid. Bake, covered, for 35 minutes. Then, anywhere from 5 to 10 minutes uncovered (this is a personal taste issue about the crispness of the crust). Let the bread rest 30 minutes. It will be hard, but you will wreck the loaf by cutting into it immediately.
I was in Versailles, Fr last month and had what was undoubtedly the best baguette of my life. The crust had the exact right crunch and the interior was soft and light. Then and there I decided I needed to perfect my baguette baking to at least approach this level of perfection.
My go-to recipe is from King Arthur and it served me well. Upon returning home I searched for differences in recipe ingredients and methods keying on authors who tauted the bread qualities that I wanted.
From what I understand the hydration level, (this recipe is 72%) at least in part, determines the size of the holes in the bread. By using the stretch and fold technique with a long rest (45 min) between each helps develop the gluten. These two properties contribute to the characteristics I desire.
This is the first attempt of “perfecting” my baguette. Do you remember my five attempts at baking an acceptable rye bread? Well, here we go again,
Classic French Baguettes
INGREDIENTS
• 500 g all purpose flour • 360 g water • 10 g salt • 3 g instant yeast about 1 tsp • 25 g honey about 1 Tbsp
METHOD
Mix all ingredients in a bowl, cover with a plastic wrap and let rest for 15 minutes.
Stretch and fold every 45 minutes and repeat at 3 times, flipping the dough upside down after each set. The rest time between stretch and folds is important.
Cover the bowl with a plastic wrap and place in refrigerator overnight for about 12-14 hours.
Turn the dough on a lightly floured work surface. Divide into 3 equal parts and gently shape into rectangles without knocking the air out of the dough. Cover and let rest for 45-60 minutes.
Preheat the oven to 500F, with a baking stone positioned in the upper half the oven. I like to use a small cast iron skillet with water to provide steam. Add the water below when the loaves are put into the oven.
Stretch each dough rectangle slightly and fold into a cylinder, sealing the seams as you roll. Using your hands, roll the cylinders gently stretching them from the center towards the ends to desired length, about 14-15 inches.
Place each loaf on a lightly floured couche, seam side up. Cover and proof at a room temperature for about 30-60 minutes, or until the dough has sufficiently proofed. Press dough with a finger. If it springs back slowly it is properly proofed. If it never springs back it is over proofed and if it springs back quickly it is under proofed.
Transfer the baguettes to a piece of parchment paper, seam side down and dust off excess flour. I like to use a serrated break knife to make 5 scores on each baguette. Don’t cut straight across the loaf, but with a shallow long cut down the length. Each cut should be 4-5” longWhen scoring, use a swift and firm motion to ensure nice and clean cuts.
Carefully open the oven, and slide the rack with the baking stone out. Slide the baguettes off the parchment paper and onto the baking stone. Add a cup of water to the cast iron skillet, close the oven and reduce temperature to 475F. Bake for 15 minutes.
Remove the water pan, rotate the baguettes, drop the temperature to 450F and continue baking for another 10- 15 minutes, Check how brown the baguettes are after 10 minutes and every couple of minutes thereafter. They should be a nice dark brown, but not too dark. Over baking will make the crust and interior too hard. Experience will tell you when it is Goldilocks just right.
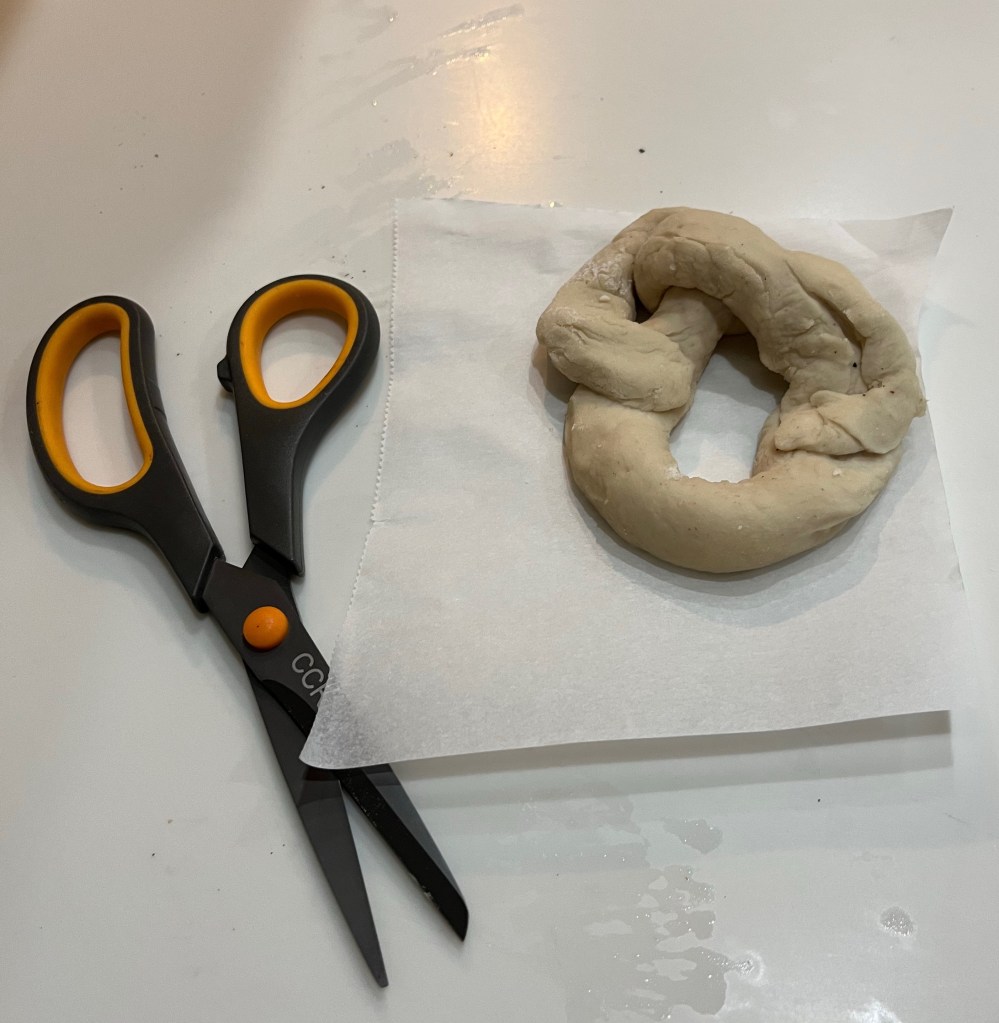
I was not a fan of my previous pretzel experiment using KAB Measure For Measure gluten free flour. While the taste was acceptable, the texture was wrong and the resulting pretzels (both dough and baked) were very fragile. That batch ended up being binned.
This batch used Kim’s Flour Blend, the flour used to make the Artisan nGDS bread a few days ago. This flour provided the correct texture and dough strength for the pretzels to hold their shape, although the taste was not as close to a traditional pretzel as the Measure For Measure flour. As an extra precaution I cut the parchment paper under each un-baked pretzel and used a large spatula to carefully slide the pretzel and paper into the alkaline bath. The paper slid off the boiled pretzel and was discarded.
This recipe required a longer bake time. Depending on your oven, bake 9 to 10 minutes, rotate the baking tray, then bake another 9 to 10 minutes.
nGDS Soft Chewy Pretzels with Kim’s Flour
Ingredients: • 3 cups (420g) Kim’s blend GF flour – weighed or poured & leveled • 1 ½ tsp xanthan gum • 1 ½ tsp psyllium husk powdered • 1 tbl active dry yeast • 1 tsp salt • 1 cup water • 3/4 cup almond milk • 2 tbl olive oil • 1 tbl honey • 3 ½ tbl red palm and coconut oils shortening (Nutivia) melted – cooled slightly
Directions:
Heat the water in the microwave for 20-30 sec to achieve a temperature of about 120-130 deg then combine with the cold milk in a small bowl for a resulting solution temperature of 110 to 115 degrees F. Add the sugar and salt to the warmed water and milk and stir to combine. Sprinkle in the yeast and mix with a fork. Allow the mixture to sit for about 5 minutes or until it becomes foamy.
Pour the foamy mixture into the bowl of a stand mixer fitted with a dough hook and add the melted, cooled, unsalted butter and flour. (I add the flour a cup at a time to be sure it mixes well.) Mix on low speed for until combined and no dry flour remains in the bowl. Scrape the bowl as needed. Continue to mix for about another 7 minutes or until the dough pulls away from the sides of the bowl and is smooth. Scrape the dough from the hook if it comes up to far. Note: The dough may begin to pull away from the bowl after only 2 minutes, but may look a bit pulled or shaggy and still be sticky. It is not done kneading until it is smooth to the touch and no longer sticky.
Remove the dough from the bowl and form into a ball. Wipe out the bowl, if necessary and grease it with 1-2 tablespoons of oil. Place the dough ball back into the bowl and turn over a couple of times to coat thoroughly with the oil. Cover the bowl with a dish towel or plastic wrap and place in a warm area , free from drafts or cool air (a microwave, turned off is a good location), for about 1 hour, until the dough has risen and doubled in size.
Refrigerate covered for at least 6 hours, preferably overnight, but up to 10 days.
On baking day, remove the dough from refrigerator and dump it out onto well-floured surface. Loosely cover with plastic wrap (the piece that covered the bowl in the fridge) and let the dough warm to room temperature.
When the dough is ready, preheat the oven to 450 F and position the oven rack in the upper third of the oven. Line a large (15″ x 20″) baking sheet with parchment paper and spray with Bakers Joy. Set aside. Note: You may need 2 baking sheets to avoid crowding the pretzels. If only one small, puny sheet is available, make one batch of pretzels and keep the remaining dough covered, so it does not become dry. Between batches, allow the baking sheet to cool, before filling with remaining pretzels.
Place in proofing oven (or other draft free, warm location such as an oven, turned off, with the light on) for 1 hour
In a large, wide pot (6-8 quarts) add 8 cups of water, baked baking soda and malt powder. Stir to combine and bring to a full boil. Place a plate lined with paper towels nearby, as well as the kitchen spider or slotted spoon.
In the meantime, dampen a kitchen towel with water and set aside. Heavily dust your work surface with Kim’s Blended Flour, remove the dough from the bowl, place it on the work surface and divide into 8 equal pieces. Cover the pieces that you’re not rolling with plastic wrap or a damp kitchen towel, so they don’t become dry. Using the palms of your hands, roll each piece of dough to a 24-30 inch long rope and then shape into a “U”. Don’t be afraid to use plenty of flour. The dough is sticky! Grab the ends of the rope and cross them over each other once or twice and then bring the ends down to the bottom of the ‘U” and press them down to seal, forming the shape of a pretzel. Place the pretzels onto the greased parchment-lined baking sheet and cover with a damp kitchen towel to prevent the dough from drying out, while you continue to roll the remaining dough. You can also cut some of them into 1 ½” logs to make nuggets.
Place the formed pretzels in a warm, draft free location (such as a proofing oven, or regular oven (Off) with the oven light on to proof for an hour.
The lack of gluten results in a more fragile structure than a traditional gluten pretzel dough. To help maintain the pretzel shape I cut the parchment paper around each pretzel and gently lowered them into the mixture as described in the next paragraph. The paper floats off when the pretzel is flipped. The boiling gave the dough more structure and helped they stay in shape.
One at a time, lower each pretzel into the boiling water mixture for about 30 seconds. I push them down underwater a few times to assure the top is treated as well. The pretzels will puff up while boiling. Using a kitchen spider or slotted spoon, carefully remove the pretzel from the water, blot slightly on paper towels and then place back onto the parchment lined greased or sprayed baking sheet a few inches apart.
Using a pastry brush, brush the top and sides of each pretzel with the almond milk wash and then sprinkle with coarse salt.
Place the pretzel filled baking sheet on the upper oven rack and bake for about 7 minutes. Open the oven and quickly rotate the baking sheet so that the pretzels that were facing the front are now facing the rear of the oven. It may seem like a pain, but it’s quick and easy and will ensure even baking. Continue to bake for another 7 minutes or until pretzels are dark golden brown.
Remove sheet from oven and place pretzels on a wire rack to cool slightly before serving. Outrageously good if served warm. Mildly spectacular if served later.
Kim’s Gluten Free Bread Flour Blend 700g (5 c) 1.4kg (10 c) 2.1kg (15 c) 2.8kg (20 c) Bob’s Red Mill potato starch 285 g 570 g 855 g 1140 g superfine white rice flour (DON’T use 250 g 500 g 750 g 1000 g regular rice flour, ie Bob’s Red Mill) Tapioca flour 75 g 150 g 225 g 300 g Egg white protein 75 g 150 g 225 g 300 g Xanthan gum 15 g 30 g 45 g 60 g
We needed a thank you gift for a friend, who happens to love my soft, chewy pretzels and as my golf was cancelled due to rain…
I had trouble rolling the dough into long enough ropes to make good pretzel “knots.” I believe the dough wasn’t wet enough to allow the 24”-30” rope. Today’s was only about 18”.
That aside the flavor and texture was wonderful. QC gave it a big thumbs up.
When I research a new recipe from someone else’s blog or website, I alway read both the good and bad reviews to find any possible problems. This recipe had very few less than 5 star reviews and were primarily due to the reviewer not reading the instructions. (I gave it 5 stars.)
The “burst” on the lower right side of the bread is due to under proofing.
I made this excellent bread as printed, except I substituted the recommended whey protein isolate with egg white protein. I also used the baking-stone/steam method.
The only change I would make to the method would be to let the dough warm to room temperature before shaping and resting for the second proof. I let the bread rest in my proofing oven for almost 90 minutes at 115F and it was still under proofed. I will try this on the second loaf.
Here is another version in my search for excellence in gluten, dairy and soy free sandwich bread. The universal acclaim indicated this version was “incredible.” Personally, QC and I thought it was pretty darn good. Nearly comparable to “regular” bread.
Two more versions to go to “perfection!”
Gluten Free Sandwich Bread (White Gold)
INGREDIENTS: • 1 package (1.1 Lb) Extra White Gold gluten free bread flour • 1 Tbsp. dry yeast (1 envelope) • 2 tablespoons honey • 3 eggs • 1 c. lukewarm almond milk • ¼ cup vegetable oil • 1 ½ tsp. salt • 1 egg for egg wash • Sesame seeds (optional)
METHOD:
Add the flour, honey and yeast to a stand mixer bowl. Mix for 3 minutes with a paddle attachment.
Add the eggs and almond milk and mix for 3 minutes.
Add vegetable oil and salt and mix on low speed for 4 minutes. The dough should be sticky.
Let it rise for 90 minutes, in the mixer bowl, covered, in a warm dry place. (Such as a proofing oven)
Pour/scape the dough in a bread loaf. (A narrower bread pan will help shape the bread.)
Let the dough rise for 20 minutes.
Pre-heat the oven to 375 deg. Place a shallow dish in the lower part of the oven
Brush the bread gently with an egg wash and sprinkle sesame seeds (optional).
Place the bread pan on a center rack and pour 1 cup of water into the shallow dish.
Bake for 40-45 minutes, until golden brown. (Don’t overtake!)
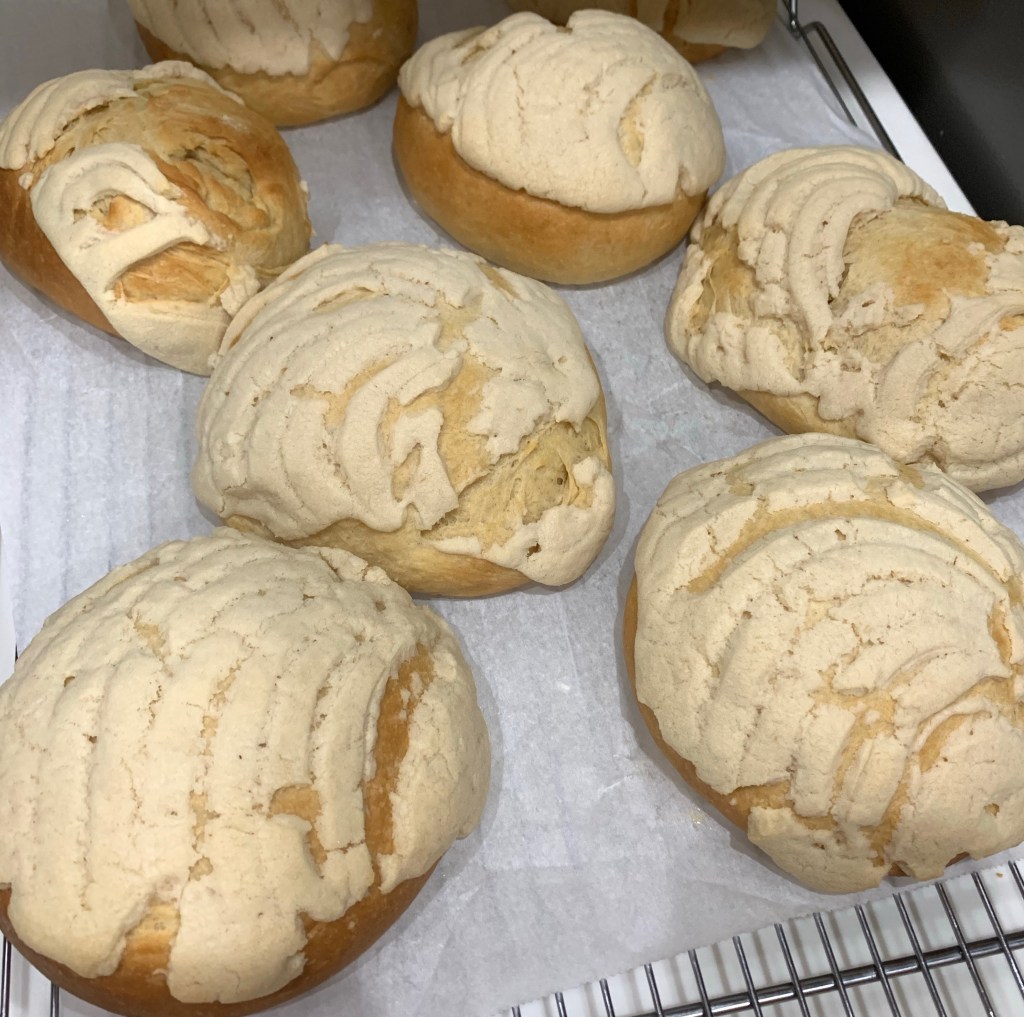
One of my sons asked if I could make conchas as a surprise treat for his wife for Mother’s Day. Of course, I said yes, then searched the internet to see what the hell conchas are. I found three or four recipes that seemed sensible, watched two YouTube videos on technique, then tried two “practice” batches.
The first batch was ok, but the texture was wrong. They were tight crumbed and tough, although the flavor was acceptable. Bear in mind, I had never eaten (or heard of) a concha before this week, but I do know what good bread texture and flavor is. QC reminded me I couldn’t even pronounce “concha” until a friend corrected me. My pronunciation was so off, she didn’t know what I was talking about until I showed her one and she said “Oh! Concha. I love them.” The sugar topping used vegetable shortening rather than butter. The author thought the resultant topping would be less grainy. I liked the ones with butter better.
Do not press the embossing concha press through the topping or it will slide off, even if the tops of the conchas were well buttered.
The second batch was better. I used butter based topping and bread flour rather than AP. The crumb still wasn’t acceptable but the flavor remained good. QC thought they needed a little more cinnamon so in the final batch I doubled the cinnamon from one-half to a full teaspoon.
Ingredients for yeast conditioner
If you make conchas do not over knead the dough. It will be, and should be, very slack,. Proof in a warm, dry, draft free environment. I did as one of the authors recommended, when I started, I turned one of my ovens to “Proof” then just before putting in the dough, turned it off. If you don’t have a proofing oven, just put the light on and leave it on. Proof this way for exactly two hours.
I changed how the topping was formed. After rolling, pressing and buttering the dough balls I rolled the topping out between two sheets of parchment paper, then chose a round cookie cutter the same size as the flattened dough balls. This worked much better than using my hands to flatten the topping into disks to put on the buttered dough balls. Trust me on this.
Conchas Mexicanas Pan Dulce
INGREDIENTS: (Makes about 8-12 conchas it all depends on how large you want them. 10 conchas will be about five inches diameter each.)
TOPPING: • 1 cup AP flour • 1 cup powder sugar • 8 tbsp unsalted butter at room temp • 1 tbsp vanilla • (Optional To add chocolate flavor add 1 -2 tsp Hershey’s cocoa)
METHOD
DOUGH
If you have a “proof” setting on your oven turn it on now. If not, turn on the oven light to create a warm environment
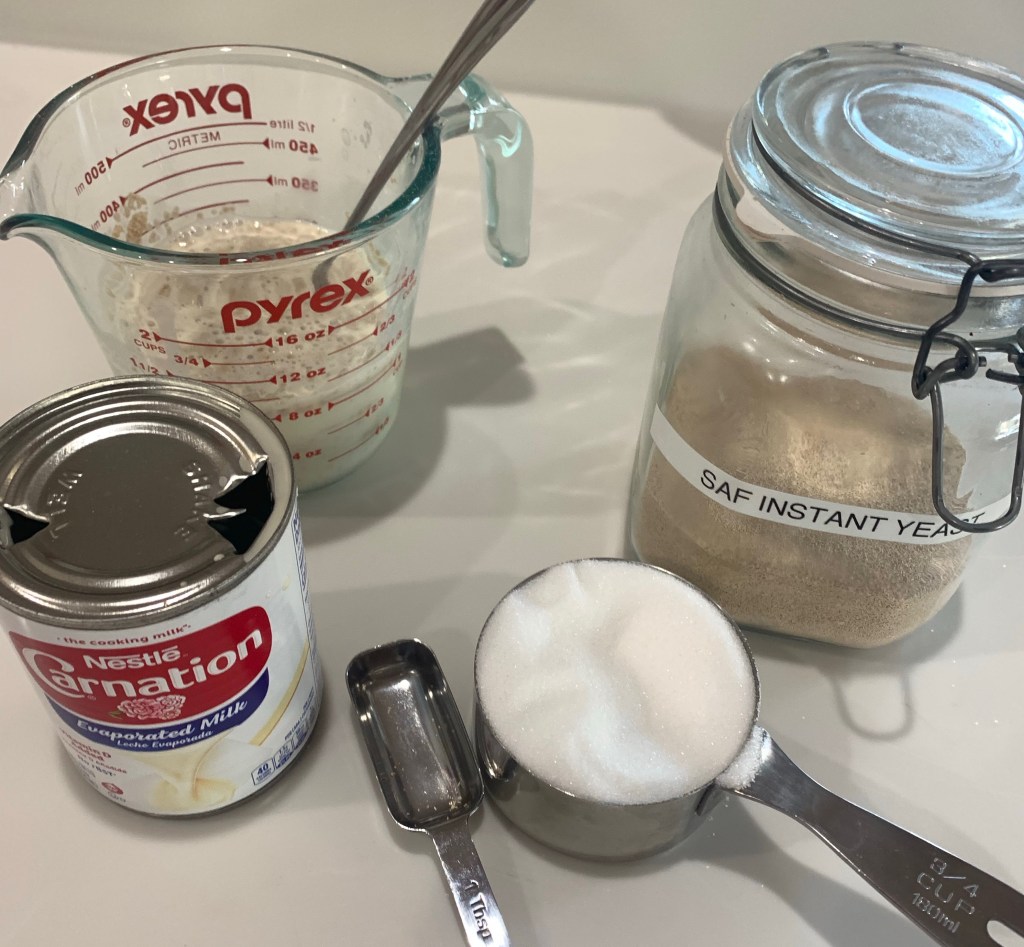
Heat evaporated milk for 30 sec in microwave
Add 1 Tbl of the ¾ c sugar and 1 Tbl yeast to the warm milk, mix thoroughly and let sit for 5-10 min
Sift flour, sugar, and cinnamon into the bowl of a stand mixer and mix until well combined
Add room temperature (soft) butter, vanilla, and yeast/sugar/evaporated milk mixture to the dry ingredients
Add eggs on at a time start timer for 10 minutes
After 5 minutes add salt and continue kneading
Coat bowl with a light coating of cooking spray, form dough into a ball and cover.
If you turned ON the proof setting turn the oven OFF now
Place covered bowl into your OFF oven with the oven light on and set timer for 2 hours
TOPPING – (Make the topping after the dough had proofed for 1 ¾ hours to keep it fresher and more pliable)
Sift powdered sugar and flour into a medium sized bowl
Add room temperature butter and vanilla and mix into a smooth paste. (I found it easiest to “knead” with my hands.)
If you are flavoring the topping add the cocoa now and mix thoroughly. You can divide the topping and only flavor half)
Wrap tightly in plastic.
ASSEMBLY
Line baking sheet with parchment paper.
Pour dough onto a very lightly floured surface and form into a log
Divide the dough into the number of conchas desired. (8 conchas will be about 5-6” diameter.)
Roll each portion by cupping your hand over the portion and rolling on the table until the little dimple on the bottom disappears. (You may need to pinch the dimple together)
Place the portions on the parchment lined baking sheet.
Rub butter on each roll covering the entire surface
Divide the topping into the same number of conchas
Place each topping portion into a ball then roll between parchment paper sheets to about 1/8” thickness
Cut flattened topping with a round cookie cutter just larger than the diameter of the dough ball
Place a disk of topping on each dough ball and press down firmly. (some people recommend pinching the edge of the topping and dough together .)
Use a concha cutter (or knife) to emboss the traditional “shell” pattern being sure not to cut all the way through the topping.
Preheat oven to 325 F.
Cover concha’s and let rest 30-45 minutes
Bake 15-20 minutes, until bottom is light brown. Don’t be surprised if it requires 28-30 minutes for the bottoms to brown.
After a grueling day of golf yesterday, praying to the golf gods the storms would stay away (they did) and preparing for another round tomorrow, I needed something to occupy my time today
I haven’t made white sandwich bread in a while so I made the dough early this morning. It needs a minimum 8 hour refrigerated rest which will be over at 2:30 this afternoon. I can then shape and bake it. If the results are good there will be a second post later.
While waiting for the sandwich bread to rest and ferment I decided to make a recipe of honey Pumpernickel bread. I am glad I did. I made this once or twice before but never with such great results. Great flavor, texture and crumb.
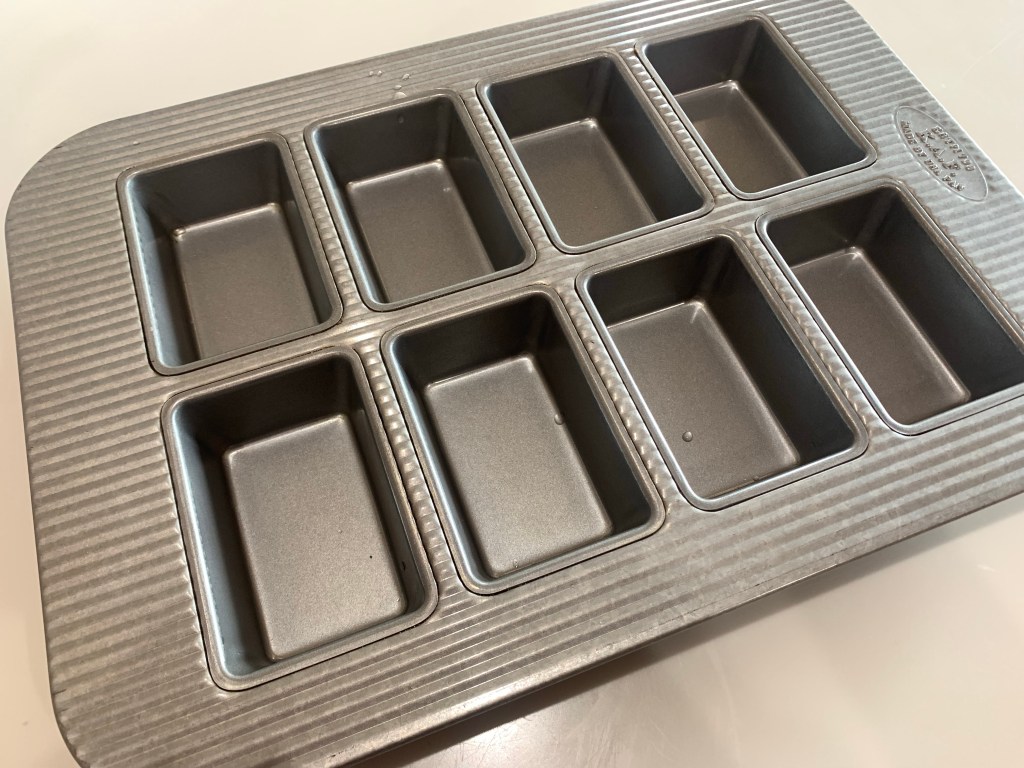
Mini Loaf Pan
HONEY PUMPERNICKEL BREAD
INGREDIENTS
• 2 ½ cups warm water (100°-110°F) • 50 g (1/4 cup) vegetable oil • 40 g (2 Tbl) molasses • 170 g (1/2 cup) honey • 3 ½ cups (400g) pumpernickel flour • 2 Tbl unsweetened cocoa powder • 2 Tbl Vital Wheat Gluten • 13.5 g (1 ½ tbl) instant yeast • 1 tsp (6g) salt • 240-360 g (2-3 cups) bread flour • rolled oats (for dusting loaves)
INSTRUCTIONS
In the bowl of a stand mixer fitter with a dough hook, stir together water, oil, molasses, and honey until mixed well.
Add pumpernickel flour and Vital Wheat Gluten to water mixture.
Add cocoa, yeast, and salt, and stir until blended.
Allow mixture sit for 10 minutes.
Stir in bread flour, one cup at a time, until dough clings to hook and almost clears the sides of mixer, about 3-4 minutes. The dough should weigh about 1880 g.
Cover bowl with greased plastic wrap.
Allow dough to rise in the bowl until doubled, about 30-60 minutes.
For two 9×5 loaves • Divide into 2 pieces.Each should weigh about 940g. • Cover each piece with greased plastic wrap, and let dough rest for 5 minutes. • Shape pieces into loaves, and sprinkle with oats. • Place each loaf in a greased 9×5-inch loaf pan. • Let dough rise until doubled, about 30-60 minutes. • Toward the end of the rising time, preheat oven to 350 F. • Bake for 30-40 minutes or until the internal temperature is about 200 F.
For 16 mini-loaves • Divide into 16 balls 112 g each. • Cover with greased plastic wrap, and let dough rest for 5 minutes. • Shape pieces into loaves, and sprinkle with oats. (Gently roll into a small cylinder, don’t deflate!) • Place 8 loaves in a greased 8 cell mini loaf pan. • Place the remaining 8 balls in the refrigerator. o Let dough rise until doubled, about 30-60 minutes. o Toward the end of the rising time, preheat oven to 350 F. o Bake for 20 minutes or until the internal temperature is about 200 F. o Cool on a cooling rack and remove the remaining balls from the refrigerator o Gently place the second batch in the still warm to touch baking sheet and repeat 20 minute baking. Don’t roll these. Just gently place in the mini baking sheet.
I ran across a four ingredient, no knead, no stretch and fold, Italian bread. I am on my third bake of this bread, each with minor tweaks.
Version 1 was as presented. Version 2 was as presented but baked in a Dutch oven (my preferred baking method.) Version 3 included Cake and Bread Enhancer (fifth ingredient) and was baked flat on a baking stone.
Version 1 was excellent. Version 2 was excellent. Version 3 was excellent. All three had great, crispy crusts and a soft tender crumb on the inside.
My current favorite is (was) my high hydration honey no-knead bread, but this may be my new go to. It’s even easier than the honey no-knead. Simply mix everything together the let it ferment for 2 hours. Gently pour out, (I do mean pour, it is high hydration, slack and sticky,) minimally shape and bake. All done!
My goal is to create larger holes in the bread. Version 2 (center) and 3 (right) were the best. I overworked the fermented dough a little too much in Version 1. Try, try, and try again!
Rustic Italian Bread
INGREDIENTS • 380 g AP flour + more for dusting • 20 g (3 Tbl) Bread Enhancer • 1 tsp sea salt • 350 g warm water • 2 tsp active dry yeast
METHOD
Add the flour, enhancer, salt and yeast to your stand mixer. Use the paddle attachment to mix and combine so no dry patches remain.
Add the warm water and mix until everything is incorporated and a soft, wet dough forms. It will be a slack, sticky dough.
Loosely cover the bowl with plastic and let the dough rise at room temperature (See tip below) for 2 to 3 hours or until doubled in size.
Dust your kitchen counter with flour and scrape the very sticky dough out with a bowl scraper.
With floured hands shape the dough into a ball (or batard,) deflating it as little as possible.
Line a banneton with parchment paper. (See tip below)
Place the ball of dough in the lined banneton smooth side up and let it rest while your oven heats up.
Use a sharp knife or lame to lightly slash an X in the top of the loaf.
Preheat your oven to 450 F with a dutch oven inside for about 45 minutes before baking the bread. Fill an oven proof bowl with 2 inches of water and place it on the bottom rack.
Once hot, carefully transfer the bread loaf into the dutch oven using the parchment paper.
Cover with the lid and bake for 30 minutes. Remove lid and bake another 5 minutes until golden brown on top. The internal temperature should be 205 F
Remove the bread from the dutch oven and transfer to a cooling rack or it won’t stay crispy.
TIPS
Lining a round banneton: Crumple parchment paper starting from the edges. You should end up with a ball which will smooth out to fill the round banneton
Room temperature proofing: I like to put the bowl in an “off” oven with the light on. In the winter my kitchen tends to be cool (62-65 F) My “off” oven with the light on is 78o F.
From King Arthur Baking’s Cake and Bread Enhancer: A “miracle” ingredient for your cakes!
(From KAB) Our bakers have called this the “miracle” ingredient for many reasons: it makes cakes and other baked goods softer, moister, and helps them stay fresher longer. Our blend contains vegetable fats that act as emulsifiers, allowing the fats and liquids in your favorite recipe to combine more easily. The enhancer also acts as a stabilizer and texture enhancer. Cake enhancers are commonly used in professional bakeries to keep breads fresh and soft, and help cakes stay light and fluffy. It’s especially great for making soft sandwich loaves.
While I was waiting for other items to mix/chill/rise/etc I made a few other items this morning.
We were nearly out of bread (amazing.) I made a loaf of my honey high-hydration no-knead bread. This may be the prettiest loaf I have made. The slashes on top were well defined and kept the bread from blowing out anywhere else.
Oh, by the way, there are three-berry scones in the background. I like to freeze them, then on golf days take them from the freezer and snack on them on the course. They don’t seem to help my game, but do make it more enjoyable.
This time, I made the scones bigger than usual. I used some frozen berries we had (ever frugal) and had trouble incorporating them into the dough. They ended up being delicious!