Not often, but on rare occasion I have a baking disaster. Yesterday I wanted blueberry muffins and unfortunately used an old recipe. Apparently, there was a major error in the recipe as after two attempts I binned the results (along with the recipe) and headed to my go-to baker, Sally McKenny. (“Binned” is a term from GBBO where whatever didn’t work is tossed in the trash.)
I wisely turned to Sally’s blueberry muffin recipe and they were overwhelmingly endorsed by the QC Cadre. (For any who do not know, the QC Cadre is composed of a number of my neighbors who volunteered to sample and review my bakes.)
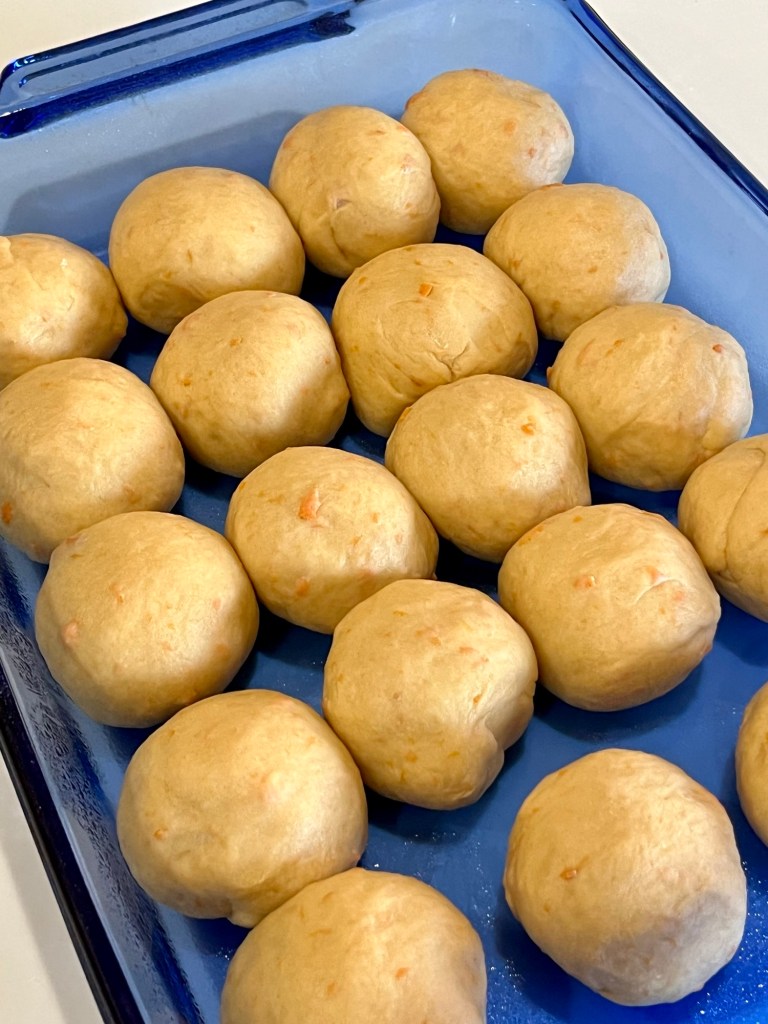
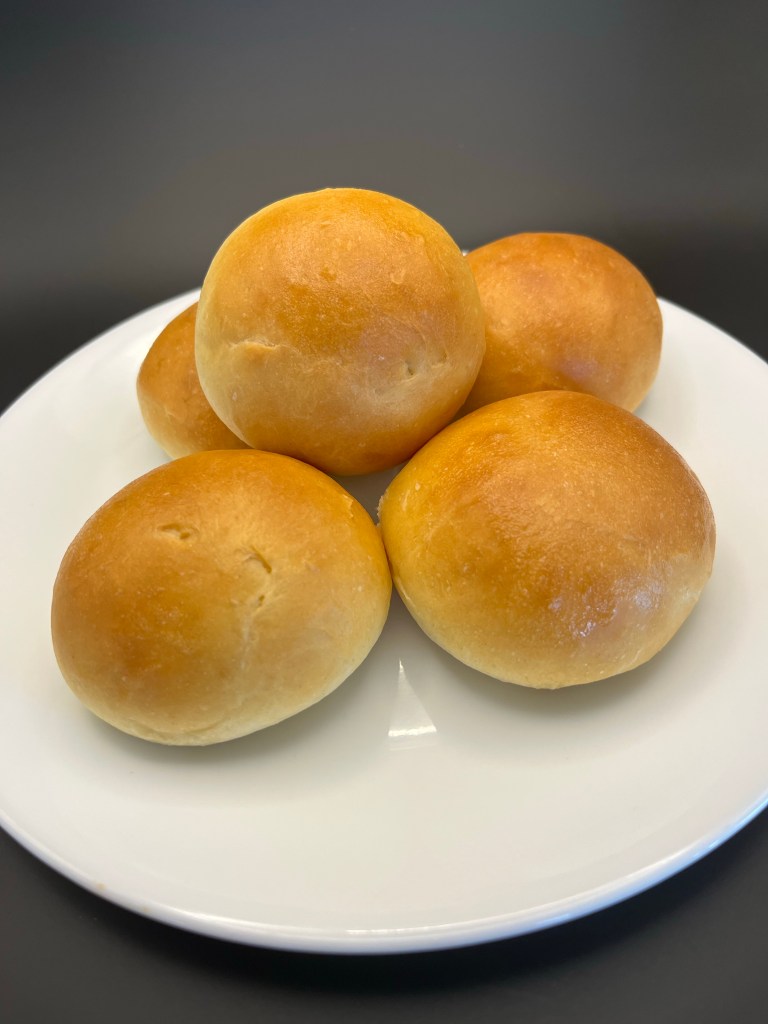
Sally’s Baking Addiction contest this week is the above mentioned Soft Sweet Potato Rolls. My usual dinner rolls are a tremendous hit, but I am willing to chance one for the contest.
I followed the instructions exactly as shown below.
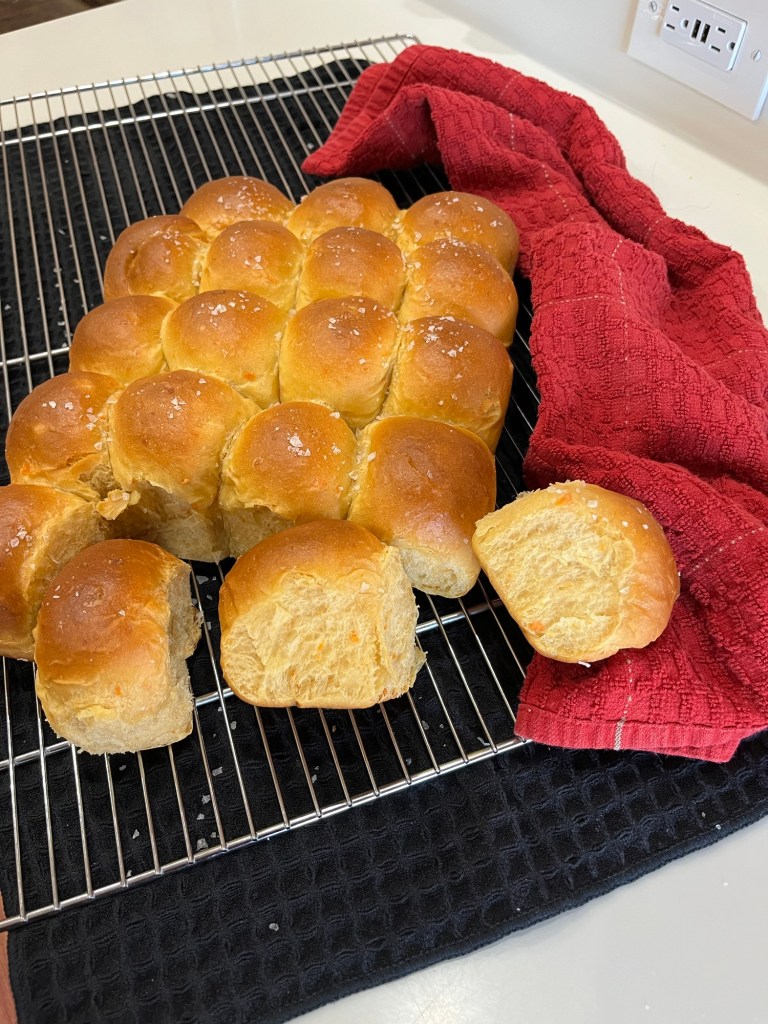
After QC and I sampled a roll each we agreed these are as exceptional and my standard rolls and they have the advantage of being sweet potato based and Thanksgiving is in a couple of week. LiG.
INGREDIENTS • 1 medium sweet potato, about 250–290g, peeled and chopped (to yield 1 cup mashed) • ¾ cup (180ml) whole milk, warmed to about 110°F (43°C) • 2 ¼ tsp instant dry yeast • 1/3 cup (113g) honey, divided • 2 large eggs, at room temperature • 5 Tbl (71g) unsalted butter, softened • 1 ¾ tsp salt • 5 ½ c (715g) bread flour* (spooned & leveled), plus more as needed • optional: 2 Tbl (28g) melted butter and flaky sea salt, for finishing
METHOD
Prepare the sweet potato: Place the chopped sweet potato in a medium saucepan and add enough water to cover. Bring to a boil over high heat, then reduce the heat to medium-high and boil until the sweet potato is very soft and tender, about 10–12 minutes. Drain off the water, then mash the sweet potato as well as you can—a few small lumps are okay. Measure 1 cup (230g) of mashed sweet potato to use in the dough, and set aside to slightly cool. (Do not use more than 1 cup in your dough. Discard or eat any leftover.)
Proof the yeast: Whisk the warm milk, yeast, and 2 Tablespoons of honey together in the bowl of your stand mixer. Cover and allow to sit for 5 minutes.
Make the dough: Add the remaining honey, eggs, butter, mashed sweet potato, salt, and 1 cup (125g) flour. With a dough hook or paddle attachment, mix/beat on low speed for 1 minute. Stop and scrape down the sides of the bowl with a silicone spatula, then add the remaining flour. Beat on medium speed until the dough comes together and pulls away from the sides of the bowl, about 3 minutes. If the dough seems too wet to a point where kneading (next step) would be impossible, beat in more flour 1 Tablespoon at a time until you have a workable dough. Don’t be nervous if you’re adding a lot more flour; there are a lot of variables such as moisture in the sweet potato, humidity, weather, etc. Dough should be soft and a little sticky, but still manageable to knead with lightly floured hands.
Knead the dough: Keep the dough in the mixer fitted with a dough hook and beat on low speed for an additional 5 full minutes, or knead by hand on a lightly floured surface for 5 full minutes. If the dough becomes too sticky during the kneading process, sprinkle 1 teaspoon of flour at a time on the dough or on the work surface/in the bowl to make a soft, slightly tacky dough. After kneading, the dough should feel soft and smooth. Poke it with your finger—if it slowly bounces back, your dough is ready to rise.
1st Rise: Lightly grease a large bowl with oil or nonstick spray. Place the dough in the bowl, turning it to coat all sides in the oil. Cover the bowl and allow the dough to rise in a relatively warm environment for 1–2 hours or until double in size. (I always let it rise on the counter. Takes about 1 and 1/2 hours.
Grease a 9×13-inch baking pan.
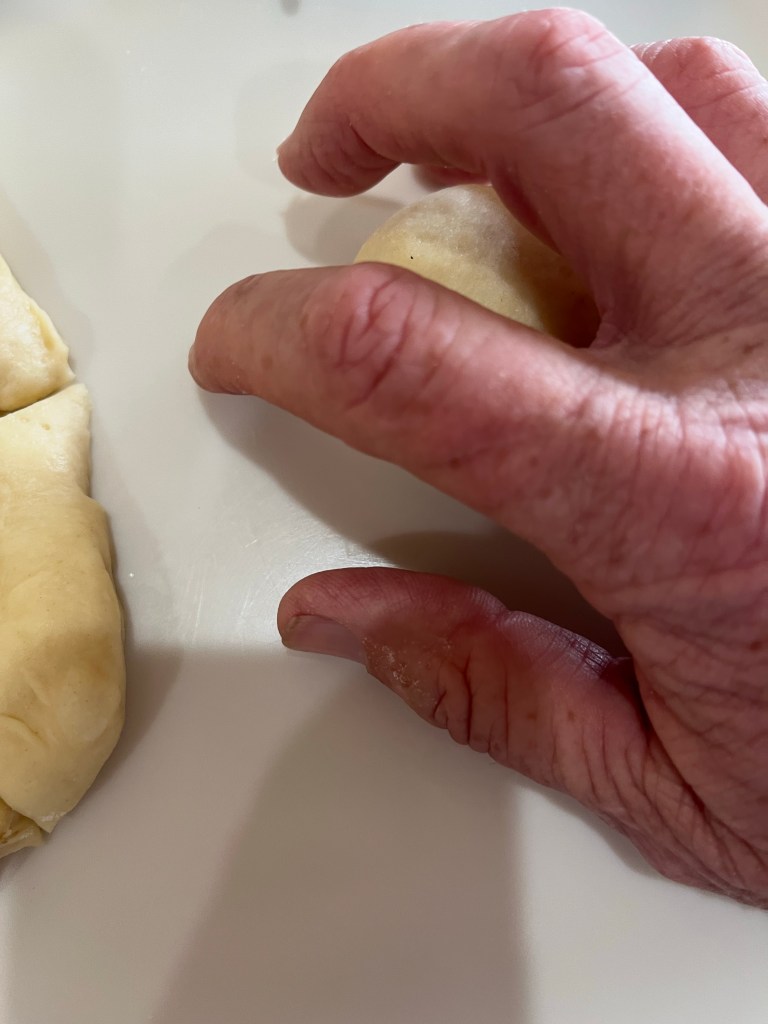
Shape the rolls: When the dough is ready, punch it down to release the air. Weigh the dough (~1370g) then divide the dough into 20 equal pieces (about ~68g each.) Shape each piece into a smooth ball. Arrange in prepared baking pan.
2nd Rise: Cover shaped rolls and allow to rise until puffy, about 30 to 45 minutes.
Adjust oven rack to a lower position and preheat oven to 350°F (177°C). (It’s best to bake the rolls towards the bottom of the oven so the tops don’t burn.)
Bake the rolls: Bake for 25 minutes or until golden brown on top (internal temperature if taken with an instant-read thermometer should be 190°F), rotating the pan halfway through. If you notice the tops browning too quickly, loosely tent the pan with aluminum foil (I usually add it after 20 minutes).
Remove from the oven, brush with melted butter and sprinkle with flaky sea salt. Allow rolls to cool for 15 minutes before serving. We’ve learned that the longer they cool, the better their flavor.
Cover leftover rolls tightly and store at room temperature for up to 3 days, or in the refrigerator for up to 1 week. Notes
Freezing Instructions: You can freeze the baked dinner rolls. Allow them to cool completely, then place them in a freezer-safe container or bag and freeze for up to 3 months. Thaw in the refrigerator or at room temperature, then reheat as desired. If reheating the whole pan, lightly cover and reheat in a 300°F (150°C) oven for about 10 minutes or until warm. If you are planning to freeze the baked rolls, omit the melted butter and flaky sea salt finishing step after baking, and instead do that after thawing and reheating.
Overnight Instructions: Prepare the recipe through step 7. Cover the shaped rolls tightly and refrigerate for up to about 15 hours. At least 3 hours before you need them the next day, remove the rolls from the refrigerator, keep covered, and allow to rise on the counter for about 1-2 hours before baking. Alternatively, you can let the dough have its 1st rise in the refrigerator overnight. Cover the dough tightly and place in the refrigerator for up to about 15 hours. Remove from the refrigerator and allow the dough to fully rise for 2 more hours. Continue with step 6.
Baking Pan: I prefer baking the rolls in a glass 9×13-inch baking pan because I find they brown a little too quickly in a metal pan. But as long as you bake the rolls on a lower oven rack and keep your eye on them, any pan is great. You can also bake these rolls in a large cast iron skillet, in two 9-inch round or square baking pans, or on a lined baking sheet. Bake time remains the same.
Can I Use Regular Potato? Yes. No other changes necessary.
Milk: Whole milk is ideal for the best, richest flavor and texture. Keeping that in mind, feel free to substitute with a lower-fat or nondairy milk.
Yeast: I always use instant yeast, but if you use active dry yeast, there are no changes to the recipe. Rise times will be slightly longer using active dry yeast. Reference my Baking with Yeast Guide for answers to common yeast FAQs.
Flour: If you don’t have bread flour, you can use all-purpose flour. All-purpose flour is convenient for most, but bread flour produces chewier dinner rolls. The rolls are still soft and fluffy no matter which you use. Either flour is fine and there are no other changes to the recipe if you use one or the other.
I gotta stop reading all those recipes on Facebook! It’s just they look so appetizing.😒
These french bread rolls are a basic bread dough, slightly enriched by 20 g of butter. They was easy to make and only required 2 1/2 hours of elapsed time and 30 minutes of hands on. Next time I may form the logs and batards a little longer. These were 6” and I think 7” might be better.
In any event, they were flavorful, had a good crust and crumb.
Dough • 380g AP flour • 10g Sugar • 7g Salt (1 ½ tsp) • 20g Unsalted butter • 210g Cold water
METHOD Starter
Mix 40g water with 7g yeast, stir to mix
Add 35g bread flour, mix thoroughly then cover and set aside for 20 minutes Bread dough
In a large bowl mix 380g AP flour and 10g sugar, mix thoroughly
Add 210g cold water, sponge from above, and mix thoroughly
Knead the dough in the bowl for 2-3 minutes
Add 7g salt and continue to knead/mix for 2-3 minutes
Cover and let rest 20 minutes
Transfer dough to a floured counter and spread into a thick rectangle
Spread 20g room temperature butter over the rectangle
Knead until smooth 8-10 minutes
Cover and rest 20 minutes
Transfer to a floured counter and divide into 6 equal parts, each ~120g
Spread into a rough circle 5-6” diameter. Fold edges to center in 6 places, fold together and form a ball.
Roll ball against the counter with an open cupped hand to tension the surface
Roll into an oval log ~ 5×2”, cover and rest 20 minutes
Flatten log and roll into an oval ~ 4×7”. Starting at the furthest short end fold the “shoulders” inward toward the center, followed by folding the top center down to meet the folded shoulders. Repeat until fully rolled up
Pinch the seams, including the ends tightly together, roll back and forth under a cupped hand to tension the surface
Rest until doubled in size
Score each batard with a razor, lame or sharp knife. One long cut the length of the batard with a very slight curve
During our “Springsteen Concert Tour” we stopped at a Logan’s Roadhouse for a meal. (We love roadhouse rolls.) Logan’s rolls are formed into round, buttery, enriched rolls, while Texas Roadhouse rolls share the same characteristics but are formed as squares. I opted for round.
In a compromise I rolled the dough into a rectangle, 12” x 8”, and cut it into 24 pieces (6×4). I then rolled each into a sphere using the same technique I used to make dinner rolls. (Place the roll on a barely floured surface, cup you hand over it and roll in a circulate motion until it forms a nice ball and there are no creases.
The taste was spot-on, but QC felt they weren’t as light and fluffy as the commercial roadhouse rolls. Next time I will make the dough a slightly higher hydration and perhaps proof a little longer. Any other suggestions are welcome!
Roadhouse Rolls
INGREDIENTS • 1 (2 ¼ tsp) packet packet active dry yeast • 1 ¼ c. warm milk (about 105-110 degrees F) • ⅓ c. granulated sugar • ¼ c. unsalted butter room temperature, (½ stick) • 1 large egg room temperature • 1 tsp kosher salt • 3 ½ – 4 c. all-purpose flour plus more for kneading • 3 Tbsp unsalted butter melted
METHOD
In your stand mixer bowl, add milk and sugar, sprinkle yeast over it.
Let the yeast set until foamy, about 5 minutes.
Then add ¼ cup butter, egg, salt and 2 cups flour to the yeast mixture. Beat on medium speed until batter is smooth.
Gradually add flour until soft ball of dough forms. Then increase speed on mixer to medium high and beat for 2-3 minutes longer. Dough should be tacky, but not sticky. If too sticky, add more flour 1 tablespoon at a time.
Lightly grease large bowl and place dough in ball, turning once to coat. Cover the bowl with clean dish towel and set in warm place to rise until doubled in size, about 45-60 minutes.
Punch the dough down dough gently. Lightly flour the work surface and turn dough out of bowl. Knead lightly if necessary.
Let set a few minutes while you prepare the baking sheets with a silicone mat or by spraying with non-stick cooking spray.
Roll dough out to 12×8 inch rectangle, ½ inch thick.
Cut the dough into even pieces using a pizza cutter so you have 24 pieces of dough. It’s optional to roll the squares into spheres if you like.
Transfer rolls to prepared baking sheets, separated by at least 1”. Cover with dish towel and let rise in a warm place until almost doubled in size, about 45-60 minutes.
20 minutes prior to rising being done, preheat oven to 350 F.
Place the rolls in the preheated oven at 350 F. Bake rolls for 12-15 minutes or until golden brown.
So, what do you do as you are waiting for your dinner rolls to proof? Well, If you have an 11 pound bag of chocolate, 60 pieces of 1”x1” caramel, making salted chocolate covered caramels is a good way to pass the time.
I cut the caramels a day ago, tempered the chocolate, dipped and drained the coated caramel and sprinkled some Maldon flaked sea salt on each.
The chocolates were setting as the first proof of the rolls completed. The proofed dough weighed 1,553 grams, so to make 24 rolls, each had to weigh about 63 g. I weighed each, formed them into a small ball and rolled them on the counter to tension the surface of the roll.
I arranged them 4×6 in a glass baking tray and baked at 375 deg until the internal temperature was 180 deg. (about 20 min.) Once out of the oven, a light brush with melted butter and boom. Excellent dinner rolls! The recipient and methods for both the dinner rolls and chocolates are found elsewhere in this blog.
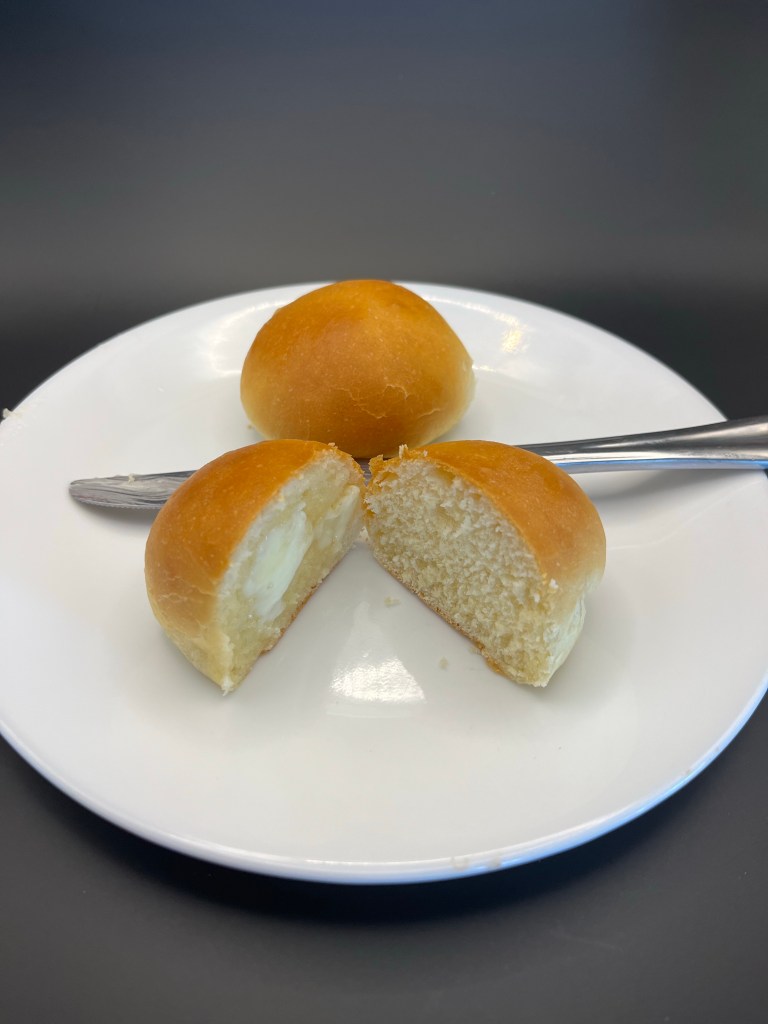
I am sure most of you are experts at making and baking Parker House Rolls, but I saw a recipe from KAB a week before Thanksgiving and thought I would give them a try.
Making the enriched dough is pretty standard, although this recipe calls for 50g of potato flour. Substituted in any yeast bread potato flour increases the moisture content. Along with the egg and milk this results in a smoother enriched dough than you would expect from 55% hydration bread. (100* weight liquid/weight flour.)
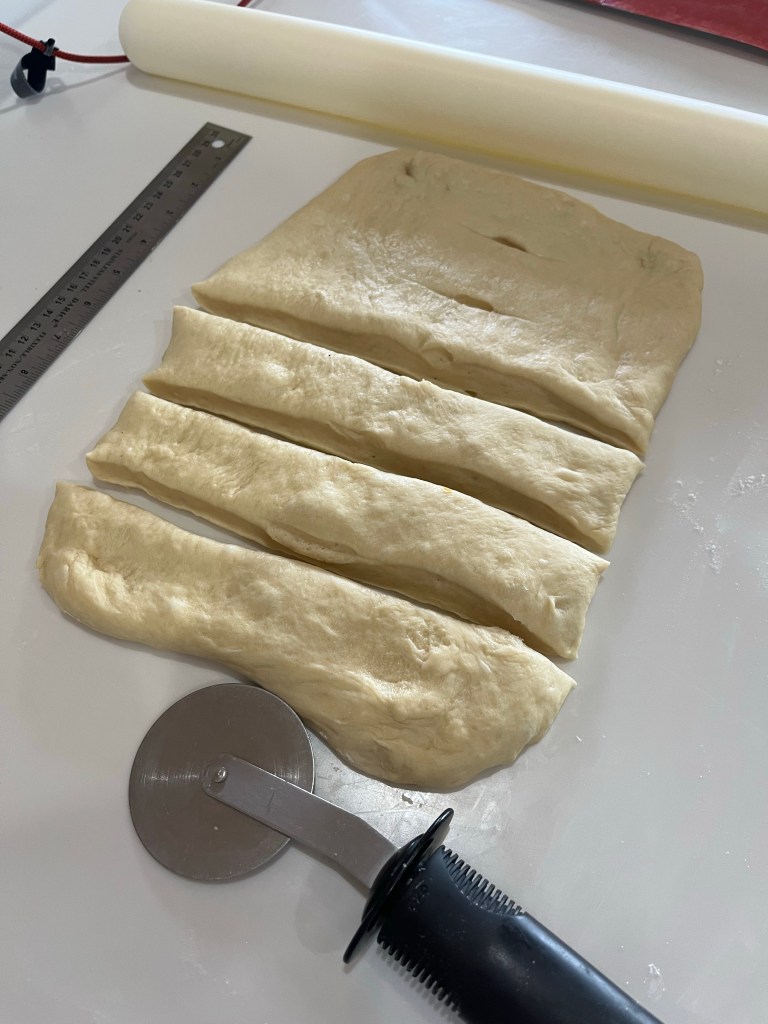
Forming the rolls is what makes the Parker House Rolls distinctive. The dough is rolled out, folded and cut into 3” portions. (See METHOD below for exact steps.) Butter painted onto the inside of the rolled dough, plus the additional butter coating the finished product after baking makes these moist, tender and very buttery. Easy to do and delicious.
Cut lengthwise and folded
Measured and cut
Finished cutting
In the pan, loose edge down
Finished Rolls
Parker House Rolls
INGREDIENTS • 3 cups (361g) King Arthur Unbleached All-Purpose Flour • 2 ½ teaspoons instant yeast • 3 tablespoons (39g) sugar • 1 ¼ teaspoons salt • ¼ cup (50g) potato flour or 3/4 cup (50g) dried potato flakes • 3 tablespoons (43g) butter • 1 cup (227g) milk • 1 large egg • 3 ½ to 4 tablespoons (50g to 57g) butter, melted; for brushing on rolls
METHOD
In a large mixing bowl, or in the bowl of an electric mixer, combine all of the ingredients (except the 3 ½ to 4 tablespoons (50 to 57g) melted butter at the end), mixing to form a shaggy dough. Note: to speed the rising process, whisk together the milk and egg, and heat gently just enough to remove the refrigerator chill; then add to the remaining ingredients.
Knead the dough, by hand (10 minutes) or by machine (7 to 8 minutes) until it’s smooth.
Place the dough in a lightly greased bowl or 8-cup measure (so you can track its rising progress). Allow it to rise for 90 minutes; it’ll become quite puffy, though it probably won’t double in bulk. Note that the dough takes quite awhile to get going; after 1 hour, it may seem like it’s barely expanded at all. But during the last half hour, it rises more quickly.
Transfer the dough to a lightly greased work surface. Divide it in half. Working with one half at a time, roll or pat the dough into an 8″ x 12″ rectangle.
Brush the dough all over with a light coating of the melted butter. You’ll have butter left over; you’ll need it for the other half of the dough, as well as for brushing on top of the baked rolls.
Cut the dough in half lengthwise, to make two 4″ x 12″ rectangles. Working with one rectangle at a time, fold it lengthwise to about ½” of the other edge, so the bottom edge sticks out about ½” beyond the top edge. You’ll now have a rectangle that’s about 2 ¼ ” x 12″. Repeat with the other piece of dough.
Cut each of the rectangles crosswise into four 3″ pieces, making a total of 8 folded rolls, each about 2 ¼” x 3″. Flip the rolls over (so that their smooth non-folded side is facing up), and place them in a lightly greased 9″ x 13″ pan. Repeat with the remaining piece of dough, making 16 rolls in all. You’ll arrange 4 rows of 4 in the pan, with the longer side of the rolls going down the longer side of the pan. Gently flatten the rolls to pretty much cover the bottom of the pan.
Cover the pan, and let the rolls rise for about 45 minutes to 1 hour, until they’re puffy but definitely not doubled. Towards the end of the rising time, preheat the oven to 350°F.
Bake the rolls for 20 to 25 minutes, until they’re golden brown and feel set.
Remove them from the oven, and brush with the remaining melted butter. Pull them apart to serve.
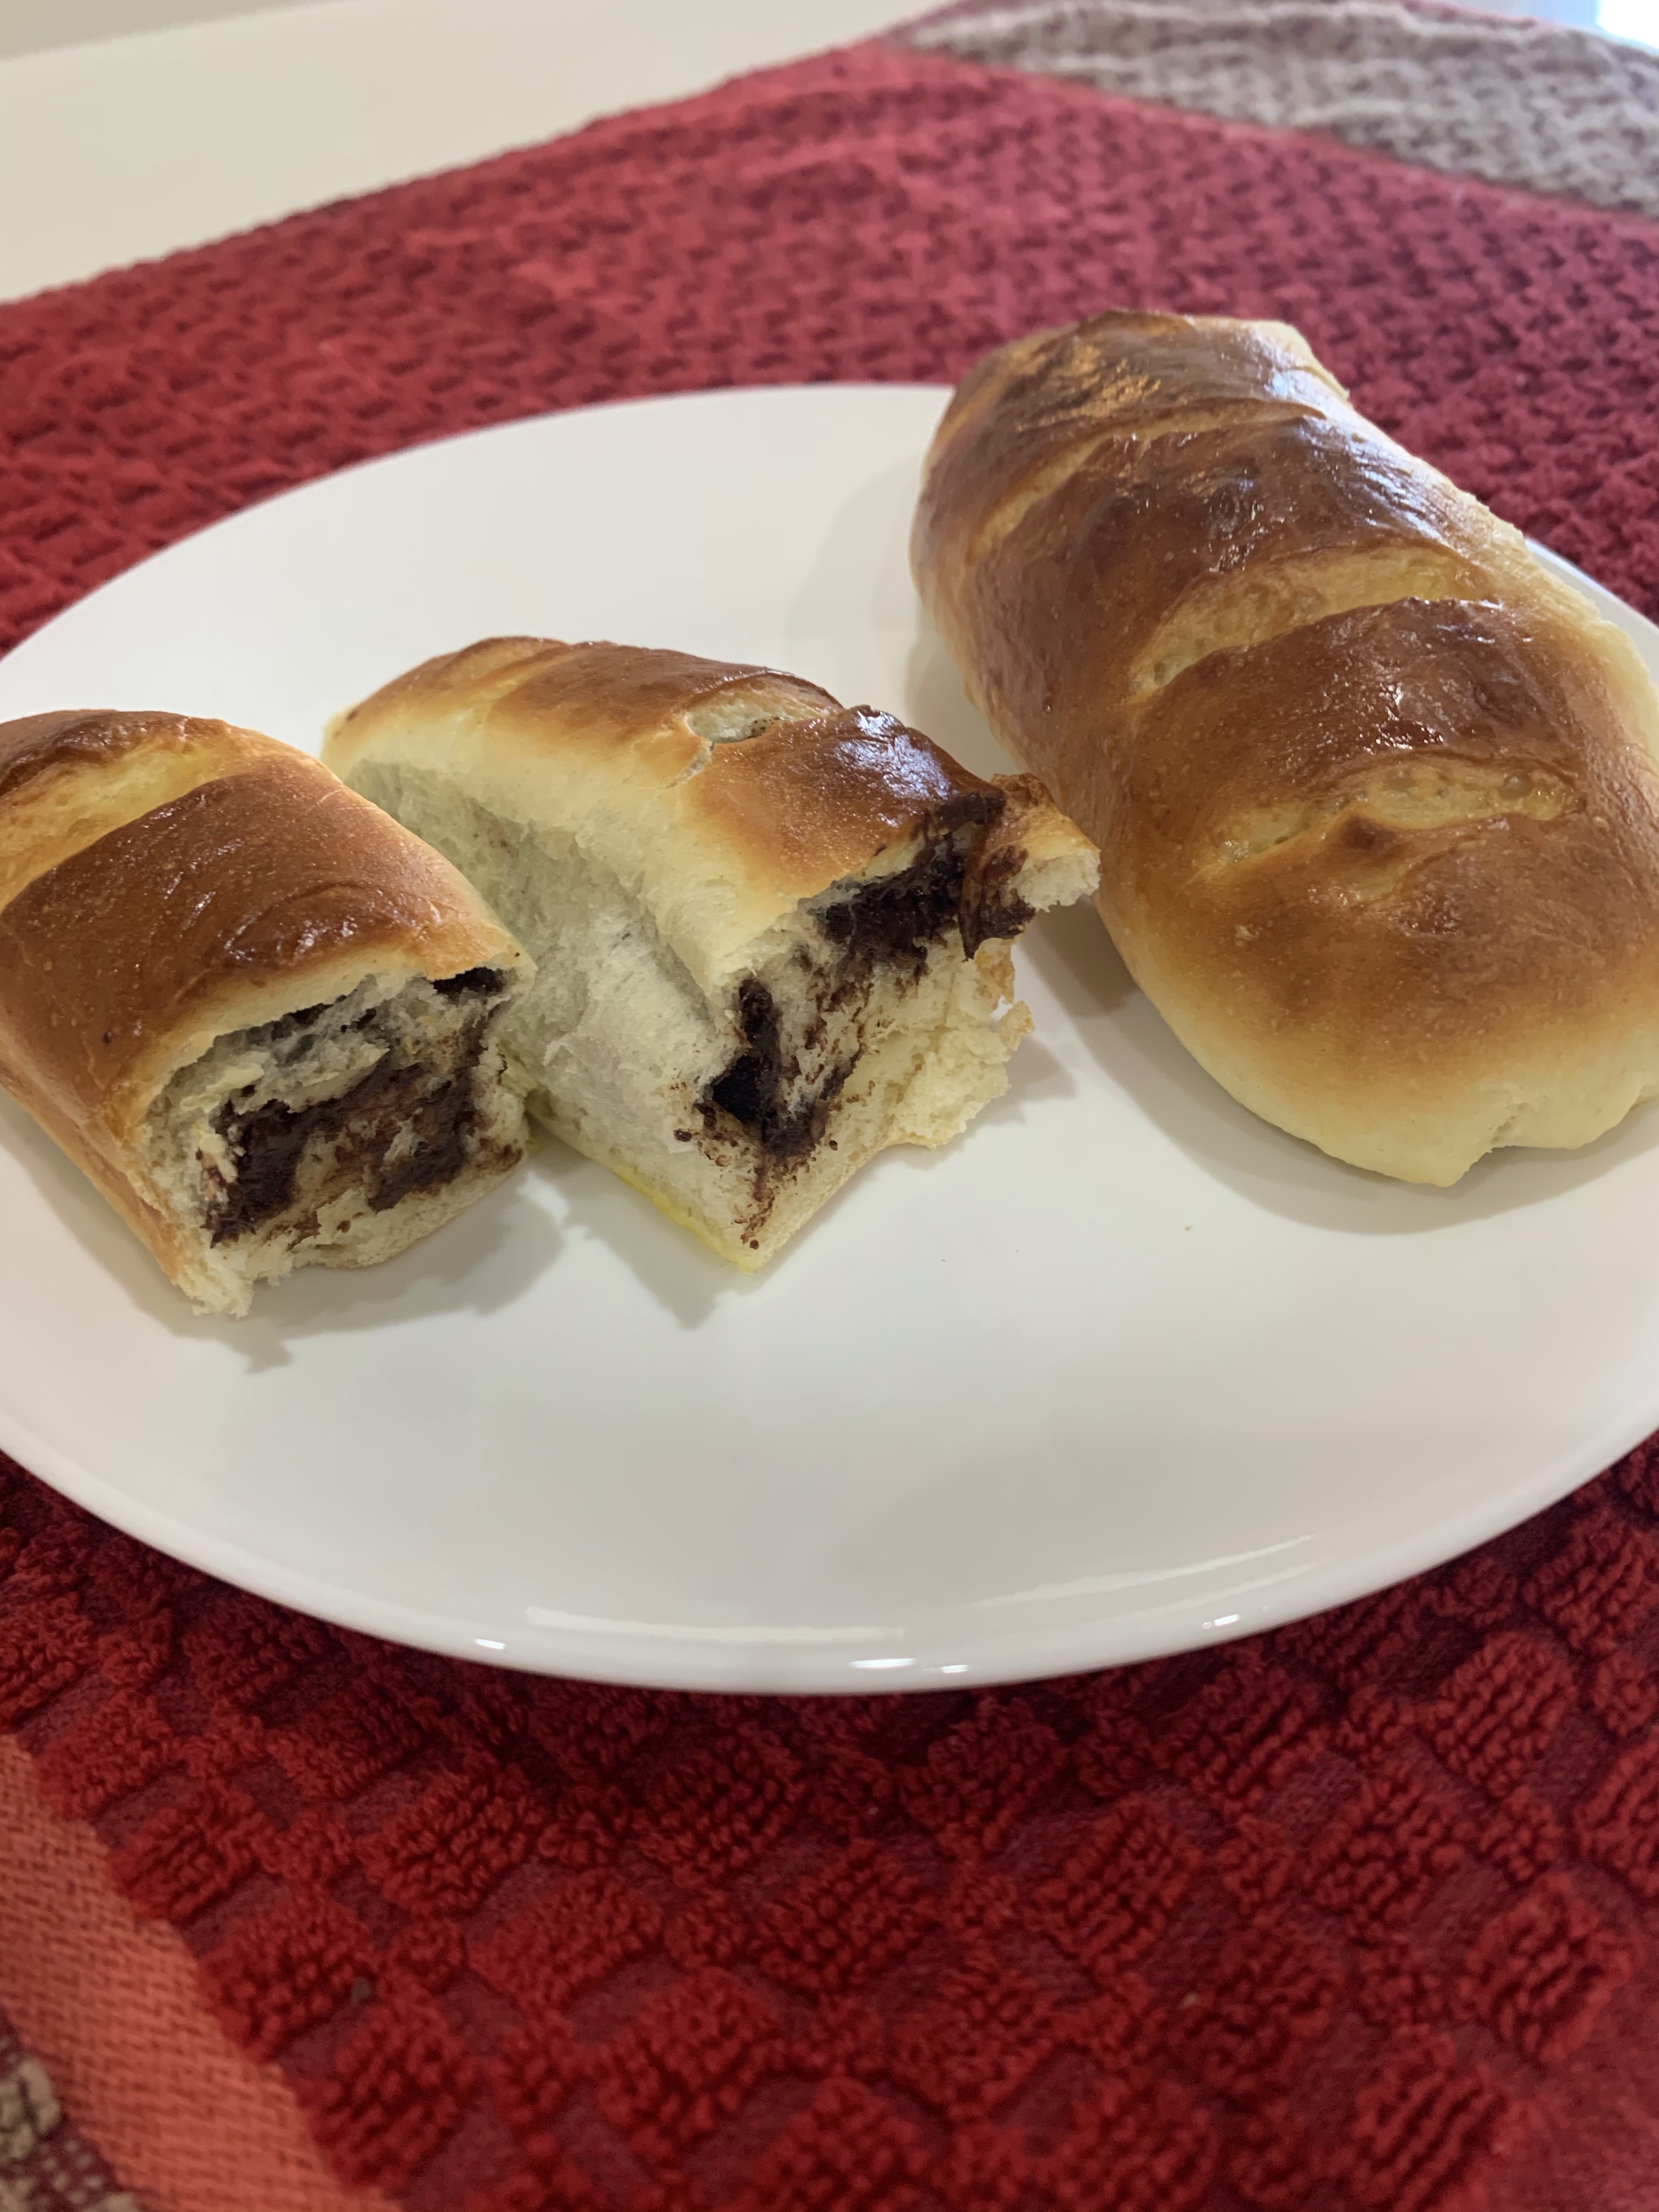
I saw a picture of an elongated bread roll, like a hot dog roll, but slashed with a lame and the slashes were filled with lemon curd before baking. Well, I couldn’t find the recipe so decided to create my own. This is the first time I have stepped out of my chemist-trained-recipe-following comfort zone.
I also decided, since I don’t really care for lemon curd, I would instead roll chocolate ala pain au chocolat but using an enriched bread dough instead of puff pastry. This was also an excuse to use some of the 11# of chocolate I bought a couple of weeks ago.
Finished Roll
Fresh From Oven
Rolled Dough
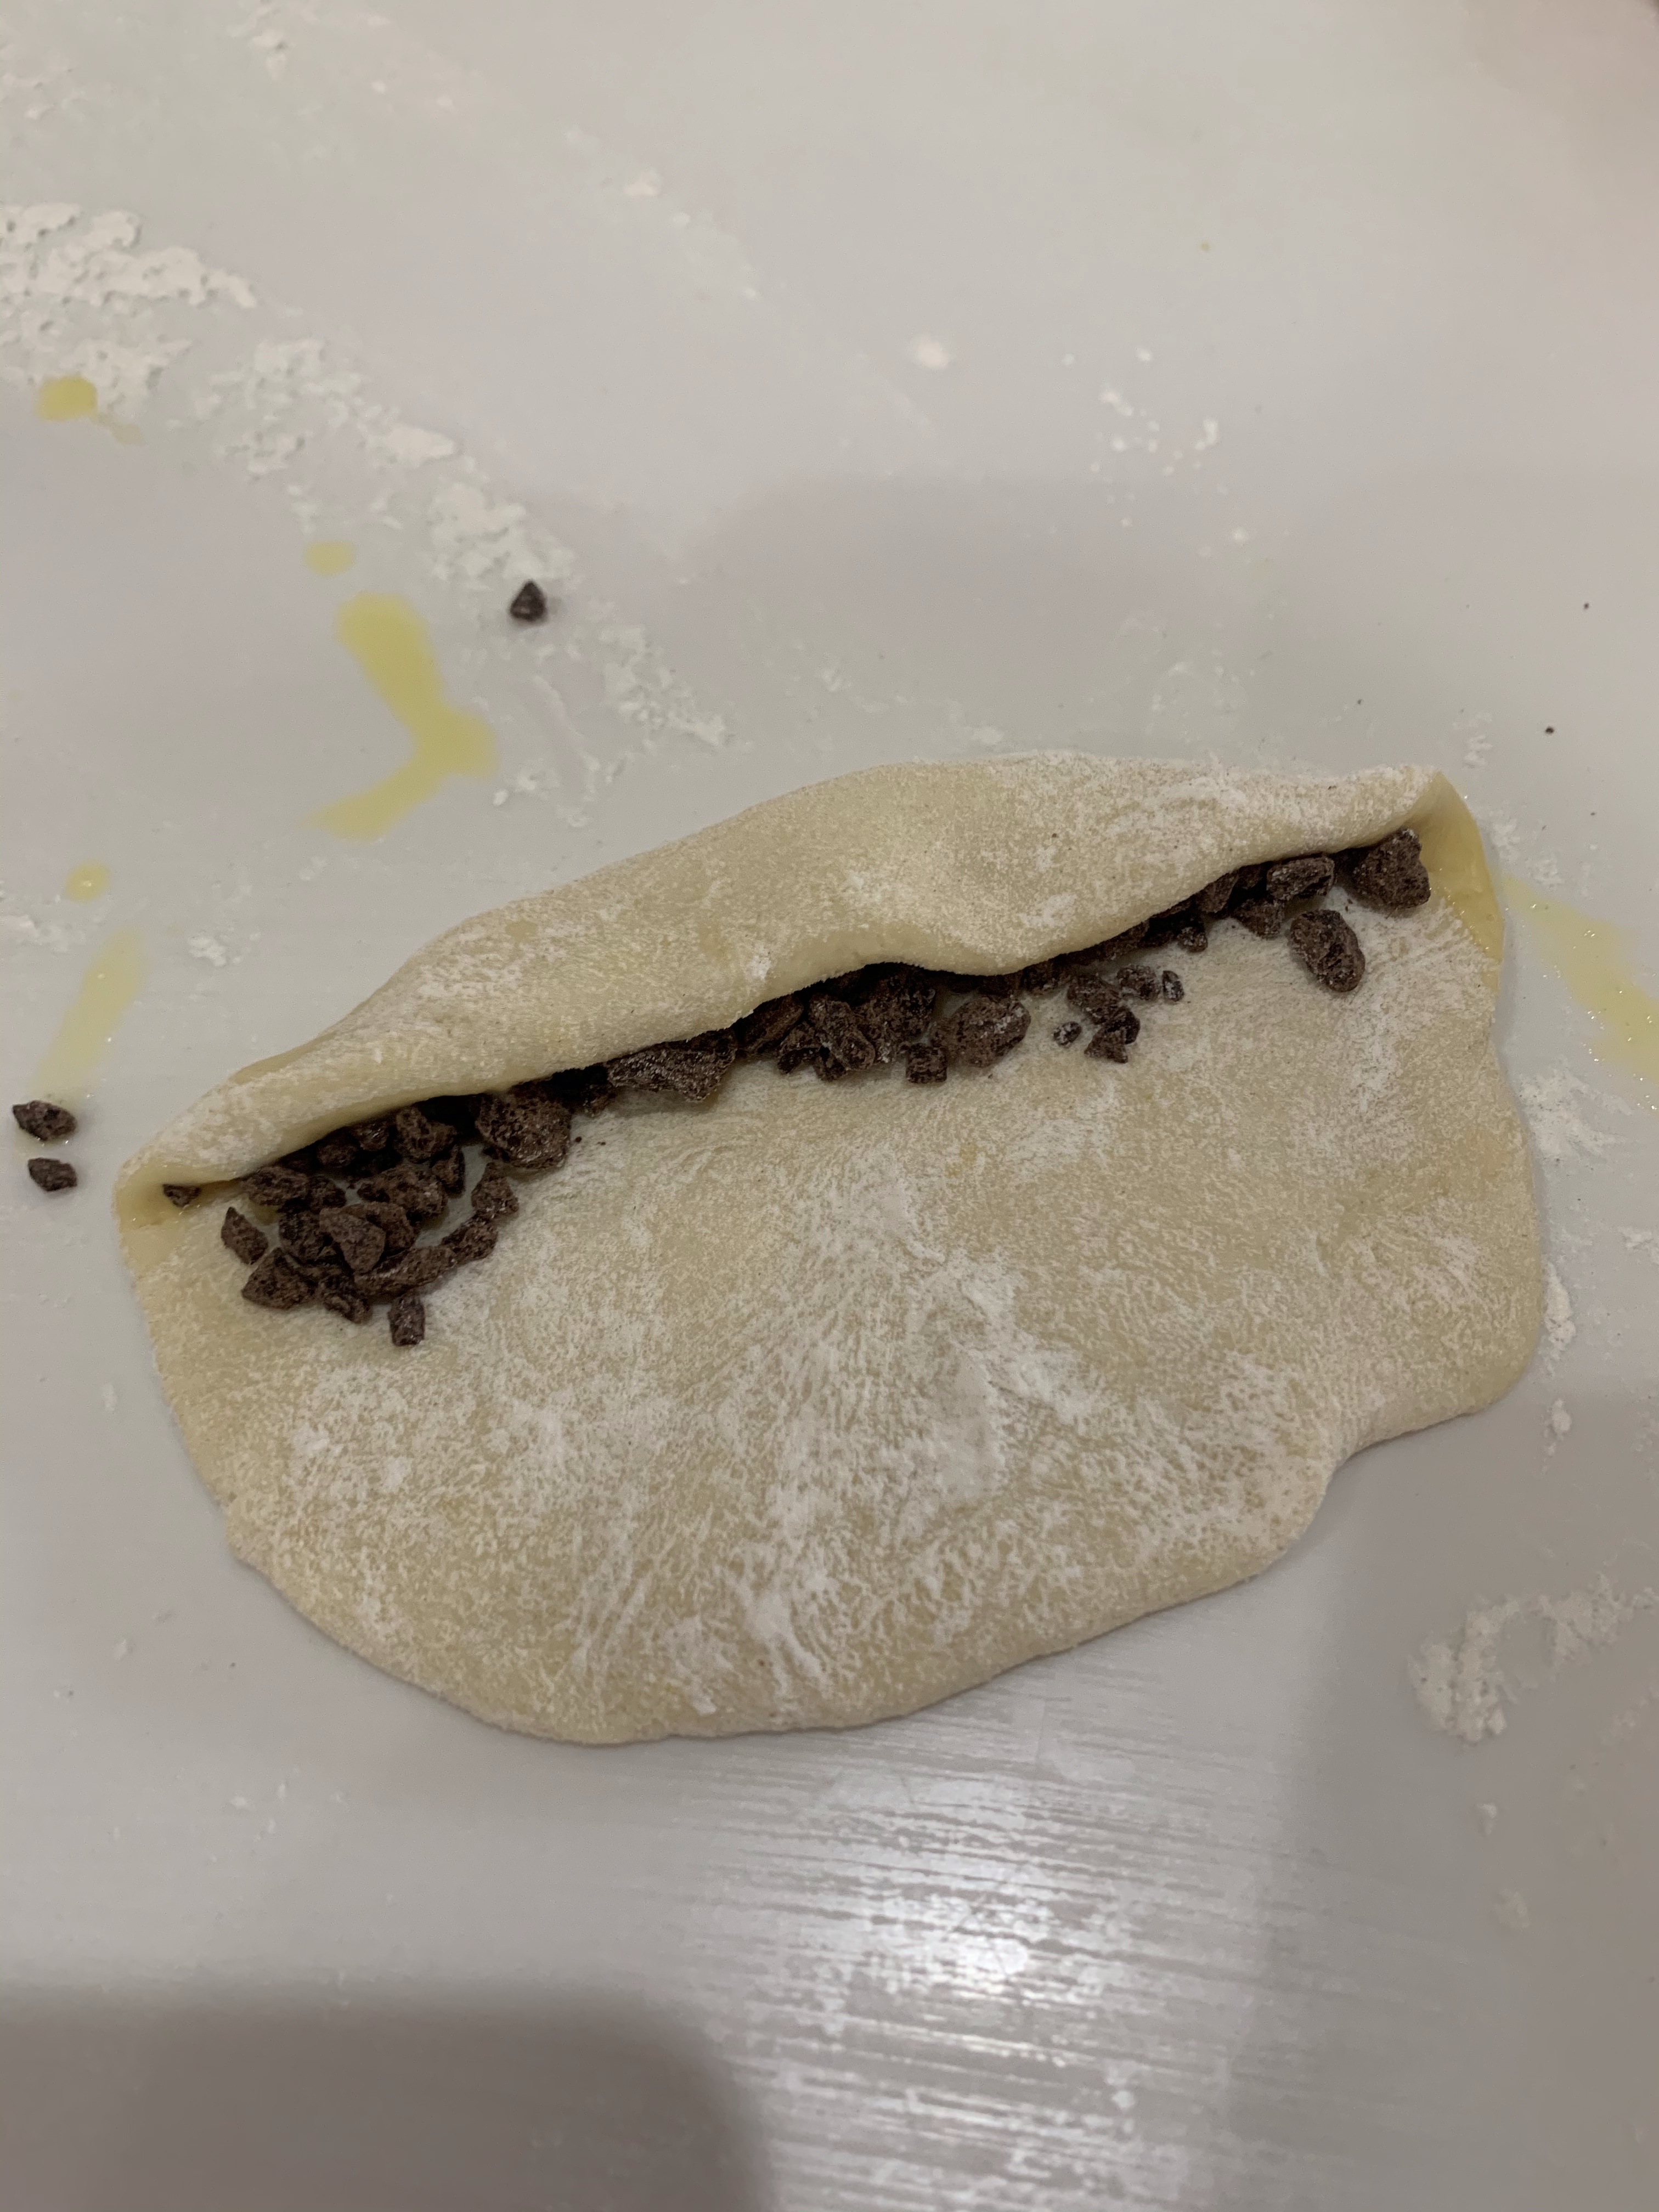
1st Stripe of Chocolate
Rolled over Chocolate
Ready for Fridge
Ready for Oven
The photos more or less follow the method below.
The QC department suggested a less bitter chocolate (64% cacao) and sparkling sugar topping (good suggestion.) QC will have to live with 64% as I do have 11 pounds. Manufacturing suggested no chop the chocolate so small. Something the size of chocolate chips should melt fine and be easier to handle.
Chocolate Filled Bread Buns
INGREDIENTS • 2 teaspoons active dry yeast • 1 cup barely warm milk • 3 cups all-purpose flour • 2 tablespoons butter, melted • 3 tablespoons sugar • 1 teaspoons salt • 2 eggs, one for dough, one for egg wash • 1 tablespoon orange zest • 165g, about 1 cup (4-6 ounces) bittersweet chocolate chopped fine (pulse in a food processor)
METHOD
In a large mixing bowl, sprinkle the yeast over the warm milk and let sit for 5 minutes.
Add 2 tablespoons melted butter, sugar, salt, egg, and orange zest. Stir until blended and fragrant.
Add 3 cups of flour and mix until the dough comes together. It will be sticky! On a lightly floured surface knead the dough until soft and elastic (about 8 minutes), adding more flour to keep the dough from sticking if necessary. Do not add too much flour! The dough will become more workable the longer you knead. Or, if you have a standing mixer, knead the dough with the dough attachment for 5-7 minutes, or until elastic.
Transfer the kneaded dough to a lightly oiled bowl. Cover with plastic wrap and a clean kitchen towel. Let the dough rise in a warm area until it doubles in size, about 2 hours.
Punch dough down, divide into 12 equal portions, and shape each portion into a round ball. Flatten into an oval then roll to ¼ “ thick rectangle.
Place a stripe of chocolate ½ “ from long end of rectangle. Roll to cover chocolate and place a second stripe of chocolate. Roll up and seal edges and all seams.
Place rolls a on baking sheet coated lightly with cooking spray. Cover with a kitchen towel and let it rise for another 20 minutes.
Preheat oven to 400 degrees F.
Slash diagonally 4x with lame.
Brush 1 egg wash over the rolls. Sprinkle with coarse sparkling sugar.
Bake for 8-12 minutes or until lightly browned. Serve warm or at room temperature.
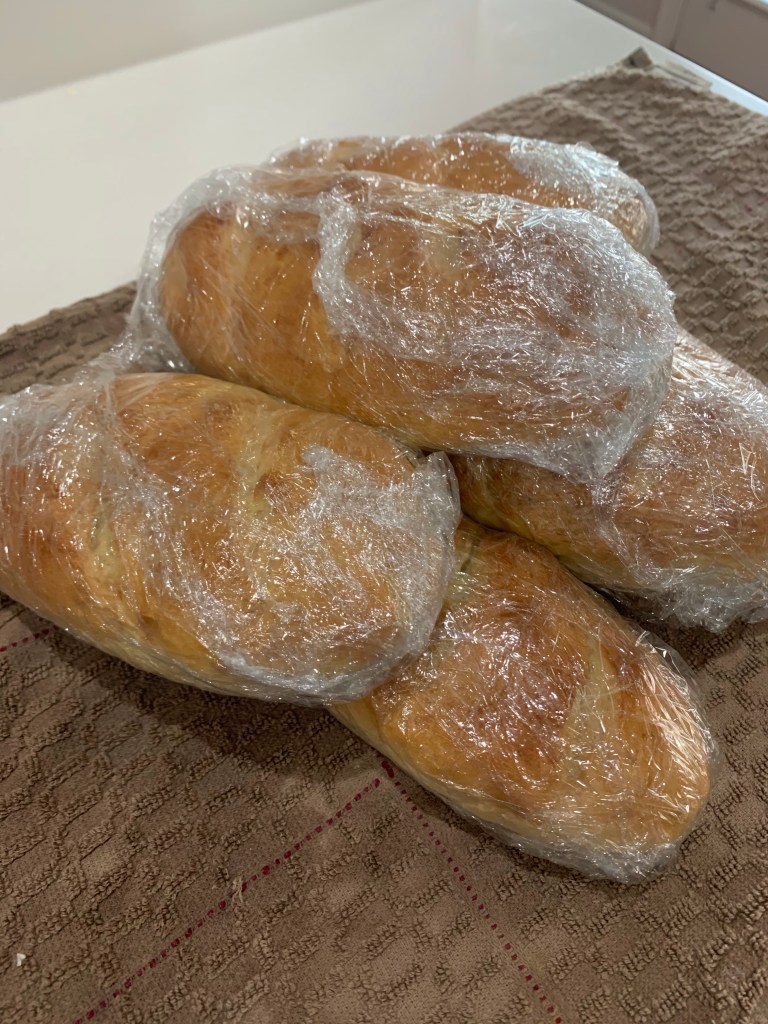
This morning’s Pain Au Chocolat required a couple of hours in the fridge before baking. We needed another batch of hoagie, or sub or grinder rolls after finishing what we had with steak sandwiches last night, and I had time. I also had time for another loaf of honey white bread. Busy morning!!
These are outstanding rolls and I am lucky to have stumbled across the recipe a month or so ago. I wrapped them for freezing before taking a picture so decided to photograph them as wrapped for the freezer. I double wrap them, then give them a couple of hours to thaw before using. After a month, or more, in the freezer, after thawing, they are as fresh as just baked.
Hoagie Rolls
INGREDIENTS • 448-512g (3½ – 4) c. bread flour • 308-355 g (1¼ cups plus 2 Tbl – 1½ c.) warm water (110-115F degrees) • 2 Tbl sugar • 2¼ tsp instant yeast • 1 tsp kosher salt • 4 Tbl cold butter, cubed METHOD
Using a stand mixer fitted with the dough hook, mix 2 cups of flour, water, sugar, and instant yeast on low for 4 minutes.
Add the salt and 1 cup at a time of the remaining flour and mix for 5-6 minutes until the dough is slack. (Slack dough is fluid but not liquid. Poured onto a board it could not be shaped. It would flow and not hold a shape.)
At this point, your mixer should be at medium speed. If your dough, after 5-6 minutes is not slack add in a bit more water (2-4 Tbl). The additional water will fully depend on how humidyour room is.
Add the butter 1 Tbl at a time and mix until almost fully blended before adding the next Tbl. In total, mix for 1-3 minutes or until the dough comes back together. Remove from bowl and transfer to a greased, covered bowl until doubled in size. ~1 hour.
Punch the dough down and place on a very lightly floured board. Divide into 4-8 pieces and shape. I would advise using as little flour as possible when shaping these. The more flour you add, the tougher the hoagies will be. (Hoagie rolls: 125 g, Hamburger rolls: 75g)
When you divide the dough, with your fingers, gently pat into a 4:3 rectangle where the dough is about 1/4″ thick.
Envelope fold the short end of the rectangle towards the center and press gently to seal.
Rotate the dough 180 degrees and repeat the above folding using your hand to seal the dough.
The dough should be shaped like a log/snake. Gently cup your hand over the center of the dough and, without applying pressure/pressing down, gently roll the dough back and forth to reinforce the seal and roll it out into a log.
Carefully pull the ends of the log outwards to stretch out dough (just an inch or so – again dependent on how long you want your rolls).
To help round out the ends, cup each hand at the end of the roll and move them in opposite directions with a back and forth motion to roll the ends and then tuck underneath the roll.
Transfer to a parchment lined tray and cover with lightly sprayed plastic wrap. Allow to rise again until almost doubled. ~30-45 minutes. Do NOT overproof them otherwise they will fall flat.
Preheat oven to 375 F. If you want to slash your bread, using a lame, make your slashes. If desired, brush with coating of choice and bake for 16-23 minutes or until golden brown. To ensure doneness, test the internal bread temp. It should be at 200F.