Unknown's avatar

About Dave Oney

Dave Oney was born mid last century in Middlebury, Vermont. He received his BS in Chemistry and worked as a polymer chemist in Massachusetts and New Jersey. He became a microscopist (someone who studies little bitty things using a microscope) and photomicrographer (someone who photographs little bitty things) before settling into a 35-year career in technical sales of scientific imaging equipment (the science of digitally recording itty bitty things, sending the image to a computer for analysis.) He designed and created a number of products contributing to this field. He is (was) proficient in several computer languages and is currently working on mastering English. After making a few more paradigm shift career changes Dave and his wife, Fran, retired and moved closer to their children and granddaughters and now live in the foothills of the Sierra Nevadas.

First Birthday

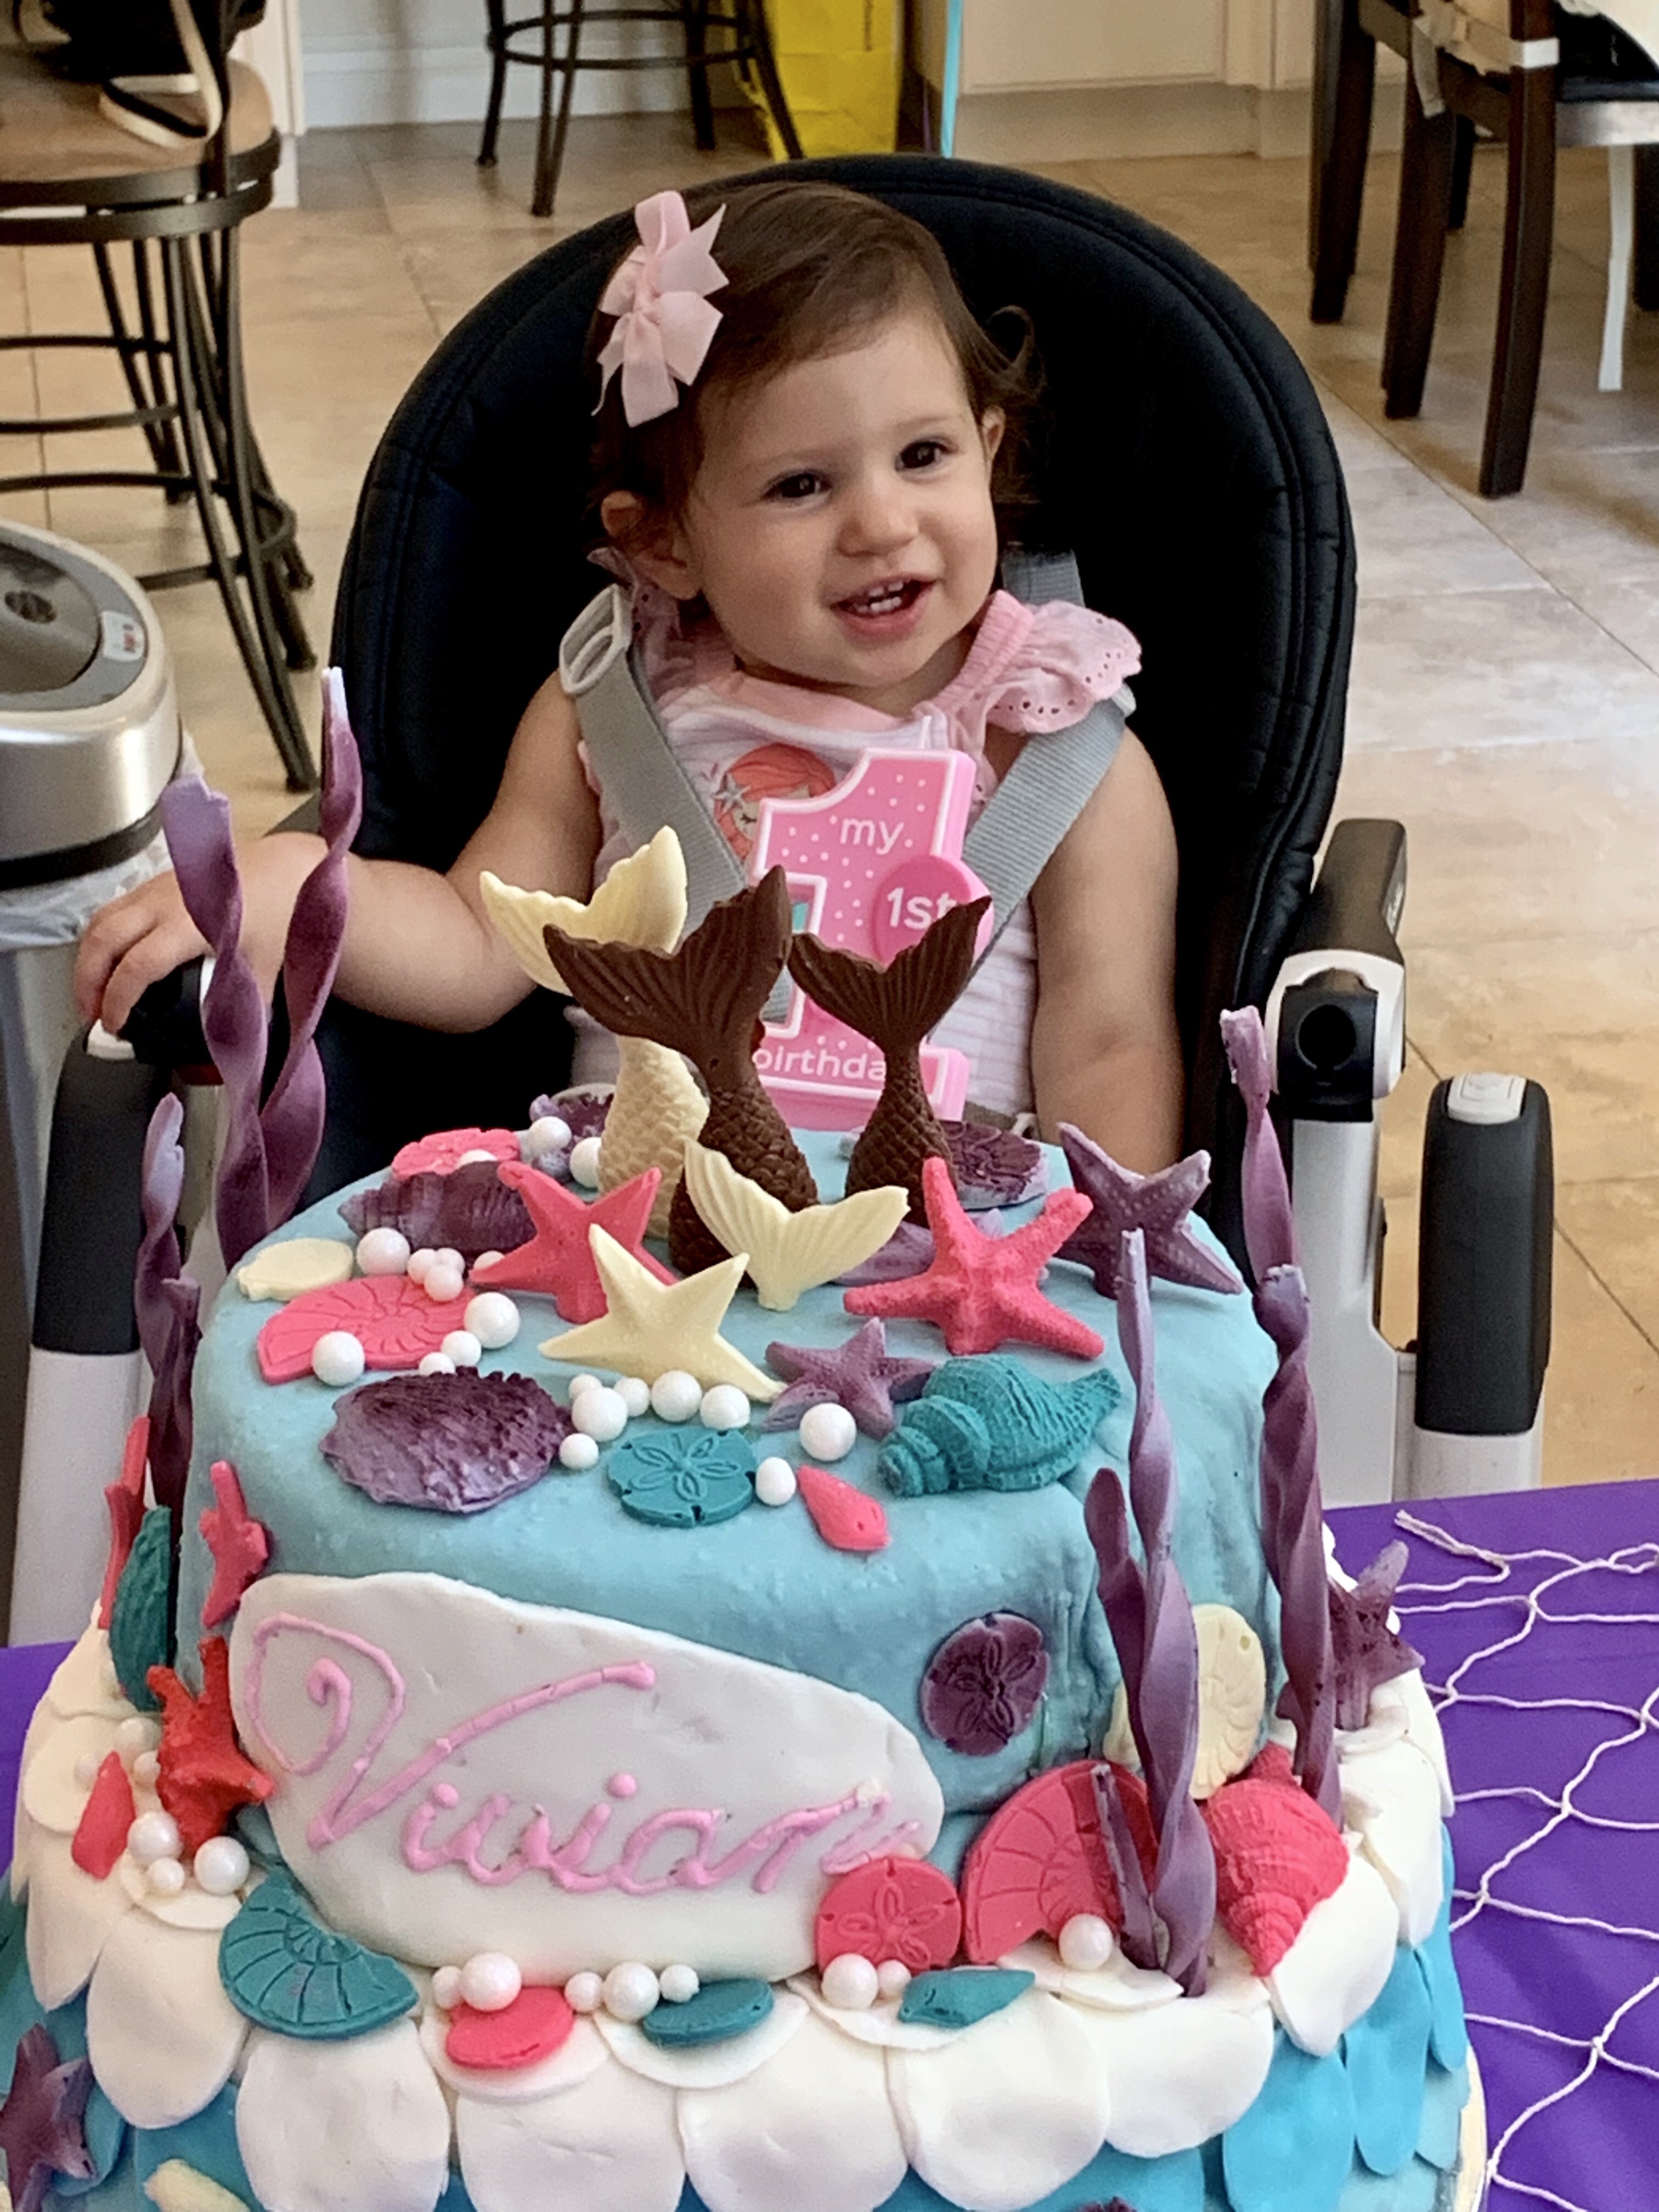
Well, I was all set for Vivian’s first birthday party on August 10, but due to typical one year old circumstances, it was postponed until today, August 25. This offered no problems, rather a whole new opportunity to perfect (maybe too strong a word) a mermaid themed birthday cake for Vivian.

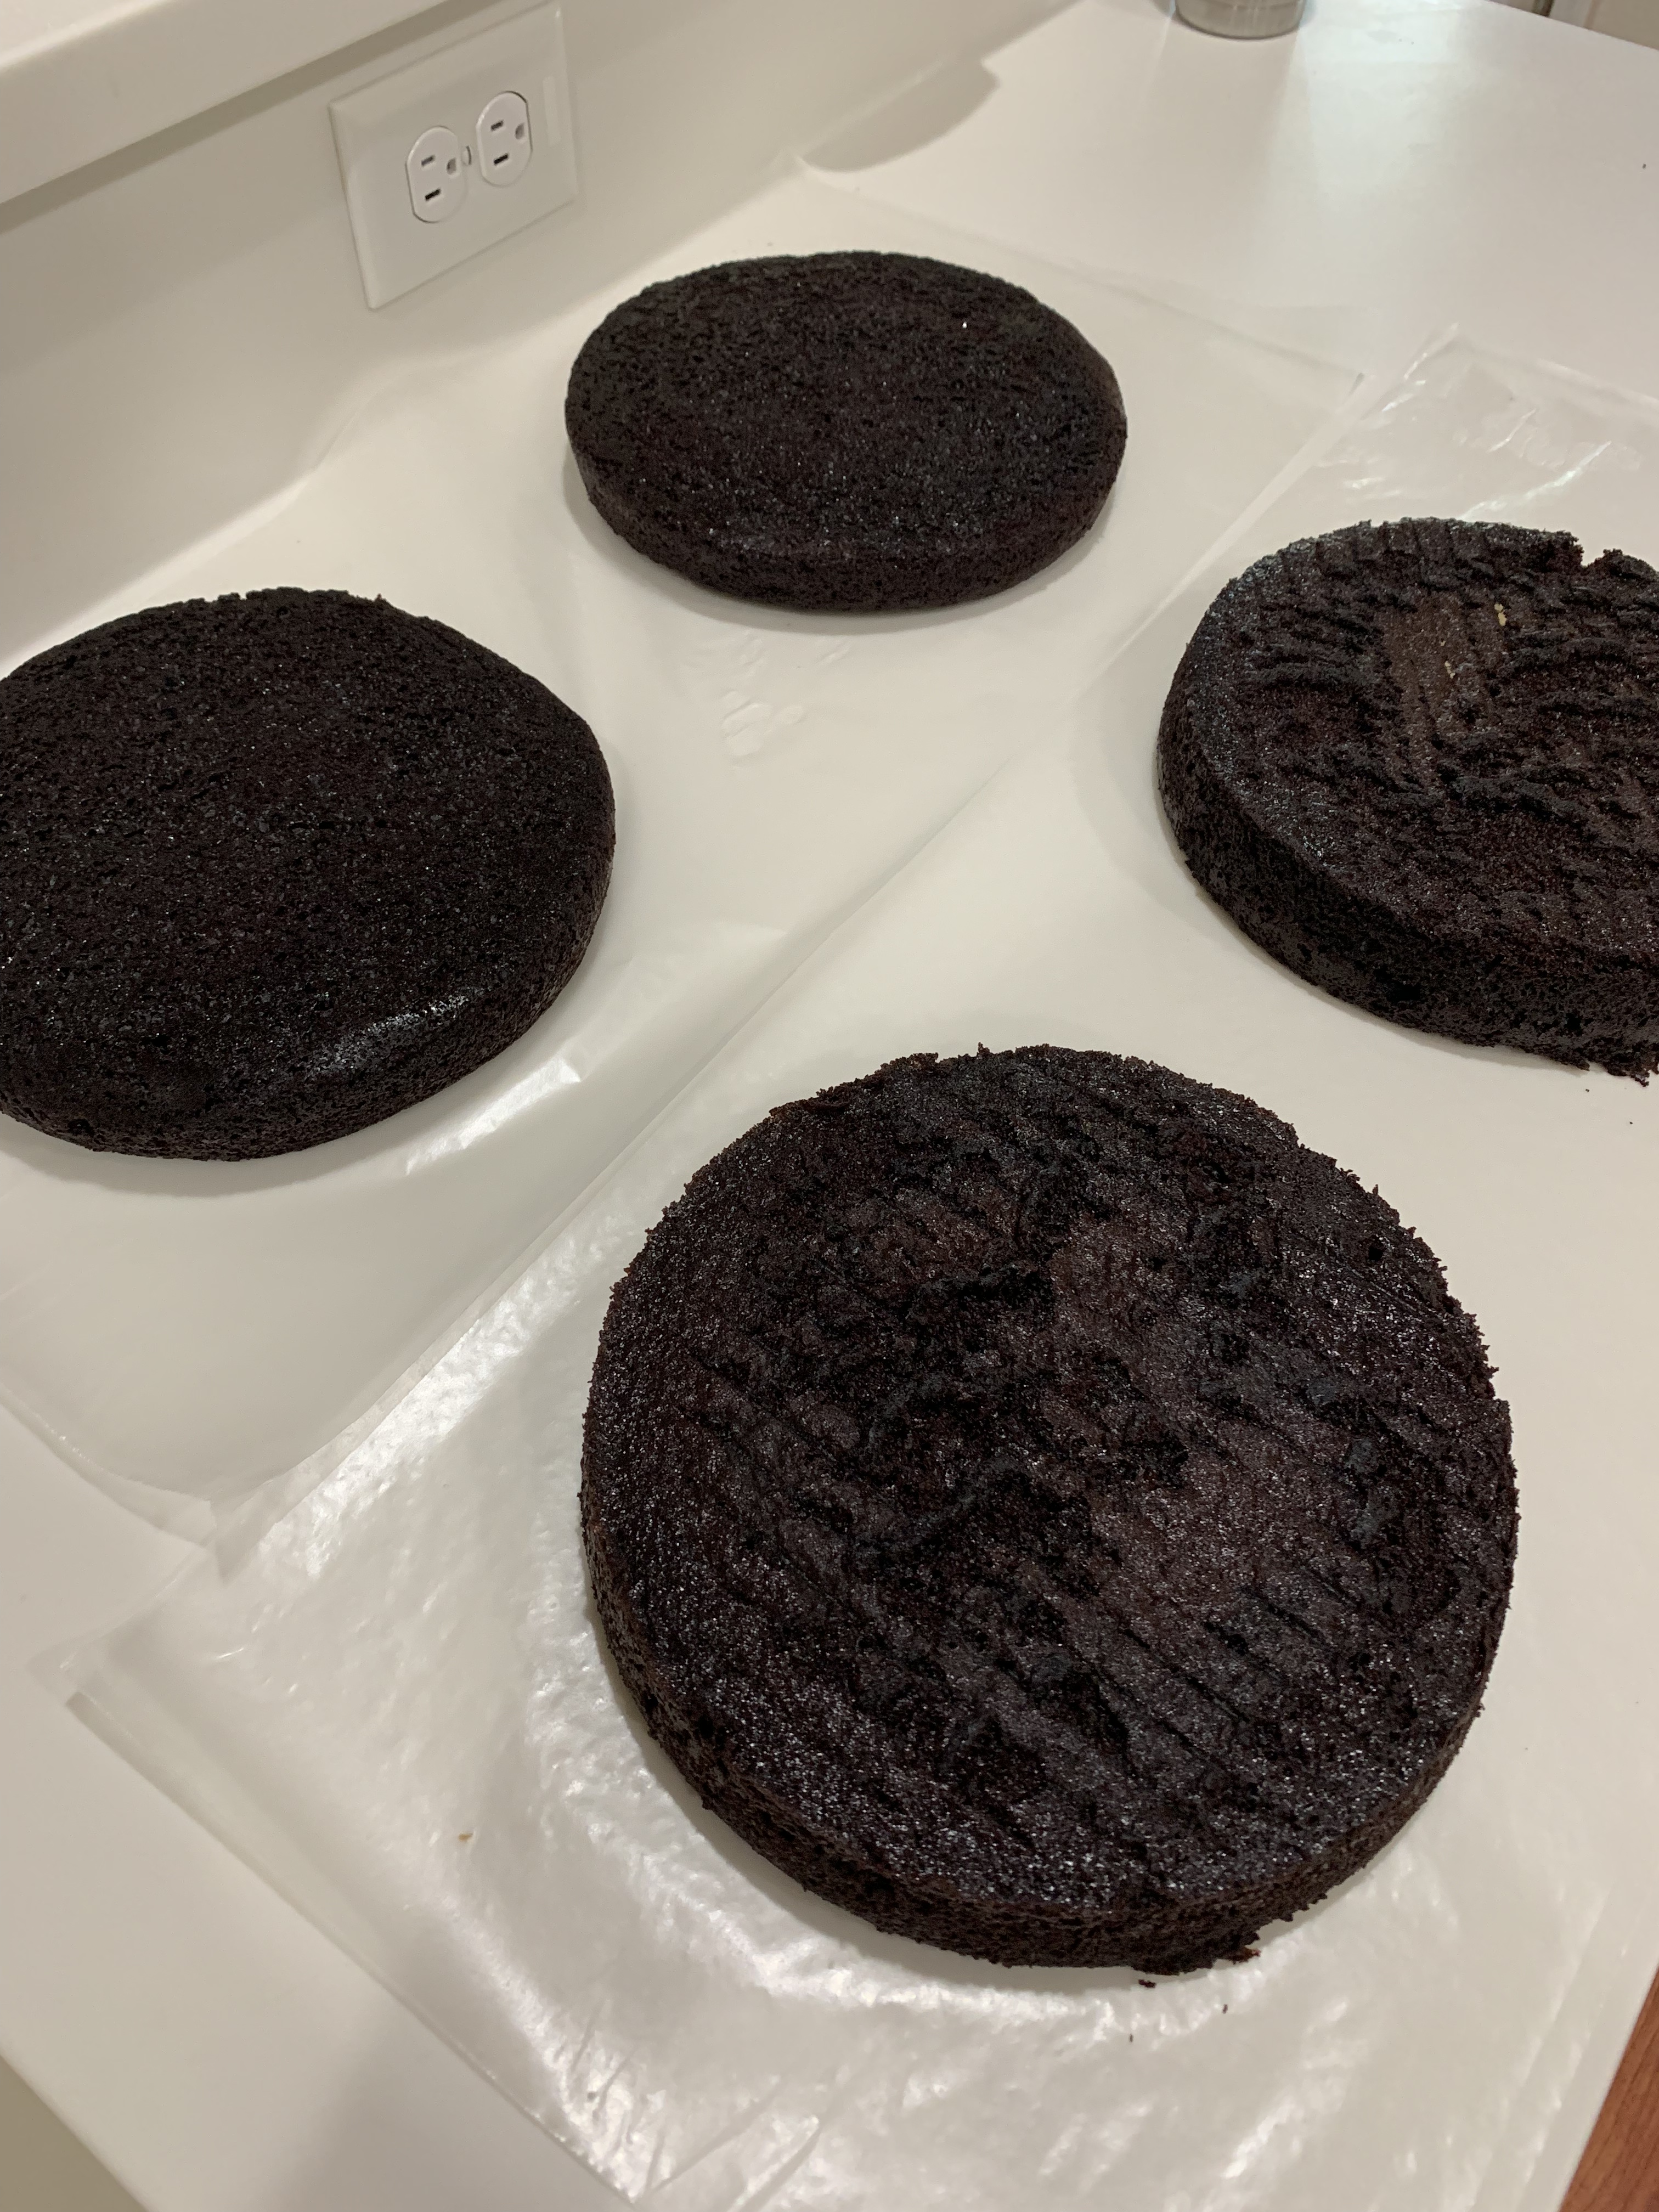
The cake was comprised of two 12″ round merengue white cake layers and three 9″ chocolate layers. Each were crumb coated and refrigerated. Meanwhile, I made marshmallow fondant and colored portions a shades of “ocean green” colors. The entire 3 layer chocolate and 2 layer vanilla cakes were covered with fondant.Then used some of it to punch out circular “scales.”

A variety of sea “creatures” were molded from both chocolate, white chocolate (tinted pink) and gum paste. The purple “sea weed” was made from gum paste and stored at room temperature in an airtight container. These were actually made over a month ago and were fine to use today. The chocolate sea creatures were made three weeks ago and stored in the fridge.

The cakes were stacked this morning and the “sea creatures” and mermaid tails were attached using Dab-And-Hold edible adhesive.

My critique: the design and execution was good. The chocolate cake was outstanding, the meringue white cake tasted good, but was a bit dry. I am still looking for an acceptable recipe. Marshmallow fondant is too sweet, but the little figurines need to be a fixed to a smooth surface. I may give rolled buttercream next. I also found a recipe where I can substitute the cocoa ingredients to create a vanilla cake with similar crumb and moisture to my chocolate cake recipe. More experimentation!!

Extreme Chocolate Cake

INGREDIENTS

  • 2 cups white sugar
  • 1 3/4 cups all-purpose flour
  • 3/4 cup dark unsweetened cocoa powder
  • 1 1/2 teaspoons baking soda
  • 1 1/2 teaspoons baking powder
  • 1 teaspoon salt
  • 2 eggs
  • 1 cup milk
  • 1/2 cup vegetable oil
  • 2 teaspoons vanilla extract
  • 1 cup boiling water

METHOD

  1. Preheat oven to 350 degrees F (175 degrees C).
  2. Grease and flour the two Wilton 3D Egg cake pans. 
  3. Use the first set of ingredients to make the cake.
  4. In a medium bowl, stir together the sugar, flour, cocoa, baking soda, baking powder and salt.
  5. Add the eggs, milk, oil and vanilla, mix for 3 minutes with an electric mixer.
  6. Stir in the boiling water by hand.

Meringue White Cake

INGREDIENTS

• 1 cup butter (softened)
• 1 1/2 cups granulated sugar
• 3 cups cake flour* (345 grams spooned & measured carefully)
• 1/2 teaspoon salt
• 2 teaspoons baking powder
• 1 cup milk (2% milkfat)
• 1 teaspoon vanilla extract
• 3/4 cup egg whites plus 3 tablespoons (160 g)

METHOD

  1. Using a stand mixer, beat the egg whites with the whisk attachment until they are stiff and form peaks. This may take a minute or two. Pour the egg whites into another bowl and place them in the refrigerator until you’re ready to add them to the batter.
  2. Using the same bowl that you used to beat the egg whites, place the softened butter in and cream the butter for about 2 minutes (using the beater blade attachmenuntil it is white in appearance.
  3. Add the sugar to the butter and beat until fluffy (about another 1-2 minutes).
  4. In a small bowl, combine the flour (measured carefully*), salt and baking powder. Set aside.
  5. In another bowl, combine the milk and vanilla extract.
  6. Add the flour mixture to the butter/sugar mixture alternately with the milk.
  7. Add the stiffly beaten eggs to the cake batter. Fold the egg whites in gently. Do not overmix at this point. If you do, your cake will become more dense.
  8. Grease and flour 2 9″ round cake pans. Pour the cake batter equally into the prepared cake pans.
  9. Bake the cakes at 350 degrees for 25-27 minutes or until the top bounces back when you touch it.
  10. Allow the cakes to cool for 10 minutes, then loosen the edges and remove them from the pans to a wire rack, allowing them to cool completely.

Marshmallow Fondant

INGREDIENTS

  • 500 g marshmallows
  • 1000 g confectioners sugar
  • 1 tsp white vanilla
  • 2-3 Tbl water

METHOD

  1. Grease (well with Crisco or equivalent) a heat proof microwavable bowl
  2. Place marshmallow in the bowl and sprinkle 2-3 Tbl water over the marshmallows
  3. Heat in a microwave in 30 second increments until the marshmallow is melted and smooth. Don’t overcook and burn.
  4. Grease (well) dough hook and stand mixer bowl and add melted marshmallow.
  5. Add confectioners sugar a cup at a time and stir on medium until incorporated.
  6. Add the vanilla during one of the sugar additions.
  7. Reserve about a cup of sugar to use during hand kneading
  8. Grease (well) your workspace and hands and turn the fondant out.
  9. Cover with sugar and begin kneading, adding more sugar as necessary until the fondant is smooth and not sticky.
  10. Use a greased rolling pin and roll the fondant out to required size. For this cake I rolled it out to about 24″ x 24″. Once kneaded and no longer sticky I folded it into quarters to make it easy to pick up and drape over the cake. Be careful. If not adequately kneaded, it will tear.


Peace on this (and all) Shabbats

Most synagogues host an Oneg after Shabbat services on Friday night. The name Oneg Shabbat means joy of the Sabbath in Hebrew and usually refers to a celebratory gathering held after Sabbath services, often with food and socializing.

Our synagogue, Temple Or Rishon, invites each family to host an Oneg once a year and many do so, often joining efforts with other friends or families. We have baked desserts for the Oneg we host with friends every year. This year I made eclairs and chocolate chip/raspberry bit/ganache covered brownies. These have been favorites of the synagogue membership. The recipes for both can be found at eclairs and brownies.

I made two dozen eclairs.


And three dozen brownies. This year I topped them with ground cashews. Last year one friend said they would have been the best brownies he ever had, if they had some nuts on them.

Time Was On My Side

Last year, after fresh peach season was over, I saw a recipe for Roasted Peach and Strawberry Jam. I saved that link for a half a year, until this week, when the farmer’s market was selling BOTH fresh peaches and strawberries. It was worth the wait.

img_0171

This jam isn’t cooked, but will last a couple of week if refrigerated. As if!

It is an easy and (hands on) quick recipe.

img_0176img_0177

INGREDIENTS

  • 3 cups (350 g) hulled and cut up strawberries
  • 3 cups (415 g) halved peaches
  • 1/3 cup sugar
  • 2 Tbl lemon juice

METHOD

  1. Halve peaches and remove the stone
  2. Bake peach halves at 250 F for 15 minutes, then turn over, skin side up and bake for and additional 15 min
  3. Slice strawberries – they don’t have to be too small, but should at least be sliced in half
  4. Remove peach halves from oven, remove the skin and dice them, toss with the strawberries, sugar and lemon juice.
  5. Spread fruit on a lightly olive oil sprayed, aluminum foil lined baking sheet (with edges) for 45-60 minutes or until the fruit is very soft, but not so long as the juice solidifies.
  6. Remove the fruit from the over and let cool 5-10 minute.
  7. Pour fruit and juices into a food processor and puree until the desired consistency is obtained.
  8. Can and place in the refrigerator.


Three Times a Charm

Time flies when you are having fun! The past year was filled with several personal achievements and lots and lots of fun, my granddaughter’s third birthday being the best of them. Much of my time and energy was applied to writing short stories and novellas. I published two novellas during the past twelve months and am working on a book of short stories and flash fiction. The novellas, The Star Alliance and The Quantum Butterfly Effect are available on Amazon. Buy a copy, or read for free on Amazon Prime and let me know what you think.

D2AA03A7-4C00-445D-97F9-B0500131ACC0
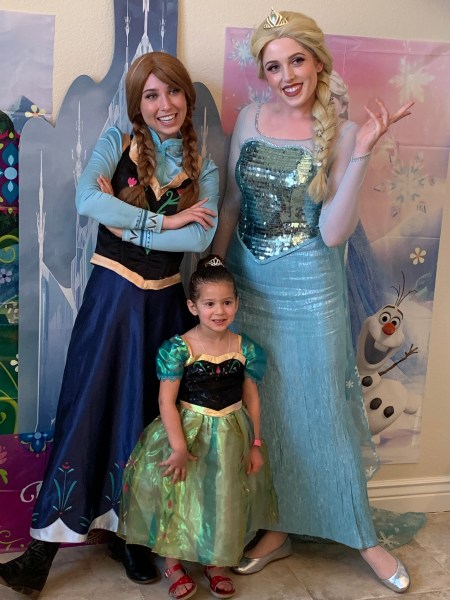
This year’s birthday theme was Disney’s “Frozen.” Grace loves all the Disney princesses (Ariel from “The Little Mermaid” is her favorite.) As a special surprise, Princess Elsa and her sister Anna, visited Grace’s birthday party! (I was Chef Louie.)img_0023-1

Keeping with the theme I made a six layer “Frozen” cake, two 10″ vanilla as the base, two 8″ chocolate in the middle and two 5″ vanilla for the top. I offset the layers to provide a ledge for the characters of Anna and Olaf, the snowman.

The cakes were crumb coated with buttercream to which I added a few drops of purple and blue food coloring with minimal stirring. This provided the swirling ice sheet pattern to the cake. Remember to put some aside for coloring to be used as the trees, tree trunk and snow. (I also made a half sheet cake to assure there was enough for everyone at the party. I left this with the frozen ice design rather than frosting with the meringue.img_0009-1

The frosting was a basic meringue stabilized with boiling corn syrup. It needs to be img_0012-3
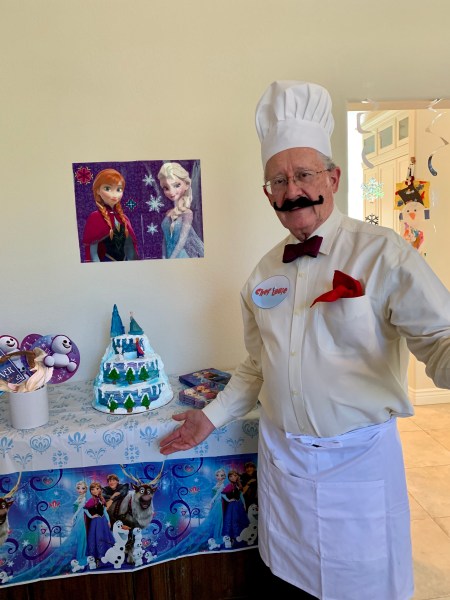
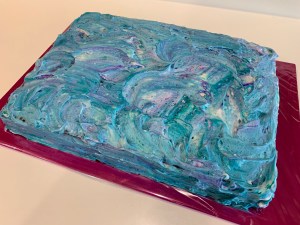
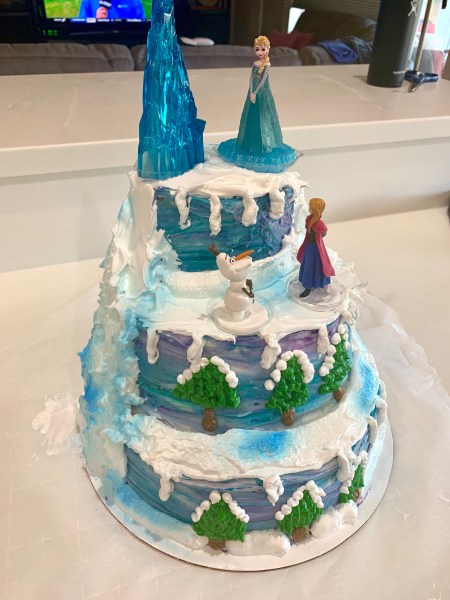
applied and sculpted to the cake quickly as it firms rapidly and will skin over when cool. Again, put some in a piping bag to use as icicles and touch up around the cake.

Blue food color spray added the ice highlights which really finished the cakes. The figurines made great toys for the birthday girl, Princess Grace.


We Only Have One Second Birthday

Granddaughter Grace’s 2nd birthday was Friday, June 1 and her party was Saturday the 2nd. For Mother’s Day, Fran and I met the rest of the family at the San Diego Zoo sending Grace to near Nirvana with all the animals. In the following weeks she visited the Los Angeles Zoo. She fed the giraffe and when she tried to pet it, the zoo keeper said, “No, no, no, don’t pet him,” so now every time she sees a giraffe Grace says “No, no, no.” She calls lions “Roars,” elephants are the trumpeting sound of an elephant that I cannot spell and zebras, oddly, are just “Zebras.”03C2353D-6118-4EC7-B8C0-84C1E604F759

So of course I had to make a zoo themed birthday cake with several fondant animal decorations. I made a “roar”, a “no, no, no” a “bbbrrrrreeeeehhhhaaaaa” (sp?), and a zebra from marshmallow fondant. They sat atop a  a double layer chocolate cake beside a white meringue “2” cake. The chocolate base cake was frosted with pink Italian Meringue Buttercream and the “2” was frosted with traditional white buttercream.

The white meringue “2” cake and the animals were bordered with green buttercream grass and “Happy Birthday Grace” was piped in purple letters. Purple is currently her favorite color. Unfortunately, my handwriting does not enhance the quality of my piping script.  The zebra is eating the grass (because he was falling forward and Fran suggested having him graze to make it look on purpose.)

White Meringue Cake

INGREDIENTS

• 1 cup butter (softened)
• 1 1/2 cups granulated sugar
• 3 cups cake flour* (345 grams spooned & measured carefully)
• 1/2 teaspoon salt
• 2 teaspoons baking powder
• 1 cup milk (2% milkfat)
• 1 teaspoon vanilla extract
• 3/4 cup egg whites plus 3 tablespoons (160 g)

METHOD

1. Using a stand mixer, beat the egg whites with the whisk attachment until they are stiff and form peaks. This may take a minute or two. Pour the egg whites into another bowl and place them in the refrigerator until you’re ready to add them to the batter.
2. Using the same bowl that you used to beat the egg whites, place the softened butter in and cream the butter for about 2 minutes (using the beater blade attachmenuntil it is white in appearance.
3. Add the sugar to the butter and beat until fluffy (about another 1-2 minutes).
4. In a small bowl, combine the flour (measured carefully*), salt and baking powder. Set aside.
5. In another bowl, combine the milk and vanilla extract.
6. Add the flour mixture to the butter/sugar mixture alternately with the milk.
7. Add the stiffly beaten eggs to the cake batter. Fold the egg whites in gently. Do not overmix at this point. If you do, your cake will become more dense.
8. Grease and flour 2 9″ round cake pans. Pour the cake batter equally into the prepared cake pans.
9. Bake the cakes at 350 degrees for 25-27 minutes or until the top bounces back when you touch it.
10. Allow the cakes to cool for 10 minutes, then loosen the edges and remove them from the pans to a wire rack, allowing them to cool completely.

Italian Meringue Buttercream Frosting

https://ofbatteranddough.com/italian-meringue-buttercream-frosting-recipe/ Author: Rebecca Blackwell
Serves: 7 cups

INGREDIENTS

  • ½ cup water
  • 1¼ cup plus ⅓ cup granulated sugar
  • 1 tsp. cream of tartar
  • 9 large egg whites
  • 6 sticks unsalted butter, at room temperature

METHOD

  1. Combine the water and 1¼ cup sugar in a small saucepan and stir once or twice just to moisten the sugar. Do not stir again; stirring encourages the sugar to crystalize. Bring to a boil over medium high heat and continue to cook until it reaches a temperature between 246 and 250 degrees.
  2. As soon as you set the syrup to cook, begin the meringue. Beat the egg whites in a standing mixer fitted with the whisk attachment at medium speed until frothy. While beating, sprinkle in the cream of tartar and then the remaining ⅓ cup sugar. Beat until stiff, but not dry, peaks form. *The goal is to have the syrup at the right temperature and the meringue at the stiff peak stage at the same time. If the syrup is not quite ready, but the meringue is, continue to beat the egg whites with the mixer on the lowest speed until the syrup reaches the desired temperature. If the syrup is done before the meringue is ready, add a very small amount of hot (not cold) water to lower the temperature slightly.
  3. When the syrup is ready, turn off the mixer and quickly pour about ⅓ cup into the meringue. Immediately turn the mixer to medium-high and then continue to pour the hot syrup into the meringue in a thin, steady stream. Try to keep the syrup from getting on the beater, although some will get on there no matter what you do.
  4. Continue to beat the meringue with the whisk attachment at medium speed, until you touch the bottom of the bowl and it is cool to the touch. *It’s important to not add the butter before the meringue is completely cool, so that the butter doesn’t melt.
  5. Turn the mixer to low and add the butter in 2 or 3 tablespoon size chunks. Keep mixing and adding the butter until all 6 sticks are incorporated. If the buttercream doesn’t look completely smooth at this point, just keep beating. It will smooth out. If it looks runny or curdled, the butter has probably melted. Put it in the refrigerator for 20 or 30 minutes and then continue beating until it’s smooth.
  6. After the butter has been fully incorporated, you can add any flavor additions you like. See ideas below.

A Remiss is as Good as a Re-mile

I was remiss in not documenting the baking I did for our synagogue’s Oneg (celebration of the joy of Shabbat after Friday night services) a couple of weeks ago. All of the recipes are posted elsewhere. Search this blog for the various key words for more detail.

We were one of three families providing pastries etc for the Oneg. I made Gooey Strawberry Brownies. (Previously I made raspberry brownies so tried strawberry this time.)  Due to the size of the strawberry jammy bits the brownies ended up very moist and “gooey,” which is not a bad thing. Somehow, only half of the brownies made it onto the serving tray, so sadly, the other half had to come home with me.

I also made sweet whipped cream filled, chocolate drizzled profiteroles. I find choux pastries easy to make and freeze well for a last minute snack when invited out, or if friends stop by. I actually saw them online a few weeks ago and decided they would be good to add to my Oneg selection.

There is nothing like a couple of dozen tartlets with cream patisserie filling and blueberry topping. Tartlets and cream patisserie are quick and easy to make, and again the tart shells freeze for future use, if necessary.  It wasn’t necessary to freeze any, they were decimated at the oneg. I like to glaze pastries with apple jelly to add that nice shine. Last year I could not find any apply jelly in the stores, or even anyone who had heard of it, so I made a couple of pints and am still using it.

And finally I decided to make some fig newtons with some of the huge store of figs I have in the cupboard prior to this year’s harvest.

Oh! I almost forgot.  I had some sugar cookies in the freezer so added them to the mix on a whim. A few months ago I froze them in cylinders so I could just cut them into disks and bake them. I used them all up so need to make another batch.

NOT Caramel by the Sea

I had some leftover caramel in the fridge. It was (almost) too soft to fill chocolates (see below) but too thick to top ice cream. What a dilemma! Over the weekend I re-heated it, being sure it was 248 degrees then poured it into a hemispherical silicone mold.

I have been practicing chocolate work so I figured this would be a good way to conserve caramel and increase tempering skills, and have some chocolates for quality control consumption.

As I said, I poured the 248F liquid caramel into a mold then tossed the mold into the fridge to set. I weighed and chopped 250 grams of semi-sweet dark chocolate. You want the chocolate to be very fine so it will melt easily during the tempering. Dark chocolate is tempered by melting about 2/3rds of the chopped chocolate in a bain-marie to 120F.
Remove Chocolate covered Caramel 1
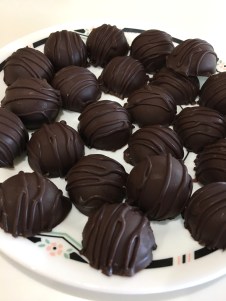
from the heat and add the remaining chocolate a little at a time waiting for each addition to melt. If after all the chocolate is added and melted the temperature is still above 82F stir until it cools to 82F. Then place it back on the barely simmering bain-marie until
it reaches 85-86F. Remove the pot containing the water and the bowl holding the melted chocolate and place it next to the caramel to be dipped. The temperature of the chocolate will continue to rise a few degrees and should hold at 88F to 90F. Dip each piece of caramel, or whatever you are coating, lift it out with a fork, drain and place on waxed paper. Repeat, repeat, repeat…

017e21b931fdb63ab976dd07c2d459f8dd8ed2ecfd

I had some leftover chocolate so put some in a piping bag and set it aside to cool slightly. The rest I poured in the cleaned silicone mold to make some nice hard chocolate candies, or to re-melt sometime in the future. Who knows, I may decide to make more caramel to use up the extra chocolate I have waiting in the fridge.

Chocolate covered Caramel 2

When the chocolate in the piping bag was cooler but not set I snipped the end off and drizzled the lines of chocolate over the dipped chocolate to add some character.

A week ago I tried to make some chocolates for Fran’s Mah Jongg group by using the still soft caramel. They looked pretty, but it was hit or miss if there was much caramel in the chocolate candy. I also used milk chocolate which is much harder to work than the dark semi-sweet. Next I think I should make some more caramel, or maybe nougat and practice with the milk chocolate.

Chocolate covered Caramel 3


Baking in Jammies?

No, not quite. Maybe it should read “Baking With Jammies,” or “Incorporating Fruit Jammies in Your Baking,” or in this case “How I Made Strawberry Jammies to Incorporate in Strawberry Brownies.”

Recently, meaning within the last 4 months, I bought some Raspberry Jammy Bits from KAF to use in making some Raspberry Brownies. They were soooo good and added extra moisture, chewiness and flavor to the brownies, I decided to make them myself. Short story shorter: it didn’t go well. They didn’t gel adequately to form into little sugar-coated bits which would retain some integrity during baking. I ended up storing them in the trash bin.

Even more recently, as in last week, I had some leftover strawberries and decided to give image1
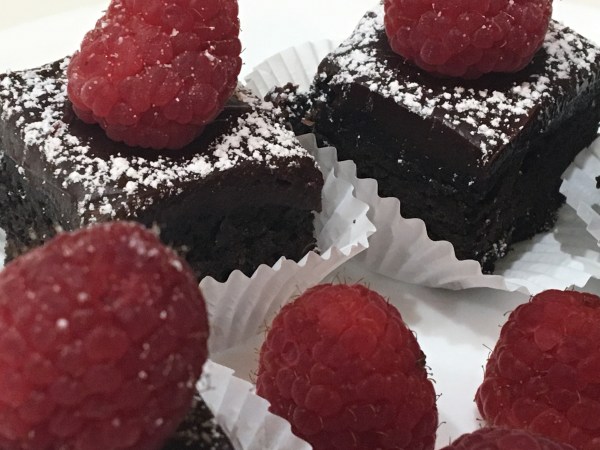
it another go. I pureed 2 cups of hulled strawberries and heated it to boiling in a medium saucepan, added 2 Tbl of fruit pectin and mixed until dissolved before adding 2 cups of sugar.  The mixture was cooked over medium-low heat (just boiling) and stirred very frequently. Once it reached 2250 F, I spread it ⅛” to ¼” thick on a caster sugar coated silicone sheet and placed it in the freezer.

After an hour I coated the top of the still tacky spread with more caster sugar. The mixture was still too sticky to cut easily. Using a pizza wheel, I managed, while using some very short words)  to cut half of the spread both lengthwise and crosswise into bits, which I then rolled in more sugar and placed back on the silicone sheet. The strawberry jammy bits were useable but not great.

image2
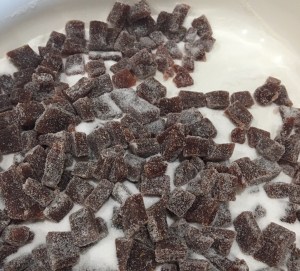
Undeterred, I tossed the second half of the spread back in a small saucepan and cooked for another 10 minutes or so. My candy thermometer died so had to guess the temperature. One trick I remember is to note how long it takes for the stirring marks to disappear. When I first started the second cooking, after the jam started to boil, the marks would disappear in 5 seconds. After 10 min of a quiet boil they remained 7-10 seconds and the jam spun as a wh0le around the spatula. I spread the twice cooked jam back on the silicone and froze again.

An hour later the spread solidified to a crack. I let it warm at room temperature for a few minutes to soften and was able to cut it with the pizza wheel. Actually, this version was just about the correct viscosity (or jamminess) and I could cut it with a long knife, cleaning in hot water and drying between cuts. Roll in more sugar and store in a air tight container in the freezer. Checking a few days later they are still semi-soft and have not fused back into a blob.

image4

Adding the DIY Strawberry Jammy Bits and some chocolate chips to the brownie batter before baking (good alliteration, huh?) resulted in spectacular brownies (NOTE: Do NOT overbake!! The middle of the pan should feel very soft and the edges should look cooked. Don’t let the middle bake to firmness, the brownies will be over baked.)

Fruit Jammy Bit Brownies

INGREDIENTS

  • 2 cups Berries (I have now used Rasp and Straw Berries and will try others)
  • 2 TBL Fruit Pectin
  • 2 cups sugar
  • Caster sugar (Extra Fine) for coating

METHOD

  1. Hull and puree strawberries
  2. Heat puree to barely boiling and add pectin
  3. Once pectin is incorporated add the sugar
  4. Continue boiling until mixing marks stay 7-10 seconds or about 235-2400F
  5. Spread mixture on caster sugar coated silicone mat and freeze
  6. Remove the sheet of fruit from the freezer and coat top with caster sugar
  7. Flip coated over onto a cutting board and coat the now top surface with more sugar
  8. When the fruit sheet is pliable cut into small squares (1/4” across) with a knife
  9. Toss the jammy bits into a bowl of sugar then store in an air-tight container in the freezer

Stairway to Raspberry Heaven

I saw a KAF recipe for Chocolate and Raspberry Brownie Bars. If you are a regular reader, you know I am baking about 800 one and two bite desserts for a fundraiser in March. Since brownies are baked in a sheet pan and cut to bite size, these brownies become a relatively easy way to make 4 dozen desserts (or about 6%) at once.F677178C-384A-4527-AFD1-0640B7565AD4

Basically this is a brownie with both chocolate chips and raspberry jammy bits folded into the batter and coated with a heavy layer of ganache. Once baked, and still warm a thinned coating of seedless raspberry jam is spread over the brownies. (Don’t over bake the brownies!) I cooled the coated brownies in the fridge for a while as I made and cooled to thicken the ganache.

While not essential topping with a raspberry and dusted with confectioners sugar really set this dessert off. (Rats, just ended that sentence with a preposition.)

CHOCOLATE AND RASPBERRY BROWNIE BARS

INGREDIENTS

BROWNIES

  • 4 large eggs
  • 1 1/4 cups dark cocoa
  • 1 teaspoon salt
  • 1 teaspoon baking powder
  • 2 teaspoons vanilla extract
  • 2 1/4 cups sugar
  • 1 cup unsalted butter, melted
  • 1 1/2 cups All-Purpose Flour
  • 1 cup chocolate chips
  • 1 cup Raspberry Jammy Bits
  • 3 tablespoons seedless raspberry jam
  • 1 tablespoon  water

CHOCOLATE GANACHE GLAZE

  • 1 cup heavy cream
  • 1 tablespoons light corn syrup (20g)
  • 2 2/3 cups (400 g)) semisweet or bittersweet chocolate, chopped
  • 1 tablespoon vanilla extract

METHOD

  1. Preheat the oven to 350°F. Lightly grease a 9″ x 13″ pan. To make very even bars, line the pan with aluminum foil before baking, leaving foil sticking up above the edges of the pan.
  2. Crack the 4 eggs into a bowl, and beat them with the cocoa, salt, baking powder, and vanilla until smooth.
  3. Add the sugar and melted butter, stirring until smooth.
  4. Add the flour, chips, and Jammy Bits, again stirring well.
  5. Spoon the batter into the prepared pan.
  6. Bake the brownies for about 30 minutes, until a cake tester inserted into the center comes out clean, or with just a few moist crumbs clinging to it. The brownies should feel set on the edges, and the center should look moist, but not uncooked. Do not overbake! Remove them from the oven.
  7. Heat the seedless raspberry jam with the water, and stir until smooth. Brush over the warm brownies. Set aside to cool for an hour or longer before topping with the ganache.
  8. To make the ganache, heat the cream and corn syrup until they begin to steam. Pour over the chopped chocolate in a bowl. Let sit for 5 minutes, add any flavorings, and whisk until smooth. Let cool for 15 minutes or so.
  9. Pour ganache over the brownies while it’s still warm, but has begun to thicken — reheat if it thickens too much as you work. Allow several hours for the ganache to set up fully. You may refrigerate the brownies to hasten the setting of the ganache.
  10. Remove the brownies from the pan using the aluminum foil sling. Heat a knife in hot water, wipe dry and use to cut the brownies. Repeat with each cut.
  11. Just before serving, garnish brownies with fresh raspberries and confectioners’ sugar, if desired.

Busy Bakery Day

Here are some samples of one and two bite pastries I am making for a party of about 200 people. We are meeting tonight for a party progress meeting. I decided to give the group a sample of some of the varieties of desserts I am baking for the event.


I have both lemon and mango curd filled profiteroles, cream patisserie filled eclairs and tartlets, vanilla cake with pink icing and raspberry drizzle and vanilla cake with chocolate drizzle. There are mini-raspberry cheesecakes, blueberry and apply mini pie bites, chocolate brownie cups with chocolate mousse and a raspberry drizzle. Some of these were made ahead and frozen until today. The tartlets, eclairs, profiteroles and all icings, drizzles and frostings were made this afternoon.

A productive bakery day!