
Making puff pastry at home is a tedious process requiring several hours to incorporate the butter into the flour. For years I have relied on the kindness of Trader Joe’s and Pillsbury as my source of puff pastry. Both are delicious and easy to use. TJ’s has less rise and is good for a variety of pastries while Pill’s has skyscraper (get it?, “high rise?”) puff. This spring I found out that TJ’s puff pastry is seasonal. Who knew? Also, trying to insert a very little humor and perhaps some click bait with “San Juan Hill” – Teddy Roosevelt and the “Rough” Riders? Oh well, maybe not.
Anyway, I decided it was time to try, at least rough puff pastry. I tried two different recipes, one from King Arthur Flour and the other from Gordon Ramsey via BBC. The primary difference between the two is KAF adds sour cream while Gordon uses cool water as the liquid and KAF adds some baking powder to assist the rise.
-

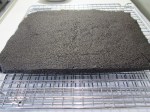
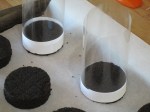
- Mixed Dough
-

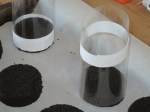
- Dough Ball
-
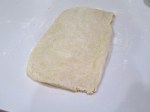
- Rolled Dough
To create the characteristic layers in the puff pastry it needs to be book folded and rolled. Both recipes called for repeating this twice, but many of the comments said to repeat up to four times, which I will do next time. The final pastry was very good, but lacked the layers and puff of either TJ’s or Pill’s.
-

- First Page Book Fold
-

- Folded, ready to chill
-

- Rolled and trimmed dough
I have trouble making the pastry and remembering to take photos as the work progresses. What I need is a camera that will take pics every 15 seconds, the just use the appropriate ones. I missed the filling of the pies. I used a heaping teaspoon for the blueberry mix and made a few using 3 fresh raspberries. Another suggestion: cut the tops of the pies about and inch bigger than the bottoms. Once the dough tries to stretch over the filled bottom the edges do not line up. I used about 2.5″ for the bottom and 3:5 inches for the tops. Also, round hand pies are much better looking but wastes a lot of dough. Square pies are rather plain, but more efficient. What I need are two hexagonal cookie cutters, one 2.5″ and the other 3.5″. Then I could have the “roundish” look but a closest pack design, minimizing waste.
-

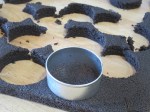
- Pastry Cut Into Squares
-

- Assembled Pastry with Air Holes
-

- Finished Hand Pies
Gordon’s pastry was a bit easier to work with than KAF’s. The original recipe called for too much water which made a very, very wet dough. Luckily, I started with about 50 ml (one third of what the recipe said you may need and half of what it said to add initially.) They both tasted excellent and the texture was good, not great, but that may improve with additional rolling, folding and chilling. Once I made Gordon’s pastry I used the bottom of KAF’s to fill and finish the hand pies.
Rough Puff Pastry – Gordon Ramsey
INGREDIENTS
- 250g strong plain flour
- 1 tsp fine sea salt
- 250g butter, at room temperature, but not soft
- about 150ml cold water
METHOD
- Sift the flour and salt into a large bowl. Roughly break the butter in small chunks, add them to the bowl and rub them in loosely. You need to see bits of butter.
- Make a well in the bowl and pour in about one-third of the cold water, mixing until you have a firm rough dough adding extra water if needed. Wrap dough with cling film and leave to rest for 20 mins in the fridge.
- Turn out onto a lightly floured board, knead gently and form into a smooth rectangle. Roll the dough in one direction only, until 3 times the width, about 20 x 50cm (~ 8”x20”). Keep edges straight and even. Don’t overwork the butter streaks; you should have a marbled effect.
- Fold the top third down to the center, then the bottom third up and over that. Give the dough a quarter turn (to the left or right) and roll out again to three times the length. Fold as before, cover with cling film and chill for at least 20 mins before rolling to use.
Blueberry Hand Pies with Rough Puff Pastry – KAF
INGREDIENTS
Pastry
- 2 cups King Arthur Unbleached All-Purpose Flour
- ¾ teaspoon salt
- ½ teaspoon baking powder
- 1 cup (16 tablespoons) cold unsalted butter
- ½ cup cold sour cream
Filling
- 2 cups blueberries, fresh or frozen
- 2 tablespoons cornstarch
- ⅓ cup sugar
- ⅛ teaspoon salt (a large pinch)
- 1 tablespoon lemon juice
- *For frozen berries, use 2½ tablespoons cornstarch.
Topping
- 1 large egg, beaten
- 2 tablespoons white sparkling sugar, for garnish
METHOD
- To make the pastry: Whisk together the flour, salt, and baking powder. Add the butter, working it in to make a coarse/crumbly mixture. Leave most of the butter in large, pea-sized pieces.
- Add the sour cream, and stir until the mixture starts to come together in chunks. Turn it out onto a floured work surface, and bring it together with a few quick kneads.
- Pat the dough into a rough log, and roll it into an 8″ x 10″ rectangle. Dust both sides of the dough with flour, and starting with a shorter end, fold it in three like a business letter.
- Flip the dough over, give it a 90° turn on your work surface, and roll it again into an 8″ x 10″ rectangle. Fold it in three again.
- Wrap the dough, and chill for at least 30 minutes before using.
- To make the filling: If you’re using fresh berries, rinse and drain well. Place fresh or frozen berries in a saucepan. Whisk the cornstarch with the sugar, and pour over the berries. Add the salt and lemon juice, stirring to combine.
- Place the saucepan on a burner set to medium-high heat and cook, stirring, until the small amount of liquid in the bottom of the pan comes to a simmer. Reduce the heat to medium and continue to cook, stirring frequently, until the mixture starts to thicken, about 5 minutes. Transfer the cooked berries to a bowl and let cool to room temperature. It’s fine to make the filling ahead of time, and refrigerate until you’re ready to use it.
- Preheat the oven to 425°F; place a rack on the middle shelf. Line a baking sheet with parchment paper.
- To assemble the pies: Roll the dough into a 14″ x 14″ square. With a straight edge and pastry wheel, or a 3½” square cutter, cut out sixteen 3½” squares.
- Divide the filling among eight of the squares, using about a heaping tablespoon for each; a slightly heaped tablespoon cookie scoop works well here. Brush some of the beaten egg along the edges of each filled square.
- Use a knife to cut a vent into each of the remaining eight squares; or use a decorative cutter of your choice.
- Top each filled square with a vented square, and press along the edges with the tines of a fork to seal.
- Brush the top of each pie with the remaining beaten egg, and sprinkle with sparkling sugar. Transfer the pies to the prepared baking sheet. Note: If at any time during this process the pies become sticky and hard to work with, simply refrigerate them for about 20 minutes, until firm.
- Bake the pies for 18 to 20 minutes, until they’re a light golden brown. Remove them from the oven, and let cool for 20 minutes before serving.
- Store pies, lightly wrapped, at room temperature for a couple of days; freeze for longer storage.
 Tying the two mold halves together without sloshing batter is a challenge. I place the string across the oval stand prior to placing the empty mold on it. The mold should be filled to the top rim with batter. Thus far, doing this assured the top half is filled with cake. I
  then place the top half on and tie the string around both. This time I also added 5 paper binder clips positioned around the edge of the
 two molds. (I would use 7-10 clips, if I had them.) Do place the mold on a cookie sheet to catch spills and choose one that does not warp in the heat.
 then remove the cake from the bottom mold 5 minutes later. You may have to shake the pan slightly for the cake to release. Cool on a rack.
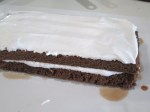
 batch of marshmallow frosting to try it on the Easter egg cake. It was easy to make, roll and drape. While intensely sweet (read: marshmallow and confectioners sugar) it tasted much better than store bought, plus it cuts easily to make decorations. This fondant may be flavored, but will be very sweet no matter what flavor. This fondant is smooth and soft,
  easy to drape and form. The pink band around the cake is a band of colored fondant, wetted and wrapped around the cake.
 piping is all buttercream, both white and colored. I was going to make buttercream roses for the toppers, but by the time I finished the rest, my hand was cramping and decided simple dropped flowers (Wilton #193 tip) would suffice. I added the jelly beans for some additional color, they probably weren’t needed but we like jelly beans.


 minutes, but the frosting started to flow a short time later. The other issue was tempering a small amount of chocolate. Because the cake was 1/3rd the original size I cut the


 New Zealand and is a favorite around Christmas in the summer. Wait! Is it a Christmas treat, or a summer treat? Isn’t that a North American oxymoron? Ah, well, it is Christmas Eve, therefore, this time, it is a Christmas treat. (I just realized, I could have used the blueberries and made it a Chanukah treat in Israeli colors of white and blue.)
 Deceptively easy and insidiously versatile. You can top your pavlova with berries, nuts, chocolate, mocha, fruit, lemon curd or as King
 Around 60 family members and friends attended at a Catholic church in Roseville for a short but meaningful service, then gathered at Frances and Daniel’s for brunch. I was asked to provide a cake for 60 people. (This may be the largest cake I have made.) The specific request was for a layer cake with chocolate mousse filling and a quilted finish.
 people who do not eat cake (friends of Marie Antionette, no doubt) and I could get away with this size. Therefore I needed two sheet cakes. (Note: about 10 slices were left at the end of the event.)
 g the cake layers I built a dam of crusting buttercream around the edges of the top crumb coated cake. Crusting buttercream has a little more body and will keep the mousse in place. Add a tablespoon of meringue powder to the confectioners sugar to make regular buttercream into crusting buttercream. After the second sheet cake is cool, add the
  mousse to the damned 🙂 bottom cake. Top with the second layer, crumb coat the entire cake and refrigerate.
  A cold cake is easier to trim to make nice square edges and setting the mousse will retard the effects the moisture will have on the fondant coating.
 arlier in the week I made the pink orchid, cross and text backing from gumpaste.
 I purchased the text from a company that makes sugar images and pasted it onto the backing gumpaste.
 problem, but find a jar of blackberry without that insidious word “seedless” on the label? Good luck. Either you spend an inordinate amount of time searching your supermarket, or go to a farm or specialty market and shell out twice the cash. I look for BOGO’s on berries. It’s like getting jam free, almost.
![IMG_1421[1]](https://abatteredoldsuitcase.com/wp-content/uploads/2015/05/img_14211.jpg?w=300&h=225)
![IMG_1422[1]](https://abatteredoldsuitcase.com/wp-content/uploads/2015/05/img_14221.jpg)
![IMG_1427[1]](https://abatteredoldsuitcase.com/wp-content/uploads/2015/05/img_14271.jpg)


