Unknown's avatar

About Dave Oney

Dave Oney was born mid last century in Middlebury, Vermont. He received his BS in Chemistry and worked as a polymer chemist in Massachusetts and New Jersey. He became a microscopist (someone who studies little bitty things using a microscope) and photomicrographer (someone who photographs little bitty things) before settling into a 35-year career in technical sales of scientific imaging equipment (the science of digitally recording itty bitty things, sending the image to a computer for analysis.) He designed and created a number of products contributing to this field. He is (was) proficient in several computer languages and is currently working on mastering English. After making a few more paradigm shift career changes Dave and his wife, Fran, retired and moved closer to their children and granddaughters and now live in the foothills of the Sierra Nevadas.

Orange Tart

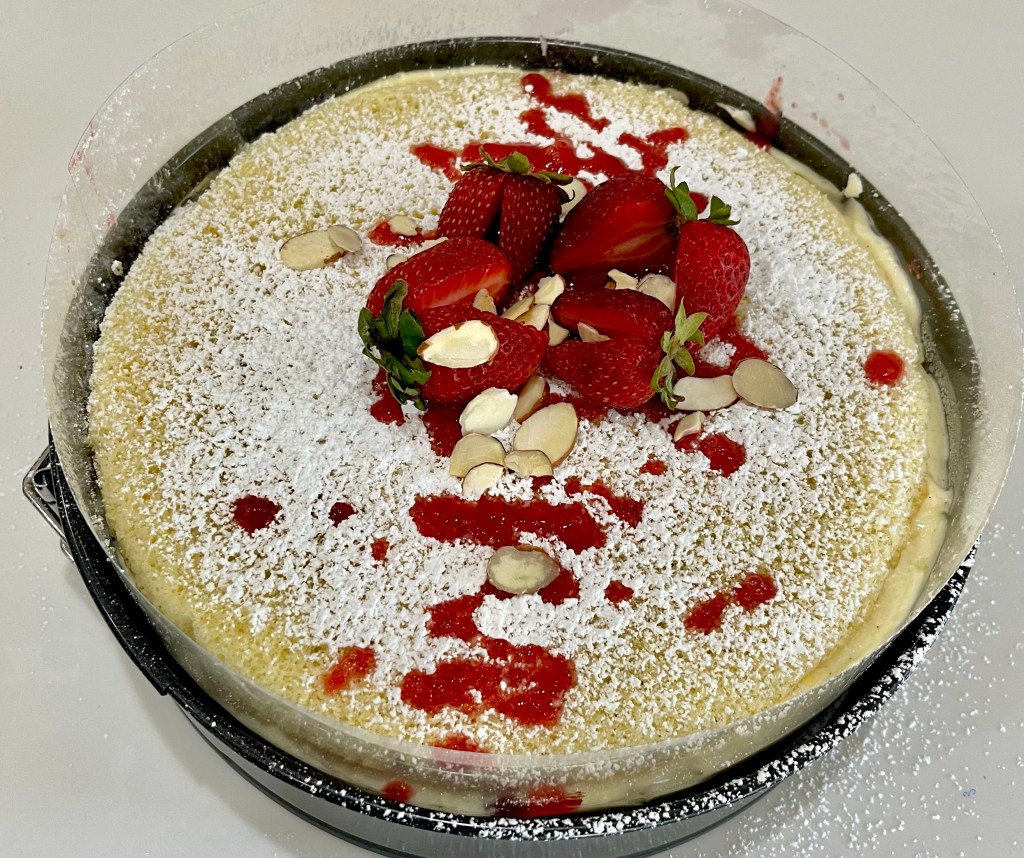
Oh, there is so much I could say about an orange tart, but this is neither the time nor the place.

I saw this recipe and decided to give it a try. I changed out the orange custard for another recipe I had, and used my standard tart shell recipe. Actually, all I kept was the orange filling. It intrigued me because it seemed like it would produce an orange jelly without any gelatin (which I never use) or agar-agar (which is my go to “gelling” agent.)

Once one of the small tartlets was submitted to QC we both thought it needed something else. I made a quick batch of basic meringue and piped stars around the perimeter of the large tart. I should have taken the time to make Italian meringue. It would have been firmer and kept its shape longer.

Orange Cream Tart

INGREDIENTS

CUSTARD FILLING
• 2 cups whole milk
• 1/2 cup sugar
• 1/4 cup cornstarch
• 4 egg yolks (Save the whites for meringue)
• 1 teaspoon fresh orange zest
• 1 tablespoon fresh orange juice
• 2 teaspoons vanilla
• 1 tablespoon unsalted butter

ORANGE FILLING
• 1 cup (250ml) orange juice, strained
• 1 cup (220g) caster sugar
• ⅓ cup (50g) corn starch
• 2 Tbl (30g) unsalted butter

SHORTCRUST PASTRY
• 100 g cold butter cut into small cubes
• 200 g all-purpose flour
• 60 g icing sugar
• ½ tsp vanilla
• ¼ tsp salt
• 2 eggs – 1 for the dough and the other reserved for an egg wash

METHOD

For the pastry shell:

  1. Mix butter with sugar
  2. Add salt then vanilla
  3. Add egg
  4. Stir in flour. Mix by hand until incorporated
  5. Wrap in plastic and refrigerate for 30 min
  6. Butter tartlet pan, or use non-stick pan
  7. Roll dough to about ⅛” thick
  8. Lay over tart mold and press into all crevices
  9. Roll top to cut off excess
  10. Prick holes in bottom and sides of formed dough
  11. Fill tart with pastry weights (I put beans in crumpled, then flattened parchment paper and remove 5 minutes before the end of the bake.)
  12. Paint edges of the tartlet with the egg wash.
  13. Bake in preheated oven 350 deg F (175 C) for 15 min
  14. Immediately remove from pan and cool on a wire rack

    For the custard filling:
  15. Heat milk in medium saucepan until hot but not boiling.
  16. While milk is heating, add sugar and cornstarch to mixing bowl. Whisk together.
  17. With an electric mixer or by hand, whisk egg yolks into sugar mixture until pale yellow.
  18. Whisk in orange zest, orange juice, and vanilla.
  19. Remove milk from heat.
  20. While whisking/mixing on low, very slowly pour heated milk into egg mixture. Mix slowly until combined.
  21. Pour mixture back into saucepan and place over medium heat.
  22. Heat and whisk continuously for 5 minutes, until custard has thickened to consistency of thick
    pudding.
  23. Once thick, remove from heat and whisk in butter.
  24. Pour custard into large bowl. Cover with plastic wrap, pressing plastic wrap onto top of custard to prevent skin from forming.

    For the orange filling:
  25. Place 1 cup (250ml) water, orange juice and sugar in a medium saucepan over medium heat and bring to just below the boil.
  26. Whisk cornflour and ¼ cup (60ml) water in a bowl and add to orange juice mixture. Cook, whisking constantly, for 2 minutes or until thickened.
  27. Set aside to cool for 5 minutes, then add butter, whisking to combine. Slowly pour into tart, over cold and set custard filling.
  28. Chill for 1 hour or until firm.
  29. Cut into wedges to serve.

Meringue – Basic

INGREDIENTS
• 3 egg whites (90g), at room temperature
• ¼ tsp ( 1.25 mL )cream of tartar
• ¼ cup ( 60 mL )granulated sugar
Add to Recipe Box Print this recipe Subscribe to the eggs.ca newsletter
METHOD

  1. Beat egg whites in medium bowl with electric mixer until frothy.
  2. Add cream of tartar and beat until soft peaks form.
  3. Gradually beat in sugar, 1 tbsp (15 mL) at a time, until sugar is dissolved and stiff, glossy peaks form.

Another Use for my Many, Many Figs

As I was updating “What’s Up in Dede’s Bakery” this recipe crossed my path. After all, I had fresh figs (but used a previous years fig jam for this bake) and the other scheduled bakes could wait, so it usurped my plans.

The original recipe called for a Bundt or tube cake pan but I opted for two decorative pans that I haven’t used in a while. The small well pan didn’t work great. The crumb was too big for any detail of the pan to be well defined, but it did make nice bite sized mini-cakes.

This is a basic, easy cake recipe with clear directions. The result is a moist, soft, flavorful cake. The glaze adds a bit of sweetness. Sprinkled with confectioners sugar would also work well.

Moist Fig Preserve Cake with Caramel Glaze

INGREDIENTS
For the Fig Cake:
• 2 cups all-purpose flour
• 1 1/2 cups packed light brown sugar
• 2 teaspoons baking soda
• 1/2 teaspoon salt
• 1 teaspoon ground cinnamon
• 1 teaspoon ground nutmeg
• 1/2 teaspoon ground allspice
• 1/2 cup (4-ounces) unsalted melted butter
• 1/2 cup vegetable oil
• 3 large eggs
• 1 cup buttermilk (or 1 Tbl lemon juice in a cup of milk)
• 2 teaspoons pure vanilla extract
• 1 cup fig preserves, or jam
• 1 cup coarsely chopped macadamias or hazelnuts
For the Caramel Glaze:
• 4 tablespoons (2-ounces) unsalted butter
• 1/4 cup packed light brown sugar
• 1/4 cup granulated sugar
• 1 dash salt
• 1/2 cup whipping cream

METHOD
Make the Fig Cake

  1. Preheat the oven to 325F.
  2. Generously grease and flour a 10-inch Bundt cake pan or 12 cup one-piece tube cake pan, making sure to cover all of the nooks and crannies. (Alternatively use cake spray, it released the cakes well. I used a 6 well Bundt cake pan and a 36 well pan for bite sized cakes.)
  3. In a mixing bowl, combine the flour, light brown sugar, baking soda, salt, and spices. Stir to blend thoroughly. Add the melted butter and vegetable oil and beat until blended.
  4. In another bowl, whisk the eggs. Add the eggs to the first mixture and beat until blended.
  5. Add the buttermilk and vanilla and beat until smooth.
  6. Add the fig preserves and chopped nuts; stir to blend.
  7. Pour the batter into the prepared baking pan. (1/2 cup of batter in each well of the larger pan, 1 tsp in the smaller.)
  8. Bake for 55 to 60 minutes, or until the center of the cake reaches 190F. (The smaller pan was baked for 20 minutes, the larger one for 30 minutes.)
  9. Cool the cake in the pan on a rack for 10 minutes. Slide a knife around the sides of the cake to ensure it isn’t sticking, and then carefully invert it onto a cake plate and let it cool completely.

Make the Caramel Glaze

  1. Combine the butter, brown sugar, granulated sugar, and a dash of salt in a small saucepan.
  2. Place the pan over medium heat and cook for 1 minute, or until bubbling, stirring constantly.
  3. Add the cream to the sugar mixture and bring the glaze to a boil. Continue to cook for 2 minutes, stirring constantly.
  4. Let the glaze mixture cool slightly; drizzle the warm glaze over the cooled cake.

Blackberry Year End Scones

My blackberries finally succumbed to the heat. I picked several pints but lost many times that due to dehydration in the 100+ temperatures. Luckily I froze a few pints and used about 175g of them to make scones this morning and have enough to make another couple of dozen scones later. Also Luckily, the scones freeze well and only need to come to room temperature to be as good as fresh.

Berry Drop Scones

INGREDIENTS

  • 2 ½ cups (312g) all-purpose flour
  • 1 tablespoon baking powder
  • 3/4 teaspoon kosher salt
  • 1/3 cup (67g) sugar
  • Zest of 1 small lemon (or orange or lime)
  • ½ cup (115g) unsalted butter, chilled and cut into cubes
  • 150-175g berries. Use any berries that you like.
  • 1 cup heavy cream + extra if required
  • Coarse or turbinado sugar for topping

METHOD

  1. Preheat oven to 400. Line a baking sheet with parchment paper.
  2. In the bowl of a food processor, add the flour, baking powder, salt, sugar and zest. Pulse a few times to incorporate.
  3. Add the cubed butter and pulse to incorporate. The mixture should resemble very coarse sand.
  4. Empty the flour mixture into a mixing bowl. Add the cream and stir until just barely incorporated. Add additional cream by the tablespoon to help the dough come together
  5. Gently fold in the berries. It’s fine if the raspberries break up a little – it adds a nice pink stain to the dough. The dough should just be moist, not wet, but also not crumbly or powdery looking. If it looks too dry, add a tablespoon of cold water.
  6. Spoon, or use your hands, the dough into 12 equally sized pieces on the parchment lined baking sheet. Sprinkle some coarse or turbinado sugar over the top, if desired.
  7. Bake for 16-19 minutes, rotating the pan halfway through. The scones should be lightly golden and cooked through. I rotate the pan after 10 minutes
  8. Cool in the pan for 5-10 minutes then carefully remove to a cooling rack.

Gluten Free Sandwich Bread from White Gold

This will be my last Gluten Free recipe (at least for now.) It is a sandwich bread from White Gold Gluten Free flour.

I used their recipe with minimal changes (Calcium free milk and butter replacing the original ingredients.) I also use an egg-white wash rather than a full egg wash.

The crumb and texture are excellent and the flavor approaches a wheat flour loaf. Use a digital thermometer and remove from oven when the interior temp reaches 200F.

(Tent the bread when it browns at about 20 minutes of baking.)

Gluten Free Sandwich Bread (White Gold)

INGREDIENTS:
• 1 package (1.1 Lb) Extra White Gold gluten free bread flour
• 1 Tbsp. dry yeast (1 envelope)
• 2 tablespoons honey
• 3 eggs
• 1 c. lukewarm almond milk
• 3 Tbl softened butter (replacing ¼ cup vegetable oil)
• ½ tsp salt (replacing 1 ½ tsp. salt)
• 1 egg for egg wash
• Sesame seeds (optional)

METHOD:

  1. Add the flour, honey and yeast to a stand mixer bowl. Mix for 3 minutes with a paddle attachment.
  2. Add the eggs and almond milk and mix for 3 minutes. (NOTE: I used ¼ cup heavy cream and ¾ c 2% calcium free milk.)
  3. Add butter (or vegetable oil) and salt and mix on low speed for 4 minutes. The dough should be sticky.
  4. Let it rise for 90 minutes, in the mixer bowl, covered, in a warm dry place. (Such as a proofing oven)
  5. Pour/scape the dough in a bread loaf. (A narrower bread pan will help shape the bread.)
  6. Let the dough rise for 20 minutes.
  7. Pre-heat the oven to 375 deg. Place a shallow dish in the lower part of the oven
  8. Brush the bread gently with an egg wash and sprinkle sesame seeds (optional).
  9. Place the bread pan on a center rack and pour 1 cup of water into the shallow dish.
  10. Bake for 40-45 minutes, until golden brown. (Don’t over bake!)

Gluten Free Berry Drop Scones

Continuing the thread of gluten free bakes, this one provides a nice gluten free snack or breakfast without being “breads.”

The only changes I made to the original recipe are including xanthan gum and substituting milk and cream for almond milk.

Gluten Free Berry Drop Scones

INGREDIENTS

  • 2 1/2 cups Bob’s Red Mill Gluten Free AP flour
  • 1 tablespoon baking powder
    • 3/4 teaspoon kosher salt
    • 1/3 cup sugar
    • 1 ½ tsp xanthan gum (optional)
    • Zest of 1 small lemon
    • 1/2 cup vegetable shortening chilled and cut into cubes
    • 150-175g fresh raspberries
    • 1 cup almond milk (See NOTE below)
    • Coarse or turbinado sugar for topping

METHOD

  1. Preheat oven to 400F. Line a baking sheet with parchment paper.
  2. In the bowl of a food processor, add the flour, baking powder, xanthan gum (optional), salt, sugar and zest. Pulse a few times to incorporate.
  3. Add the cubed Crisco and pulse to incorporate. The mixture should resemble very coarse sand.
  4. Empty the flour mixture into a mixing bowl. Add the almond milk and stir until just barely incorporated. (NOTE: I use ¼ c heavy cream and ¾ c 2% calcium free milk)
  5. Gently fold in the berries. It’s fine if the raspberries break up a little – it adds a nice pink stain to the dough. The dough should just be moist, not wet, but also not crumbly or powdery looking. If it looks too dry, add a tablespoon of cold water.
  6. Spoon (I used my hands, wetted if necessary to form small balls of dough) the dough into 9-12 equally sized pieces on the parchment lined baking sheet. Sprinkle some coarse or turbinado sugar over the top, if desired.
  7. Bake for 16-19 minutes, rotating the pan halfway through. The scones should be lightly golden and cooked through.
  8. Cool in the pan for 5-10 minutes then carefully remove to a cooling rack.

Blackberry Season

“It’s been a long time comin’ but I know a change is gonna come.“

Blackberry season is in the summer. Summer is when it’s hot outside. When it’s very hot outside blackberries can burn and be damaged.

It’s about 110F today so I went to check on my crop. To my surprise there were many to be gathered and fewer sun damaged. Oh boy!

New “Best Ever” Chocolate Chip Cookie Recipe

Thanks to my friend Beth here is a new chocolate chip cookie recipe. I can’t even tell you how long Beth and I have been friends. Our parents were life long friends before us and we simply continued the relationship.

This recipe has slightly different ingredient ratios than my “go-to” recipe. Plus it doesn’t use light brown sugar but substitutes turbinado sugar for the white granulated sugar, which adds a light caramel flavor. The author did not specify what kind of sugar to use, but the video showed a non-white sugar. The turbinado would add some of he flavor removed by not using the light brown sugar. (Full disclosure, I didn’t have any turbinado but did have some demarara which is similar to turbinado but a little darker and coarser.)

This author (Emojoie) only made 4 cookies (mine were 123g each) whereas next time I will make a dozen (~40g each) or so.

Chocolate Chip Cookies Best Ever from YouTube

INGREDIENTS
• 100g butter, softened.
• 80g Demerara or turbinado sugar
• 1g salt
• 50 g (1 large egg)
• ½ tsp vanilla extract
• 160g all-purpose flour
• 3g baking soda
• 100 g (3/4 c) chocolate chips
• 50g hazelnuts (optional)

METHOD

  1. Preheat oven to 375° F.
  2. Beat by hand: butter, sugar and salt in large bowl until creamy. (Don’t over beat.)
  3. Fork whip the egg and add in two additions mixing to incorporate after each addition
  4. Add vanilla and mix well
  5. Gradually add flour mixture mixing by hand. (Again, don’t over beat.) it should form one large ball between wet and dry dough.
  6. Stir in morsels and optional hazelnuts and mix by hand.
  7. Chill in the fridge for 30 minutes.
  8. Divide the dough into 135 g portions
  9. Form into balls with hands and add more chocolate to the top
  10. Bake for 13 – 14 minutes or until golden brown. Do NOT overbake!
  11. Cool on baking sheets for 2 minutes; remove to wire racks to cool completely.

Gluten & Dairy & Soy Free Artisan Bread

Continuing my gluten free string, this is an artisan bread recipe (mostly) from Kim, the creator of Kim’s Gluten Free Bread Flour.

While preparing the dough I was skeptical of the outcome. The dough was VERY wet (why wouldn’t it be with 100% hydration?) It fermented well and rose as expected but the shaping and proofing was… challenging.

I forgot that the best way to prepare the dough for proofing is to stretch and fold it in a bowl, rather than knead it on a floured surface. I made the change to Kim’s method below.

I also thought that after proofing the dough was very wet and wouldn’t score well, but I was wrong. I also thought that the scored bread wouldn’t have any oven spring, but was also wrong. I also, also thought that adding an extra 10 minutes to the baking time would be sufficient, but was also, also wrong. It probably needed another 30, or even 40 minutes for a total of 90-100 minutes. Not an also, but I should have taken the breads temperature near the end of the bake, but I didn’t, resulting in an underbaked center.

The taste was good, definitely LIKE bread, but certainly not like a typical wheat/gluten bread. The crumb and texture was good, just different. For our gluten free friend, she thought it was wonderful, besides all its faults because it was, indeed bread.

Gluten Dairy Soy Free Artisan Bread

INGREDIENTS
• 3 cups (420 g) Kim’s gluten free bread flour blend
• 1½ tsp xanthan gum (in addition to what’s already in the blend)
• 1 ½ tsp psyllium husk powder
• 1 tbsp (9 g) instant/rapid rise/fast-acting yeast (not active dry yeast)
• 1 tsp kosher salt
• 1¾ cups (420 ml) water*
• 2 tbsp (26 ml) olive oil
• 1 tbsp (21 g) honey

METHOD

  1. In the bowl of a stand mixer fitted with the dough hook, add all dry ingredients and whisk using a handheld wire whisk. Add the honey, olive oil, and water. Place on mixer and mix briefly to incorporate. Turn the mixer up to medium high and knead for 5 minutes. Remove the dough hook and scrape the dough into a cohesive mass using a plastic dough scraper or a rubber spatula (or scrape into another bowl). Cover and place the bowl in a warm, draft-free area and allow it to rise (proof) for 1-2 hours, or until doubled in volume.
  2. Refrigerate for at least 6 hours, preferably overnight, but up to 10 days.
  3. On baking day, remove the dough from refrigerator and dump it out onto well-floured surface.
  4. Loosely cover with plastic wrap (the piece that covered the bowl in the fridge.) Let the dough warm to room temperature.
  5. Place the dough in a medium sized bowl and stretch and fold until fairly smooth, wetting your fingers as necessary. It will be a somewhat sticky dough so keep a small bowl of water on hand to wet your fingers.
  6. To shape into a boule, simply form into a round ball, pulling the dough up and under the ball and pinching on the bottom. Place on parchment paper. To shape into a baguette, smooth the dough and roll into a rope shape, tapering it at the ends, adding more flour as necessary. Roll out as thick or thin as you’d like and as long as you’re able to fit in your oven (make sure it will fit on your pizza steel or stone). Place it on a sheet of parchment paper.
  7. Place the loaf or loaves, covered loosely with plastic wrap, in a warm, draft-free area to rise until visibly puffed and slightly larger, but not doubled in size, about 1/2 to 1 hour. This time will vary depending on the warmth of your proofing area. DO NOT over proof!
  8. BAKING STEEL OR STONE METHOD: Set up your oven for baking. Place a baking steel or stone (or overturned baking sheet) onto the middle rack with a shallow pan on a rack underneath. Preheat the oven to 450° F.
  9. DUTCH OVEN METHOD: Place a Dutch oven with a tight-fitting lid into the oven and preheat it to 500° F. You won’t need the shallow pan with steam as enough steam will be created in the Dutch oven once the bread goes in. NOTE: This will only work with boules or loaves that can fit into the Dutch oven. If you’re making a longer batard or baguette, you’ll need to use the first method.
  10. When the dough has finished rising and is visibly puffed, run a serrated knife under hot tap water and cut slits in the dough swiftly but uniformly, about ½-¾ inch deep.
  11. BAKING STEEL OR STONE METHOD: Fill a measuring cup with one cup of very hot water (from the tap is fine). Using a pizza peel (paddle), slide the loaf (or loaves) onto the baking steel (or stone), parchment and all. Immediately pour the cup of very hot tap water into the shallow pan. Quickly shut the oven door.
  12. DUTCH OVEN METHOD: Remove the lid carefully and carefully lower the dough, parchment and all, into the Dutch oven. Replace the lid and shut the oven door. Immediately reduce the temperature down to 450° F.
  13. BAKING STEEL OR STONE METHOD: Bake for about 30 minutes for baguettes, or about 40 minutes for boules, OR longer for larger boules (some larger boules can take up to an HOUR or more). If the loaves are getting too browned, you can cover them loosely with foil. The loaves will look crusty and done on the outside, but will feel light when picked up. If they feel heavy, they’re not done yet. Allow them to bake for another 5-10 minutes and then check again, picking up the loaf with two gloved hands. If they’re still feeling heavy, allow them to bake for another 5 minutes and check again.
  14. DUTCH OVEN METHOD: Bake the bread for 60 minutes with the lid on. Remove the cover and continue to bake for another 20 minutes. Check for doneness with a digital thermometer. The bread will be done when the temperature in the center is 200-205F..
  15. Remove from the oven and place on a cooling rack. Allow to cool COMPLETELY before cutting (or it will be gummy on the inside).

Kim’s Gluten Free Bread Flour Blend

Yield: 700g (5 c)

INGREDIENTS
• 285g Bob’s Red Mill potato starch
• 250g superfine white rice flour (DON’T use regular rice flour, ie Bob’s Red Mill)
• 75g Tapioca flour
• 75g Whey protein isolate or egg white protein.
• 15g Xanthan gum

METHOD

  1. Weigh all ingredients and add to a stand mixer bowl
  2. Mix on low, with bowl covered for 30 seconds

Key Lime Tartlets Using Kim’s Bread Flour

QC asked if I could bake something for a friend of ours who is gluten intolerant. I instantly thought of these key lime tartlets. They are delicious. I’m also baking a loaf of gluten free artisan bread and while searching for the recipes I found one for gluten free berry scones. Bingo!

For brevity I am posting each bake under a different title. Otherwise the post would be looooonnnnnggggg,

Adding the juice of a lime to the filling adds some acidity and tartness that really makes the bake.

Key Lime Tartlets Using Kim’s Bread Flour

INGREDIENTS
SHELL
• 100 g cold butter cut into small cubes
• 60 g icing sugar
• 200 g Kim’s Bread flour
• ½ tsp vanilla
• ¼ tsp salt
• 2 eggs – 1 for the dough and the other 1 reserved for an egg wash

FILLING (For the tart, double the amount filling.)
• zest (grated rind) of 1 lime
• 4 large egg yolks
• 14-ounce can (397g) sweetened condensed milk, (1 1/4 cups)
• 3/4 cup (170g) Key lime juice
• Juice of 1 lime

METHOD
SHELL

  1. Mix butter with sugar until well incorporated 3-5 min
  2. Add salt then vanilla.
  3. Add egg and mix 3-5 min
  4. Stir in flour. Mix by hand until incorporated and forms a thick smooth(ish) sticky dough
  5. Cover with plastic and refrigerate for 30 min.
  6. Butter or lightly spray tartlet pans or use non-stick pans.
  7. Roll dough between parchment paper to about ⅛” thick
  8. Pre-heat oven to 350 degrees
  9. Refrigerate rolled dough still between parchment paper until firm: 20 – 30 minutes
  10. Remove from fridge and while still firm, cut dough to rounds about 1” larger diameter than the mold. Cut all the rounds at once while still firm. If necessary, return to the fridge to firm up. Again, if necessary, use an offset spatula to remove the circles from the parchment paper. Keep the spatula clean.
  11. Lay tart dough circles over molds. This allows the dough to thaw slightly and be pressed into the molds and fill all crevices.
  12. Return to fridge for 15 – 20 min to firm up the shell
  13. Prick holes in bottom of formed dough
  14. Place a mini cupcake paper in each tart and fill with with pastry weights (or beans)
  15. Paint edges of the tartlet with an egg-white wash. (Whisk one egg white with 1 Tbl water)
  16. Bake in preheated oven 350 deg F (175 C) for 8 min until edges are dry
  17. Remove pastry weights and bake an additional 4-6 minutes to dry the bottoms. Bake until the edges begin to turn light brown and the bottom is nearly dry.
  18. Immediately remove from pans and cool on a wire rack

FILLING

  1. Whisk the lime zest and egg yolks at high speed of an electric mixer for about 4 minutes. The mixture will lighten in color and thicken somewhat, appearing similar to Hollandaise sauce.
  2. Stir in the sweetened condensed milk, mixing until smooth. Beat at high speed for 3 minutes; the filling will become slightly thicker and gain a bit of volume.
  3. Add the lime juice, stirring just to combine. The mixture will thicken again. Add lime oil to taste.
  4. PIPE the filling into the crust and return the tart (on the baking sheet) to the oven. Bake the tart for 12 to 18 minutes, until it appears set around the edges though still a bit wobbly in the center. The center should read about 145°F on a digital thermometer.
  5. Remove the tart from the oven and cool to room temperature. Refrigerate for several hours before serving.
  6. Once chilled, serve the key lime pies cold with whipped cream, or merengue and a lime slice or zest, if desired.
  7. Store leftover pies in the refrigerator (covered) for up to 1 week. If they last that long!

ITALIAN MERINGUE (NOTE: Alternatively use whipped cream)

INGREDIENTS
• 80g (or 0.4 cup or 6.5 Tbl) granulated sugar
• 30ml (or 1/8 cup) water
• 60g (or ¼ cup) egg whites (about 2 large egg whites)
• 20 g icing sugar

METHOD

  1. Whisk the egg whites into a light and fluffy foam, using an electric (stand) mixer.
  2. Add the icing sugar and continue whipping until you’ve got a glossy stable foam. It should stay in place if you turn the bowl upside down. Set aside.
  3. Add the granulated sugar and water to a pan and bring to a boil. Once all the sugar has dissolved, refrain from stirring. Continue boiling at moderate/high heat while continuously keeping an eye on the temperature.
  4. Once the solution has reached 121°C (250°F), take it from the heat immediately*.
  5. While SLOWLY beating the egg whites, gently pour the hot sugar solution into the whipped egg whites (this is where the stand mixer comes in handy!).
  6. Once all the sugar syrup is in, turn up the speed to high and continue whisking until the foam is lukewarm.
  7. Use the meringue immediately to top whatever it is you want to cover.

Kim’s Gluten Free Bread Flour Blend

Yield: 700g (5 c)
INGREDIENTS

  • 285g Bob’s Red Mill potato starch
  • 250g superfine white rice flour (DON’T use regular rice flour, ie Bob’s Red Mill)
  • 75g Tapioca flour
  • 75g Whey protein isolate or egg white protein.
  • 15g Xanthan gum

METHOD

  1. Weigh all ingredients and add to a stand mixer bowl
  2. Mix on low, with bowl covered for 30 seconds

I’m Doctor Fraisier Cake, and I’m listening

The GGBO is a very bad influence. I saw this cake (again) and thought it would be a great summer dessert. (It is.) Once again, Mary Berry does not disappoint. Maybe I should stop re-watching the show…

This is a pretty technical bake with lots of steps requiring careful timing. The genoise needs to be baked and cooled. The strawberry syrup needs to be heated twice. The agar has to be microwaved to boiling, then added to the pastry cream as it begins to boil but not before it thickens too much. The finished pastry cream must be room temperature before the whipped cream is added or it will melt the whipped cream.

Other than that, it’s pretty straightforward.

Fraisier Cake

INGREDIENTS
Genoise Sponge

• 4 Eggs
• 60 g (1/4 c) Caster Sugar
• 100 g (2/3 c) Plain Flour
• 20 g (2 ½ Tbl) Cornstarch
Strawberry Syrup
• 120 g Fresh Strawberries
• 118 g (1/2 c) Water
• 90 g (6 Tbl) Caster Sugar
Crème Diplomat
• 500 ml (2 c) Full Cream Milk
• 1 tsp Vanilla Paste – or 1 fresh Vanilla Bean
• 1 tsp Orange extract – optional
• 4 Egg Yolks
• 30 g (2 Tbl) Caster Sugar
• 35 g (1/4 c) Cornstarch
• 1 tsp Agar-Agar Powder
• 4 Tbl of water
• 250 ml (1 c) Whipping Cream + 1 Tbl cornstarch
Cake Filling
• 500 g (about 1 pound) Fresh Strawberries – or more to taste
• 20 g (1/4 c) Flaked Almonds – optional
Cake Toppings
• Icing Sugar – to taste
• Fresh Strawberries – to taste
• Flaked Almonds – to taste
• Mint Leaves – to taste

METHOD

Genoise Sponge

  1. Preheat your oven on 160’C/325’F. Line two 8” round springform pans with parchment paper and set aside.
  2. In the bowl of a stand mixer, whisk the eggs and caster sugar on medium/high speed for 5 to 8 minutes, or until very pale, frothy and doubled in size.
  3. Sift the flour and cornstarch over the sugar/eggs and gently fold in with a spatula until it’s all incorporated. Pour over the lined springform pans and gently spread with an offset spatula to level the batter. Weigh each pan/batter to assure they are the same weight and therefore size.
  4. Bake for 10 to 12 minutes or until puffed and golden. Transfer over a cooling rack and leave to cool down completely before releasing the pan and removing the baking paper.

    Strawberry Syrup
  5. Blend the strawberries (thawed if using frozen) then place the strawberry puree, water and sugar into a small pot on low to medium heat. Cook for about 5 minutes, occasionally stirring, or until the sugar has dissolved and the liquid has started to slightly thicken.
  6. Sieve the mixture through a fine sieve to remove everything except the liquid.
  7. Set aside to cool.
  8. (NOTE: After coating one side of both genoise sponges return the syrup to the heat and cook until it thickens. Then cool, covered with plastic wrap directly on the syrup.)

Crème Diplomat

  1. Mix agar-agar and water in a small bowl. Microwave for 30 seconds and mix until it is a clear gelatinous liquid. Let cool to the touch, but still warm.
  2. Whisk eggs and milk together and add to all other ingredients (except extracts and agar-agar gel) to a medium saucepan.
  3. Bring to boil whisking constantly
  4. Add the still warm agar-agar gel to the pastry cream
  5. Cook until thickened (it will look lumpy, its ok)
  6. Sieve lumpy mixture into a bowl, add extracts whisk until dissolved and combined. Transfer the pastry cream into a clean bowl or tray, cover with plastic wrap touching the surface and place in the fridge to cool down.
  7. Once the pastry cream has reached room temperature, start whipping the cold cream until you reach stiff peaks.
  8. Whisk the pastry cream to loosen it then gently fold in the whipped cream in 3 or 4 portions. Transfer into a piping bag with large round piping tip (Wilton #A1.)

Assembling the Cake

  1. Pick strawberries that have about the same height to create the edges of the cake. Remove the stems and slice them in half to form a triangle. Cut the rest of the strawberries into small cubes and set aside.
  2. Surround the interior of a 8×2 inch springform pan with an Acetate Strip.
  3. Put the first layer of genoise at the bottom of the ring and brush it with strawberry syrup.
  4. Place the strawberries sliced in half around the edges of the cake, sliced side facing out. Try to place them as tightly against each other as possible.
  5. Pipe the crème diplomat between each strawberry, going as high as the pastry ring. Add about half the of the crème over the genoise and spread with an offset spatula if needed.
  6. Cover the cream with the cubed strawberries and almond flakes (optional). Gently press on them to avoid any large air pockets.
  7. Pipe the rest of the crème diplomat over the cubed strawberries and almonds, going all the way to the edges of the pastry ring (and over the strawberries on the edges).
  8. Brush the second layer of genoise with the strawberry syrup (on one side only) and cover the cream with it, brushed side facing in. Gently press on it to even it out.
  9. Place in the fridge to set for 2 to 3 hours, or overnight.

    Cake Toppings
  10. To finish the cake, sprinkle icing sugar over the genoise. Use the thickened and cooled strawberry syrup to drizzle a design on the genoise.
  11. Add some slices of fresh strawberries in the centre of the cake with fresh mint leaves and flaked almonds.
  12. Carefully remove the pastry ring and acetate strip before serving.
  13. Carefully remove the pastry ring and acetate strip before serving.