Sally’s Baking Addiction – Ciabatta – Jan 2025

I just typed the year for the first time and got it right!

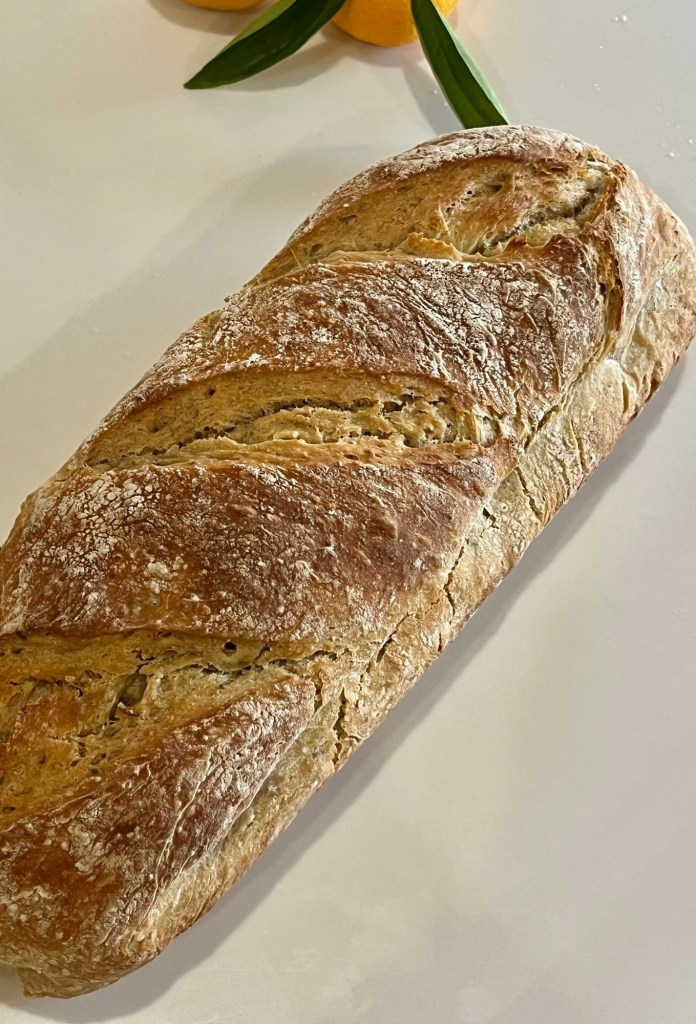
Sally set this month’s challenge as ciabatta bread. Her recipe is based on KAB’s, but with a few minor changes that makes the method easier but remains fantastic. In the past I used KAB’s recipe and method but I am now a Sally convert. (As I am with so many other fantastic bakes.)

There are a lot of steps in this bake, making it intermediate level difficulty . Follow Sally’s directions (which I modified very, very slightly) and you too can enjoy this amazing bread.

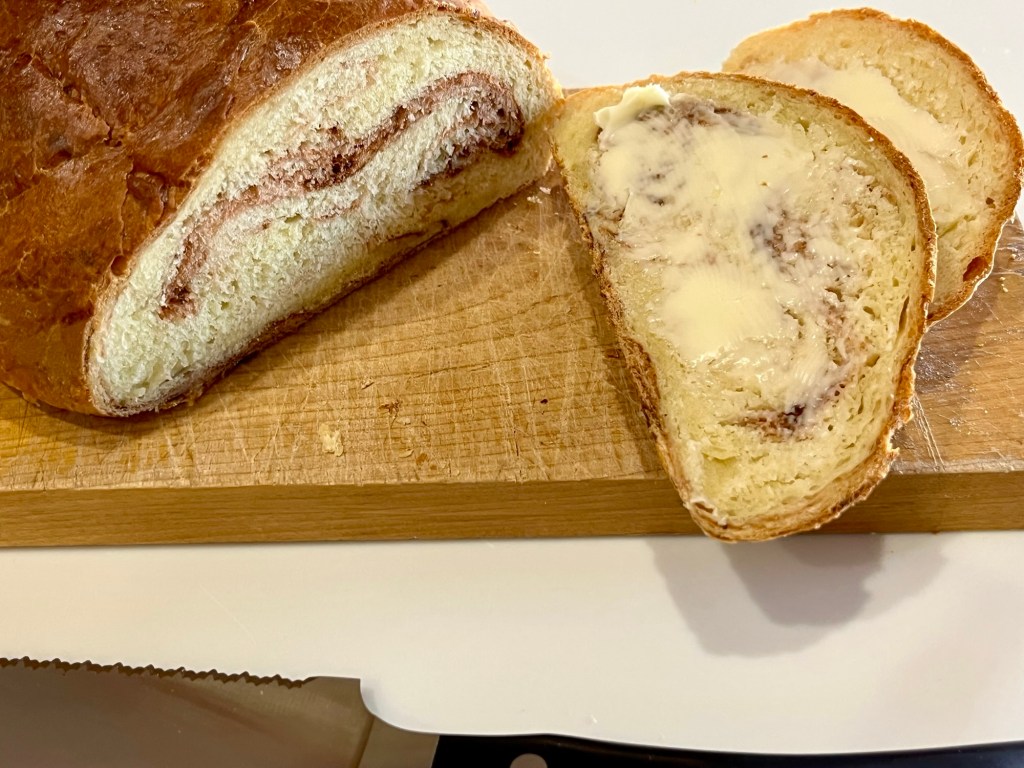
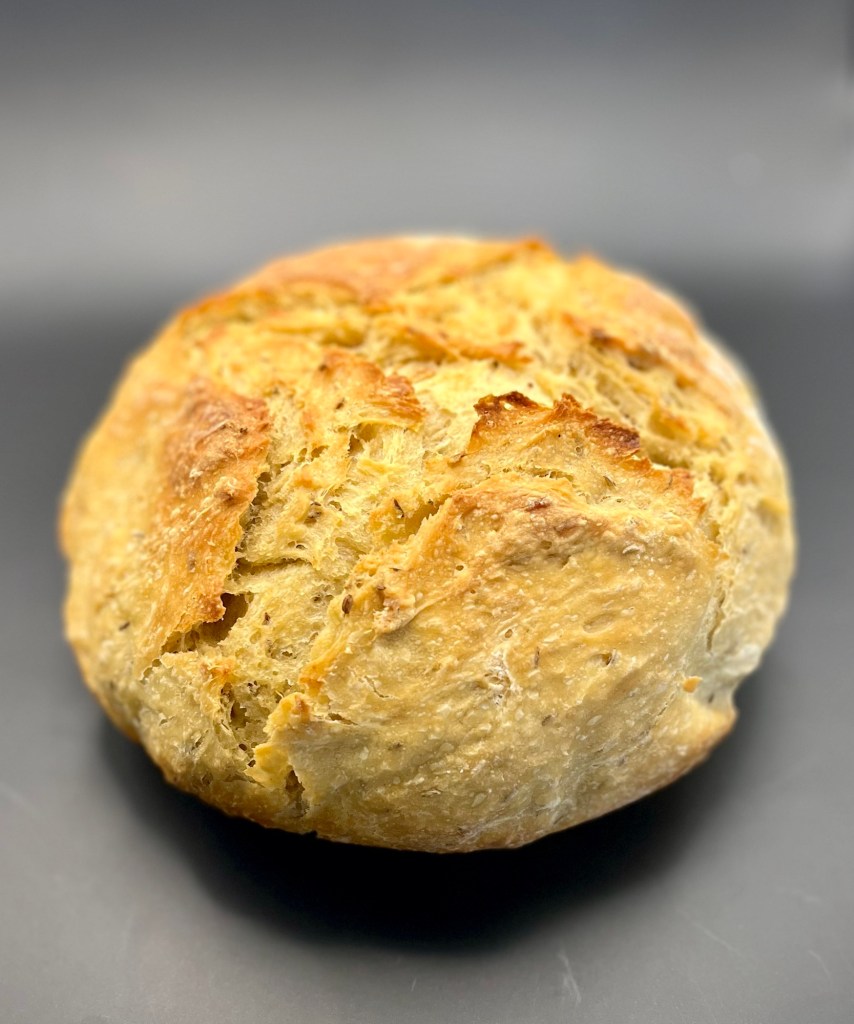
Good with or without butter, with or without oil and vinegar. I know, I tried it both ways.

Homemade Ciabatta Bread -Sally


INGREDIENTS
Biga/Preferment
• 130g (1 c) bread flour
• 1/8 tsp active-dry or instant yeast
• 120g/ml (½ c) room-temperature water (about 70°F)
Ciabatta Rolls
• 3g (1 tsp) active-dry or instant yeast
• 240g (1 c) warm water (about 100–110°F)
• 325 (2 ½ c) bread flour, plus more as needed
• 8g (1 ½ tsp) table salt
• olive oil, as needed for coating hands and spatula

METHOD
Day 1: Make the biga/preferment:

  1. In a large mixing bowl, whisk together the bread flour and yeast.
  2. Add the water and mix with a silicone spatula until combined.
  3. Cover the bowl tightly with plastic wrap and let rest at room temperature for 8–24 hours.
    Day 2: Make the dough:
  4. Uncover the bowl with the biga. In a separate large mixing bowl whisk together the yeast and warm water.
  5. Cover and let sit for 5 to 10 minutes until the yeast has dissolved.
  6. Add the biga, flour, and salt. Gently mix together with a silicone spatula or Dutch bread whisk. The dough will seem dry and shaggy at first but keep working it until all the flour is moistened and the dough is uniform in texture (no dry pockets). If needed, lightly grease your hands with olive oil and gently knead the ingredients together in the bowl. The dough will be wet and sticky; that’s normal, expected, and encouraged.
  7. 1st rest: Cover the bowl and let the dough rest for 30 minutes at room temperature.
  8. 1st stretch-and-fold: Visualize a clock on top of your dough. You’ll be folding it at the 12 o’clock mark. With an olive oil-greased spatula or lightly oiled hands, lift up the dough at 12 o’clock and gently stretch it up and pull it toward the opposite side of the bowl (6 o’clock), folding it down over the dough. Turn the bowl 90 degrees and repeat. Do this until you’ve gone around the bowl twice, for a total of 8 folds. Cover the bowl and let rest for 30 minutes at room temperature.
  9. Remaining stretch-and-folds: Repeat step 8 three more times, allowing the dough to rest for 30 minutes between each. Use a coil fold for the 4th stretch-and-fold then cover the bowl and place it in the refrigerator for at least 1 hour and up to 24 hours.
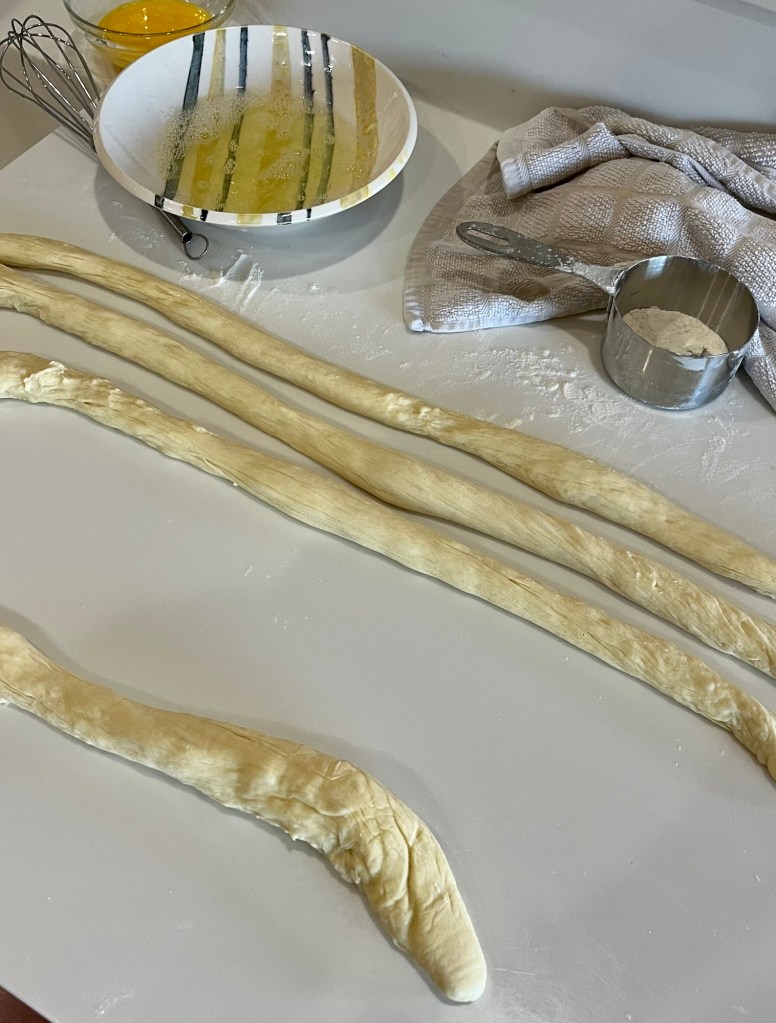
  10. Shape the rolls/bread: Very generously flour your counter or work surface. Using lightly oiled hands or a lightly oiled spatula, gently scrape the dough out of the bowl and onto the floured surface. Generously sprinkle flour on top of the dough. Using floured hands, gently stretch and shape the dough into a rough rectangle shape, about 10×7 inches in size.
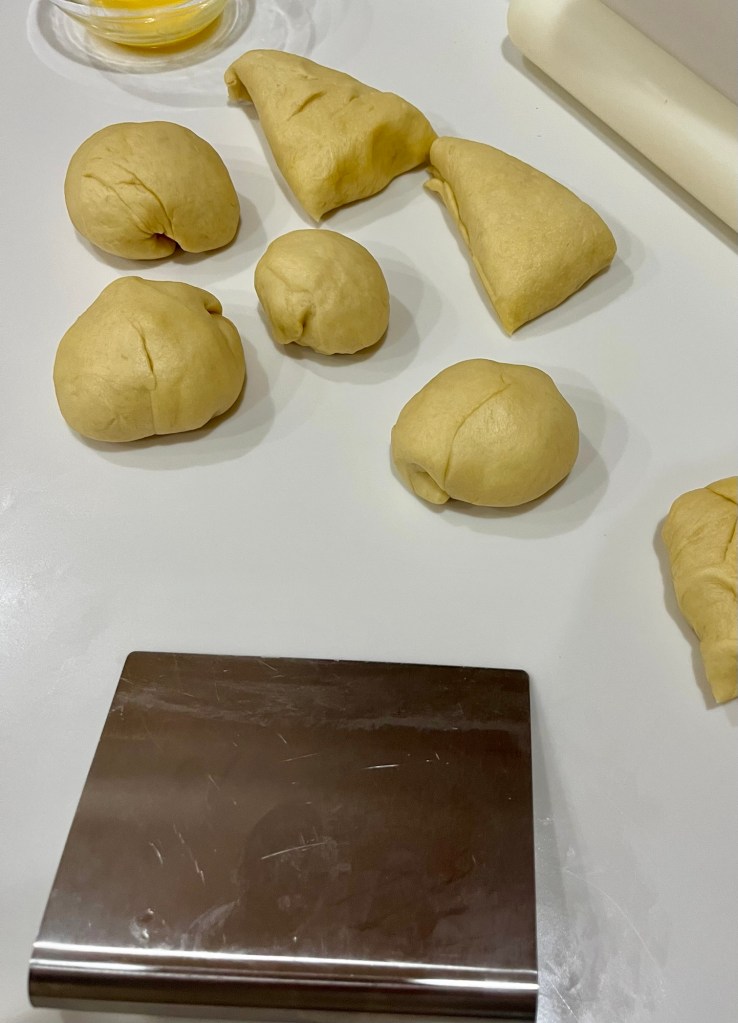
    a. For 8 rolls: With a floured bench scraper, cut the dough into 8 pieces each around 2.5×3.5 inches.
    b. For 2 loaves: With a floured bench scraper, cut the dough in half to make two 5×7-inch (or 10×3.5-inch) rectangles.
  11. Lightly flour a piece of parchment paper. With floured hands, and using the floured bench scraper to help, lift the sticky dough pieces up and transfer them to the floured parchment, arranging them at least 2 inches apart to make room for expanding. Take care to be extra gentle because you don’t want to deflate the dough. If the pieces of dough lost shape during the transfer, gently reshape into rectangles.
  12. Proof Before Baking: Lightly sprinkle flour over the rolls, and then gently cover them with a clean kitchen towel or piece of parchment paper. Let rest at room temperature for 1 hour.
  13. Meanwhile, position one oven rack in the very bottom position and another rack in the center/middle position. Place a flat cookie sheet or a rimmed baking sheet on the center rack. Preheat the oven to 450°F (232°C). You want your oven and baking surface to be heating for about an hour before the bread goes in.
  14. When ready to bake, scatter several cups of ice cubes in a large shallow metal roasting pan, cast-iron skillet, or rimmed baking sheet (do not use glass). Uncover the rolls and lightly spray or flick them with a little water. (This is optional, but it helps create even more steam, which promises a crispier crust.) Working quickly, carefully remove the preheated baking sheet from the oven and slide the parchment paper and proofed bread onto it. Place back in the oven. Slide the pan with the ice cubes onto the bottom oven rack and quickly close the oven door, trapping the steam from the melting ice inside.
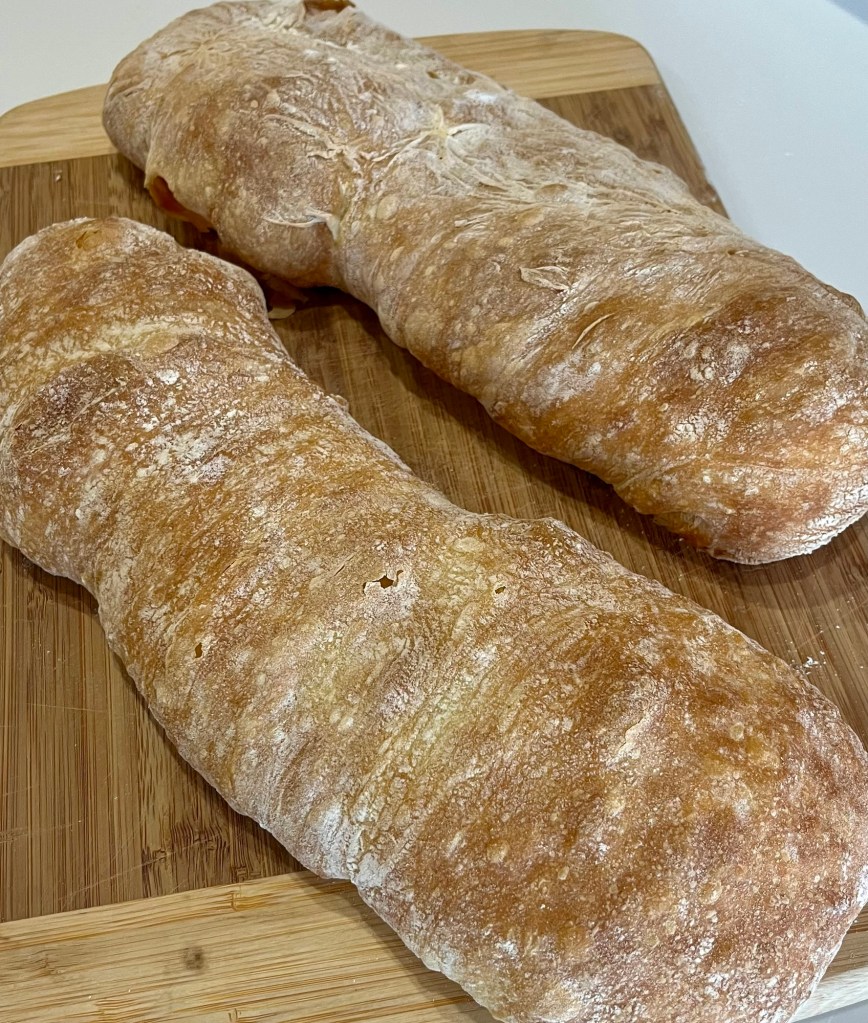
  15. Bake for 20–22 minutes, or until the bread/rolls are golden brown. I usually extend this time to 25 minutes, for a deeper golden color. Gently tap the bread—if they sound hollow, they’re done. For a more accurate test of doneness, the bread is done when an instant-read thermometer inserted in the bread reads 205°F (96°C) to 210°F (99°C).
  16. Remove the rolls from the oven and allow to cool for at least 45 minutes before slicing and serving. If you cut into the bread too early, it will likely have a gummy texture.
  17. Store leftovers loosely covered at room temperature for up to 5 days or in the refrigerator for up to 1 week.

    Notes
  18. Make Ahead & Freezing Instructions: There are many ways to make this dough ahead of time. First, in step 1, the biga can sit for up to 24 hours. Second, in step 5, after you have completed all of the stretch-and-folds, the dough can sit in the refrigerator for up to 24 hours. You can also bake the bread, allow it to cool, and freeze for up to 3 months. Thaw at room temperature before serving.
  19. Flour: For absolute best flavor and chewy texture, I strongly recommend using bread flour. You can use a 1:1 substitution of all-purpose flour in a pinch with no other changes to the recipe, however the dough may not be as strong, and may not hold shape very well. Do not use whole-wheat flour in this dough.
  20. Yeast: You can use instant or active dry yeast, but I highly recommend an instant (aka “rapid rise” or “quick rise” yeast). If using active dry yeast, there are no changes needed to the recipe.
  21. Adding Herbs/Flavors: Fresh or dried herbs are best for flavoring this dough. My favorite is fresh or dried rosemary with a little garlic. When adding the salt in step 2, add 2 and 1/2 teaspoons fresh chopped rosemary or 1 teaspoon dried, plus 2 minced garlic cloves. Feel free to replace the rosemary with another herb, and/or leave out the garlic.
  22. Can I Bake on a Pizza Stone? Yes. If you want to bake your bread/rolls on a pizza stone, place the pizza stone in the preheating oven for 1 hour. In step 10, place the shaped and scored dough on your preheated pizza stone. Bake as directed.
  23. Can I Use This Dough for Focaccia? Yes. Generously grease a 9×13-inch baking pan with olive oil. After completing step 5, pour the dough into the greased pan. Flip to coat all sides in the oil. Stretch and flatten the dough to fit the pan, being careful to avoid tearing the dough. If it’s shrinking back as you try to stretch it out, cover with a clean towel and let it rest for 5–10 minutes before continuing. This lets the gluten settle and it’s much easier to shape after that. Continue with step 7 in my focaccia recipe.

Azerbaijan Based Enriched “Simit-like” Bread

After Friday’s QC Cadre Fete I took this past Saturday and Sunday off. So back in the bakery this morning I made a new bread. It’s based on a blend of Azerbaijani and Turkish breads. My friend Maggie sent me a video of a rural Azerbaijani woman making bread that looks like this but only showed ingredients but no amounts or temperatures etc. I am sure the woman knows the amounts by looking at and feeling the dough. I do not.

Turkish “simit” was the closest bread I could find, but the ingredients and method were totally different from the bread in the video. I figured out the method based on the video and calculated the amounts, times and temperatures myself. Basically, it is not a “simit” but it’s a good a name as any until some Azerbaijani corrects me.

I also add a Tangzhong to increase the bread’s shelf life and make it softer.

The QC Cadre feels this may be the best bread ever (although my Pain de Cristal is very good, different but very, very good!)

Azerbaijan Enriched “Simit” Bread

INGREDIENTS
Tangzhong
• 60g (½ c) bread flour
• 320g (1 ⅓ c) whole milk (I use 2% milk plus ¼ c whole cream)
Dough
• 720g (6 c) bread flour plus 60g reserved to add to the dough as it kneads in case its too sticky
• 240g (1 c) warm water (~115F)
• 56g (4 Tbl) olive oil
• 2 large eggs
• 100g (½ c) sugar
• 18g (4 tsp) yeast
• 2 tsp kosher salt
• 104g (8 Tbl) softened unsalted butter
Egg Wash
• 3 large eggs, divided
• 2 Tbl water

METHOD

  1. In a small saucepan mix the tangzhong ingredients and heat while constantly whisking until the mixture looks like smooth mashed potatoes. (~2-3 minutes)
  2. Add tangzhong to the bowl of a stand mixer and sift remaining 720g of flour into the bowl
  3. Add warm water and oil into the flour
  4. Add egg, sugar, yeast, salt (not on top of yeast) and softened (but not melted butter)
  5. Mix well with Dutch whisk to combine and make a shaggy dough being sure all the butter is incorporated.
  6. Knead the soft, pliable dough (KitchenAid mixer speed 4 for 10 minutes.) If necessary, add more flour 20g at a time to help kneading.
  7. Remove dough from the mixer bowl (it will be very sticky) then oil the bowl and return the dough, flip it over to coat both sides of the dough with oil then cover and let rise until doubled. (~45- 60 min. I use an oiled proofing bucket)
  8. Dump from bowl onto lightly floured work surface. My dough weighed 1687g,
  9. Punch it down to de-gas then divide the dough into 9 pieces ~180-190g. (9 pieces 187g each)
  10. Reserve 2 balls for the roses and 7 for the coils.
  11. Let the 2 balls rest at room temperature and 7 balls rise, covered in a warm place.
  12. Working with 1 at a time (leave the rest covered,) roll each ball into a rope ~12” long, then let the rope rest as you shape the rest of the rolls. Repeat the roll/rest until you can roll the rope to ~36” long. (48” would be better.) The rope thickness should be ½-3/4” thick
  13. Form a ~5” diameter loop with one end and coil the end under and around a couple of times.
  14. Coil the other end around the rest of the loop and tuck the end under
  15. Cover and let rest
  16. Roll each of the two reserved balls into a large circle ~2mm thick on a lightly floured surface, like a thin pie crust. ~12” diameter yields ~12 three-inch circles. Let the dough rest once or twice to reduce shrinkage during rolling.
  17. Cut 4” long ovals (they may be circles, distorted by the angle of the camera) and stack 6 over-lapping leaving ½ to ⅓ uncovered
  18. Roll up, then cut in half, placing cut end on the table and spreading the loose end to resemble a rose. Don’t let the roses rise.
  19. Use scraps if necessary to make extra roses.
  20. Preheat oven to 375. degrees
  21. Separate ~3 eggs, first whisk the whites then whisk in ~2 tbl water
  22. Whisk the yolks and 1Tbl water to make an egg wash
  23. Dip one side of each coil into the egg-white wash, then dredge that side in the sesame seeds and set on a parchment paper lined baking pan sesame side up
  24. Place a dough rose inside each coil and egg wash the rose with egg yolk wash
  25. Bake until done. (~20-25min) They should be a golden brown with the egg washed roses darker. (~190F)

QC Cadre Fete

Yesterday we held our first ever QC Cadre Fete at our house. For those not in the know the Quality Control Manager (QC) is my wife, Fran. The QC Cadre incudes all our immediate neighbors, and significant others. To thank everyone for their reviews over the past year I made a selection of heretofore untried pastries and bread.

From front to back are” Snowflake Bread, fig newtons and raspberry filled profiteroles, chocolate glazed chocolate filled chocolate tarts with a croustillant layer and finally gingerbread millionaires bars.

Sadly, I pulled the gingerbread millionaires bars before the fete began. I over cooked the caramel and while it tasted good, it was a very hard crack and once you started to chew it, your mouth could be glued shut. As I said, this was the first attempt at each bake so accidents will happen, but not again!

Chocolate Orange Snowflake Bread

INGREDIENTS
For the Dough:
• 1c milk, plus 1 tbsp extra
• 30g (2 Tbl) cubed butter
• 2 Tbl olive oil
• 2 Tbl sugar
• 7g (2 ¼ tsp) instant yeast
• 175g AP white
• 175g bread flour, plus extra for dusting
• 1 tsp cinnamon
• A pinch of salt
• 1 orange, zested?
For the Filling:
• 100g cream cheese
• 2 Tbl sugar
• 2 Tbl cacao powder
• 1 Tbl cinnamon
• 1 Tbl cornstarch
• 1 orange, zested
For Decoration
• Candy orange peel

METHOD

  1. Combine the milk and butter and warm until just melted and lukewarm. Stir in the olive oil, sugar, and yeast. Let rest for 5 minutes.
  2. In a large bowl whisk flour, cinnamon, and salt. Pour in the yeast-milk and bring to a shaggy dough with a spoon. Tip onto a lightly floured work surface and knead for 1 minute to make a smooth ball of dough. Place in a lightly greased bowl, cover and leave somewhere warm for 30 minutes, to rise. Meanwhile, pre-heat the oven to 350ºF.
  3. Whisk together all the filling ingredients until smooth (you can microwave the mix for 10 seconds, if needed, to make it smoother to combine).
  4. Punch down the dough and form into 2 balls. (I like to weigh the dough and divide the total weight by 2 to make equal sized balls. My dough weighed 1630 g therefore, each ball should be ~815g.)
  5. Divide each ball into two smaller balls, each ~400g and form each into a rough circle ~6” diameter, then roll out into circles ~10”
  6. Place one circle down and coat with 1/3rd of the filling, leaving the outer 1” un-coated. Repeat for the next two layers and leave the top layer uncoated.
  7. Center a 10” cake pan and trim the circles to an even circle.
  8. Set a 3” bowl in the center of the stack of circles and press down making an impression
  9. Cut the dough from the perimeter to the outside of the 3” circle into 16 equal portions
  10. Twist adjacent portions away from each other and pinch the ends into a point
  11. Snip each dendrite is several places to form fronds, or feathers.
  12. Cover and let rise 20-30 min.
  13. Beat the egg with 1 Tbl water to use as the egg wash
  14. Brush the pastry evenly with the 1 tbsp egg wash and place in the middle of the oven for 22-25 minutes, until well-risen, golden and springy.
  15. Remove from the oven sprinkle with candied orange peel and cool for 20 minutes.

Homemade Fig Newtons

INGREDIENTS
• 1 pint fresh or preserved figs or 12 ounces dried figs 2 Pints
• 1 ½ cups AP flour 3 cups
• ¼ teaspoon baking powder ½ tsp
• ¼ teaspoon salt ½ tsp
• ¼ tsp ground cinnamon ½ tsp
• 1 stick butter 2 sticks
• 1/3 cup sugar 2/3 cup
• 1 egg 2
• 1 teaspoon vanilla extract 2 tsp
• 2 tablespoons orange juice 4 Tbl
If you are using:
• Fresh figs: Remove stems and boil figs with 2 cups of sugar in 1 cup of water for 45 minutes. Drain and cool. This seemed to be too much sugar and water. Try cutting in half. If too thin, cook down until temp reaches about 210.
• Dried figs: In a bowl, pour boiling water over figs (stems removed) and let rest 10 minutes. Drain all but 2 tablespoons water and stir in 2 tablespoons corn syrup + ¼ teaspoon cinnamon.
• Preserved figs: Drain syrup.

METHOD

  1. Puree figs in food processor into a thick paste (if too thick or thin to spread evenly, add a little water or flour until spreadable consistency is reached).
  2. Combine flour, baking powder, cinnamon, and salt together and set aside.
  3. Cream butter and sugar in a mixing bowl.
  4. Add egg and vanilla, mix until smooth
  5. Add orange juice and combined dry ingredients to bowl and mix until dough forms.
  6. Optional: form dough into a flat thick disk and chill to set butter and make it easier to roll and fold.
  7. Roll dough out on a floured surface into an 8”x14” rectangle about ¼” thick.
  8. Cut rectangle in half lengthwise.
  9. Spread fig paste onto half of each rectangle, lengthwise.
  10. Cut the rectangle in half crosswise, or even thirds to facilitate folding.
  11. Fold dough in half lengthwise to cover fig paste and pinch edges to seal.
  12. Slide each newton log onto a parchment lined baking sheet.
  13. Bake 25 minutes at 350 degrees until crust begins to brown.
  14. Slice into cookie-sized segments and cool. Slice while warm to reducing flaking.

Raspberry Italian Meringue Profiteroles

INGREDIENTS
Choux Pastry:

• ½ c (65 grams) AP flour
• ½ tsp granulated white sugar
• ¼ tsp salt
• 4 tbsp (55 grams) unsalted butter, cut into pieces
• ½ c (120 ml) water
• 2 large eggs, lightly beaten
Raspberry Italian Meringue
• egg whites room temperature
• 2/3 cup caster sugar
• 1/4 cup water
• 1/4 teaspoon cream of tartar
• 2 drops raspberry flavor
• 1-2 drops red food coloring
• Optional: 1 tsp freeze dried raspberry powder
Chocolate Glaze:
• 2 ounces (55 grams) semisweet chocolate, finely chopped
• ¼ c (60 ml) heavy “whipping” cream (cream with 35% butterfat content)
• ¼ tsp pure vanilla extract
• ½ tbsp light corn syrup (or golden syrup or glucose)

METHOD

  1. Preheat oven to 375o F (190o C) and place rack in center of oven.
  2. In a bowl whisk the flour with the sugar and salt.
  3. Place the butter and water in a saucepan over medium high heat and bring to a boil.
  4. Remove from heat and, with a wooden spoon, add the flour mixture, all at once, and stir until combined. It will look like mashed potatoes. Return saucepan to the heat and stir constantly until the dough comes away from the sides of the pan and forms a thick smooth ball (about 1-2 minutes). The dough will film the bottom and sides of the saucepan and make cleaning a pain.
  5. Transfer the dough to an electric mixer and beat on low speed to release the steam from the dough (about 1 minute).
  6. Once the dough is lukewarm start adding the lightly beaten eggs (dough will separate and then come together) and continue to mix until you have a smooth thick paste (dough will fall from a spoon in a thick ribbon).
  7. Place the dough in a pastry bag fitted with a large plain tip and pipe round mounds of dough (about 1 ½ inch) onto the parchment lined baking sheet. (When piping, hold the bag at a 90-degree angle, ie straight up.)
  8. Bake for 15 minutes and then reduce the oven temperature to 350o F (180o C).
  9. Remove from oven, pierce the bottom of each profiterole with a small skewer to release the interior steam.
  10. Continue to bake for a further 25 minutes or until the shells are a nice amber color and when split, are almost dry inside. Remove from oven and place on a wire rack to cool.
    Raspberry Italian Meringue
  11. Wipe down all tools with white vinegar or lemon juice to remove any trace of fat.
  12. Place sugar and water mixture over medium heat for 5 minutes. Do not stir it at all during this time. The mixture will look cloudy.
  13. Gently stir the mixture for 1 minute. There should be little to no granules of sugar left at this point.
  14. Once the mixture begins to bubble from the bottom, 3 to 5 minutes, place the digital thermometer in the pot and increase to medium-high heat. Do not stir it at all after this.
  15. In the bowl of an electric mixer, whip the eggs whites on low speed until foamy. Add the cream of tartar, increase the speed to medium and beat until soft peaks form.
  16. Allow the sugar mixture to come to a boil and watch carefully. Once it reaches 230 °F turn stand mixer on highest speed to whip egg whites to peaks.
  17. Once the sugar syrup reaches 240 °F, remove from heat and remove the probe. This takes about 4- 6 minutes.
  18. Allow the boiling to come to a slow bubble before moving on.
  19. Slowly pour sugar syrup (steady stream) into whisked egg whites. Avoid the whisk attachment or it will fling your mixture all over the bowl.
  20. Allow mixture to whisk for another 3-5 minutes until the mixer bowl is cool/room temperature to the touch.
  21. Add raspberry flavoring and if desired, the freeze-dried raspberry powder. (In my first attempt at adding the powder I added it prior to adding the sugar syrup and it ruined the soft peaks. I think adding at the end should work.)
    Chocolate Glaze:
  22. Place the chocolate in a heatproof bowl.
  23. Heat the cream just until boiling and immediately pour it over the chocolate.
  24. Gently stir until the chocolate has melted.
  25. Stir in the vanilla extract and corn syrup, mixing to ensure incorporation.To complete:
  26. Fill a piping bag equipped with a filling tip (such as Wilton 230). Inject crème pat into the hole you made to allow the steam to escape. When you feel the side of the profiterole begin to bulge, the éclair is full.
  27. Dip the top of each profiterole into the warm, thin ganache and set on a piece of waxed or parchment paper to dry. (I use the parchment paper previously used to line the baking sheet.)

Gingerbread Millionaire Bars

INGREDIENTS
FOR THE GINGER SHORTBREAD BOTTOM:
• 1 c butter
• ½ c packed dark brown sugar
• ¼ c (85g) un-sulfured molasses
• 1 large egg
• 1 tsp cinnamon
• 1 tsp powdered ginger
• ¼ tsp cloves
• ½ tsp salt
• 2 ½ c all-purpose flour
FOR THE CHEWY CARAMEL:
• ¾ cup packed light brown sugar
• ⅓ cup sweetened condensed milk
• ⅓ cup butter
• 3 tbsp. golden cane syrup (or honey as a substitute)
• 1 tsp. flaky sea salt
FOR THE CHOCOLATE TOP:
• 7 oz dark chocolate, chopped

METHOD

  1. Preheat oven to 350°F. Grease and line a 9×9 baking pan with parchment paper.
  2. In a standing mixer fitted with a paddle attachment, cream the butter, brown sugar, and molasses together until light and fluffy, about 2 minutes.
  3. Add in the egg, spices, fresh ginger, and salt, whipping an additional minute. Fold in flour, mixing only until combined.
  4. Transfer dough to prepared baking pan, patting down evenly. Bake for 15-18 minutes, until a knife inserted in the center of the shortbread comes out clean. Allow to cool while you make your caramel.
  5. In a small saucepan over medium low heat, combine the sweetened condensed milk, sugar, and honey. Use a rubber spatula to mix slowly but continuously for about ten minutes. The mixture will slowly turn a light golden color and begin to pull away from the sides of ithe pan. Heat until mixture reaches a nice golden caramel color then add the butter and mix until incorporated, then remove from heat and mix in salt.
  6. Pour mixture over ginger shortbread and use spatula to spread evenly. Place in the fridge to harden completely, about 2 hours.
  7. Once the bars have cooled, put the chocolate into a large glass measuring cup and heat in 30 second intervals. (My 1000W microwave requires 90 second total heating, but the chocolate should be stirred after each 30 second interval.
  8. Pour over chilled bars, then place back in fridge to harden.
  9. Cut into 1″x1″ cubes and serve! Will last up to 1 week when sealed tightly in a container in the fridge.

Lunch Anyone?

This noon we are co-hosting a soup and bread lunch for a group of friends. I decided to make some of my favorite breads to share. They are all documented in this blog, so I am not including any recipes here.

Pan de Cristal, or ice bread, is one of my favorites. It’s an open structure and crisp crust bread, and so good.

Artisan bread rolls are easy to make and are always delicious. I simply formed my normal artisan bread into small rolls and baked for a shorter time.

The bi-colored star loaf is based on my dinner roll recipe that everyone loves.

Baguettes are always a favorite and don’t forget the breadsticks. I made both rosemary and caper and olive breadsticks (my favorite.)

On The Head of a Pin – Angel Hair Bread

I saw a picture of Angel Hair Bread and of course, searched for a recipe. The one I found included a number of flaws, which I fixed, except one. The recipe didn’t call for any salt, and while I thought that was odd, I decided to give the bread a bake anyways. Note to self: If you think it is wrong, fix it.

The author also neglected to add the baking powder although it was listed in the ingredients, (I added it with the first portion of flour.) They also didn’t specify a pan size, but I calculated a 9 x 12” would work, also, I added oiling or spraying the pan, Parchment paper would have helped also, next time.

They also didn’t bother to give approximate times for resting, proving or baking. I watched, timed and noted everything.

The flavor is good, (although salt would have made it very good), and the crumb is excellent.

Angel Hair Bread

INGREDIENTS
• 1 ¼ c warm milk
• 2 eggs (1 for egg wash)
• 3 Tbl sugar
• 1/3 c oil
• 10 g yeast
• 10 g salt
• 10 g baking powder
• 700 g AP flour

METHOD

  1. Add warm milk, 1 egg, sugar, oil, salt, and yeast and mix well.
  2. Add 100 g of wheat flour and baking powder in 2-3 portions mixing well after each addition.
  3. Let rest 10 – 30 minutes until mixture is a little firm and full of bubbles
  4. Add the remaining flour and mix well
  5. Dump onto the table and knead it until it becomes smooth, ~8 minutes
  6. Let it rest 45 – 60 minutes (until doubled in size.)
  7. De-gas the dough then knead again
  8. Roll into a circle and divide into 8 pieces.
  9. Form into balls, then roll out to ~6” x 8” ovals
  10. Pinch one long edge of oval to stick to work surface. I stretched the stuck edge to form a rectangle, then cut slits ~ ½” into the thin edge and roll up so that the fingers are exposed.
  11. Lay into an oiled or sprayed 9”x12” baking pan
  12. Leave to rest 10-30 minutes, preheat oven while resting.
  13. Wash with the egg yolk mixed with a Tbl water.
  14. Bake at 350⁰F for 20-30 minutes, until golden brown.

Bi-color Pull Apart Bread

I made this trial loaf for a luncheon I am co-hosting next week. I made this type of bread before but my co-host is making soups and I wanted a bread that wouldn’t fight with the flavors of the soups. Rather than use cinnamon or chocolate to make the color, I used some gel food coloring.

I used my dinner roll recipe as the soft texture would pair well with the various soups. The resultant bread is soft, tender and if you closed your eyes and thought “dinner rolls” that is what you would think you are eating.

Bi-Color Pull Apart Rolls

INGREDIENTS
• 488g (2 cups) warm milk
• 2 Tbl instant dry yeast
• 50g white granulated sugar
• 2 tsp salt
• 6 Tbl salted butter softened
• 2 large eggs
• 750-850g all-purpose flour
• 1 egg and 1 Tbl water

METHOD

  1. In a stand mixer bowl, combine and mix all ingredients except the flour.
  2. Add in 5 ½ cups of flour. Using a dough hook, turn the mixer on and increase speed slowly to keep the flour from flying all over. Slowly add the remaining flour until the dough pulls away from the sides of the bowl. (I watch the bottom of the bowl and add flour until the dough just comes clean from the bottom.) Once the dough clears, knead for 8 minutes. The dough mixture should be sticky and soft.
  3. Transfer the dough to a lightly greased bowl. Cover and let rise 35-45 minutes (until doubled) in a proofing drawer,
  4. Punch down the dough and form into 2 balls. (I like to weigh the dough and divide the total weight by 2 to make equal sized balls. My dough weighed 1630 g therefore, each ball should be ~815g.)
  5. Add 2-3 drops of brown gel food coloring to one ball and knead until well mixed. (Wear gloves)
  6. Divide each ball into two smaller balls, each ~400g and form each into a rough circle ~6” diameter, then roll out into circles ~10”
  7. Stack the circles interleaving the light and dark colored ones.
  8. Center a 10” cake pan and trim the circles with a pizza cutter to an even circle.
  9. Set a 3” bowl in the center of the stack of circles and press down making an impression
  10. Use a pizza cutter to cut the dough from the perimeter to the outside of the 3” circle into 12 equal portions
  11. Twist adjacent portions away from each other and pinch the ends into a point.
  12. Combine the scraps and roll into an oval, fold and form into a boule.
  13. Cover and let rise 20-30 min. Re-pinch the ends as you stretch them out, then tuck the thin ends under the bread.
  14. Whisk the egg and water and use to egg wash the breads
  15. Preheat oven to 375⁰F. Bake for 20 to 30 minutes, until lightly browned. (Tent the bread with foil after 15 -18 minutes to prevent over browning.) Internal temperature should be ~190⁰ F
  16. Best when served warm. To cool, let rest in the pan for 15 minutes then transfer to a wire rack. Once cooled completely, store in a plastic bag.

Happy Thanksgiving to all who celebrate!

By special invitation is my almond-crust-cranberry-curd tart.

Today is Thanksgiving in the USA . Thanksgiving is a national holiday celebrating the harvest and other blessings of the past year. It is believed to be modeled on a 1621 harvest feast shared by the English colonists (Pilgrims) of Plymouth and the Wampanoag people.

For my whole life Thanksgiving centered around family and friends, old and new, sharing both a meal and each other. As a child Thanksgiving was held at our house and all our aunts, uncles and cousins would come for a huge mid-day meal. We had to finish early as our uncles had to go back to the farm to milk the cows. I had a lot of aunts and uncles and LOTS of cousins. Mostly I remember the pies, so many pies.

Since moving to California our son and daughter in law have hosted Thanksgiving and this year was no exception. There were over 20 people and enough food for 50.

I made an apple pie, an almond-crust-cranberry-curd tart (see below) and sweet potato dinner rolls. There were also two pumpkin pies and very little left when we were done.

Cranberry Curd Tart Almond Crust

INGREDIENTS
For the crust
• 99g (½ c) granulated sugar
• 113g (8 Tbl) unsalted butter, softened
• ¼ tsp table salt
• 1 tsp King Arthur Pure Vanilla Extract
• ½ tsp almond extract
• 180g (1½ c) King Arthur Unbleached All-Purpose Flour
• 72g (¾ c) almond flour or finely ground sliced or slivered almonds

For the cranberry curd
• 12 ounces cranberries (fresh or frozen)
• juice of one orange (~ ¼ c)
• 250g (1 ¼ c) sugar
• 2 whole eggs
• 2 egg yolks
• 113g (½ c, 1 stick) unsalted butter
• 1 teaspoon vanilla extract
• 1 tablespoon orange liqueur, such as TripleSec or Grand Marnier (optional)

For the Italian meringue
• 2 egg whites
• 1/8 teaspoon cream of tartar
• 1/2 cup sugar
• 1/4 cup water

METHOD
Crust

  1. Mix butter with sugar then add salt then vanilla.
  2. Add egg and mix until incorporated. Stir in flour. Mix by hand like you are kneading bread until incorporated
  3. Cover with plastic and refrigerate for 30 min
  4. Pre-heat oven to 350⁰F
  5. Butter tartl pans, or use non-stick pans
  6. Dock (prick holes in) bottom and sides of formed dough then refrigerate for 20 minutes
  7. Line tart pan with crumpled then smoothed parchment paper and fill with pastry weights.
  8. Paint edges of the tartlet with the egg wash.
  9. Bake in preheated oven 350⁰ F (175⁰ C) for 15 min. Remove pastry weights 5 minutes before the end of the bake.
  10. Immediately remove from pans and cool on a wire rack

    Cranberry Curd
  11. Heat the cranberries and orange juice in a medium saucepan over medium-high heat until the cranberries split. Mix with an immersion blender then strain through a food mill or fine mesh sieve and discard the skins.
  12. Return the strained cranberry mixture to the saucepan and add the sugar, eggs, egg yolks, butter, vanilla, and orange liqueur (if using) to the pan and give everything a good stir. Heat gently over medium-low heat, stirring constantly, until the mixture thickens and registers 170°F on an instant read thermometer (this usually takes about 8-9 minutes). Immediately strain (again) through a fine mesh sieve into a large measuring bowl and then pour into the prepared crust. (The curd can be stored in an airtight container in the fridge for up to a week. You may need to bake it a few more minutes for the tart to set when baking from chilled)
  13. Bake (still at 350°F) until the curd is set (it should jiggle but not slosh), about 10 minutes. (Curd was jiggly after 20 more minutes baking.)
  14. Let cool at room temperature for about 1 hour, then transfer to the refrigerator to chill. You can serve this chilled or at room temperature.

    Italian meringue
  15. Add egg whites and cream of tartar to the bowl of a stand mixer fitted with a whisk attachment. Heat sugar and water in a small saucepan over medium high heat.
  16. When the sugar mixture registers about 220°F turn on the mixer and begin beating the egg whites on medium speed.
  17. When the sugar mixture registers 240°F remove from heat and carefully pour into the mixer over the egg whites. Increase the mixer speed to high and beat until the egg whites form stiff peaks.
  18. Transfer to a piping bag (or zip top bag) and pipe onto cooled tart as desired. If you want, torch the meringue with a kitchen torch. (But since it is cooked, this is totally optional).

As long as the oven was on and I had time to wait for doughs to chill etc, I also made a loaf of artisan bread.

Soft Sweet Potato Rolls

https://sallysbakingaddiction.com/sweet-potato-dinner-rolls/

Sally’s Baking Addiction contest this week is the above mentioned Soft Sweet Potato Rolls. My usual dinner rolls are a tremendous hit, but I am willing to chance one for the contest.

I followed the instructions exactly as shown below.

After QC and I sampled a roll each we agreed these are as exceptional and my standard rolls and they have the advantage of being sweet potato based and Thanksgiving is in a couple of week. LiG.

Soft Sweet Potato Rolls


https://sallysbakingaddiction.com/sweet-potato-dinner-rolls/

INGREDIENTS
• 1 medium sweet potato, about 250–290g, peeled and chopped (to yield 1 cup mashed)
• ¾ cup (180ml) whole milk, warmed to about 110°F (43°C)
• 2 ¼ tsp instant dry yeast
• 1/3 cup (113g) honey, divided
• 2 large eggs, at room temperature
• 5 Tbl (71g) unsalted butter, softened
• 1 ¾ tsp salt
• 5 ½ c (715g) bread flour* (spooned & leveled), plus more as needed
• optional: 2 Tbl (28g) melted butter and flaky sea salt, for finishing

METHOD

  1. Prepare the sweet potato: Place the chopped sweet potato in a medium saucepan and add enough water to cover. Bring to a boil over high heat, then reduce the heat to medium-high and boil until the sweet potato is very soft and tender, about 10–12 minutes. Drain off the water, then mash the sweet potato as well as you can—a few small lumps are okay. Measure 1 cup (230g) of mashed sweet potato to use in the dough, and set aside to slightly cool. (Do not use more than 1 cup in your dough. Discard or eat any leftover.)
  2. Proof the yeast: Whisk the warm milk, yeast, and 2 Tablespoons of honey together in the bowl of your stand mixer. Cover and allow to sit for 5 minutes.
  3. Make the dough: Add the remaining honey, eggs, butter, mashed sweet potato, salt, and 1 cup (125g) flour. With a dough hook or paddle attachment, mix/beat on low speed for 1 minute. Stop and scrape down the sides of the bowl with a silicone spatula, then add the remaining flour. Beat on medium speed until the dough comes together and pulls away from the sides of the bowl, about 3 minutes. If the dough seems too wet to a point where kneading (next step) would be impossible, beat in more flour 1 Tablespoon at a time until you have a workable dough. Don’t be nervous if you’re adding a lot more flour; there are a lot of variables such as moisture in the sweet potato, humidity, weather, etc. Dough should be soft and a little sticky, but still manageable to knead with lightly floured hands.
  4. Knead the dough: Keep the dough in the mixer fitted with a dough hook and beat on low speed for an additional 5 full minutes, or knead by hand on a lightly floured surface for 5 full minutes. If the dough becomes too sticky during the kneading process, sprinkle 1 teaspoon of flour at a time on the dough or on the work surface/in the bowl to make a soft, slightly tacky dough. After kneading, the dough should feel soft and smooth. Poke it with your finger—if it slowly bounces back, your dough is ready to rise.
  5. 1st Rise: Lightly grease a large bowl with oil or nonstick spray. Place the dough in the bowl, turning it to coat all sides in the oil. Cover the bowl and allow the dough to rise in a relatively warm environment for 1–2 hours or until double in size. (I always let it rise on the counter. Takes about 1 and 1/2 hours.
  6. Grease a 9×13-inch baking pan.
  7. Shape the rolls: When the dough is ready, punch it down to release the air. Weigh the dough (~1370g) then divide the dough into 20 equal pieces (about ~68g each.) Shape each piece into a smooth ball. Arrange in prepared baking pan.
  8. 2nd Rise: Cover shaped rolls and allow to rise until puffy, about 30 to 45 minutes.
  9. Adjust oven rack to a lower position and preheat oven to 350°F (177°C). (It’s best to bake the rolls towards the bottom of the oven so the tops don’t burn.)
  10. Bake the rolls: Bake for 25 minutes or until golden brown on top (internal temperature if taken with an instant-read thermometer should be 190°F), rotating the pan halfway through. If you notice the tops browning too quickly, loosely tent the pan with aluminum foil (I usually add it after 20 minutes).
  11. Remove from the oven, brush with melted butter and sprinkle with flaky sea salt. Allow rolls to cool for 15 minutes before serving. We’ve learned that the longer they cool, the better their flavor.
  12. Cover leftover rolls tightly and store at room temperature for up to 3 days, or in the refrigerator for up to 1 week.
    Notes
  13. Freezing Instructions: You can freeze the baked dinner rolls. Allow them to cool completely, then place them in a freezer-safe container or bag and freeze for up to 3 months. Thaw in the refrigerator or at room temperature, then reheat as desired. If reheating the whole pan, lightly cover and reheat in a 300°F (150°C) oven for about 10 minutes or until warm. If you are planning to freeze the baked rolls, omit the melted butter and flaky sea salt finishing step after baking, and instead do that after thawing and reheating.
  14. Overnight Instructions: Prepare the recipe through step 7. Cover the shaped rolls tightly and refrigerate for up to about 15 hours. At least 3 hours before you need them the next day, remove the rolls from the refrigerator, keep covered, and allow to rise on the counter for about 1-2 hours before baking. Alternatively, you can let the dough have its 1st rise in the refrigerator overnight. Cover the dough tightly and place in the refrigerator for up to about 15 hours. Remove from the refrigerator and allow the dough to fully rise for 2 more hours. Continue with step 6.
  15. Baking Pan: I prefer baking the rolls in a glass 9×13-inch baking pan because I find they brown a little too quickly in a metal pan. But as long as you bake the rolls on a lower oven rack and keep your eye on them, any pan is great. You can also bake these rolls in a large cast iron skillet, in two 9-inch round or square baking pans, or on a lined baking sheet. Bake time remains the same.
  16. Can I Use Regular Potato? Yes. No other changes necessary.
  17. Milk: Whole milk is ideal for the best, richest flavor and texture. Keeping that in mind, feel free to substitute with a lower-fat or nondairy milk.
  18. Yeast: I always use instant yeast, but if you use active dry yeast, there are no changes to the recipe. Rise times will be slightly longer using active dry yeast. Reference my Baking with Yeast Guide for answers to common yeast FAQs.
  19. Flour: If you don’t have bread flour, you can use all-purpose flour. All-purpose flour is convenient for most, but bread flour produces chewier dinner rolls. The rolls are still soft and fluffy no matter which you use. Either flour is fine and there are no other changes to the recipe if you use one or the other.

“To crooked eyes truth may wear a wry face”

J. R. R. Tolkien used that phrase in The Two Towers and I modifyied it to a “rye face”. I decided to continue my rye bread recipe experiment and made a dark rye bread this morning using my new rustic rye “breadboard” recipe.

In the first experiment I used White Rye Flour and used Dark Rye Flour for the second round. I baked a loaf using Medium Organic Rye this morning and still and Organic Pumpernickel to go. (I am not endorsing any particular brand of flour, it’s simply what is my cupboard.)

The dark rye bread had a stronger rye flavor than the white rye (no surprise,) but was just as delicious with a similar soft interior. The medium rye (today’s loaf) has a great interior and crunchy crust and surprise, surprise, the flavors is between the white and dark ryes.

Next up will probably be the pumpernickel. Stay tuned.

White Rye Rustic Bread

I had some white rye flour in the cupboard and wanted to use it so… I gathered advice from a number of different websites to create this bread. It met my goal of a soft crumb, mild, rye bread with a nice firm crust. (To be fair, I have 20 different flours in my cupboards.)

This is my first attempt at creating (for the most part) a recipe and method to make bread. I am very pleased with the result.

With my first bite, I realized this would make a great template (a breadboard if you will) to experiment with other flours. As I said, I have a few to choose from including rye, whole wheat, pumpernickel and a variety of other wheat flours. This will make for hours and hours of baking enjoyment .

White Rye Rustic Bread

INGREDIENTS
• 384g (3 c) bread or all-purpose flour
• 96g (1 c) white rye flour. (This flour is very dense, so 1 c weighs less that other flours}
• 10g (2 tsp) kosher salt
• 10g (2 tsp) instant yeast
• 9g (1 Tbl) caraway seeds
• 395g (1 ¾ c) lukewarm water
• 42g (2 Tbl) honey (or maple syrup)
• 28g (2 Tbl) extra-virgin olive oil, divided
• 2 Tbl Bread and Cake Enhancer

METHOD

  1. In a large bowl, whisk together the flours, salt, instant yeast, and caraway seeds. In a medium bowl, whisk together the water and the honey until the honey is dissolved.
  2. Add to the flour, followed by 1 tablespoon of the oil. Using a rubber spatula or Dutch dough whisk, mix until the liquid is absorbed, and the flour is all moistened and the dough form a sticky mass.
  3. Cover the bowl with plastic wrap and set aside in a warm spot to rise for 2 to 3 hours, until the dough has doubled in volume.
  4. Line a brotform with parchment paper. It helps if you crumple the parchment paper into a small ball, then smooth it out and fit it to the brotform.
  5. When the dough has doubled, drizzle the remaining 1 Tbl of olive oil over the top and use your hand to rub the oil over the surface to coat. Use your hand again to release the dough from the sides of the bowl, then flip the ball over so that the oil side is down. Pour dough out of bowl onto a lightly floured counter. Form a boule, tensioning the surface as you shape.
  6. Preheat the oven and Dutch oven to 400ºF.
  7. Place the boule in the parchment paper lined round brotform and let it rise for 45 minutes until the finger punch test indicates it is proofed.
  8. Transfer the Dutch oven to the oven and bake for 30 minutes,
  9. After 30 minutes remove the cover and bake an additional 15 minutes, or until internal temperature is 205ºF) or until the top is evenly browned.
  10. Remove the pan from the oven and Dutch oven and carefully lift the loaf by the parchment paper out onto a cooling rack.
  11. Let the loaf cool for at least 30 minutes before slicing.